How to Create & Sell Online Courses in WordPress with LearnDash & ProfilePress
Do you have some knowledge you want to share with the world? And you want to make a few bucks while doing this? Then it’s time to create and sell online courses with WordPress. This is arguably the easiest way to break into the e-learning space. The upfront investment is relatively low. And you can succeed even with zero technical knowledge.
Online courses have been generating quite a buzz in recent years. If you’re reading this, you’ve probably taken a course on Udemy or Coursera before. Online learning platforms provide the ideal avenue for people to gain new knowledge, acquire new skills, and chase their passions. Many internet users use them to learn coding, photography, cooking, and other exciting topics.
WordPress should easily be your go-to solution if you’re looking to sell online courses. The web development platform is the most popular option out there. And it’s also very versatile and ideal for even complete newbies. Using WordPress helps you to escape the dilemma of deciding where to start. This way, you can easily create multiple income streams in minutes. And all you need is the desire to share what you already know.
In this article, we’ll share everything you need to know about how to sell online courses with WordPress. We’ll use both essential plugins to make the entire process very easy. LearnDash will serve as the Learning Management System (LMS) plugin. And we’ll also use ProfilePress to create one-time or subscription plans to sell the courses.
Why Sell Online Courses With WordPress?
There are several solutions to choose from when it comes to creating and selling online courses. Of all the available options, we highly recommend WordPress. The platform is flexible and robust, with all the features you need to sell courses quickly. These include content creation, payment processing, user management, and content marketing features.
Let’s look at some key reasons why selling online courses with WordPress makes sense.
WordPress is Flexible and Highly Customizable
Looking to sell online courses for the first time? WordPress’s flexibility and customizability easily make it a content creators’ favorite. The platform offers everything, whether you want to sell simple text materials or fully-featured video courses. In addition, you get access to unlimited themes, plugins, and other tools. These resources make it easy to deliver your students a wholesome learning experience.
Even better, WordPress also supports custom code. This means you can add virtually any feature to your LMS site. Provided you know some HTML and PHP. Alternatively, you can easily hire a WordPress developer.
You Get Several Automation Options
Many processes form the entire online learning experience. From course registration to a membership subscription, progress tracking, and additional support. For easy management and maximum profitability, you need to automate almost everything. WordPress makes this possible.
Combining the power of WordPress with LearnDash and ProfilePress means you don’t need to handle each process manually—for example, LearnDash ships with course registration templates. So once new users register for a course, they’ll instantly be added to your dashboard. You can even choose to plug them into some automated, integrated service.
You Have 100% Control Over Your Content and More
In addition to flexibility, WordPress also grants you complete control of your site’s entire content. Compared to other beginner-friendly low-code tools, you get the highest level of control here. Though you get many templates and plug-and-play features that make it easy to get things running quickly. You’re not stuck with them.
You can create pages, posts, lessons, and courses from scratch. LearnDash and ProfilePress also support a wide range of content or file types. You may want to add multimedia and dynamic HTML content to your site. WordPress lets you achieve all this.
WordPress is also 100% SEO-friendly. This means you can fully optimize your content so search engines can crawl them easily. This helps you get your courses on Google’s first page. The process is very straightforward if you also need to change existing courses and lessons.
It’s Very Cost-Effective and Scalable
Another reason you may want to sell online courses with WordPress is its cost-effectiveness. Compared to the alternatives, the entry requirements for using WordPress are very low. You only need to spend on what you deem necessary. It’s a perfect solution for solopreneurs and small businesses with little or no budget.
For starters, WordPress is completely free to download and use. You also get many free tools like themes and plugins that help your LMS site look elegant and function professionally. Even the premium plugins you need offer a free trial or a money-back guarantee.
WordPress is also super scalable. You can start with as much hosting storage, processing power, and bandwidth as you need. As your students and site traffic increase, you can add more resources to support your needs. The same goes for premium plugins and additional features.
It Supports Third-Party Integration and Payment Options
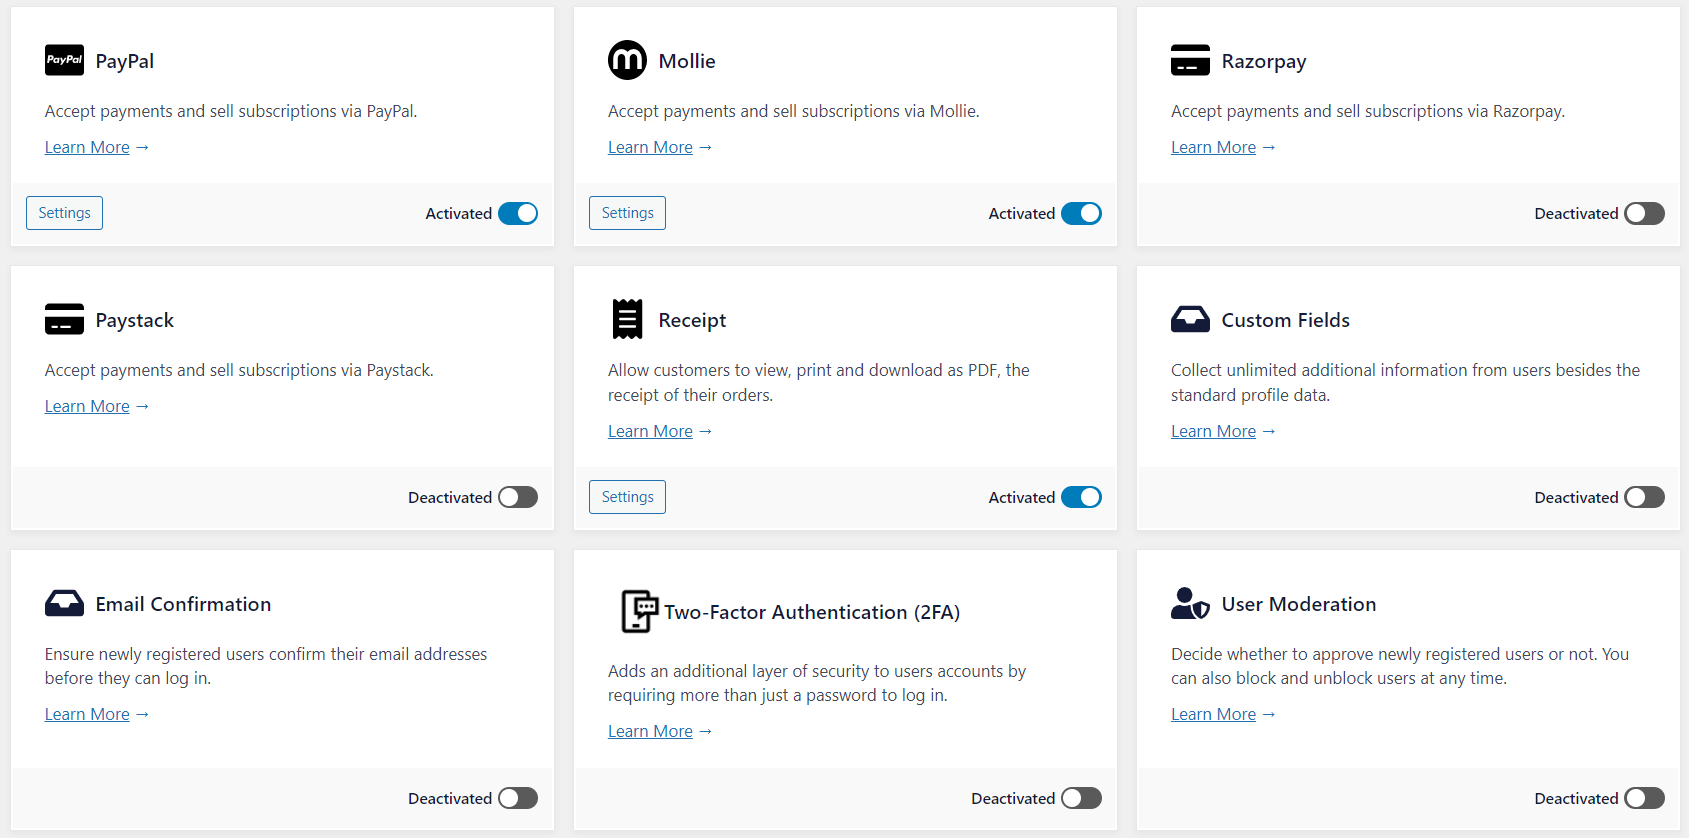
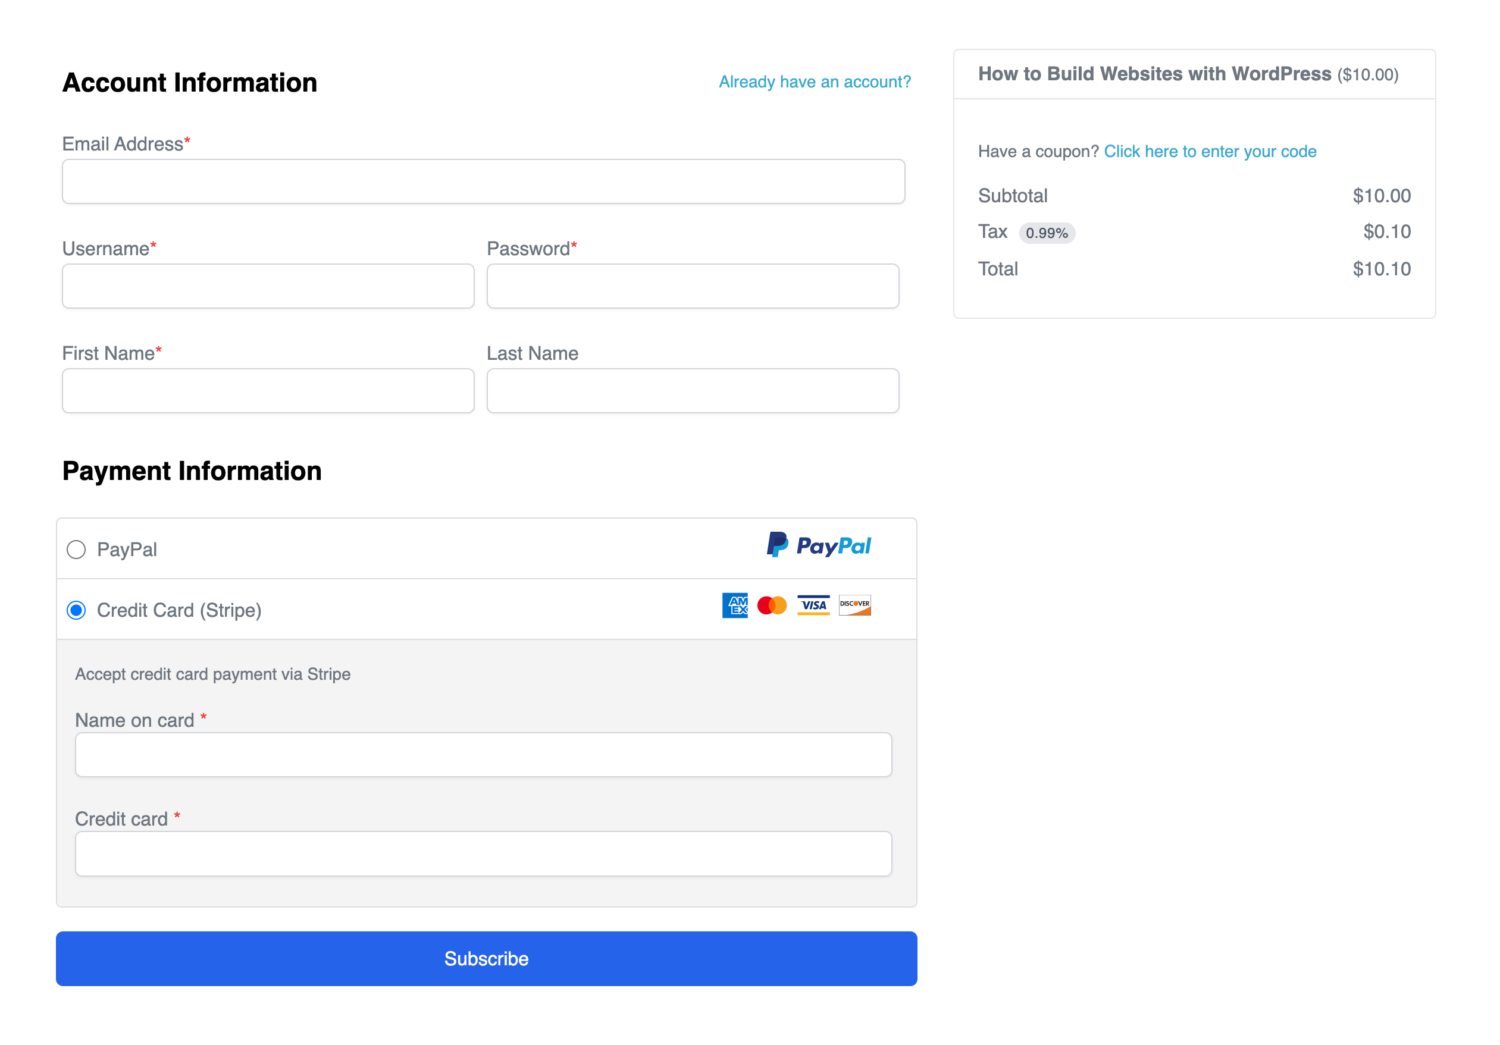
Allow your site learners to choose from third-party tools and payment gateways they’re already used to. Your site visitors can pay for your courses using multiple methods. Whether you prefer Stripe, PayPal, Mollie, Razorpay or Paystack, you’ll get access to your preferred payment method.
However you look at it, there are many benefits for anyone looking to sell online courses with WordPress. This explains why it’s now a popular choice amount digital educators and course creators across industries.
Now, let’s look at the simple steps you can follow if you’re looking to sell online courses with WordPress.
How to Sell Online Courses With WordPress
Ready to create and sell online courses with WordPress? The process is super easy. We’ll break everything down into steps you can follow and complete in a few minutes. In essence, here are the essential tools you’ll need to get things up and running:
- A WordPress site
- A Learning Management System (LMS) plugin. We recommend LearnDash.
- A membership plugin. We recommend ProfilePress.
Let’s run through the steps quickly!
Step 1: Get a Domain Name, Hosting, and Set Up Your WordPress Site.
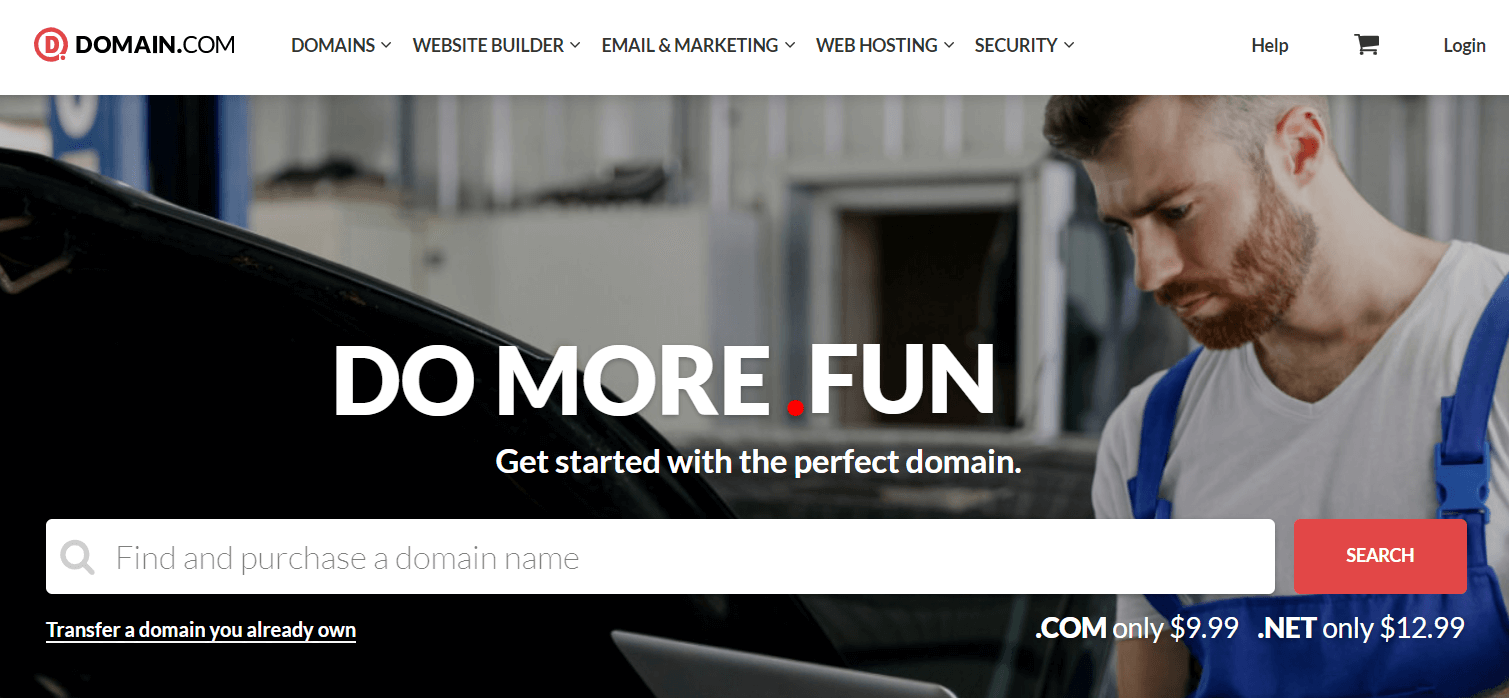
To get started, get yourself a domain name that suits your brand. Also, make sure it’s a domain name learners can easily find. ‘.com’ should be your go-to domain extension, except in unique cases.
Once you’ve decided on the domain name, you can secure it with any popular domain registrar like Domain.com, NameCheap, and GoDaddy. The average price is about $9.99/year. Even better, most WordPress hosts offer one free domain when buying a hosting plan.
Talking about WordPress hosting, there are many to choose from, you should consider getting managed WordPress hosting if you are entirely new to WordPress because it is a better option than regular shared hosting. In most cases, you get automatic backup and updates and priority support. You can check out WordPress hosting plans from Kinsta, SiteGround, and Hostinger.
Once you get your WordPress hosting, you’ll gain access to the hosting account dashboard. Most modern hosts allow you to install WordPress in just one click.
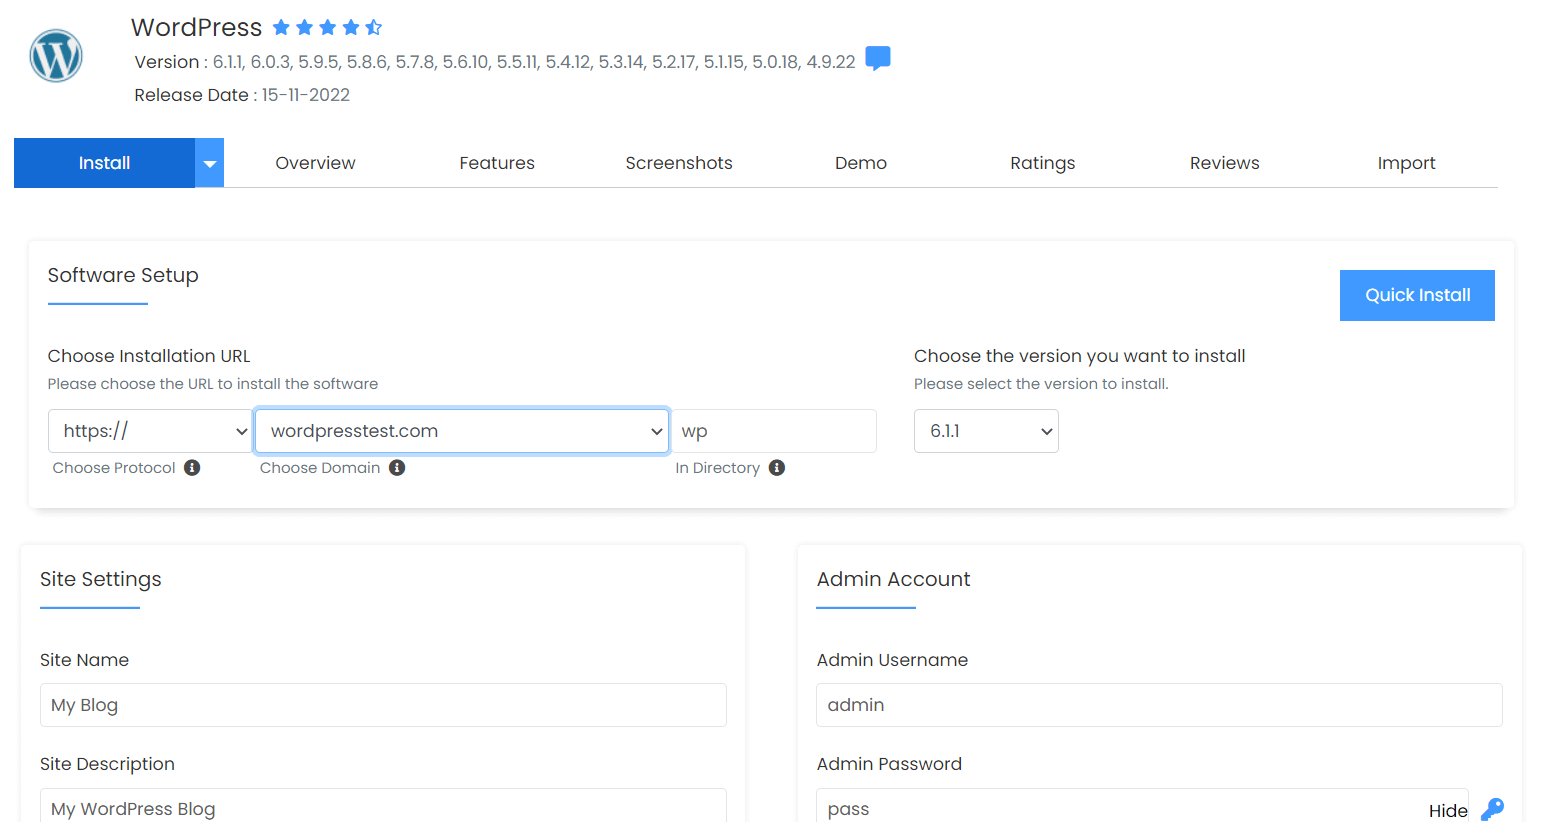
After setting up your WordPress credentials, you can now log into the WordPress admin back end. First, install a theme like Astra and other essential plugins like JetPack. Congratulations, you now have a WordPress site. The first step out of the way!
Step 2: Get the LearnDash plugin
Now, it’s time to add the first essential plugin you need to sell online courses with WordPress. It’s LearnDash, the best WordPress LMS plugin. The plugin packs powerful course creation and management features. And it’s also straightforward to use.
You can get your copy of the LearnDash plugin here. Once the purchase is complete, you’ll receive an email with your license key and a downloadable ZIP file.
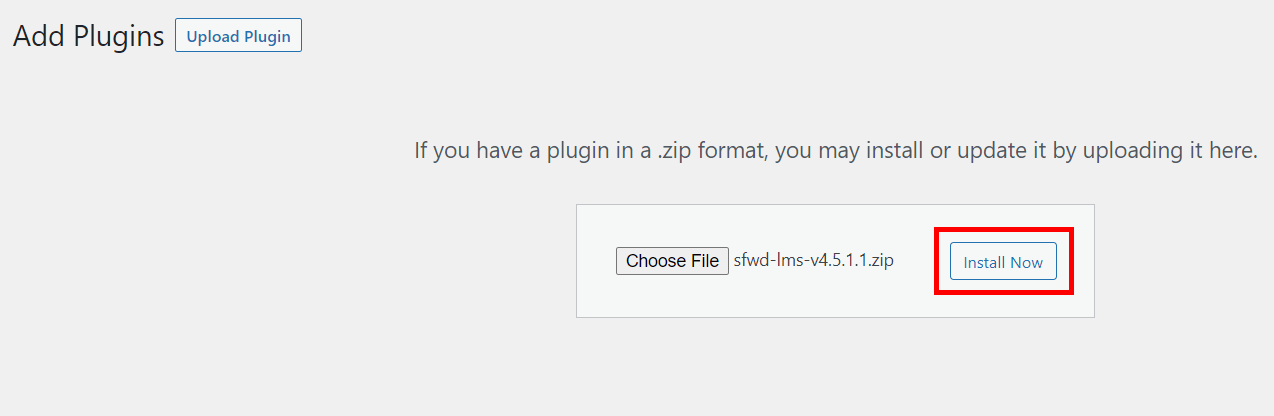
Log into your WordPress dashboard. Then go to Plugins > Add New > Upload Plugin.
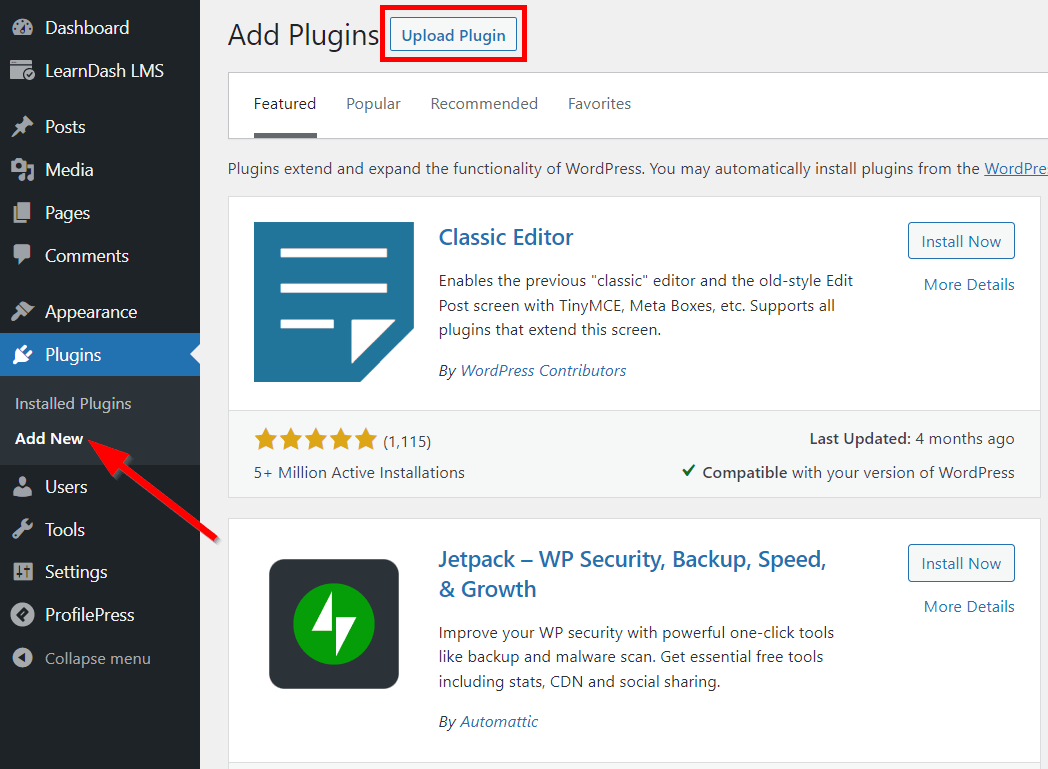
Next, select the plugin ZIP file from your local storage. Click Install Now, followed by Activate Plugin on the next page.
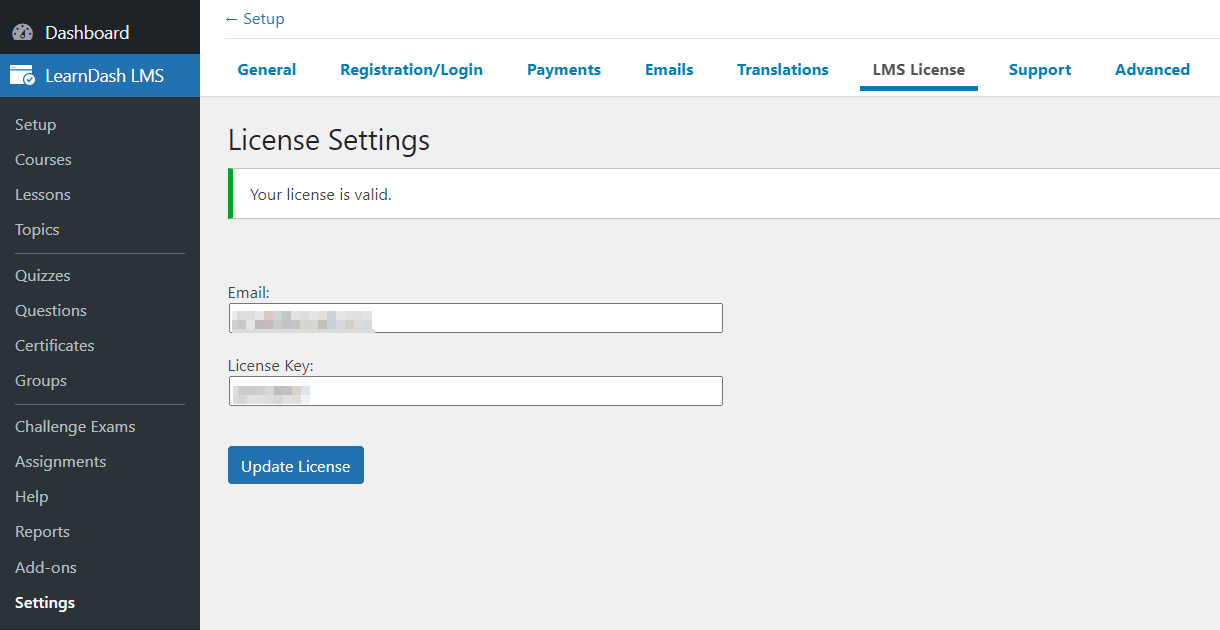
Next, it’s time to activate your LearnDash license. Navigate to LearnDash LMS > Settings > LMS License to do this. Then enter the license key from your email to proceed.
You can follow the plugin setup wizard to configure your site for your new students. To do this, go to LearnDash LMS > Setup. You can follow each step here.
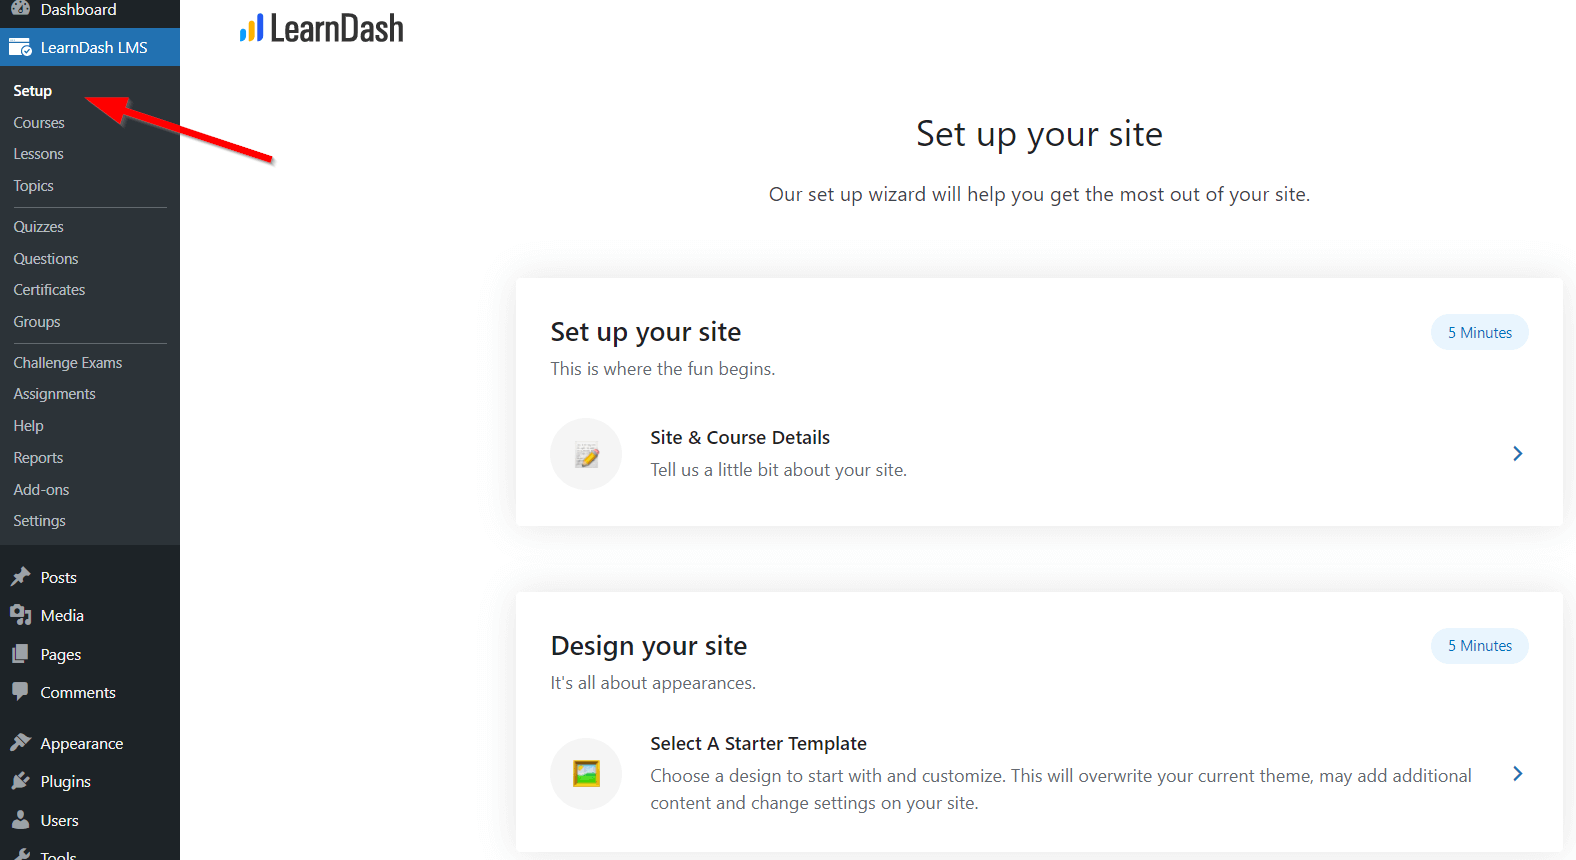
You can choose to set up things like the payment gateways and registration/login pages. But for this tutorial, we’ll focus on only the essential steps. We’ll be using ProfilePress to set these up.
Step 3: Create and Structure Your First Course
To be able to sell online courses with WordPress, you need to first create one. To do this, go to LearnDash LMS > Courses > Add your first Course.
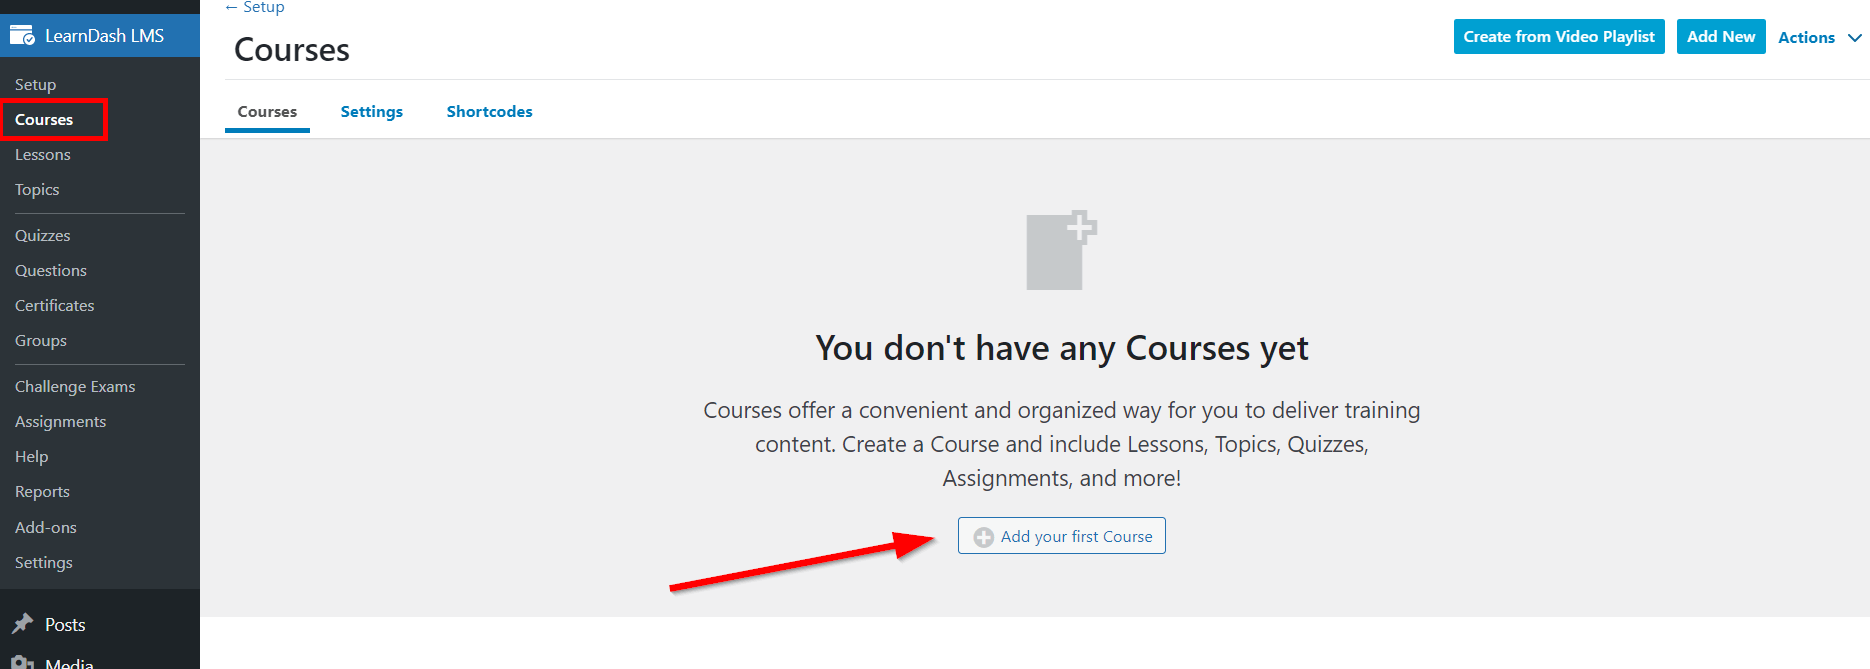
This opens the Block Editor. Enter the course title and course content. You can use blocks to add different content types here. Examples of suitable content are images, links, YouTube videos, and subheadings. Whatever you add here will appear on the default course page.

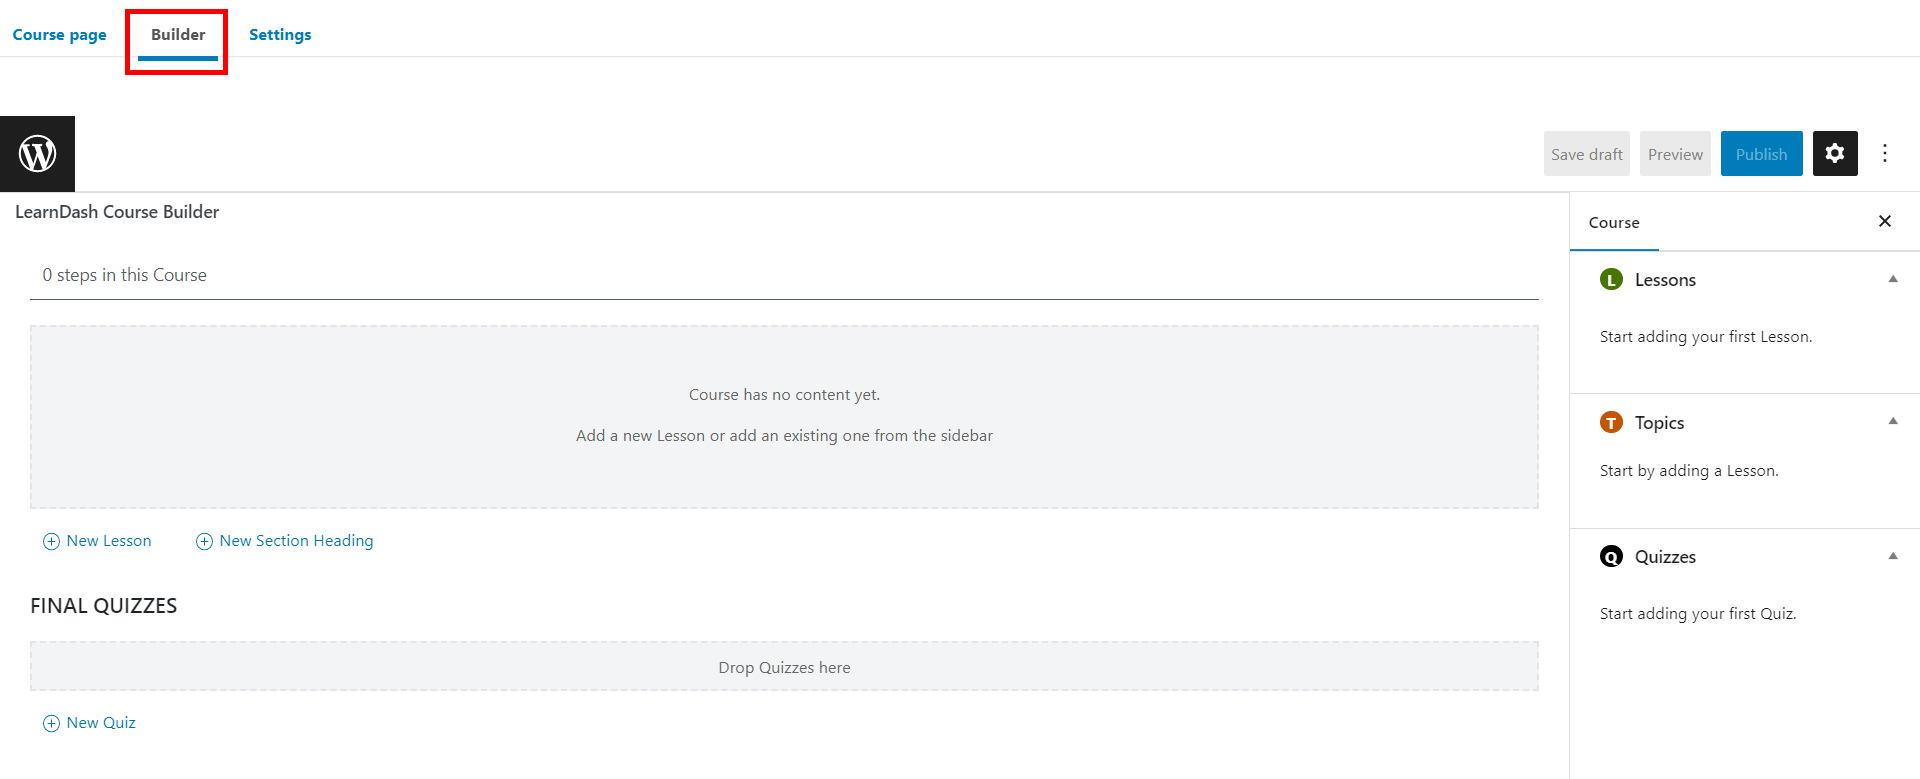
Next, navigate to the Builder tab. You can add multiple lessons, topics, and quizzes to the course. Lessons work like chapters or smaller sections of a course. You’ll only be able to create new topics after adding lessons to a course.
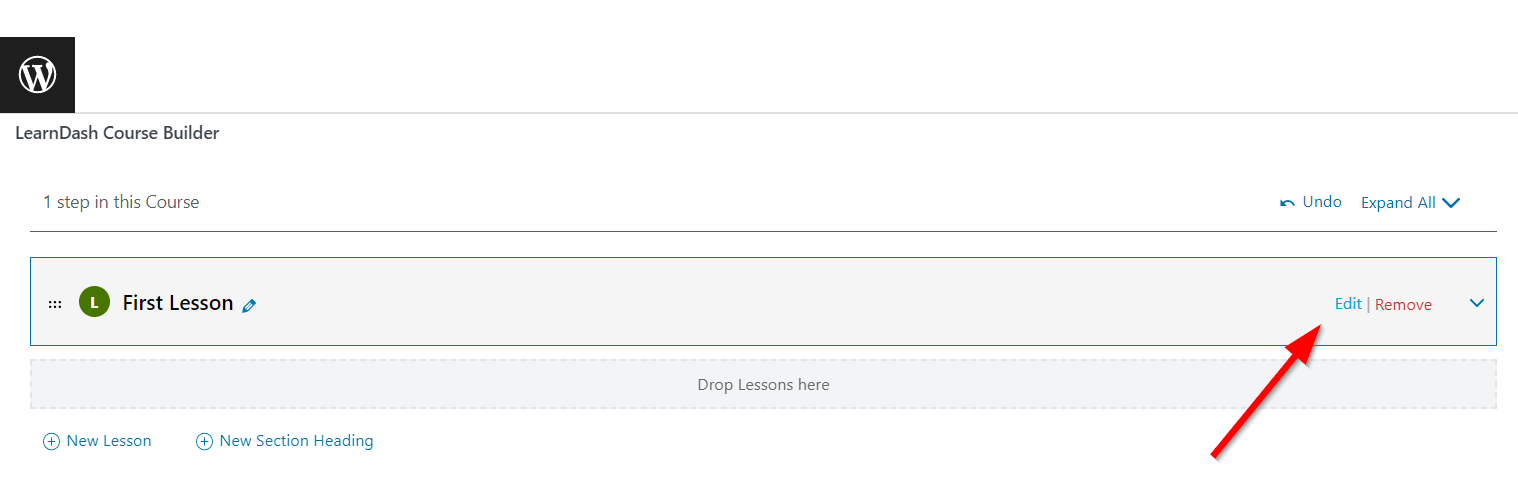
After creating your first lesson, hover over it and click Edit. It will redirect you to the block editor, where you can add dynamic content to that individual lesson too. It works just like the course page.
You can follow a similar procedure to add topics and quizzes to your lesson. All you need to do is expand the lesson first.
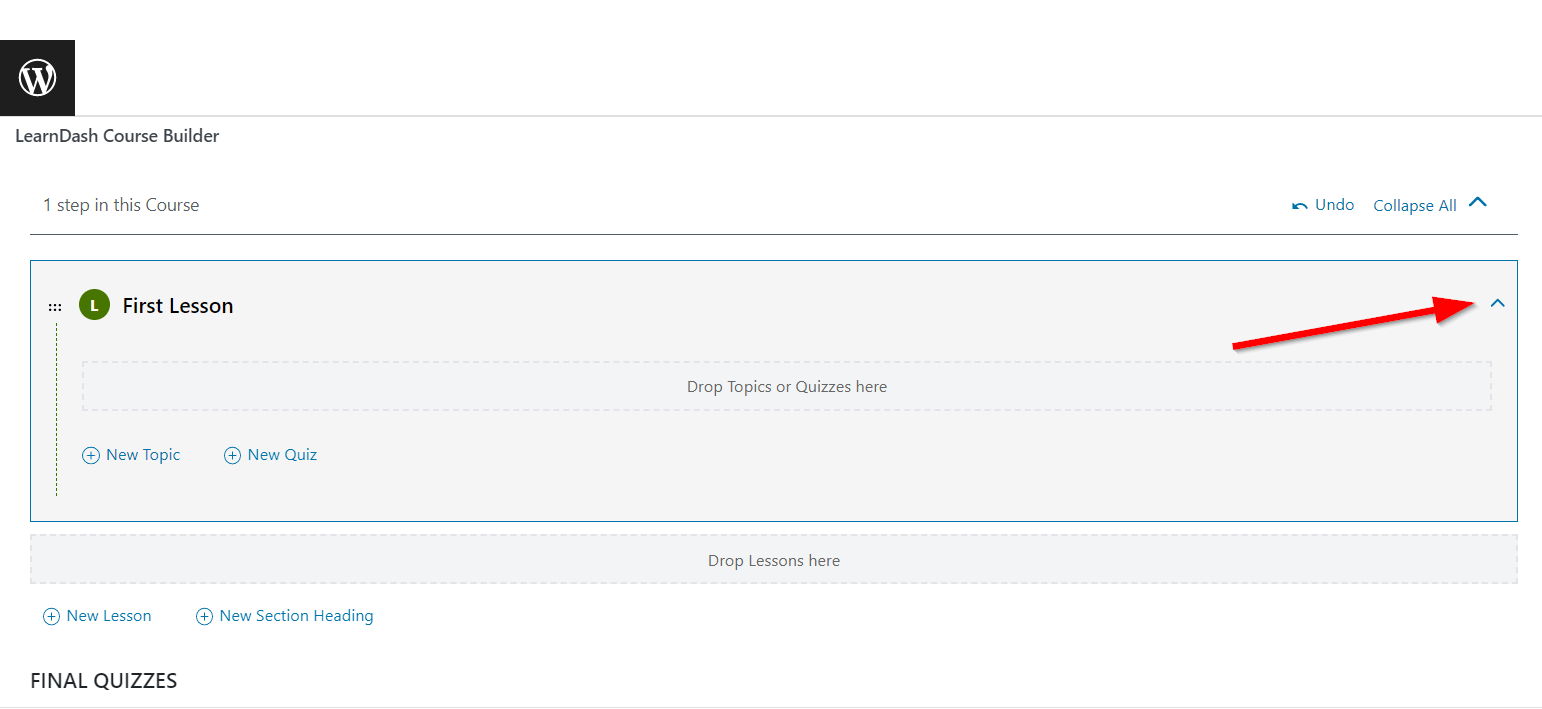
You can repeat this process to add more lessons, topics, and quizzes to your LearnDash course.
Head to the Settings tab to configure some critical elements of your LearnDash course.
Here are some of the basic settings on this page:
- Access Mode
- Course Prerequisites
- Course Access Expiration
- Course Materials
- Course Certificate
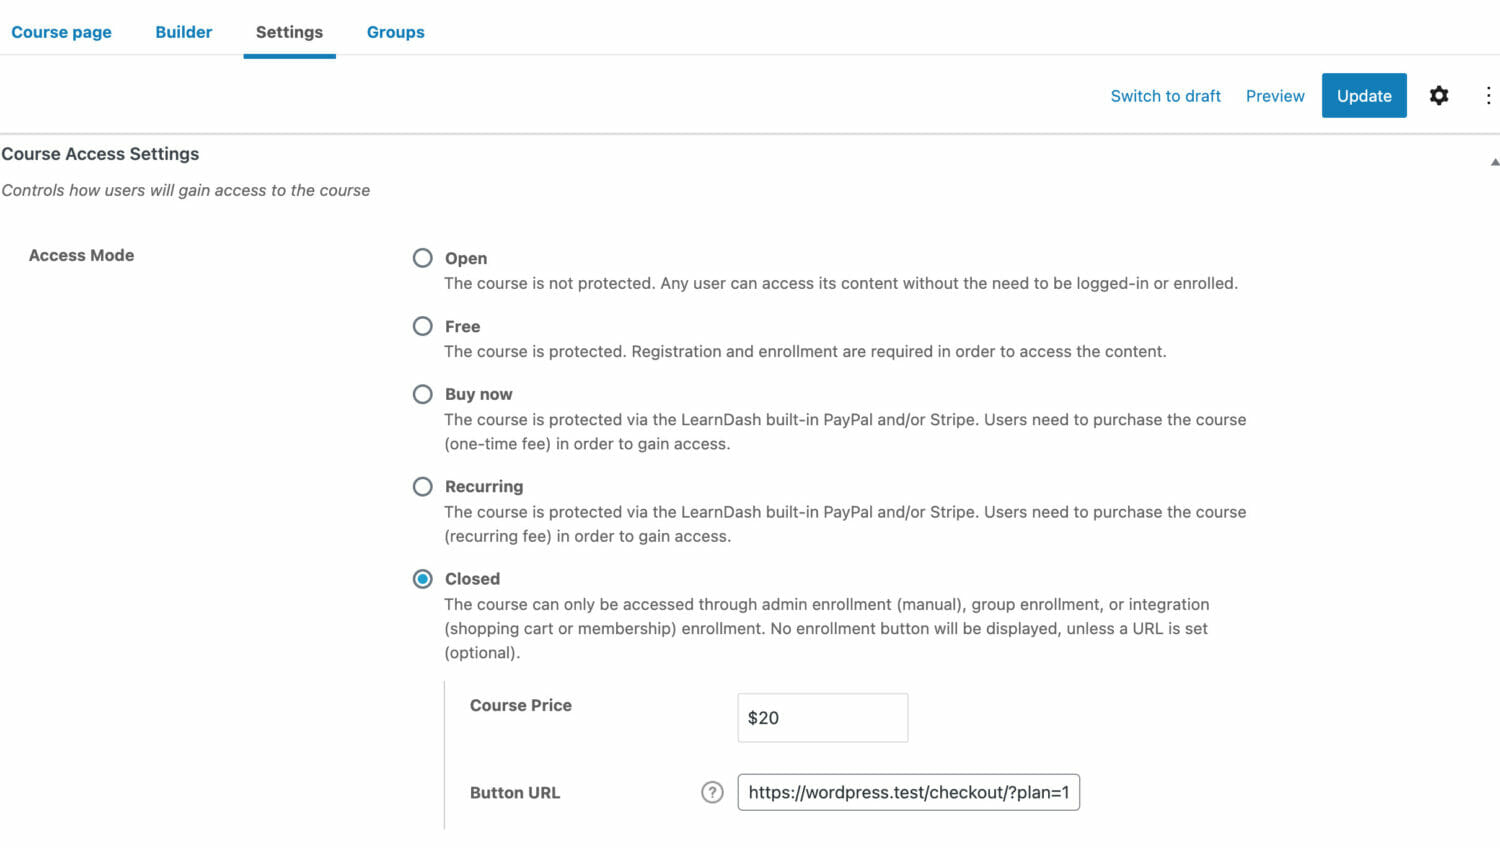
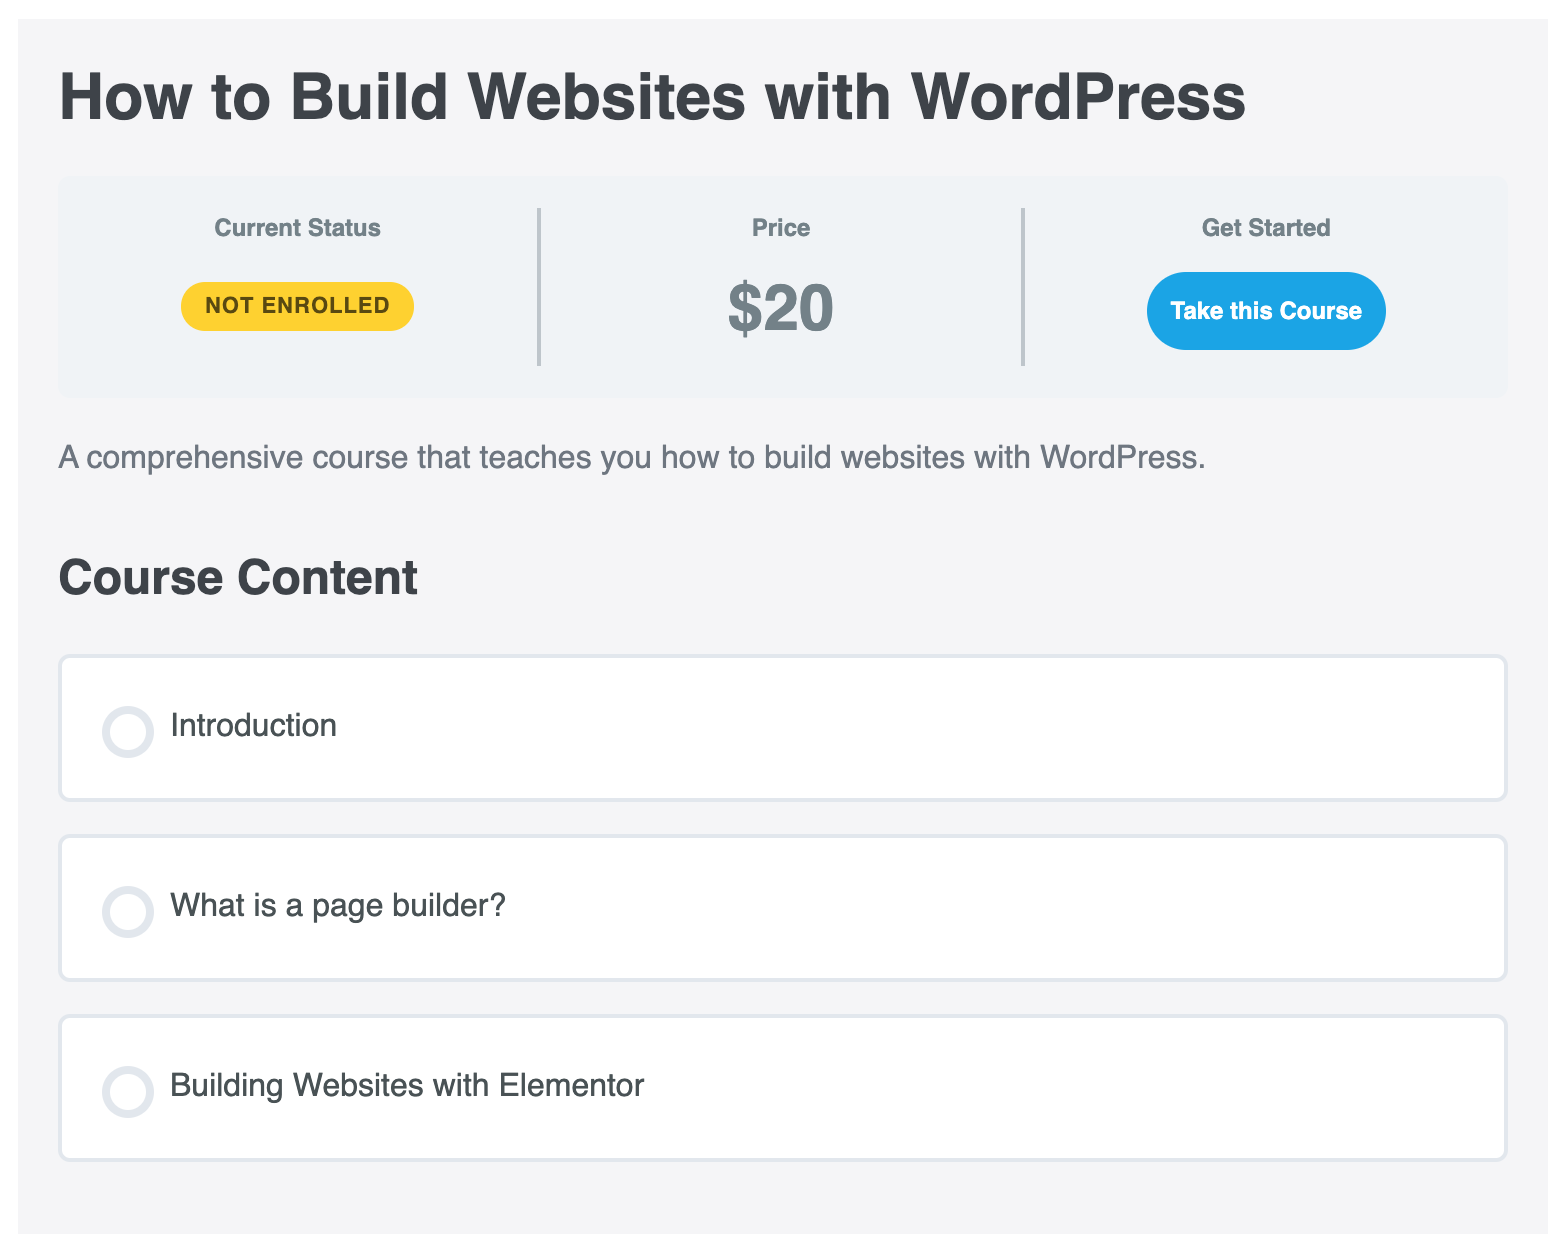
For the Access Mode settings, set it to Closed. You will also see two fields to set the course price and the purchase button URL.
Setting a course/group access to closed ensures that the users can only be enrolled by ProfilePress after membership checkout or user registration if you have courses or groups selected in the ProfilePress LearnDash settings page or the LearnDash integration of a registration form.
Now when people visit your course page, the “Take this Course” button will send them to the corresponding membership plan’s checkout page for them to complete the checkout process.
Remember to click Publish once you’re done. Before then, you can click Preview to see the results.
Step 4: Install and Activate ProfilePress and LearnDash Addon
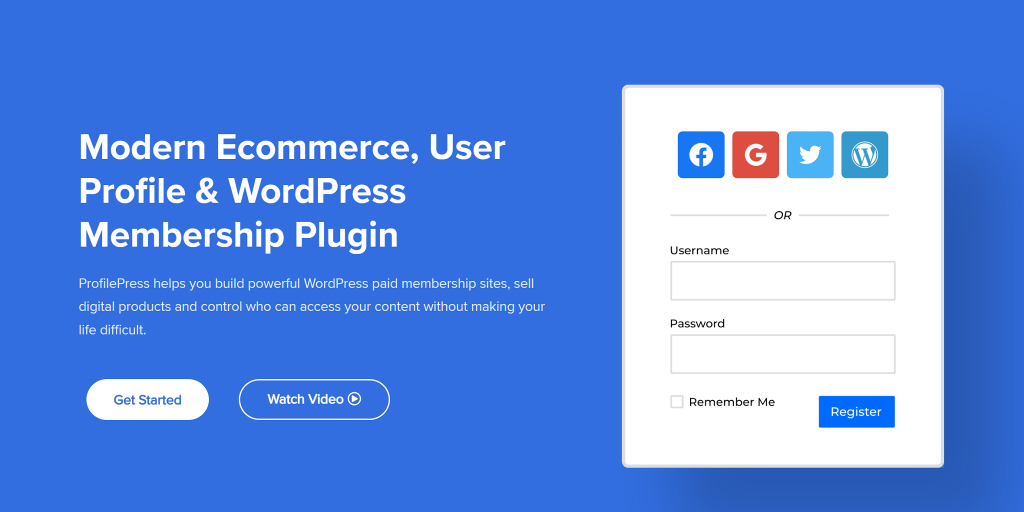
Remember, we talked about adding a membership plugin to your WordPress site. This plugin will help you sell your online courses and register new users. You can use it to manage access to different courses and lessons. For this purpose, we highly recommend ProfilePress.
The plugin is straightforward to set up, and you get additional features when you sell online courses with WordPress. Here are a few:
- Group multiple courses into one membership plan. ProfilePress combines seamlessly with LearnDash. This way, you can sell subscription plans. These membership plans can be linked to multiple courses and sold in a bundle. This system also makes it easy to cancel access to these courses when a user cancels their membership, or it expires.
- Custom registration, login, and checkout. With this plugin, you can also redesign and replace the default LearnDash modal forms. This helps you to give your subscribers a unique enrolment and return login experience.
- Enhanced My Account page. Many membership plugins create a My Account page for individual subscribers by default. ProfilePress will display the course, the tracked progress, and other important information on this page. All are unique to the individual subscriber!
You can get your copy of ProfilePress here to start enjoying the features listed above. You can follow the exact instructions in Step 2 to install and activate the plugin.
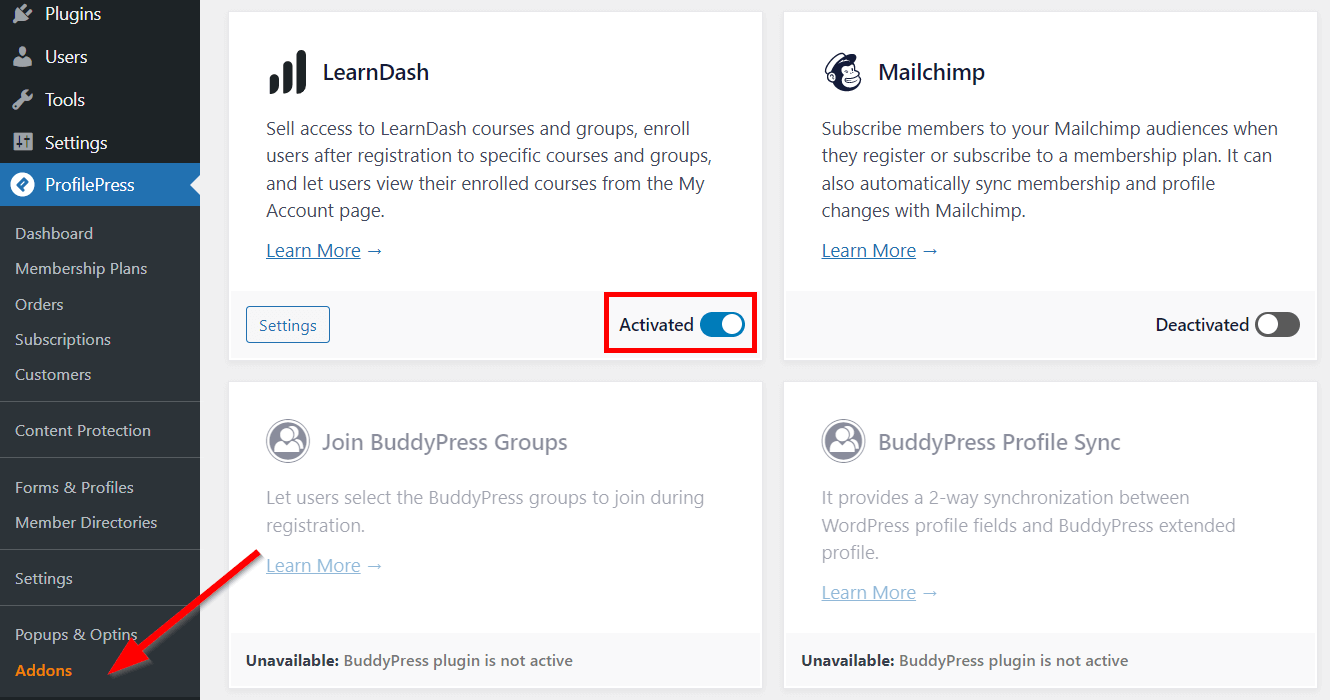
To use ProfilePress with LearnDash, you’ll need to activate the addon. To do this, go to ProfilePress > Addons. Then, scroll until you find the LearnDash addon and toggle on to activate it.
Step 5: Set Up the Payment Options
To start accepting payments using ProfilePress, you need to first set up a payment gateway and a membership plan.
Go to ProfilePress > Settings > Payments > Payment Methods to set up payment. You can choose from Stripe, PayPal, and Mollie. There are addons you can also activate to use more payment gateways.
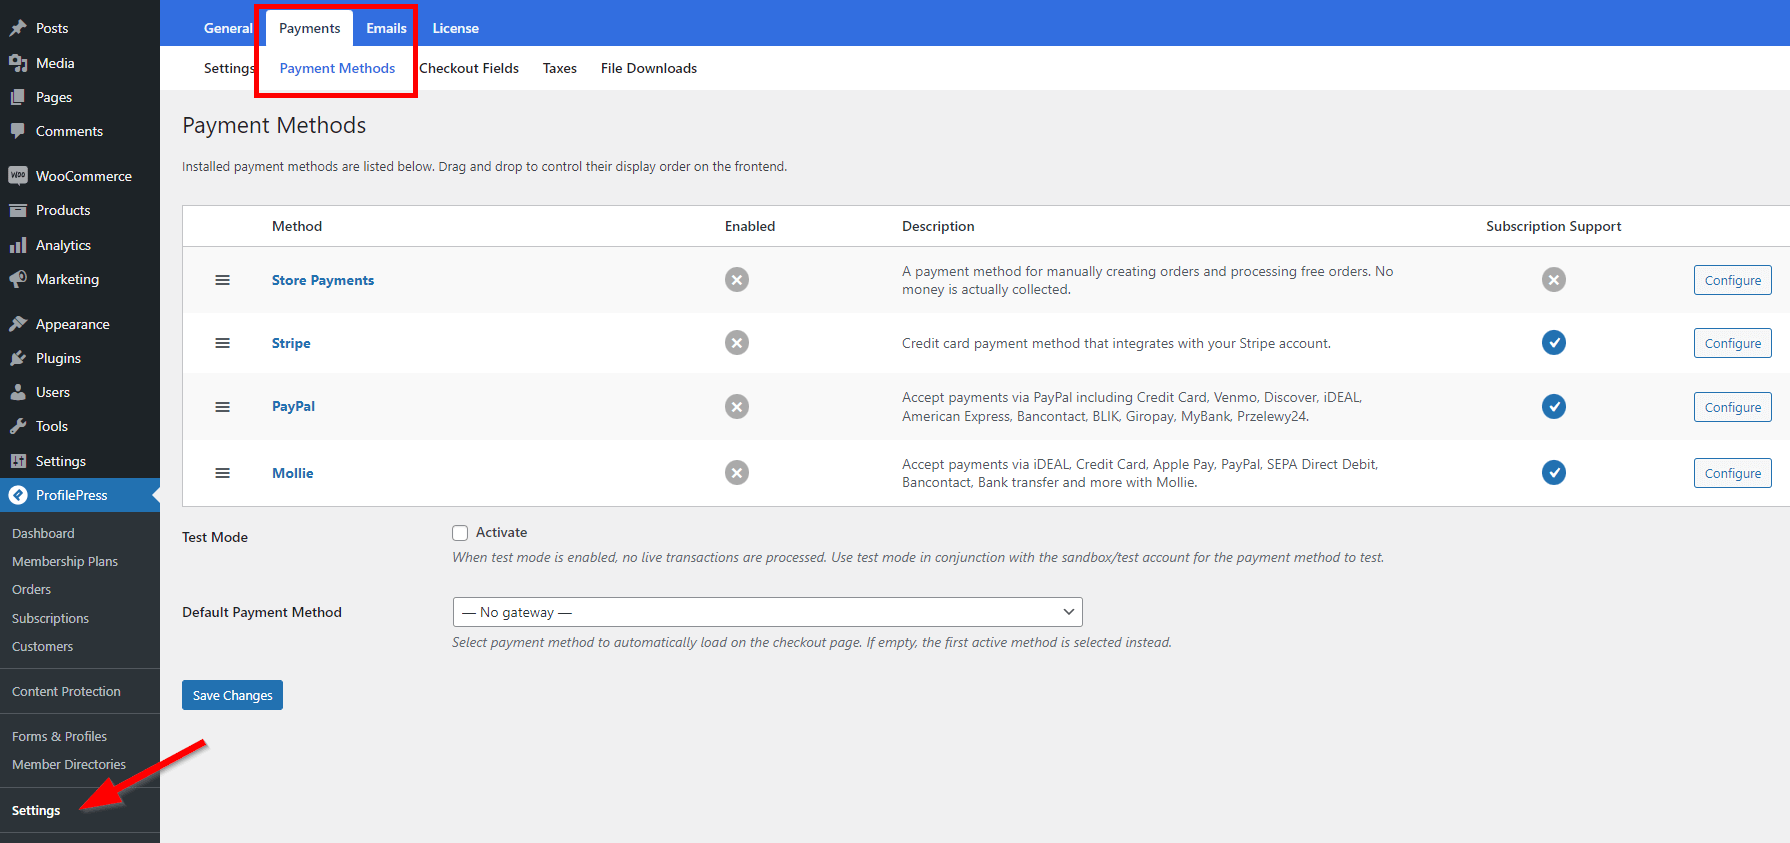
You can also choose to process orders manually and not receive payments in the store. Configure the Store Payments option for this. Select a preferred payment gateway if you want a payment method to load automatically on the checkout page.
The test mode allows you to use a sandbox account to test the payment gateway during configuration. Check Activate to enable this mode. Uncheck the box once everything is set.
Step 6: Create a Membership Plan and Add Online Courses
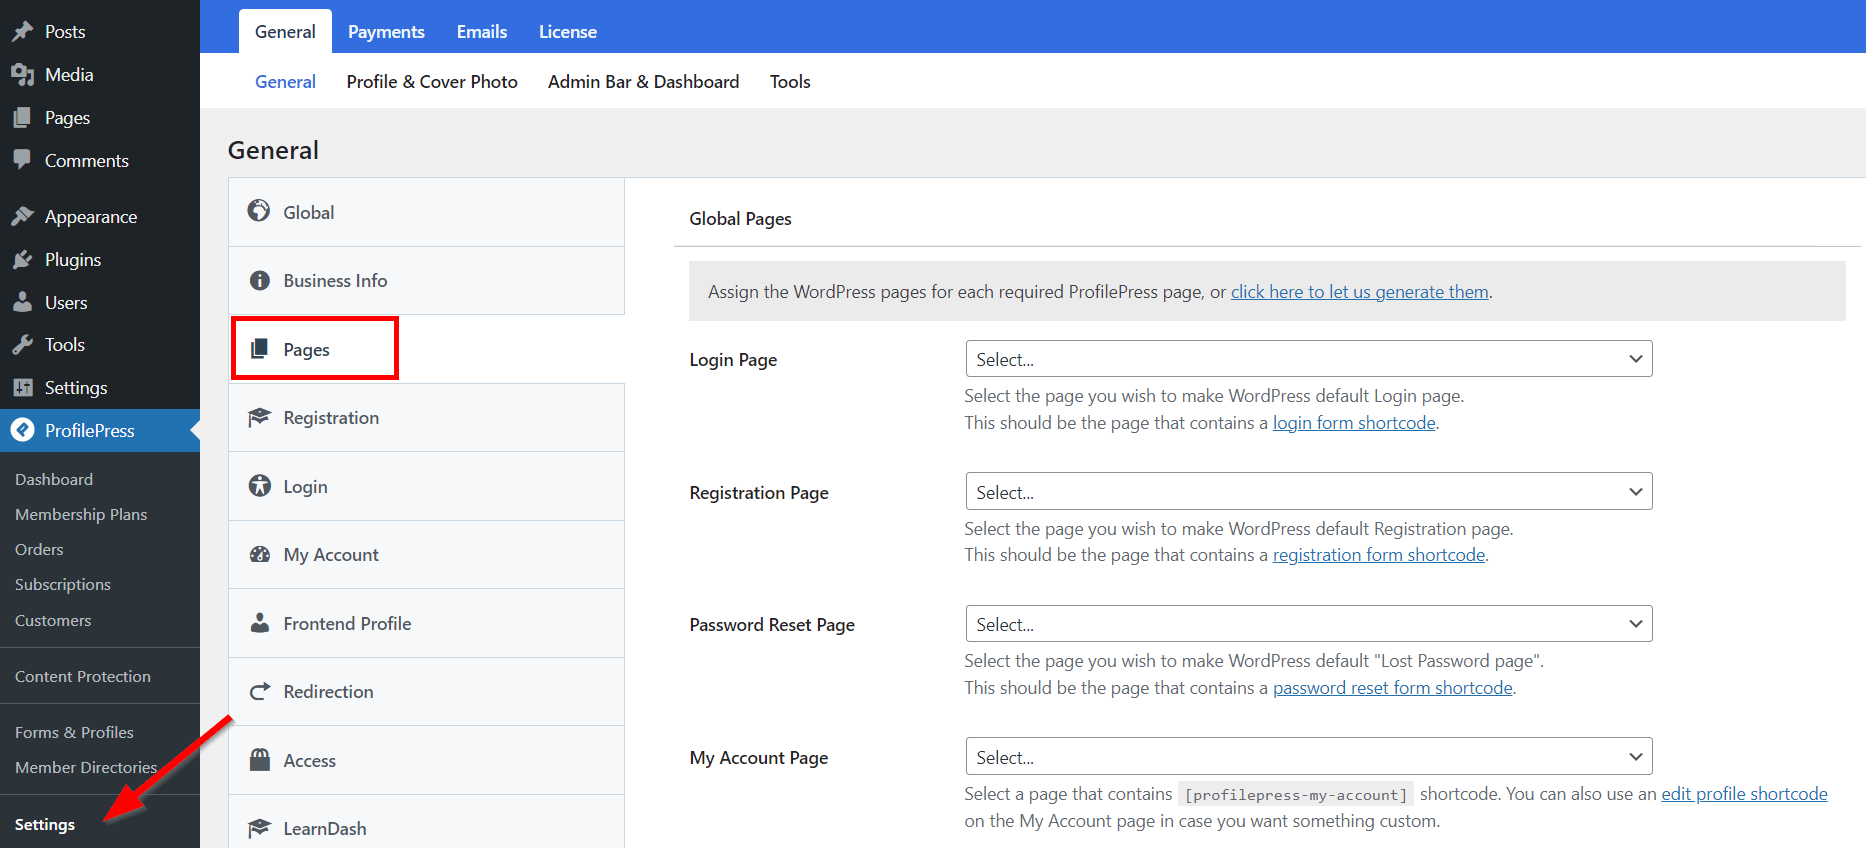
Once ProfilePress is up and running, you can start by configuring essential pages. You should pay attention to the Checkout, Registration, User Profile, and all the payment pages. Next, go to ProfilePress > Settings. Then open the Pages tab to assign existing pages. You can create and edit those pages individually.
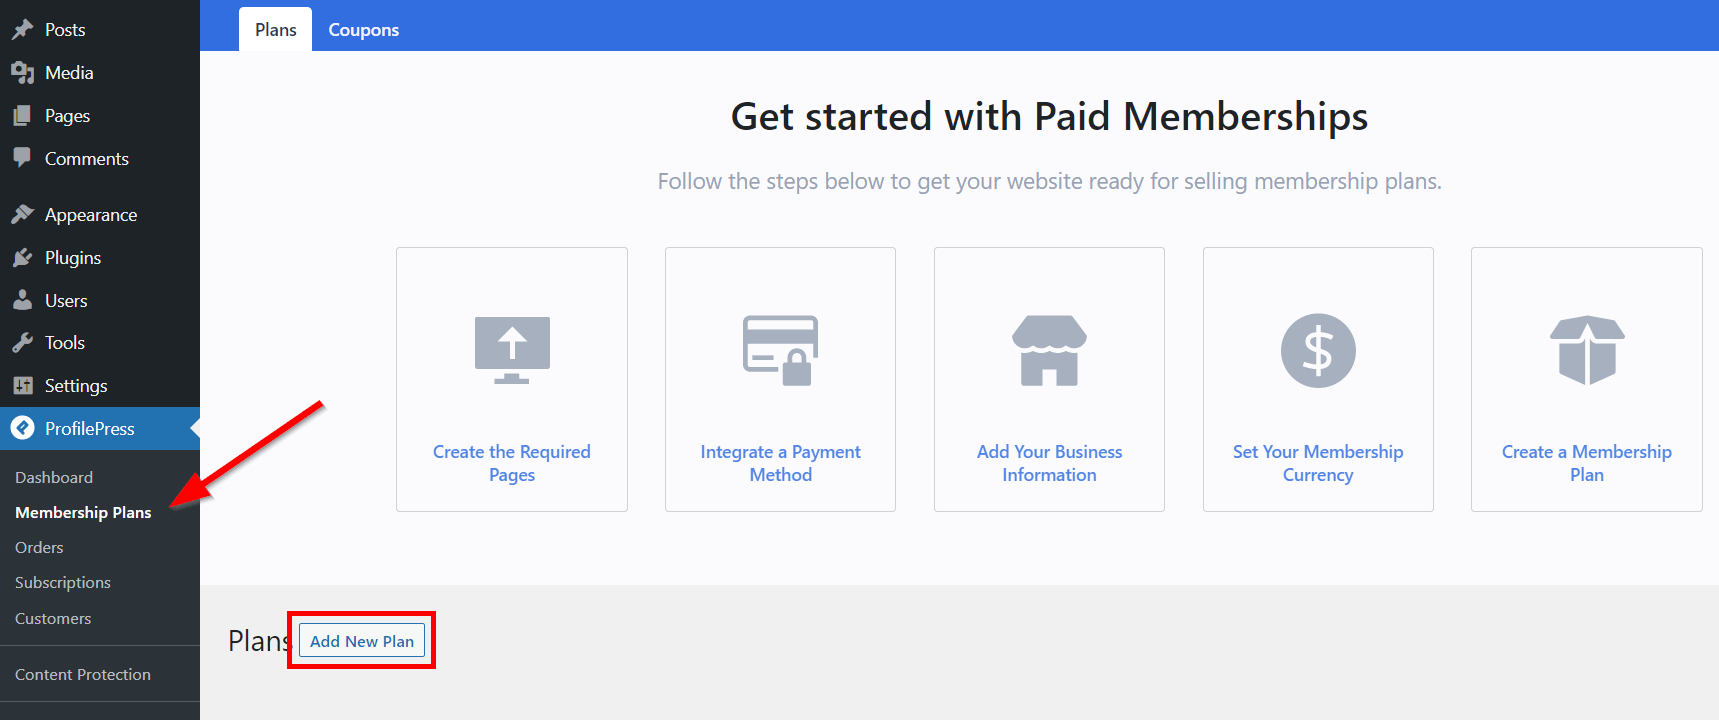
Next, let’s create a membership plan! Head over to ProfilePress > Membership Plans > Add New Plan.
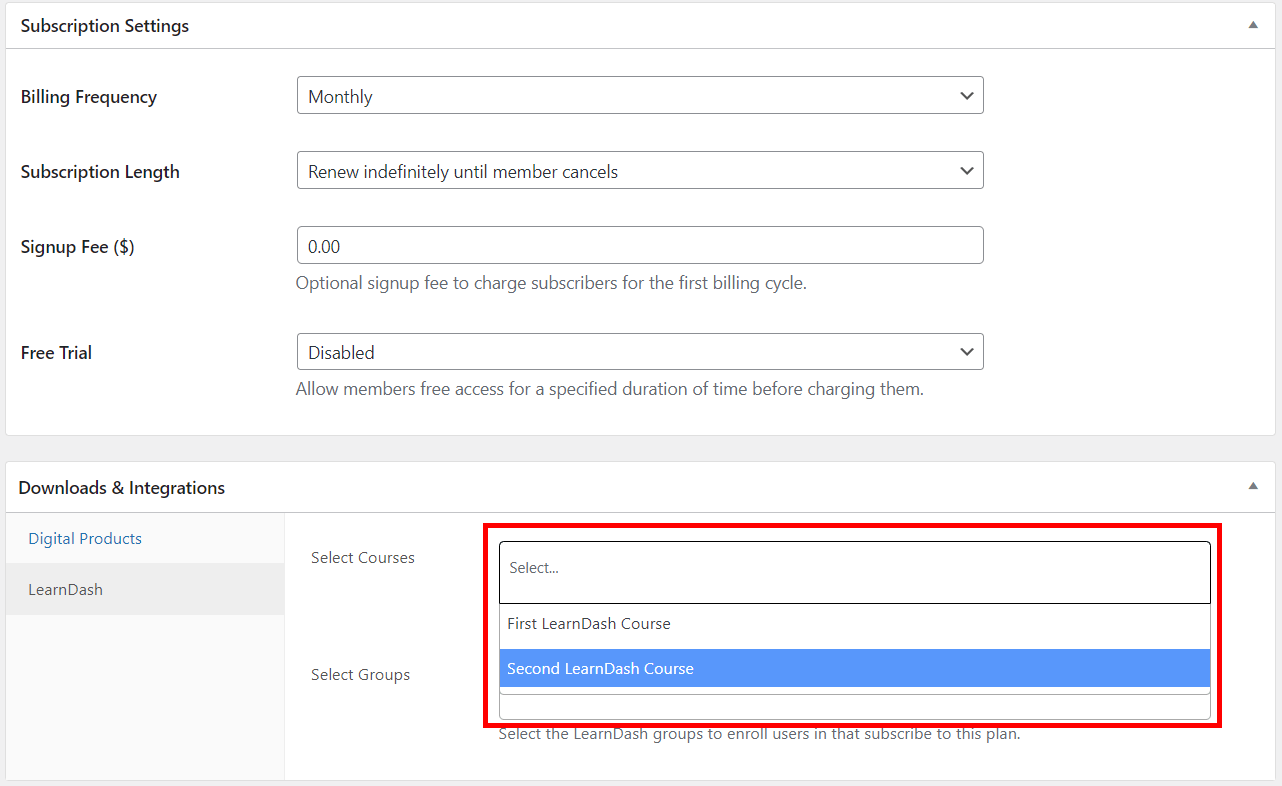
Fill in the plan title and other necessary information on the next page. Pay attention to items like the Description, User Role, Price ($), and Billing Frequency. Then scroll down to the LearnDash tab under the Downloads & Integrations section. Click within the Select Courses field to add courses to the membership plan. Users will have access to these courses when they subscribe to the membership plan.
When you’re done, click Save Plan. Then head back to ProfilePress > Membership Plans and copy the plan’s Checkout URL.
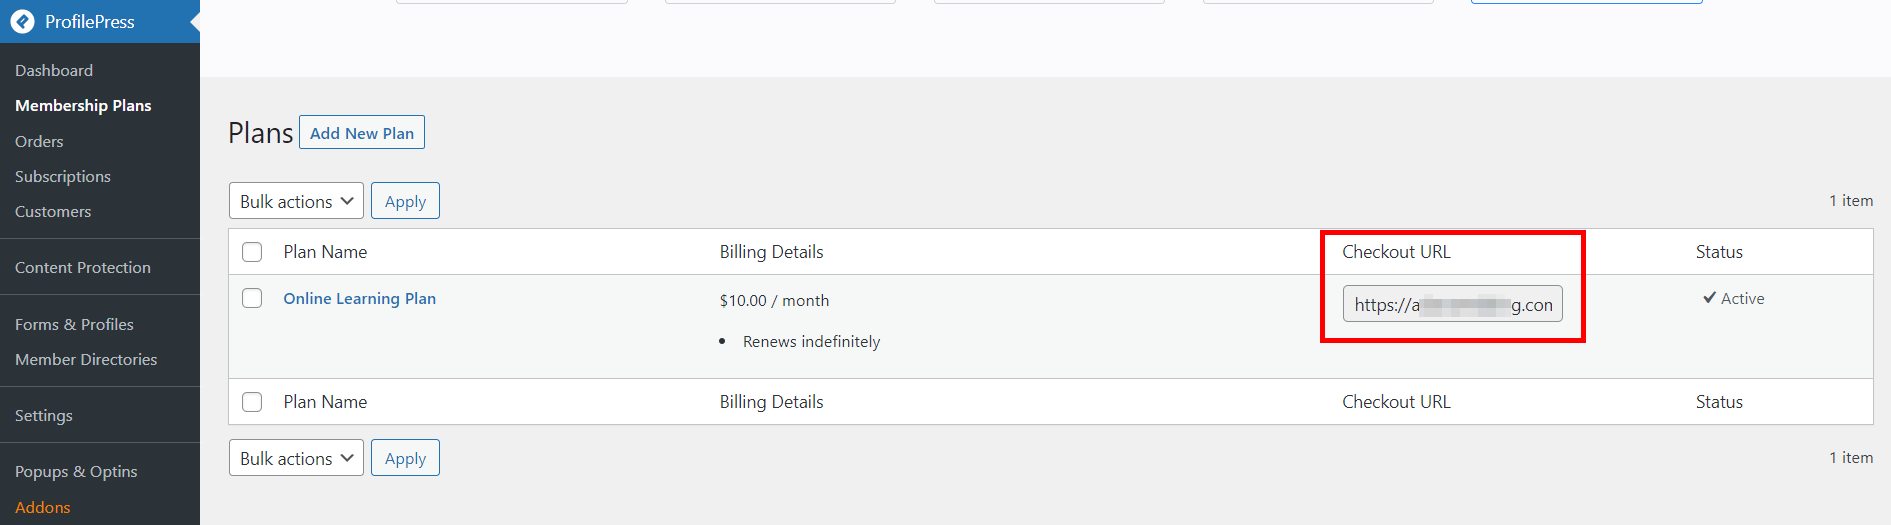
Now you can add this link to the course registration page, pricing page, or any page on your WordPress site. And when the URL is visited, it will open the checkout page for the membership plan.
Selling Online Courses With WordPress the Easy Way
Creating and selling online courses has become popular for individuals and businesses to share their expertise and generate revenue. In this article, we’ve discussed how to create and sell online courses in WordPress with the help of two plugins, LearnDash and ProfilePress.
LearnDash is a powerful and flexible learning management system that can help you create engaging and interactive courses. With features like course progress tracking, quizzes, and assignments, the tool makes creating a professional-looking course that will engage your learners easy.
ProfilePress, on the other hand, is a user registration and membership plugin. This plugin can help you create a seamless user experience for your learners, making it easy for them to sign up for your courses and access your content.
Combining these two plugins allows you to build a powerful online learning platform that is easy and effective. So why wait? Start building your online course today and take your expertise to the next level with ProfilePress.