How to Create an Elementor Registration Form in WordPress
Are you looking for the best way to create an Elementor registration form in WordPress?
Simplifying user registration on your WordPress website can significantly improve user experience and engagement. Elementor, a popular page builder plugin, allows you to create beautiful and functional forms easily without touching any code.
However, while Elementor excels in design, you still need a tool to create the actual WordPress register form that adds users to your website.
In this article, you will learn how to create a custom WordPress registration form using the ProfilePress user registration plugin and how to embed it on a page built with the Elementor page builder.
Creating an Elementor Registration Form in WordPress
Here, we’ll cover the steps to create an Elementor Registration Form in WordPress using the ProfilePress plugin.
ProfilePress is an excellent WordPress membership plugin that allows you to create beautiful and user-friendly membership sites, eCommerce stores, custom registration and login forms, and frontend password reset & edit profile forms.
Step #1: Purchase and Installing the ProfilePress Plugin
Purchase the ProfilePress plugin from the pricing page and install it on your WordPress site. To do this, navigate to Plugins → Add New and upload the plugin’s ZIP file to your WordPress site.
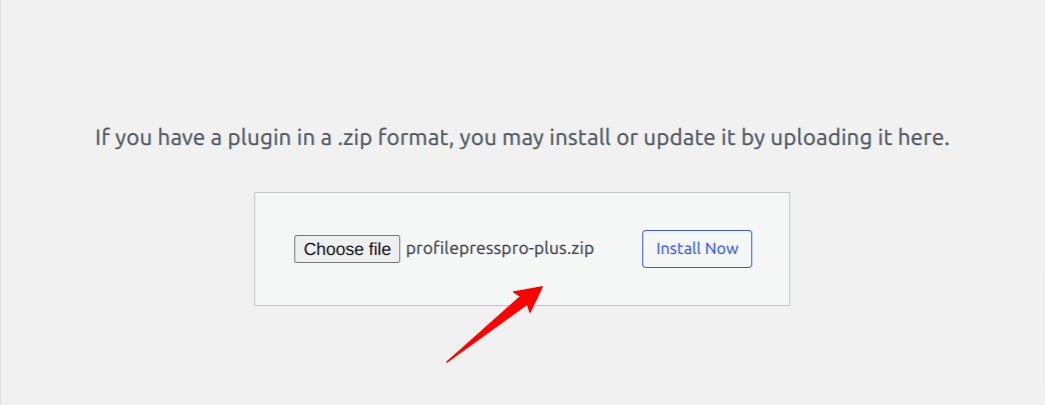
Once you click the Install Now button, the plugin will automatically be installed on your site. Activate the plugin once it’s installed.
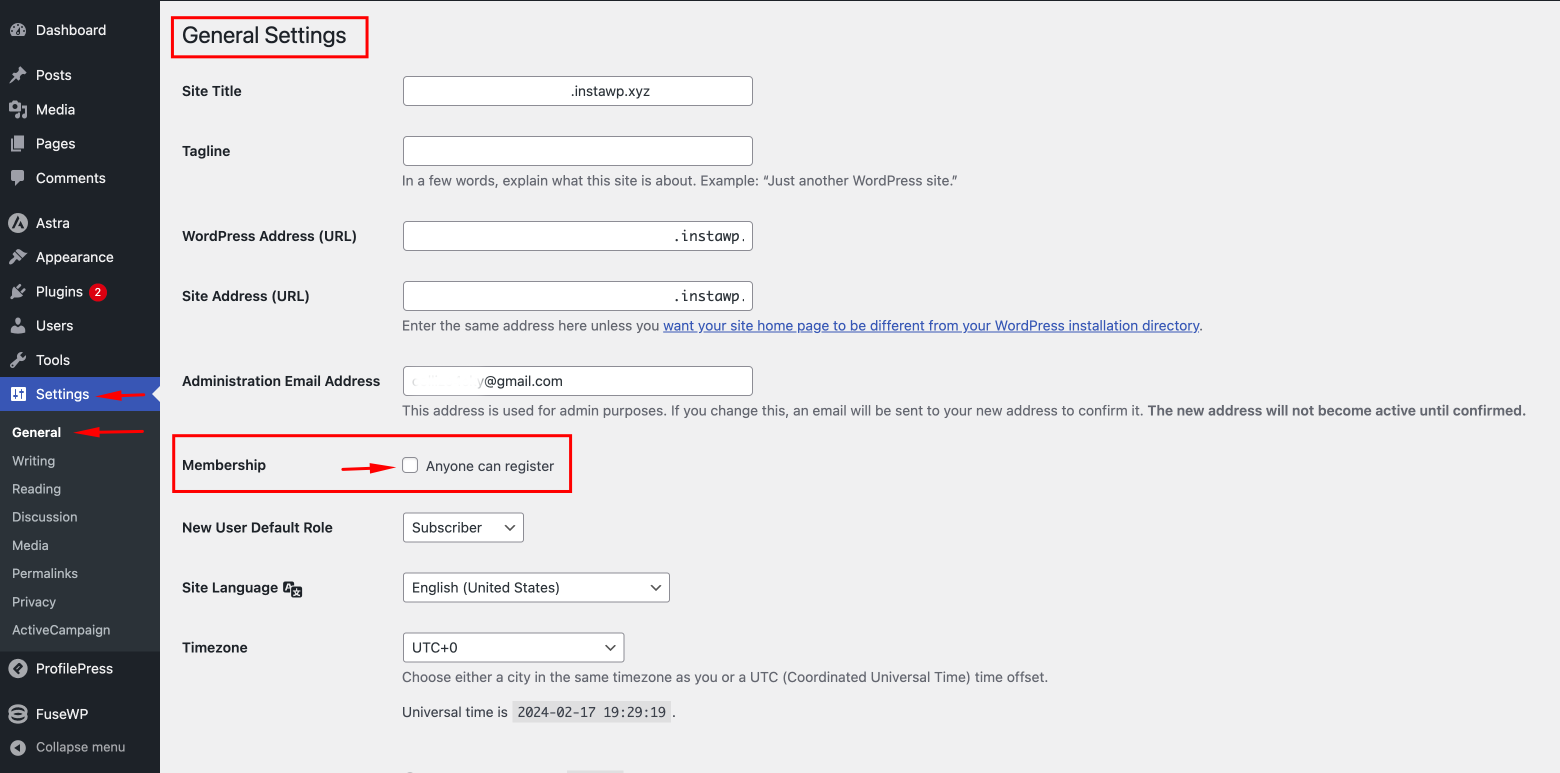
Ensure that registration is enabled on the site before moving forward. You can do this by navigating to your WordPress admin dashboard, then selecting Settings >> General >> Membership, and ensuring that the checkbox is selected as shown below.
Step #2: Creating the Custom Registration Form in ProfilePress
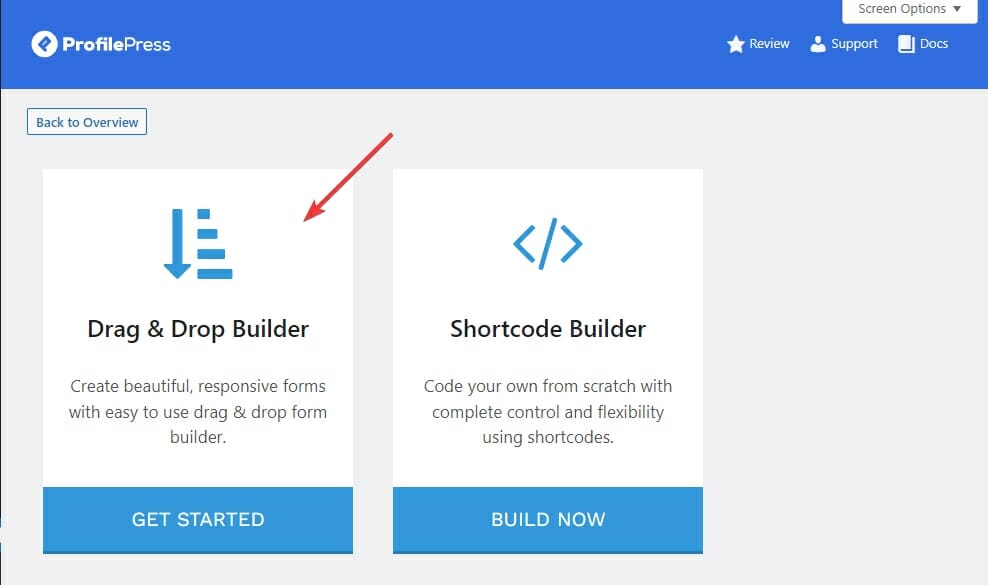
Navigate to ProfilePress >> Forms & Profiles from your WordPress dashboard and click the Add New button.
ProfilePress offers an intuitive drag-and-drop form builder, enabling you to add and arrange form fields effortlessly.
After clicking the Add New button, you can choose between the Drag & Drop Builder and the Shortcode Builder. In this section, we will cover using the Drag & Drop Builder, so go ahead and click on the “Get Started” button beneath it.
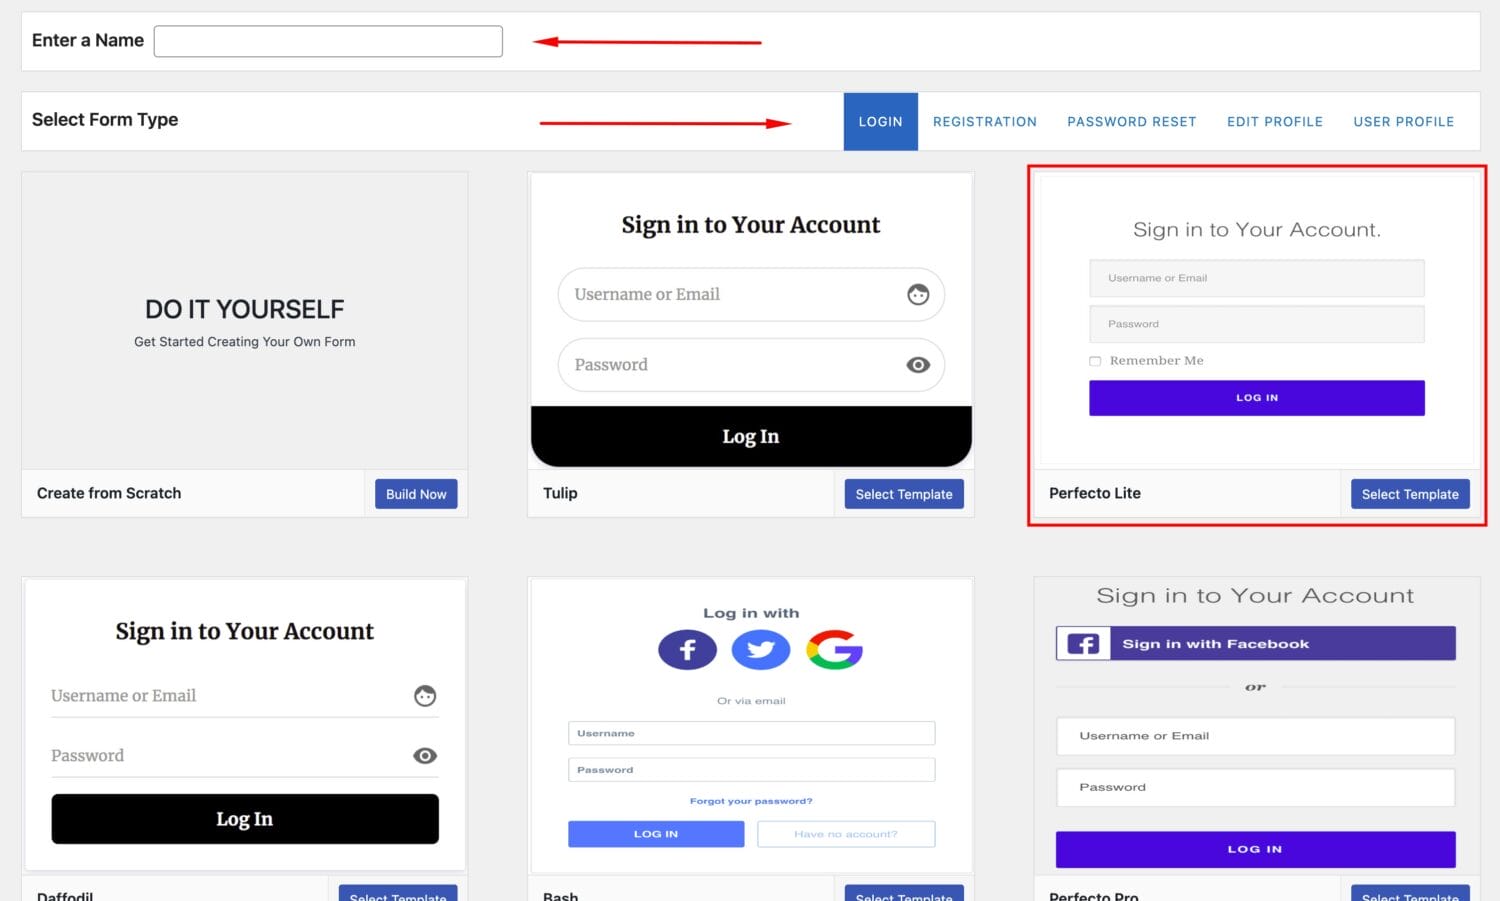
Type in the desired name for your form and click on the Registration tab.
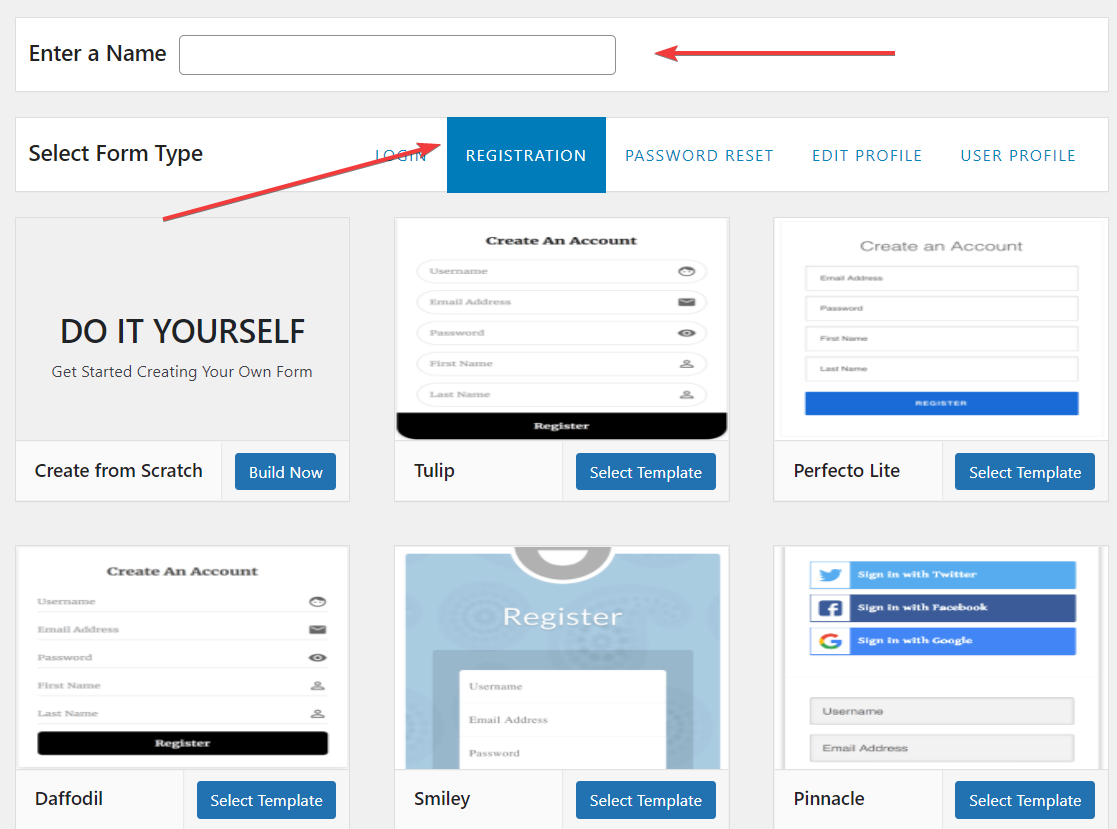
Next, select your desired template and use the drag & drop builder to customize the form using the intuitive drag & drop builder.
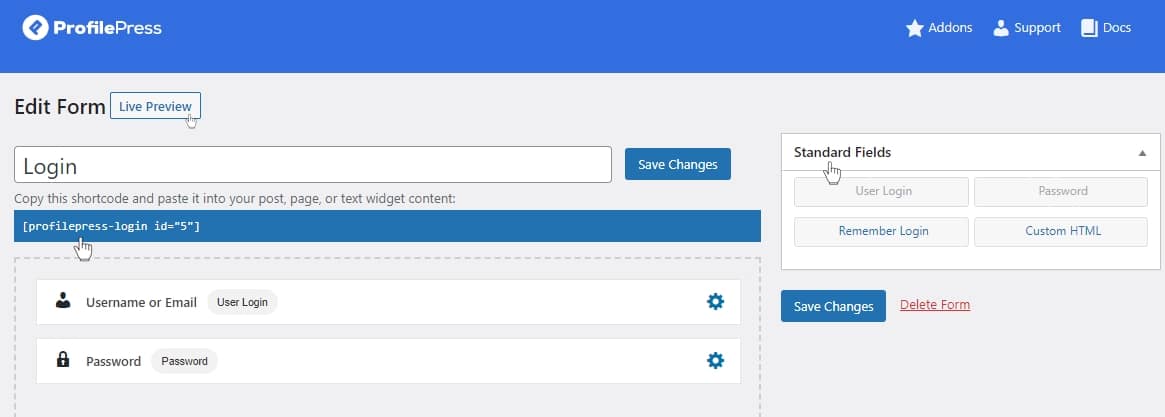
This powerful tool allows you to effortlessly rearrange the form elements of the WordPress registration form you are creating, such as text fields, checkboxes, dropdown menus, and more, simply by dragging and dropping them into place.
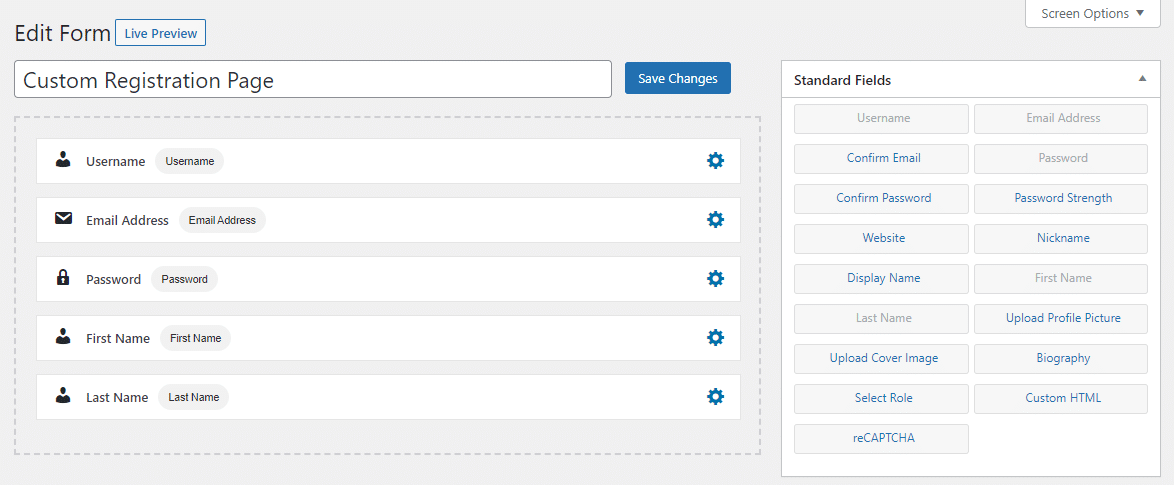
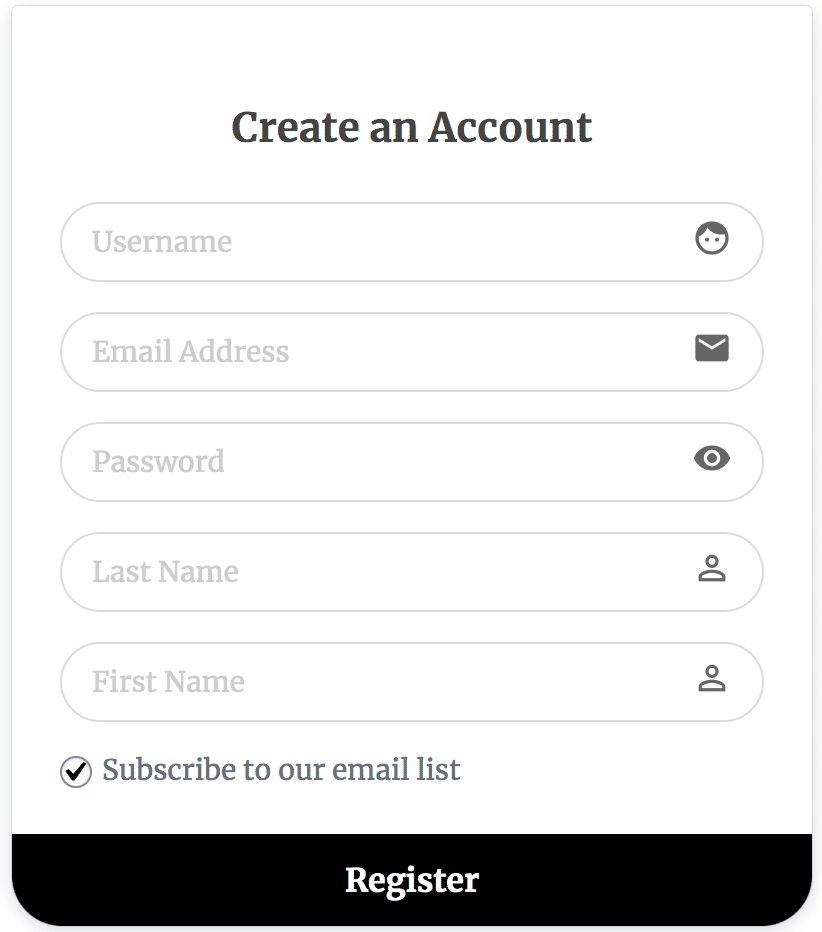
You can preview how the custom WordPress registration form will look by clicking on the “Live Preview” button.
Once you have finished customizing your form, click on the “Save Changes” button to save your form.
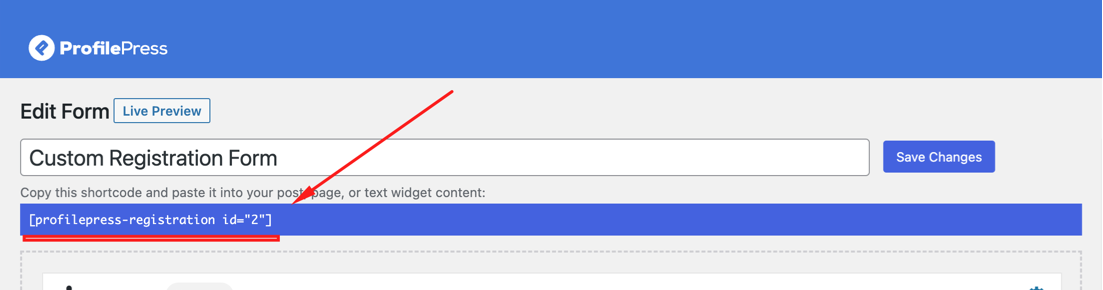
After saving the form, copying the shortcode displayed directly below the form title is crucial. This shortcode will be used in the next step, allowing you to embed the form into your Elementor registration page.
Step #3: Embedding the Form in a Registration Page by Elementor
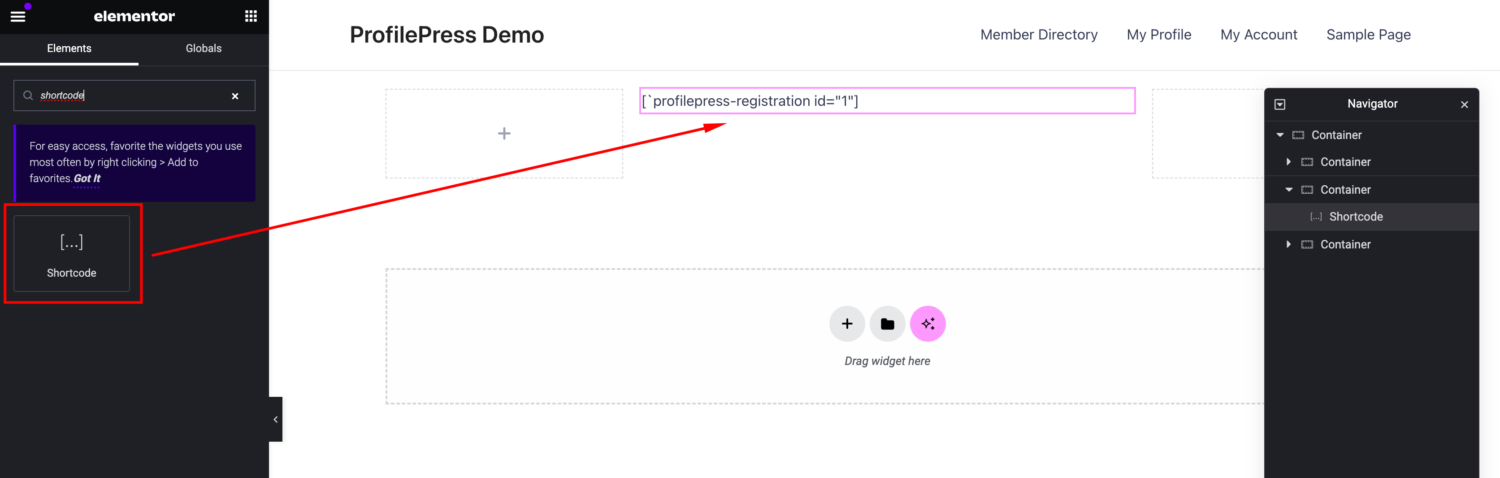
Now that your custom Elementor registration form is ready, it’s time to embed it into a registration page built using Elementor.
To do this, open the page where you want to embed the registration form in the Elementor editor. Drag and drop the “Shortcode” element onto the page. Paste the shortcode generated by ProfilePress in the step above into the designated area within the Elementor shortcode element.
Adjust the layout and styling of the WordPress registration page to blend with your website’s design seamlessly.
Elementor’s visual editor provides an easy and intuitive interface for customization, ensuring your registration form functions well and looks aesthetically pleasing.
Bonus: Creating a Custom Elementor Login Page
ProfilePress also allows you to create custom WordPress login forms, so you can also create an Elementor login page. The process is similar to creating registration forms.
Create a new form, choose the “Login” tab, and select a template.
Next, customize the fields and layout to your preference.
Once done, save changes and copy the shortcode provided by ProfilePress.
Next, create a page using Elementor, drag the Shortcode element to the desired location of the page, and paste the copied login form shortcode into it.

Incorporating a WordPress login form alongside the registration form allows you to offer a comprehensive user experience on your website. This allows your visitors to seamlessly navigate between creating an account and logging in to access their account on your WordPress website.
Create Your Elementor Registration Form for WordPress Today
With ProfilePress, you can create a custom registration form in Elementor without needing Elementor Pro. Even if you have Elementor Pro and its registration form widget, ProfilePress offers more flexibility. For example, you can:
- Gives you more control over the form fields in your registration form, including letting you add custom fields.
- Offers admin features, such as requiring users to be approved before they can log in.
- Email confirmation lets users verify their account email addresses before they can log in.
- Lets you create multiple Elementor registration forms, each with unique fields and settings.
- Integrates with WooCommerce for Elementor WooCommerce registration forms.
By following the step-by-step guide provided in this article, you now know to create an Elementor registration form for your WordPress site.
Get the ProfilePress plugin today to build custom WordPress registration forms for your Elementor-powered website.