How to Create a Custom WordPress Registration Page
Do you want to create a custom WordPress registration page for your website?
While WordPress provides default registration and login pages for users, they don’t always align with the design and branding of your website. This is where creating a custom registration page becomes crucial. A custom registration page enhances the user experience and gives you complete control over how users register on your WordPress site.
In this article, we will guide you through creating a custom WordPress registration page using the powerful ProfilePress membership plugin to help you achieve a registration page that perfectly matches your website’s style and requirements.
Creating a Custom WordPress Registration Page
When installing ProfilePress, you will be prompted to create pages necessary for the plugin to function smoothly. One of these pages is a custom registration page. However, you can follow these instructions if you dismiss this prompt or prefer to create a new custom registration page for your WordPress.
The page you create will contain a shortcode from the Forms & Profiles Section, which will be used to register new WordPress users to the website.
Building the WordPress Registration Form
To create a custom WordPress registration page, we must first create the WordPress registration form. To do this, go to ProfilePress > Forms & Profiles and click the Add New button.
Next, choose a builder type. For this guide, we’ll focus on the Drag-and-Drop Builder. In the Drag-and-Drop Builder section, click the Get Started button.
Enter a name for the WordPress registration form, then select the Registration tab to change the form type to Registration.
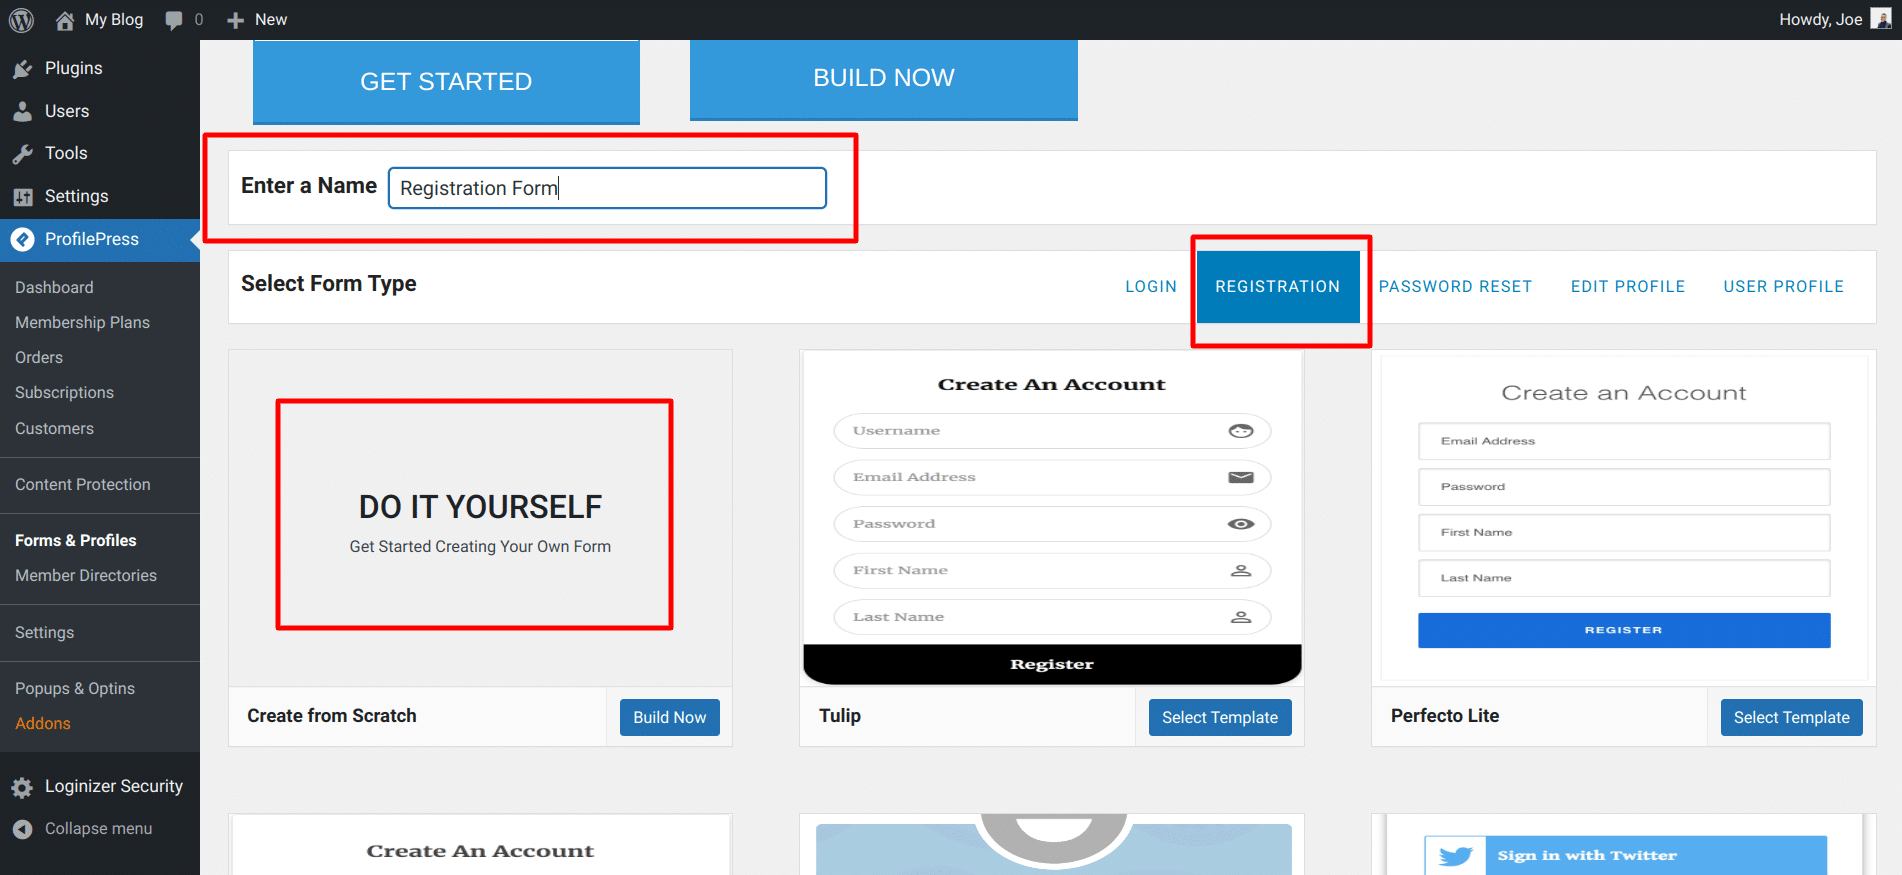
You will see several pre-made registration form templates and the Do It Yourself option. We will select the Do It Yourself option for this guide to create a registration form from scratch.
This takes you to the form creation page with various fields to build the WordPress registration form. At the top, you’ll find the form shortcode and a Live Preview button to see any changes.

Drag and drop fields from the Standard Fields section on the right sidebar to customize the registration form. You can remove unwanted fields by hovering over them and clicking the Bin icon.
To adjust the settings for any form field, click the Gear icon. This opens a popup with options under General, Style, and Settings. These sections allow you to modify the field’s display and behavior.
When you’re done building the registration form, click on ‘Save Changes.’
Next, copy the shortcode for the newly created form.
Creating the WordPress Registration Page
To create the WordPress registration page, navigate to Pages > Add New in your WordPress dashboard.
Give the page a suitable title. Then, paste the form shortcode you copied earlier into the page content. Finally, publish the page.

NB: If you are using Gutenberg Block Editor, you need to add the Shortcode block and then paste the shortcode in the field

Setting the WordPress Registration Page as Default
Now that you have a custom WordPress registration page for your website, you need to set it as the default registration page across your site. This ensures that all registration links on your site point to the front-end WordPress registration page.
To do this, go to ProfilePress >> Settings. Select the Global Settings tab, scroll down to the registration page section, and select the created custom registration page.

Don’t forget to save the changes to finalize the setup.
Conclusion
Creating a custom WordPress registration page makes your website look more professional and cohesive. It also enhances the user experience and gives you valuable control over the registration process.
Following the steps outlined in this article, you can create a WordPress registration page that effectively captures user data and leaves a lasting impression on your visitors.