How to Create an Email Subscription Form in WordPress
Do you want to add an email subscription form to your WordPress site?
As a business or website owner, there are numerous benefits that you can derive from building an email list.
An email subscription form enables your site visitors to signup for your mailing list and get marketing or promotional emails from you. By building an email list, you can drive traffic to your site, make more sales and build a relationship with your audience.
In this guide, we will learn how to create various email subscription forms in WordPress, connect them to an email marketing provider, and start growing your email list.
Why do you need an Email Subscription Form on your Website?
There are indeed other ways to connect with your audience. Still, email marketing remains one of the best ways to connect with your audience directly, and very quickly, we will look at some of the benefits of adding an email subscription form to your WordPress website.
- Targeted Leads: Before anyone subscribes to your list, they have decided to hear from you. These people are more than casual website visitors, they came to your website, liked your content or offerings, and they were interested enough to want to stay in touch with you. This shows that your subscribers are genuinely interested in your business and can bring much value.
- Direct Communication: Unlike other means of communication, such as social media, email marketing allows you to connect with each of your subscribers without any distractions directly. This means there is a higher chance of them seeing your messages, which will also feel more personal to them.
- Targeted Campaigns: An email list allows you to create targeted campaigns for your audience. When you build a list, you are in control of your data and have access to various information about your subscribers. These data can help you interact with them better and tailor your content to your audience.
How To Add Email Subscription Form To Your WordPress Site
The WordPress platform does not come with an inbuilt email marketing system or subscription forms; therefore, to start collecting those emails, you need a plugin to help you create your opt-in forms and capture subscribers’ information.
This guide will teach us how to use the MaiOptin plugin to create subscription forms on your WordPress site.
MaiOptin is a leading WordPress email marketing tool that enables you to convert your website visitors into subscribers. It allows you to create, customize, and showcase professional opt-in boxes on your WordPress site. It is straightforward to use, and it comes loaded with a lot of valuable features.
In the sections below, I will show you how to install and activate MailOptin, set it up, and use it to create email subscription forms.
How to Install and activate the MailOptin plugin
The first step is installing the MailOptin plugin, which you can easily do from your WordPress dashboard.
You will need to purchase a MailOptin License and install the MailOptin plugin. To do that, head to the MailOptin website to purchase a suitable license plan.
After purchasing your copy of the MailOptin Plugin, you will receive a confirmation email with a link to download the plugin zip file and your license key. You can also download the plugin from your account page on the MailOptin website.
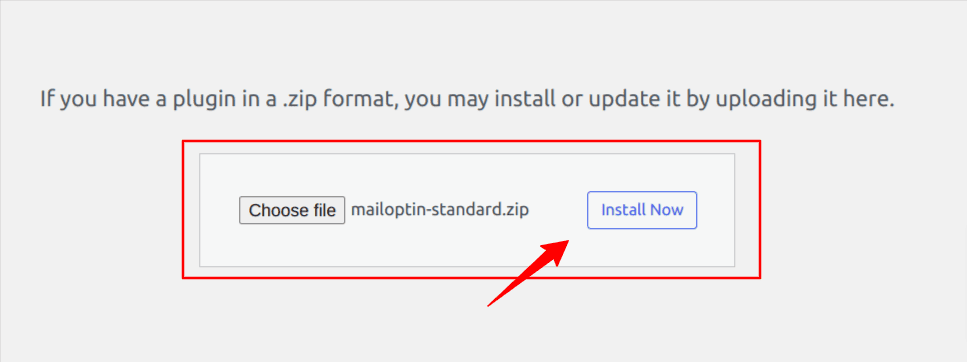
Once you have downloaded the plugin, login to your WordPress admin dashboard, and navigate to the Plugins page; click on the “Add New” button and click “Upload Plugin“. Upload the zip file and install and activate the plugin on your WordPress site.
How to Create WordPress Sidebar Widget Subscription Forms
A sidebar widget subscription form is one of the most common ways to get your site visitors to join your mailing list without being intrusive. When visitors visit your website, the sidebar is a prominent section, making it a good spot for a subscription form.
To get started, go to MailOptin > Optin Campaigns > Add New, then name the campaign. Next, select Sidebar/Widget optin type.
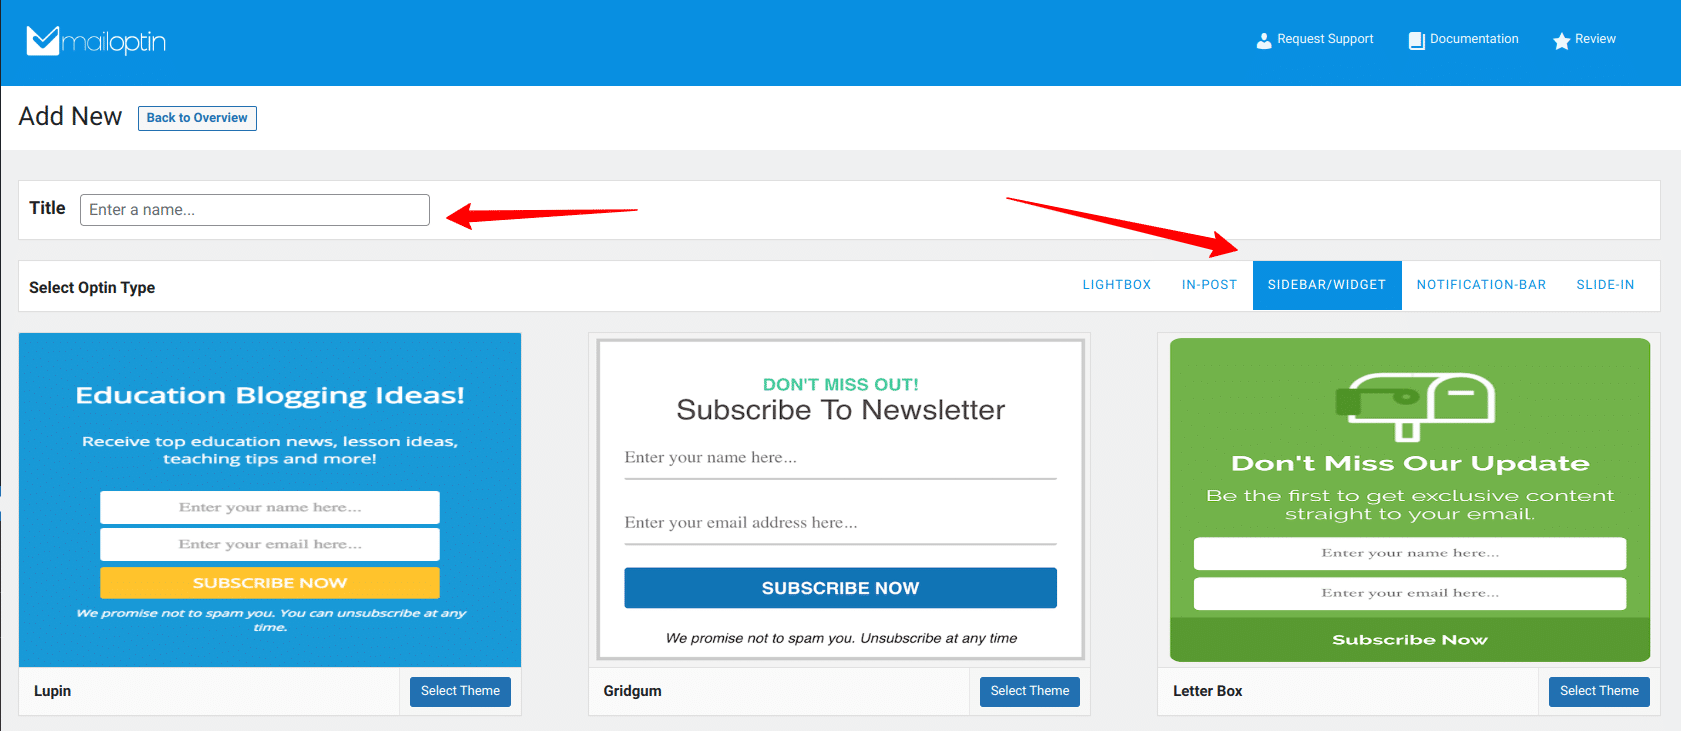
Once you select a desired optin form, you will be taken to the form builder page where you can customize the sidebar subscription form.
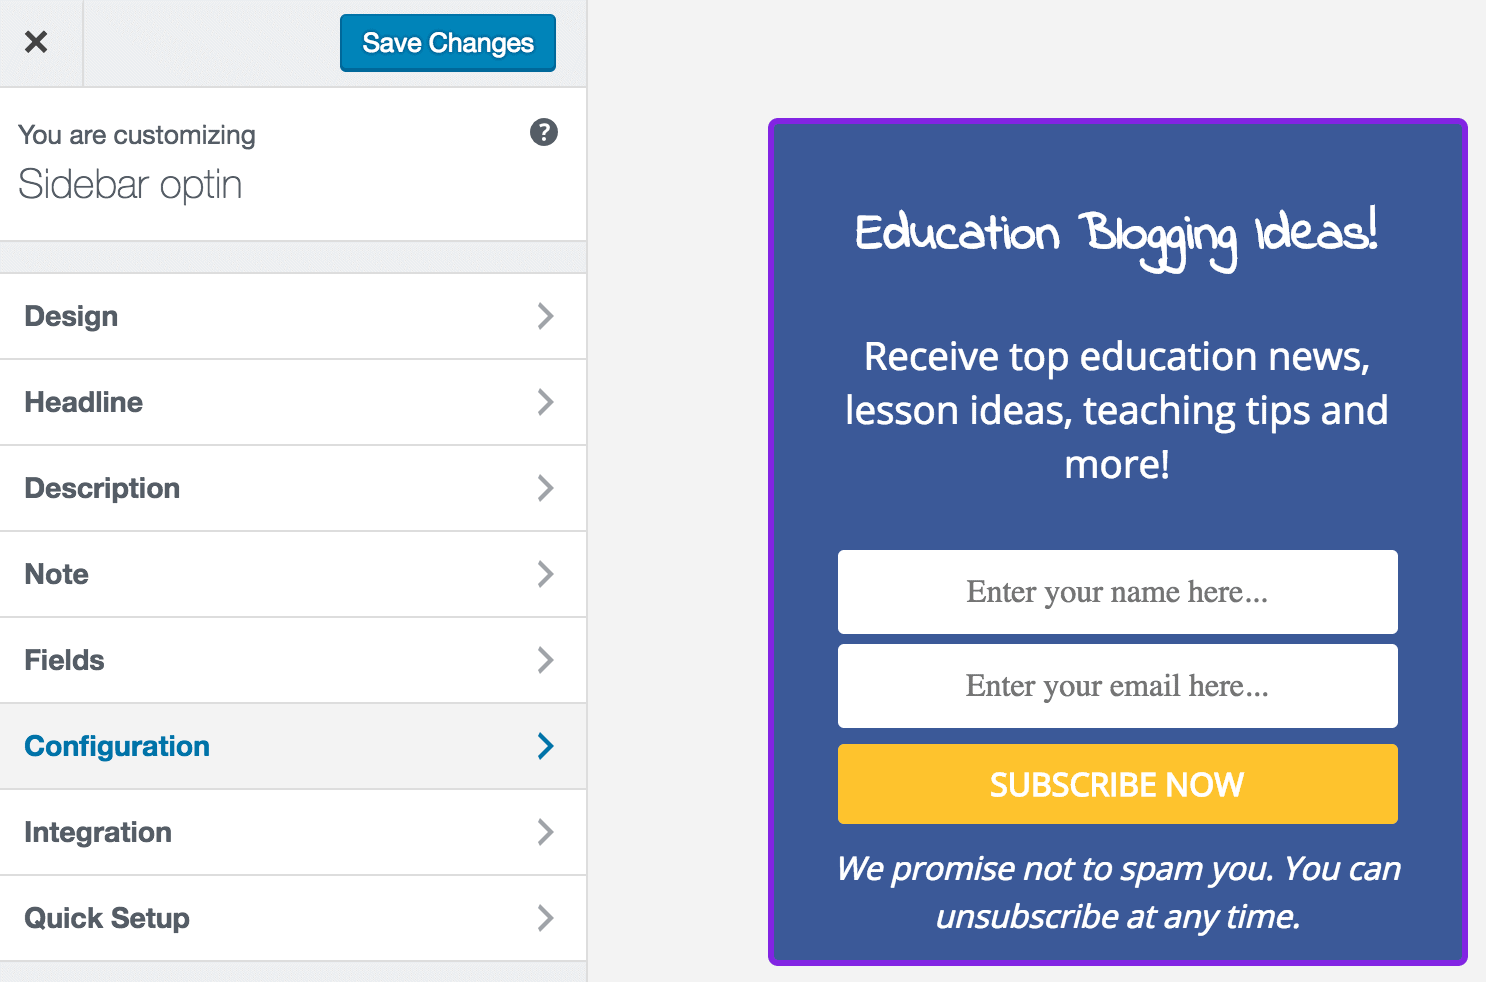
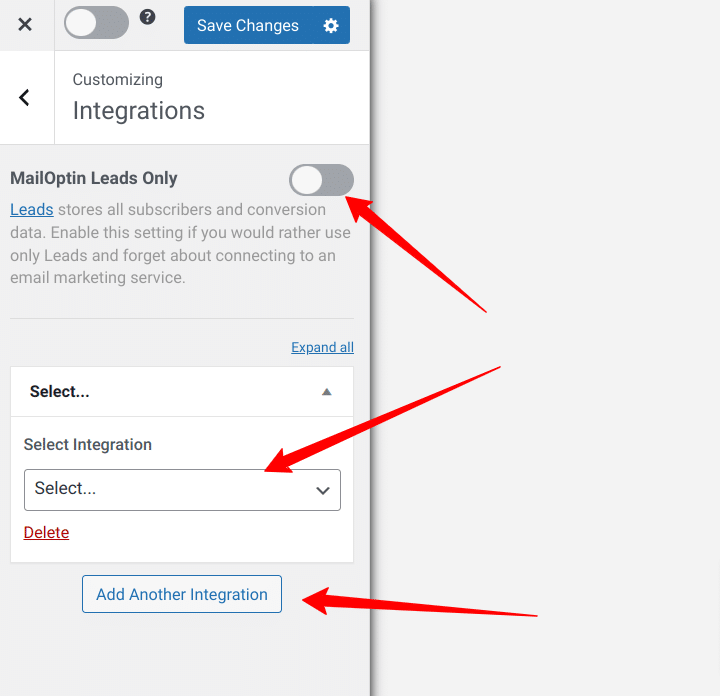
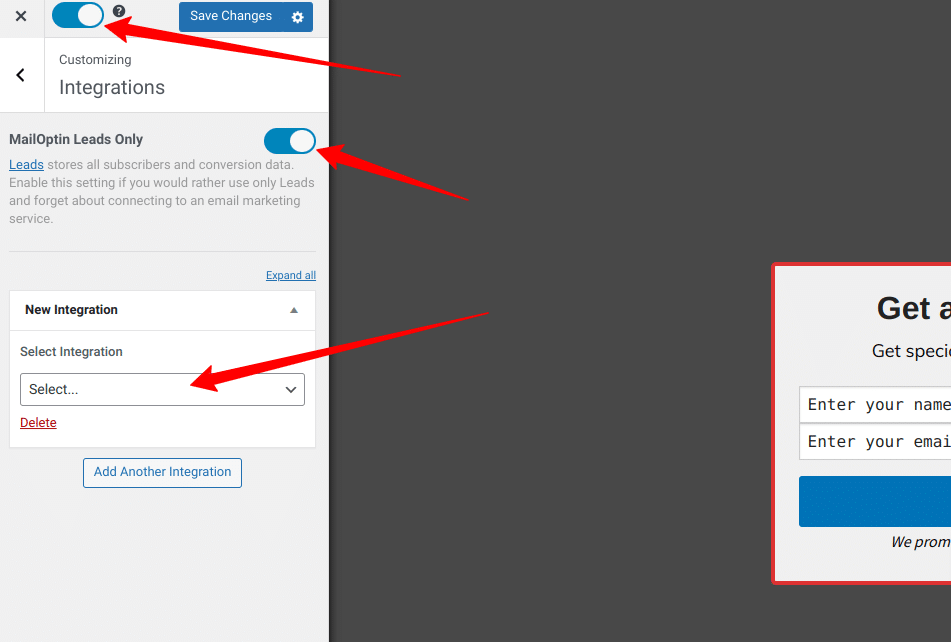
To connect your form to an email service provider, go to the “Integrations” panel, select your email service provider, and the email list of all captured leads/conversions will be saved to your email provider.
You could also decide to use MailOptin Leads for the lead storage instead of an external email service provider.
After completing your customization and integrations, activate the optin by toggling the switch at the top right corner of your screen, just beside the “save changes” button.
Displaying the Subscription Form
The next step is to display the subscription form on the sidebar of your WordPress site. Go to Appearance >> Widget or Appearance >> Customize >> Widgets and add or drag the “MailOptin” widget to your sidebar widget area or any area of your site you want the optin shown.
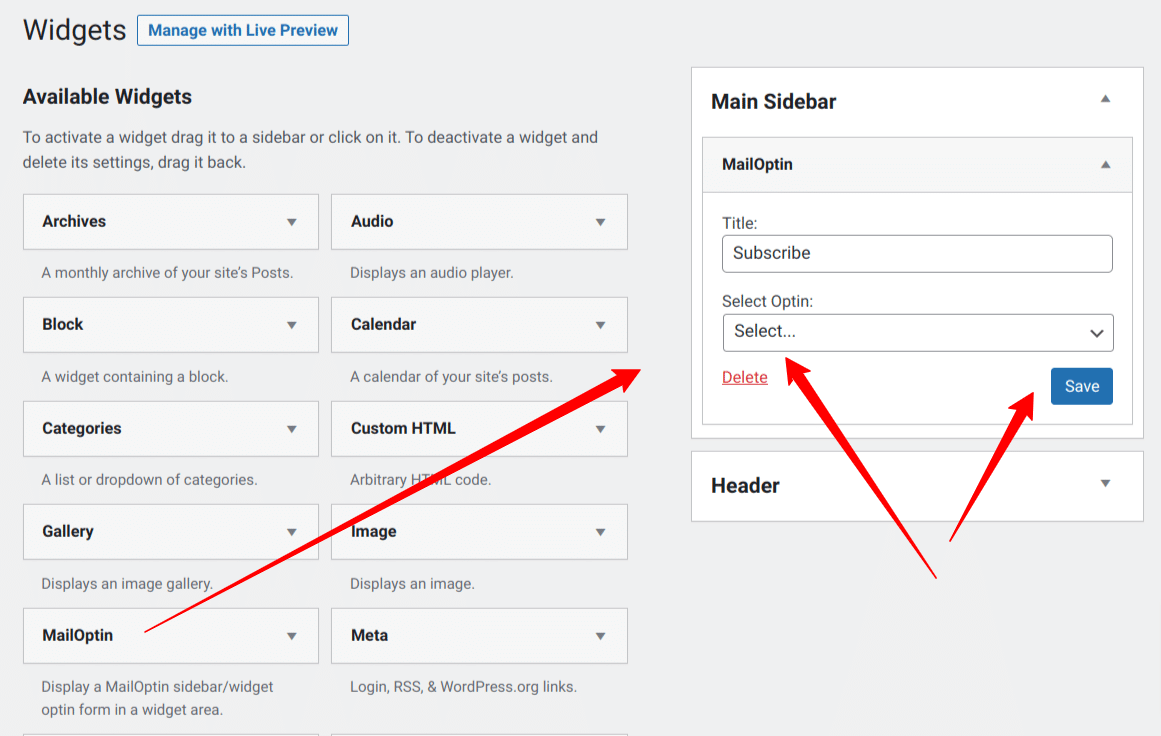
Select the sidebar subscription form you designed and save changes. If you visit your website, the form should appear exactly where you placed it.
How to Create a WordPress Popup Subscription Form
Lightbox Popups are one of the popular types of subscription forms that grab your website visitors’ complete attention and convert them into subscribers. There is always an ongoing debate about whether popups are good, but I believe the key is to find a balance and make sure your popups are not annoying by being too persistent.
To add a popup subscription form, go to MailOptin > Optin Campaigns > Add New, then name the campaign. Next, select Lightbox type.
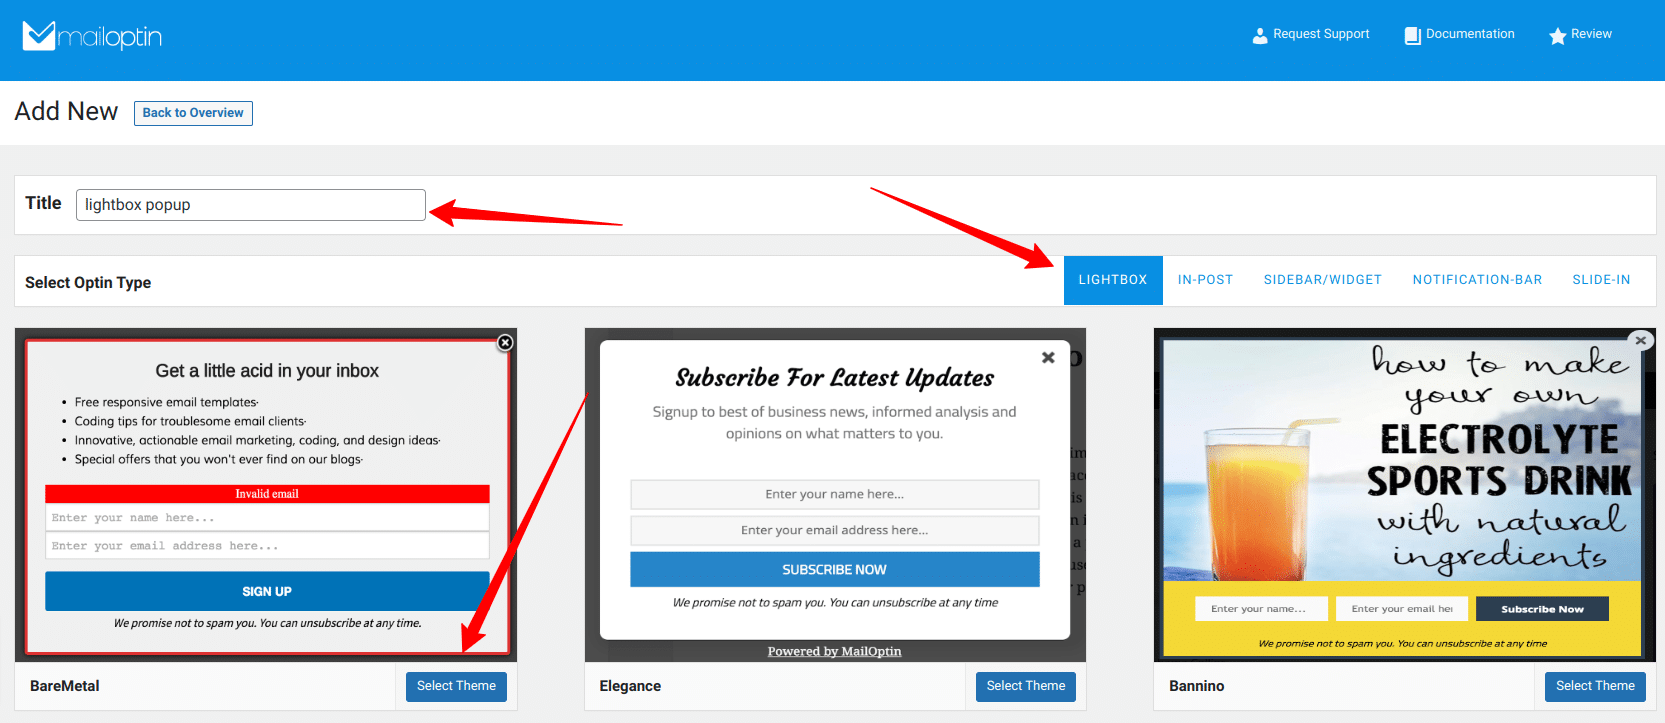
Once you select a desired template, you will be taken to the form builder page, where you can customize the lightbox popup subscription form.
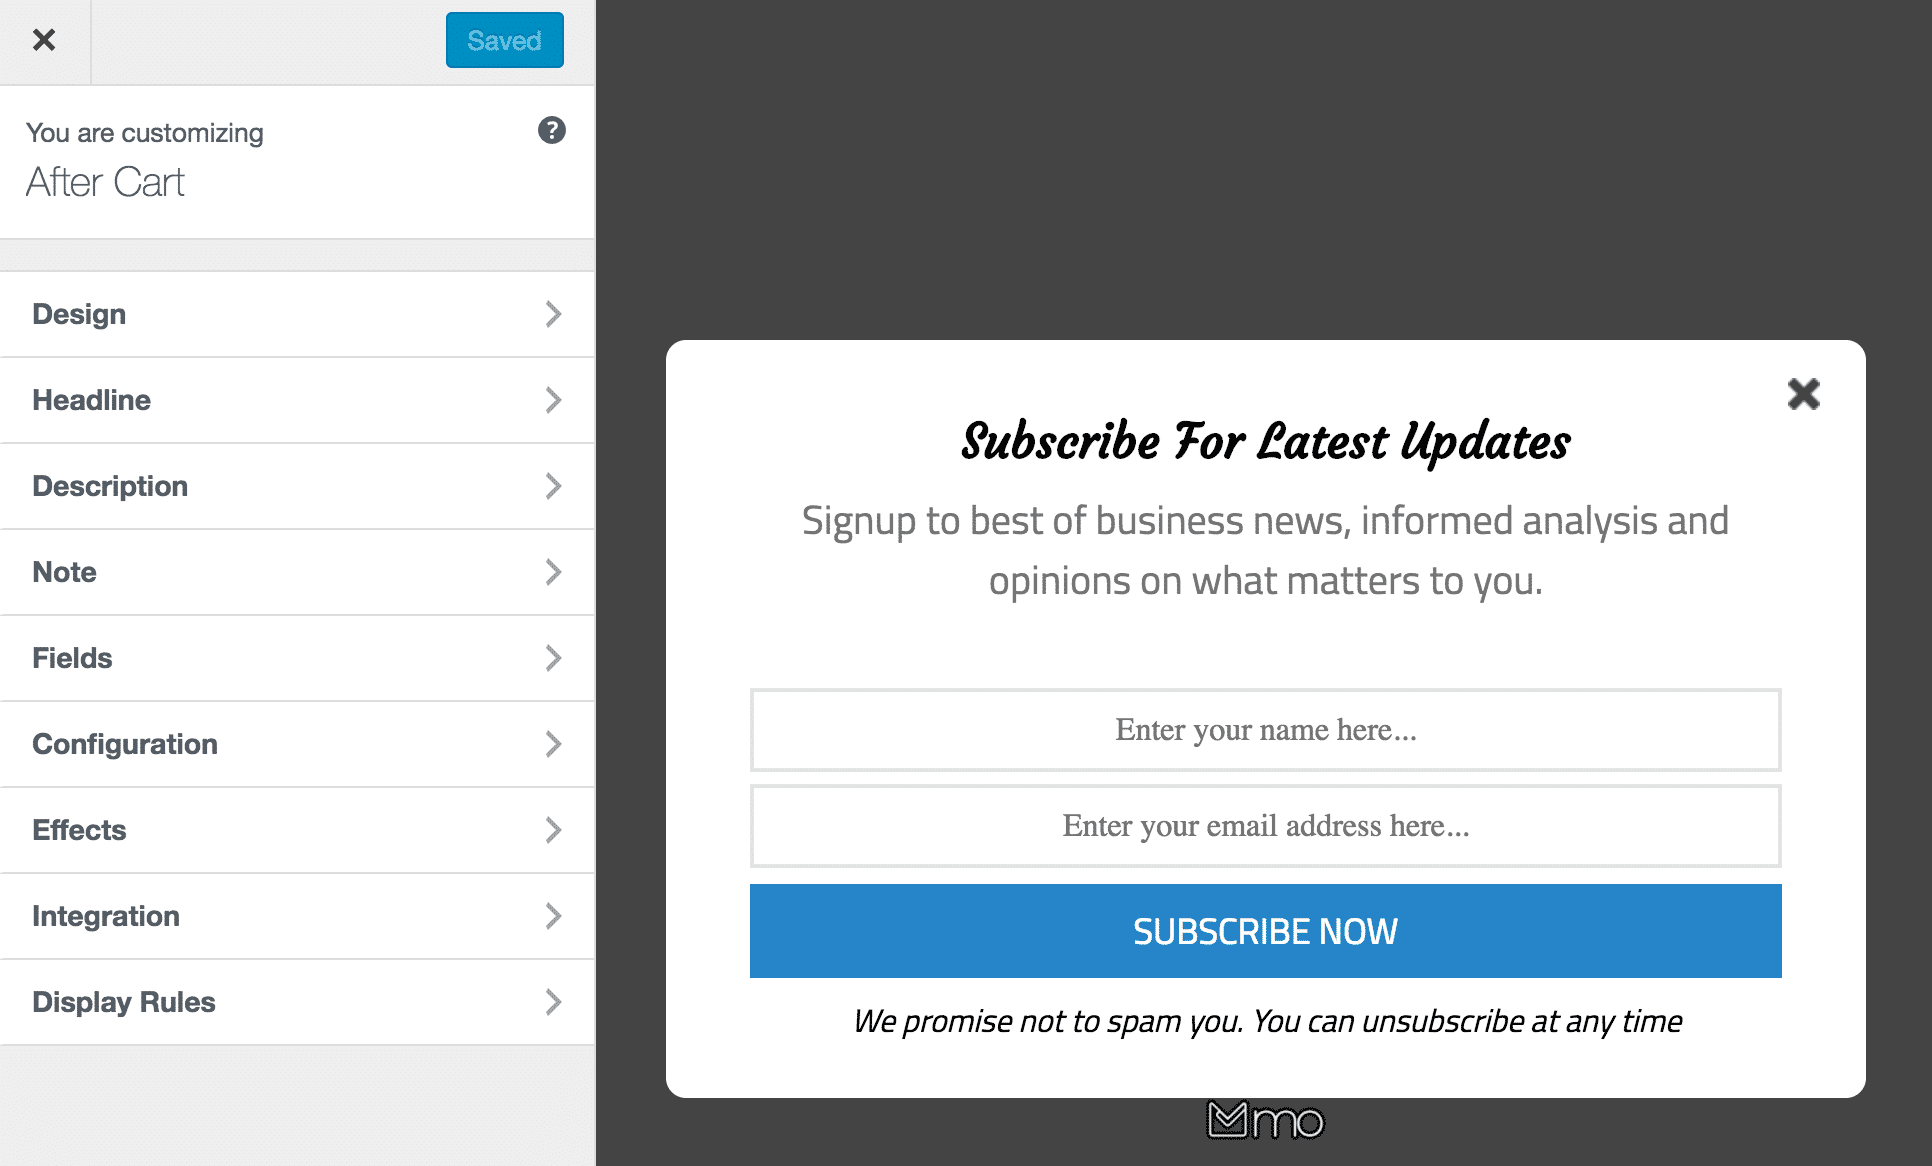
Use the various options available on the side panel to customize the appearance and behaviors of your lightbox form.
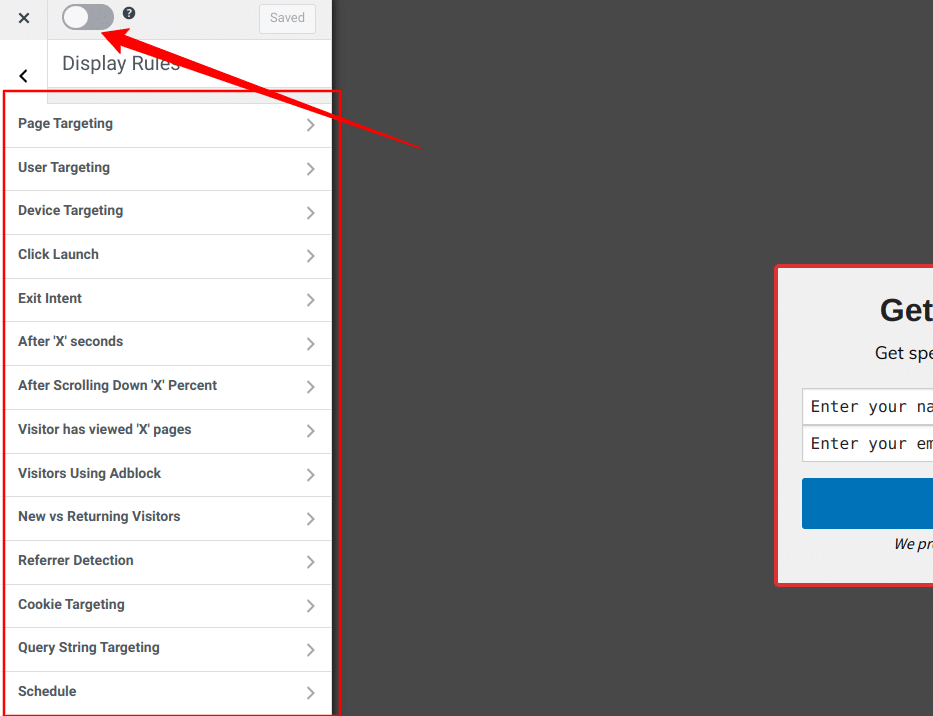
Go to the “Display Rules” to configure where and how your popup subscription should be displayed. Various targeting levels are available at your disposal, such as Page targeting, Device targeting, Exit intent, cookie targeting, and more! MailOptin has a lot of options for you.
Also, go to the “Integrations” panel to select your email service provider so that your email leads can be saved there. You could also use “MailOptin Leads” for the lead storage instead of another external service.
When you are done, don’t forget to click the “Activate Toggle” to activate your popup form, the switch is at the top right corner of your screen, just beside the “save changes” button.
How to Create WordPress Notification Bars (Bottom/Top Bar) Subscription Form
Notification Bars (also known as top & bottom bars, floating bars, or hello bars) are also one of the most common methods of building an email list without being intrusive.
To add a Notification bar subscription form, go to MailOptin > Optin Campaigns > Add New, then name the campaign. Next, select Notification-Bar type.
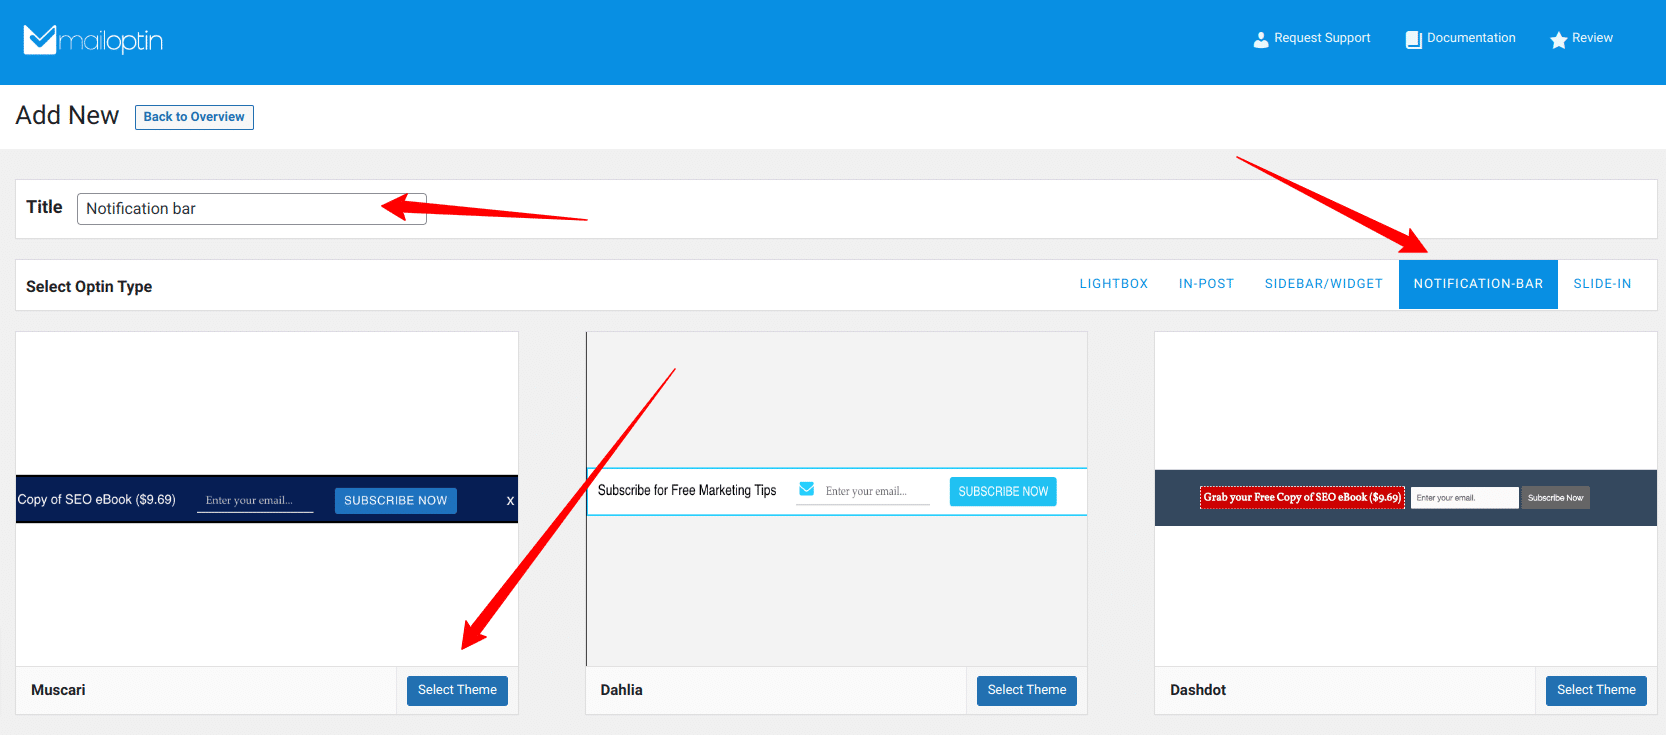
Once you select a desired Notification-bar template, you will be taken to the form builder page, where you can customize the subscription form to your liking.
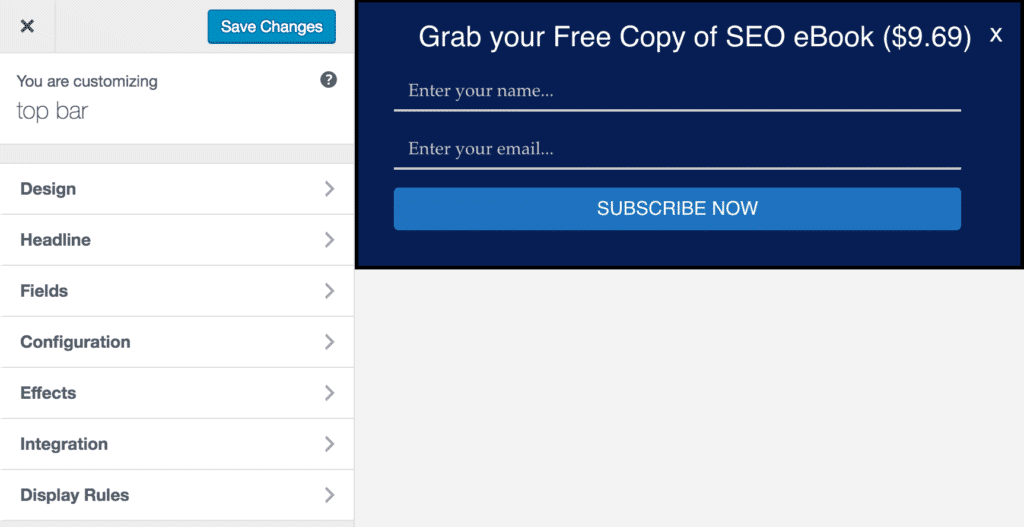
Use the options available on the side panel to customize the appearance and behaviors of your lightbox form. Go to the “Integrations” panel to select your email service provider so that your email leads can be saved there.
You could also use “MailOptin Leads” for the lead storage instead of another external service.
Go to the “Display Rules” to configure where and how your Notification bar subscription form should be displayed. Various targeting levels are available at your disposal, such as Page targeting and Device targeting.
You can also use Triggers to cause the optin to display based on user activities and interactions on your site, such as exit intent, scroll trigger, time on site, and number of page views.
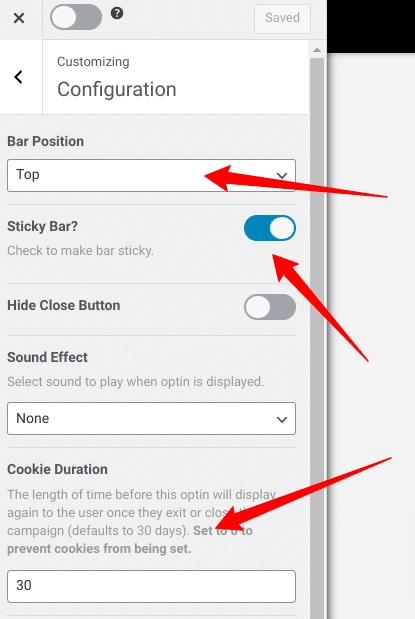
Use the “Configuration” panel to decide whether to display the notification bar at the top or bottom of the visitor’s screen. The sticky bar option allows you to make the top notification bar sticky. It will stick to the top of visitors’ screens even when they scroll down your page.
Also, go to the “Integrations” panel to select your email service provider so that your email leads can be saved there. You could also use “MailOptin Leads” for the lead storage instead of another external service.
When you are done, don’t forget to click the “Activate Toggle” to activate your popup form, the switch is at the top right corner of your screen, just beside the “save changes” button.
How to Connect MailOptin With Mailchimp
Mailchimp is one of the most popular email marketing providers, and MailOptin offers seamless integration with Mailchimp. Follow the step-by-step guide below to connect MailOptin with your Mailchimp account.
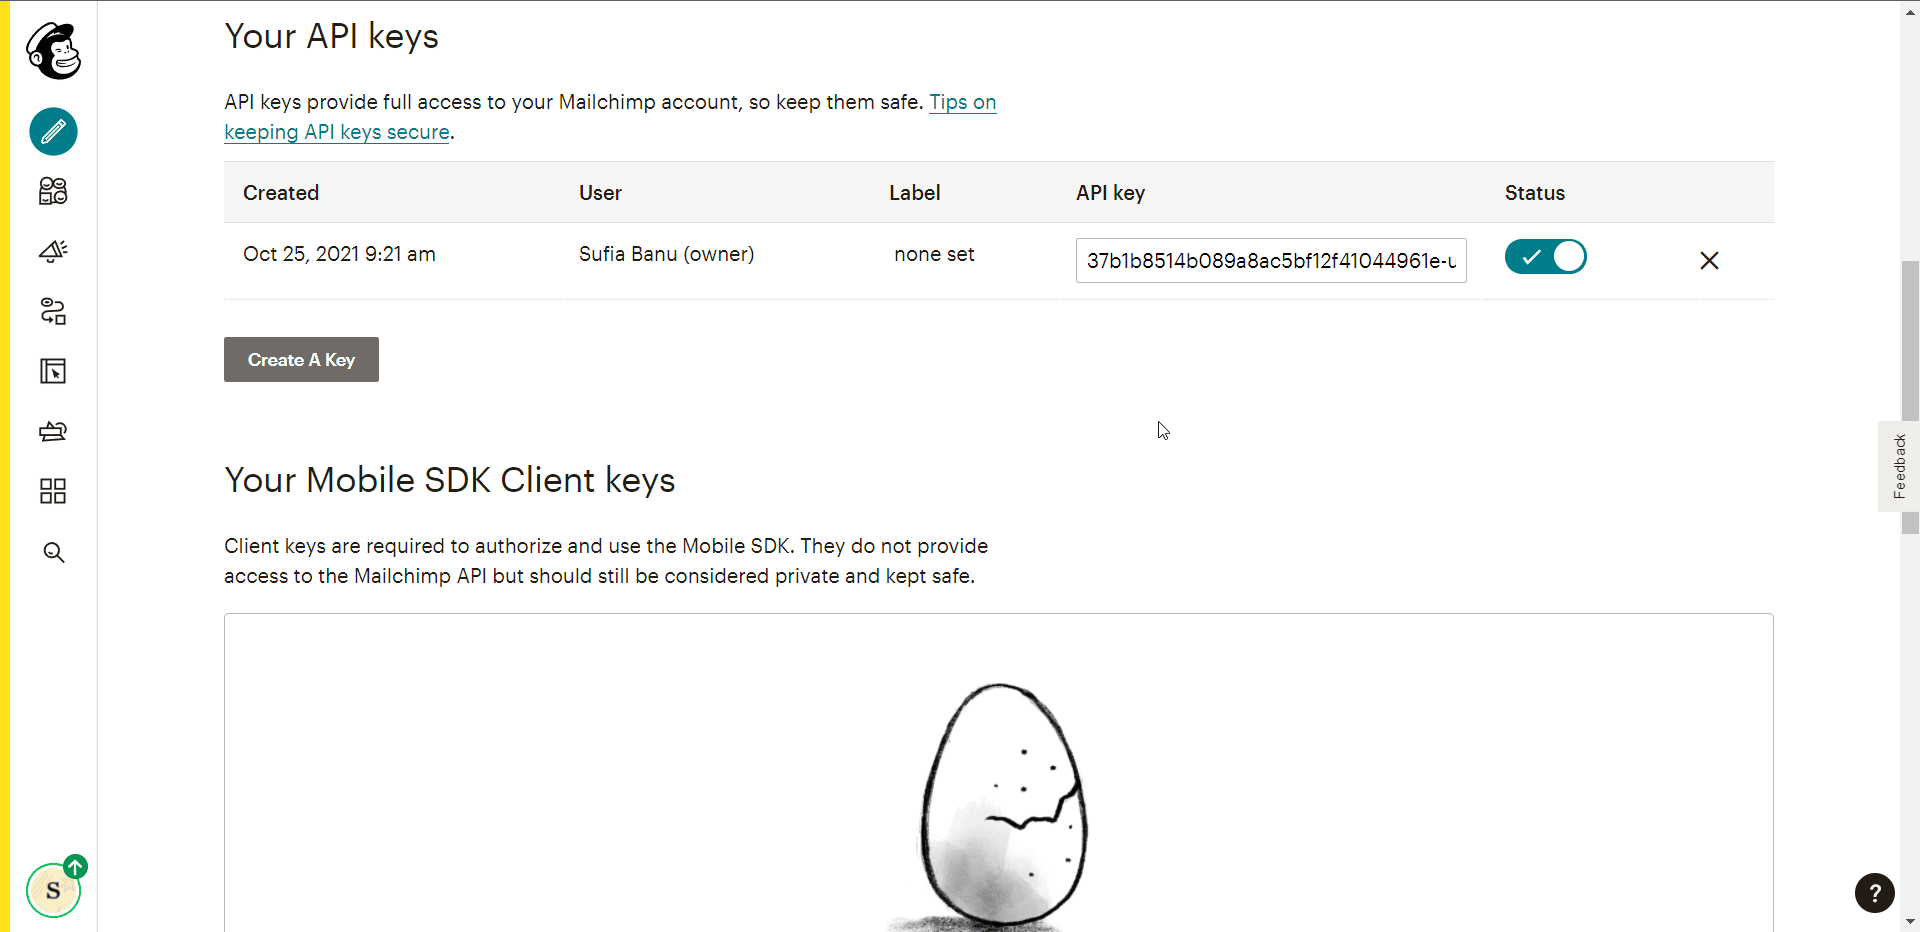
First things first – you need to create a MailChimp API. Open your MailChimp account and go to Account > Extras > API keys > Create a Key. MailChimp will create a key that looks like this:
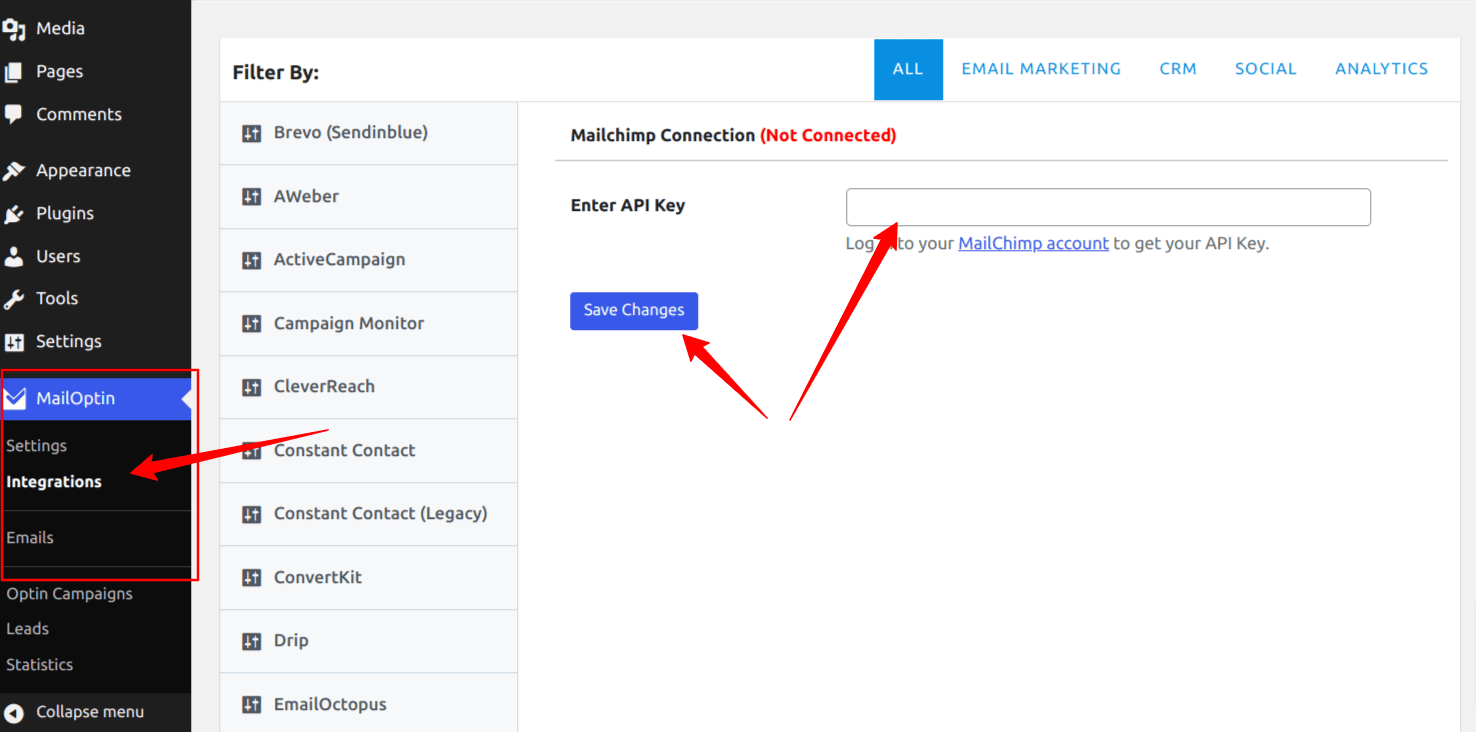
Now go to MailOptin > Integrations > MailChimp and enter the API key to establish a connection between MailOptin and MailChimp.
Do note that aside from Mailchimp, MailOptin also supports sending emails to contacts or subscribers in other email marketing software, including Campaign Monitor, Sendy, Constant Contact, AWeber, ConvertKit, MailerLite, GetResponse, Klaviyo, ActiveCampaign, SendinBlue, SendGrid, Mailjet, Keap/Infusionsoft, Vertical Response, CleverReach, and Moosend.
Conclusion
So far, we have learned about the benefits of having an Email Subscription form on your website, and we have also gone through how to add various subscription forms such as Notification Bar, Lightbox popups, and Sidebar subscriptions using the MailOptin Plugin.
With a powerful plugin like MailOptin, you can easily set up these email subscription forms on your WordPress site and connect them with external email marketing tools like Mailchimp.
If you are using a different marketing tool like Convertkit or Brevo, I am glad to inform you that MailOptin integrates with all the popular email marketing tools.