How to Add Content Locking in WordPress
Content locking is an effective way to get users to take some action on your website. You can use content lockers to make your visitors subscribe to your mailing list, pay for a membership plan or create an account on your website.
The WordPress platform does not ship with a content-locking feature, but the good thing is that there are many WordPress content locker plugins that you can easily use to add this feature to your site.
In this article, we will look at what content locking is, the benefits of content locking, and how to add content locking to your WordPress site.
Table of Contents
What is Content Locking?
Content locking restricts user access to certain parts of your website to encourage the users to act; these restrictions may include pages and posts, categories, reports, tags, downloadable, and so on.
Many website owners use content locking to block access to parts of their content and make visitors subscribe to their newsletters, purchase a premium plan, or share the content on social media.
Content locking allows your site visitors to have a taste of what you offer while encouraging them to act to get full access to your content.
Benefits of Content Locking
You can derive many benefits from locking your content, but we will look at a few below.
- Lead Generation – Content locking can be a source of high-quality lead generation. When you restrict access to your content, you are sure that only those genuinely interested in what you offer are taking the extra step to access your content.
- Social Shares – Content locking is an excellent way to increase social shares and engagement. You can lock your content in exchange for social media share. This is a perfect way to promote your products, increase traffic and get some social engagements while offering valuable content to your visitors.
- List Building – Content locking is also an effective list-building tool. It allows you to grow your email subscribers exponentially by locking away tempting content and requiring your visitors to opt into your email list before they can access it. This is one of the most popular ways website owners use content locking to their advantage.
- Revenue Generation – Content locking can help you to generate revenue from your website. Many website owners put their content behind a lock and require their visitors to join a paid membership plan or buy a product before they gain full access to their content. Content locking with paid subscriptions for high-quality content can be a good source of constant revenue.
How to Add Content Locking in WordPress
So far, we have learned about content locking and its benefits, and now we will learn how to add content locking to our WordPress website.
You can consider several WordPress content locker plugins based on your end goal or actions you want your visitors to perform. You may want your users to share your post on social media, join your email list, register as a site user, or maybe pay to join a membership plan.
In this article, we will look at the ProfilePress plugin, which allows you to offer premium paid content, and the MailOptin plugin, which will enable you to grow your email list with content locking.
How to Add Content Locking with ProfilePress
ProfilePress is the best WordPress membership plugin enabling you to sell digital products, create membership sites, and control website content.
ProfilePress has a content locking feature, payment gateway integrations, a drag-and-drop form builder, and many more features you will need as a website and business owner.

In the sections below, I will show you how to install and activate ProfilePress, set it up, and use it to lock content on your WordPress site.
Install and Activate ProfilePress
The first step in the process will be to install and activate the ProfilePress plugin. You will need to purchase a ProfilePress Pro License and install the ProfilePress plugin. To do that, head to the ProfilePress website to purchase a suitable license plan.
After purchasing your copy of the ProfilePress Plugin, you will receive a confirmation email with a link to download the plugin zip file and your license key. You can also download the plugin from your account page on the ProfilePress website.
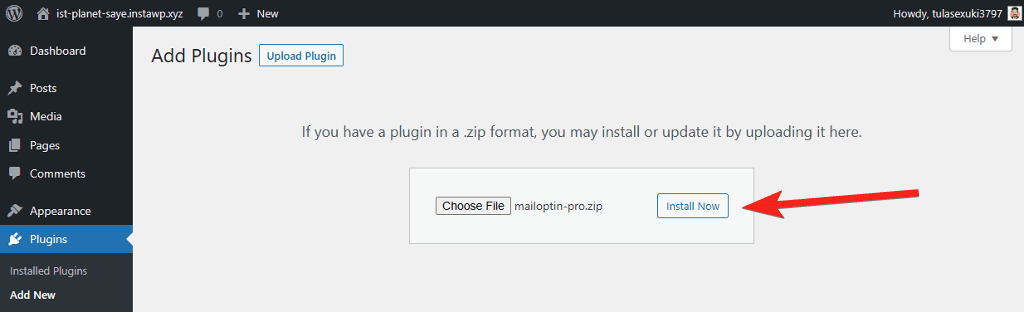
Once you have downloaded the plugin, login to your WordPress admin dashboard, and navigate to the Plugins page; click on the “Add New” button and click “Upload Plugin“.
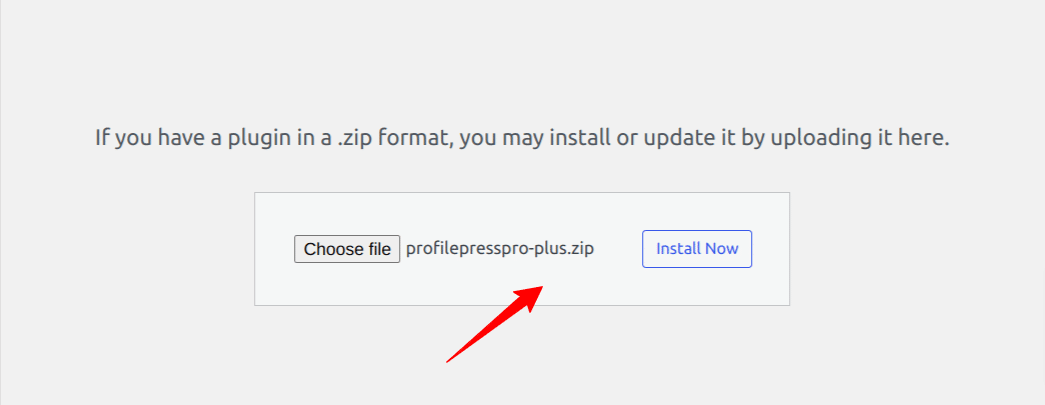
Next, click “Choose file” to select the previously downloaded plugin zip file. Click “Install Now.”
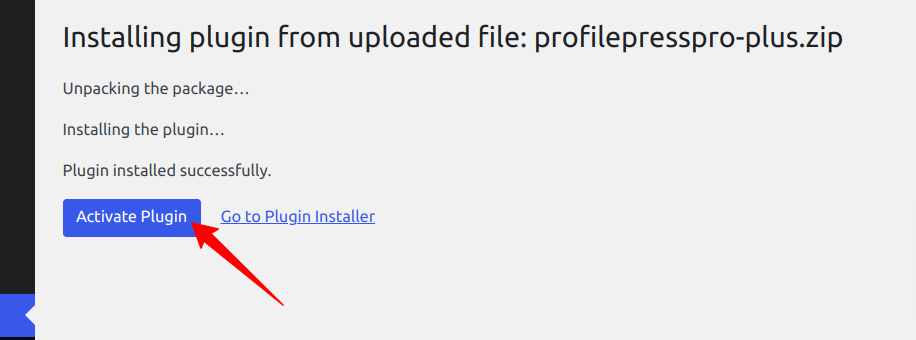
After installation is complete, click the Activate Plugin button.
At the top of the page, you will see a notification that says, “ProfilePress needs to create several pages,” Click on the “Create Pages” button to complete the plugin setup.
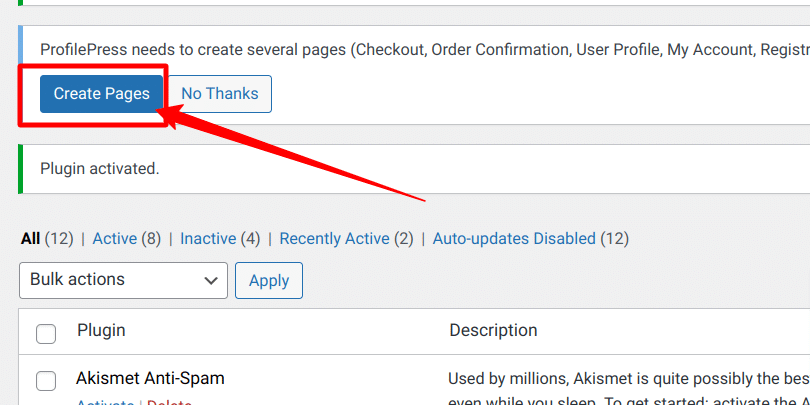
If you do not see this notification, navigate to ProfilePress > Dashboard and click the “Create pages” button to complete the plugin setup.
With this done, we have completed the initial setup of the ProfilePress plugin on our WordPress site.
Setup a payment method
After installing the plugin, we set up a Payment Method for our Premium Plans. For this example, we will set up the stripe payment gateway, which is in-built into the ProfilePress plugin.
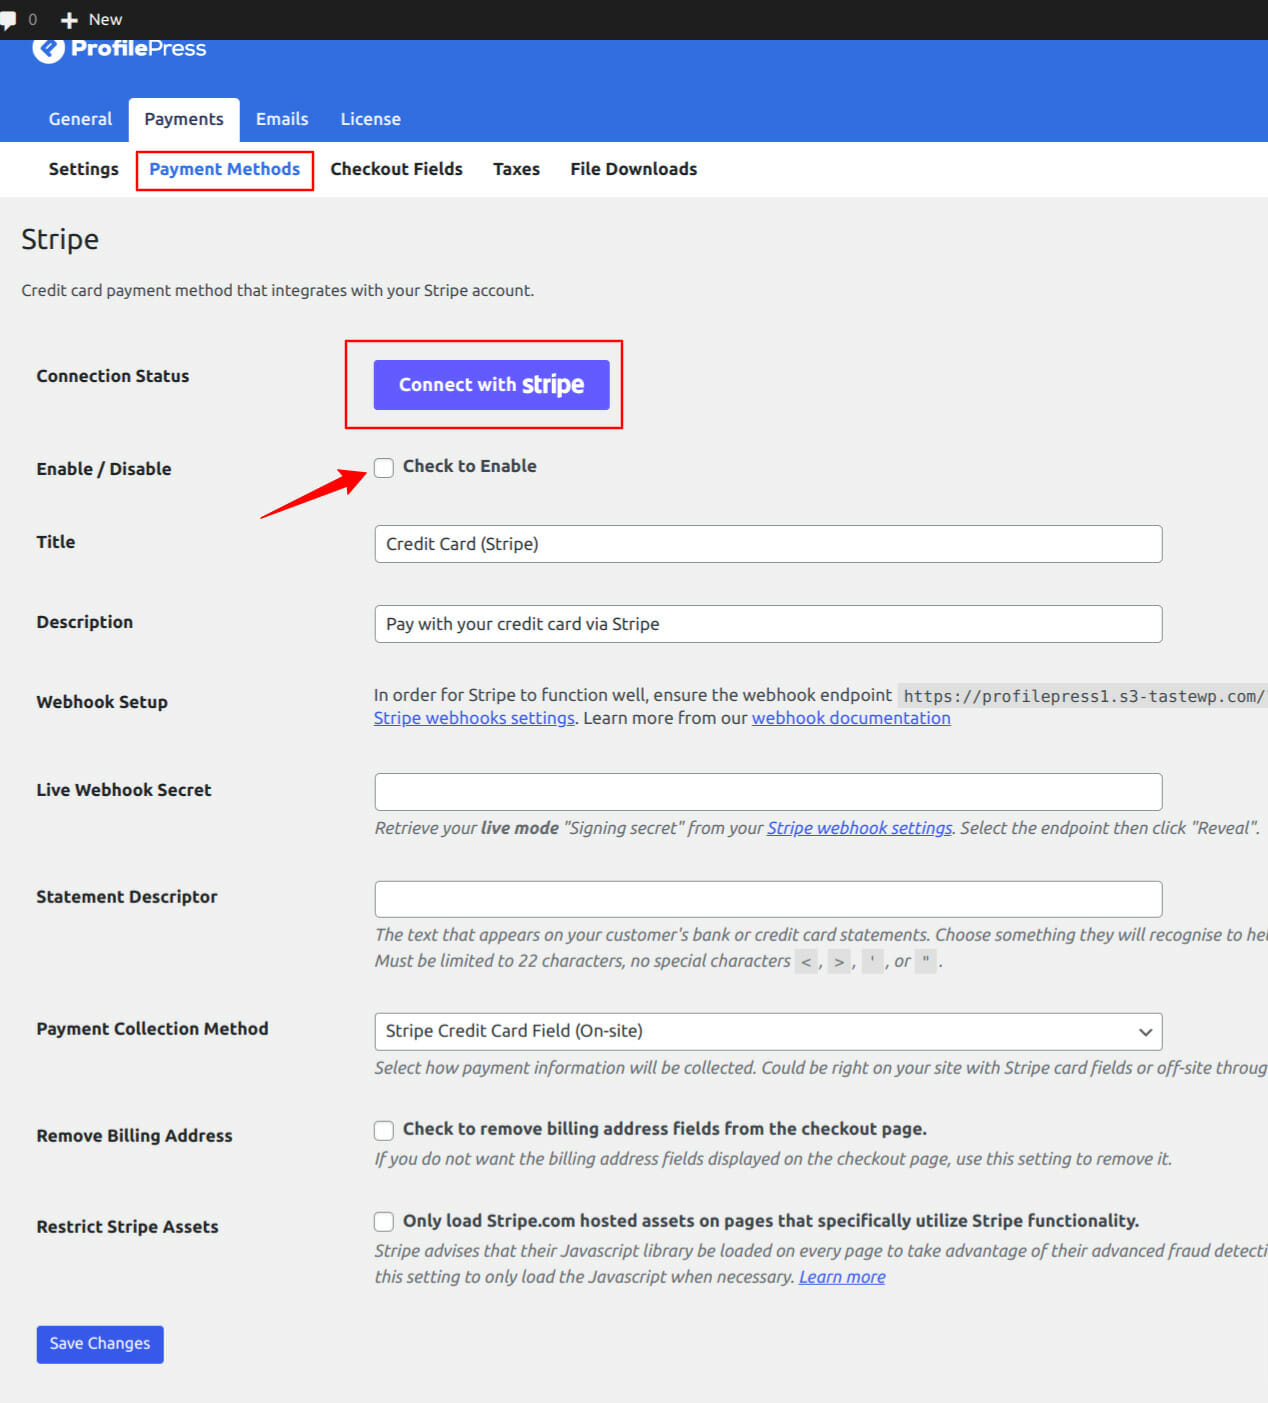
You can configure the Stripe payments on your site by navigating to ProfilePress > Settings > Payments > Payment Methods and choosing Stripe.
Click on the “Connect Stripe” button, follow the prompts, and you are all set to start accepting payments from your customers.
Aside from Stripe, ProfilePress supports other popular payment gateways like PayPal, Razorpay, Paystack, and Mollie.
Setup Membership Plans
Now that we have a way to collect payments from our site visitors, the next thing is to create membership plans that will be sold to our visitors. In this example, we will be creating a Silver membership Plan.
Go to ProfilePress >> Membership Plans to create a new membership plan or open up the edit screen of an existing one.
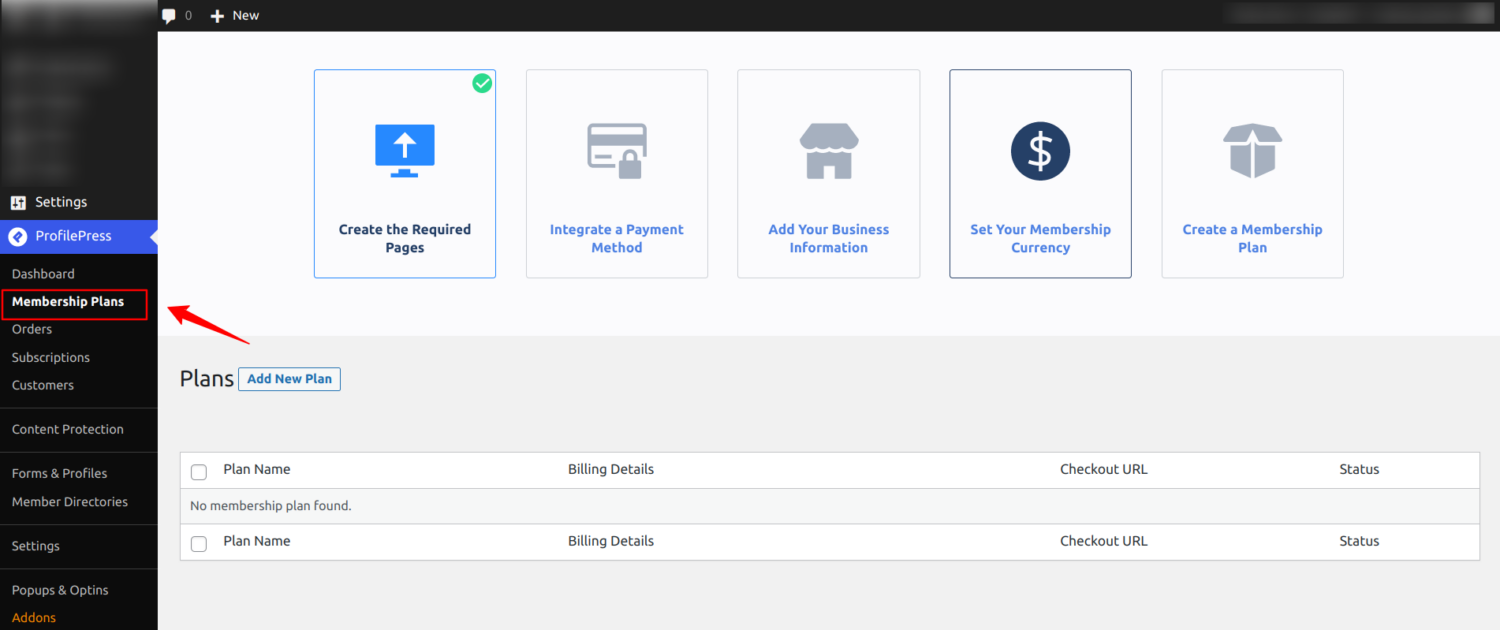
Click on “Add New Plan,” and you will be taken to the page where you can add a plan and set up the details for your product. After filling in the details, set the price, subscription length, and billing frequency you want to associate with this plan.
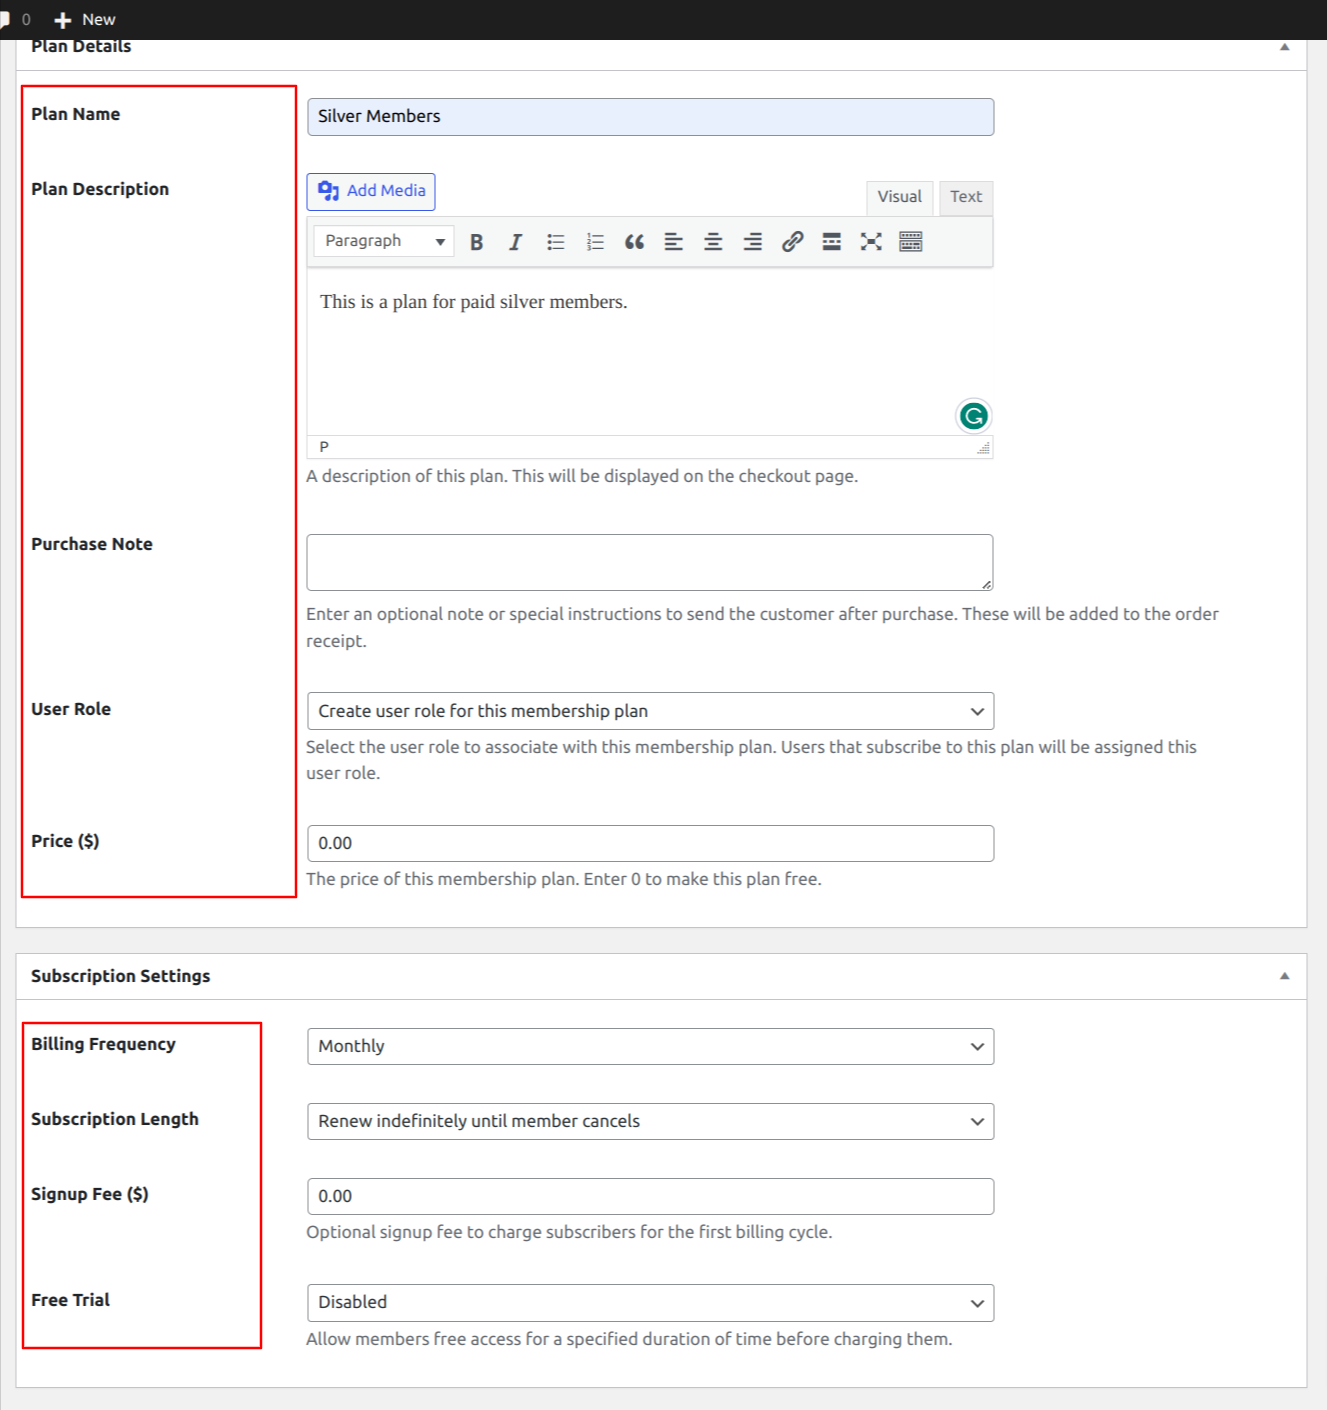
Once you are done editing the membership plan, save your changes.
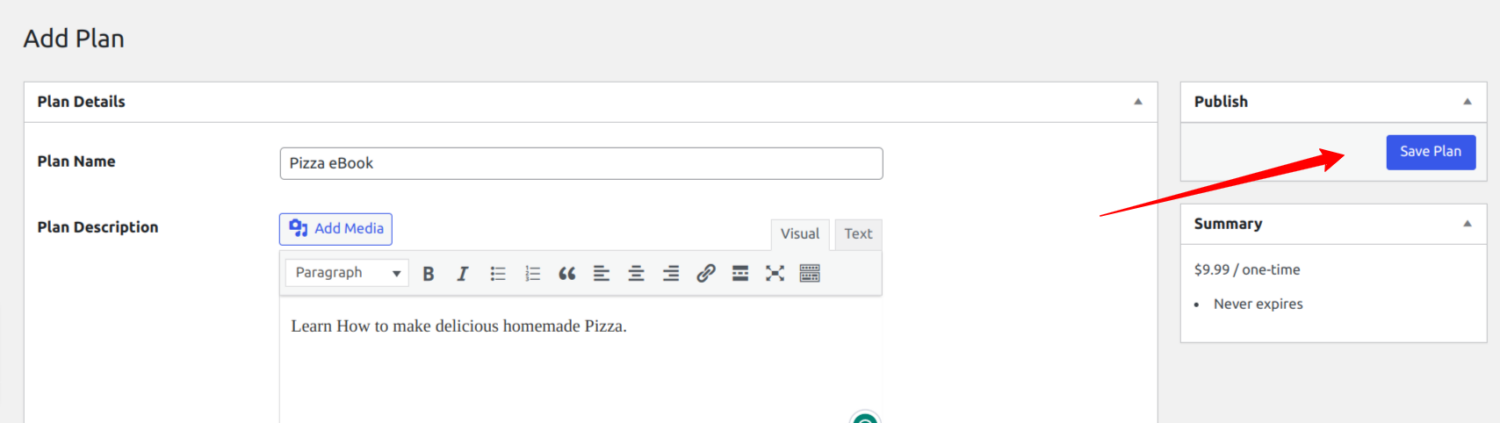
Every membership plan includes a checkout link to add to your website pricing page or email your users to make payments or purchase the product.
Go to ProfilePress > Membership Plans, and you should see a checkout page link associated with the membership plan you created above.

Create a Content Locker
Now that we have a membership plan and a means to collect payment from our users, we will set up the content locker next.
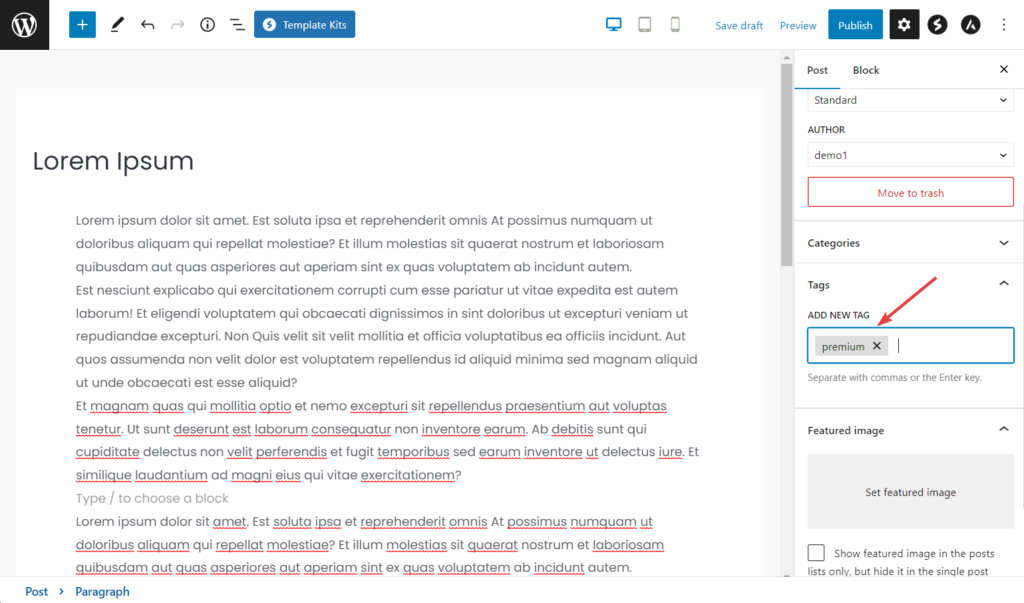
To set up the content lock, you must first separate the free and premium content. Then tag the premium content as “paid” or “premium.”. Instead of the use of tags, you can also use categories.
The tagging happens in the WordPress content editor. Open the page or post you want to lock, go to Tag, write “paid” or “premium,” and hit enter. You will need to tag all your premium posts and pages this way.
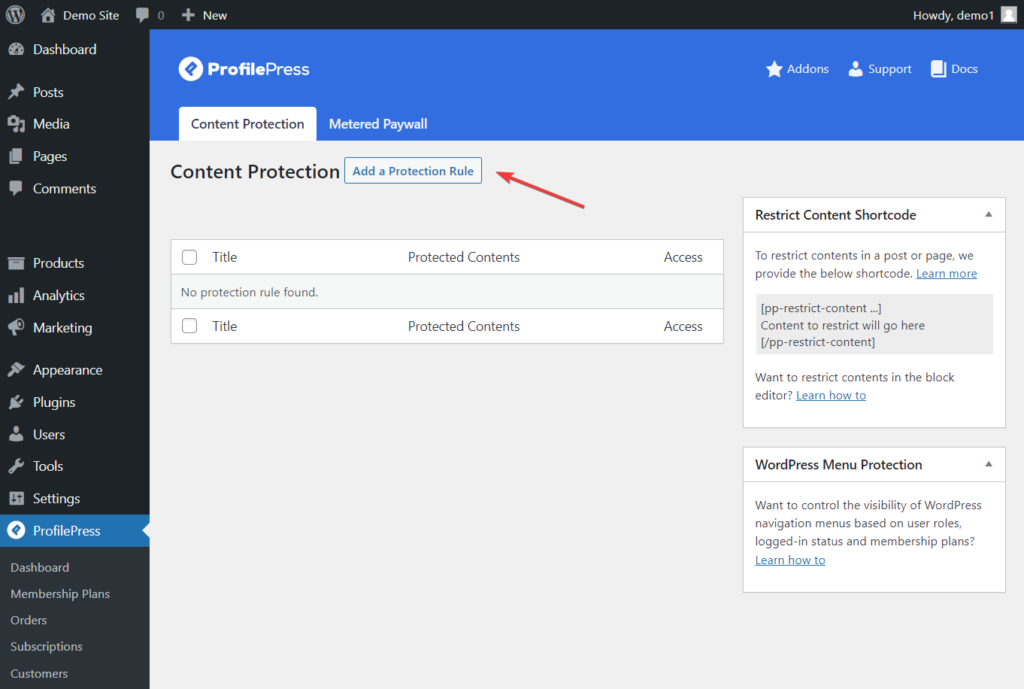
The next step is to choose which content is available to each membership plan. ProfilePress makes it easy to control access using “Protection Rules.” Navigate to ProfilePress > Content Protection and click the Add a New Protection Rule button.
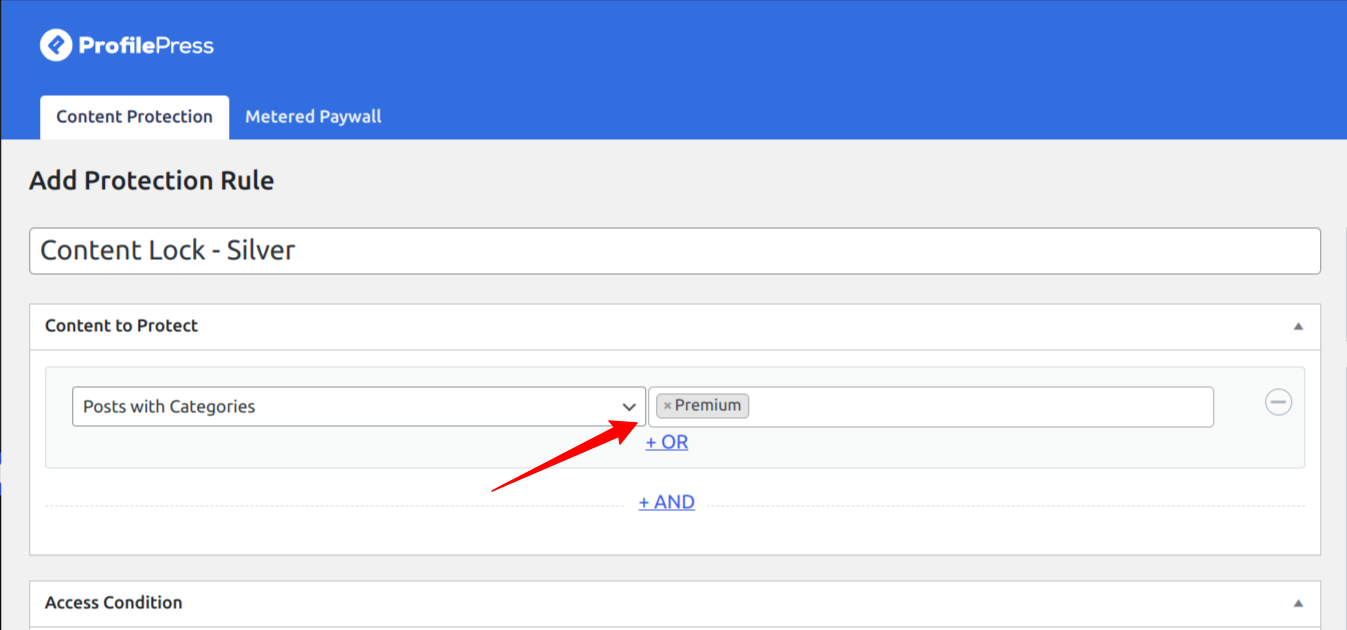
On the rule edit page, add a title, and from the dropdown menu under Content to Protect, select Posts with Tags or Posts with Categories if you used categories to define your premium content.
A search box will appear on the right as soon as you do that. In the search box, look for the tag or category you just created. Then, select the tag or category.
Next, you must go to the Access Condition section on the rules editing page to configure who can access the premium content.
In the Access Condition section, select Logged in users from the dropdown menu against the “Who Can Access the Content?” option.
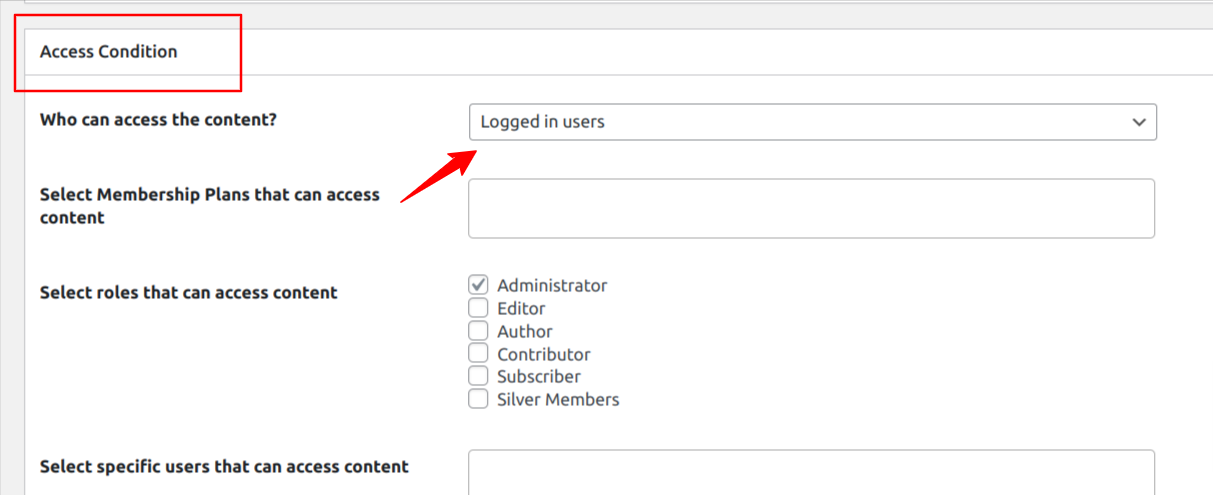
As soon as you select the Logged in users option, several new options appear in the Access Condition section.
Firstly, go to the “Select Membership Plans That Can Access Content” field and add the membership plan you created in the step above.
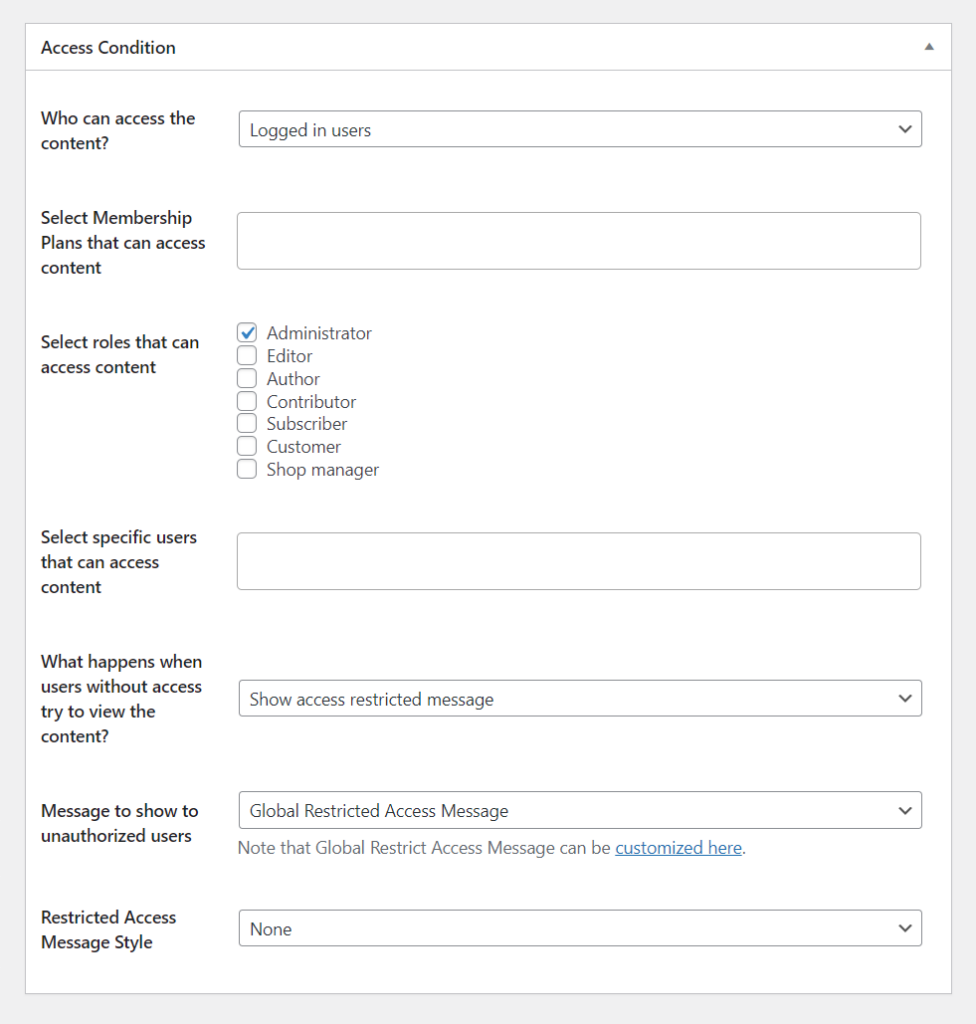
You might also want to select additional Roles to access the content besides paid members with an active subscription. You could select the Administrator and Editor roles.
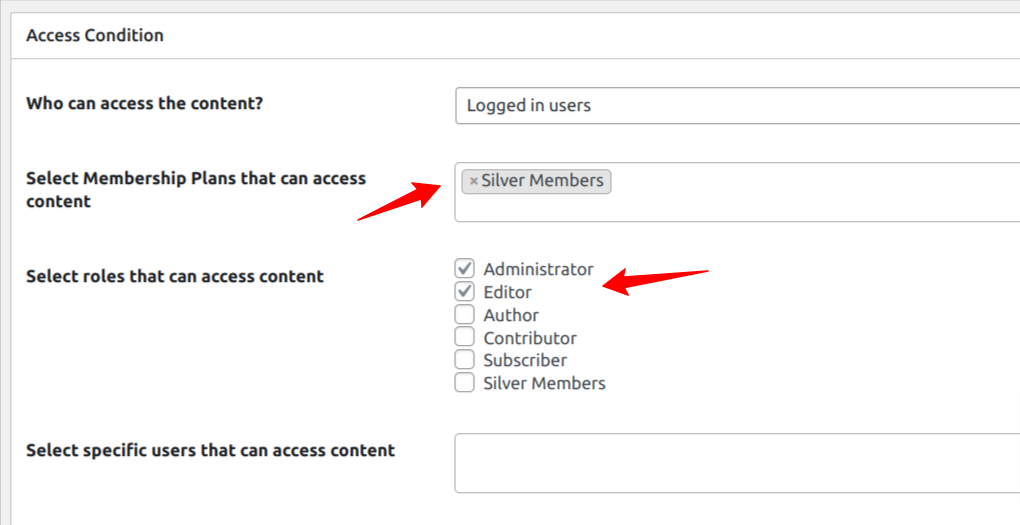
Tip: Whichever user role you select, make sure to choose Administrators as well because you would want admins to access your site’s content.
Next, select the Restricted Access Message Style Option and select Blur & Fade Effect from the dropdown menu. Next, under Message to Show to Unauthorized Users, select the Post Excerpt + Global RestrictedAccess Message.
Hit the Save Rule button to save your setting.
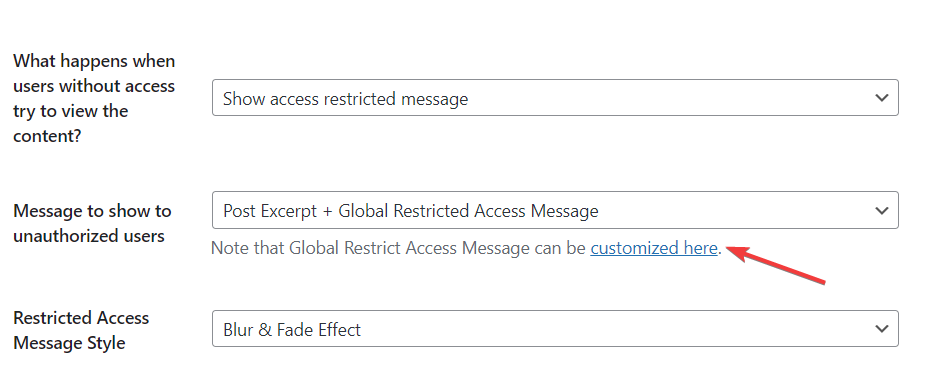
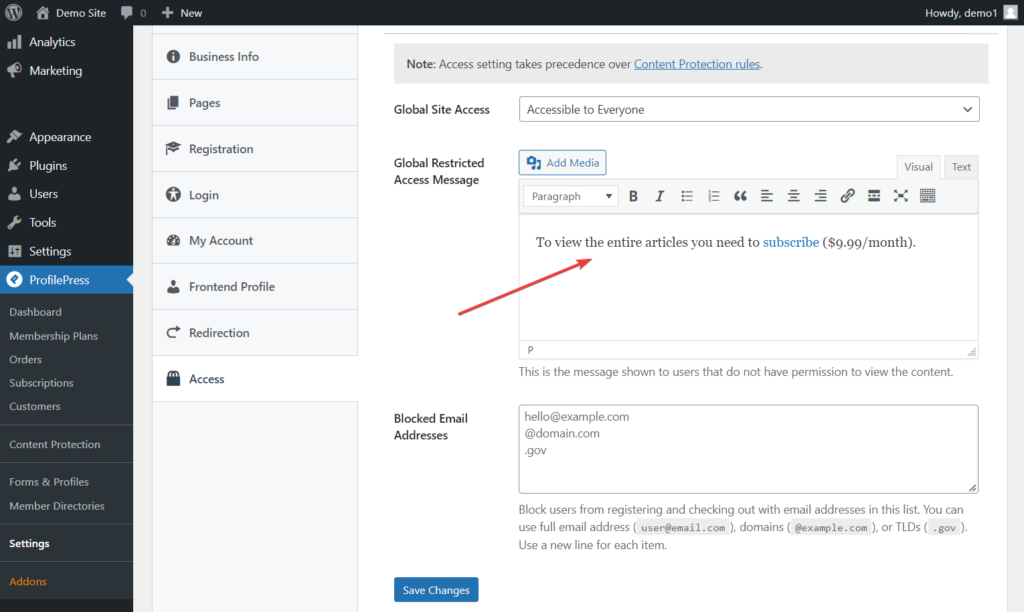
Click on the customized here link, as shown in the image above, to add a custom message for your content lock. This message should inform the visitors that they need to become premium members to access the full content.
Make sure to include the plan checkout or pricing page URL you copied in the set-up membership plan section in this custom message. Visitors will use that link to make payments and subscribe to your website.
Alternatively, you can select “Post Excerpt + Custom Message” as the Message to show to unauthorized users if you don’t want to use the global restricted message.
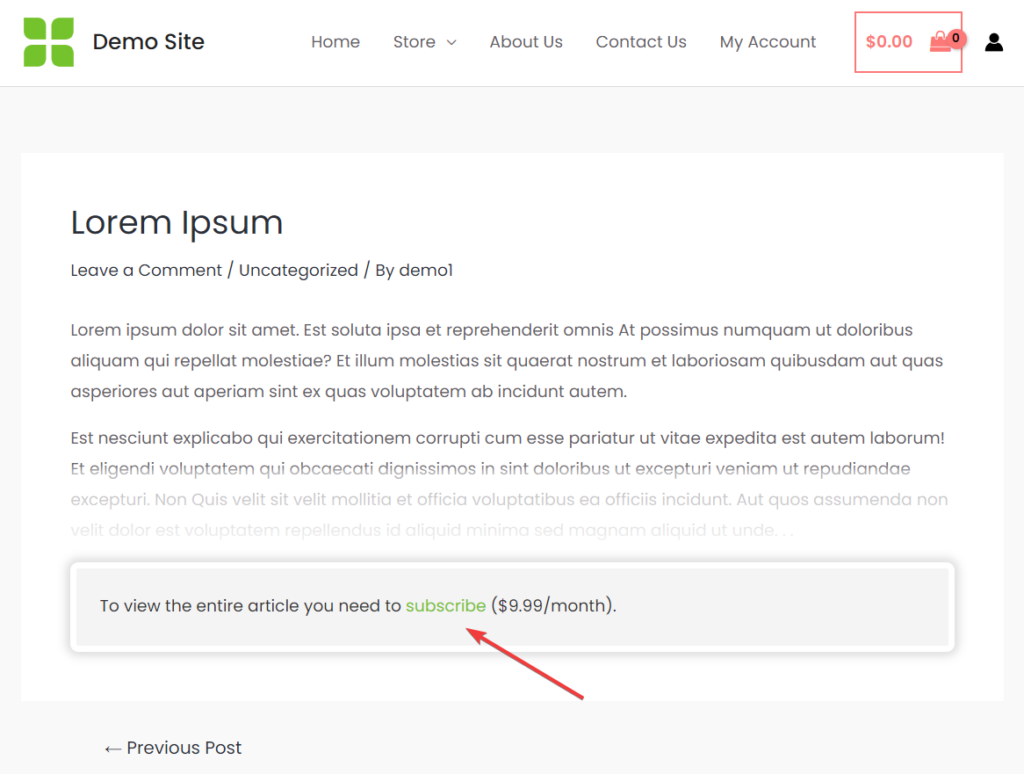
By completing this setup, we have successfully added content locking to all posts in the premium category, which paid subscribers or selected user roles can only access.
How to Setup Metered Content Lock
Aside from the content locking feature above, ProfilePress supports metered content lock. With the metered content lock, visitors can access all content, but they must pay after a certain number of views.
For example, visitors can read three free articles weekly, and then all content becomes locked until they pay for a membership plan.
Activating the Metered Paywall Addon
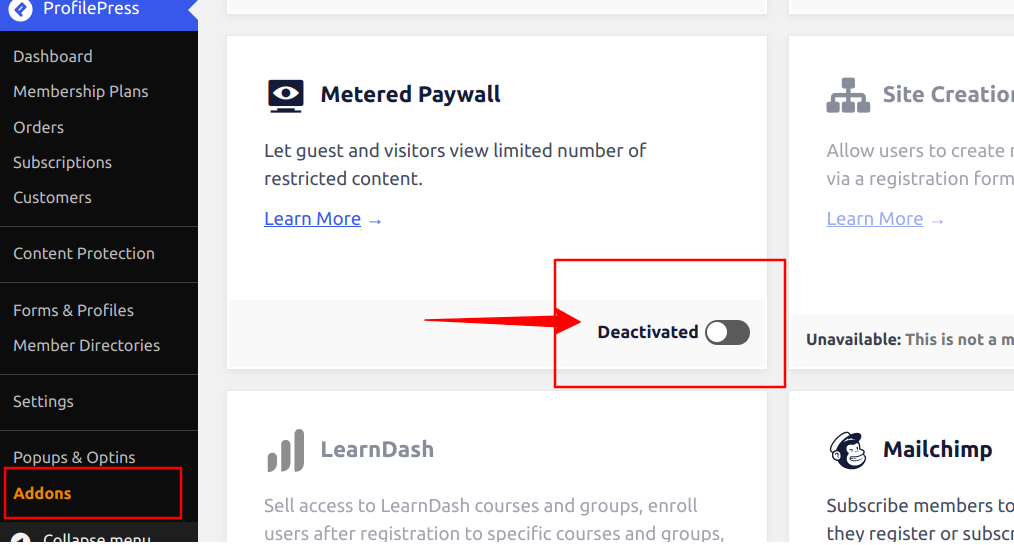
Before starting metered locking content on our WordPress website, we need to activate the paywall addon available in the ProfilePress plugin.
Navigate to ProfilePress > Addons and toggle on the Activate button in the Metered Paywall section.
After activating this addon, we will have to go through four steps to set up the metered content lock:
- Restricting content
- Setting up a metered paywall
- Preventing abuse of paywall
- Adding countdown slider
i. Restrict Content
First, restrict your WordPress site content by following the guidelines below.
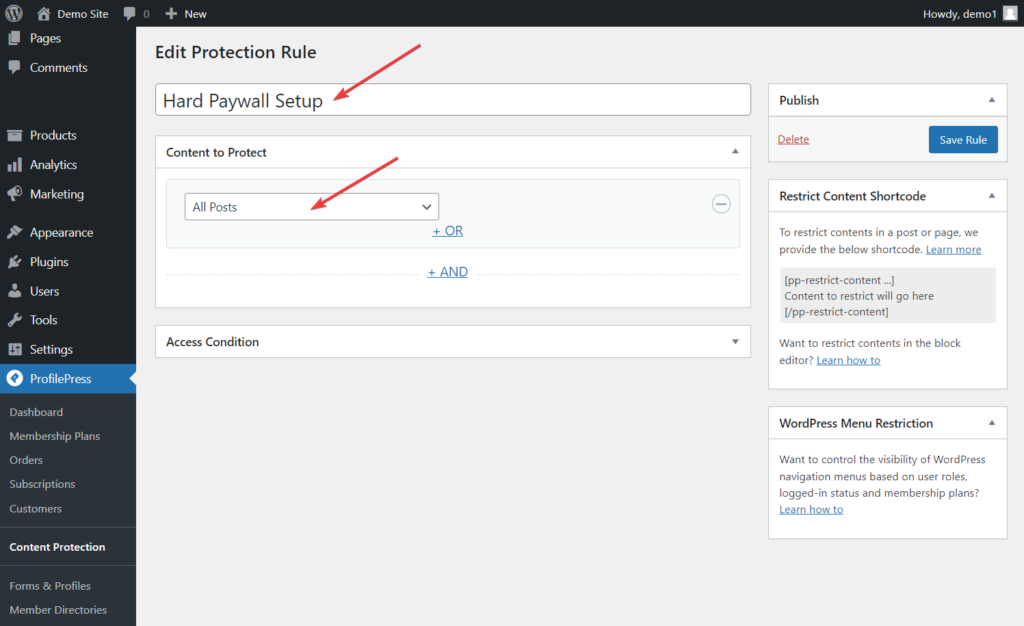
Navigate to ProfilePress > Content Protection and click the Add a New Protection Rule button.
Add a Title on the next page, and select All Posts from the dropdown menu under Content to Protect.
Scroll down to the Access Condition section, and from the dropdown menu against the Who Can Access the Content option, select Logged in users.
As soon as you select the Logged in users option, several new options appear in the Access Condition section.
Firstly, go to the “Select Membership Plans That Can Access Content” field and add the membership plan you created in the step above.
You might also want to select additional Roles to access the content besides paid members with an active subscription. You could select the Administrator and Editor roles.
Tip: Whichever user role you select, make sure to choose Administrators as well because you would want admins to access your site’s content.
Next, go to the Restricted Access Message Style Option and select Blur & Fade Effect from the dropdown menu. Next, under Message to Show to Unauthorized Users, select the Post Excerpt + Global RestrictedAccess Message.
Hit the Save Rule button to save your setting.
Click on the customized here link, as shown in the image above, to add a custom message for your content lock. This message should inform the visitors that they need to become paying subscribers to access the full content.
Make sure to include the plan checkout or pricing page URL you copied in the set-up membership plan section in this custom message. Visitors will use that link to make payments and subscribe to your website.
Alternatively, you can select “Post Excerpt + Custom Message” as the Message to show to unauthorized users if you don’t want to use the global restricted message.
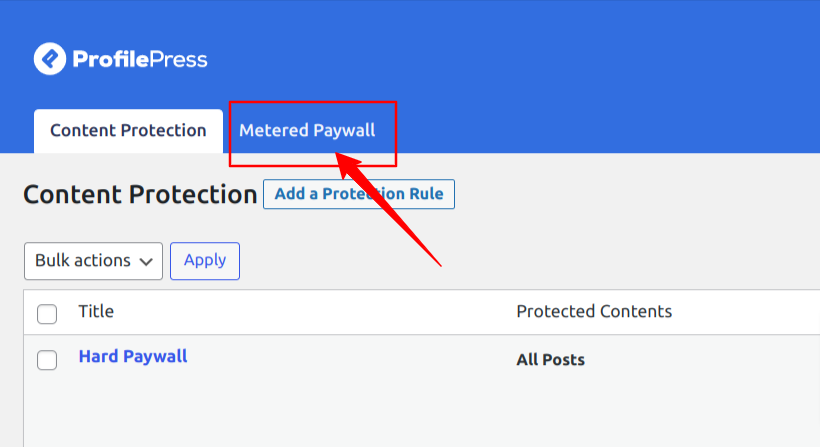
When all is done, hit the Save Rule button and proceed to the second step, which involves opening the Metered Paywall settings page beside the Content Protection menu tab at the top.
ii. Set Up Metered Paywall
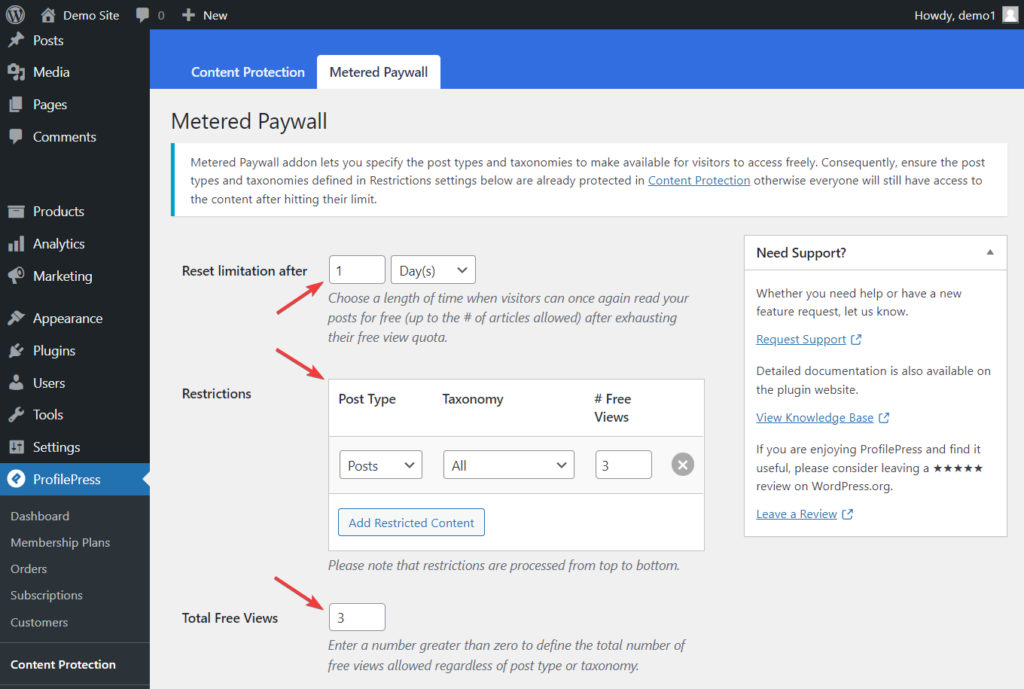
You need to modify the first three options on the Metered Paywall page. Let’s take a look at each option and try and understand what they mean:
- Reset limitation after allows you to choose a length of time when visitors can once again read your posts for free.
- Restrictions allow you to choose which post types you plan to restrict and how many posts, pages, or custom post types you will offer for free.
- Total free views allow you to define the number of posts a visitor can view for free. This is a global setting, and it will override the previous setting on free views.
Hit the Save Changes button to save the modifications.
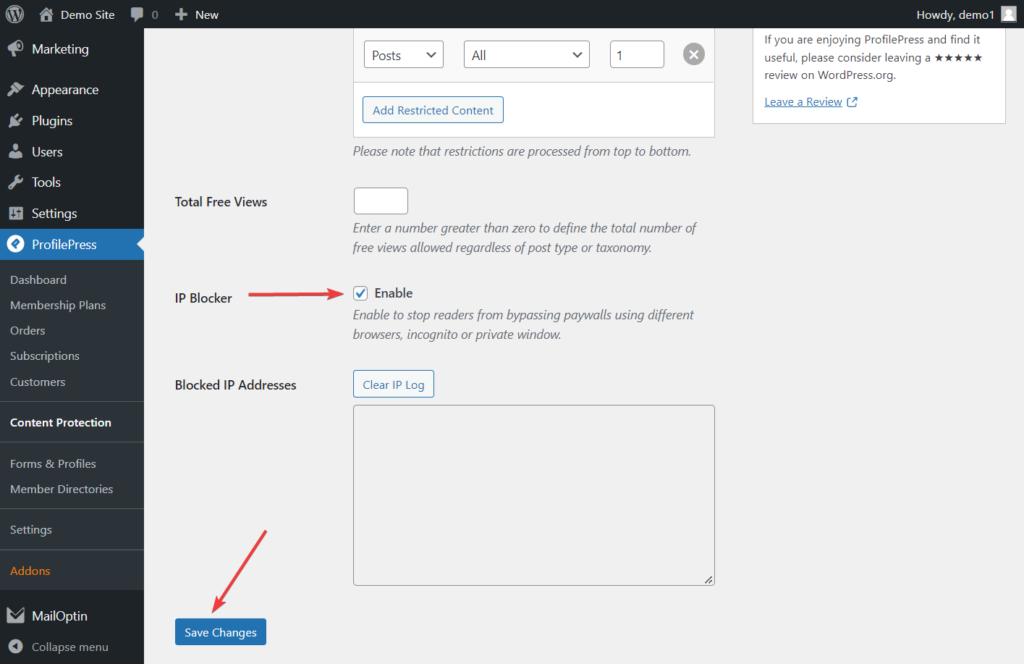
iii. Prevent Abuse of Paywall
After setting up the metered paywall, you need to ensure that your premium content is protected from access via an incognito browser.
You need to activate the IP Blocker feature to prevent this abuse. First, go to the Metered Paywall > IP Blocker and select the Enable option to enable the feature. Then, hit the Save Changes button before exiting the page.
iv. Add a Countdown Slider
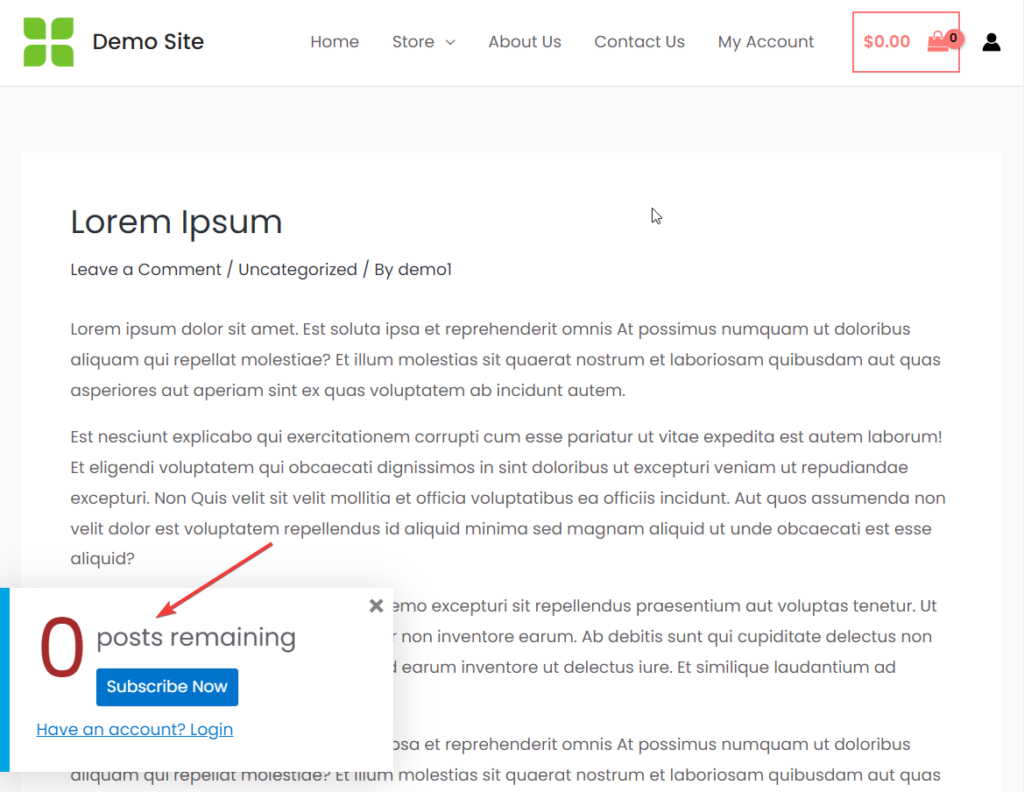
Popular websites like The New York Times and Medium allow visitors to read a few premium articles for free before asking them to sign up for a subscription. Then, they inform the visitor of how many views are left using a countdown slider.
You can also create a countdown slider on your WordPress website and inform visitors how many articles they can view before subscribing.
Open the Metered Paywall option on your WordPress dashboard and go to the Countdown Slidebox section.
Select the Enable option and add the link to your pricing or checkout page in the Button Link option. Visitors will use this link to go to a page where they can sign up and make payments.
You can change the button text and message and log in to the text if you need to.
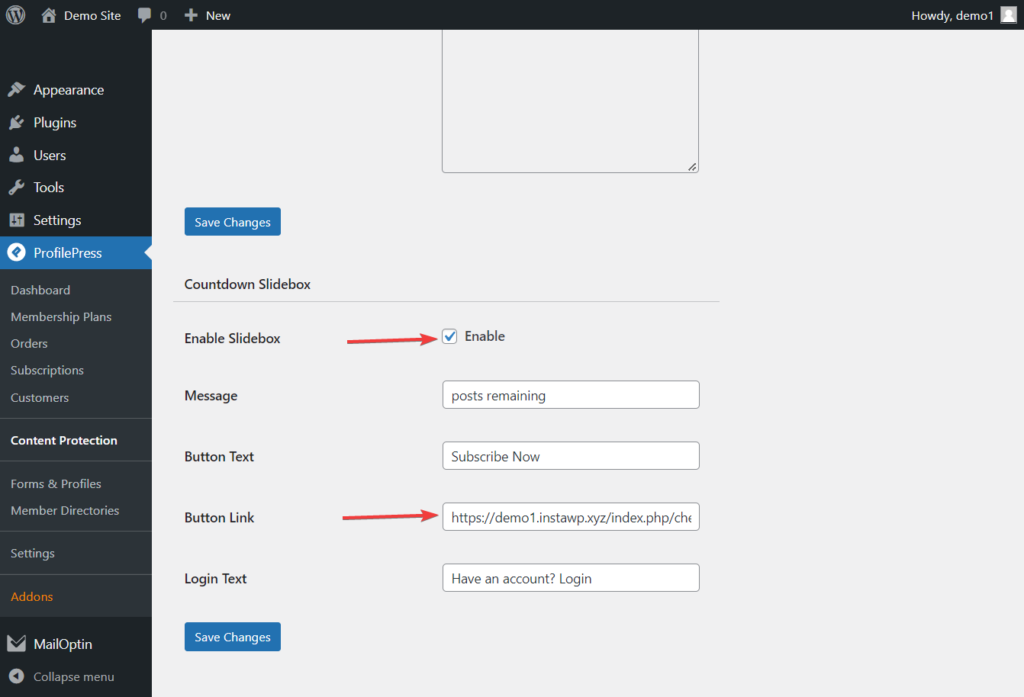
When you are ready, hit the Save Changes button, and the countdown slider will be added to your WordPress site.
That’s it. You have now completed the setup of a metered content lock on your WordPress website.
How to Add Content Locking with MailOptin
MailOptin is an all-in-one solution for converting site visitors into subscribers. It allows you to create, customize, and showcase professional opt-in boxes on your WordPress site.
It allows you can lock specific parts or pieces of your content on your site and ask site visitors to perform particular actions before accessing the restricted content. It also comes with an easy-to-use form builder that lets you create attractive-looking pop-up lightboxes and display them based on certain conditions.
MailOptin is a handy plugin, mainly if you aim to build an email list or grow your subscribers using content locks.
In the sections below, I will show you how to install and activate MailOptin, set it up, and use it to lock content on your WordPress site.
Step #1: Install and activate the MailOptin plugin
The first step is installing the MailOptin plugin, which you can easily do from your WordPress dashboard.
You will need to purchase a MailOptin License and install the MailOptin plugin. To do that, head to the MailOptin website to purchase a suitable license plan.
After purchasing your copy of the MailOptin Plugin, you will receive a confirmation email with a link to download the plugin zip file and your license key. You can also download the plugin from your account page on the MailOptin website.
Once you have downloaded the plugin, login to your WordPress admin dashboard, and navigate to the Plugins page; click on the “Add New” button and click “Upload Plugin“. Upload the zip file and install and activate the plugin on your WordPress site.
Step #2: Create and customize your opt-in form
With the MailOptin plugin installed on your site, navigate to MailOptin > OptinCampaigns and click the Add New button.
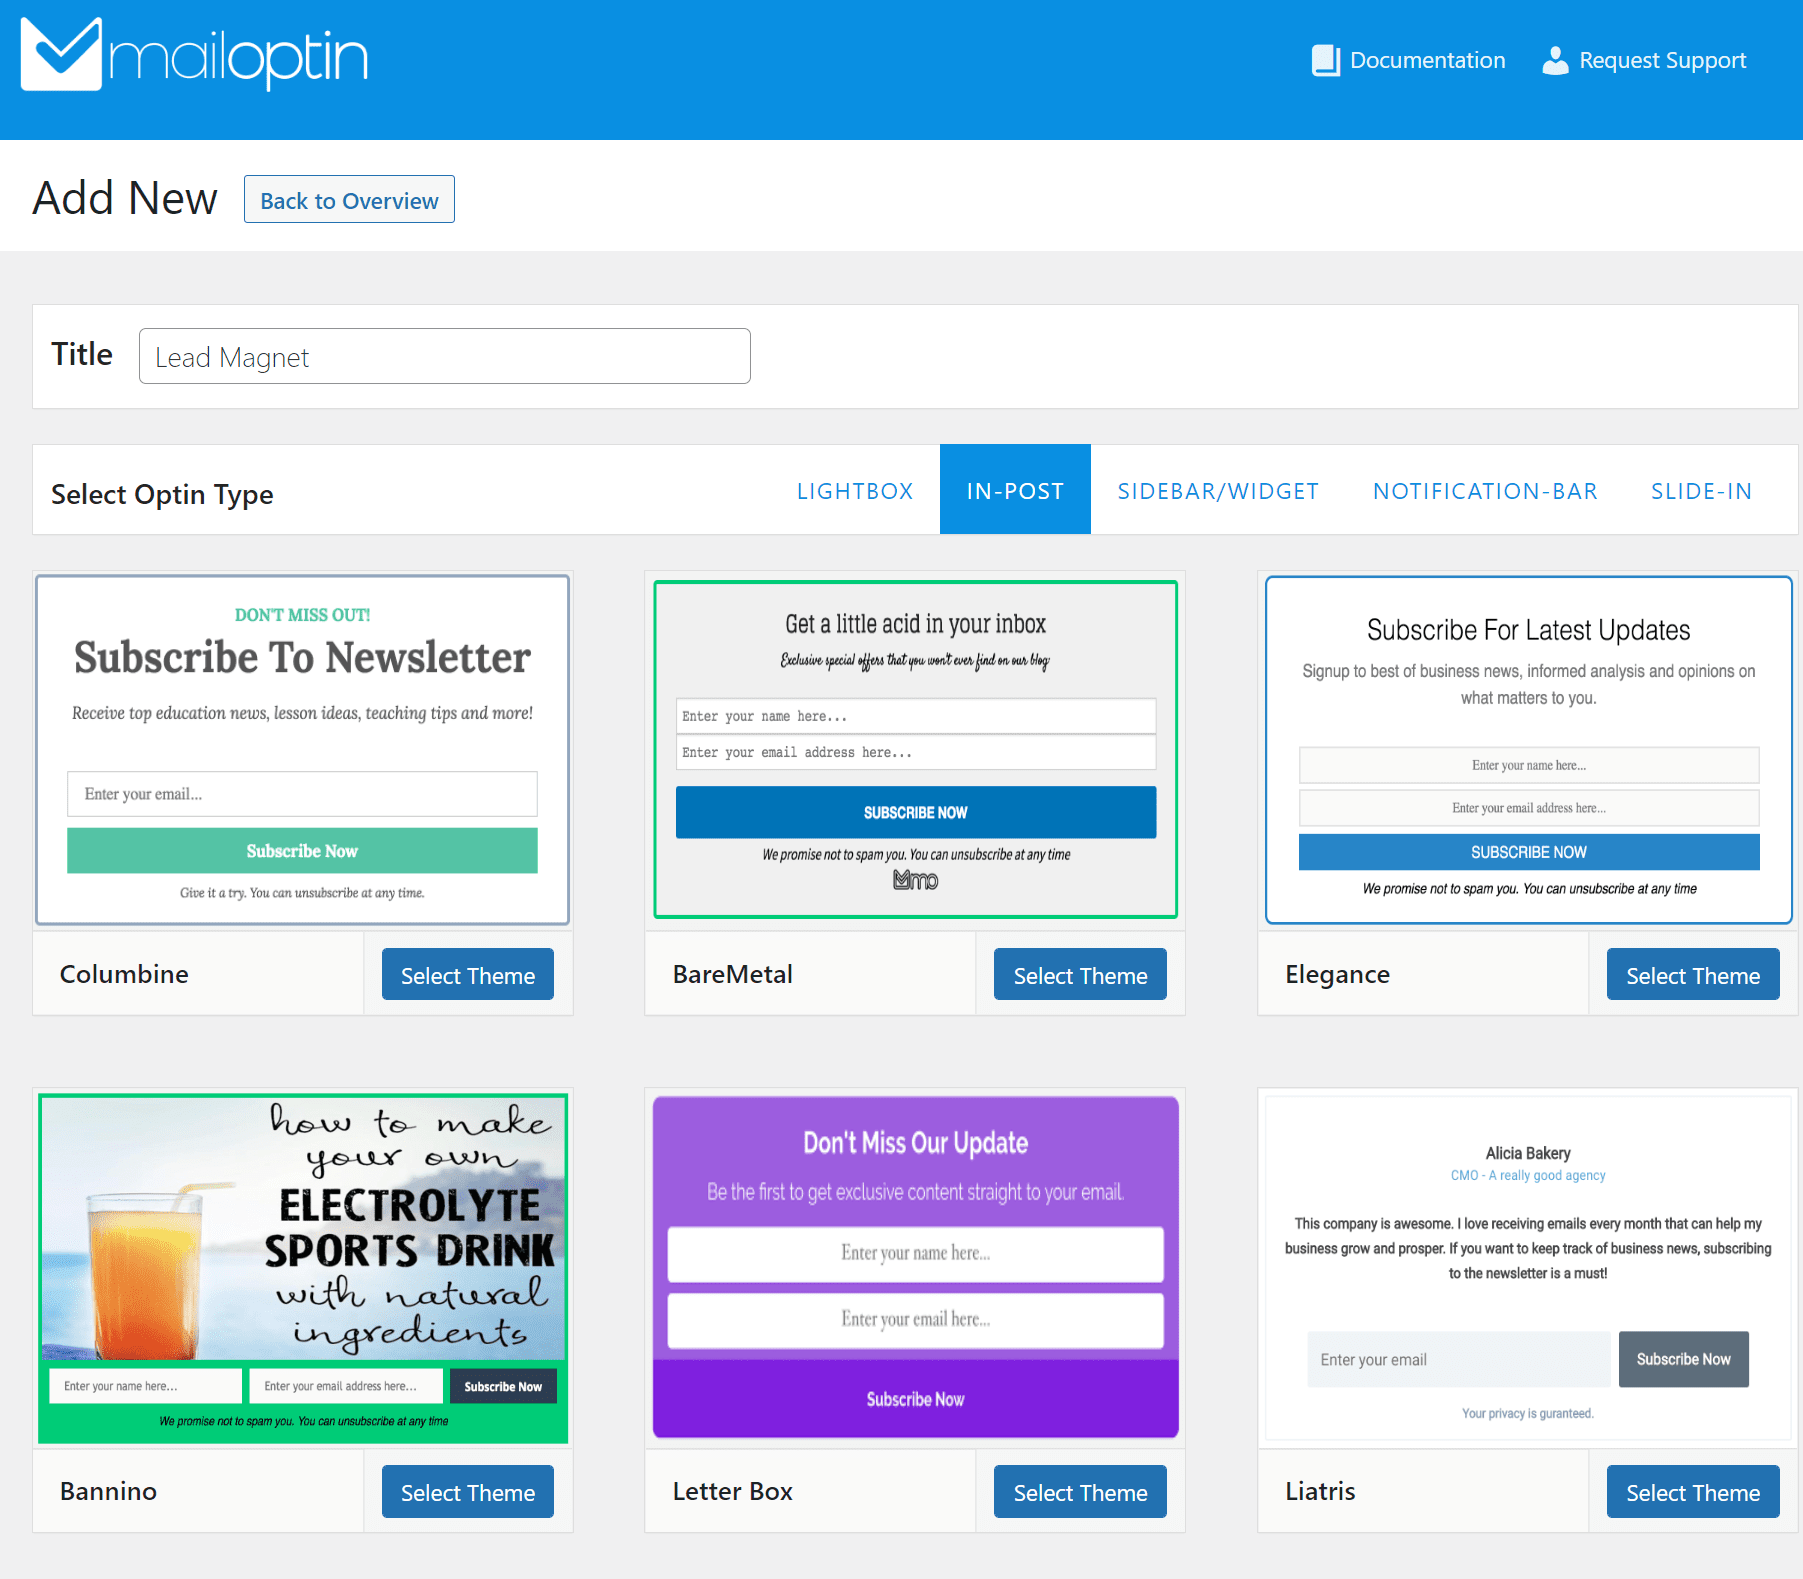
Enter a name in the Title field and select In-Post from the Select Optin Type section.
Next, select the template you want to start customizing. We’ve decided to go with the Letter Box theme for this example. Once you click on the Select Theme button, you will automatically be redirected to the customization page.
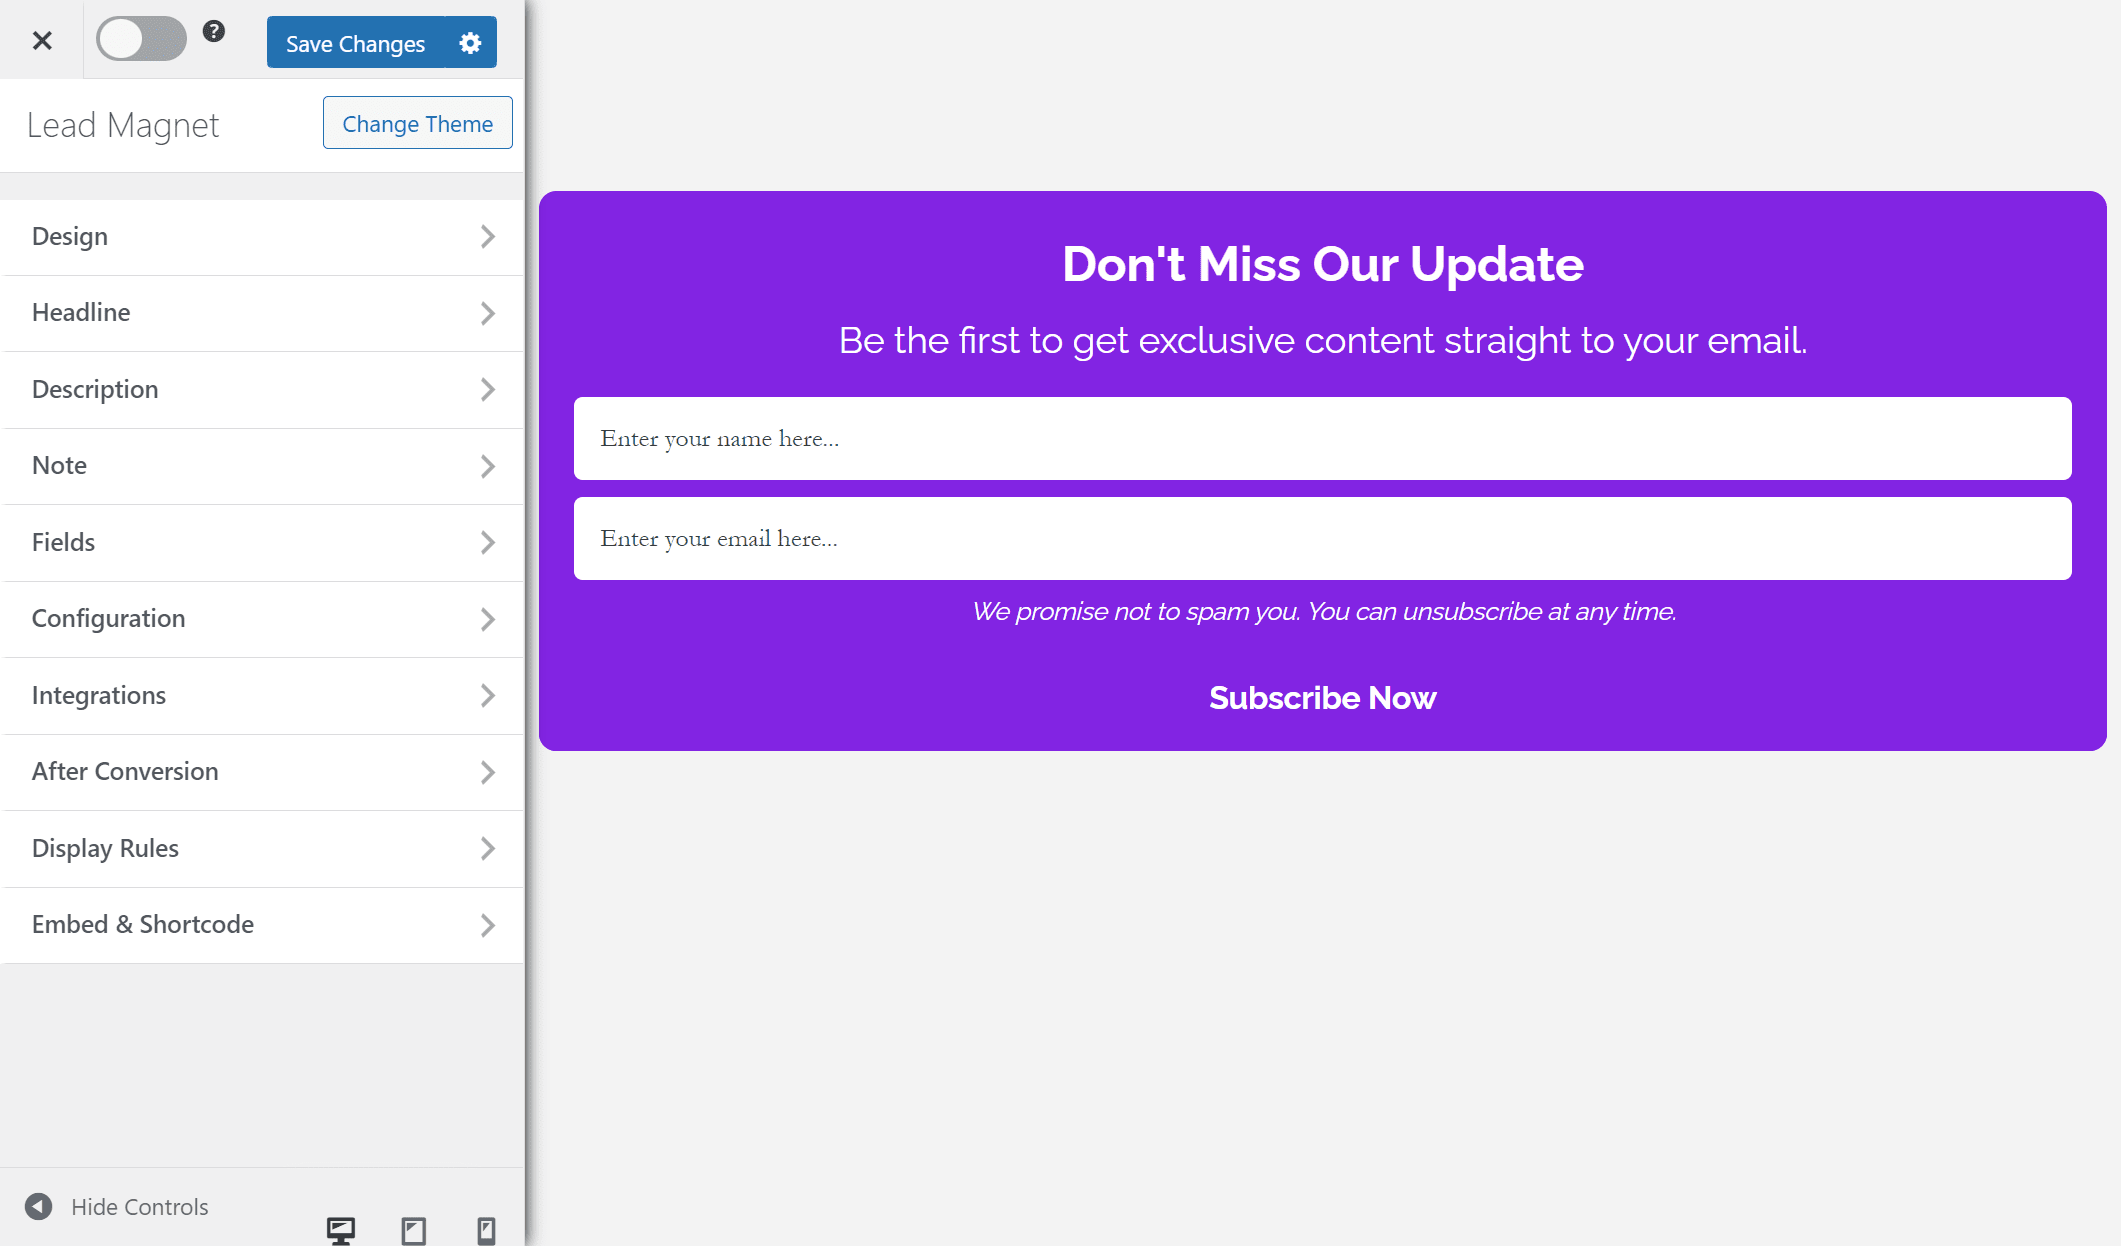
Using the options available on the form editing page, you can customize the opt-in form appearance and feel on the front end of your WordPress site.
Click on the Design tab to customize the background color of your opt-in form. You can customize the typography using the Headline and Description menus and set text colors.
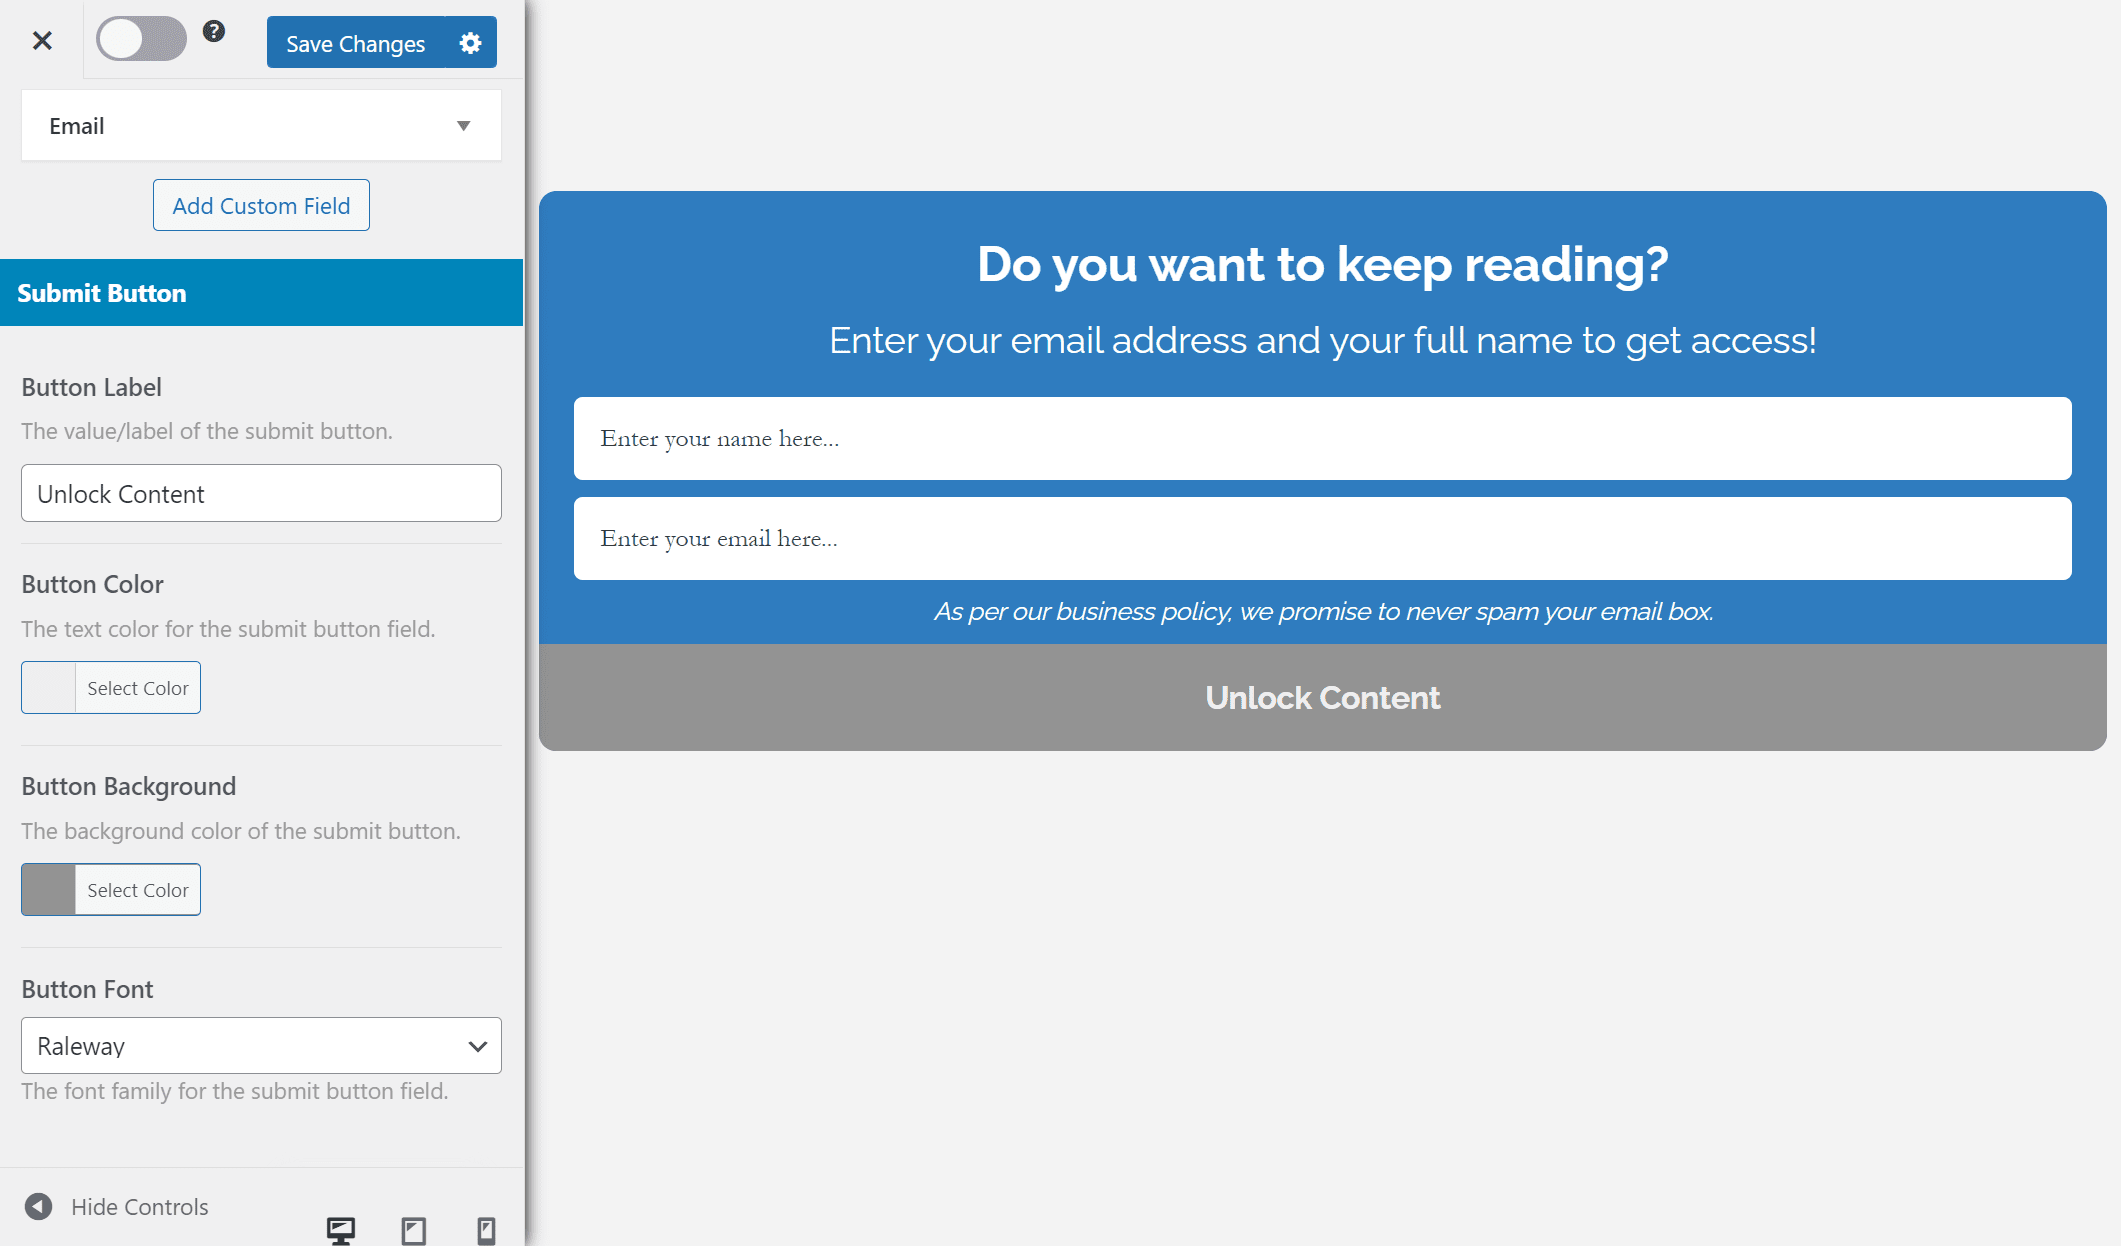
It’s also essential to display custom button text for the content locker to look professional and relevant to your audience.
Go to the Fields section and scroll down to the Submit Button section. Enter the custom text using the Button Label text field and set the button color.
Step #3: Create a WordPress content locker
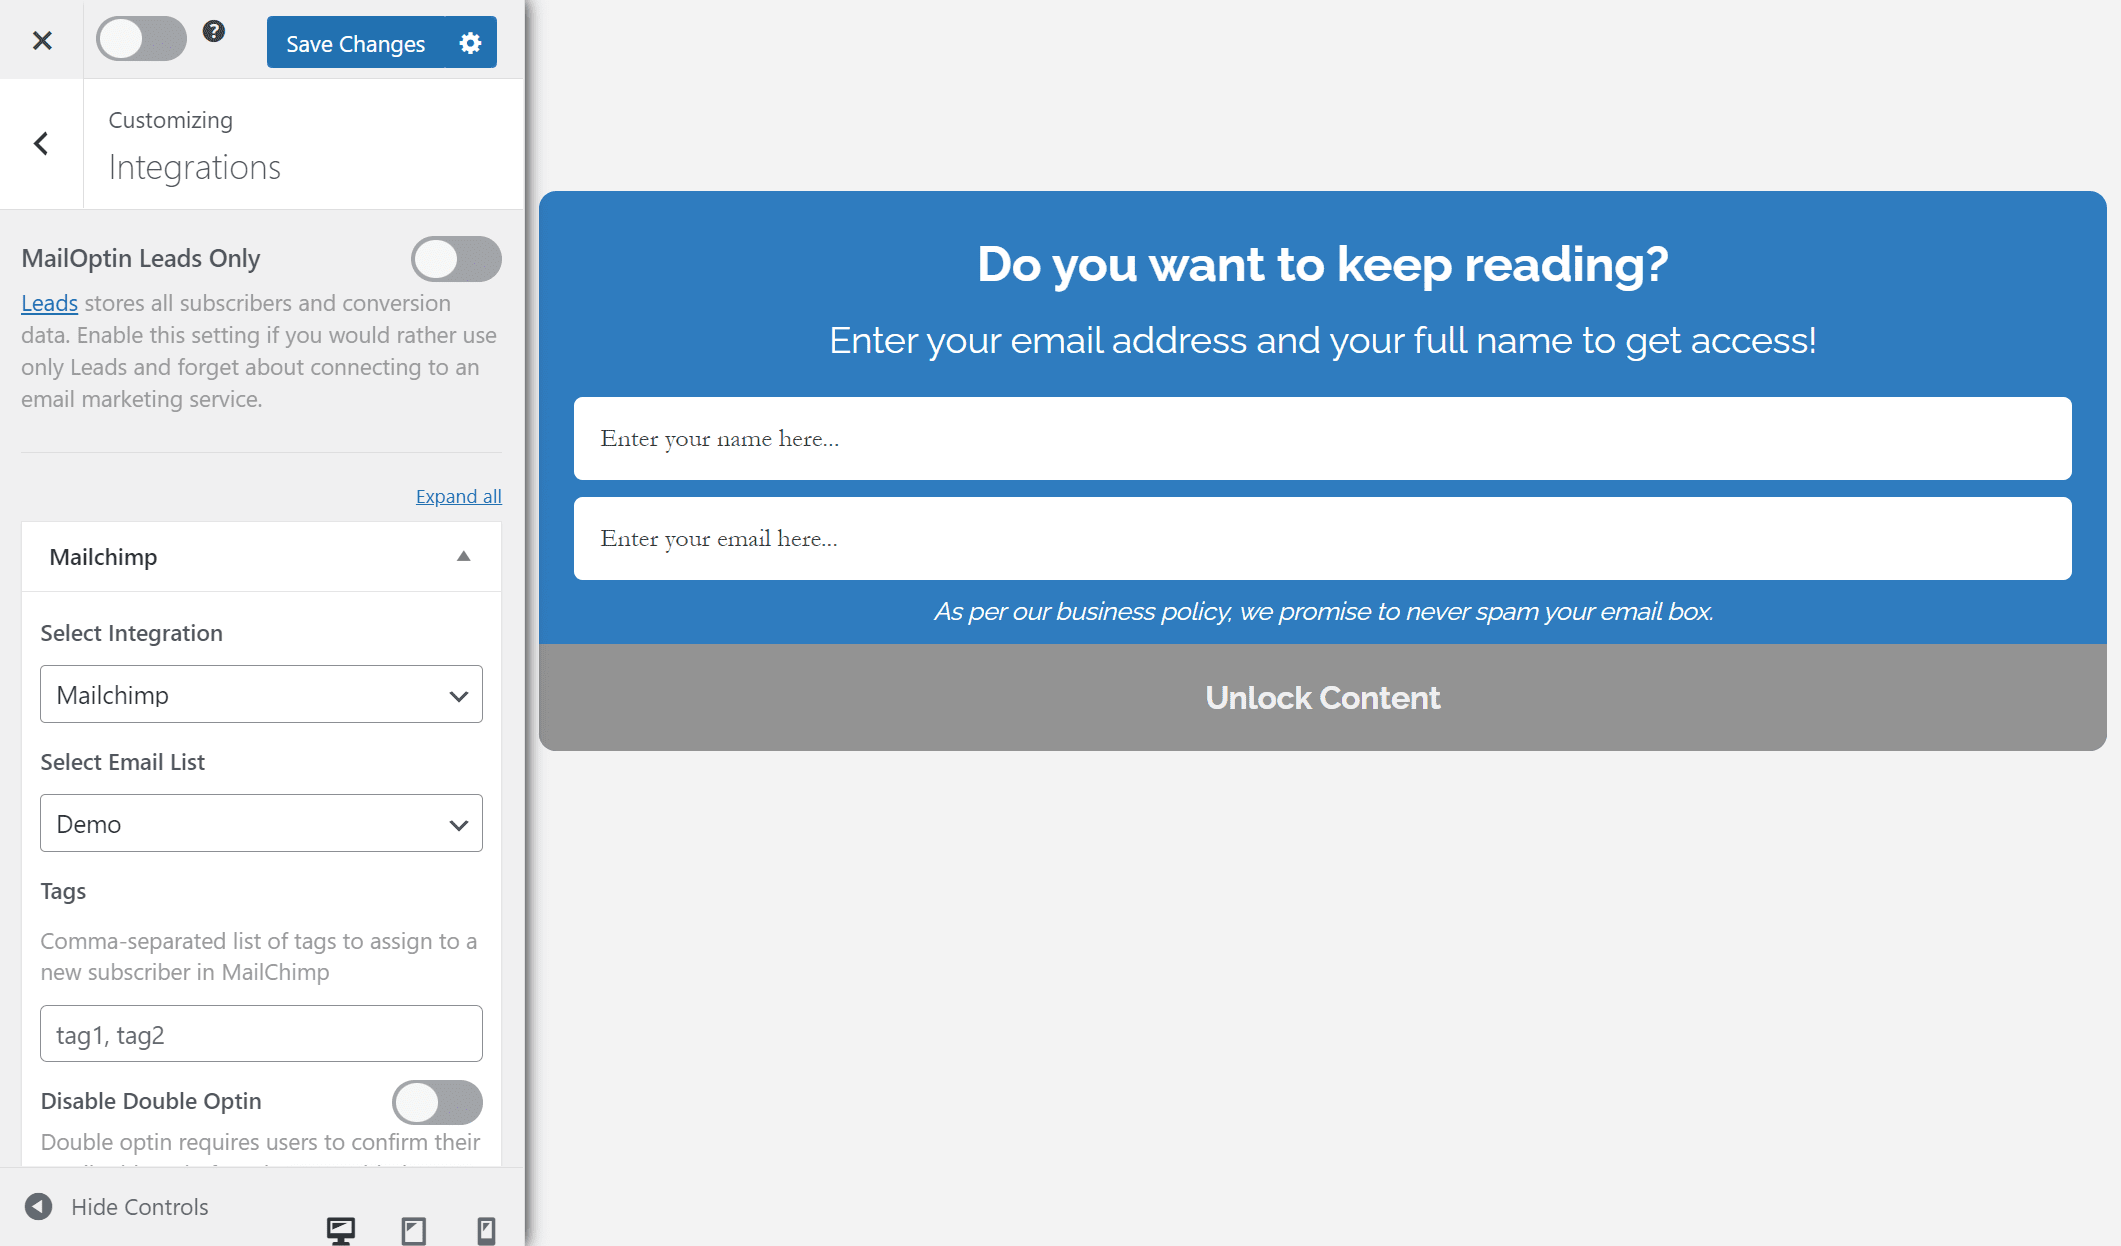
With your opt-in form looking precisely how you want it, click the Integrations button and select your email service provider using the Select Integration dropdown menu. As an example, we’re using Mailchimp.
Click the Configuration button and select the Lock Content Below Optin checkbox.
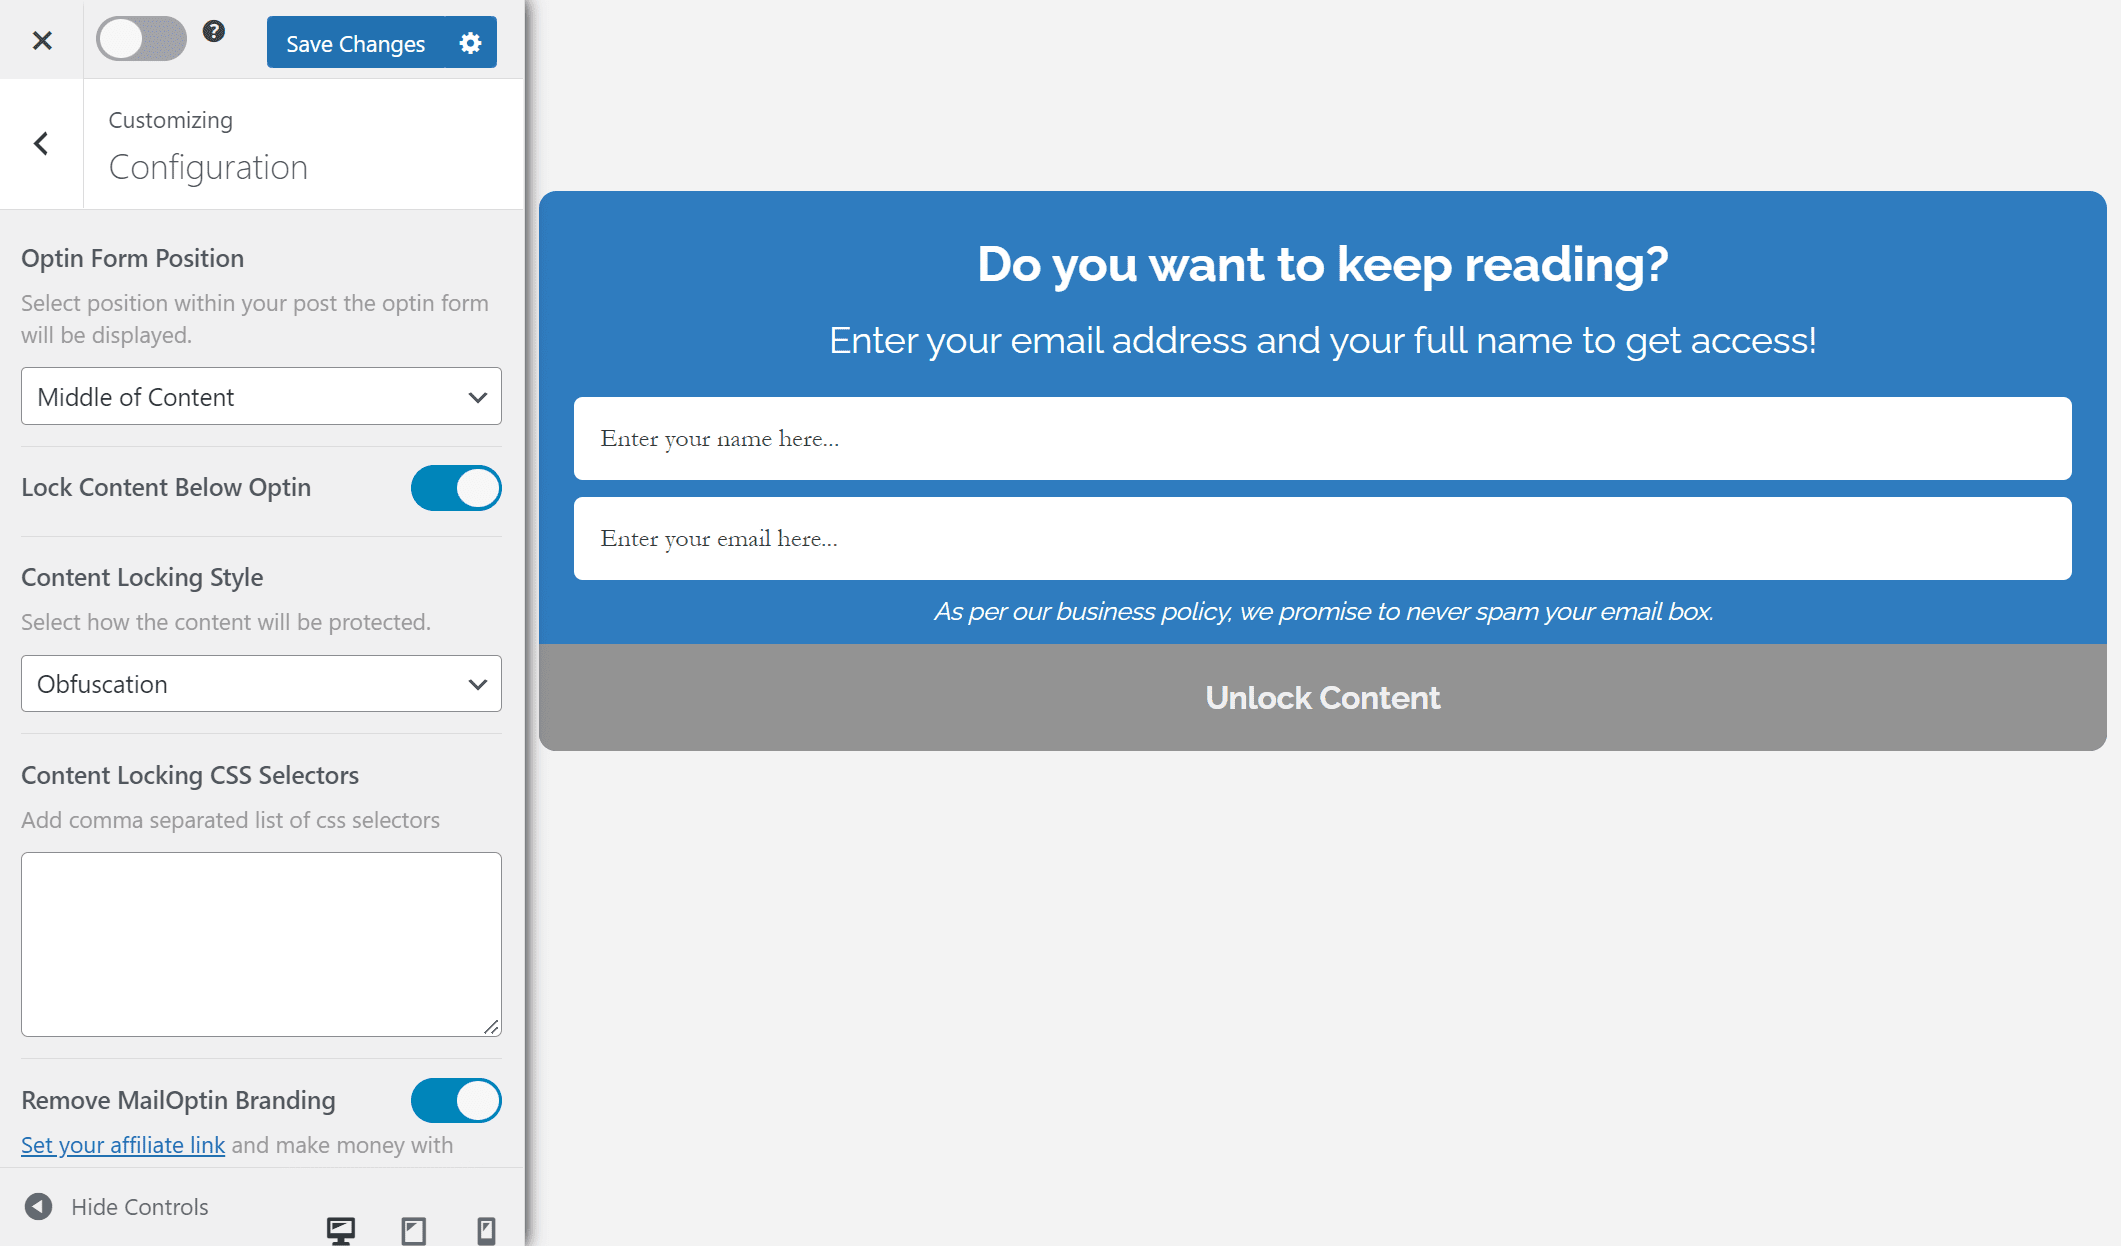
You will see new options appear. For example, you can select how the content locking style will display the restricted content and add custom CSS selectors.
Once you’re done, click on the Save Changes button and remember to activate the opt-in form using the checkbox next to the Save Changes button.
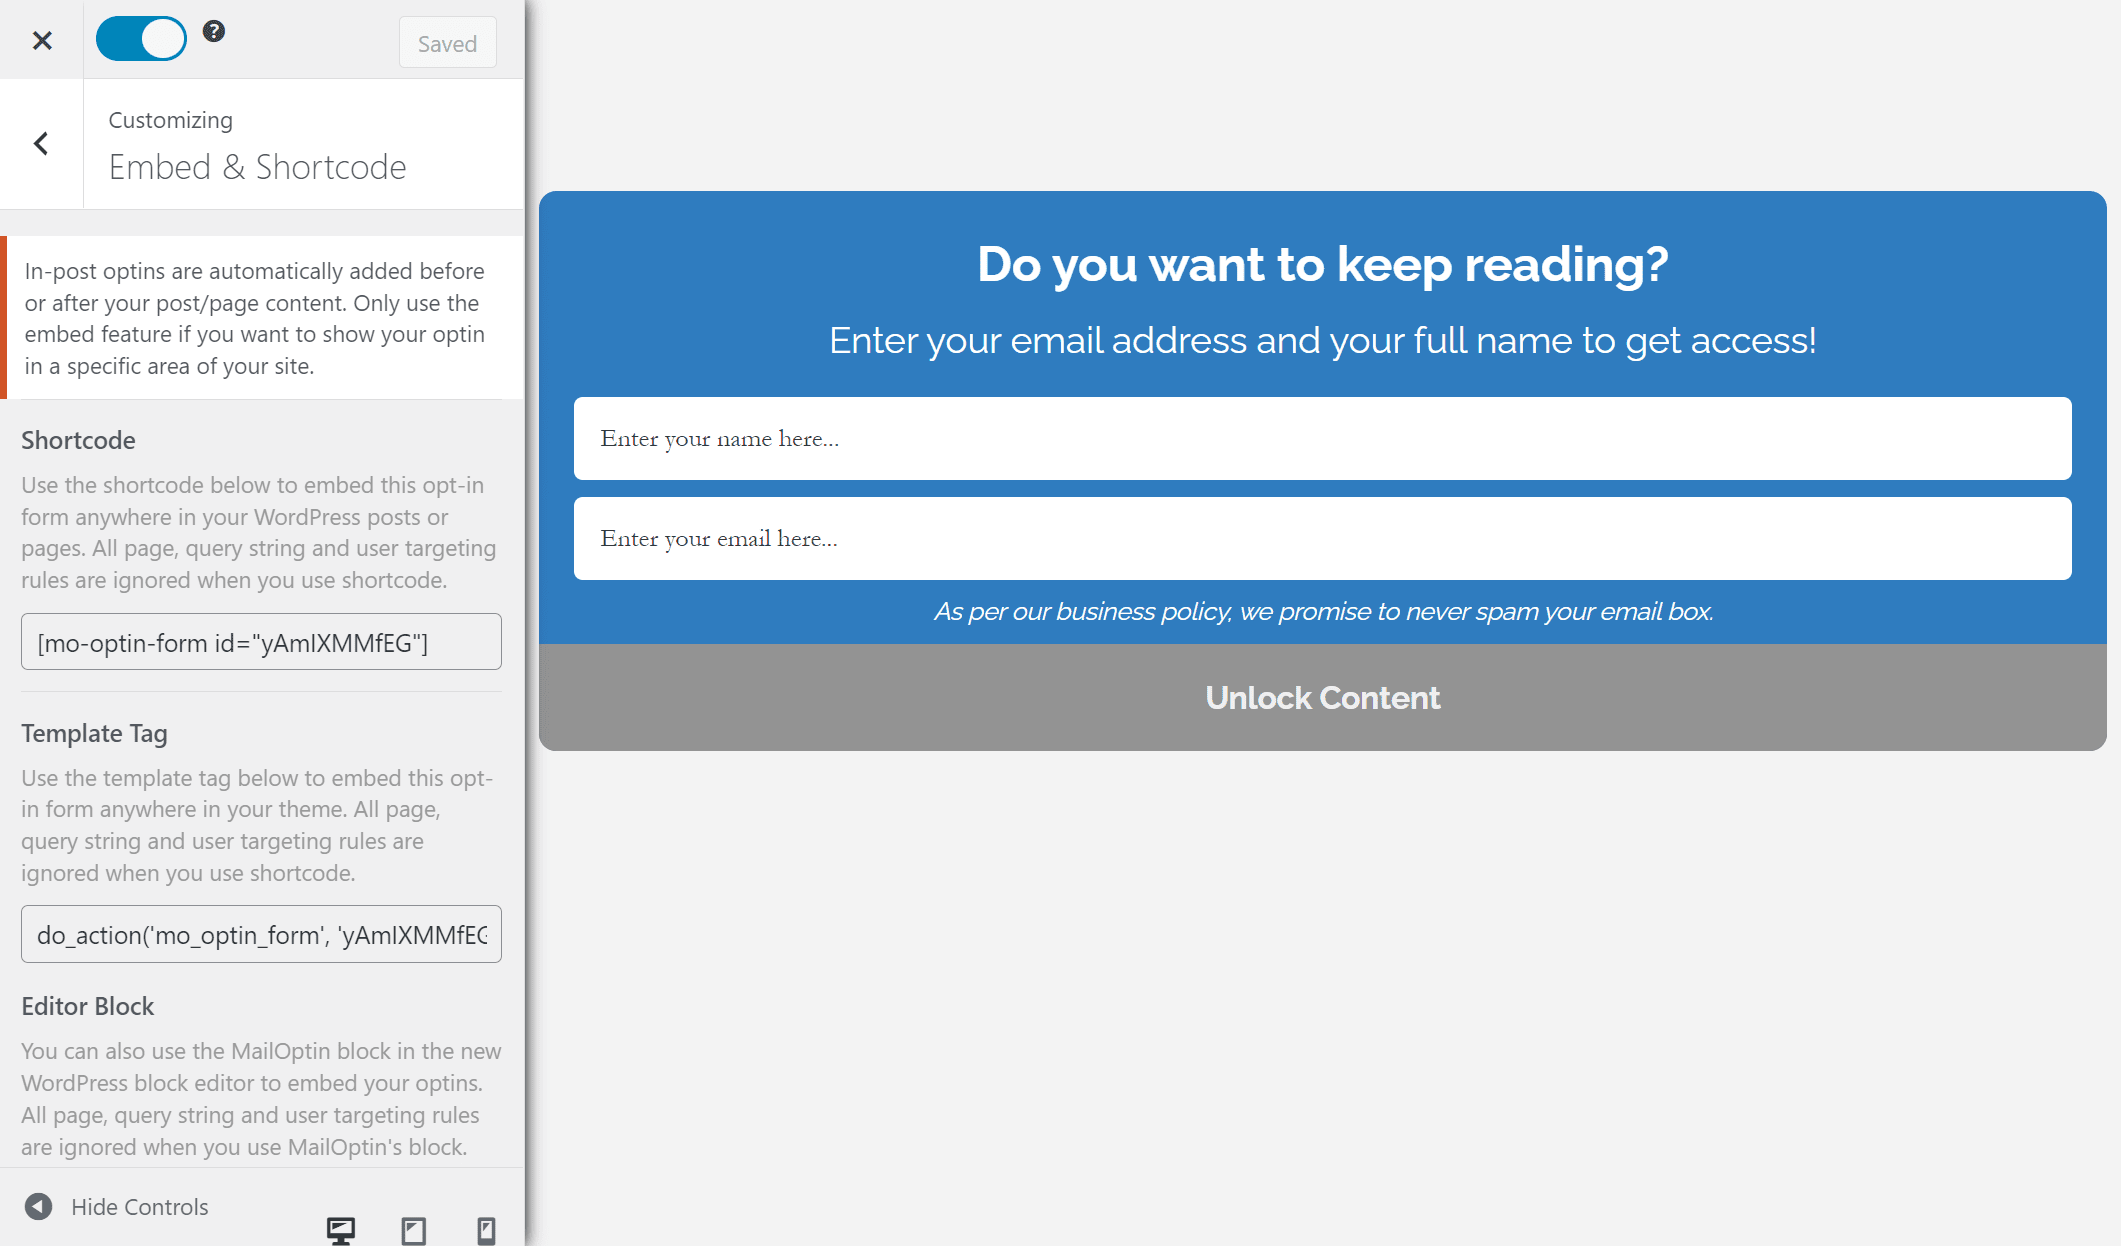
Before leaving the form customization page, click the Embed & Shortcode menu and copy the shortcode for the opt-in form. Also, disable the Show Optin Globally checkbox using the Display Rules > Page Targeting menu.
Now, navigate to the page or post you want to add a content locker to and paste the shortcode exactly where you want the content locker to appear.
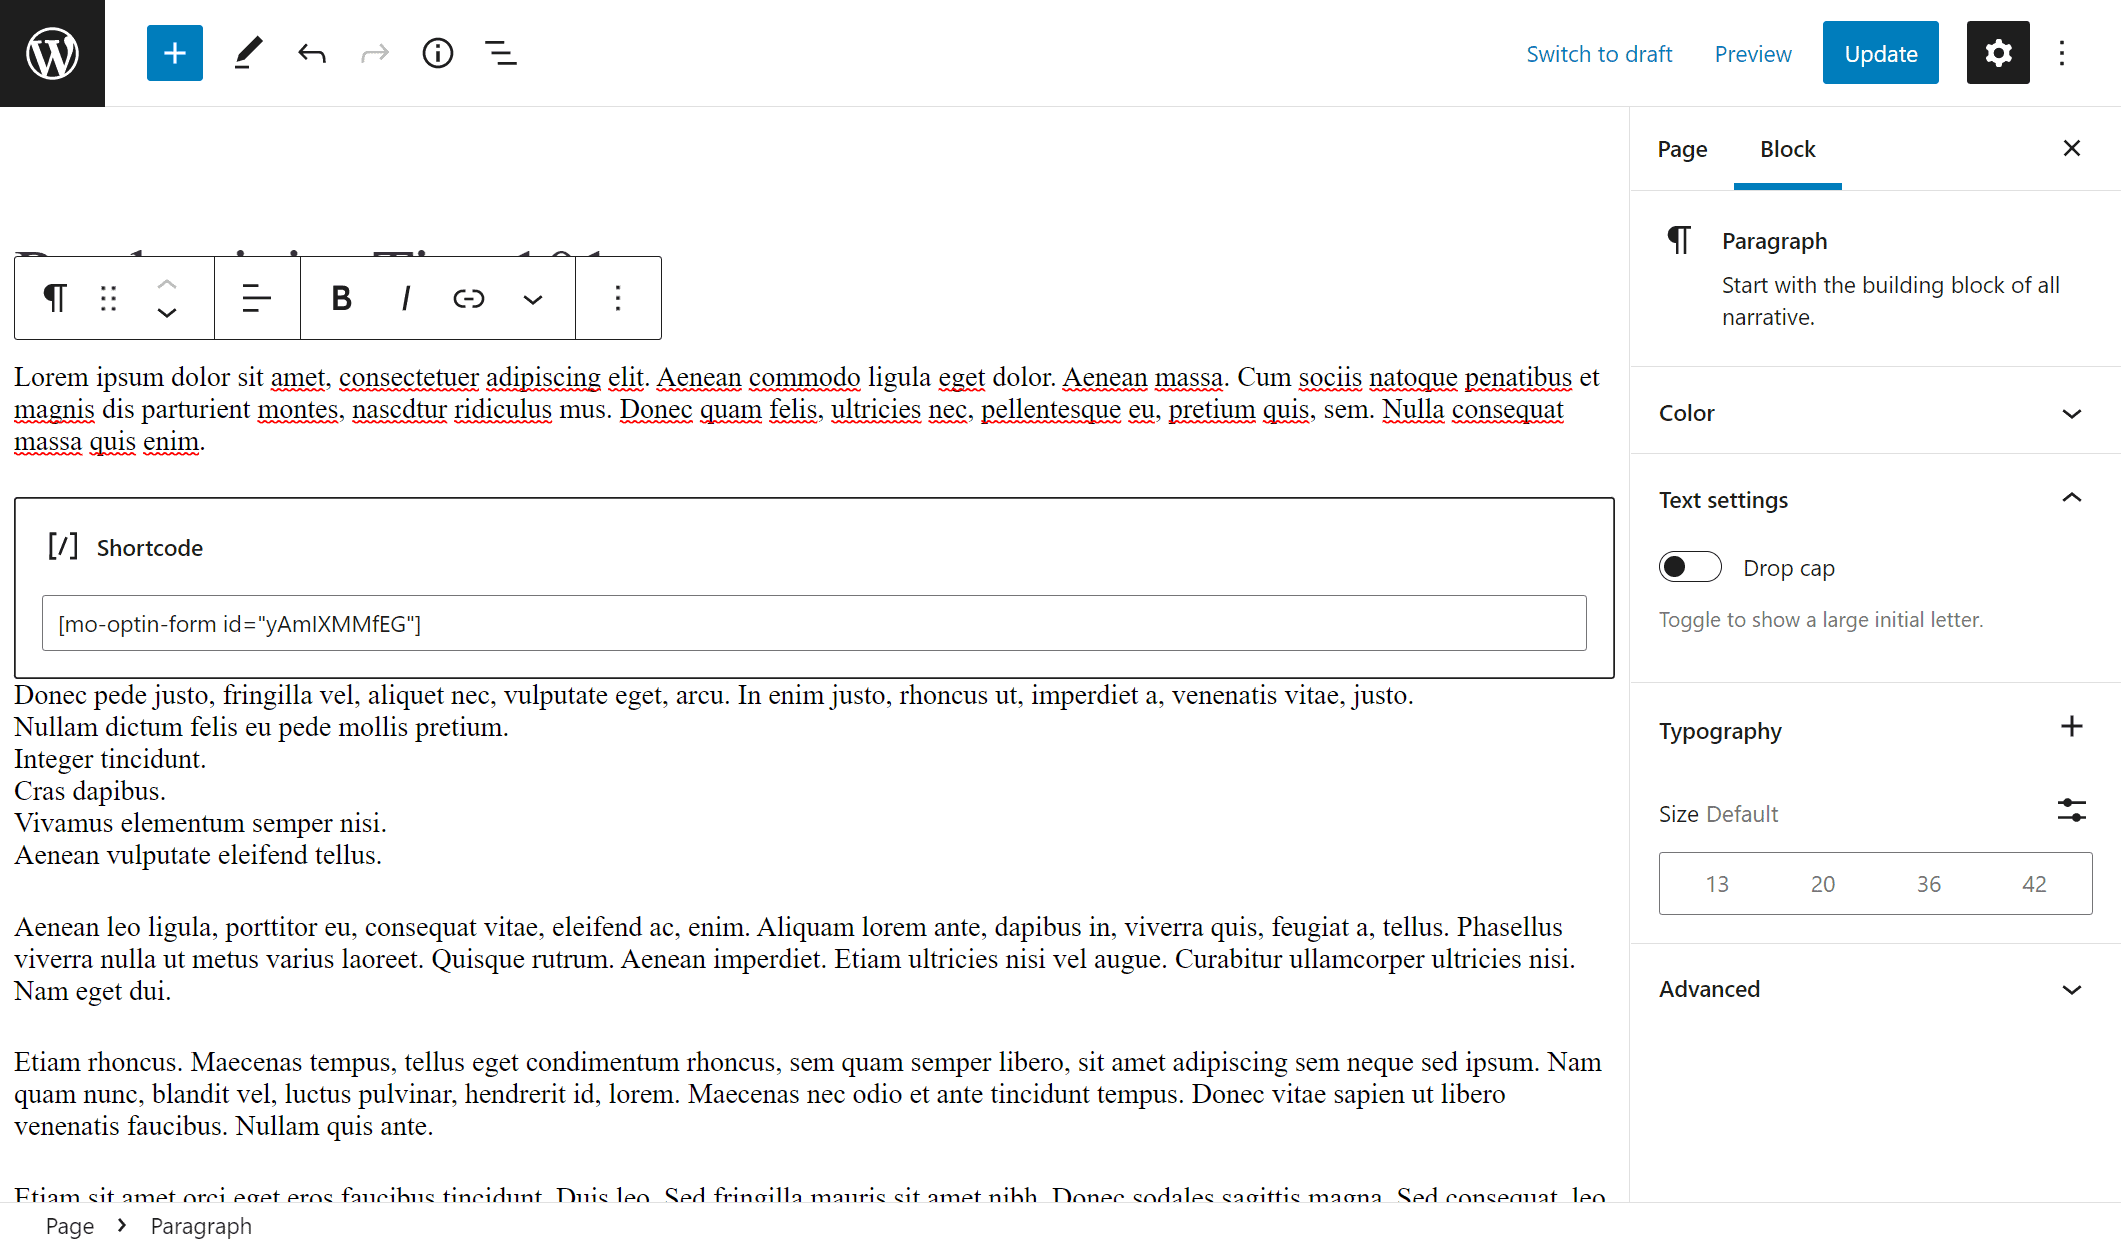
Make sure to click on the Update button to save the changes.
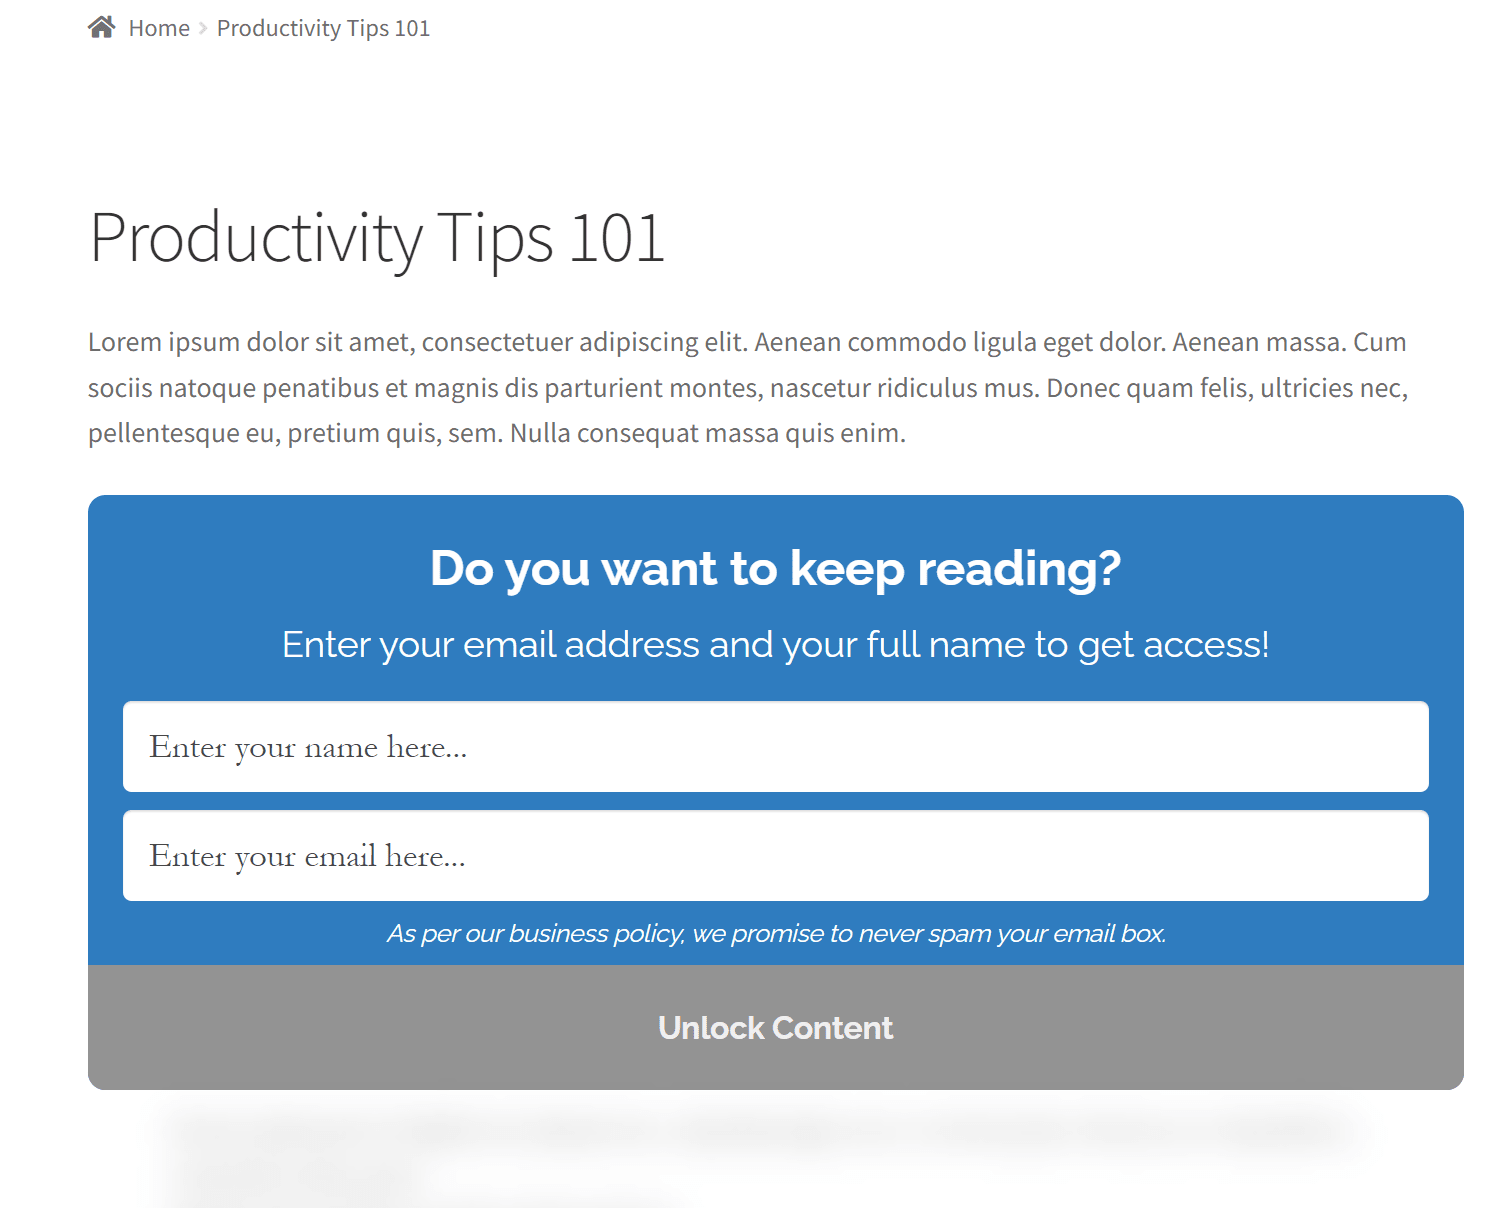
As you can see, the content has been locked right from where we placed the shortcode. Now, site visitors will have to enter their email addresses and name before they can have full access to the premium content on the WordPress site.
Final Words
There are numerous goals you can achieve with content locking. For some website owners, it is a way to grow their email list, while many website owners use it to generate revenue from their websites.
If your goal is to sell products or paid membership and generate revenue from your website, then the ProfilePress plugin will be a good choice, and if your goal is to build an email subscriber list, then the MailOptin plugin will be a better choice for you.
No matter your goals, choose a plugin that meets your requirements, provides high-quality content that your visitors will want to unlock, and monitor your analytics to evaluate your content lockers’ performance.