How to Setup Metered Paywall for WordPress Content
Are you looking to set up a metered paywall for your WordPress content?
If you enjoy reading large online magazines and newspapers, you might have encountered a website or publication that permits you to access a limited number of articles for free within a specific time period. Once you reach that limit, they will prompt you to become a paid member or subscribe to a plan for unlimited access.
This method of restricting access to content is called Metered Paywall, and the New York Magazine, The New York Times, and Medium use it.
A metered paywall balances free and paid content access, allowing website owners to offer limited free content to visitors while encouraging them to subscribe for unrestricted access.
With the ProfilePress Metered Paywall addon, you can easily add a metered paywall to any content, post, page, custom post type, and taxonomies on your WordPress website, ensuring your valuable content is protected and effectively monetized.
This guide will walk you through setting up a metered paywall, empowering you to maximize your revenue and control access to your content.
Please note that the Metered Paywall addon doesn’t work with work with hosts that cache heavily such as WPEngine, Flywheel, Pagely, SiteGround, Pressable. But it can be easily resolved by requesting them to disable caching or the cookie below from caching.
For single site: ppress_mv
For multisite: ppress_mv_<site id>Or they can simply exclude from cache the cookie matching this pattern ppress_mv*
Setting up Metered Paywalls for WordPress
Install and activate the ProfilePress plugin on your WordPress site to set up a metered paywall. If you haven’t already purchased the plugin, head to the pricing page to get your copy.
Navigate to your WordPress dashboard >> ProfilePress >> Addons to enable the Metered Paywall addon.
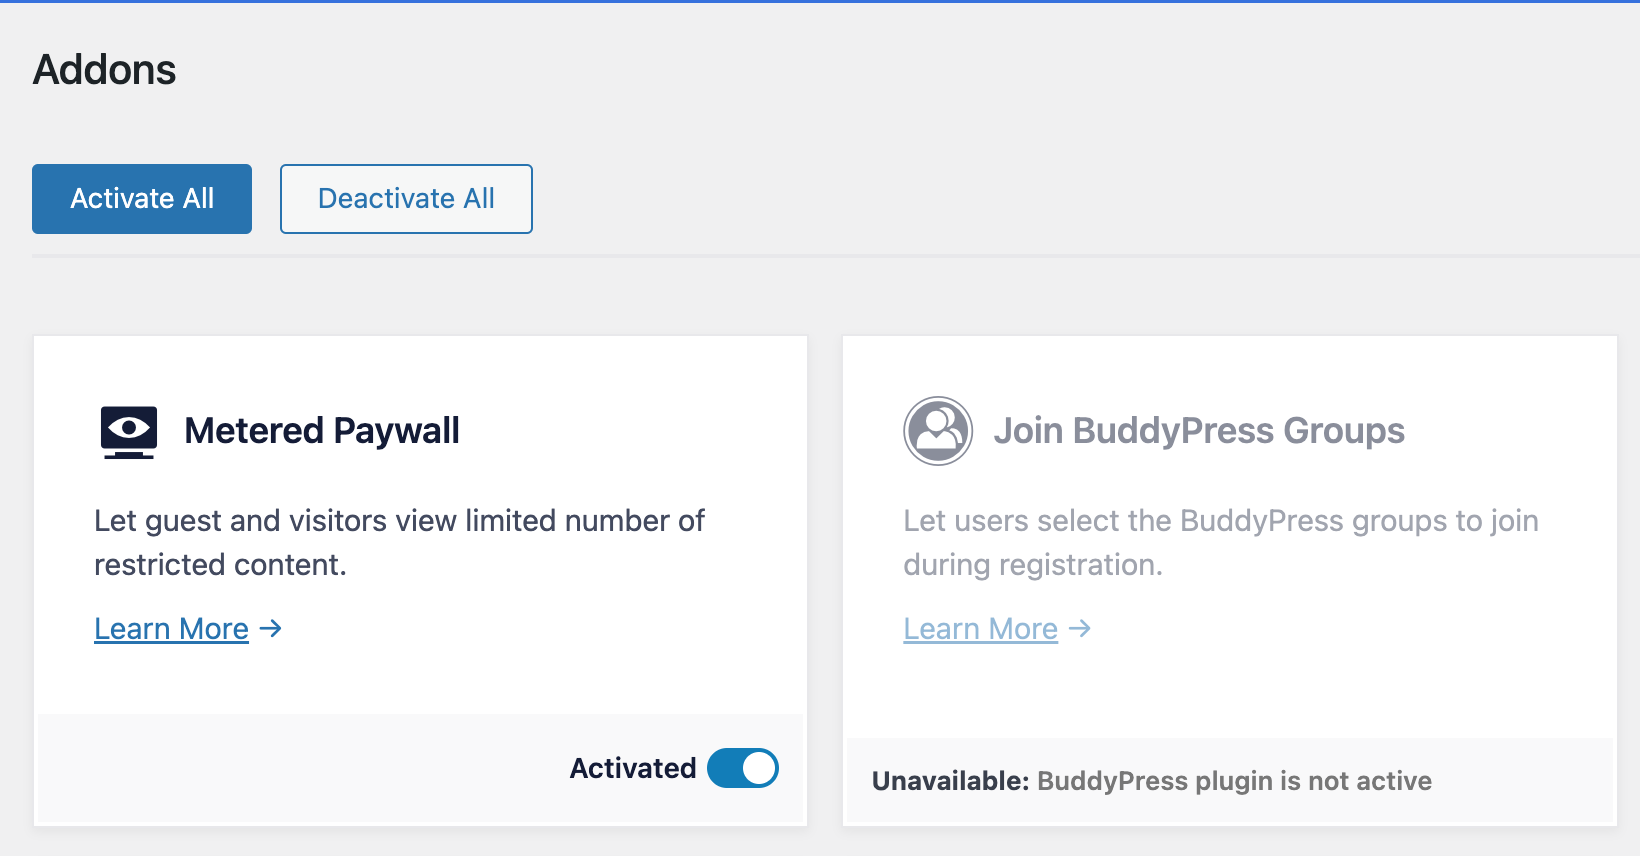
The Metered Paywall addon lets you define or configure the content to make it accessible to guests and non-paying members on your WordPress site. Consequently, you need to ensure the contents are already protected or restricted with the ProfilePress content protection feature. Otherwise, everyone will still access the content after hitting their limit.
Example / Usecase
Say all published posts on your WordPress site are available only to Standard membership plan subscribers, but you want to offer three free post views daily to guests and users not subscribed to the Standard membership plan (implementable via this code snippet). The guide below shows how you would set things up.
Setting up the WordPress Content Protection
Using the example/use-case above, we will protect all posts from all users except members subscribed to the Standard plan. This means only Standard plan subscribers can access all published posts.
To restrict all WordPress posts to members with an active Standard plan subscription, go to ProfilePress >> Content Protection.
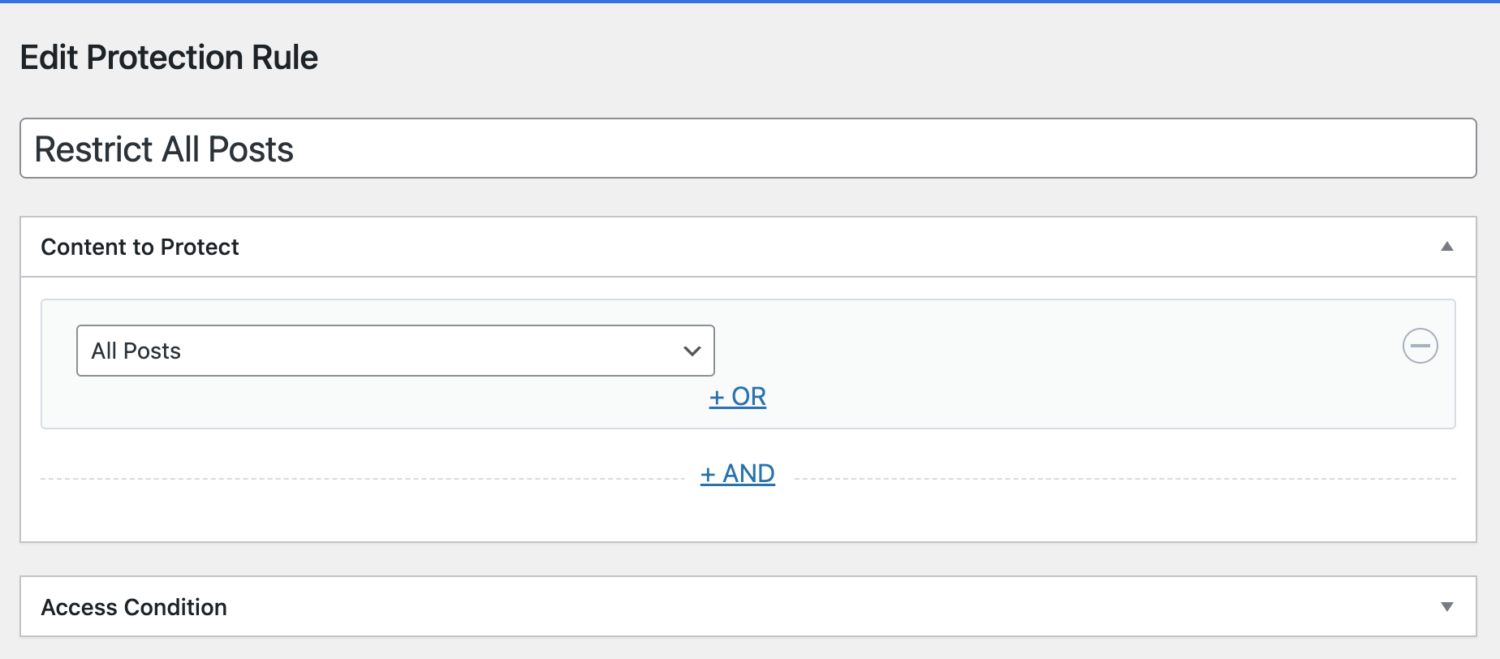
Click the “Add a Protection Rule” button to add a new rule.
Select “All Posts” as the “Content to Protect” condition.
In the “Access Condition” section, you define who can access all your WordPress posts. For this setup, it’s limited to logged-in users with an active subscription to the Standard plan.
In the screenshot below, I’ve also selected “Administrator” to ensure all site admins have unrestricted access to all posts.
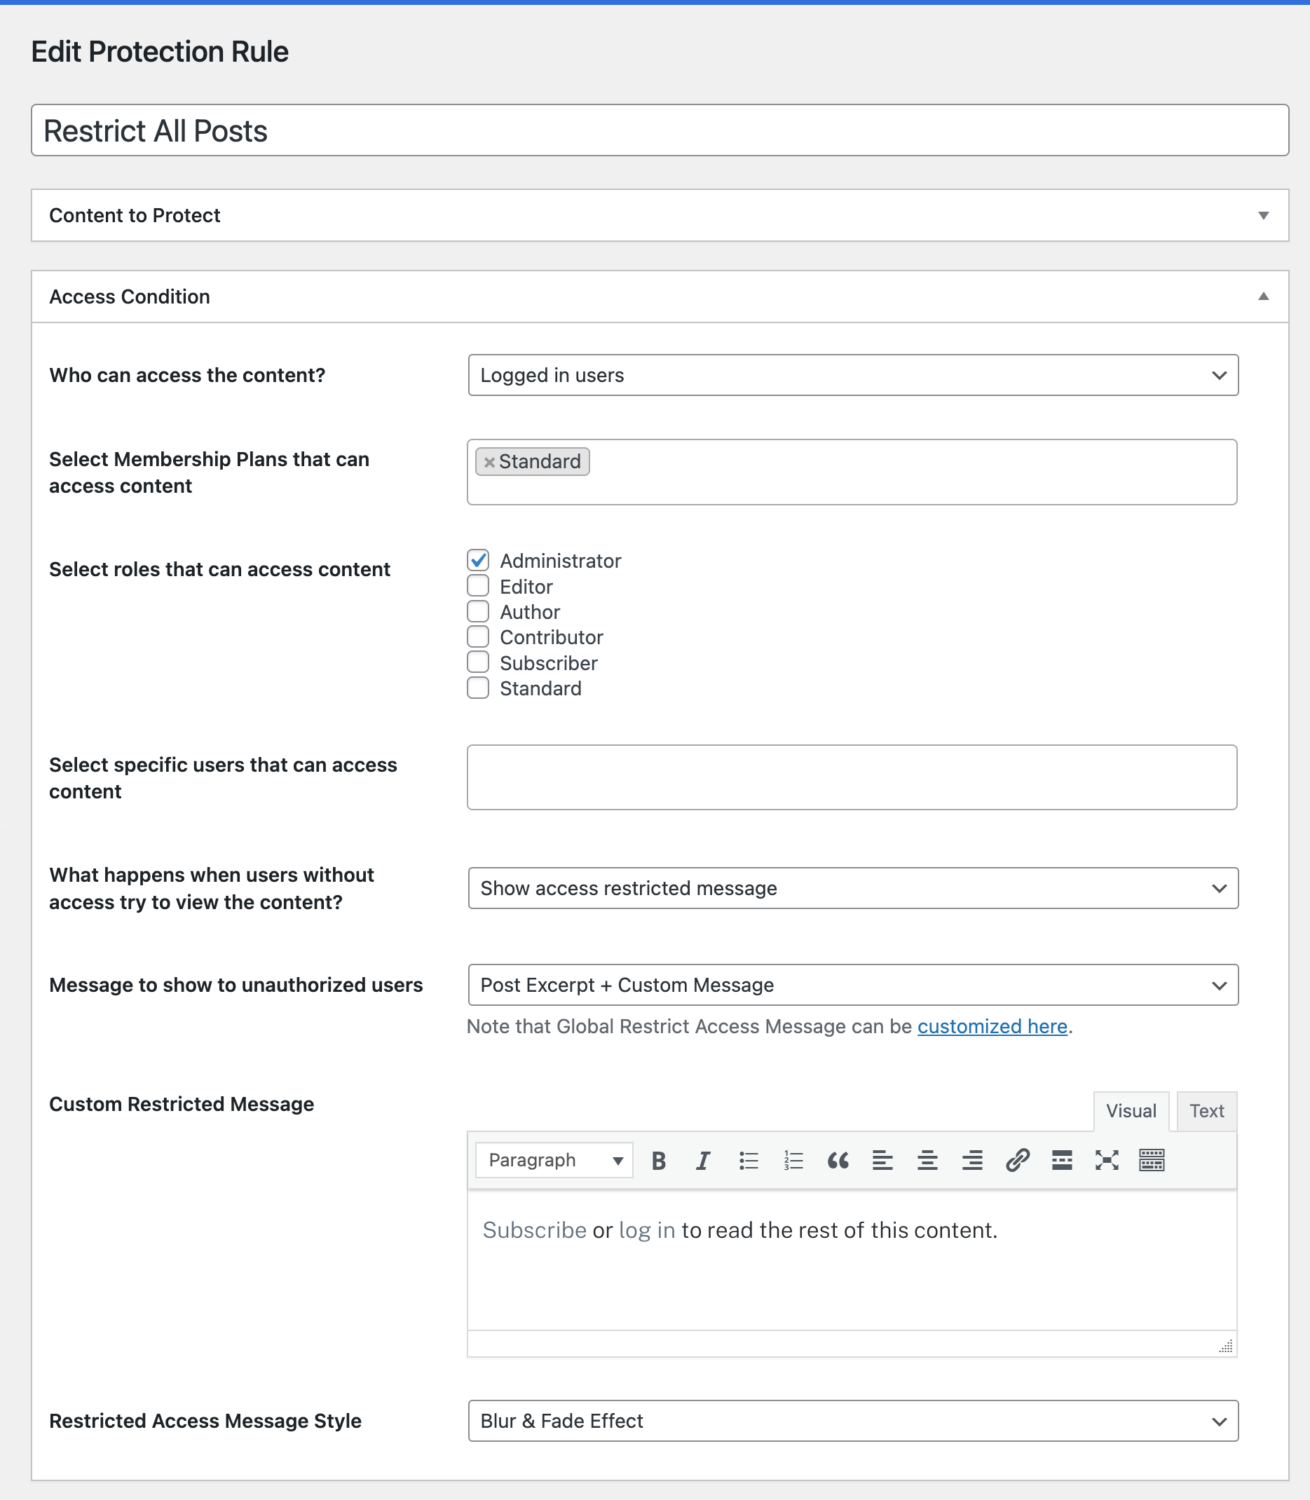
When a post is restricted or protected from a WordPress user, we want to show an excerpt of it and our message urging them to subscribe.
I selected the “Blur & Fade Effect” as the Access Message style to give the end of the post excerpt a blurring/fading effect.
Finally, save your changes.
Next, use the Metered Paywall addon to define the posts and the number of free views guests and non-members of the Standard plan are limited to.
Configuring WordPress Metered Paywall
To set up the actual metered paywall feature, go to ProfilePress >> Content Protection and click the Metered Paywall menu tab.
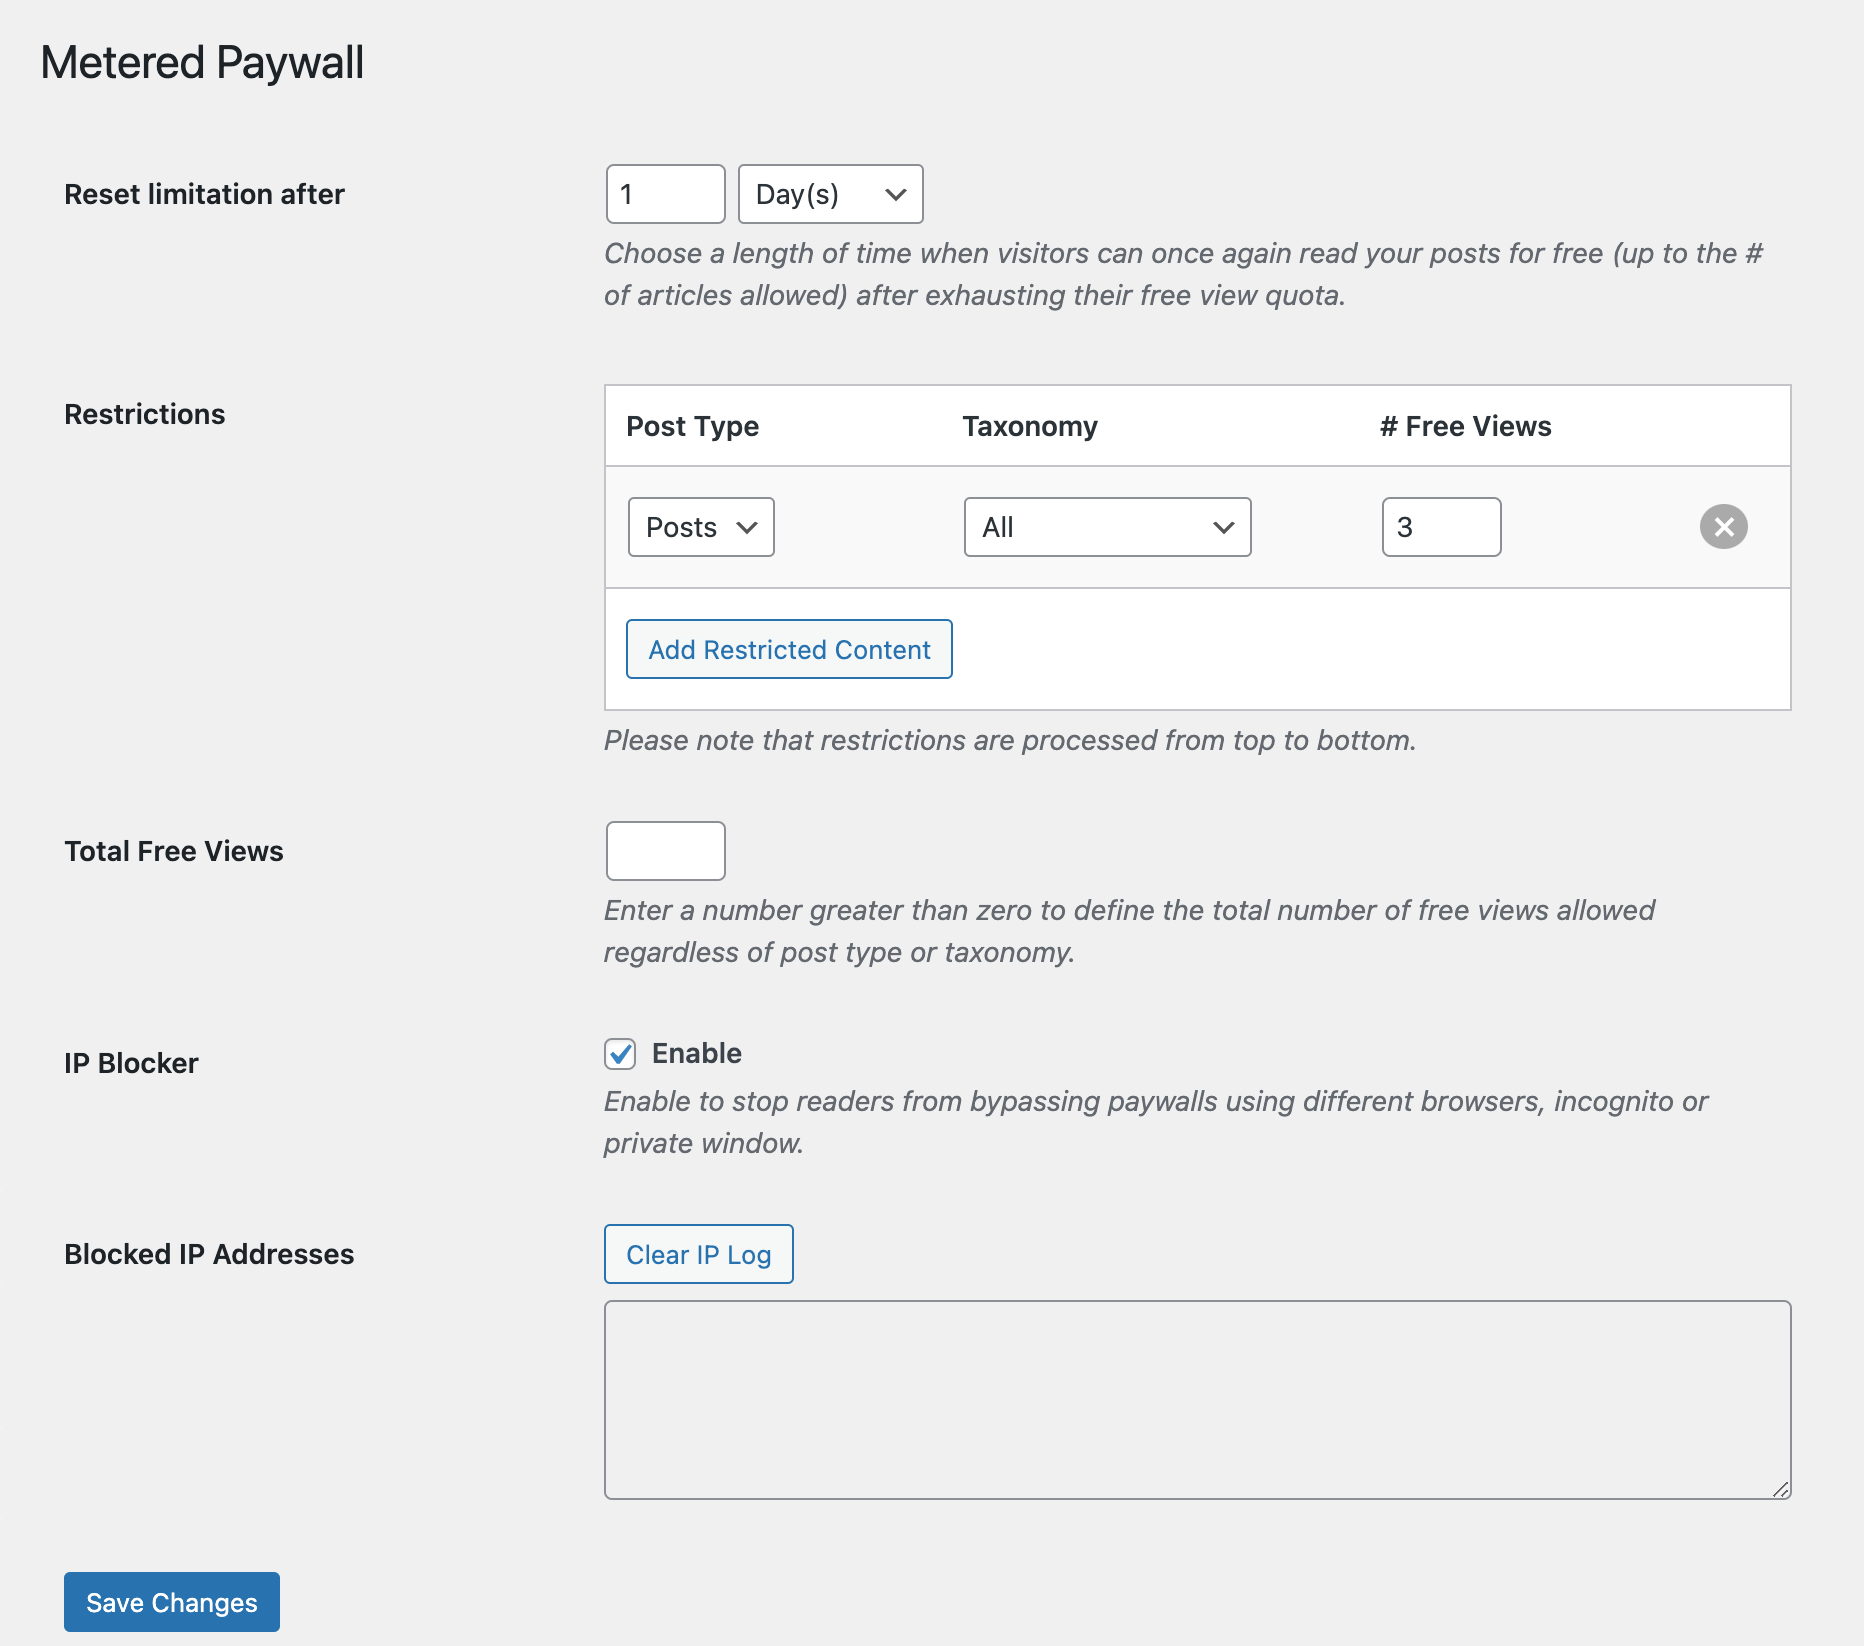
The Reset limitation after setting lets you define how long before a restricted WordPress user can once again view protected content for free after hitting their limit.
Use the Restrictions section to define the WordPress post types and, optionally, the taxonomy to make available for free viewing and the number of free views to grant to users.
If you’ve added multiple roles of restrictions and want to use a single value for the total number of allowed free views regardless of content type or taxonomy, use the Total Free Views setting.
Preventing Abuse
The IP Blocker feature prevents users from bypassing your paywalls in WordPress using incognito mode or private browsing by tracking the IP address of each visitor. If a visitor consumes their allotted free articles and then tries to access more content through an incognito window, private mode, or a different browser, they will still be blocked and prompted to subscribe.
To activate the “IP Blocker” feature, check the Enable checkbox. Then, use the “Clear IP Log” button to clear blocked IP Addresses.
Don’t forget to save your changes.
Countdown Slidebox
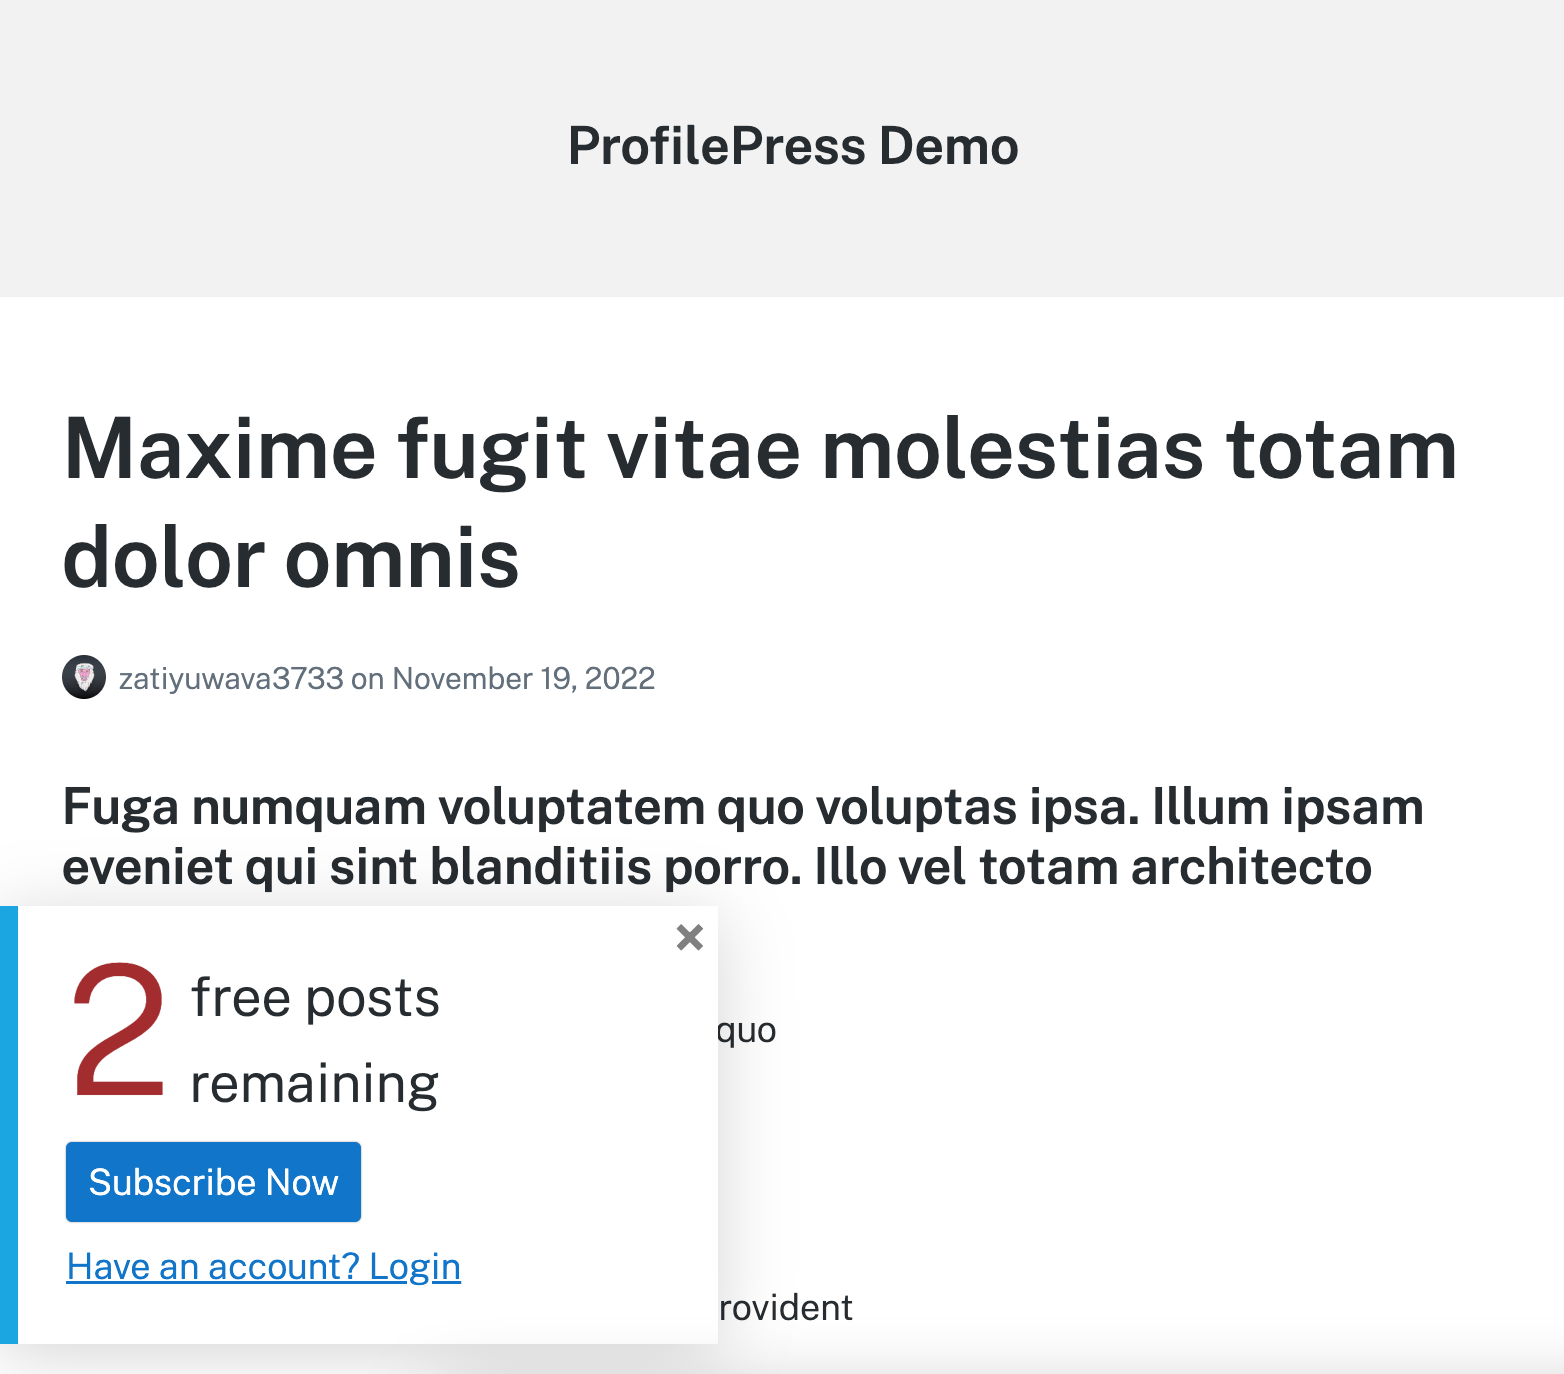
Our Metered Paywall addon can display a customizable slide-box on restricted content to let guests and non-members know how many views they have left before they are required to subscribe.
When a user views restricted content, a notice slides in from the bottom left of the screen after a few seconds, alerting them to how many free articles they have remaining.
To enable the countdown slidebox, scroll to its section and enable it.
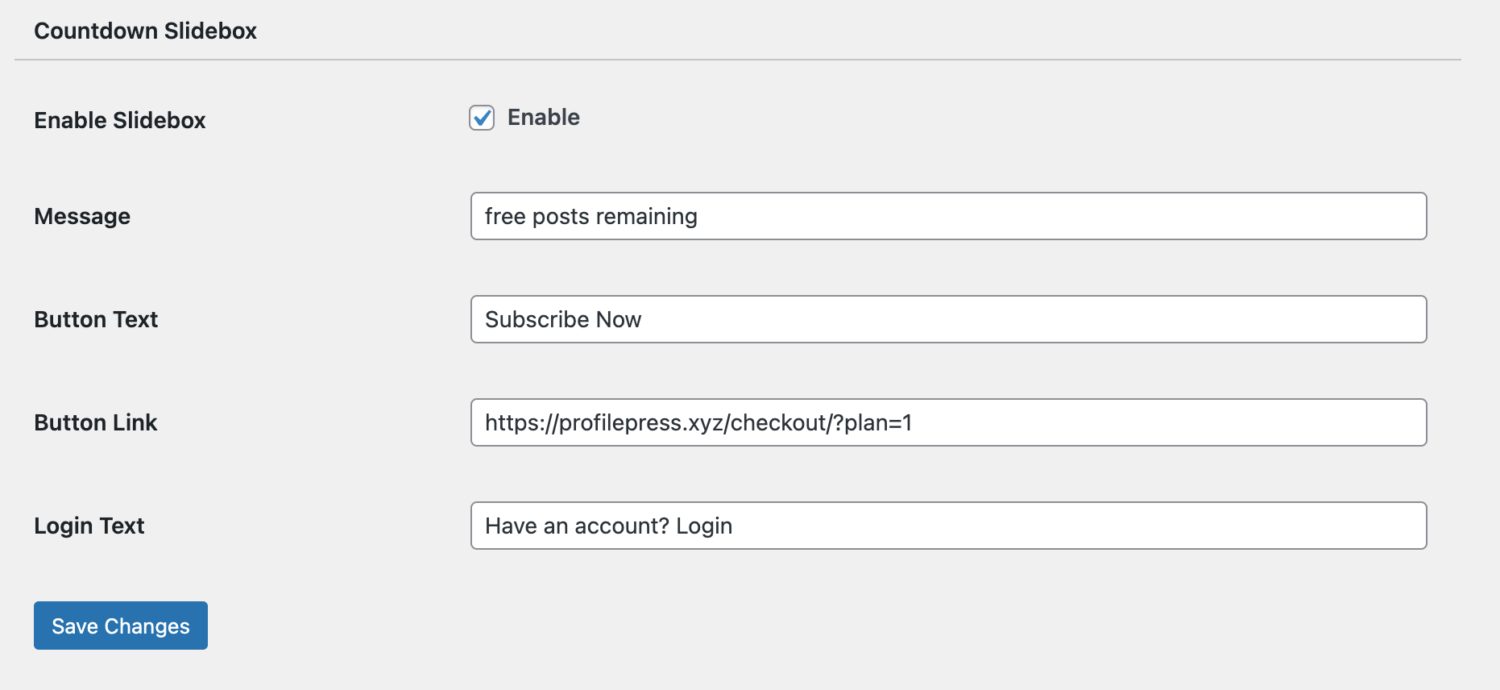
Save your changes when you are done.
That is how easy it is to paywall your WordPress content using the metered paywall model.
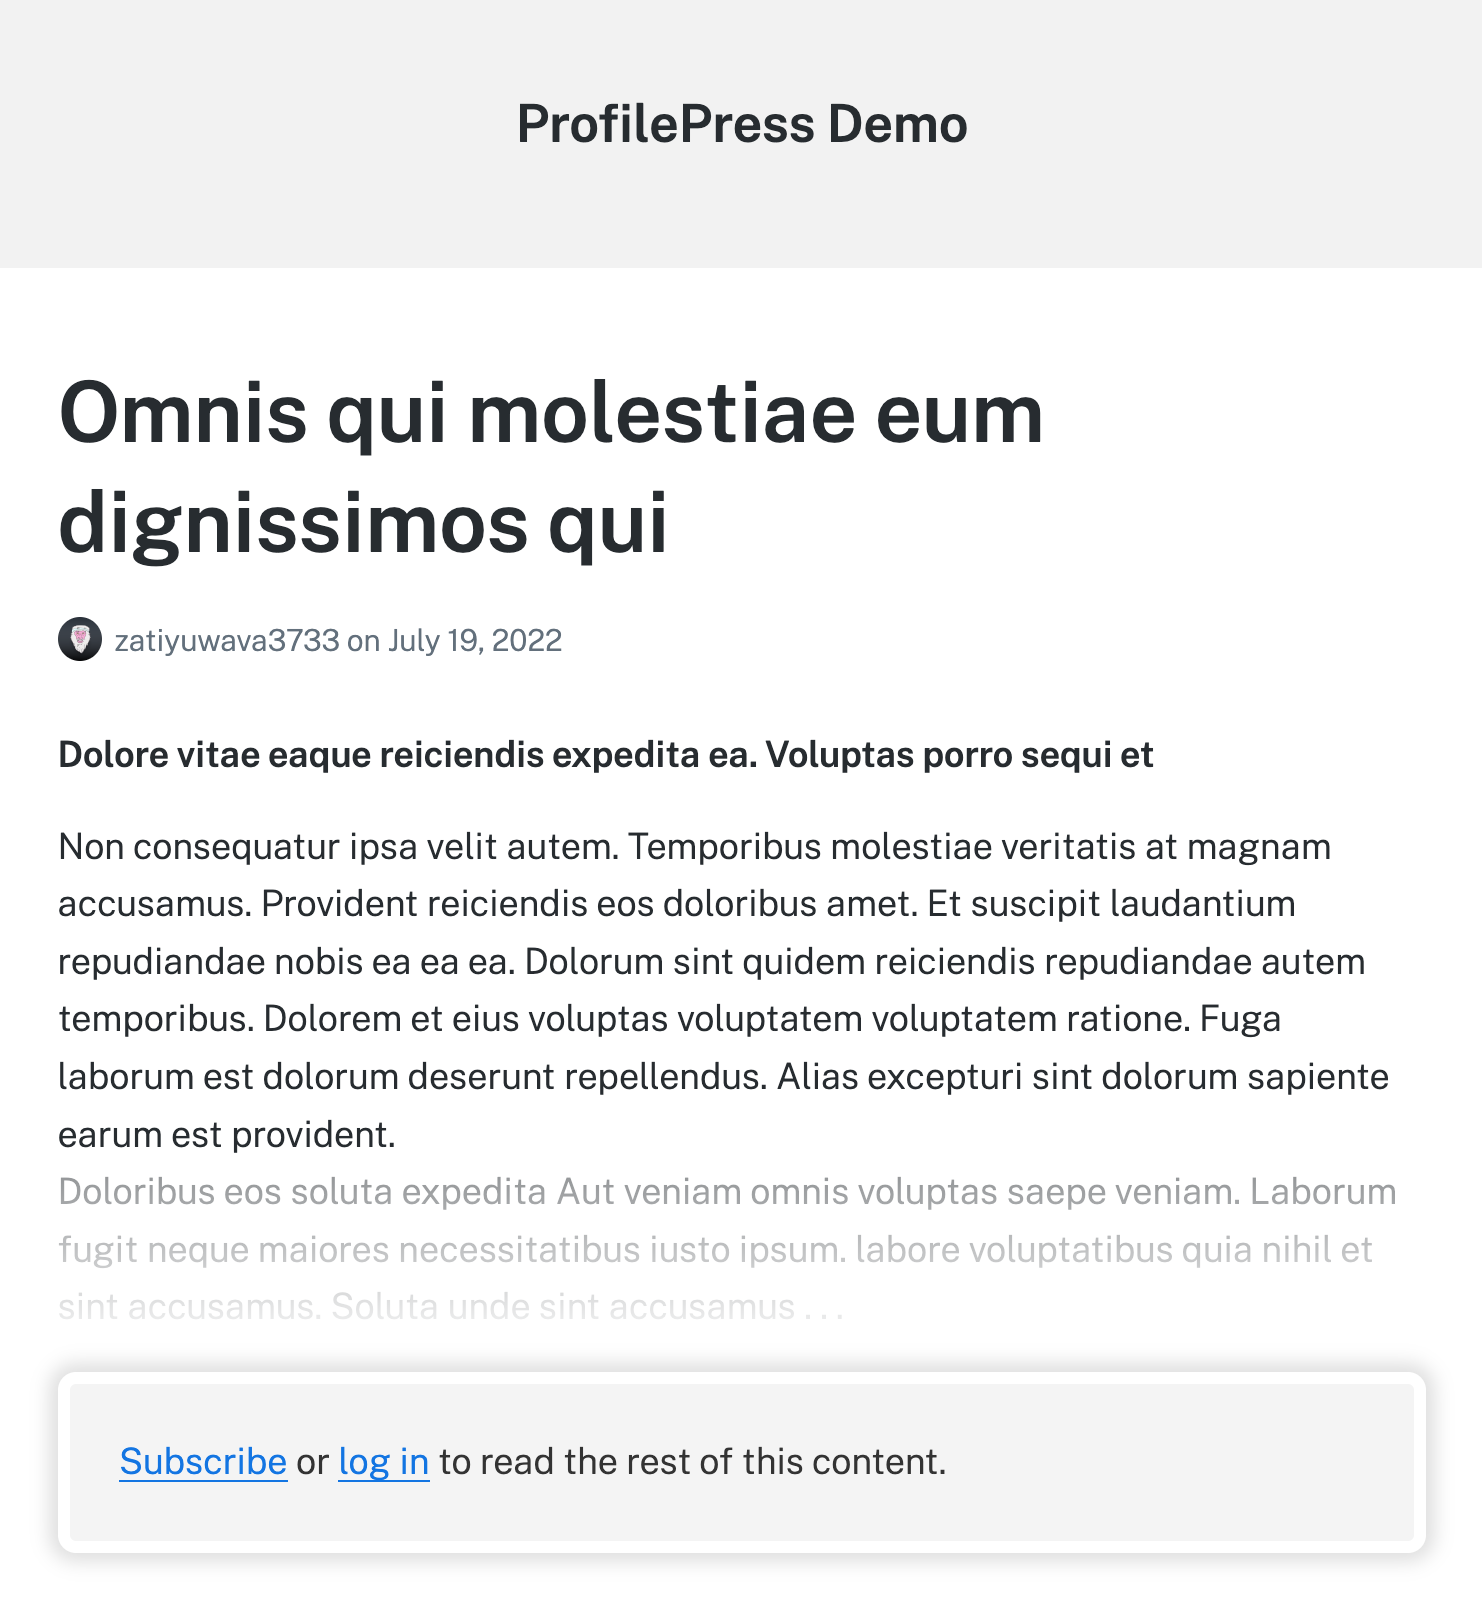
When users hit the free view limit, they would see the message urging them to subscribe to a membership plan to gain unlimited access.
Setup Metered Paywall in WordPress Today
Monetizing a blog can be challenging, especially if you’re not selling products or relying on ad revenue. A metered paywall offers a practical solution, allowing you to generate income from your audience in exchange for access to your content.
With ProfilePress, adding a metered paywall to your blog is simple. Just follow these steps:
- Install the ProfilePress plugin.
- Enable the Metered Paywall addon.
- Create your membership plan(s).
- Protect your content with the Content Protection feature
- Use the Metered Paywall settings to define content to make available for free.
Note: Other types of paywalls, such as hard and soft paywalls, are also available.
For more information, you may want to check out our article on setting up a WordPress paywall for your content.