How to Enable User Registration in WordPress
WordPress as a CMS allows you to enable user registration on your website. When users register on your WordPress website, they are given various permissions depending on their user role. This can be a helpful way to control access and allocate tasks among multiple users to maximize efficiency. If you wish to add user registration, this tutorial will step you through all the required steps.
Why Allow User Registration?
There are various reasons to enable user registrations in WordPress. For example, if you want to make it easier for your guest bloggers, you can allow them to register on your website and assign the “Contributor” role so they can write their posts. When they are done, they can submit their post for review. You then get to decide what to do with the post.
User registration also has other advantages, such as logged-in-users-only areas; you can offer discounts to only registered members who have contact information on your site. Registered users can also provide a marketing advantage and keep you updated with related news, products, or service offerings.
Enabling user registration on your WordPress website
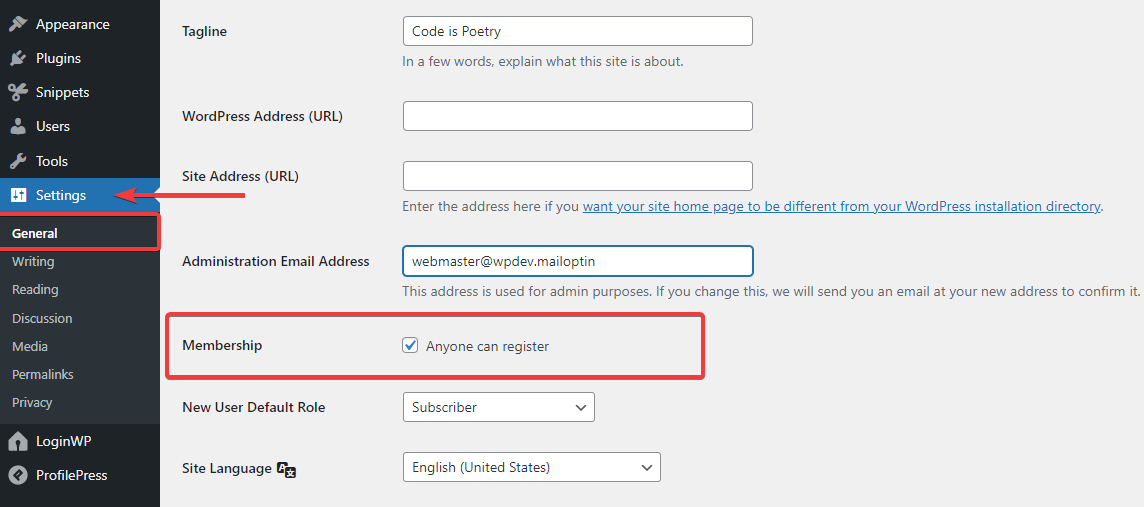
To enable user registration in WordPress, go to Settings >> General in the WordPress admin and mark the option “Anyone can register” under Membership.
To set a user as the default, choose which defaults you want for any new registrants on the site.
Registered users can be set to the default Subscriber role. However, if you want them to be able to write articles, you can assign them the Author role.
Once you specify a default role for your users, click the save changes button, and it will take effect.
Adding the register and login links on your WordPress website
Now that users can register on your website, it’s time to add a way for them to register or log in. You can add the register/login links to the sidebar or use specialized plugins to make an entire page dedicated to registering/logging in users.
Using the Meta Widget to Register New Users
This is undoubtedly the fastest way to add a register and login link to your website. All you need to do is head to Appearance >> Widgets and then find and add the Meta widget in your sidebar (by either clicking on Meta and selecting Add Widget or dragging it to the Sidebar widget area). Make sure you click Save when you’re done.
The following screenshot shows how the login link will look once you set your Meta widget in the sidebar.
How to create a custom login and register page with the help of a plugin
You can quickly create custom WordPress registration forms and login forms with an easy-to-use form builder with the ProfilePress plugin, which prevent unauthorized users from accessing your WordPress blog and protect your WordPress login and registration forms.
This drag-and-drop form builder makes it easy to create custom registration and login forms. Once you’ve created your custom form, you can easily add it to any page on your website with the help of a shortcode. Here’s how:
Creating a Custom WordPress Registration Form
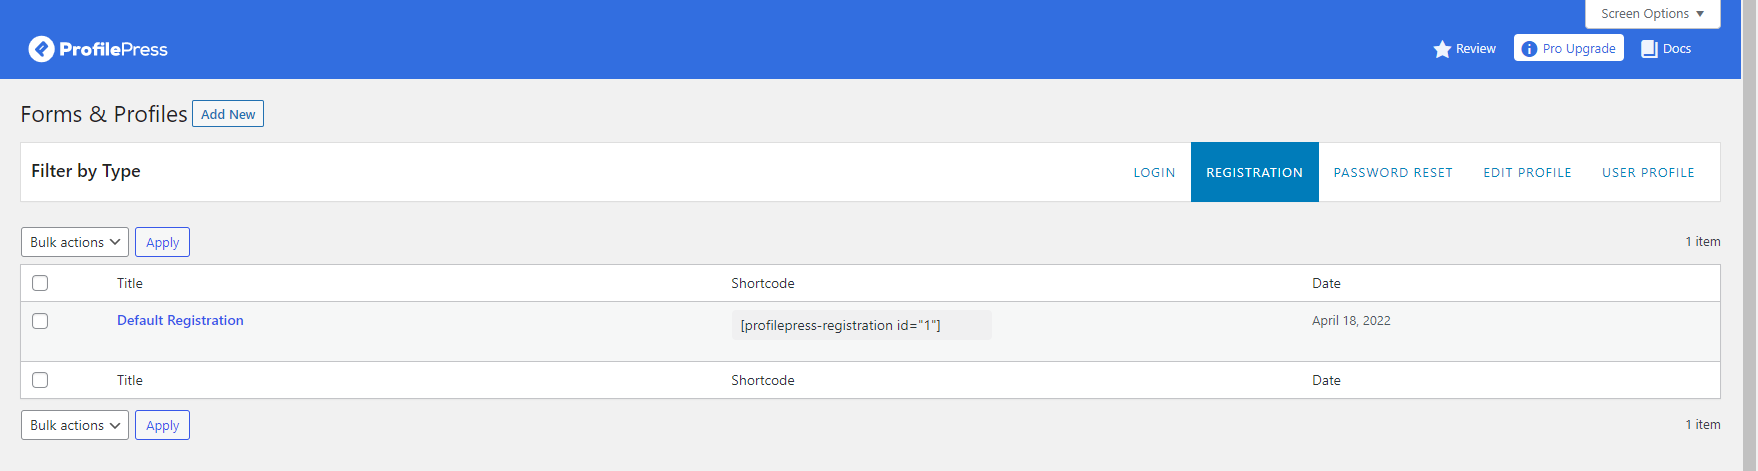
Since we are using the ProfilPress plugin, you can find and install it by going to Plugins >> Add New, typing “ProfilePress” in the search bar, and clicking the Install button. As soon as you install and activate the ProfilePress plugin, a message will appear telling you to create new registration/login pages. The process is simple: click the Create Pages button, and the plugin will set up your default login/registration pages.
Once the process is complete, the plugin will create login, registration, and password reset pages for you.
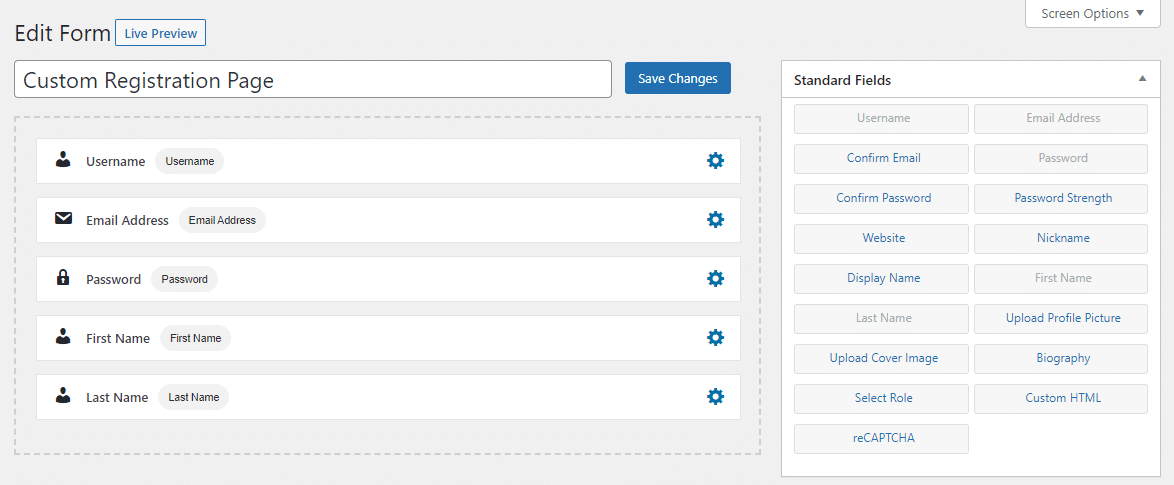
You can either modify the default form or create your form from scratch. The default form provides some fields to fill in related to you, while the other option allows you to input any relevant information.
The default registration form includes all the standard fields, like username, email, and password. However, you can add, delete or clone any fields with ease. Just hover over any item, and options to clone or delete will be displayed.
You can also add new fields from the right standard-fields-panel, including password strength meter, profile picture, etc.
Building the User Registration Form
- Hover on ProfilePress and click on Forms & Profiles
- Click on Add New and select the Registration form type
- Enter a name for the form
- Select your preferred template
- Design the form with the drag & drop builder or the Advanced shortcode builder.
You can preview what the form will look like by clicking on the “Live Preview” button.
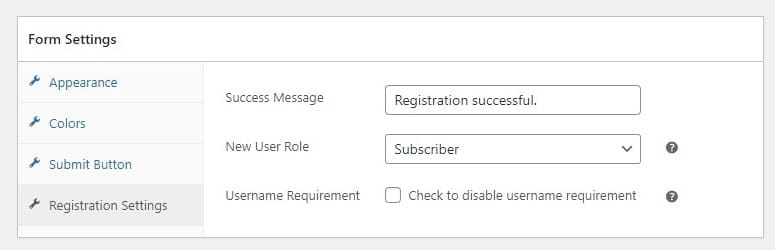
Form Settings
You can change the form headline, colors, button labels, and registration settings in the form settings. You can also select the user role to assign to the new users and disable the username requirement.
After saving the form, a shortcode will be generated for that particular form.
The form settings section allows you to edit the appearance, styling, and the default role the user will be assigned after submitting the registration form.
Creating a Custom WordPress Login Form
You can either modify the default login form or create your form from scratch. The default form comes with only two fields. The username and password fields. However, you can add, delete or clone any fields with ease. Just hover over any item, and options to clone or delete will be displayed.
You can also add new fields from the right standard fields panel, including “remember login” and custom HTML.
Building the Custom Login Form
- Hover on ProfilePress and click on Forms & Profiles
- Click on Add New and select the Login form type
- Enter a name for the form
- Select your preferred template
- Design the form with the drag & drop builder or Advanced form builder.

You can preview what the form will look like by clicking on the “Live Preview” button.
Form Settings
The form settings let you change the form’s appearance, field styling, labels, text, and the submit button.
After saving the form, a shortcode will be generated for that particular form. Click on Forms & Profiles>>Login and copy the shortcode.

How to Create a WordPress Login/Registration Page
If you made no changes to the default registration form, you will find the generated form page in Pages >> All Pages. Otherwise, create a new Page for your new form as well.
First, you need to copy the shortcode of your custom form. You can find it in the custom form editor or on the login/registration forms page.
To create a custom form page, go to Pages>> Add New (or click on Edit if you wish to add your form to an existing page) and paste the form shortcode into the shortcode field. Once you’re done, hit Update/Publish, and you’ve created your custom login/registration page.
To preview your custom form, you need to view the just-created page.
General Login and Registration Settings.
The Form Setting tab includes four options for deciding how your users log in. You can require users to manually log in after registering or use email confirmation, which requires their email to be valid. Alternatively, you can allow them to automatically log in after registration or ensure that admins approve the user’s registration.
1. Registration Settings
The Registration Settings panel allows you to control whether to automatically log users in when they sign up on your website or prompt them to log in.

2. Login Settings
WordPress allows users to log in using either an email address or username by default. ProfilePress enables you to restrict logins only to accept email addresses, usernames, or both.
- Email Address and Username (Default) – Allow users to log in using their user email address or username. This is the default WordPress behavior.
- Email Address Only – Users can only log in using their email address. It disables logging in using a username.
- Username Only – Users can only log in using their user’s username. It disables logging in using an email address.

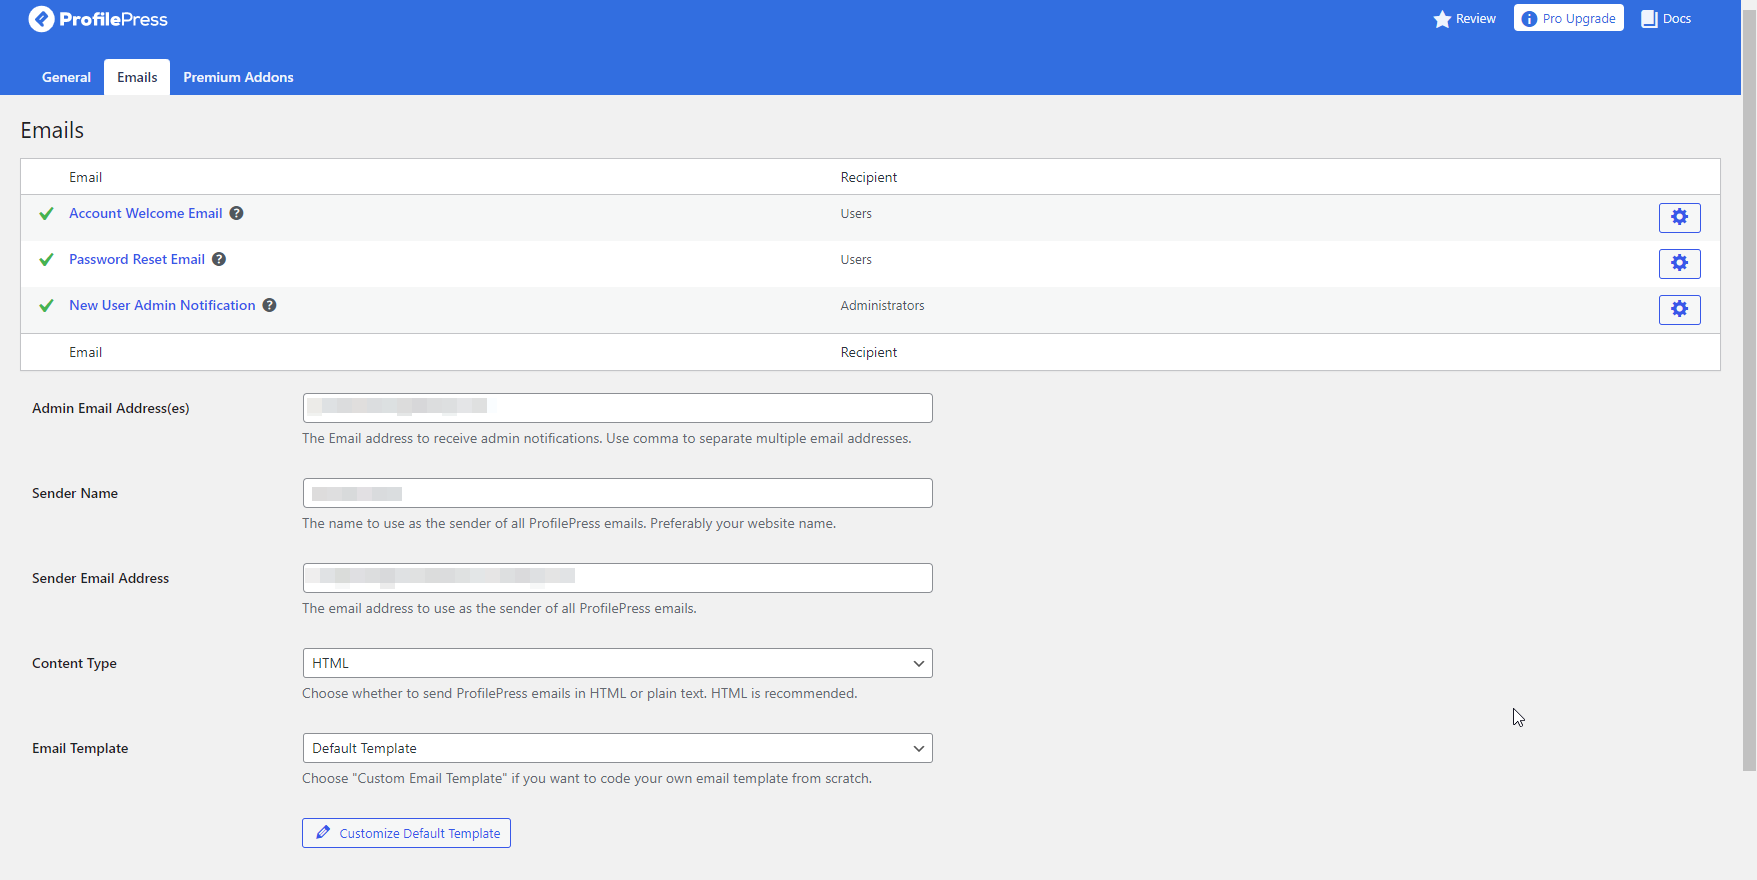
3. Email Settings
You can customize the email experience by disabling all emails sent after registration and configuring the email notification sent to a user who registers to the site. For example, you can customize the contents of the confirmation email sent when someone registers on your website.
You can also customize other emails such as Password Reset Email, New User Admin Notification Email, Pending Registration Email, etc.
Conclusion
Our guide on enabling user registration in WordPress sites is now complete. We have presented two methods to accomplish this task: using the Meta widget placed in a sidebar and building custom login and registration forms with the ProfilePress plugin.
We are confident that you will find both methods easy to implement since we have only included efficient and user-friendly methods.