WordPress Private Pages for Subscribers: How to Set Them Up
Do you want to make your WordPress pages private?
As a website owner or content creator, an excellent way to grow your subscriber base and encourage user subscriptions is by offering premium or exclusive content to your subscribers; to do this, you will need to make some pages of your WordPress site private so that only active subscribers can gain access to them.
A WordPress private page protects your content from unauthorized access and public view. It ensures that only a specific category of people (subscribers) can view the page and access content.
In this article, we will learn how to set up WordPress private pages and posts for subscribers on your website using the ProfilePress membership plugin.
How to Create Private Posts and Pages for Your Subscribers
This section will cover a step-by-step approach to creating WordPress private pages. We will learn how to make WordPress posts and page content types private and accessible only to our site subscribers.
Without much ado, let’s get into it.
1. Install & Setup ProfilePress
The first step in creating WordPress Private Pages is to install and set up the ProfilePress plugin. ProfilePress is a content restriction and WordPress membership plugin that allows you to sell digital products, create membership sites, and control access to your content.
You will need to purchase a ProfilePress License and install the plugin. To do that, head to the pricing page to purchase a suitable license plan. After your purchase, you will receive a confirmation email with a link to download the plugin zip file and your license key.
Once you have downloaded the plugin, login to your WordPress admin dashboard, and navigate to the Plugins page; click on the “Add New” button and click “Upload Plugin“.
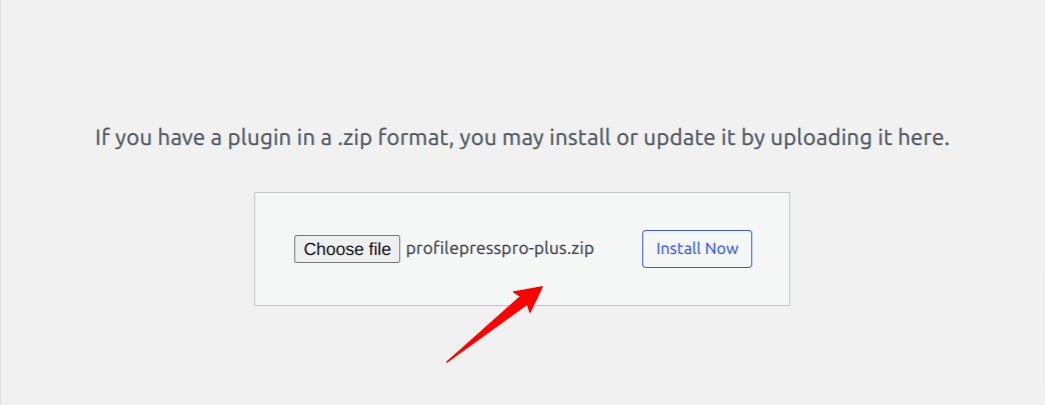
Next, click “Choose file” to select the previously downloaded plugin zip file. Click “Install Now.”
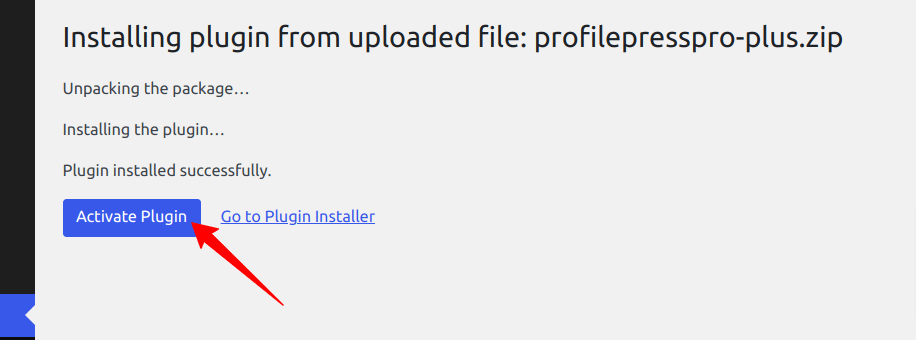
After installation is complete, click the Activate Plugin button.
At the top of the page, you will see a notification that says, “ProfilePress needs to create several pages,” Click on the “Create Pages” button to complete the plugin setup.
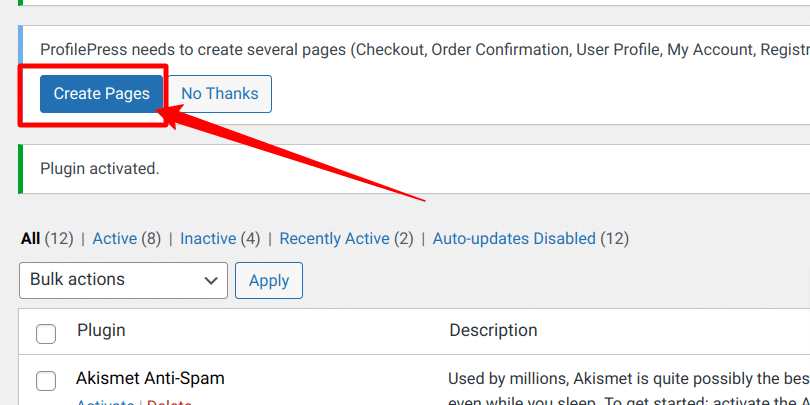
If you do not see this notification, navigate to ProfilePress > Dashboard and click the “Create pages” button to complete the plugin setup.
With this done, we have completed the initial setup of the ProfilePress plugin on our WordPress site.
2. Create subscriber-only categories
The easiest way to create WordPress Private Pages is to group them by categories; you need to create a subscriber-only category for your WordPress posts or pages.
By default, WordPress post content type has a category functionality that allows you to add each post to a category, but this is not available for WordPress page content type. To add this functionality, we will need the help of a plugin that enables us to add pages to categories, such as Pages with category and tag, a free plugin that does the job well.
Next, we need to create a category for our subscriber-only content and add subscriber-only pages and posts to it.
Navigate to Posts or Pages >> Categories. Under the Add New Category section, enter a name for the category, add an option description, and click on the “Add New Category” button to save the category.
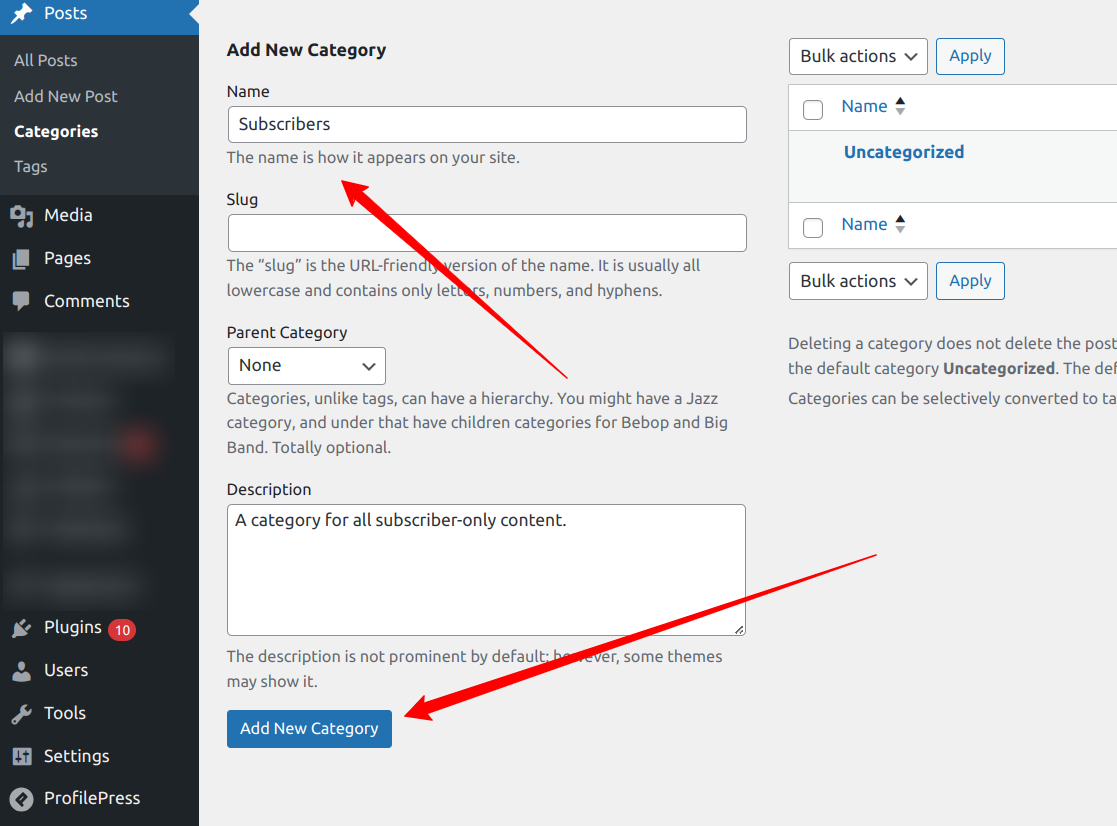
We have created a category that will house all our subscriber-only content. Any post or page added to this category will only be available to subscribers.
3. Create your WordPress Private Posts or Pages
Now that we have created a category to host the WordPress private pages or posts, the next thing is to create some pages or posts and add them to this category.
To create a private WordPress page, navigate to Pages > Add New. Add the page title and all other content of the page.
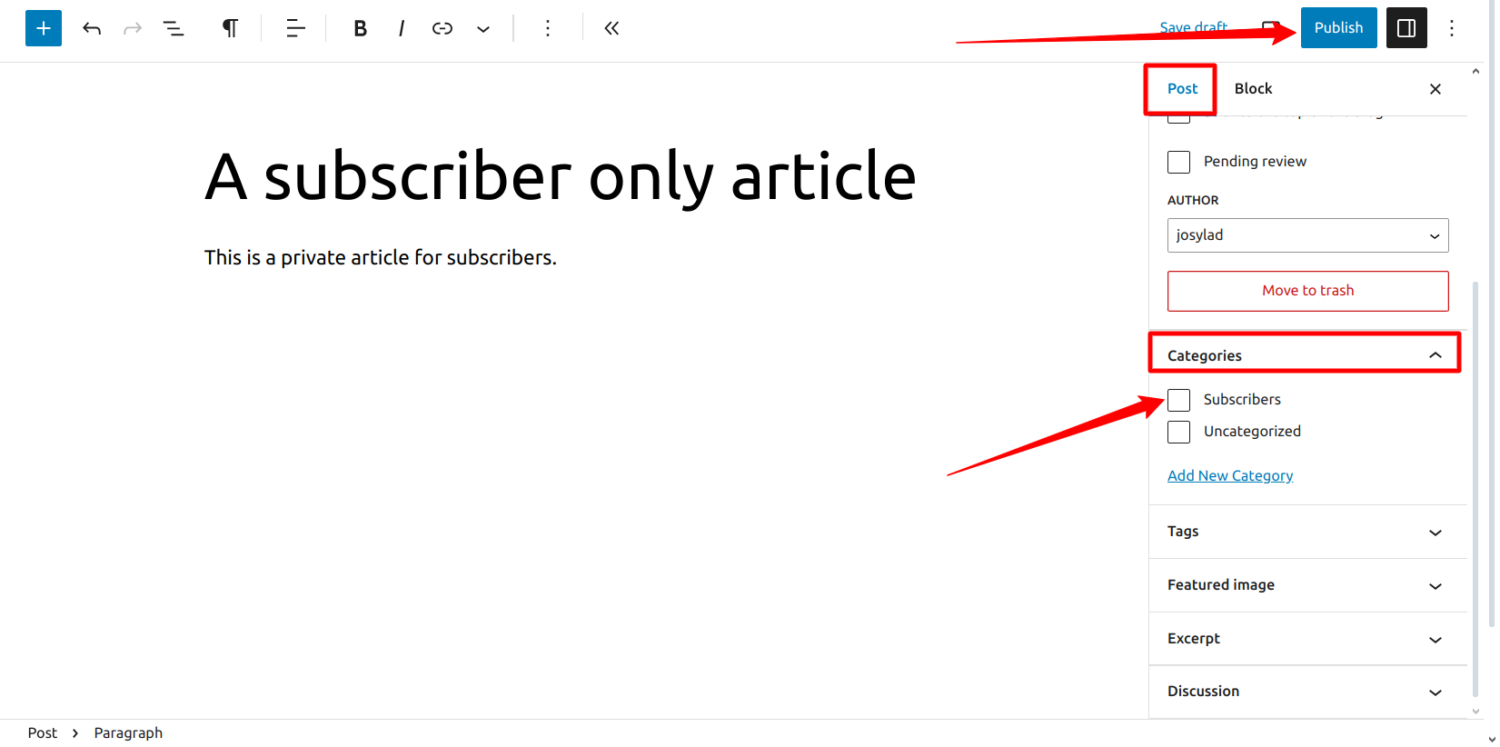
Next, Under the Page tab of the page editor, locate the “Categories” option and select the “Subscribers” category.

Click the “Publish” button and now have a subscriber-only private page.
To create a WordPress private post, navigate to Posts > Add New. Add the post title and all other content of the post.
Next, Under the Post tab of the page editor, locate the “Categories” option and select the “Subscribers” category.
Click the “Publish” button to have a subscriber-only private post.
You can follow the procedure above to add as many pages and posts to the subscriber-only category on your WordPress site as you want.
4. Restrict Access to the Category Pages
Now that we have our subscribers’ category set up and we have also added some posts and pages to this category, the next thing is to restrict access to this category’s contents so that any page or post assigned to this category becomes hidden and requires authorization before it can be viewed.
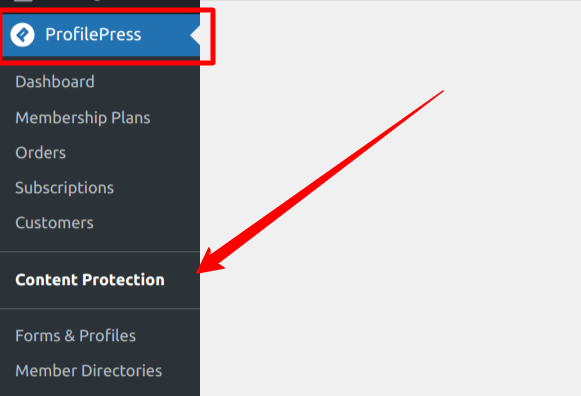
To do that, navigate to ProfilePress > Content Protection.
Click on the Add a Protection Rule button.
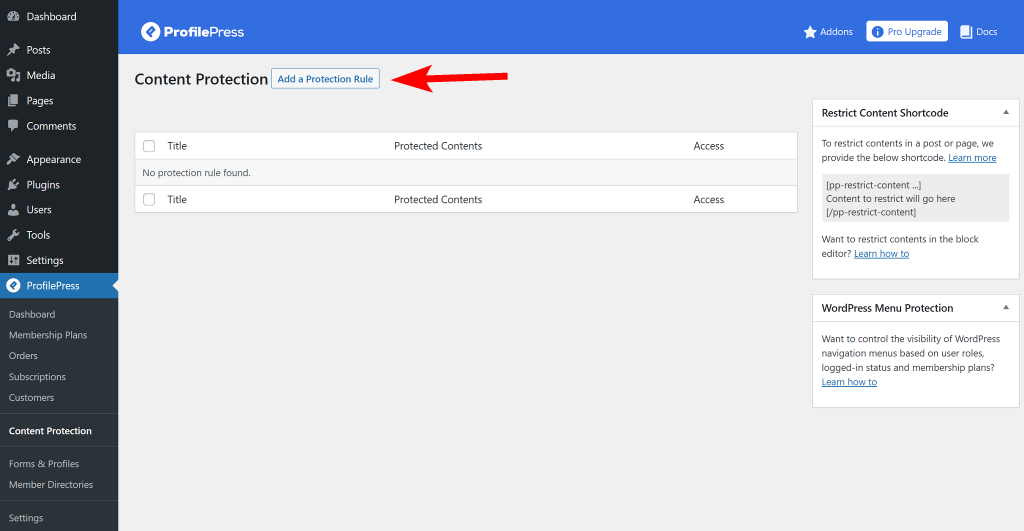
When you click the button, you will be taken to the Protection Rule editing page, where we will build our content protection rule.
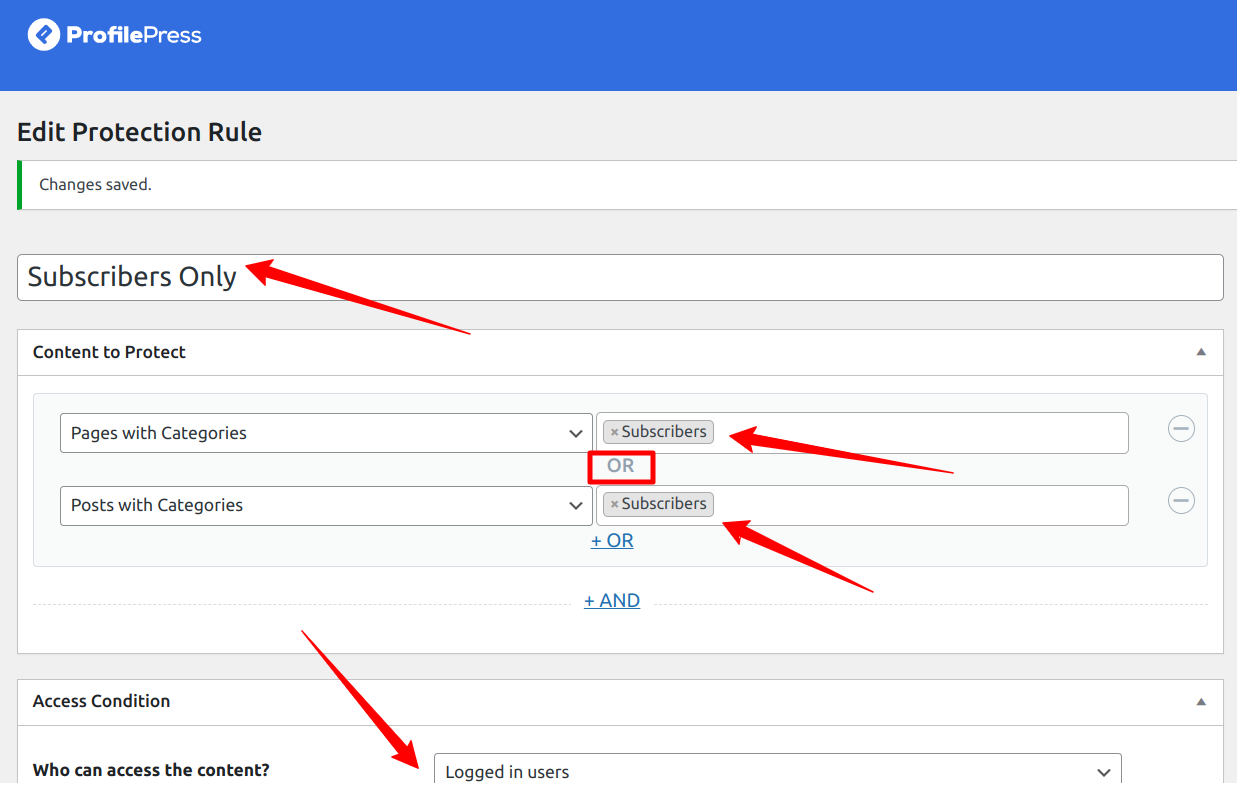
Enter a descriptive title for the rule you create, select the content you want to make private, use the logical OR to set the rules and use the access condition to select who can access the content.
In the “Content to protect” section, we will choose “Posts with Categories” and “Pages with Categories” options and select our “Subscribers” category, which we created in Step 2.
The Access Condition section allows you to assign who can access the content you want to protect, such as:
- Everyone (all users will have access to the content),
- Logged-in users (only those who are logged in can access the content)
- Logged-out users (only those not logged in to your website can access the protected content).
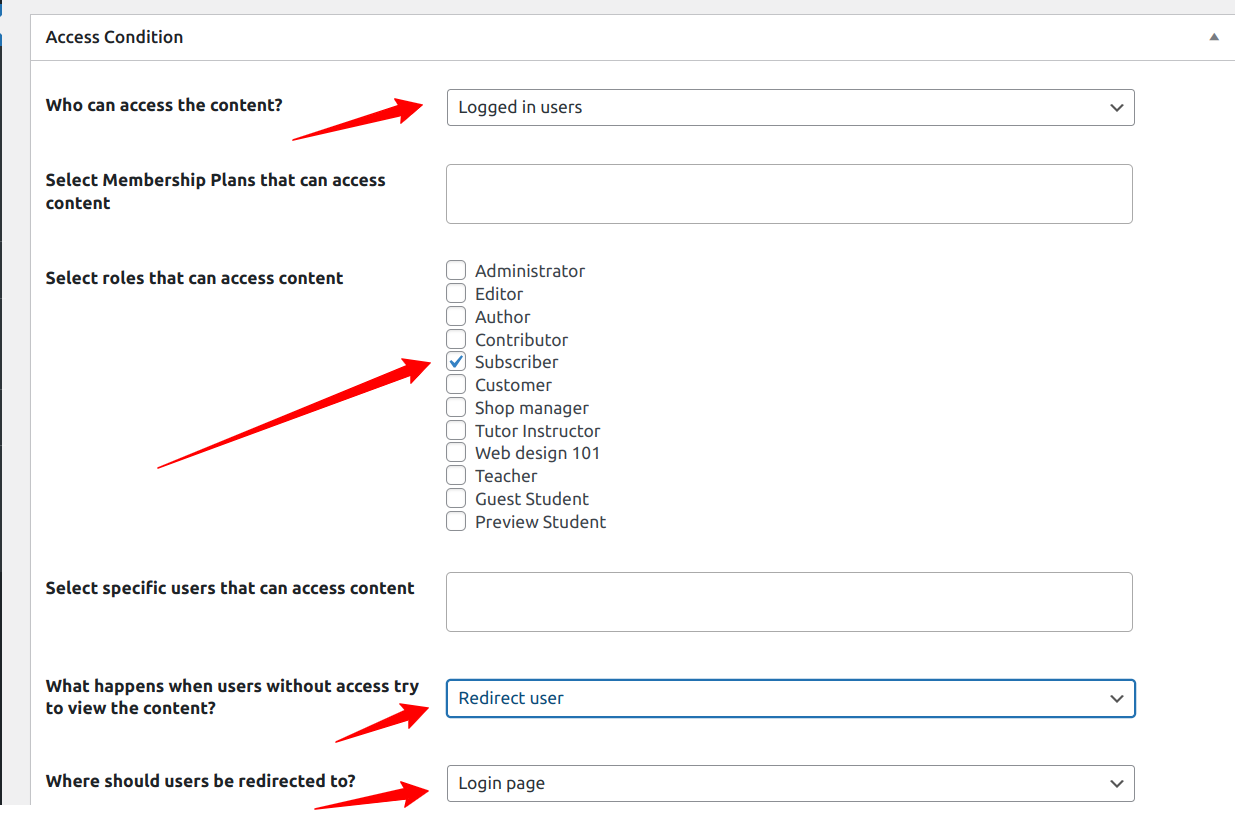
For this content restriction rule, we used the OR logic, where the protection rule will kick in when anyone accesses either of the selected posts or pages in our subscribers’ category.
We then selected “Logged in users” and “Subscriber” as our User Role. This means that only logged-in users with a “subscriber” role can access this category’s content.
With this setup, any new post or page added to our “Subscriber” category will also become private.
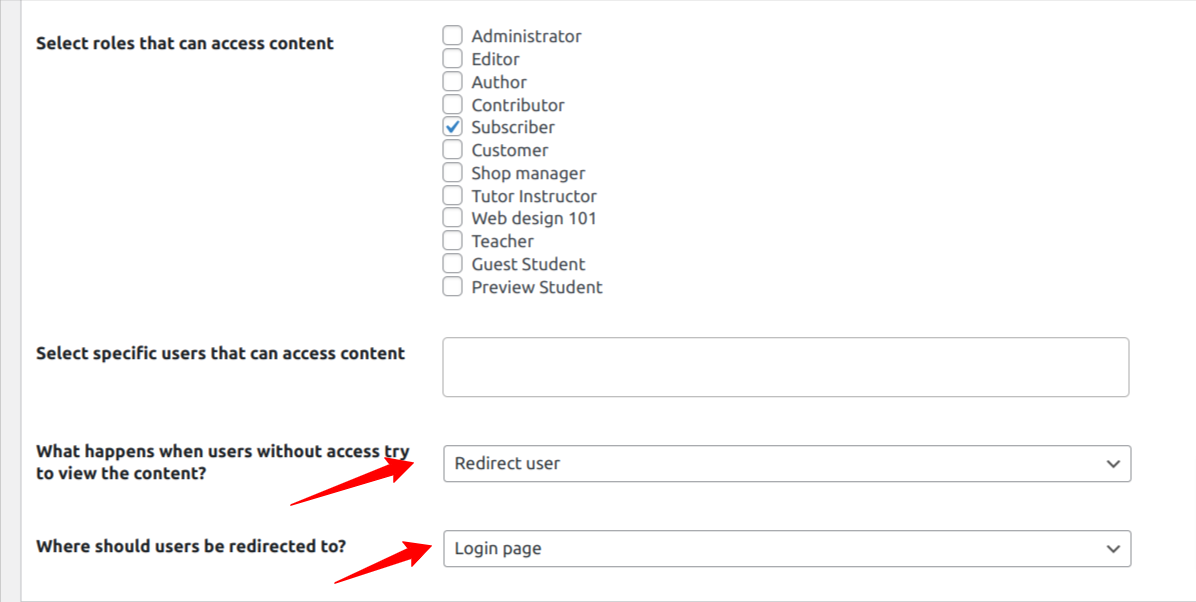
Under the “What happens when users without access try to view the content?” option, you can choose whether to “Show access restricted message” or “Redirect user” to another page.
If you choose the “Redirect user” option, you can select an existing page on your WordPress site or redirect the user to a custom URL.
For this article, we will redirect the user to a login page where they can log in to their subscriber account to gain access to the content, which is why we selected the login page option.
Hit the Save Rule button to save your settings.
Now, if we visit any posts or pages belonging to the subscriber category, we will be redirected to a login page, as shown below.
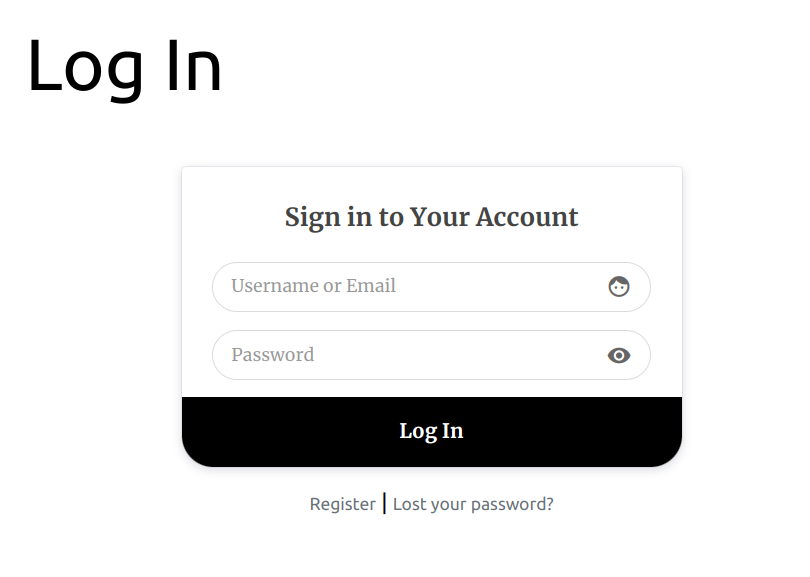
This is how easy it is to create WordPress private pages for Subscribers on your site.
Conclusion
In this article, we have gone through a step-by-step process of creating WordPress Private Pages. We have learned how to install and set up the ProfilePress plugin, create subscriber-only categories, create a private page, and post and restrict access to these pages using the content protection feature of ProfilePress.
Creating private pages for subscribers on your WordPress site is quite simple. With the help of a content restriction plugin like ProfilePress, with a few clicks and configuration, you can start creating exclusive content on your WordPress website.
Aside from content protection, ProfilePress can also help you build full-fledged paid membership sites, create payment pages, and much more.