How to Lock WordPress Content for Premium Subscribers
Looking for the best way to lock WordPress content for only premium subscribers?
Content locking is a powerful tool for monetizing your website. By locking your WordPress content, you restrict access to premium content to only customers who have paid for it. This can be particularly useful for bloggers, podcasters, and video creators who want to offer exclusive content to their most loyal fans.
One of the easiest and most effective ways to do this is to use a WordPress premium content plugin like ProfilePress. The plugin allows you to set up membership levels, custom registration forms, and custom login pages on your site. This way, you get to easily create and manage subscriber-only content in minutes, even with zero coding experience.
ProfilePress is both easy-to-use and highly customizable. You can use it to restrict access to specific pages, posts, and custom post types based on user roles and capabilities. It also allows you to customize the registration and login forms to match your website’s branding and design.
In this article, we’ll cover everything you need to know about locking premium content and its benefits. We’ll then explore two methods you can use to lock WordPress content using content locker plugins in a few minutes. Let’s get to it!
Why Lock WordPress Content?
As a content creator or publisher, it’s very important that you monetize your content. While online readers are often on the lookout for free content, many would still willingly pay for premium content. Provided they’re getting value for their buck. If you want to benefit from this model of revenue generation, then it makes sense to lock WordPress content.
Apart from monetizing your website, locking premium content also offers a way to reward your most loyal fans. By restricting access to subscriber-only content, you can ensure that only those who truly value your content are able to access it.
Some of the most popular use cases for content locking are bloggers, podcasters, and video creators who want to offer exclusive content. For example, a blogger may offer a premium membership that gives subscribers access to exclusive articles and behind-the-scenes content.
On the other hand, a podcaster or video creator can restrict access to exclusive episodes, videos, tutorials, and bonus content. Online learning platforms are not left out either. Course creators can ensure that only paid subscribers have access to course materials. This not only helps to monetize the course but also protects the content from being shared or distributed illegally.
Some of the major benefits of locking WordPress content include:
- Revenue generation: This remains the biggest benefit of offering exclusive content. Locking your site content allows you to monetize it and generate revenue.
- Increased engagement: Locking WordPress content can increase the perceived value of your content and, in turn, boost customer loyalty. When subscribers pay for content, they generally want to get the best for it. This often results in longer site visit duration.
- Manage access to site content: You can also lock WordPress content to control which customers get access to different sections or categories of your site content. This way, you’ll offer different content types to different customers based on their subscription plans.
How to Lock Premium WordPress Content
As earlier mentioned, the best way to lock WordPress content is to use a plugin. Following this approach makes it possible for even complete newbies to set things up in a few minutes. You also don’t need to hire any developer or possess coding experience.
In this article, we’ll show you two methods you can use to lock your site content. The first method involves using a membership plugin with a WordPress paywall feature. Alternatively, you can also use a lead generation plugin. With the second method, you can easily display the restricted access message in a popup. Irrespective of your needs, you can hardly go wrong with either method.
Let’s take a look at them.
Method 1: Use ProfilePress (WordPress Membership Plugin)
Looking for the fastest way to lock WordPress content on your site? ProfilePress is your best bet. The WordPress membership plugin allows you to restrict access to your site content in a hassle-free beginner-friendly way.
Using the plugin, here are some of the key features you get to enjoy.
- Custom content lock options: ProfilePress helps you to control every element of your site’s content. You can restrict access to individual pages, posts, multimedia, and other content on your website. After locking your content, you also get to customize the text and design of the message. A good way to maintain consistent colors and design across your site.
- Fully customizable membership plans: One of the commonest ways of offering premium content is to receive recurrent payment. ProfilePress makes it easy to set up multiple membership plans for your premium subscribers. You can use it to accept payment via various gateways like Stripe, PayPal, etc. You also get to allow subscribers to choose from different access levels and pricing options.
- Third-party app integration: Attract more subscribers and manage them using third-party apps. The plugin works with lead generation and email marketing tools. This way, you get all the features to attract new subscribers and manage them in one place.
Let’s quickly run you through the process of locking your WordPress content with ProfilePress.
Step 1: Install and Activate ProfilePress
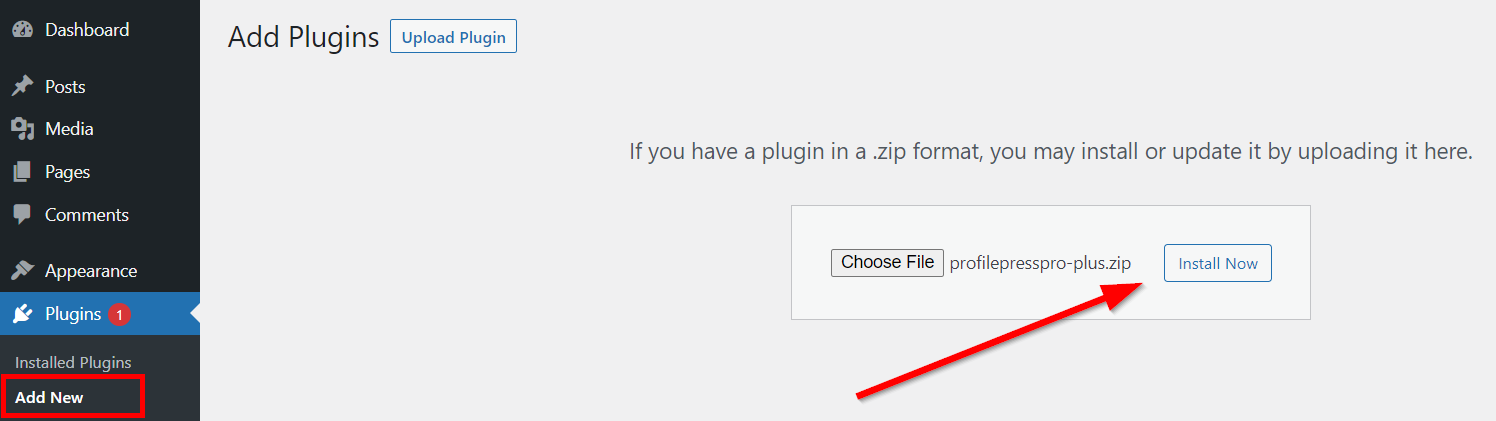
The first thing you need to lock WordPress content with ProfilePress is to get the plugin here. After getting your copy, check your registered email for a downloadable ZIP file and license key. You’ll need the key to activate the plugin later.
Next, get the ZIP file and head over to your WordPress back end. Navigate to Plugins > Add New > Upload Plugin and select the plugin file. Once it’s uploaded, click Install Now followed by Activate Plugin.
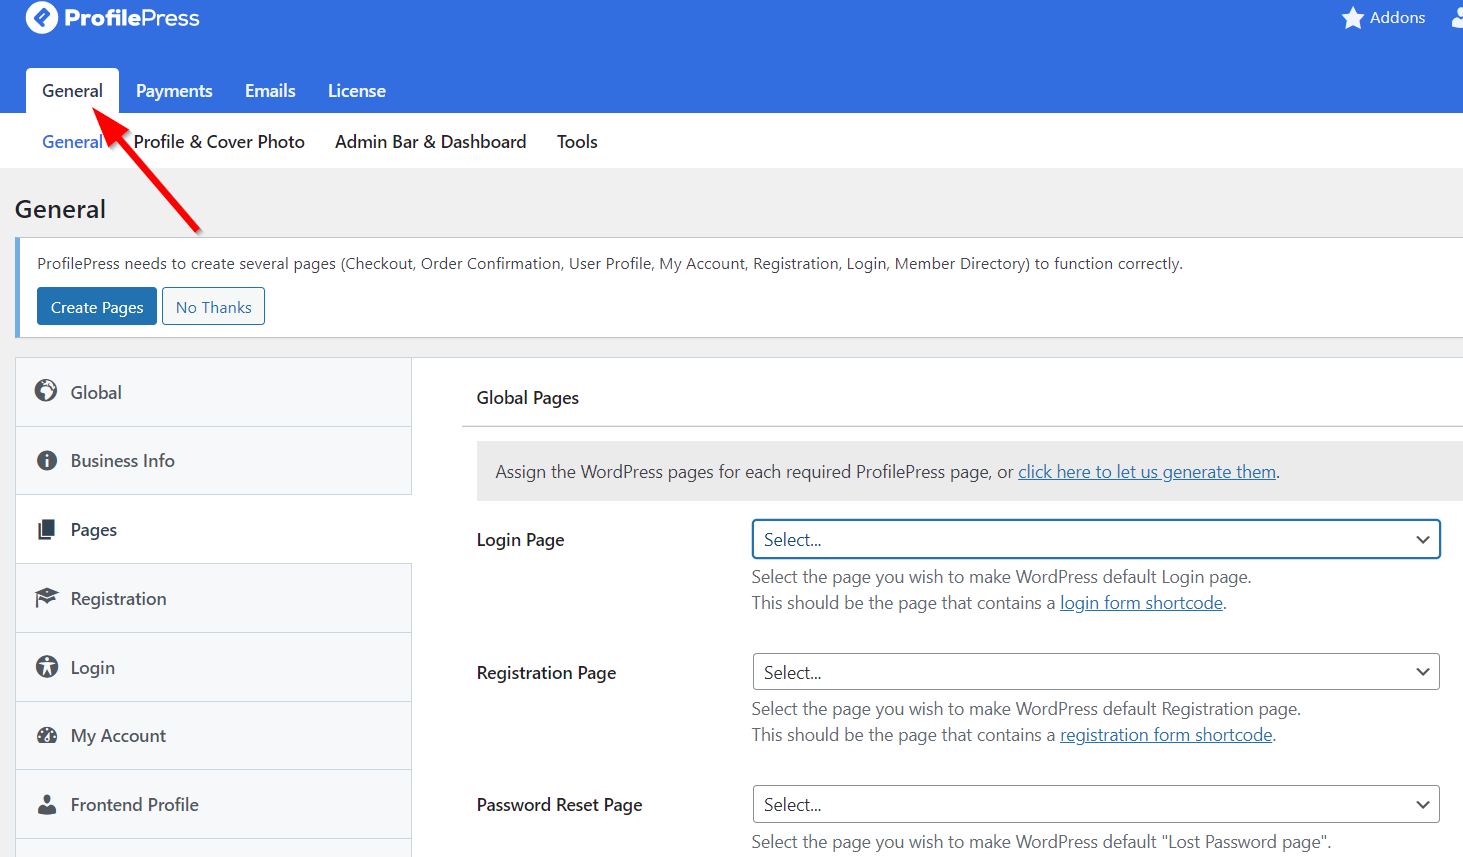
Navigate to the General tab to configure other important settings and get things running. For example, you can set up pages like the Checkout, Registration, and User Profile pages. It’s very important to set up these pages as buyers require them to join a membership plan and pay for your premium content.
Having set up the plugin, let’s lock some WordPress content for premium subscribers. We need to first create a new membership plan.
Step 2: Set Up a New Membership Plan
To grant access to premium content on your WordPress site, you need to add the subscribers to a membership plan. Not to worry, you’re not limited to recurrent plans only. You can also receive a one-time payment.
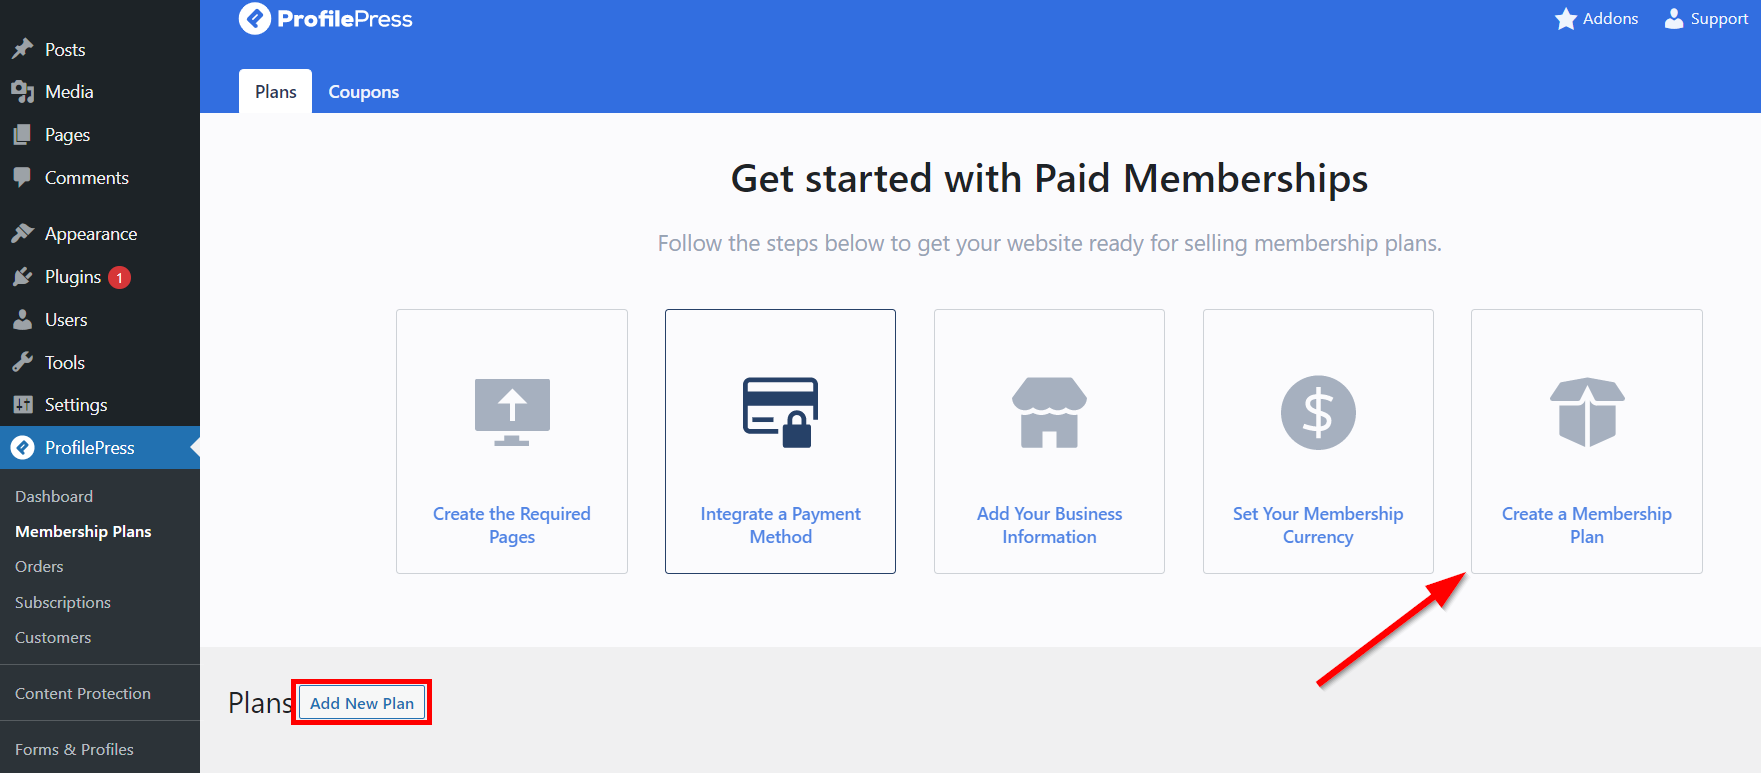
To get started, go to ProfilePress > Membership Plans > Add New Plan. You’ll also see other quick links on the plugin settings welcome screen.
On the next page, you’ll be able to make all the necessary changes to your membership plan. Under the Plan Details, enter the plan’s name, description, price, a purchase note for the buyer, and then select which user role you want to associate with the plan.
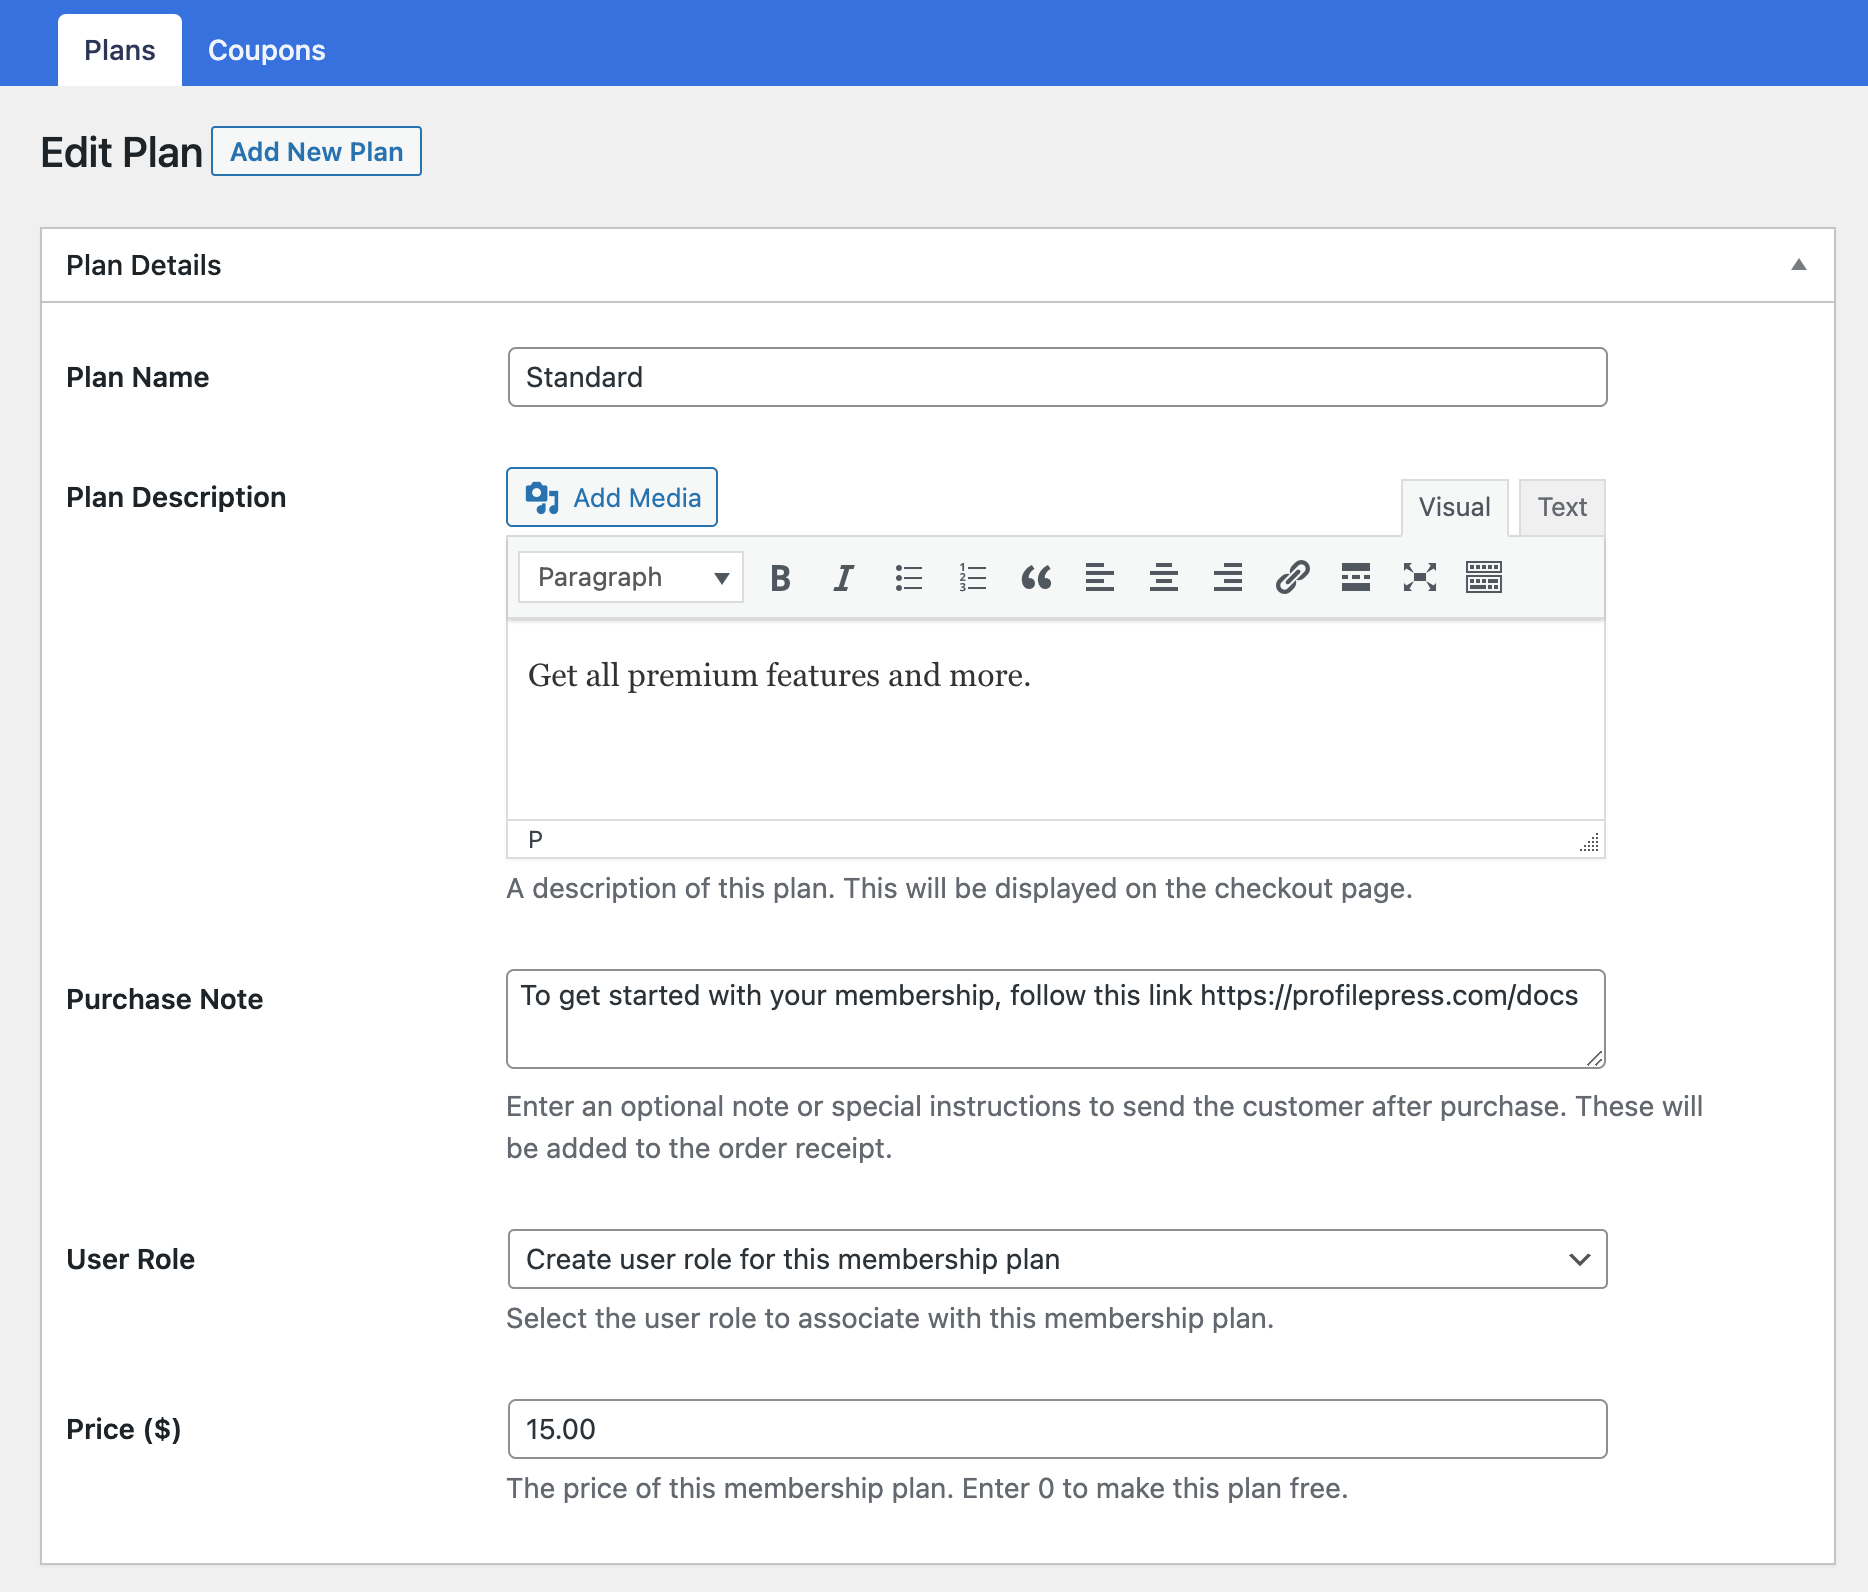
To decide the subscription length and billing frequency, scroll to Subscription Settings. You can also charge a separate sum for the first billing cycle under Signup fee. Once you’re done, click Save Plan.
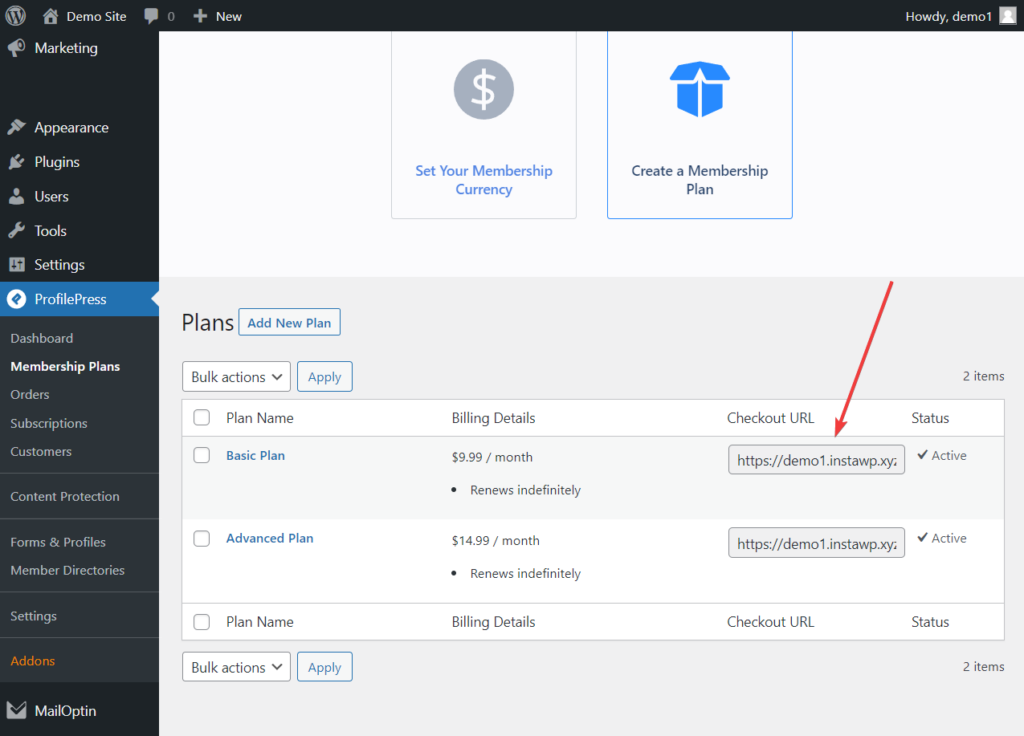
Next, go back to ProfilePress > Membership Plans > Add New Plan and copy the checkout URL for this plan. You’ll need it a little later.
In the next step, we’ll set up a payment gateway for receiving payments from subscribers.
Step 3: Configure Your Preferred Payment Gateways
ProfilePress supports Stripe, PayPal, Razorpay, Paddle, Paystack, Direct Bank Transfer, Mollie. To configure the, go to ProfilePress > Settings > Payments > Payment Methods.
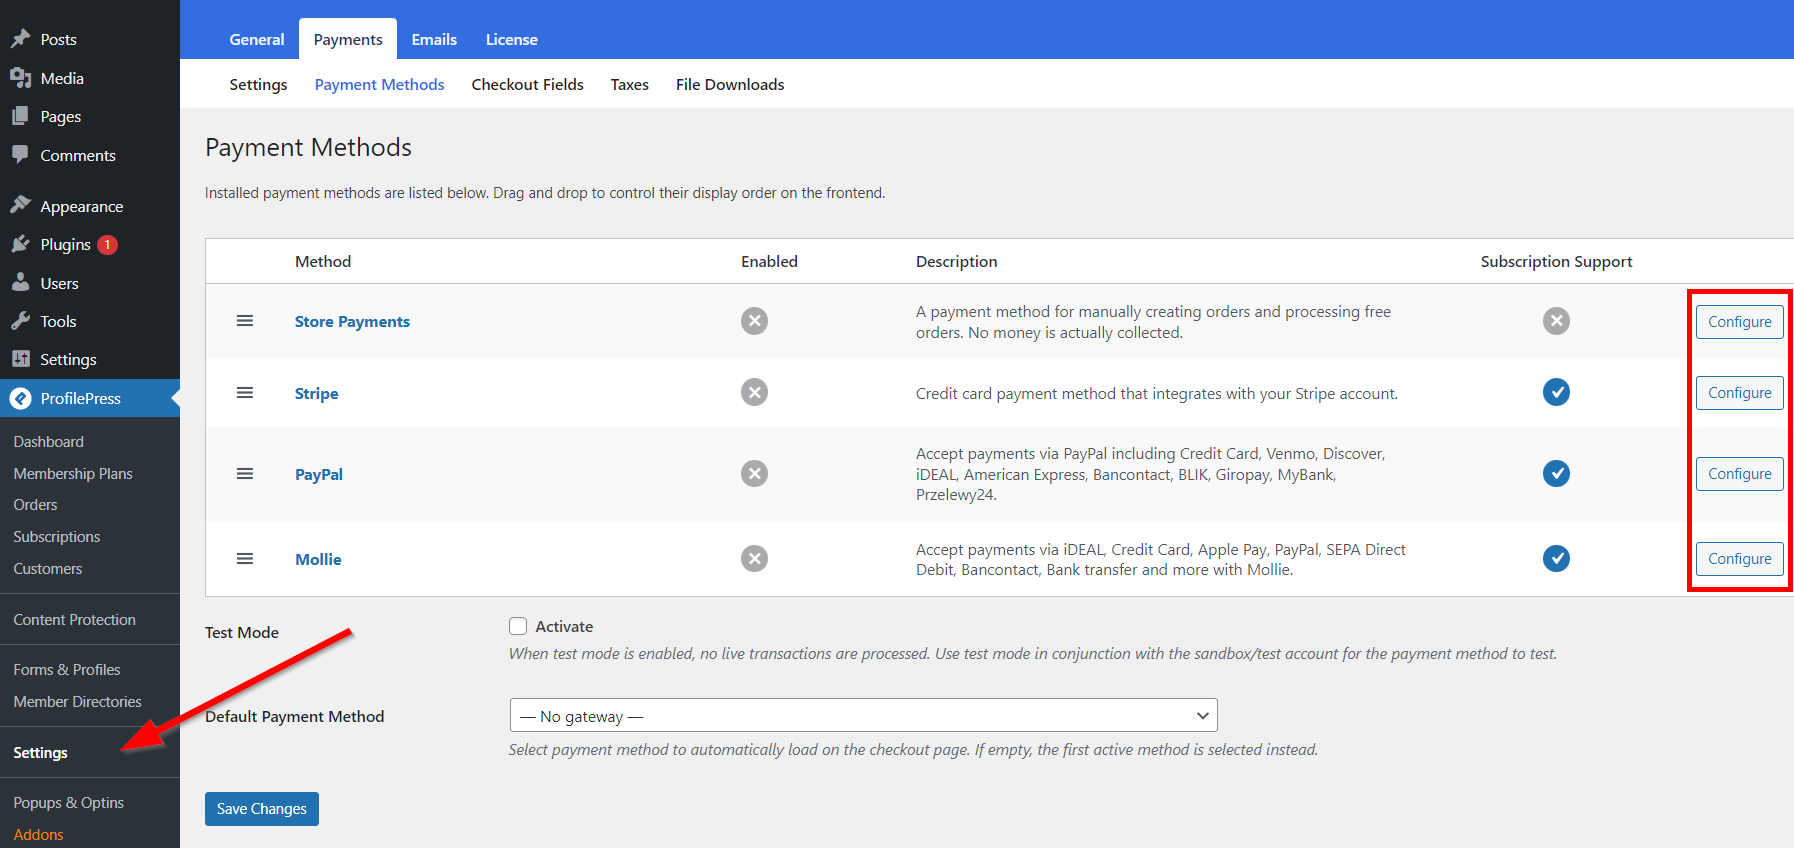
You can also choose to process orders manually and not receive payments in the store. Configure the Store Payments option for this. Select a preferred payment gateway if you want a payment method to load automatically on the checkout page.
The test mode allows you to use a sandbox account to test the payment gateway during configuration. Check Activate to enable this mode. Uncheck the box once everything is set.
Next, we’ll create a protection rule to lock the WordPress content we want to restrict to premium subscribers exclusively.
Step 4: Create a WordPress Content Protection Rule
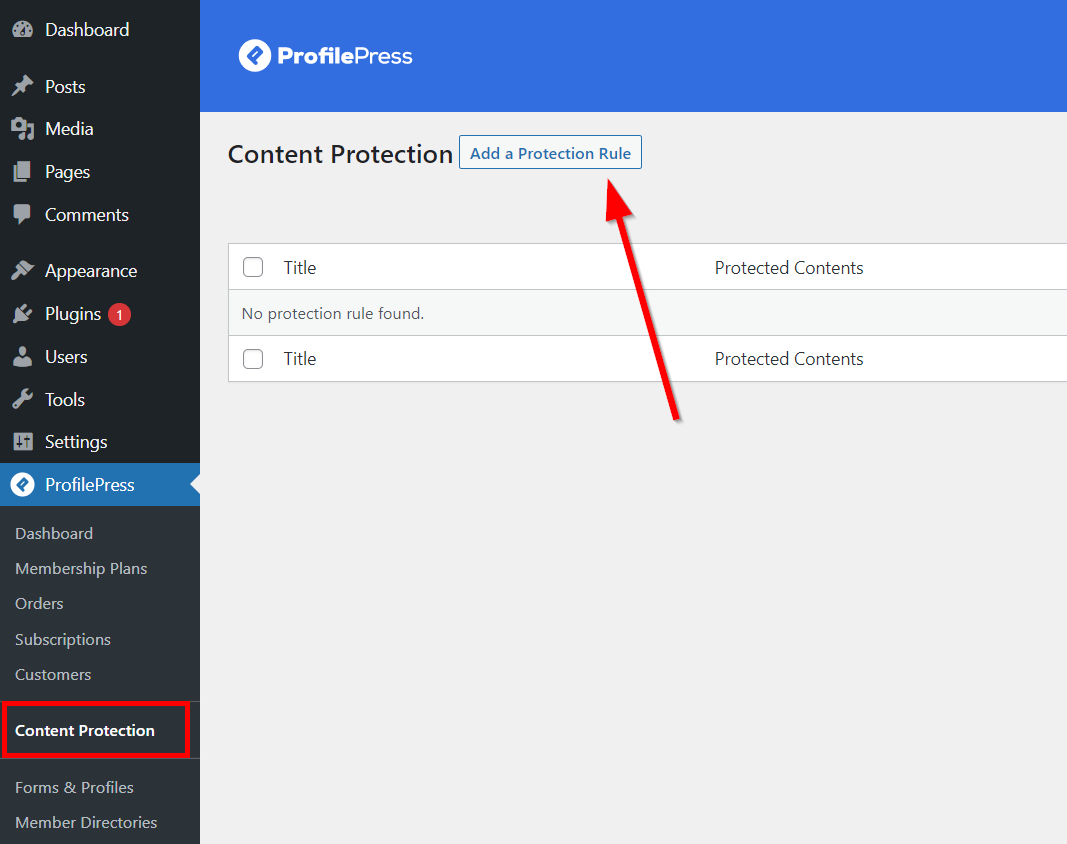
To lock WordPress content on your site, go to ProfilePress > Content Protection, and click Add a Protection Rule.
After adding a protection rule, you need to decide which content to protect and who can access this content. You can select All Posts and/or All Pages under the Content to Protect section.
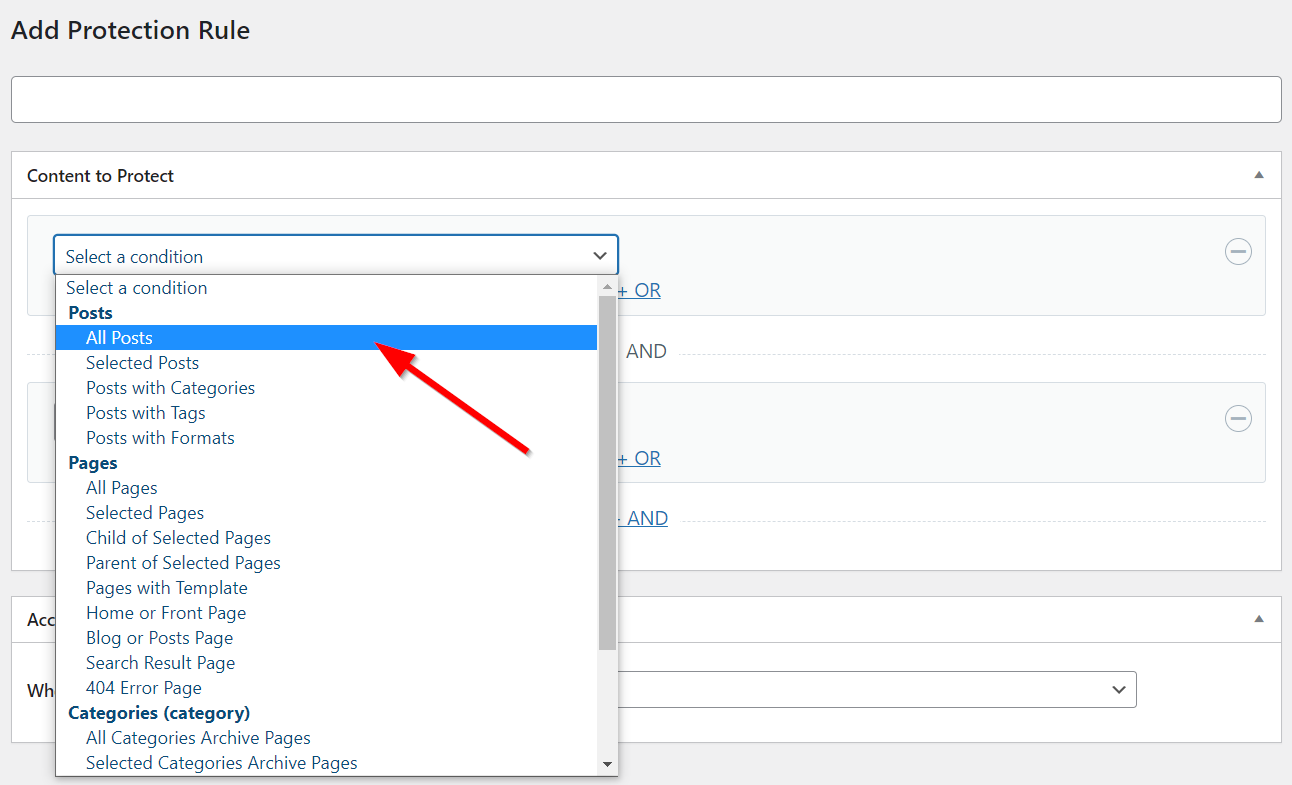
Otherwise, choose Selected Posts, Posts with Categories.
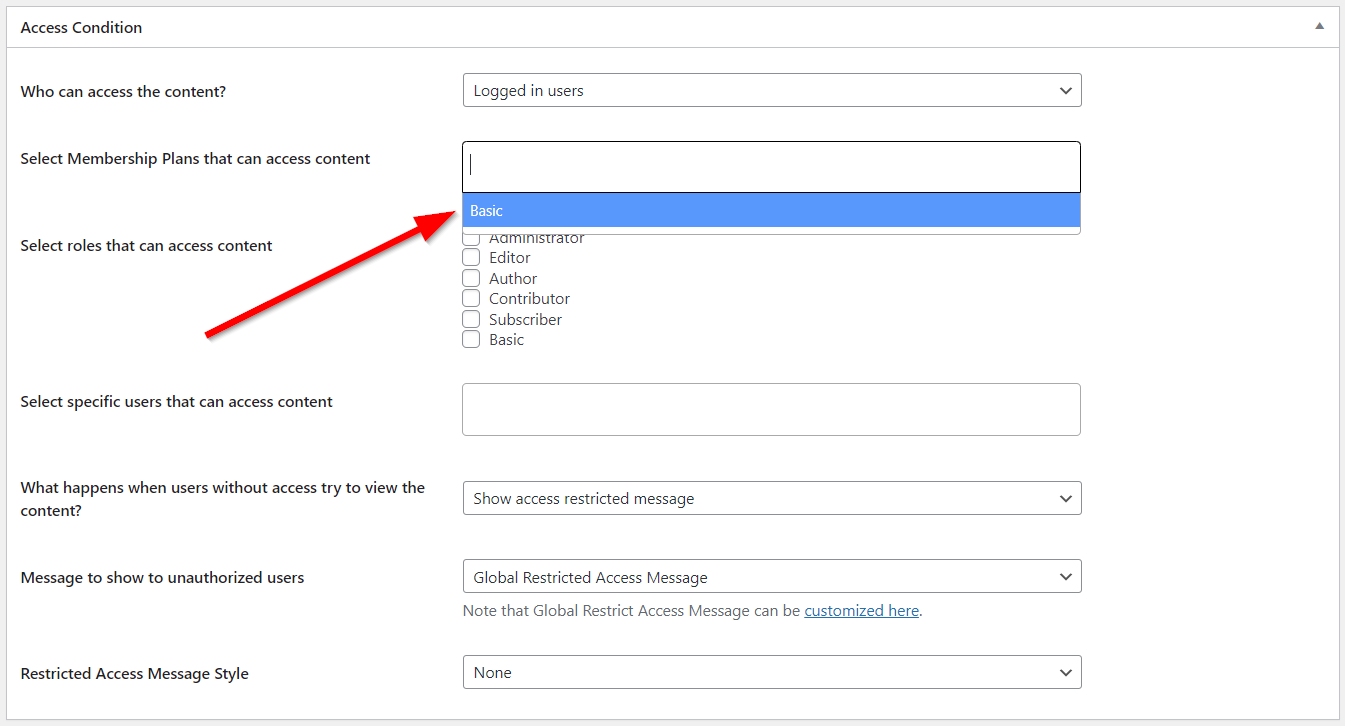
Under Access Condition, select Logged in users. Then select the membership plan you want to grant access to its subscribers. You can then restrict access to this content based on a membership plan, user role, or specific user IDs.
Step 5: Paste the Checkout Link in the Restricted Access Message
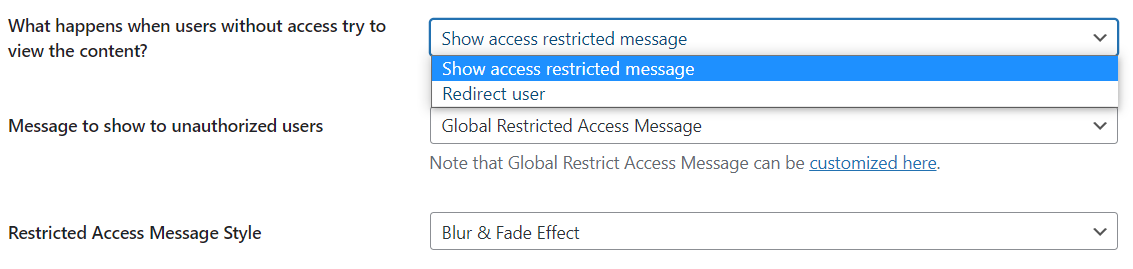
Finally, you need to customize the restricted access message. This is the message non-subscribers see when they try to view the locked content. ProfilePress allows you to show a ‘restricted access’ message or redirect the user to an entirely different page.
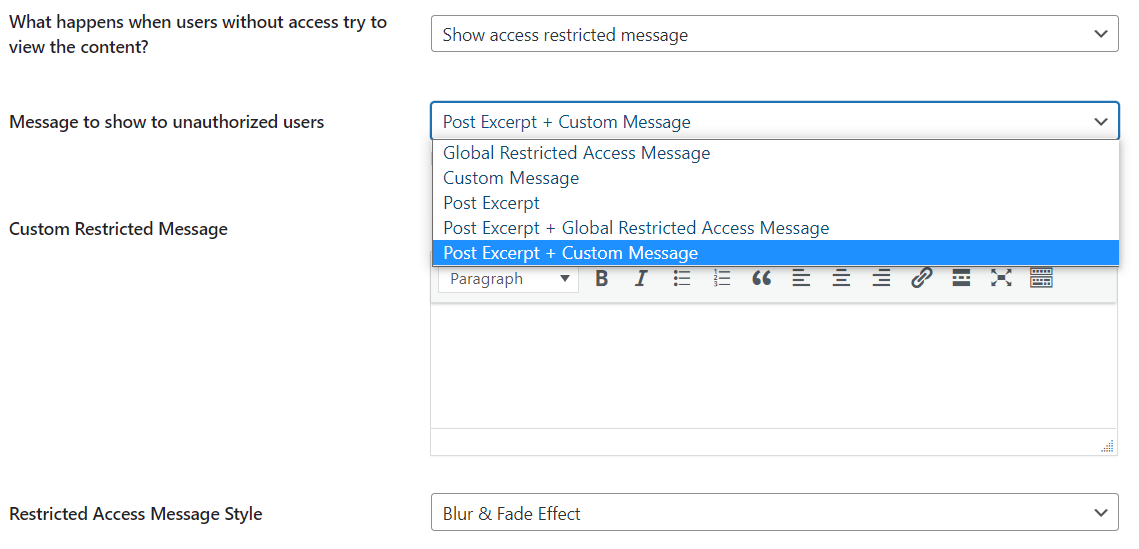
Next, choose the message to show unauthorized users. Then customize the content of the message. Remember to add a subscribe and login link in the message. The subscribe link should contain the membership plan’s checkout URL we copied earlier.
ProfilePress also allows you to add a blur & fade effect to the message. Once you’re done, click Save Rule.
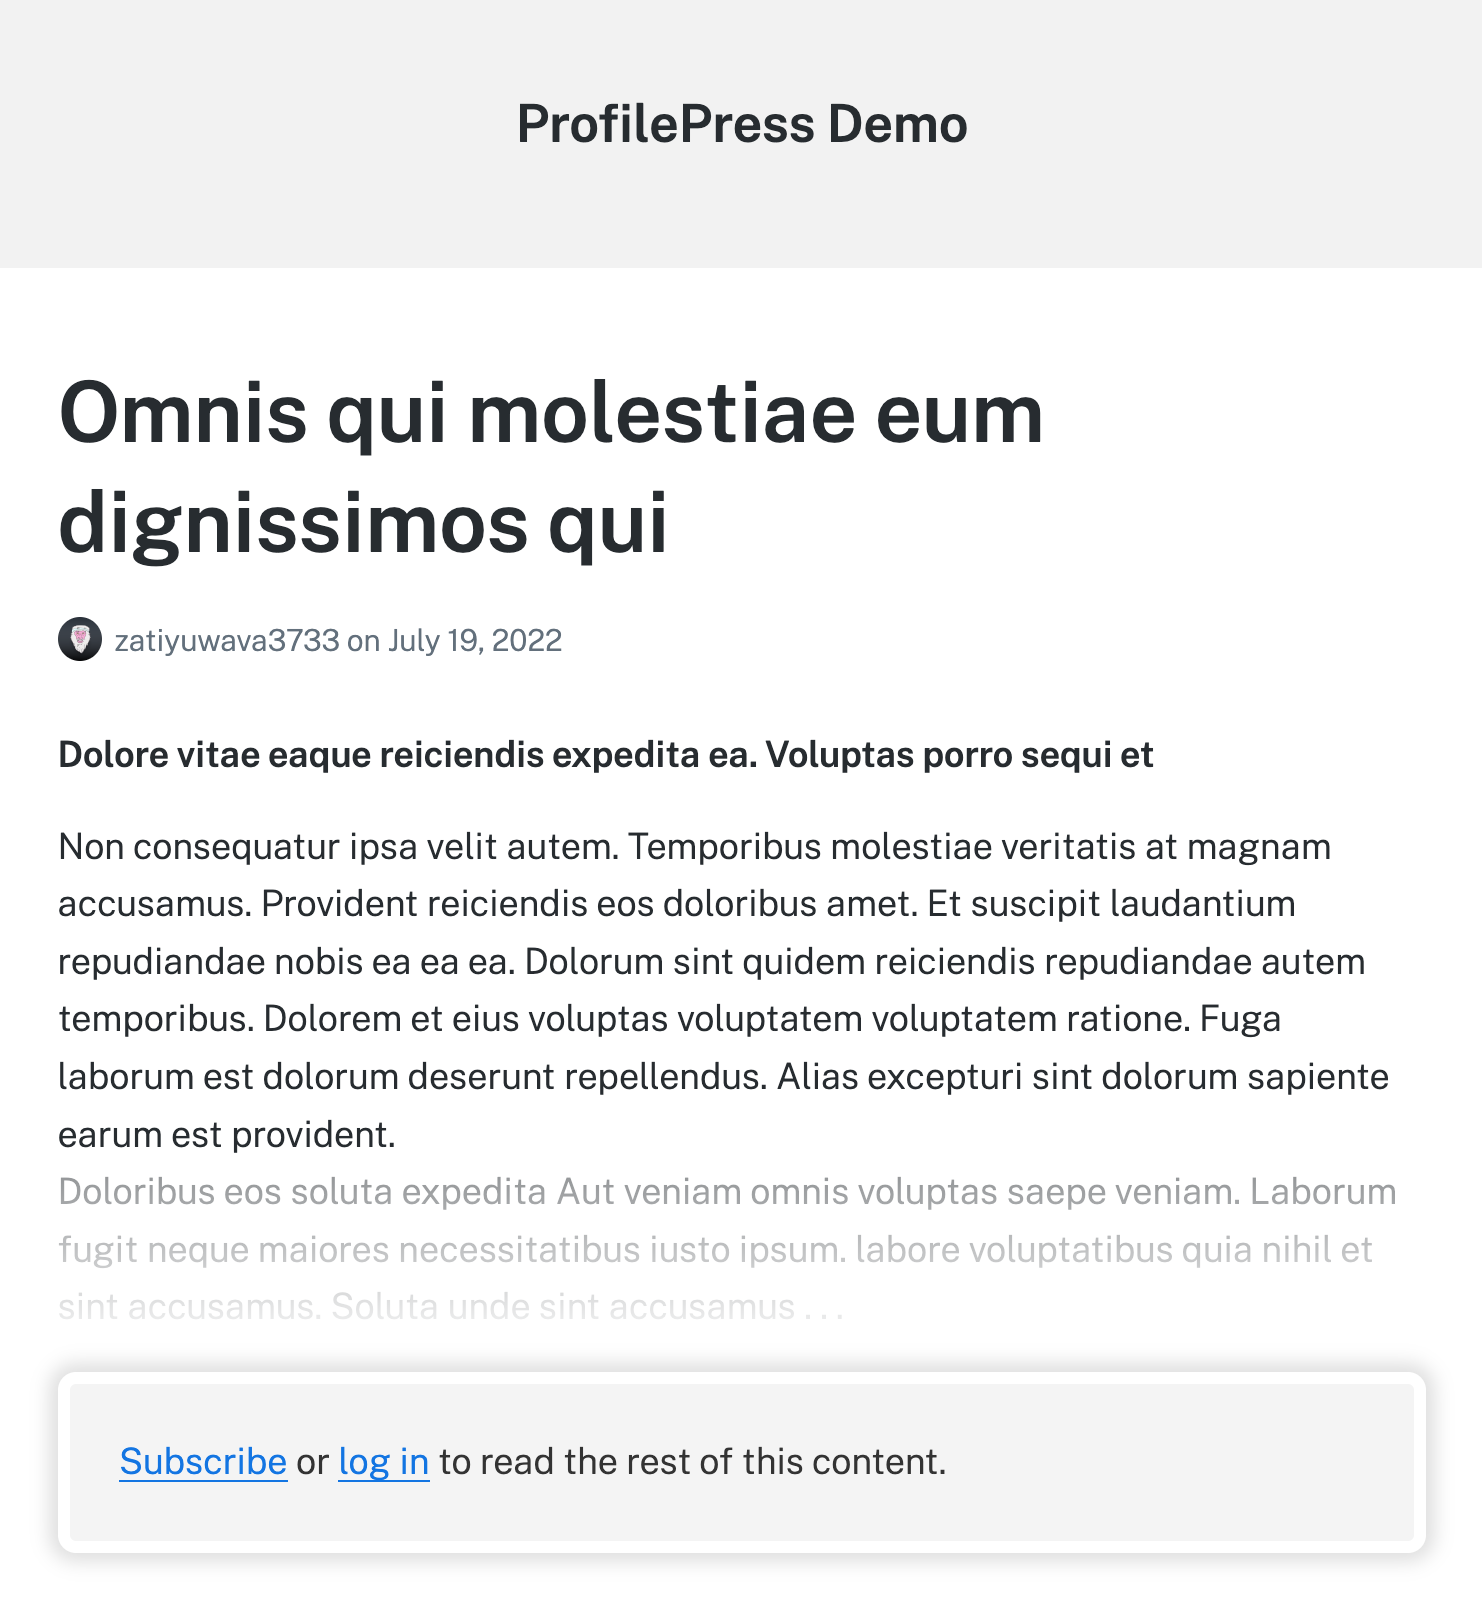
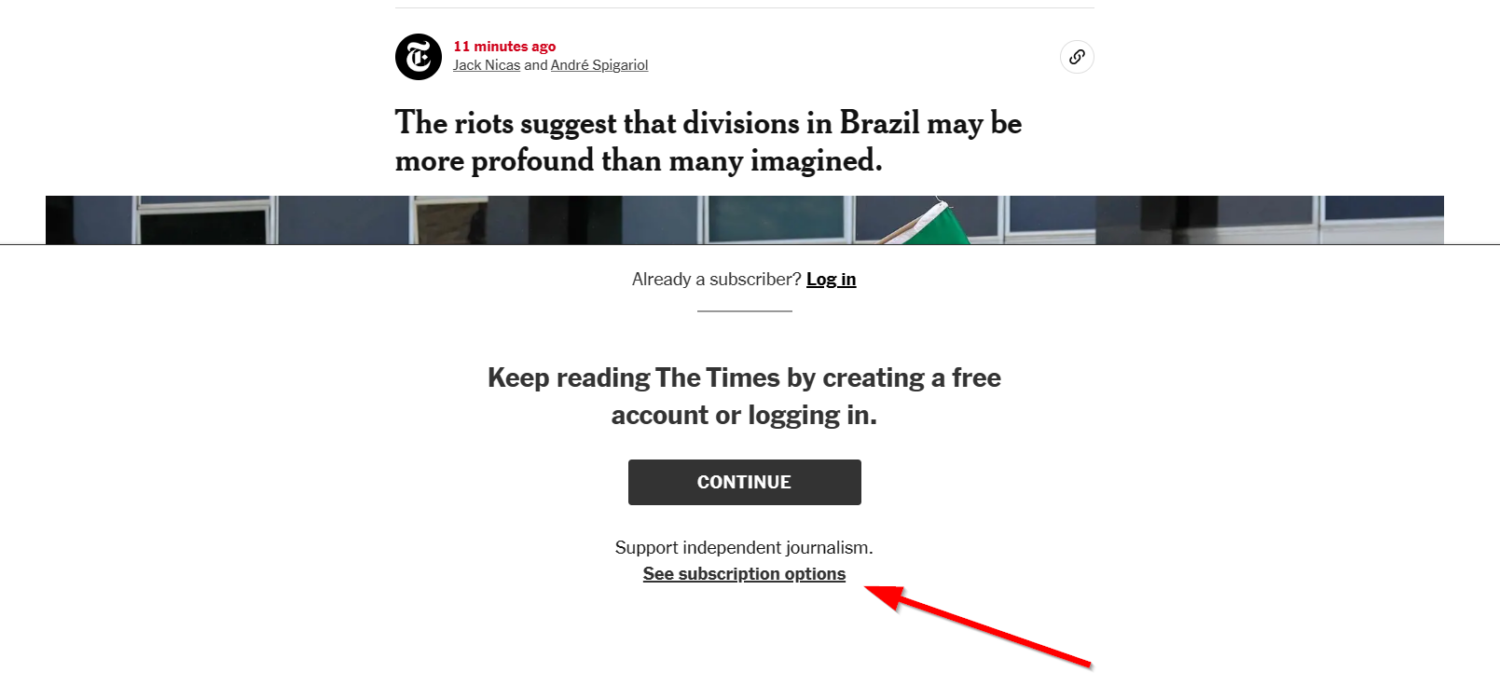
Now when site visitors who aren’t premium subscribers try to view the content, they’ll see something like the below.
Now, let’s examine the second method we recommend for locking WordPress content.
Method 2: Use MailOptin (Lead Generation Plugin)
The second method of locking WordPress content is to use a lead generation plugin. The plugin allows you to create an optin campaign that attracts new premium subscribers. It then hides the locked content behind an optin popup.
To lock WordPress content with this approach, you’ll need to first get your copy of MailOptin. Then you can follow the same steps in the previous section to install and activate the plugin.
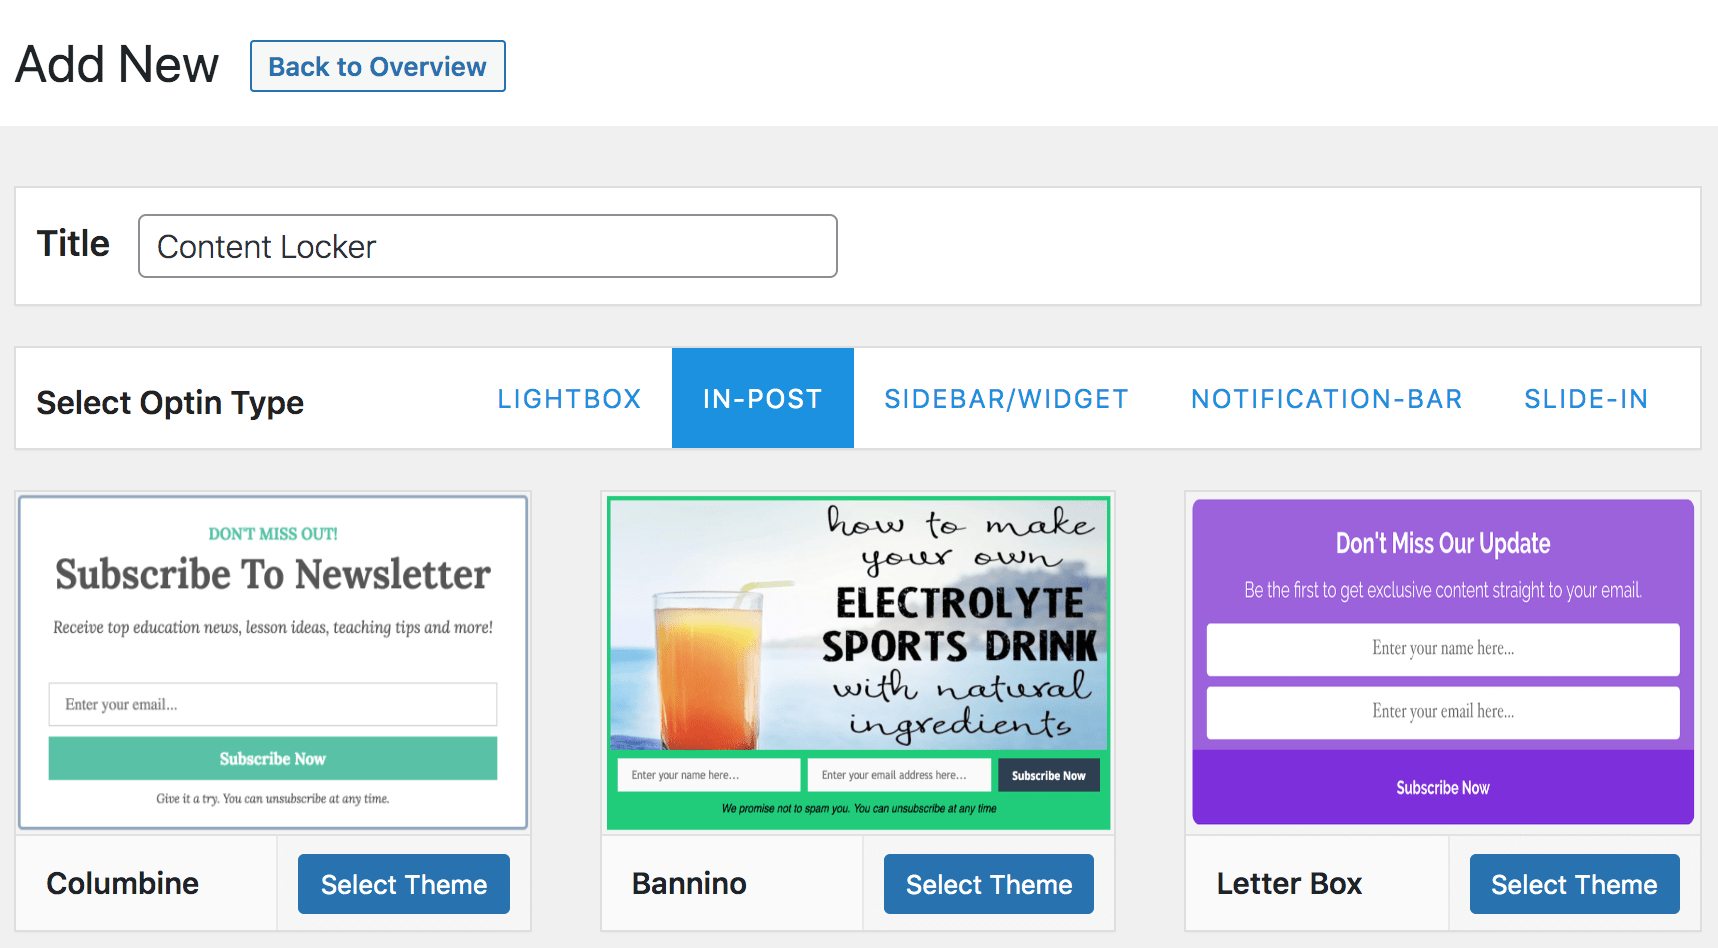
Next, go to MailOptin > Optin Campaigns > Add New. Name the new optin campaign as you wish and select ‘IN-POST’ in the Select Optin Type tab. This type of optin campaign allows you to assign the campaign to specific posts.
Now, you can design the optin as you wish. Make sure you add a link to the premium subscription checkout page in a button. You can also integrate third-party email marketing services in the ‘Integrations’ panel.
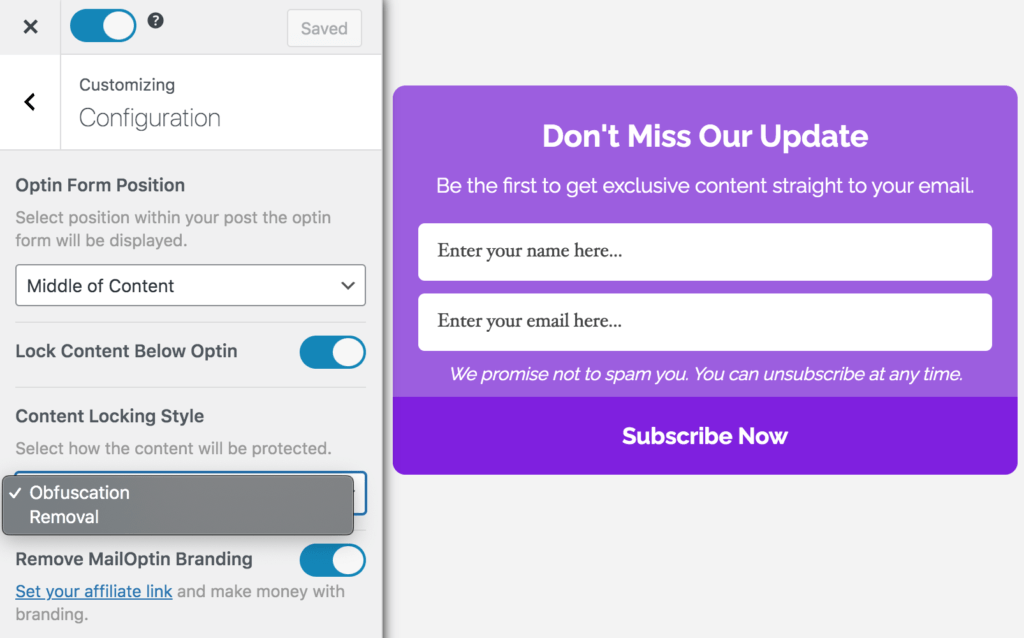
To configure the WordPress content lock feature, open the ‘Configuration’ panel. Then toggle on Lock Content Below Optin. You get to choose from 2 content-locking styles.
- Obfuscation: This option blurs the locked content behind the optin form. It’ll be illegible to the reader.
- Removal: It removes the content from the page completely and replaces it with the optin form.
MailOptin also ships with a shortcode or block embed feature that allows you to embed the optin campaign within a post manually.
Conclusion
In conclusion, locking WordPress content for premium subscribers is a great way to monetize your website and provide exclusive content for your most dedicated users.
ProfilePress and MailOptin are two powerful WordPress content lock plugins that make it easy to accomplish this. By using these plugins, you can create custom registration and login forms, manage user profiles and memberships, and capture email subscribers. Additionally, MailOptin’s lead generation features will help you to convert website visitors into customers.
In this article, we’ve shown you how to use these two plugins to lock WordPress content. Using these tools, you can make the most of your WordPress website and deliver an exceptional user experience to your premium subscribers.
So, are you ready to start making money with the premium content on your site? You can get started with your copy of ProfilePress right away!