How to Add X/Twitter Social Login to WordPress
Are you considering adding an X/Twitter social login to your WordPress site?
Social media integration can significantly impact user engagement in today’s digital landscape. Incorporating an X/Twitter social login on your WordPress site isn’t just an added feature; it’s a gateway to improved user interaction and community building.
With millions of monthly active users on X/Twitter, implementing this social login option can connect your website to a vast audience of potential users.
Remember, each extra step in the registration process can lead to user dropout. By offering Twitter social login in WordPress, you remove these barriers, allowing visitors to join your community using the same account they interact with daily on social media.
This guide will walk you through setting up an X/Twitter social login on your WordPress website using the ProfilePress social login addon.
Why Add X/Twitter Social Login to WordPress?
Think about how many usernames and passwords you currently have to remember. It’s a long list for most users, and many struggle to track all these details.
When you add X/Twitter social login to WordPress, you allow users to bypass the need for a new password, letting them sign in with their existing X account.
Other benefits include:
- Improved User Experience: Users enjoy logging in without extra credentials.
- Enhanced Engagement: Social logins increase the likelihood of returning visitors since logging in becomes simple and fast.
- Verified User Data: Profiles are linked to real social media accounts, helping to prevent spam registrations.
Setting Up X/Twitter Social Login on WordPress
First, you must install the ProfilePress plugin on your WordPress site if you haven’t already purchased the plugin, head to the pricing page to get your copy.
If you’re unfamiliar with the installation process, follow this guide on installing and activating the ProfilePress plugin.
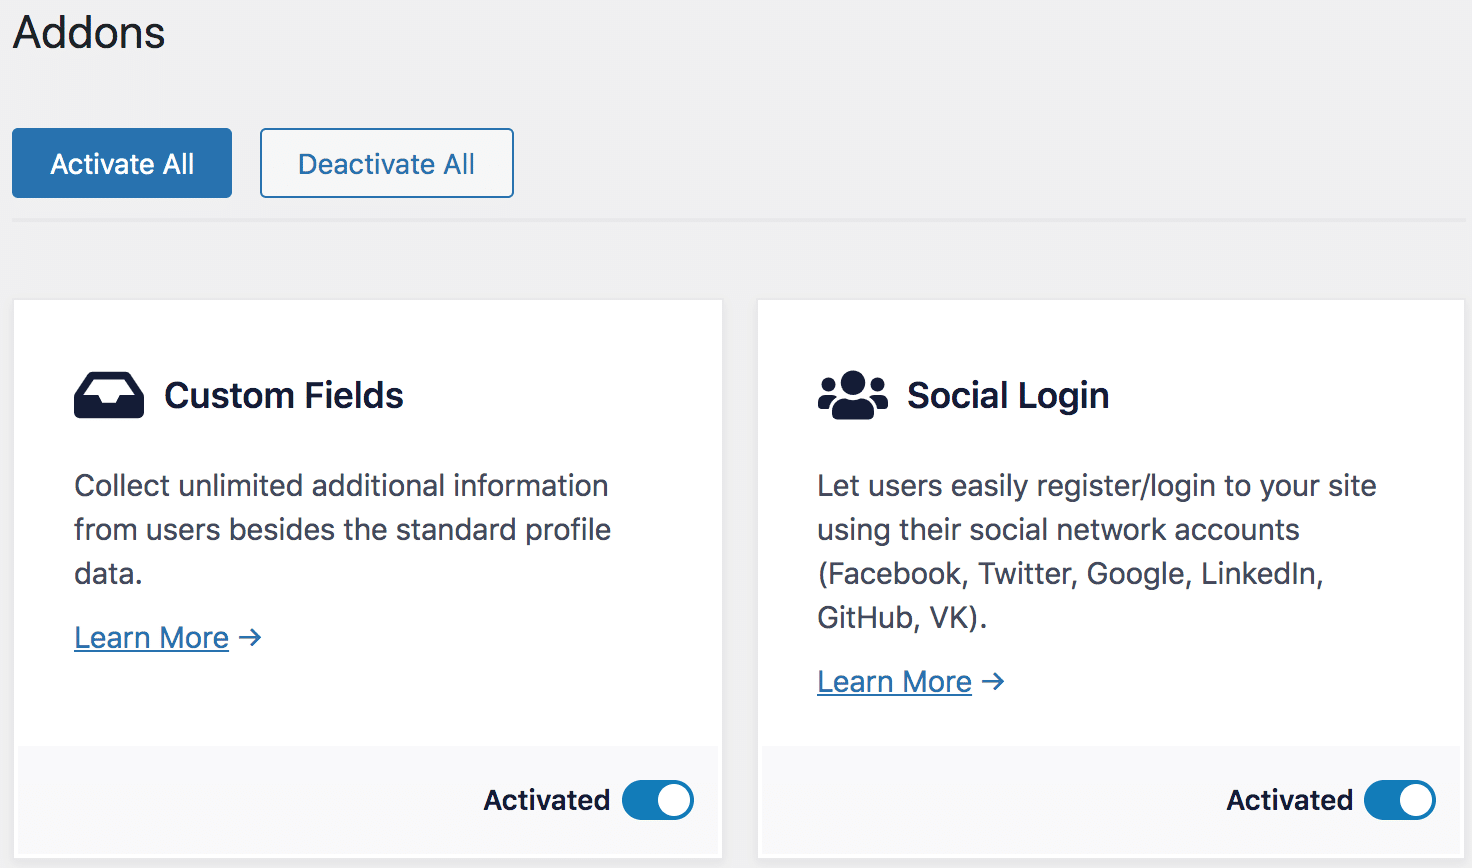
After successfully activating the plugin, we’ll need to enable the Social Login addon feature by navigating to your WordPress dashboard >> ProfilePress > Addons.
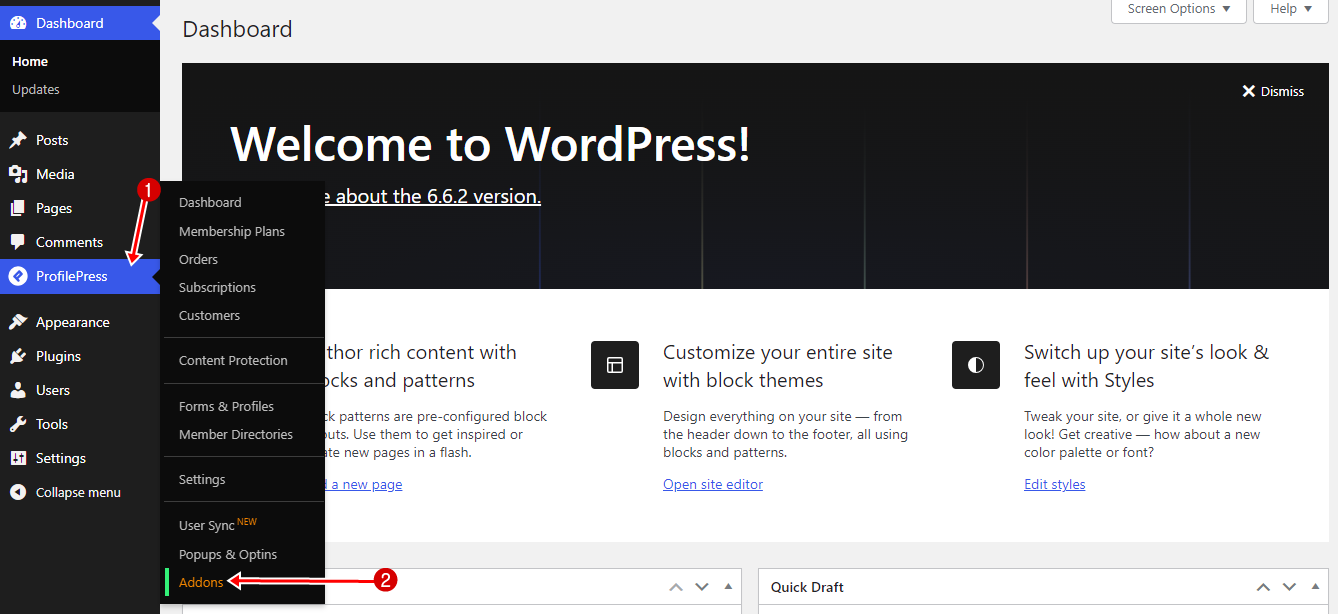
Locate the Social Login addon on the list and enable it.
Creating an X/Twitter App
You need to create a Twitter app to allow users to log in to your WordPress site with their Twitter account. To create a new Twitter app, follow the steps below:
Visit https://developer.x.com. If you are not logged in, use your X account to access the site.
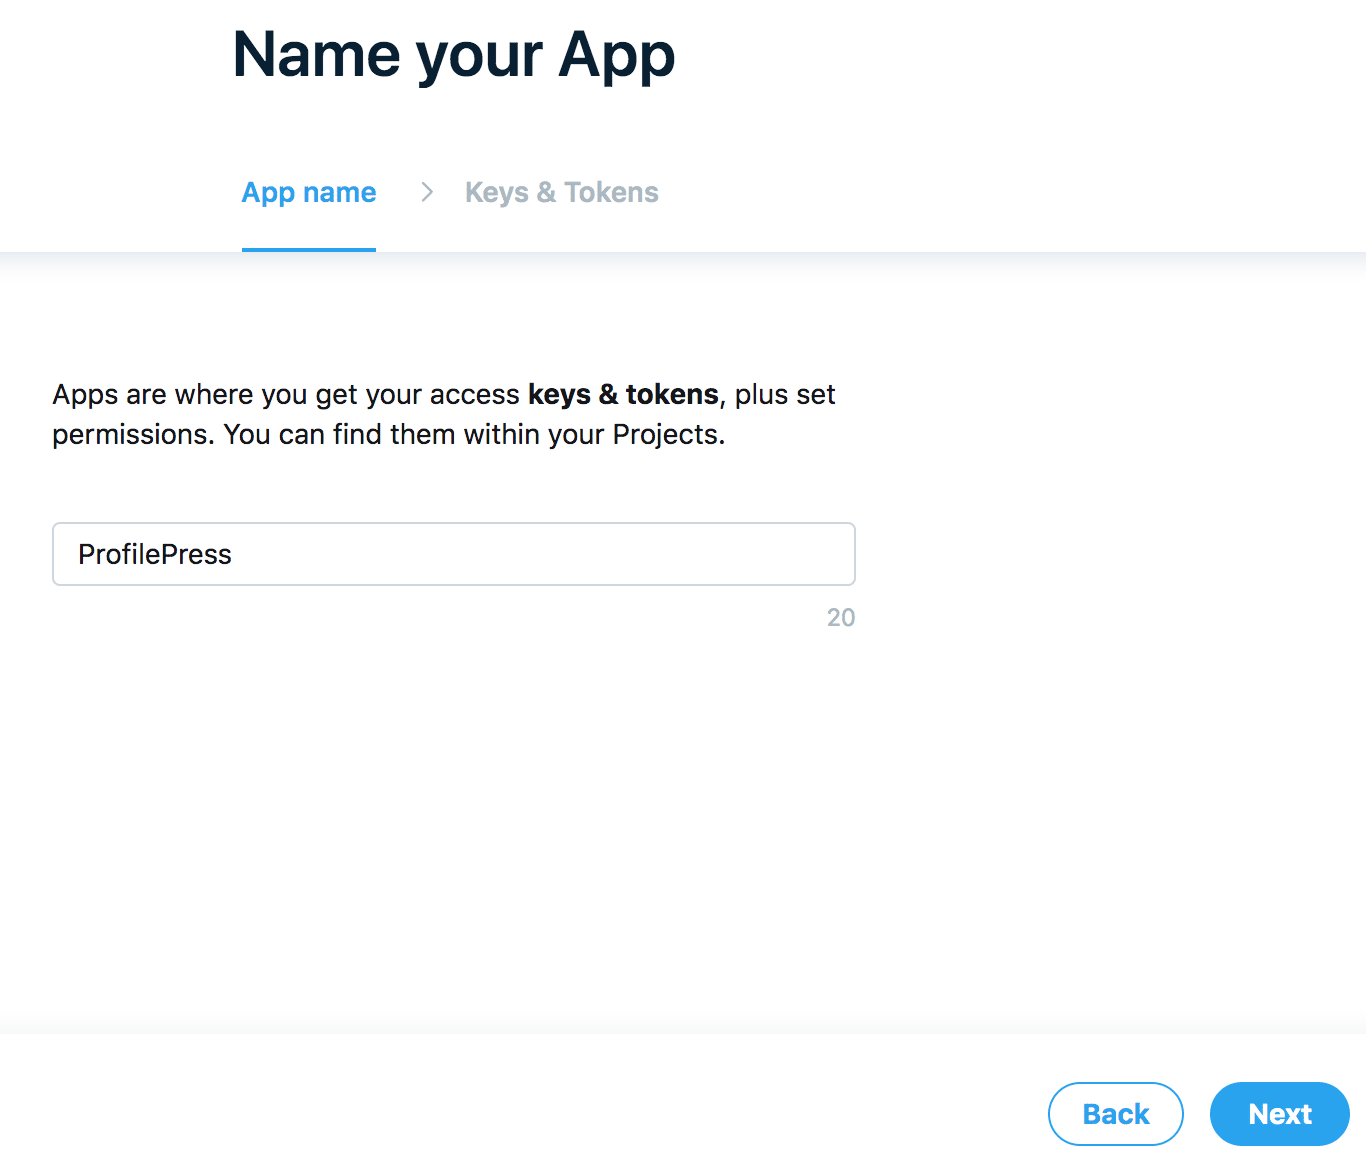
Go to Projects & Apps >> Overview and click the “Create App” button under the Standalone Apps section.

Name the app and hit the Next button to reveal your API credentials.
Copy and save the API key and secret to a secure location because it won’t be shown again.
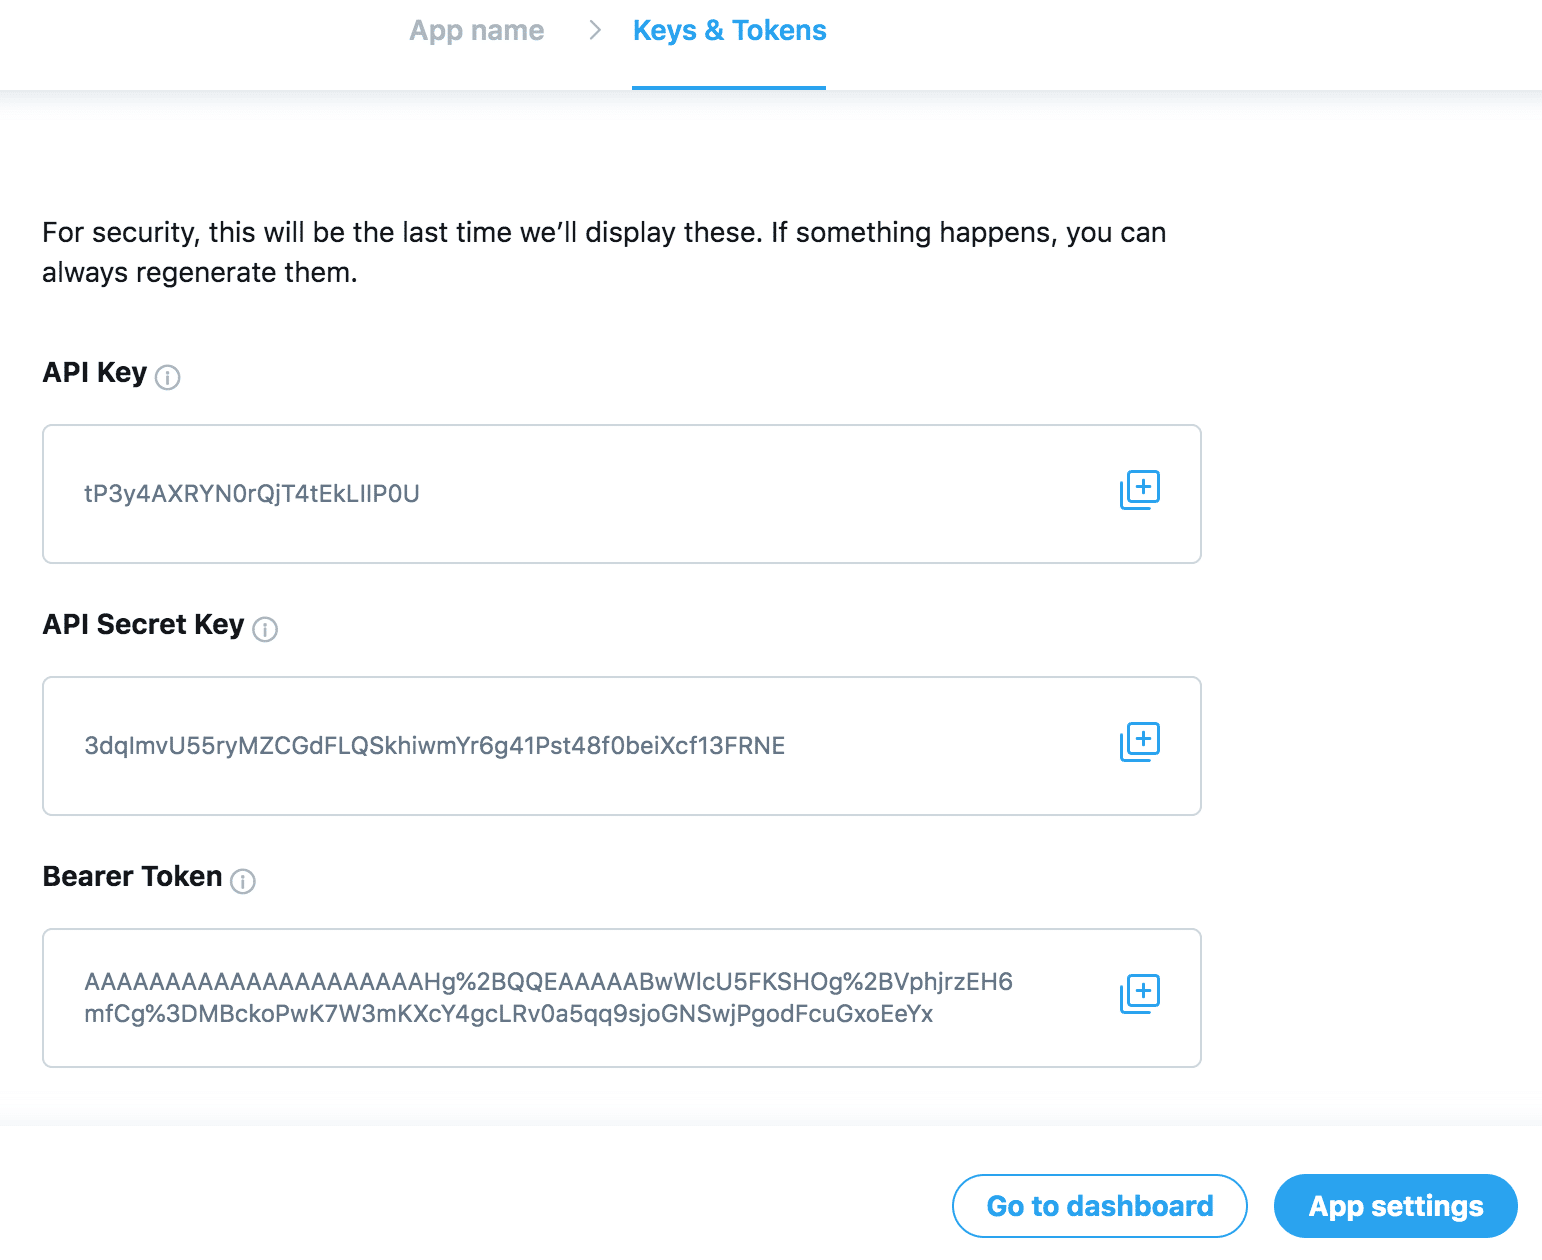
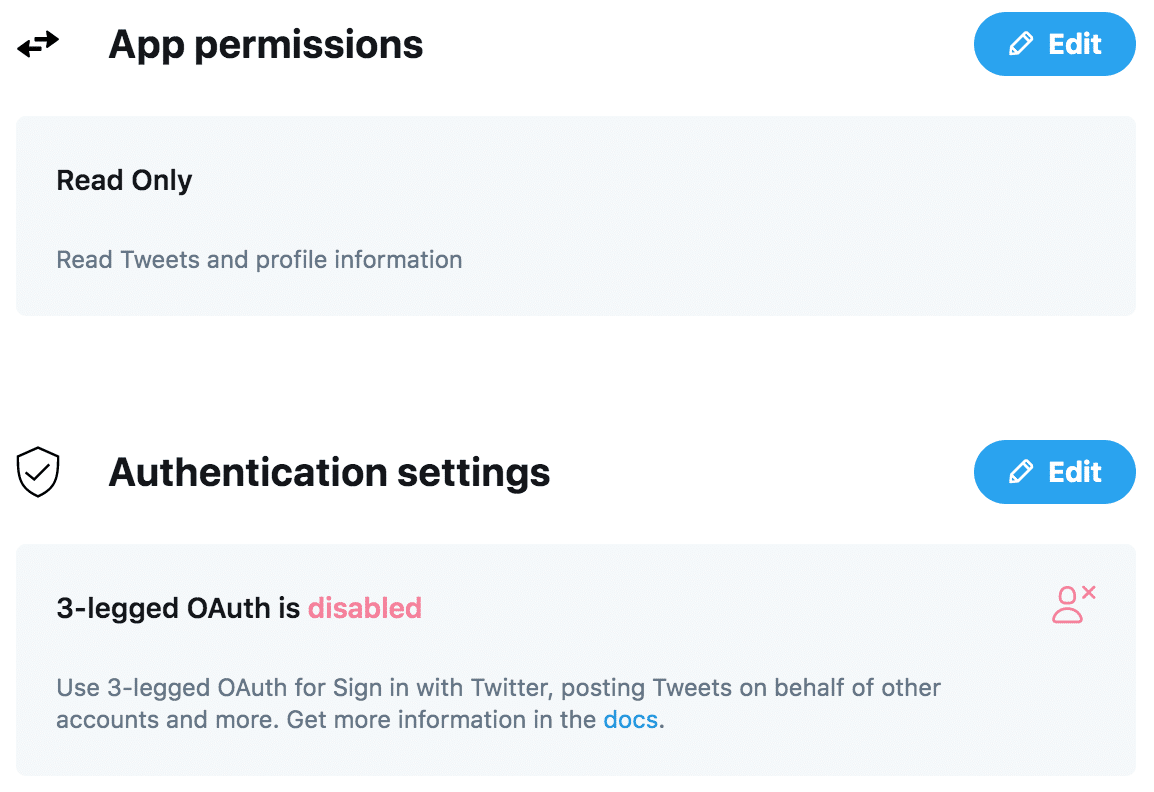
Click the “App settings” button to add an app icon and description and enable 3-legged OAuth.
To enable 3-legged OAuth, click the Edit button in the Authentication settings section.
Enable “3-legged OAuth” and “Request email address from users” and add the following as a callback URL https://yourwebsite.com/ppauth/twitter. Replace yourwebsite.com with your website domain.
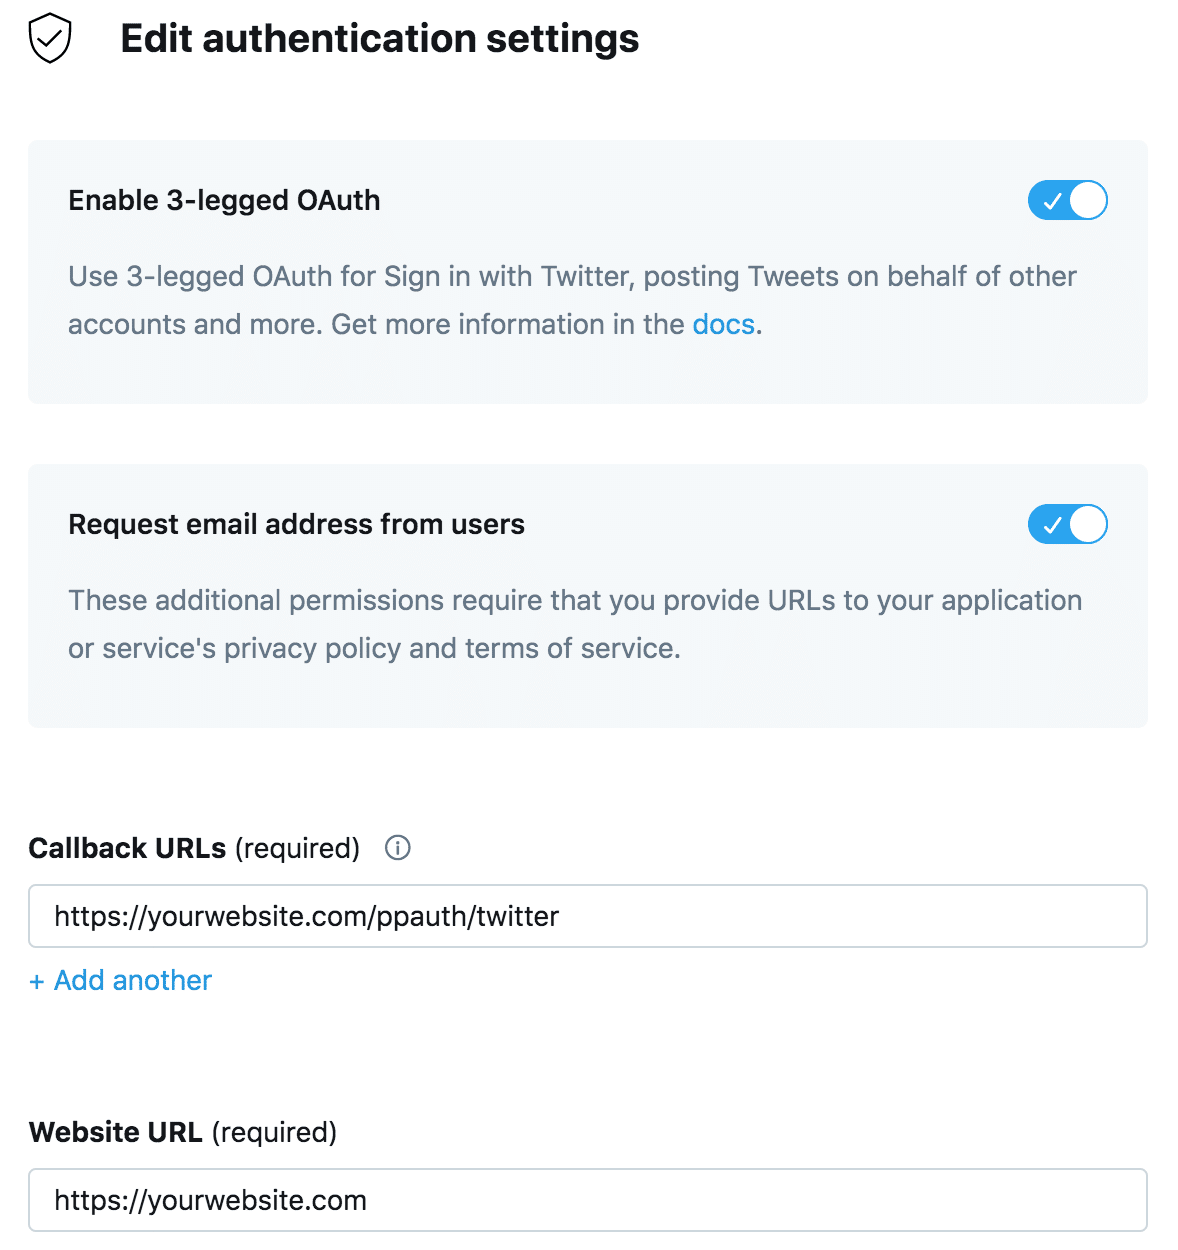
Don’t forget to fill out the required fields for the website, privacy policy, and terms of service.
Save the changes.
Integrating the Twitter App with ProfilePress
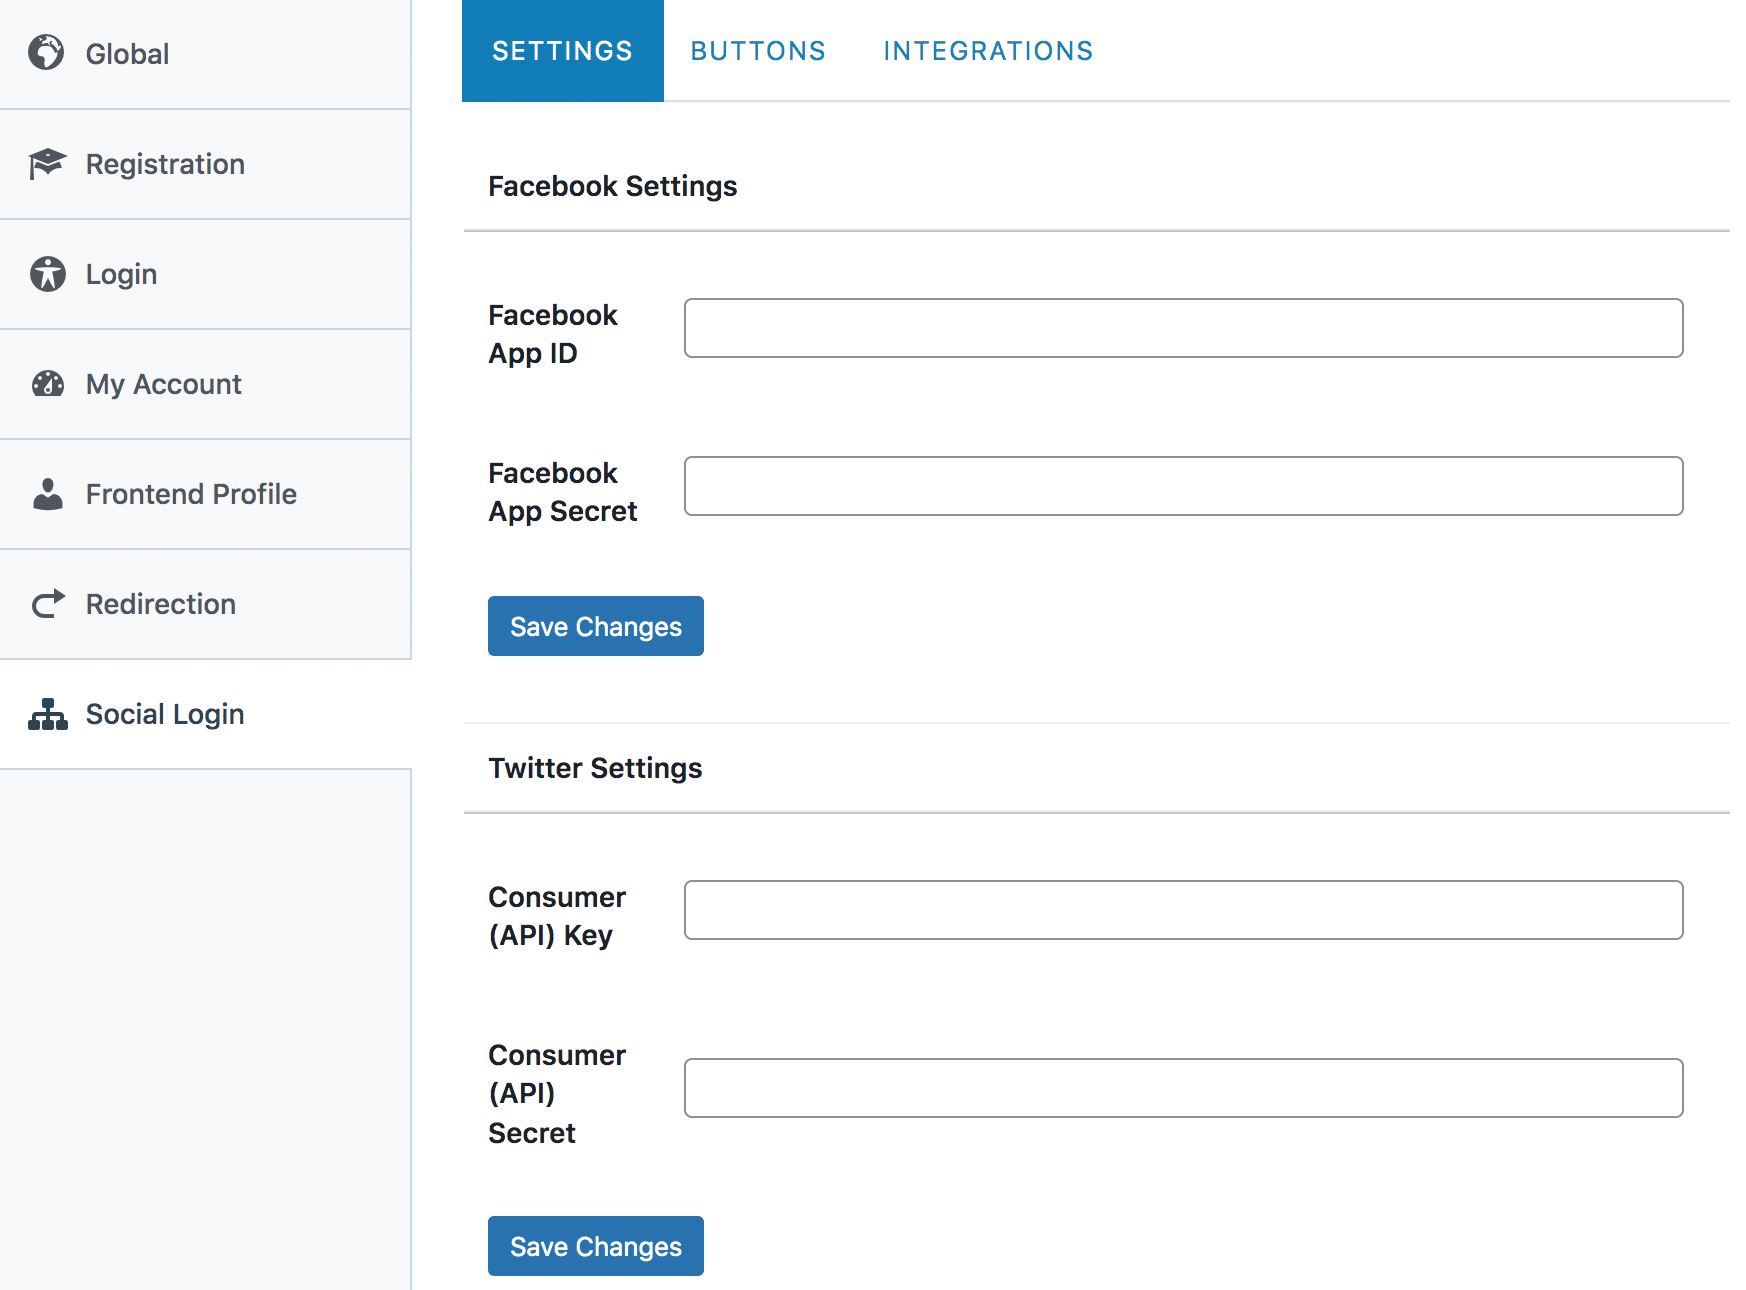
Login to your WordPress dashboard. Go to ProfilePress >> Settings and open the Social Login section.
Save the API Key and API Secret Key to the settings.
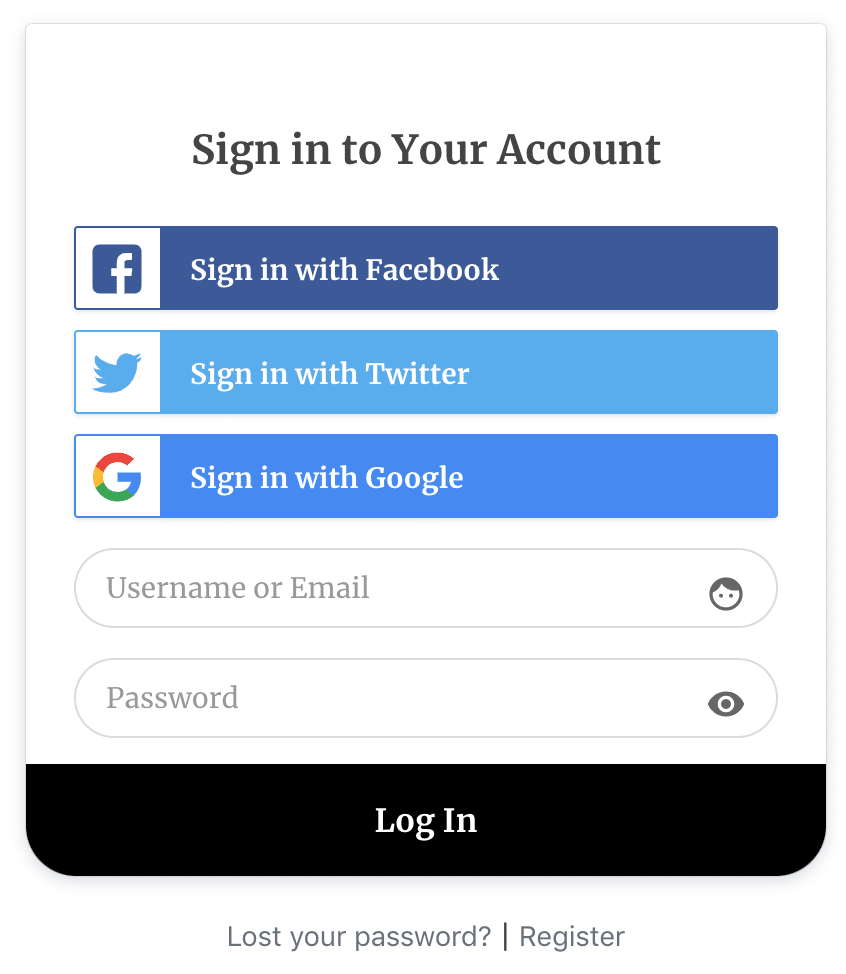
To complete the Twitter login integration, follow this article to learn how to add the Twitter login button to your registration and login forms.
Conclusion
Integrating Twitter social login on your WordPress website using ProfilePress is a practical and valuable feature for modern websites. With a simplified signup and login process, you create a welcoming environment for users who might otherwise hesitate to sign up.
Enhance the experience of your WordPress site users with X/Twitter social login today.
Get ProfilePress & The Social Login Addon