Building a WordPress Member Directory Page
Do you want to create a WordPress member directory page?
The ProfilePress plugin allows you to create unlimited WordPress member directories for your membership site.
If you run a membership or community site, you’ll need an easy way for people to contact one another. This means making everyone’s contact information and other key details readily available. To do that, you can put together a WordPress user directory.
Creating a WordPress Member Directory Page
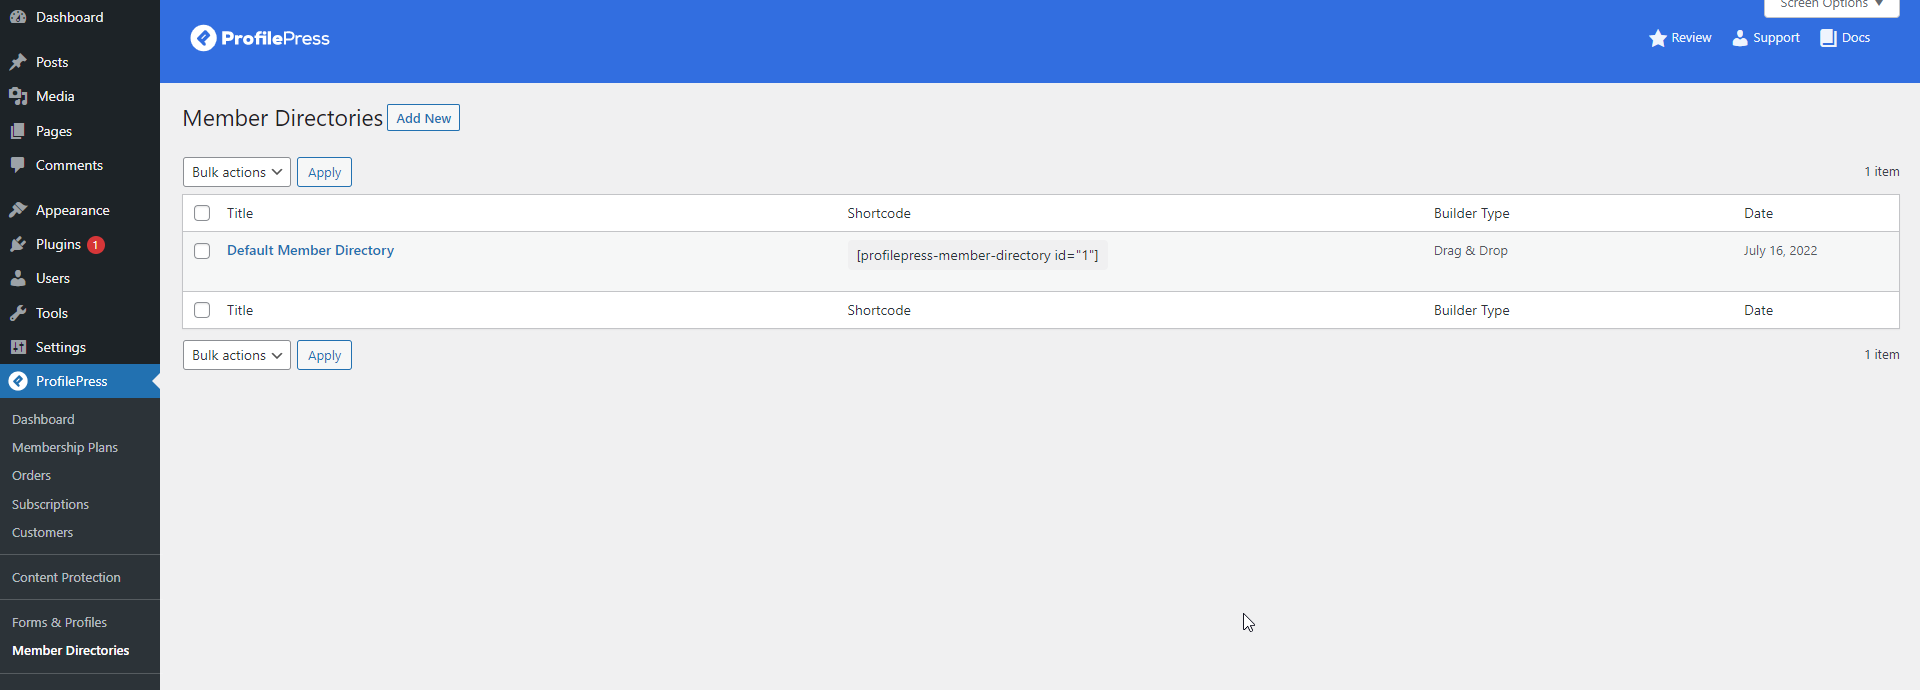
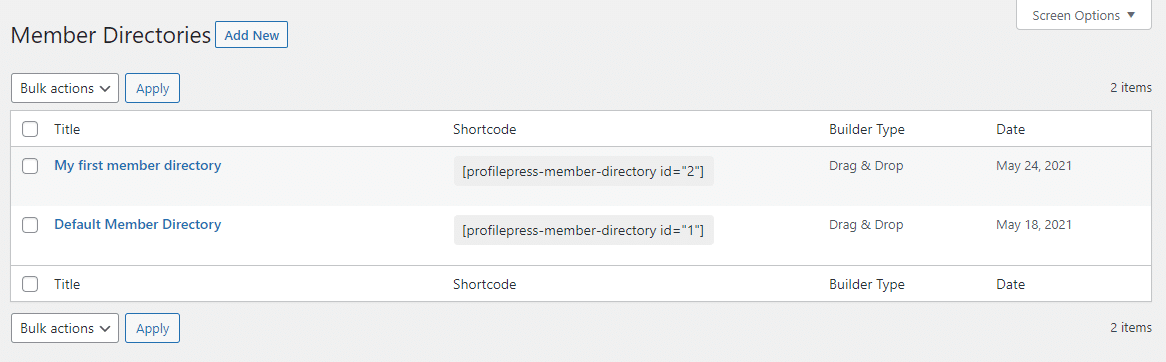
To create a new member directory, navigate to ProfilePress > Member Directories and click the Add New button.
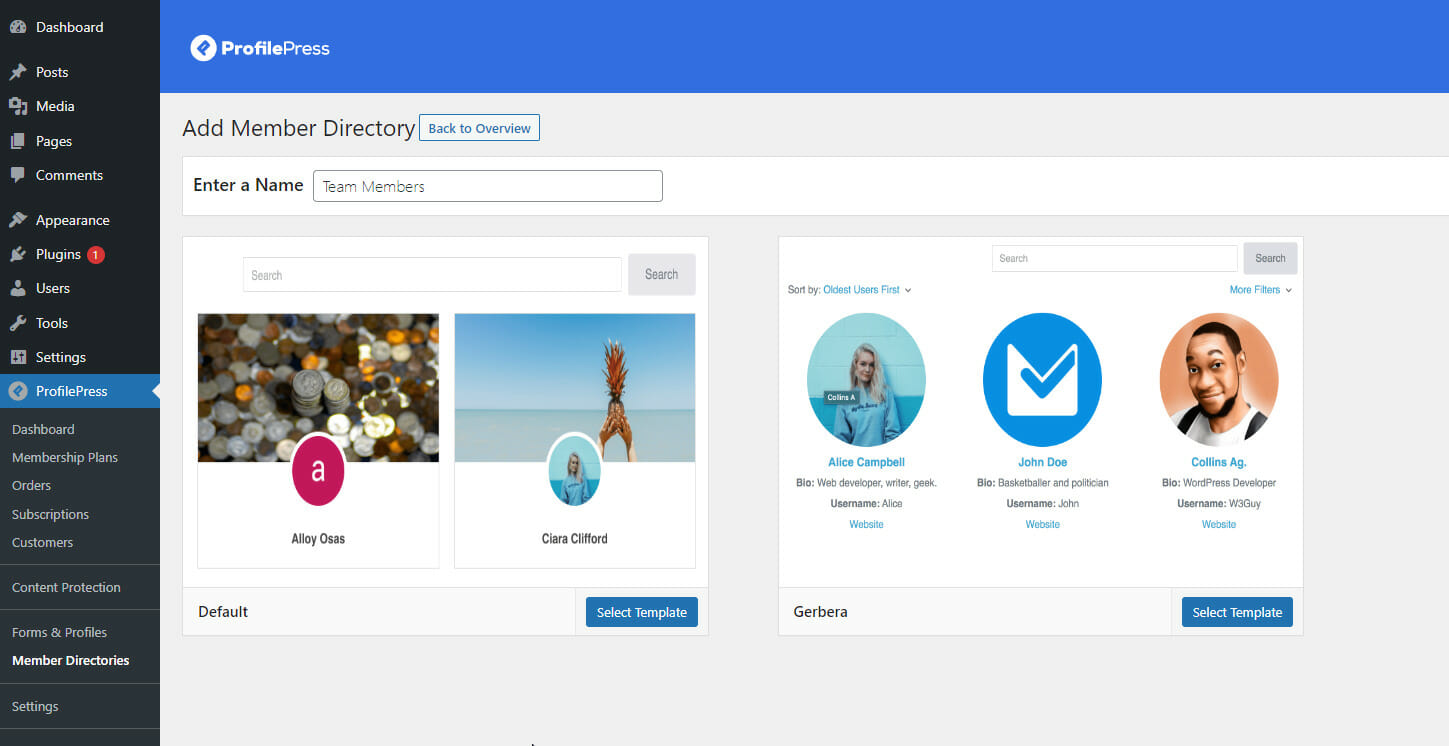
Enter a name for your new member directory and click the Select Template button to create the directory.
Next, you will be taken to your newly created member directory, where you can specify what fields to display in the directory and set up the criteria (directory settings).
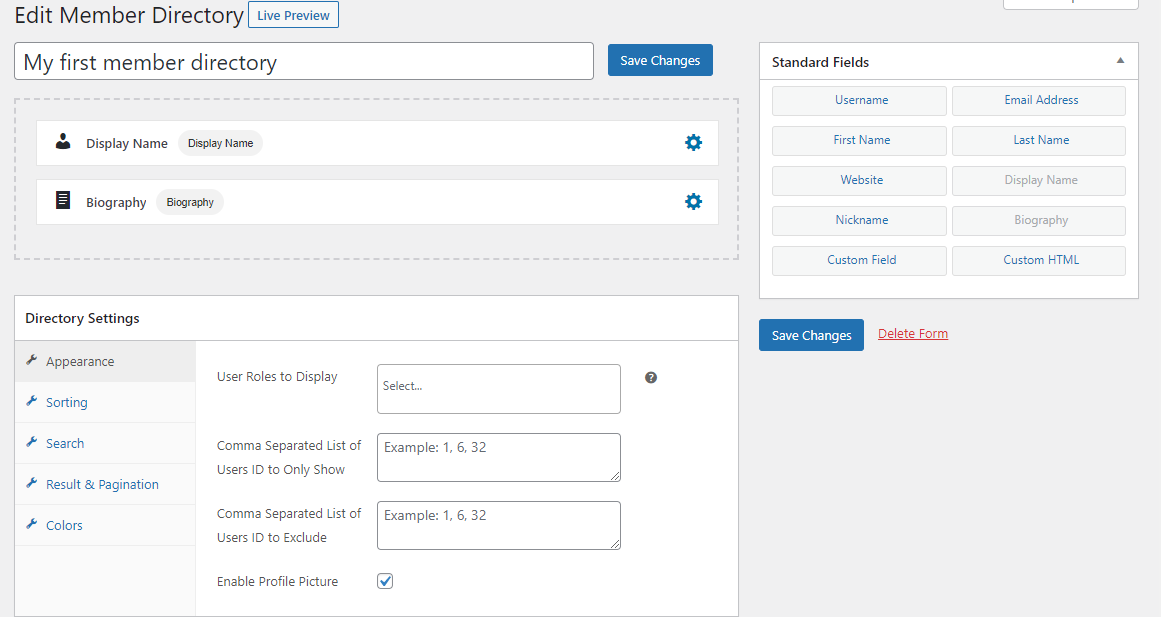
Editing the Member Directory Fields.
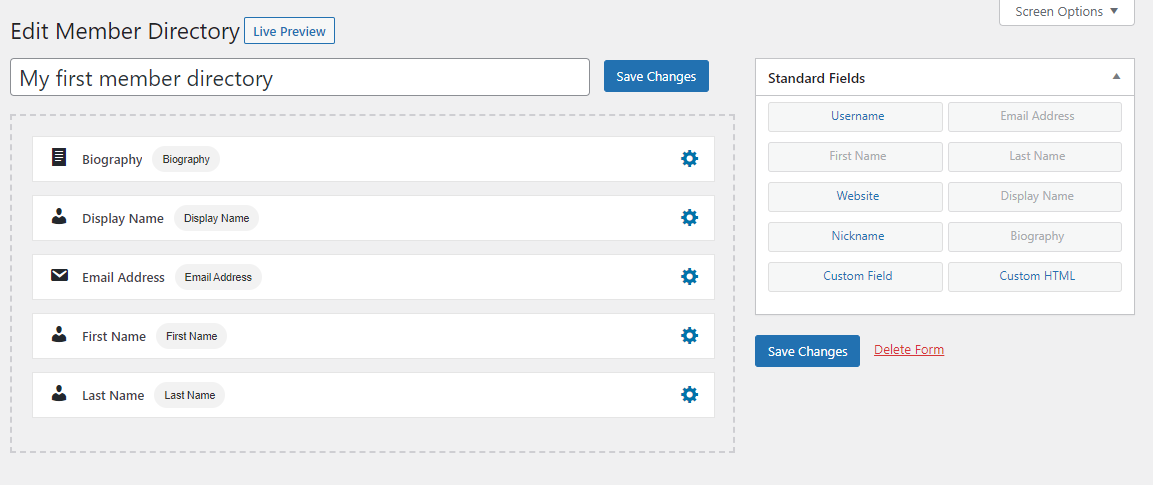
You can specify what fields to display on a particular Member Directory. Drag the field from the Standard Fields section and drop it into the directory content area section.
If you have the custom fields addon activated, you will see the section to drag and drop them to the directory.
After making your modifications, click on the Save Changes button to save your changes. To preview your Member Directory, click on the Live Preview button.
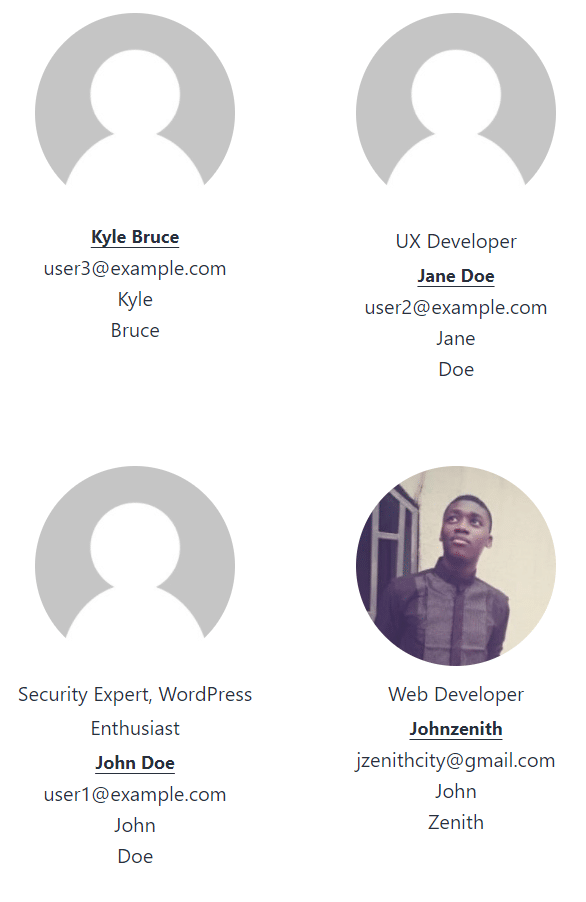
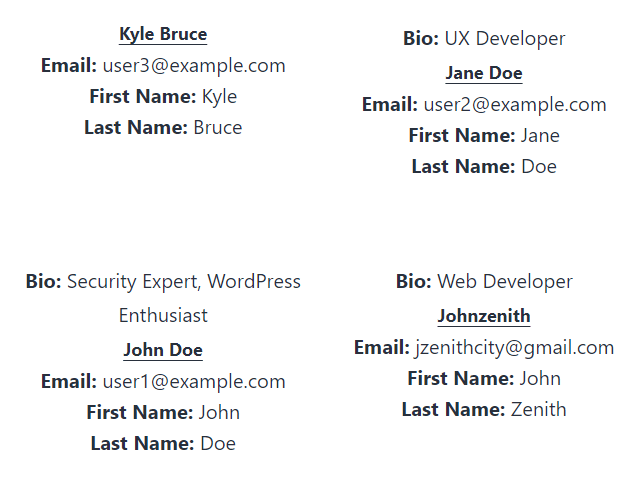
Note: The Biography of the user, Kyle Bruce, is not displayed. This is because the field has not been filled out in the user profile. This means blank fields are not visible when the Member Directory is displayed. Also, we can set up a Field Title that will be displayed before the user profile data.
Customizing the Member Directory Field Title
To edit the field title, follow the steps described below.
- Click on the Cog Setting Icon located at the end of the field.
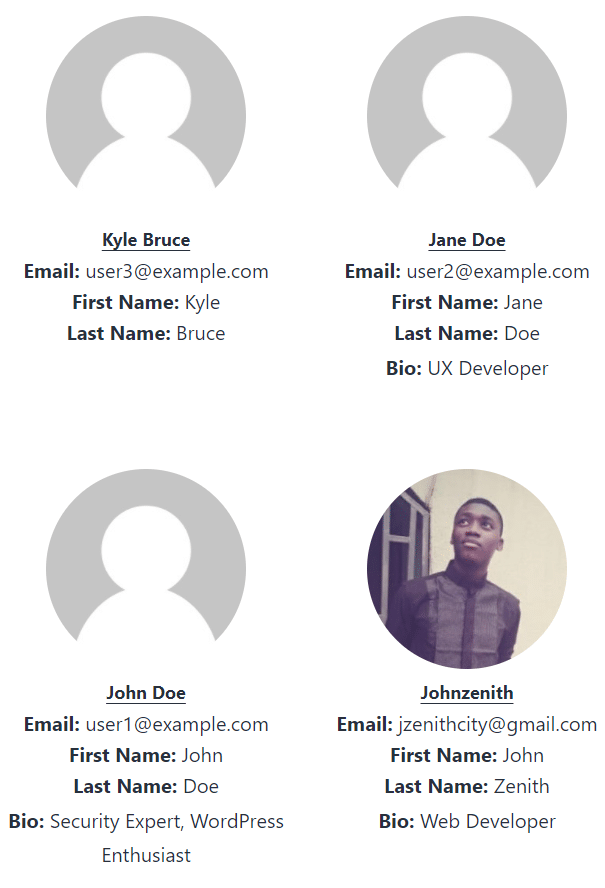
- A modal is displayed, showing an input field. Enter the title for the field.
- Click on the Apply Changes button to save the field title.

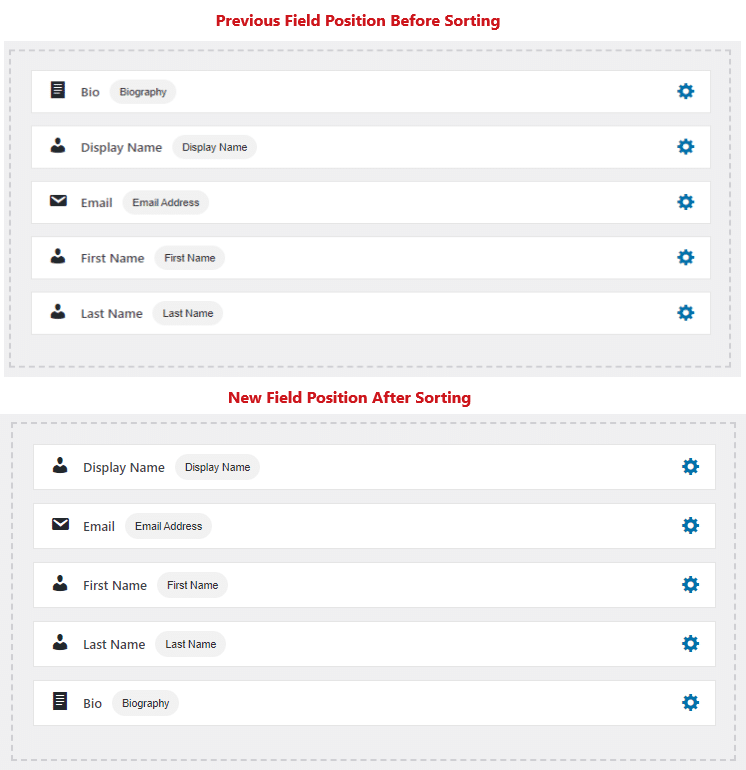
Note: The Member Directory Fields can be sorted. Hover over the field, drag it to the desired position, and save your changes.
Now, after saving your changes, click on the Live Preview button to see how the Member Directory will be displayed on the front-end.
Tip: Instead of showing both the First and Last Name fields separately, you can use the Display Name field formatting option to customize this and display both fields together. To do this, follow the steps described below.
- Click on the Cog Setting Icon button on the Display Name field.
- A modal is displayed. Locate the Format field on the modal, and select First & Last Name.
- Click on the Apply Changes button.
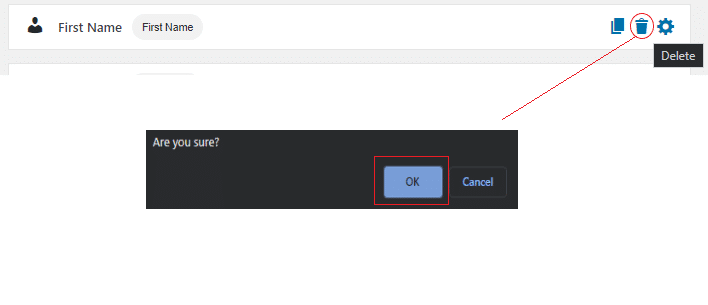
Note: You can remove the First and Last Name field since we are now using the Display Name field to show the First and Last Name of the user. To remove a field, hover over the field, click on the Delete Icon button, and confirm the operation when prompted.
After making all the modifications, don’t forget to click the Save Changes button to save your changes.
At this point, let’s click on the Live Preview button to preview the Member Directory one more time.
Configuring the Member Directory Settings
Earlier in this tutorial, we talked about the member directory criteria and said they are like rules or filters used to determine the members listed or displayed on a particular directory. The Directory Settings section is where you can carry out such operations.
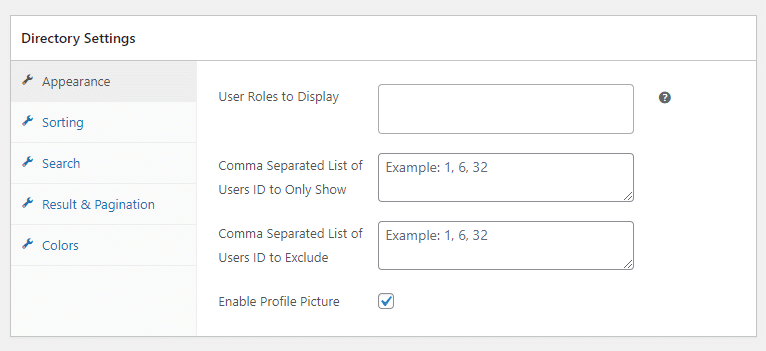
The Directory Settings consists of five settings groups, which are listed below.
- Appearance
- Sorting
- Search
- Result & Pagination
- Colors
Directory Settings – Appearance
These settings are used to control members’ visibility. It consists of the following settings listed below.
User Roles to Display: This setting is used to select the user roles that should be visible or be part of the directory.
Comma Separated List of Users ID to Only Show: This setting is used to specify a list of users ID only to show. If both the Comma Separated List of Users ID to Only Show and User Roles to Display settings are set, and the user’s role doesn’t exist in the User Roles to Display setting, then that particular member will still not be visible in the Member Directory.
Suppose a particular user ID appears in the Comma Separated List of Users ID to Only Show setting and in the Comma comma-separated list of Users IDs to Exclude setting. In that case, the member will be visible in the Member Directory. The reason is that precedence is given to the Comma Separated List of user IDs to Only Show settings.

Comma Separated List of User IDs to Exclude: This setting is used to specify a list of user IDs to exclude.

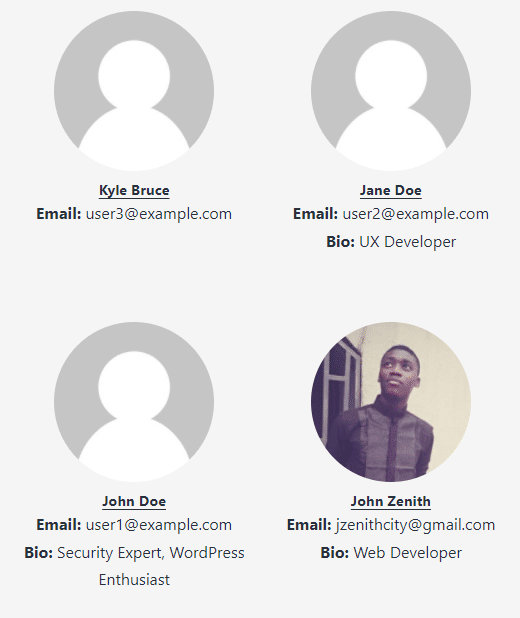
Enable Profile Picture: This setting specifies whether the profile picture of the members in the directory should be visible or not. This is enabled by default.

If we disable the profile picture, then this is how the Member Directory will be displayed on the front-end.
Directory Settings – Sorting
These settings control how the members in the directory are sorted. It consists of the following settings listed below.
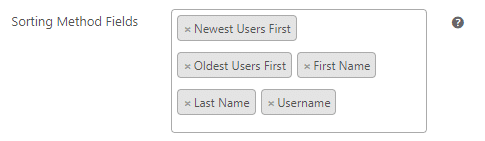
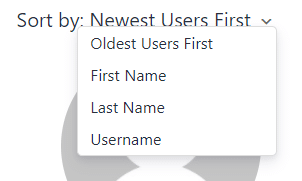
Default Sorting Method: Specifies how the members in the directory will be sorted when viewed on the front-end. By default, the newest members will be listed first in the directory. You can also sort by oldest users first.

Enable custom sorting: Specifies whether to show a sorting dropdown menu on the front-end when the Members Directory is displayed.
With the above custom sorting, when the Members Directory is previewed, this is what the sorting dropdown menu will look like.
Directory Settings – Search
These settings control how the members in the directory can be searched or filtered out.
Important: For this to work correctly and display the correct search result, the Permalink Structure must not be set to Plain. To set the Permalink Structure, go to WordPress Dashboard >> Settings >> Permalinks, then select the structure you want, but don’t set it to Plain.
The Search Directory Settings consists of the following sub-settings listed below.
Search Fields: Specifies whether to enable or disable the search functionality of the Members Directory. This is enabled by default, which means users can search and filter members in the directory.
Note: When disabled, all search-related functionalities (such as search form, members filters, etc.) will be removed completely when the Members Directory is displayed on the front-end of your website.
Search Fields: Specifies the user’s profile fields to search in. If no field is specified, the search keyword will be ignored, and the search result will always return all the members in the directory.

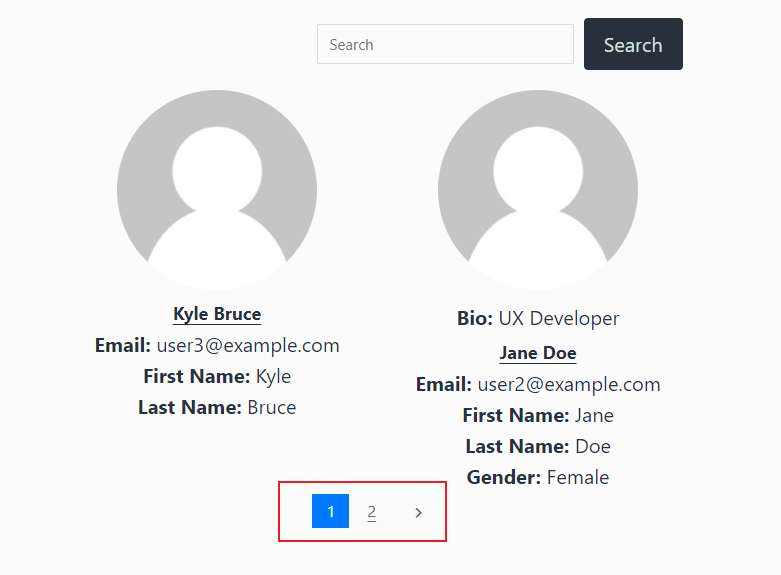
For example, by specifying the above fields as shown in the image above, users can search for a particular member by Email Address, Display Name, First Name, or Last Name. So when a member is searched for in the Members Directory, this is what the result would look like.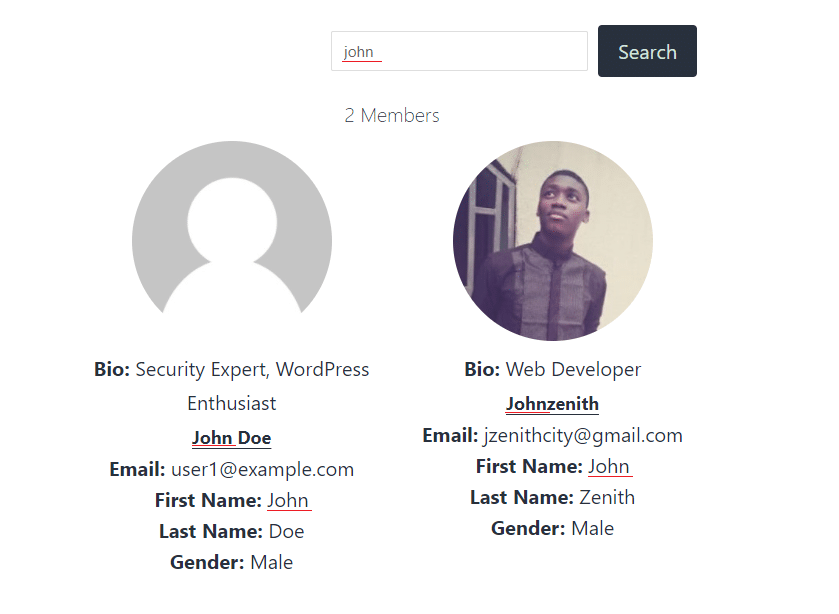
From the search results shown in the image above, two users were matched using the keyword john, and the fields where the matches occur have been marked out for demonstration purposes.
Enable Filters: Specifies whether to display a dropdown menu allowing users to filter members in the directory. Even if the Filters are enabled, the dropdown will not be displayed unless the Filter Fields are set, which we will discuss below.
Filter Fields: Specifies the custom fields that members can be filtered by.Note: Only Select, Checkbox, Radio, Country, and Date/Time fields are supported.
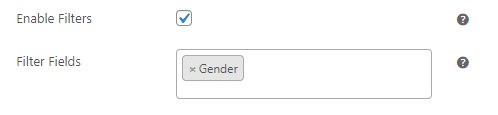
The Gender custom field has been added to the Filter Fields setting. This will enable users to filter the members in the directory by gender.

Directory Settings – Result & Pagination
These settings control members’ search results in the directory and set up the pagination limit.
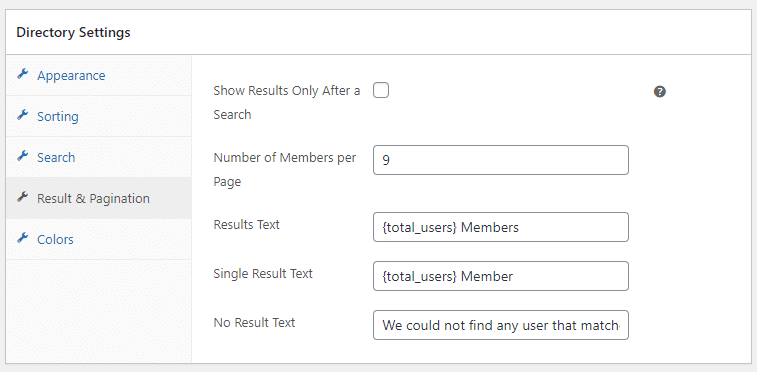
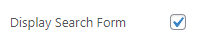
- Show Results Only After a Search: If enabled, members in the directory will only be visible or displayed after a search is performed. For the search form to be visible, the Directory Settings >> Search >> Display Search Form setting must be enabled.
- Number of Members per Page: Specifies the number of members to show per page when the members are displayed in the directory.
- Results Text: Specifies the results text to show after a search is performed. By default, this is set to “{total_users} Members”. The {total_users} placeholder represents the total number of members found in the search results.
- Single Result Text: This does the same thing as the Results Text but is used only when the search result returns a single member in the directory.
- No Result Text: Specifies the text to show when the search result is empty.
Directory Settings – Colors
These settings control the text and background colors of search fields and pagination links.
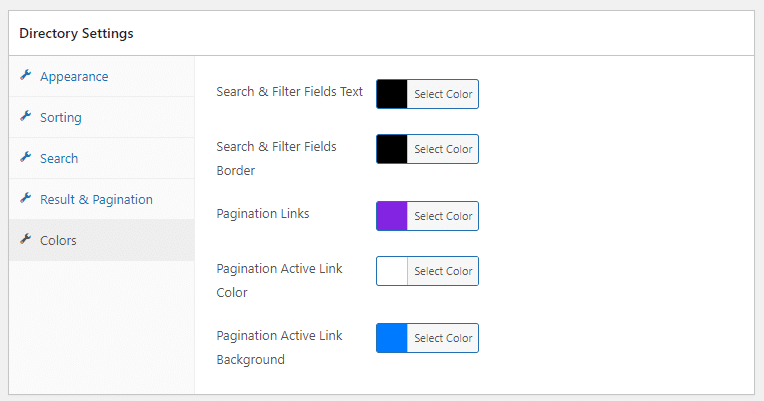
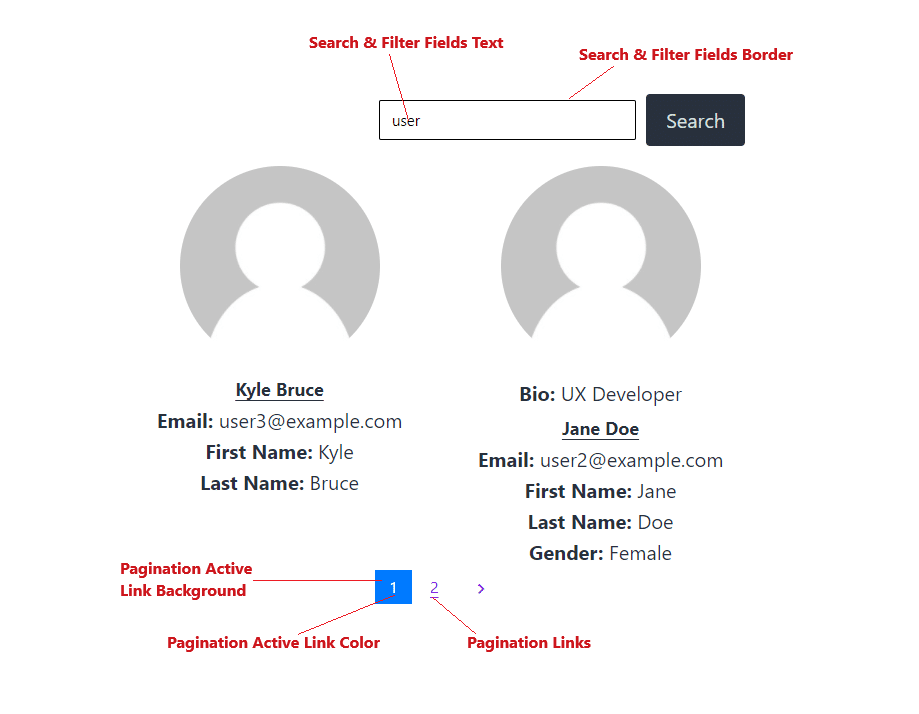
Based on the color settings in the image above, below is a descriptive image that shows how the colors are applied when the members’ directory is displayed.
Setting up the Member Directory Page.
Whenever you create a new member directory, a corresponding shortcode is also generated. The shortcode is provided so that you can easily add the directory to the page where you want it to be displayed.
To see the directory shortcode, navigate to ProfilePress > Member Directories, locate the member directory you want to display on the page, and copy the provided shortcode.
Next, you will need to create a page to add the copied shortcode. The page becomes your user directory page.
Conclusion
Creating a WordPress member directory page is a valuable addition to any website that fosters a community or relies on user engagement. By implementing a member directory, you provide a centralized platform for users to connect, share information, and build relationships. This not only enriches the user experience but also promotes a sense of belonging and community engagement.
We encourage you to consider building a WordPress member directory page to enhance your website’s functionality and foster a thriving community.
Get the ProfilePress member directory plugin today.