How to Detect AdBlock Users in WordPress
Do you want to detect AdBlock users in WordPress?
In today’s digital age, online advertising has become a primary source of revenue for many website owners. However, the growing popularity of ad-blocking software such as AdBlock Plus has made it increasingly difficult for website owners to generate revenue through advertising.
If you’re a publisher running a WordPress website, you may wonder how to detect AdBlock users and prevent them from blocking your ads.
In this article, we’ll show you how to use the MailOptin Adblock detector plugin to detect AdBlock users in WordPress. We’ll also share tips and tricks for ensuring that as many users see your ads as possible.
Why is AdBlock Bad for Your WordPress Website?
Ad Blocking software has been around for quite some time, and its use has grown exponentially in recent years. Unfortunately, while they provide a better browsing experience to users by removing ads, they hurt publishers and content creators who rely on ads for revenue.
Here are some reasons why ad blockers are bad for your website:
- Reduced Ad Revenue: Adblockers prevent ads from loading on your website, which means you won’t be able to generate revenue from those users visiting your site. This can significantly impact your website’s revenue, especially if you rely heavily on ad revenue to fund your operations.
- Bad User Experience: Adblockers occasionally prevent legitimate scripts from loading on a website. This can cause the website layout to break or prevent certain content from loading properly. This can make the website difficult to use, resulting in a bad user experience.
What Can You Do About AdBlock Users?
If you’re a publisher, you’ve three options.
- Embrace it: You can accept that some users will be using ad blockers and cannot do anything about it. You learn to live with the potential revenue loss as a tradeoff for providing an enjoyable experience to users.
- Educate users: Another way is to educate them about the importance of displaying ads on your website. You can explain to them that ads help fund the content they enjoy for free and that blocking ads can negatively impact your ability to keep creating quality content.
- Offer an ad-free subscription: The last option is to offer an ad-free version of your website to users willing to pay a subscription fee.
Giving away your earned revenue can be difficult, and implementing a subscription-based offering is not as simple. Your best bet is politely requesting that users whitelist your website in their ad blocker.
Let’s look at how to do that using the MailOptin plugin.
How to Detect AdBlock Users in WordPress Using MailOptin
MailOptin is a lead generation and anti-adblock WordPress plugin that allows you to create and manage email optin campaigns, such as email optins, scroll-triggered boxes, notification bars, and more.
It is designed to help you grow your email list and convert website visitors into leads and customers.
It also has an AdBlock detection trigger feature that lets you detect AdBlock users in WordPress and present them with a message to turn off adblocking software on your WordPress site.
Let’s see how to set this up on your site.
1. Install and Configure the MailOptin Plugin
The first step is to install and activate the MailOptin anti-adblock WordPress plugin. MailOptin has a free version available on the WordPress directory, but the AdBlock trigger feature is part of the premium version.
To purchase the Pro version of the plugin, head to the pricing page and buy a plan that fits your needs.
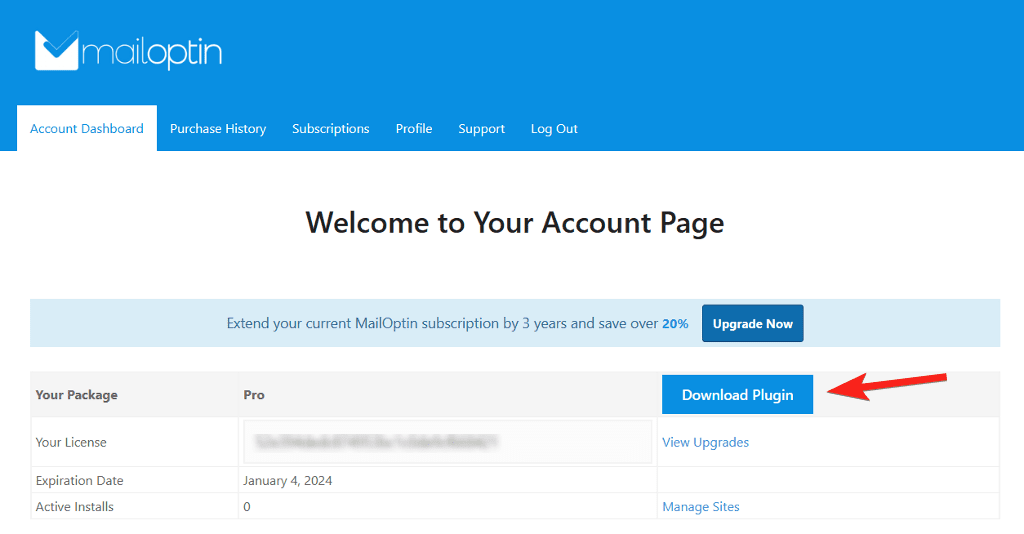
After you’ve purchased a plan, log in to your account and, under Account Dashboard, click on the Download Plugin button to get the zip file.
Next, log in to your WordPress dashboard and go to Plugins > Add New to install the plugin. Next, click the Upload Plugin button at the top, and then choose the plugin’s zip file from your computer.
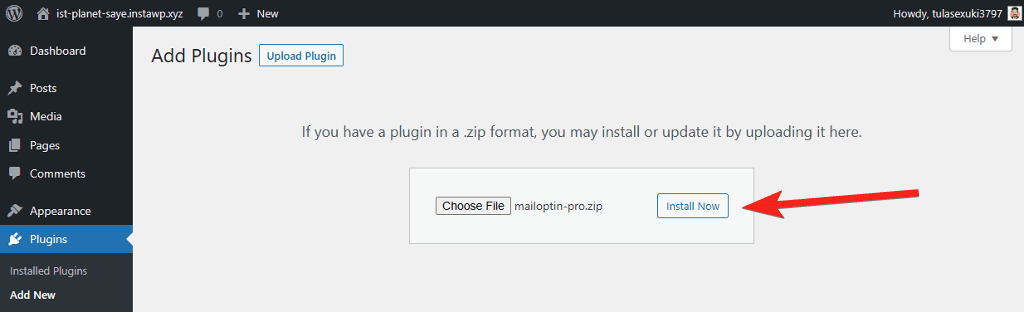
Install the plugin and then activate it.
Next, we need to verify the license to unlock the premium features of the plugin. To do so, navigate to MailOptin > Settings and switch to the License tab at the bottom.
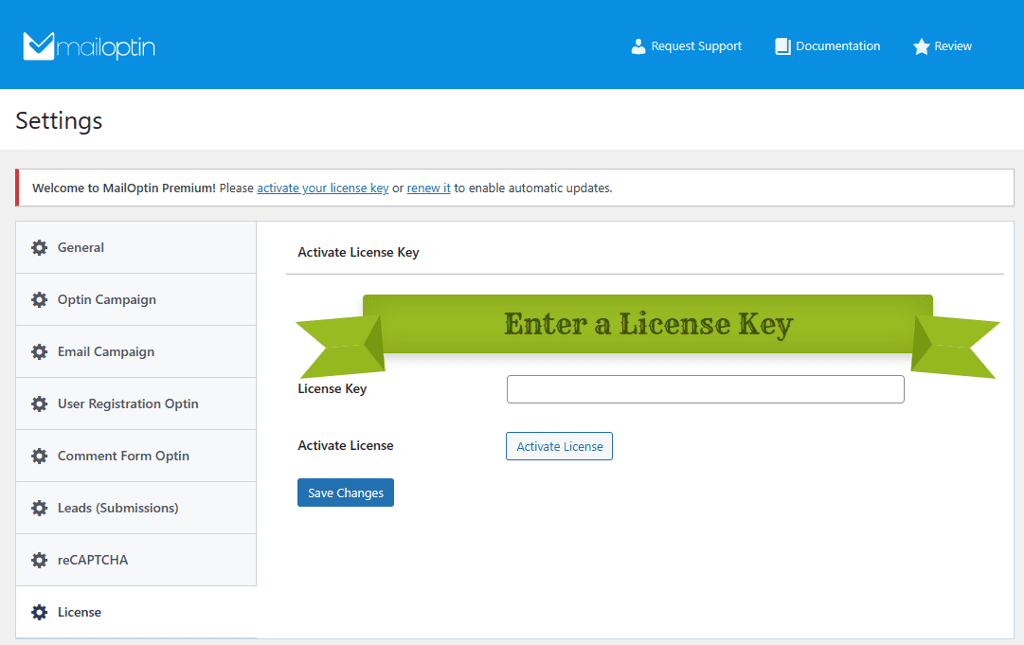
Copy the license key from your account page and paste it into the box provided. Then, click the Activate button, and you’re all set.
2. Design AdBlock Popup with MailOptin
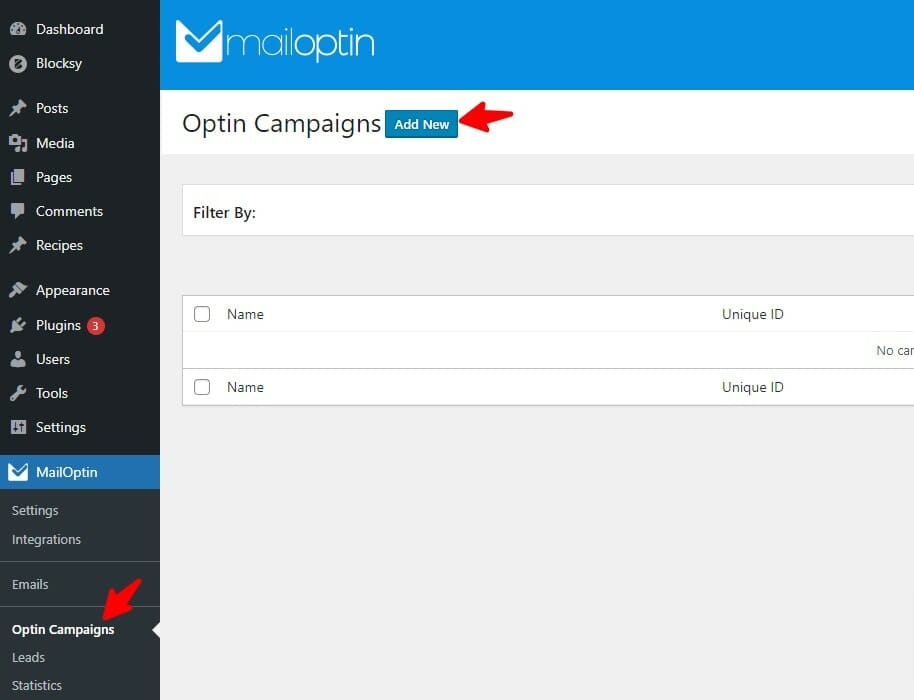
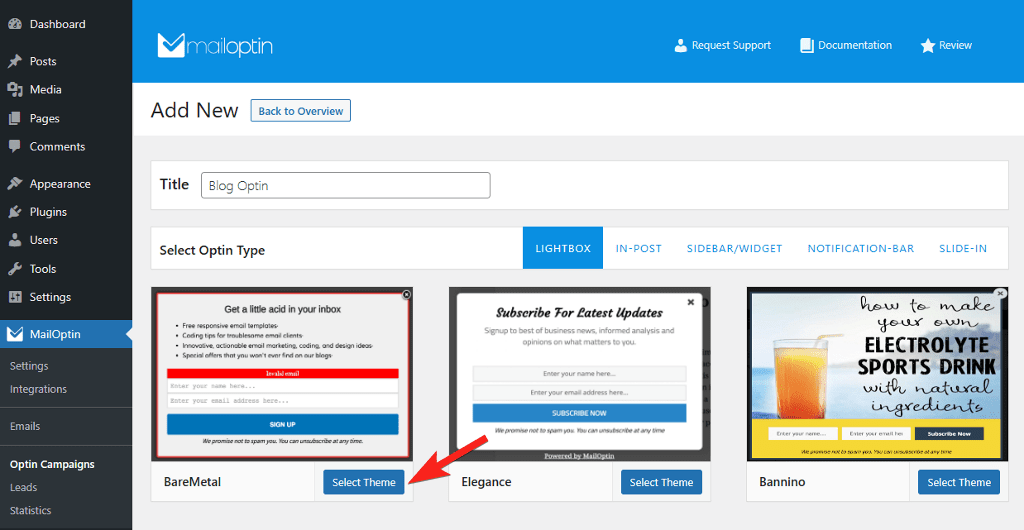
After installing the plugin, it is time to create your AdBlock-triggered popup. From your WordPress dashboard, go to MailOptin > Optin Campaigns.
Next, choose a campaign type and give it a name. MailOptin supports many optin types, such as lightbox, in-post, sidebar/widget, notification bar, and slide-in. The lightbox type is the best for the AdBlock popup as it covers the entire page to have the users’ undivided attention. But you can use other types if you prefer that.
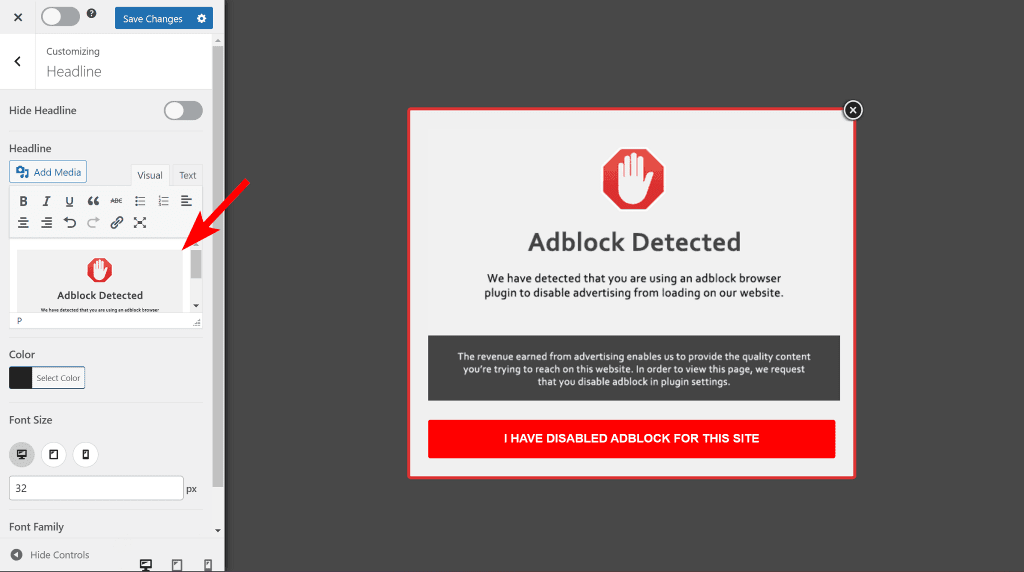
Click the Add New button at the top and give your popup a name. Next, select Lightbox as the campaign type and choose from the list of premade templates.
It will launch the customizer, which is similar to the WordPress theme customizer. This makes editing and customizing the popup message easy, as you don’t have to learn a new interface.
The premade template has a different design, but don’t worry – we can easily modify it for the AdBlock message. The customizer has a sidebar with a list of various customization options.
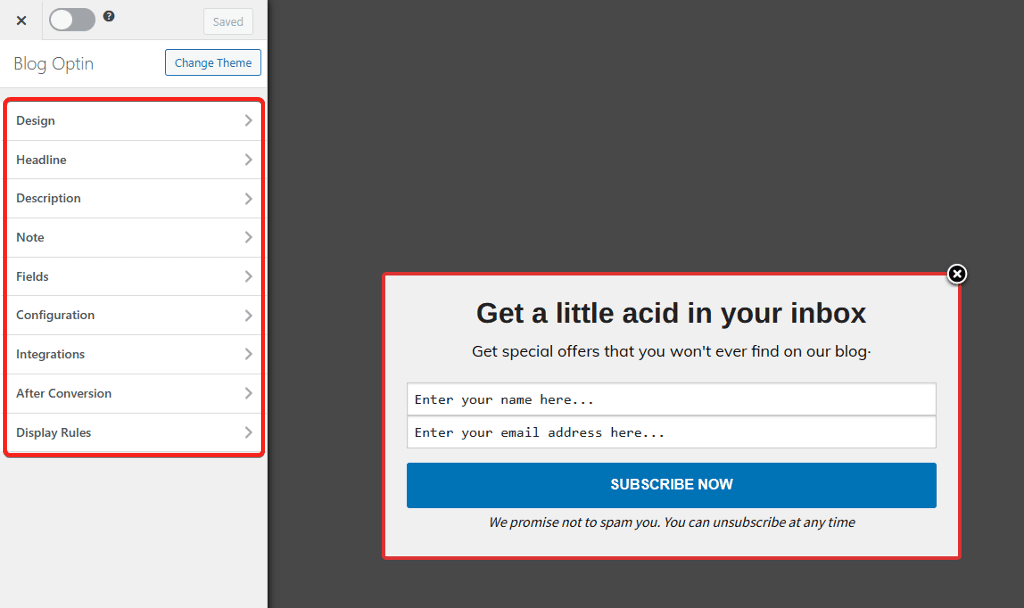
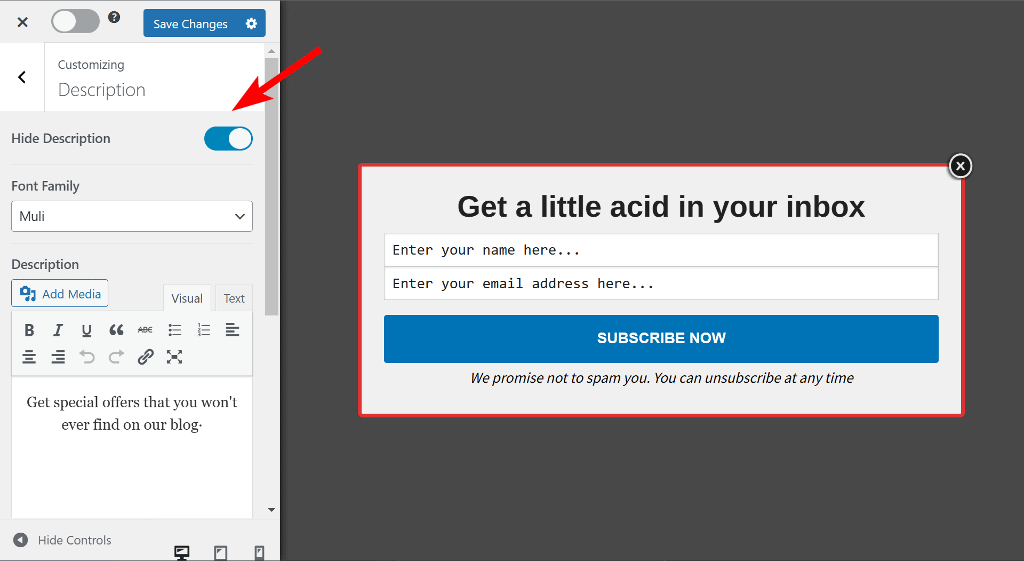
To make things easier, open the description and notes panel and turn them off.
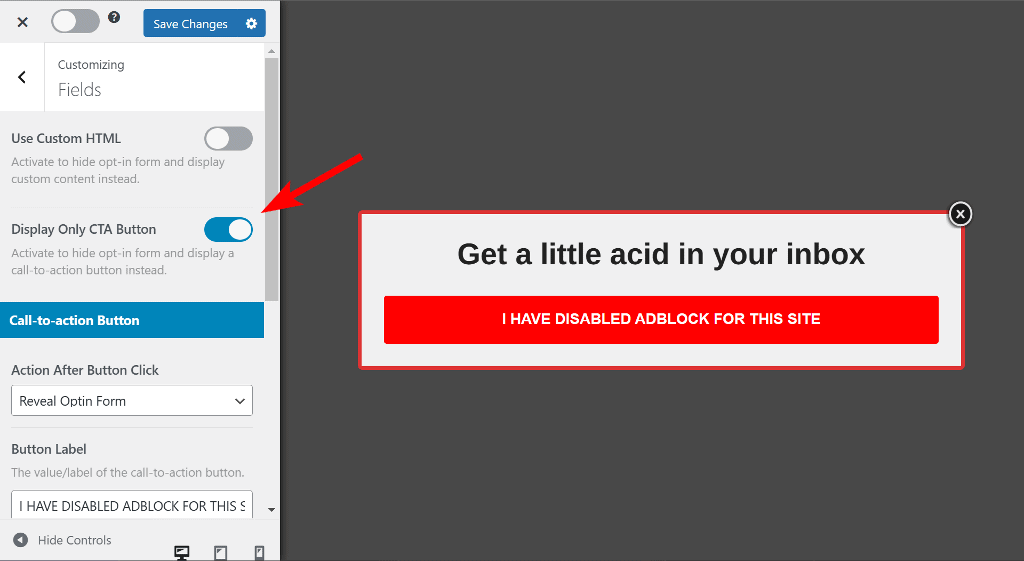
Then, in the Fields panel, toggle the Display Only CTA Button option to hide the fields from the optin and change the button label to “I HAVE DISABLED ADBLOCK FOR THIS SITE” in all caps. Scroll down and change the button background color to red to make it eye-catching.
Next, in the Headline panel, delete the text and replace it with this image. If you want, you can change the width of the optin in the Design panel.
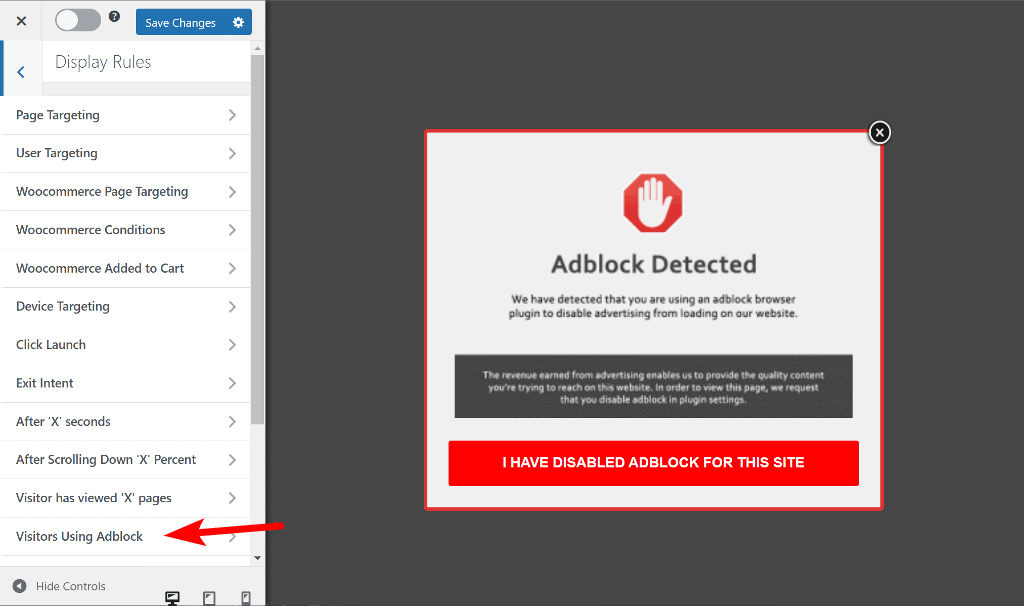
Now that our design is ready, let’s look at how to trigger the popup only for users with the Adblock extensions enabled.
3. Configure the AdBlock Trigger to Detect Adblock WordPress Users
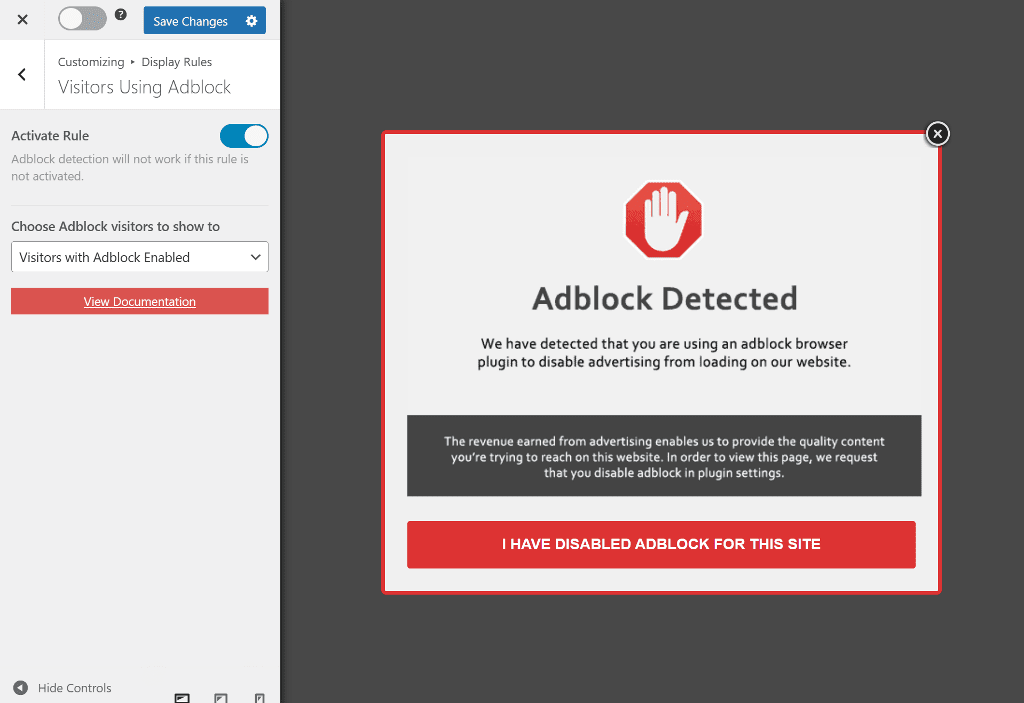
In the same customizer, open the Display Rules panel and look for the Visitors Using Adblock option. Open it and activate the rule.
Once done, you can choose which users will see the message. Select Visitors with Adblock Enabled from the dropdown menu, and you’re all set!
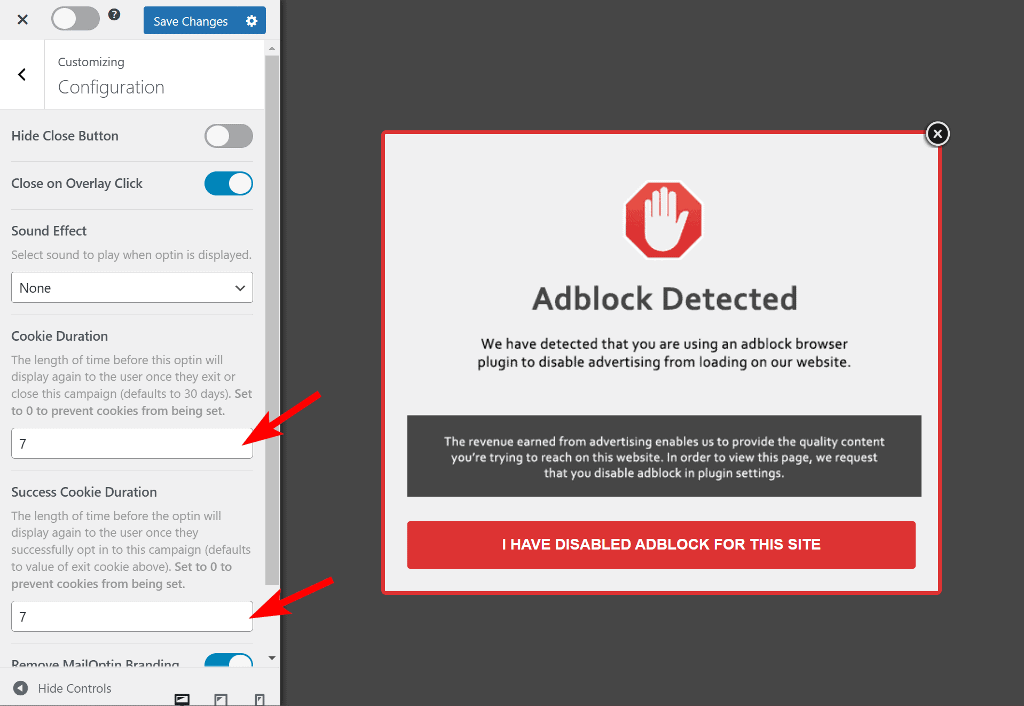
But that’s not all. We can also control how often the popup is displayed to the same user. That’s where the cookie period comes in. By setting the cookie period, we can ensure that users won’t be repeatedly bombarded with the same message.
Go to the Configuration panel from the sidebar and scroll until you see the Cookie Duration option. Here, you can enter the number of days after which you want to show the AdBlock message again. Just type in the number of days that you feel is appropriate.
We can also set the Success Cookie Duration to ensure that users who have clicked the CTA button but didn’t disable the AdBlock extension will see the message again. So, ensure you enter the same number of days in this field.
Once that’s done, toggle the button at the top and click on Save Changes to make the AdBlock popup message live on the website.
Tip: Your users won’t see the popup message again, depending on the cookie duration you set. If you want to keep showing the popup to users until they disable AdBlock or whitelist your WordPress site, set Cookie Duration in the Configuration panel to “0” (zero) with CTA Action After Button, Click settings set to “Close optin and reload the page.”
Best Practices Detect AdBlock Users in WordPress
Displaying a popup message just alone wouldn’t solve everything. Here are some best practices when using MailOptin to detect AdBlock users in WordPress and maximize ad revenue:
- Test different messages: Experiment with different popup messages to encourage AdBlock users to allowlist your site or turn off the extension. Test variations in the tone of the message to determine what works best.
- Avoid annoying ad formats: Annoying ad formats such as full-screen and video ads could turn off users and lead them to install an AdBlocker. Instead, you should focus on providing value to your visitors through high-quality content and non-intrusive advertisements that don’t disrupt their browsing experience.
Wrapping Up: Detect AdBlock Users in WordPress
AdBlock users can take up a good portion of your ad revenue. However, with the right tools, such as MailOptin, it is possible to identify AdBlock users and encourage them to turn off their adblocking extension, thus helping you safeguard your revenue streams.
Don’t let AdBlock users eat into your revenue. Try MailOptin today, the best WordPress Adblock detector plugin.