How to Create a Frontend WordPress User Profile Page
Do you want to add a frontend user profile page to your WordPress site?
A frontend profile page lets users view their profile information, uploaded profile pictures, and more. This is particularly important for membership sites, online communities, and e-commerce platforms.
In this guide, you will learn how to create a frontend WordPress user profile page using ProfilePress.
Creating a Frontend WordPress User Profile Page
When you install ProfilePress, you’ll be prompted to create essential pages so the plugin can function. Among the pages created is a User Profile page. If you skipped this step or want to create your custom user profile page for your WordPress website, follow these steps.
The page you create will include a user profile shortcode, allowing users to view their profile information directly on your website.
Before the tutorial, let’s quickly review how the front-end user profile works.
The URL to a WordPress user profile with the username “demo” is accessible via https://yoursite.com/profile/demo. You can change the “profile” in the URL at Settings >> Frontend Profile >> Profile Slug.
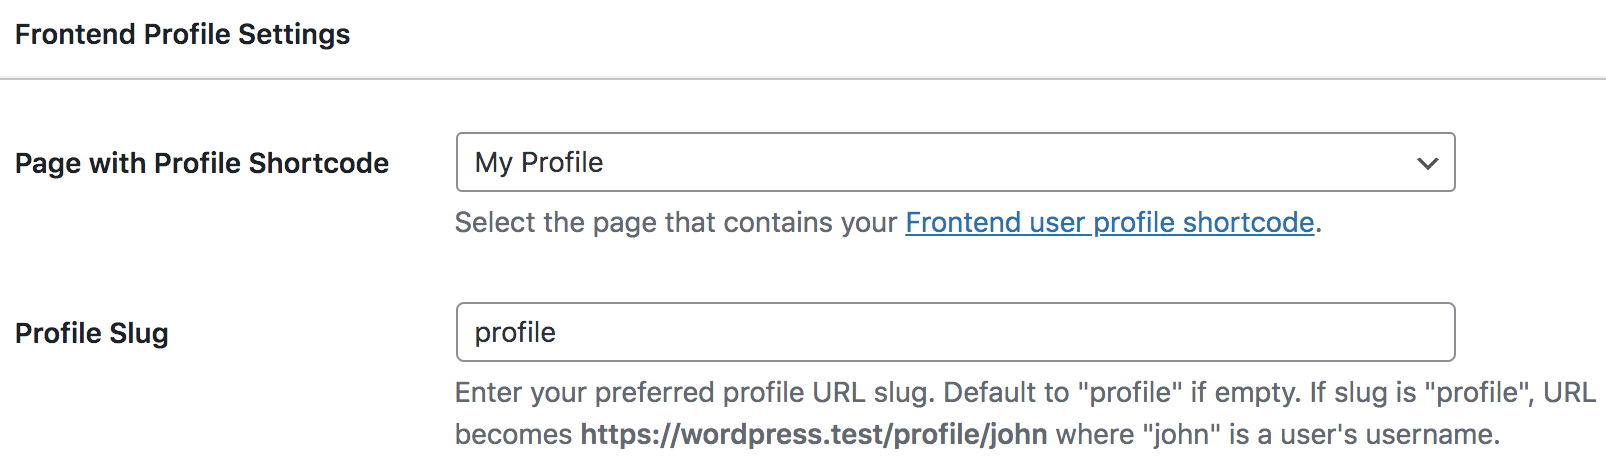
If users are logged in to the site, accessing https://yoursite.com/my-profile/ will reveal their profile, assuming the page with the User Profile shortcode has a “my-profile” slug.
Building a WordPress Frontend User Profile
To create a frontend user profile for your WordPress site, follow these steps.
First, go to ProfilePress in your WordPress dashboard and click on Forms & Profiles.
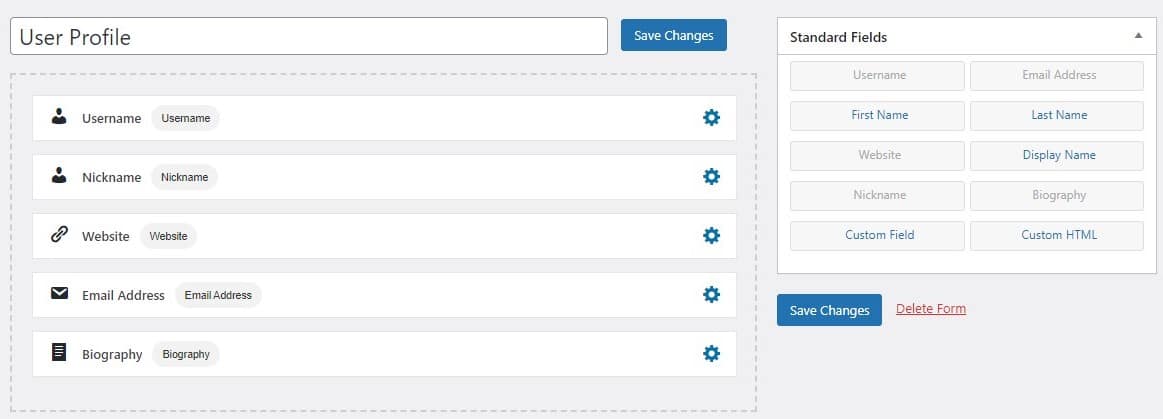
Next, click Add New and select User Profile as the form type.
Enter a name for your WordPress User Profile, choose your preferred template, and customize the design as needed.
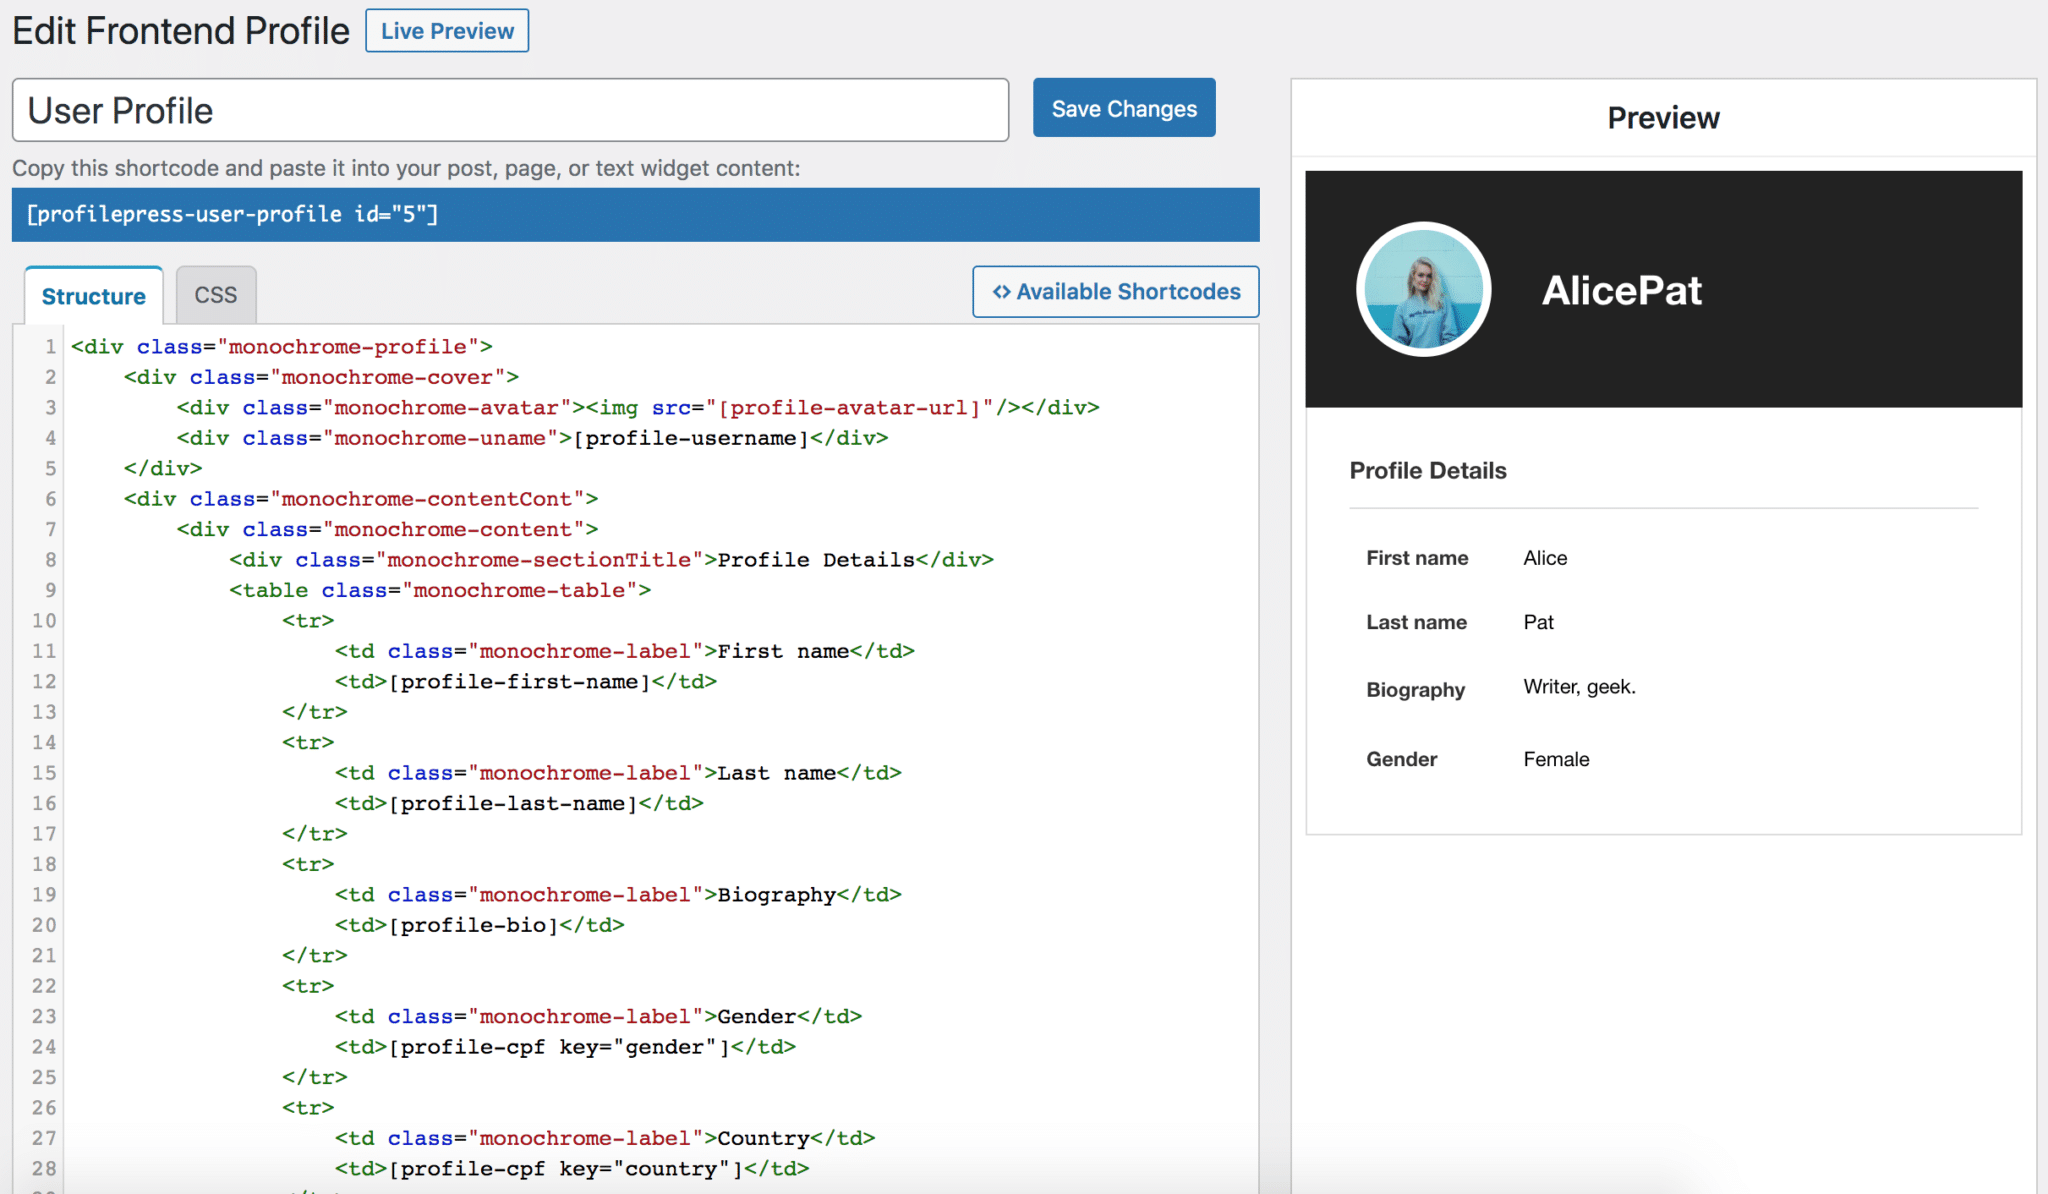
You can preview how it looks by clicking the “Live Preview” button.
You can change texts, headlines, colors, and more in the settings, depending on your chosen template. You can also display social media links and profile menu tabs.
When done, click on ‘Save Changes’.
Then, copy the generated shortcode for the User Profile, as we will need it in the coming sections.
Creating the User Profile Page in WordPress
To create a WordPress user profile page where users can visit to view their profile information and that of others, go to Pages > Add New in your WordPress dashboard.
Enter a title for the page, then paste the shortcode you copied earlier into the content area. Once done, save the page.

NB: If you use the block editor, add the Shortcode block and paste in the shortcode.
Setting the Default Profile Page
After creating the profile page, you need to set it as the default profile page of your WordPress website.
To do this, go to ProfilePress >> Settings and navigate to the Frontend Profile Settings tab. Under the Page with Profile Shortcode option, select the page you just created and save.
Conclusion
Creating a front-end user profile page on your WordPress site makes it more user-friendly. This allows your users to see and manage their information, which is excellent for building a sense of community and making your site more interactive.
Following the steps in this guide, you can easily set up a WordPress profile page that looks good and meets your needs. You can also customize it to match your website’s design and branding.