Subscribe Registering WordPress Users to Mailchimp List
Do you want to automatically subscribe WordPress users to your Mailchimp list when they register on your site?
Whether running an online store, blog, or membership site on WordPress, keeping in touch with your audience is essential for growth.
One of the best ways to stay connected is through email marketing, and Mailchimp is an excellent platform for managing and growing your email lists.
With the ProfilePress Mailchimp addon, you can effortlessly sync WordPress users to your Mailchimp list immediately after they register via your custom WordPress registration form. It even allows users to choose the specific Mailchimp list they want to subscribe to, offering a more personalized experience.
It sounds like a win-win, doesn’t it? In this guide, we will walk you through the setup process.

Benefits of Subscribing WordPress Users to Mailchimp
Subscribing WordPress users to your Mailchimp list offers several benefits that can enhance your email marketing efforts and improve overall site engagement.
Here are some of the advantages:
Effortless List Building: Manually adding users to your email list is time-consuming and can lead to missed opportunities. By subscribing users to Mailchimp during registration, the process becomes fully automated. Every new user is instantly added to your mailing list, ensuring consistent growth without manual input.
Instant Engagement: When WordPress users are subscribed to Mailchimp, you can immediately connect with them through automated welcome emails, updates, and offers.
Increased Conversions: Email marketing is among the most effective tools for driving sales and conversions. By growing your Mailchimp list with WordPress users, you can regularly share promotions, product updates, and special offers, encouraging users to take action and convert into paying customers.
Grow Your Audience: As your WordPress site grows, so does your email list. The more users you add to Mailchimp, the larger your audience becomes. A bigger email list allows for greater reach in your marketing campaigns, which translates to more opportunities to promote your products or services.
How to Subscribe WordPress Users to Mailchimp
To begin, you’ll need to install and activate the ProfilePress plugin. If you’re unsure how to do this, refer to the installation and activation guide.
Once the plugin is activated, you can proceed to activate the Mailchimp addon. To do this, please refer to our article on activating the Mailchimp addon.
Setting up List Selection
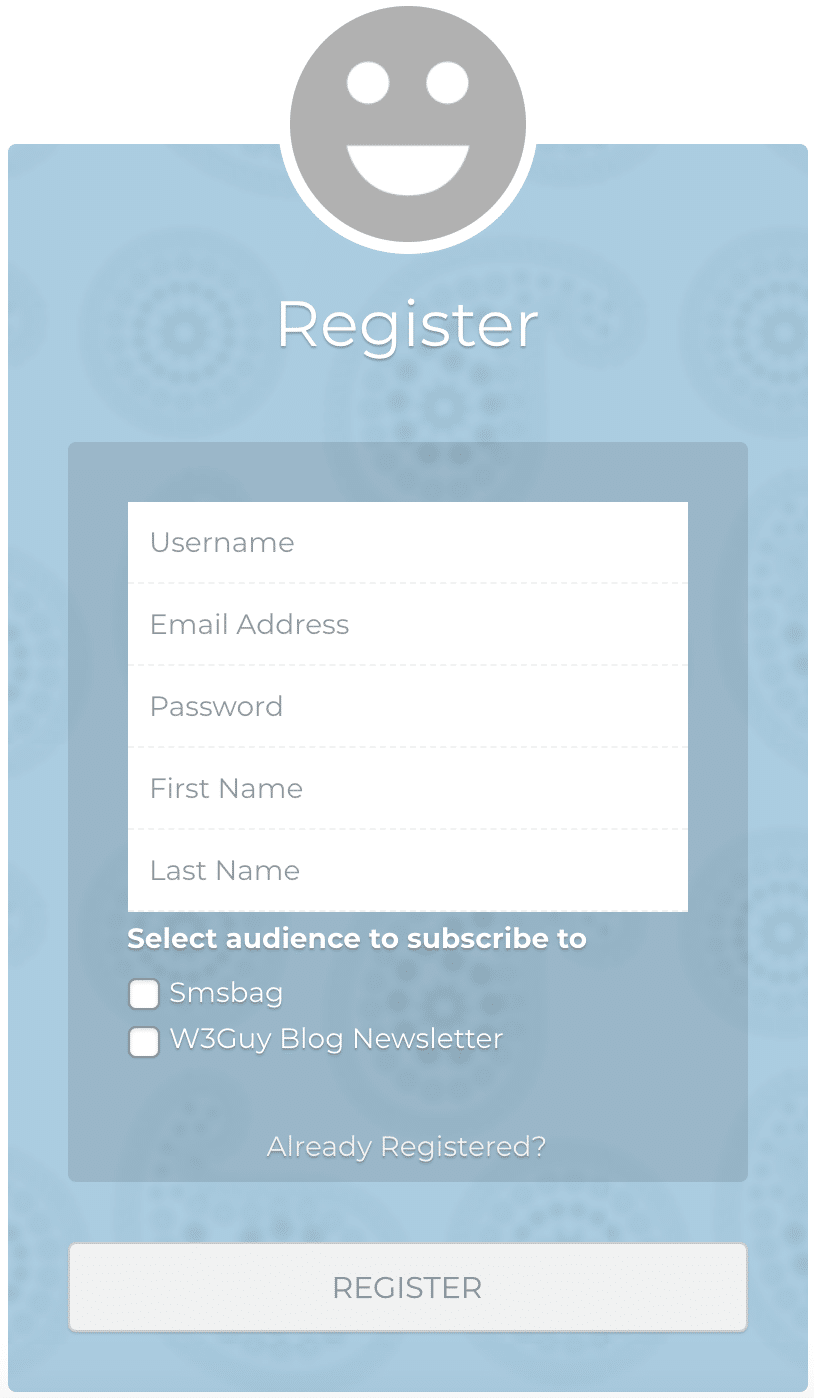
To allow users to choose which Mailchimp list or audience they’d like to join during WordPress registration, you’ll need to add the Mailchimp block or shortcode to your WordPress registration form powered by ProfilePress.
There are two ways to do this: Drag & Drop Builder or the Shortcode Builder. We’ll guide you through both methods, ensuring you can easily integrate list selection into your WordPress signup form.
Drag & Drop Builder
Open your registration form builder or create a new one.
Drag and drop the Custom HTML field to the location you want to add to the list selection.
Click on the gear icon, then type a description for the lists (e.g. Select a List to Join) and click “Apply Changes”.

Next, drag and drop the Mailchimp field.
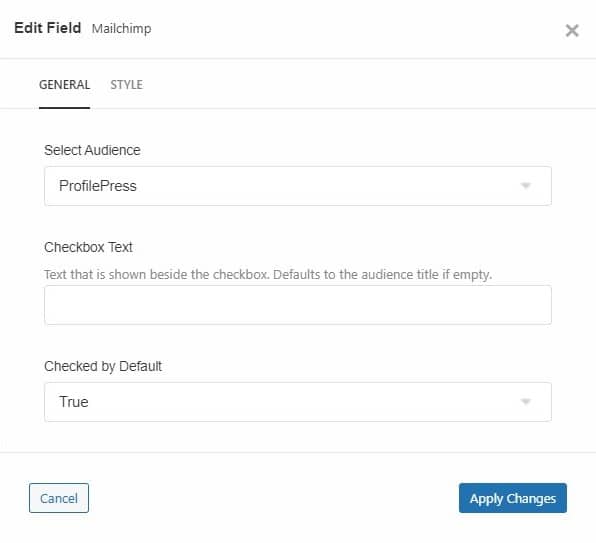
Then click on the gear icon to select the audience and enter a label for the checkbox field (or leave it empty to use the audience title).

You can also choose to make the field checked by default.
Repeat the above steps for every audience you want to display on your registration form.
Don’t forget to save your changes.
Shortcode Builder
Open your registration form or create a new one.
Write the description for the lists wrapped in, say, a paragraph tag (e.g. <p>Select a list to join</p>)
To add the Mailchimp shortcode that will display the subscription checkbox on your form:
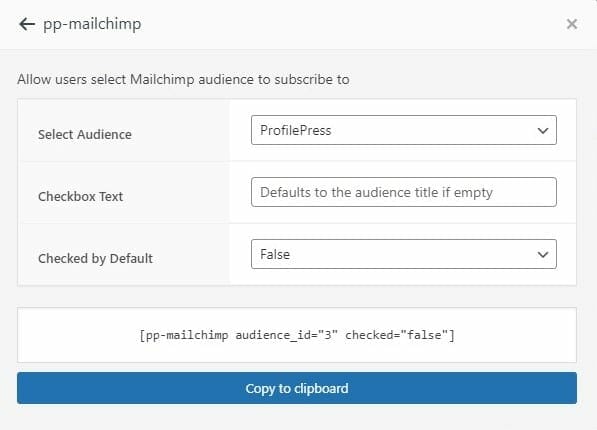
- Click on Available Shortcodes and scroll to and select pp-mailchimp
- Select an audience.
- Enter a checkbox text or leave it empty to use the audience title.
- Choose whether to select this option by default
- Click on “Copy to Clipboard“.
- Paste the code right below your list description in step 2
- Repeat steps 3-8 for each audience (list) you want to display on your form.
- Save changes

Note: Each list must have its own audience created on the settings page. See: Setting Up Mailchimp Addon
Ready to subscribe WordPress users to Mailchimp?
By implementing the ProfilePress Mailchimp addon, you can automate adding new WordPress users to your email list. This integration saves you time and enhances user experience by allowing them to select their preferred email lists during registration.
Get started today and watch your email list grow.