How to Use Mailchimp to Send WordPress Blog Posts by Email
Want to learn how to automatically email new WordPress posts to your Mailchimp subscribers?
Emails are one of the best marketing channels out there because they allow you to connect with your target audience in a personalized way, resulting in better engagement and customer retention.
Through your email campaigns, you can educate, seek feedback, and offer service updates, along with deals and discounts, to keep your customers invested in your business.
To run a successful email campaign, you need an email list of subscribers and a tool to automatically email them about new WordPress posts.
Automate Sending New Post Alerts to Mailchimp Subscribers
To automate sending email campaigns of the latest posts to your list subscribers, you will need email marketing software such as Mailchimp and MailOptin.
This article will be using Mailchimp, but you can still follow the tutorial if you use another email marketing platform such as Mailchimp, Campaign Monitor, Sendy, Constant Contact, AWeber, ConvertKit, MailerLite, GetResponse, Klaviyo, ActiveCampaign, Brevo, SendGrid, Mailjet, Keap Max Classic (Infusionsoft), Zoho Campaigns, Moosend, Vertical Response, NewsMAN, CleverReach.
Installing MailOptin Plugin
In this section, we will show you how to install the MailOptin plugin and use it to connect your site with the Mailchimp account you created.
After purchasing the plugin, you can download the plugin from your MailOptin account or the welcome email.
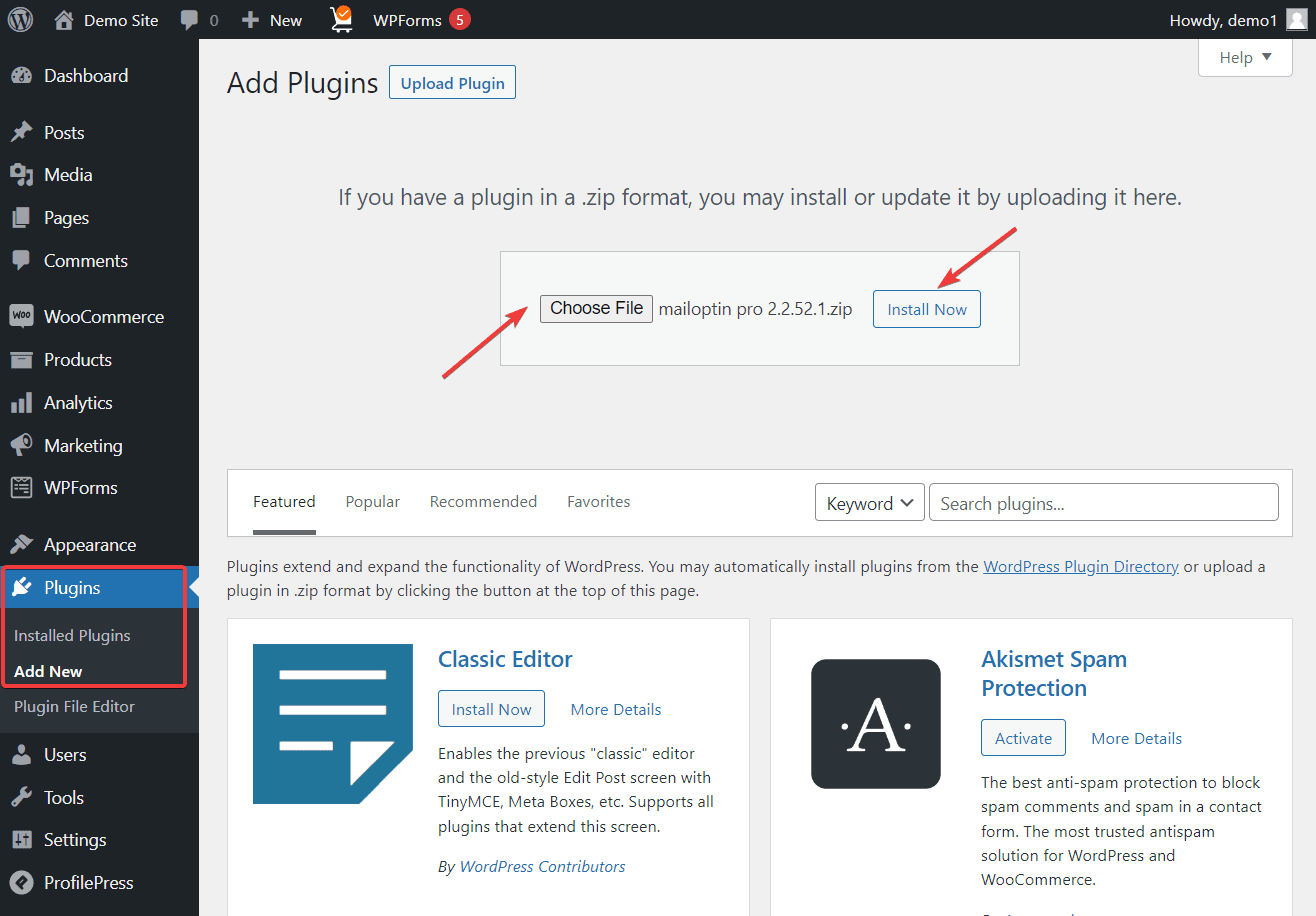
To install the plugin, one your WordPress we-admin, and from the menu located on the left side of the screen, go to Plugins > Add New > Upload Plugin. Next, upload the plugin by clicking on the Choose File option and hitting the Install Now button. The plugin will be installed within a few seconds.
Following the installation, you will need to activate your license.
First off, copy your unique license number from the welcome email or your MailOptin account. Then open your wp-admin and go to MailOptin > Settings > License. Paste your license key in the license box, hit the Save Changes button, and your license will be activated.
Using MailOptin to Connect Your Site With Mailchimp
MailOptin is active on your WordPress website. We will now use the tool to connect your site with your Mailchimp account.
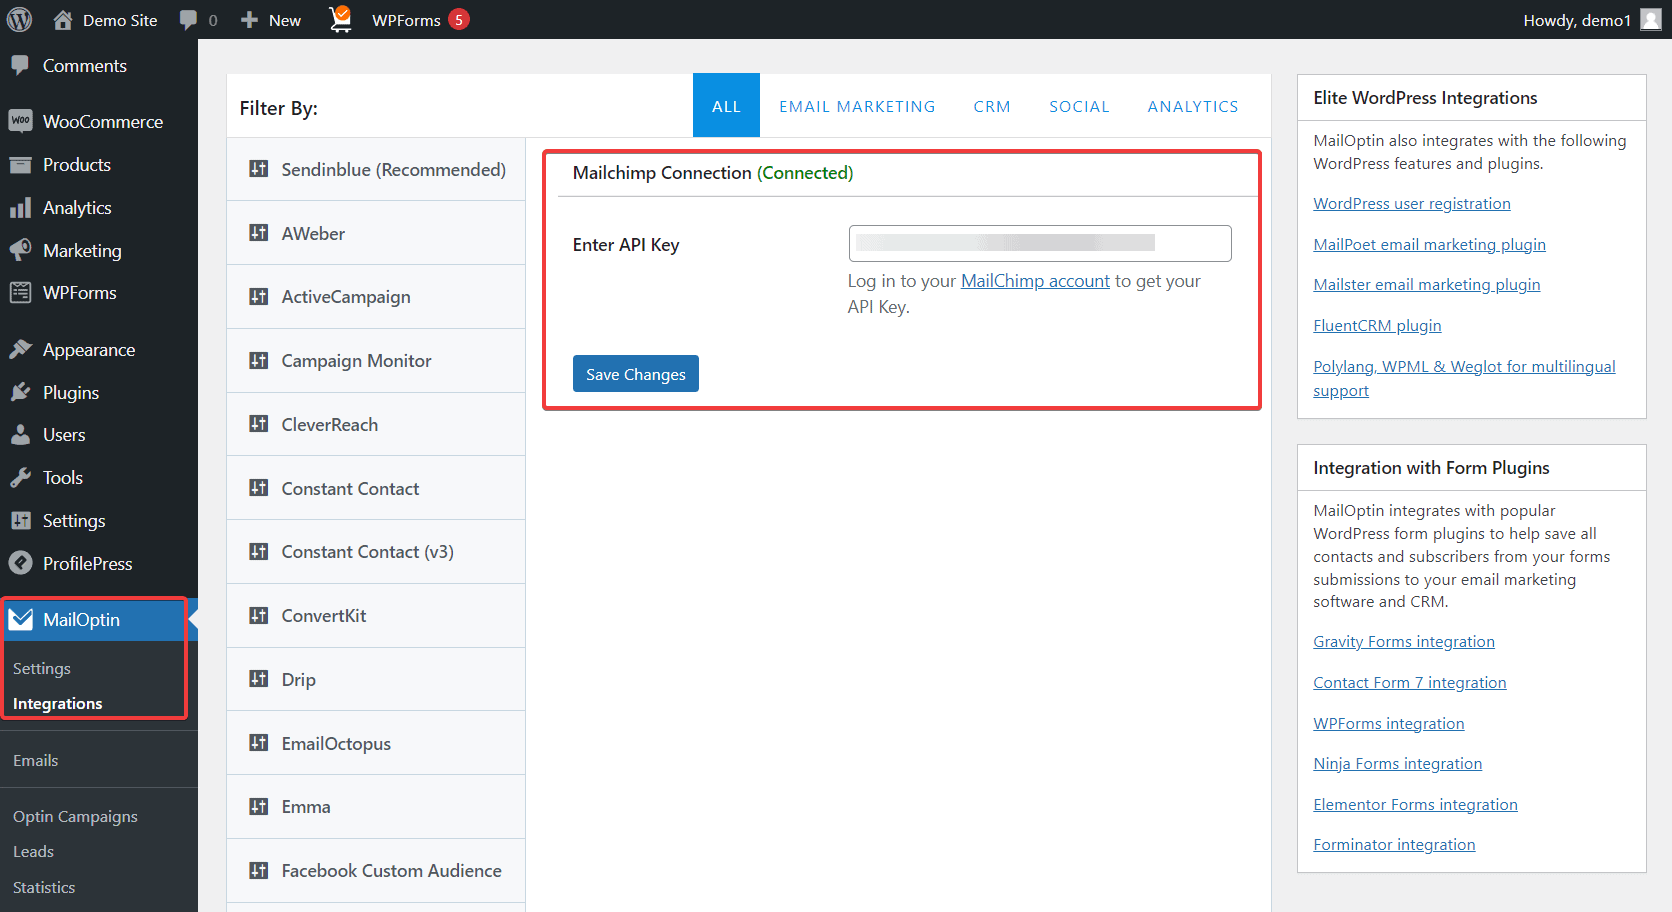
This is easy. Just go to MailOptin > Integration > Mailchimp. On the next page, enter the API key you copied into a notebook in Step 1 and paste it into the grey box near the Enter API Key option. Hit the Save Changes button. And it will connect your website with your Mailchimp account.
Automate New Published Post Alerts in WordPress
Now, we will show you how to automatically email new WordPress posts to subscribers in Mailchimp.
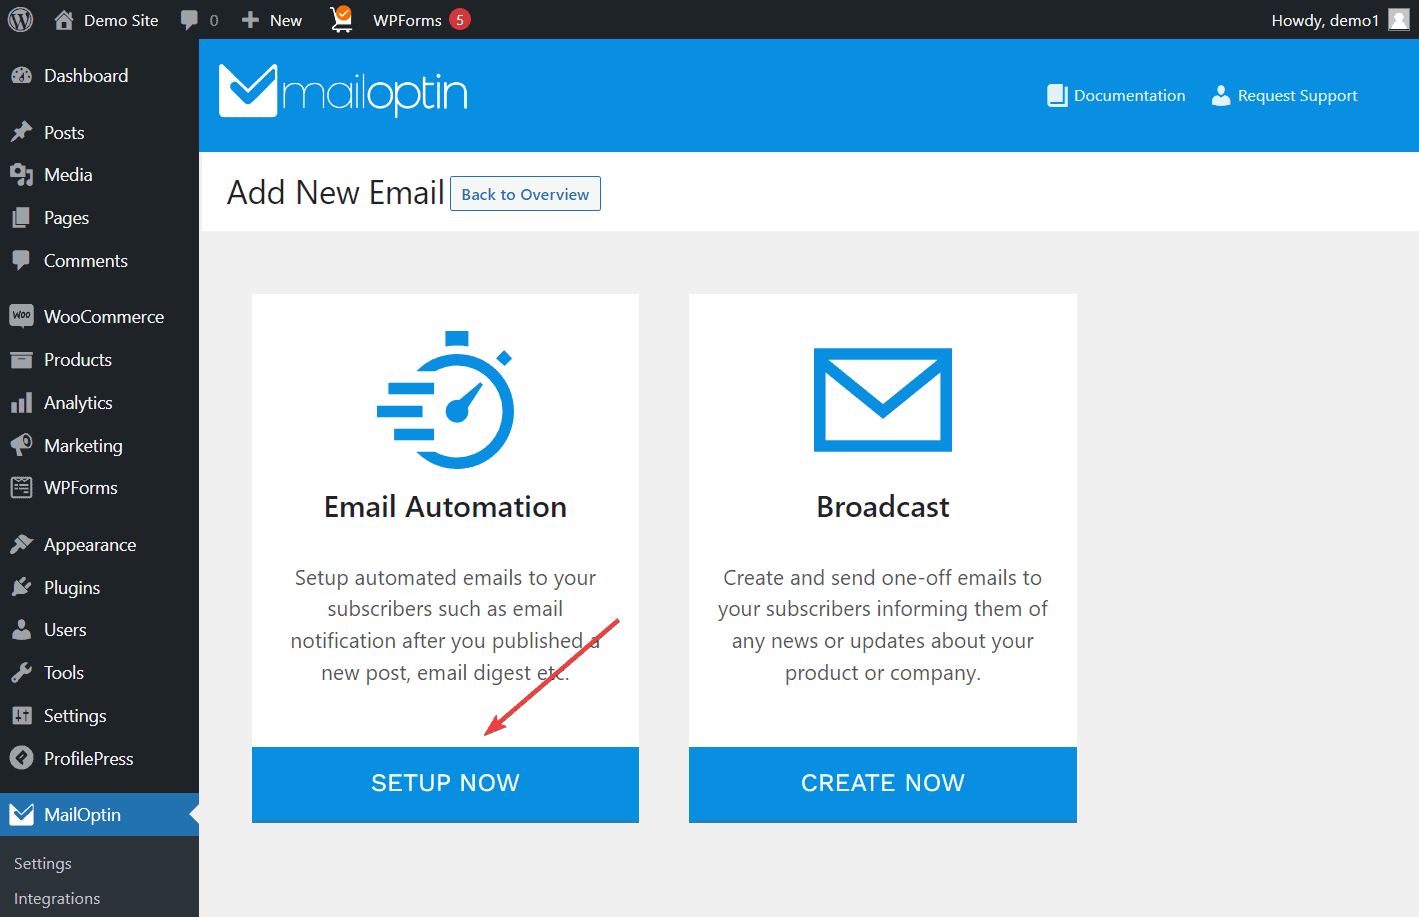
Login to your WordPress dashboard and go to MailOptin > Emails > Add New.
On the next page, select the Setup Now button in the Email Automation option.
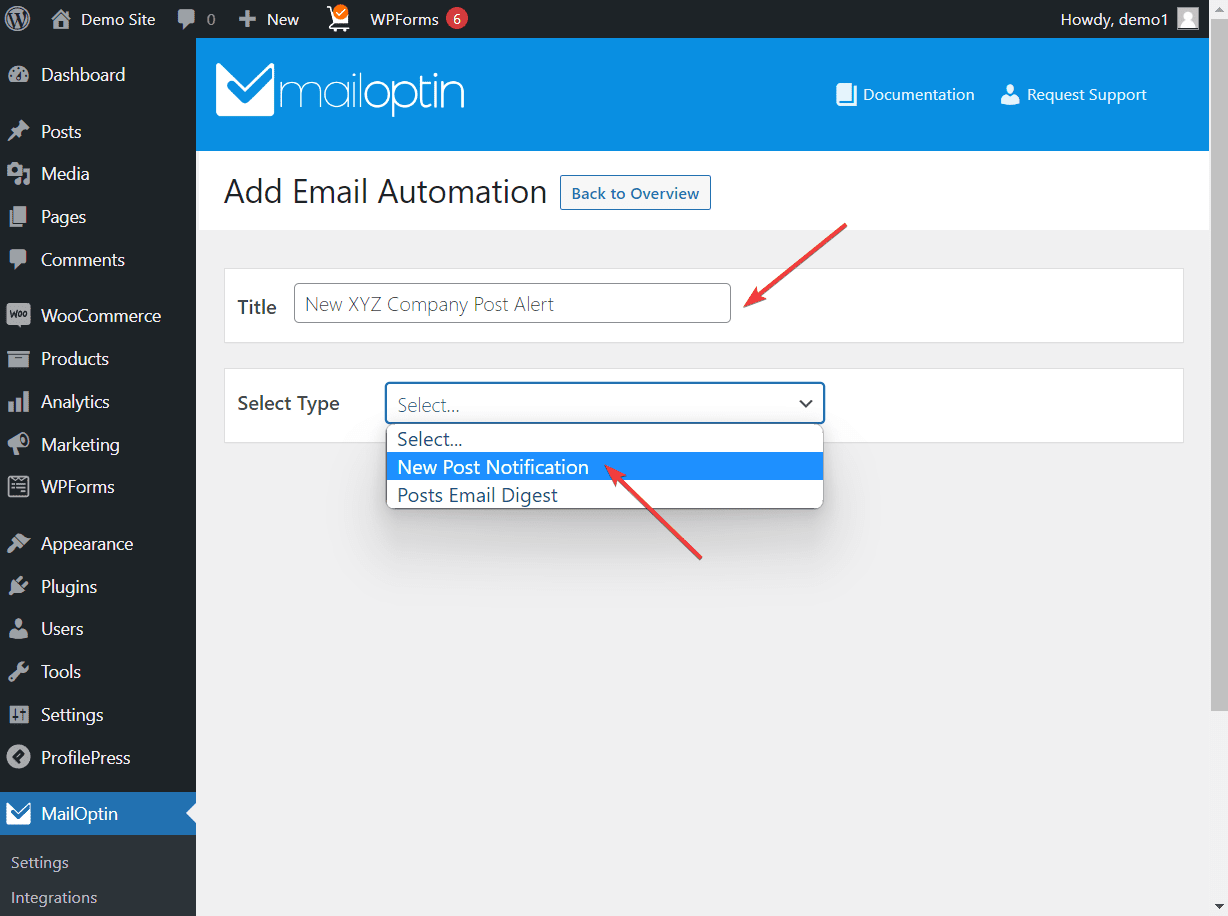
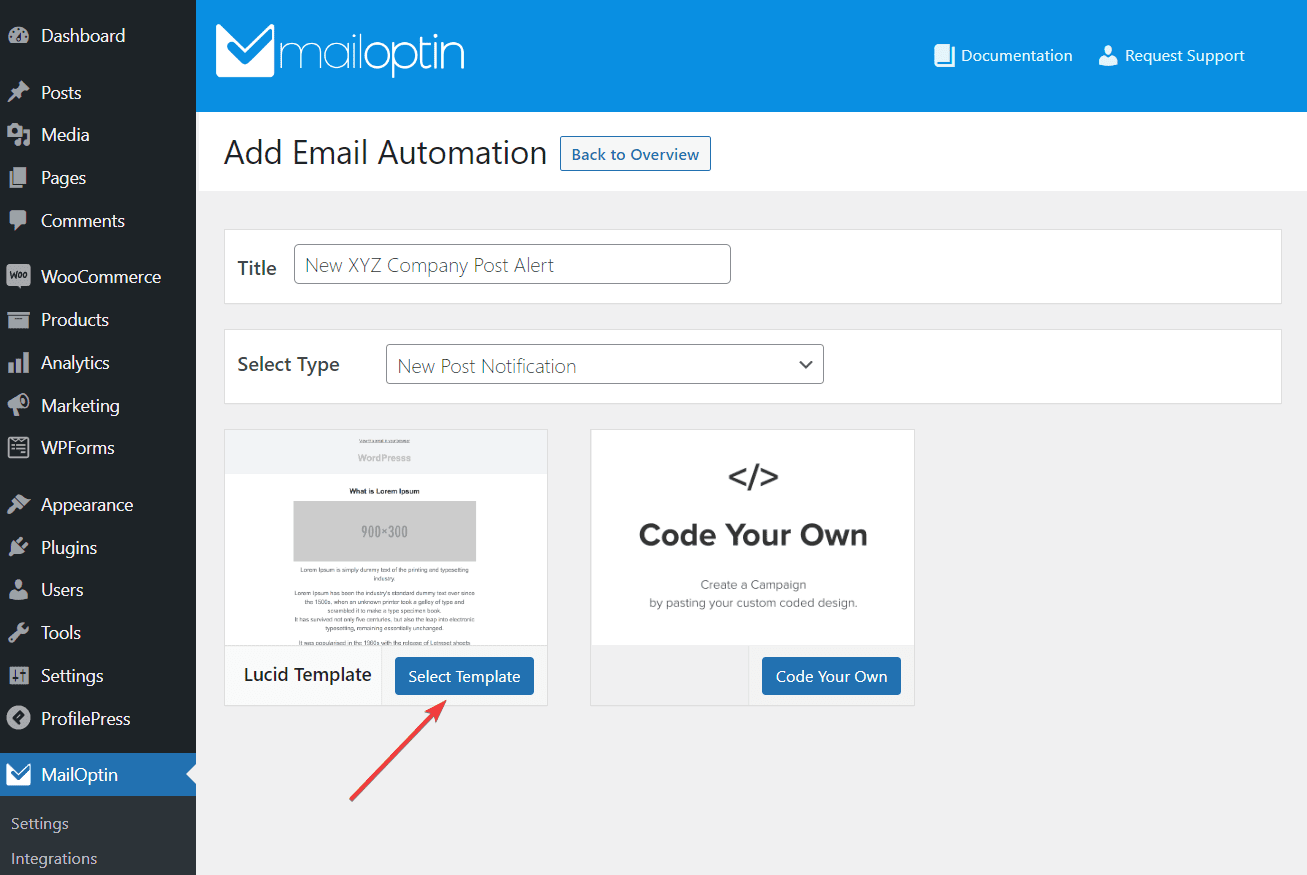
Then enter a name for the new campaign. And from the dropdown menu beside the Select Type option, choose New Post Notification.
As soon as you select that option, two boxes will appear.
The first one offers a template that you can customize and set up for automatic sending. The second one allows you to use your custom code to design a template and set it up for automatic sending.
Choose the Select Template button under the Lucid Template option.
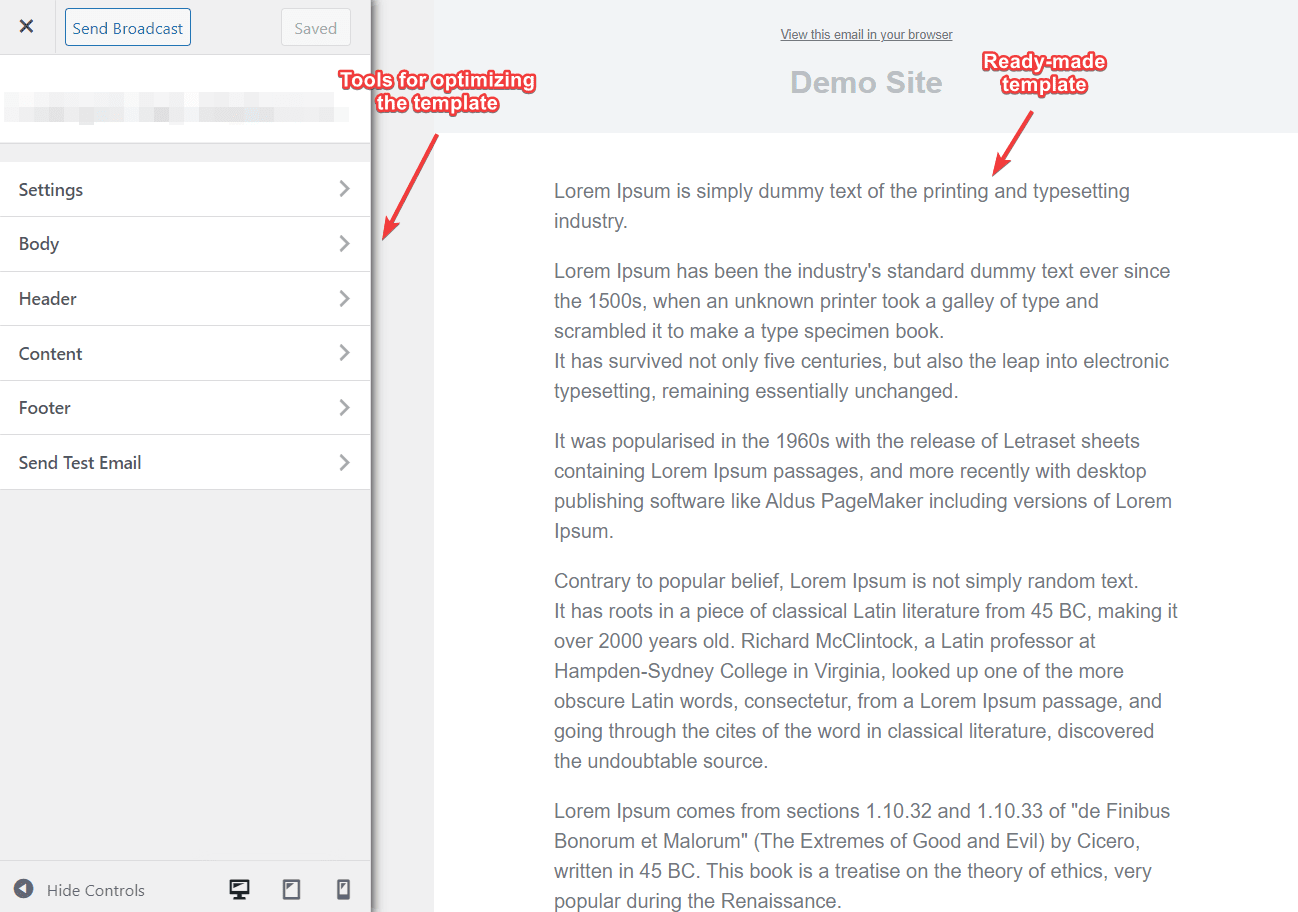
On the next page, you will see a ready-made email template that can be modified using the email editing tools that appear on the left side of the screen.

The first thing you need to do is modify the template as per your needs. You can modify or add a new title, text, and images to the email.
After the email is ready, you can set up the email to be automatically sent whenever a new post is published on your WordPress website. Here’s how:
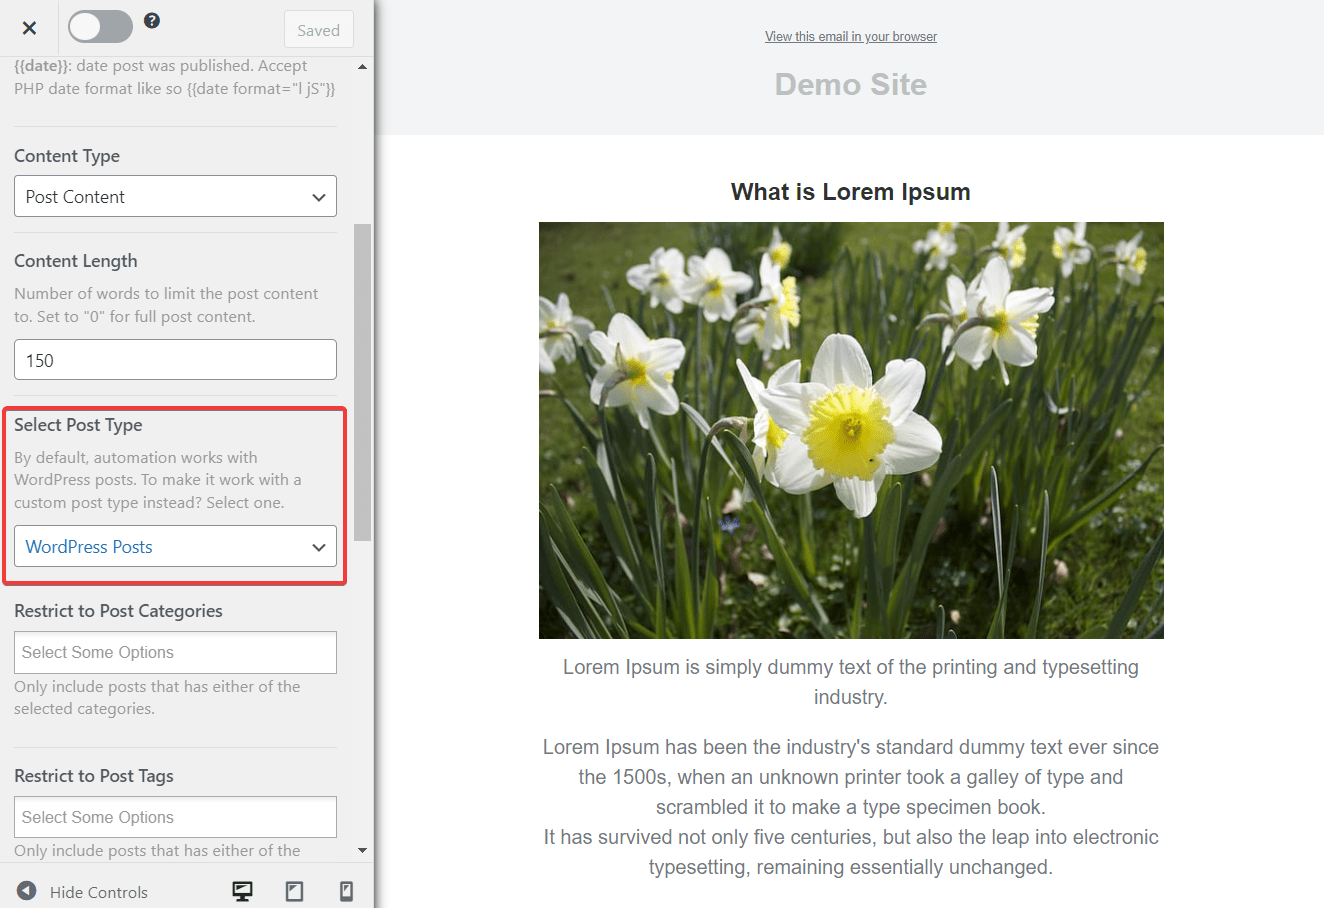
On the email editor, go to Settings and scroll down to the Select Post Type section. Make sure the WordPress Posts option is selected from the dropdown menu.
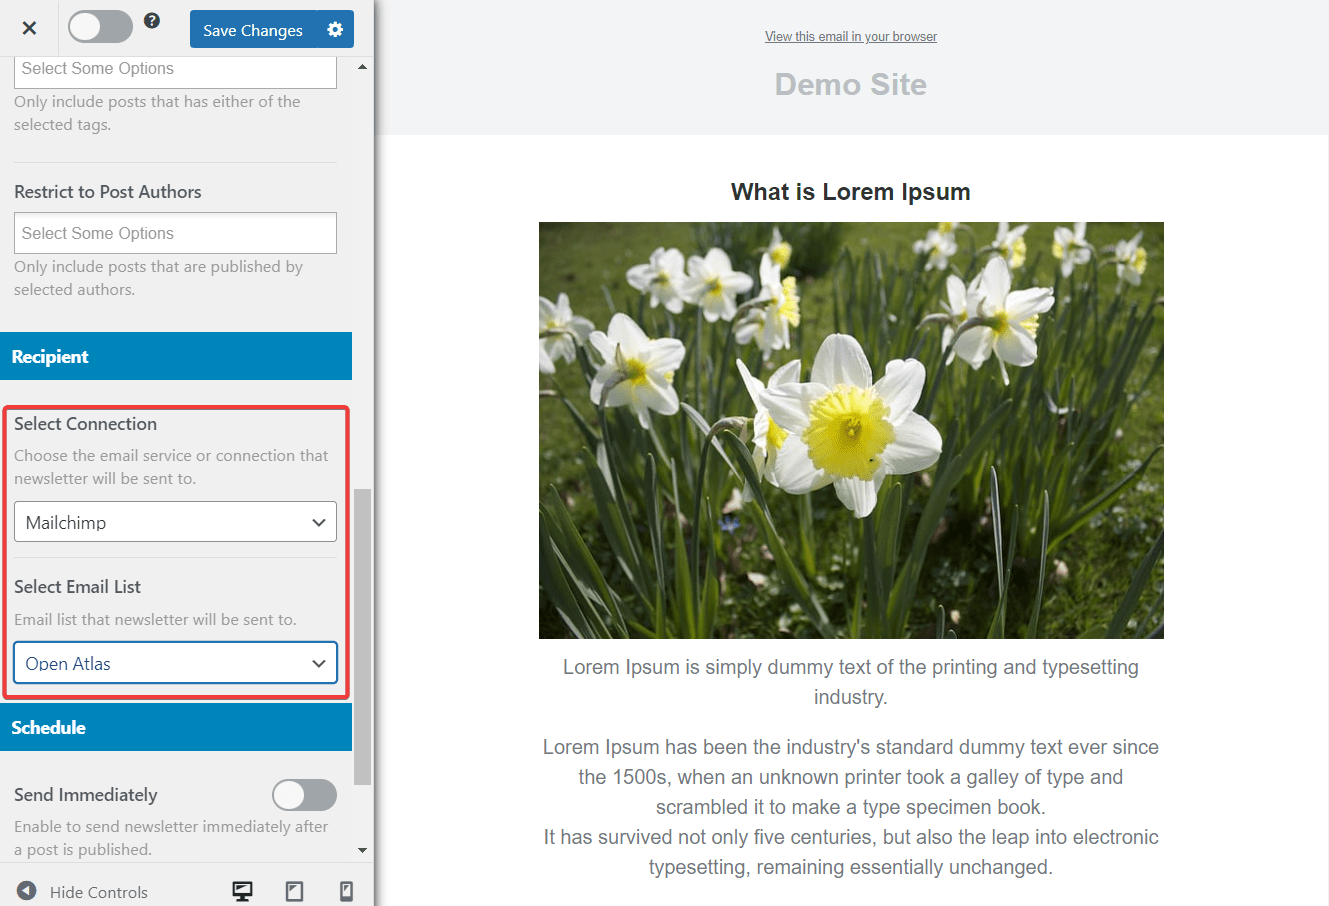
Scroll down further and under Select Connection, choose Mailchimp from the dropdown menu.
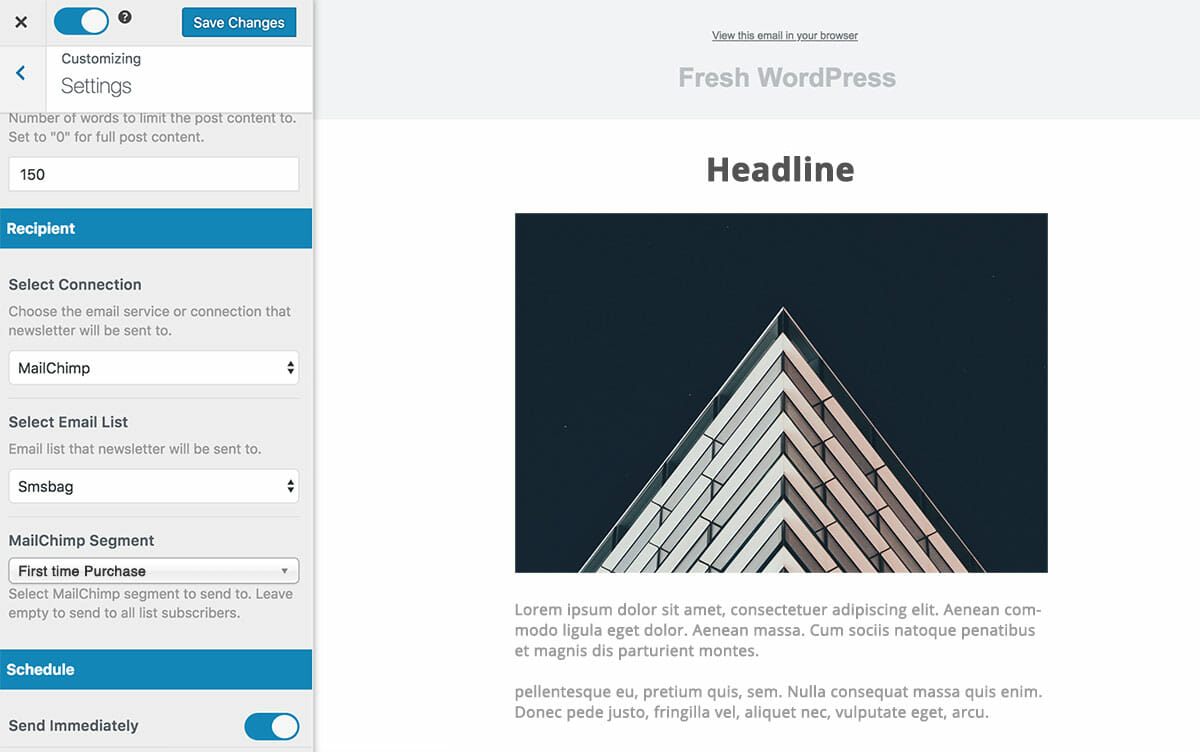
Next, toggle on the Send Immediately button. It will ensure that your articles are sent to your subscribers as soon as you hit the Publish button.
So far, you have installed the MailOptin plugin, connected it with Mailchimp, crafted an email, and added your email list. Now, the only thing left to do is save your settings and activate the email campaign.
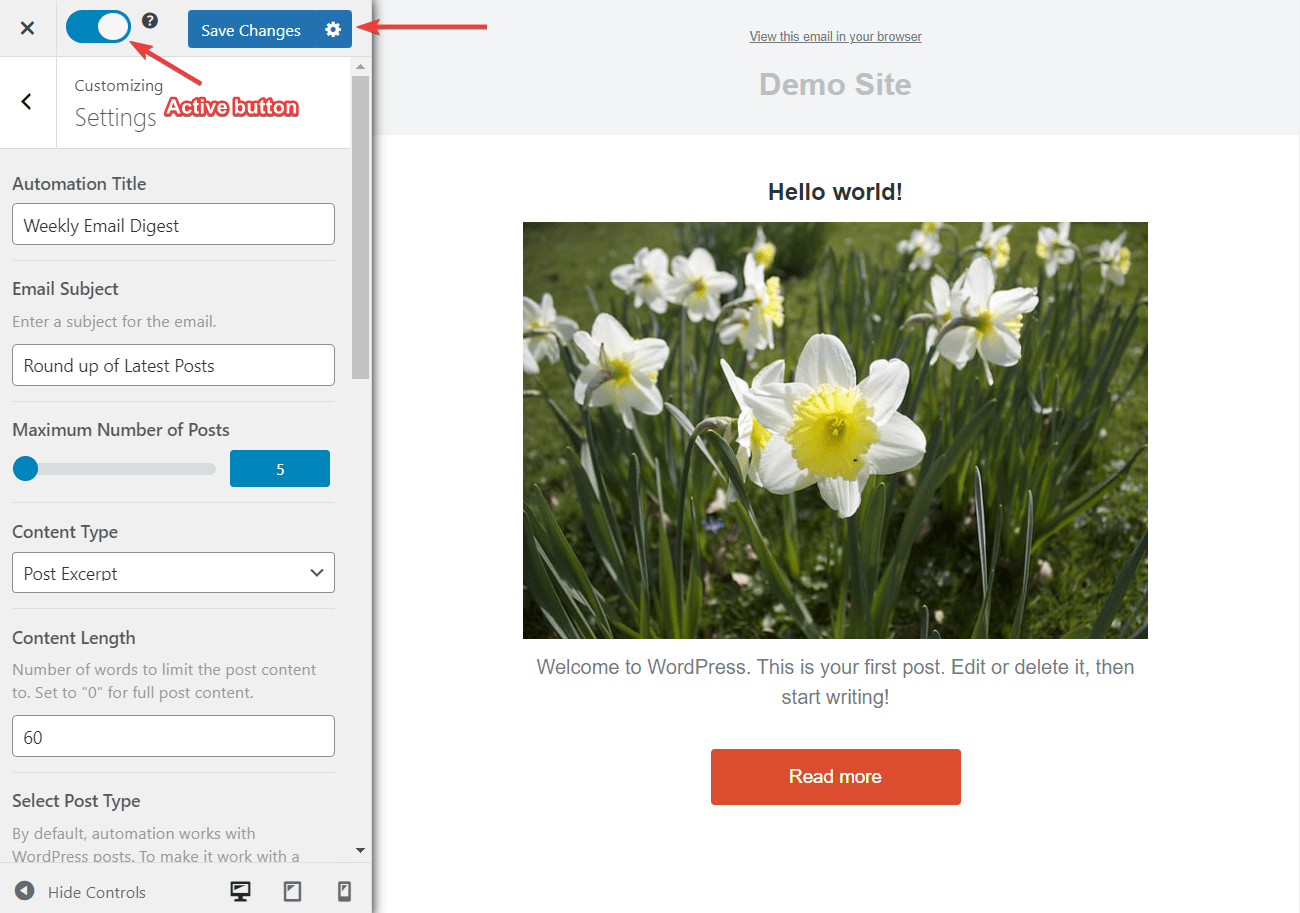
On the top of the screen, hit the Save Changes button and toggle the Active button on.
Also, if you want to send automated email alerts to your WordPress registered users, WooCommerce customers, MemberPress members, EDD Customers, all you need to do is choose their option instead of Mailchimp.
That’s it, folks! Any new article published on your website will be automatically emailed to your subscribers.
See Also:
- WordPress New Post Notification To AWeber List Subscribers
- WordPress New Post Notification To ActiveCampaign List Contacts
- WordPress New Post Notification Email To MailerLite List Contacts
- Setup WordPress New Post Notification To ConvertKit Subscribers
- WordPress New Post Notification Email To Keap/Infusionsoft Contacts
- Setup WordPress New Post Notification To Constant Contact Email List
- Setup WordPress New Post Notification To SendGrid Email Marketing
- Setup WordPress New Post Notification to Zoho Campaigns Contacts
Setup WordPress Email Digests
An email digest is a recurring email sent to subscribers. It can update subscribers about a product’s monthly progress or inform them about the articles published on your WordPress website, among other things.
Consider setting up an email digest if the open rates of your WordPress post alert flounder. Too many emails can lead to information fatigue, causing a decline in open rates. Switching to email digests can boost your open rates and draw more traffic to your website.
MailOptin, the powerful email automation and lead generation plugin, will help you set up recurring email digests. Here’s how:
Step 1: Start an Email Digest Campaign
On your wp-admin, go to MailOptin > Emails > Add New and select the Setup Now button under Email Automation.
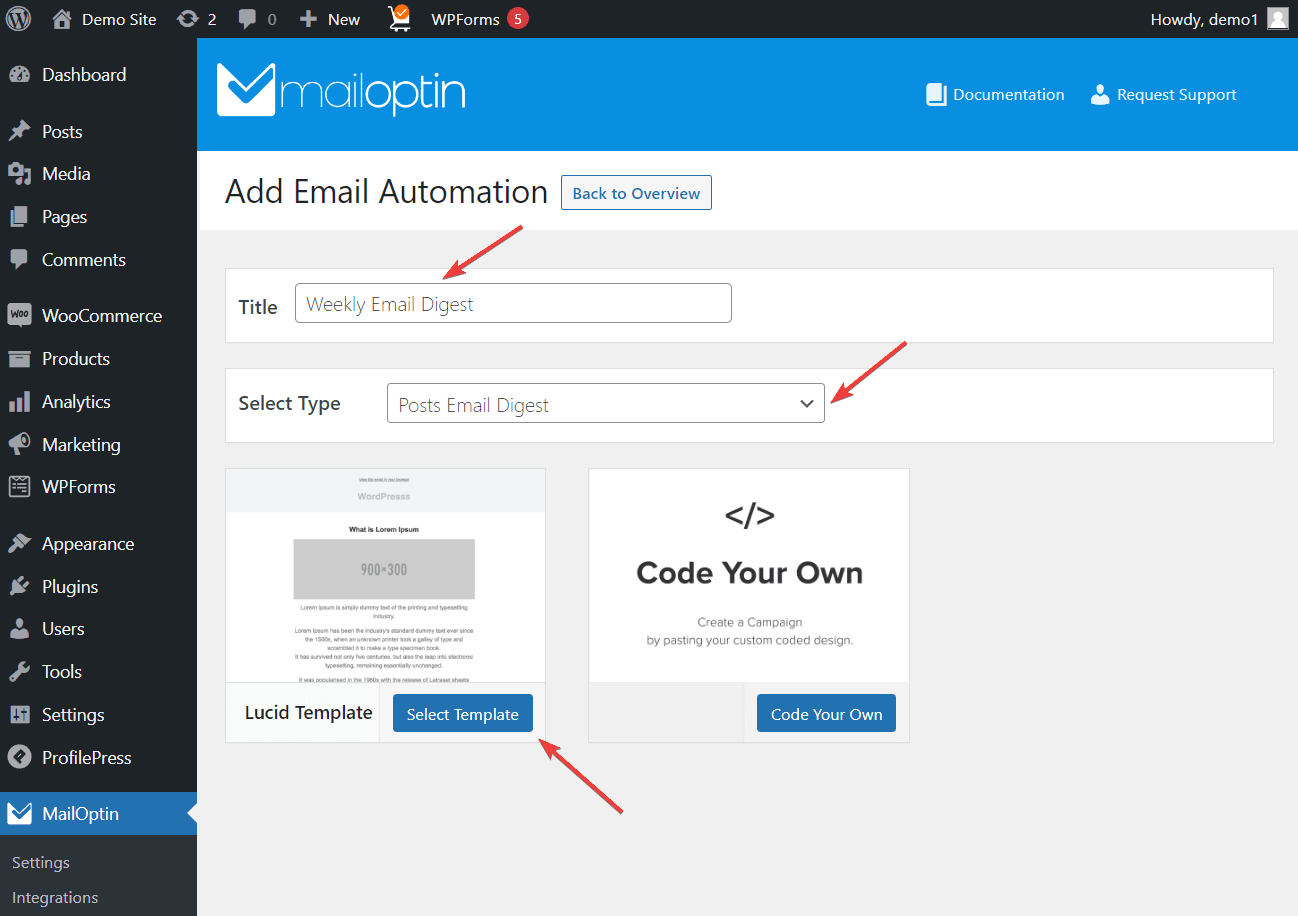
On the next page, enter a name for the email campaign (something like “Weekly Email Digest”), and from the dropdown menu located beside the Select Type option, choose Posts Email Digest.
Hit the Select Template button to select the premade Lucid Template.
Step 2: Modify the Email Template
The email template appears along with the email editing tools on the left side of the screen.
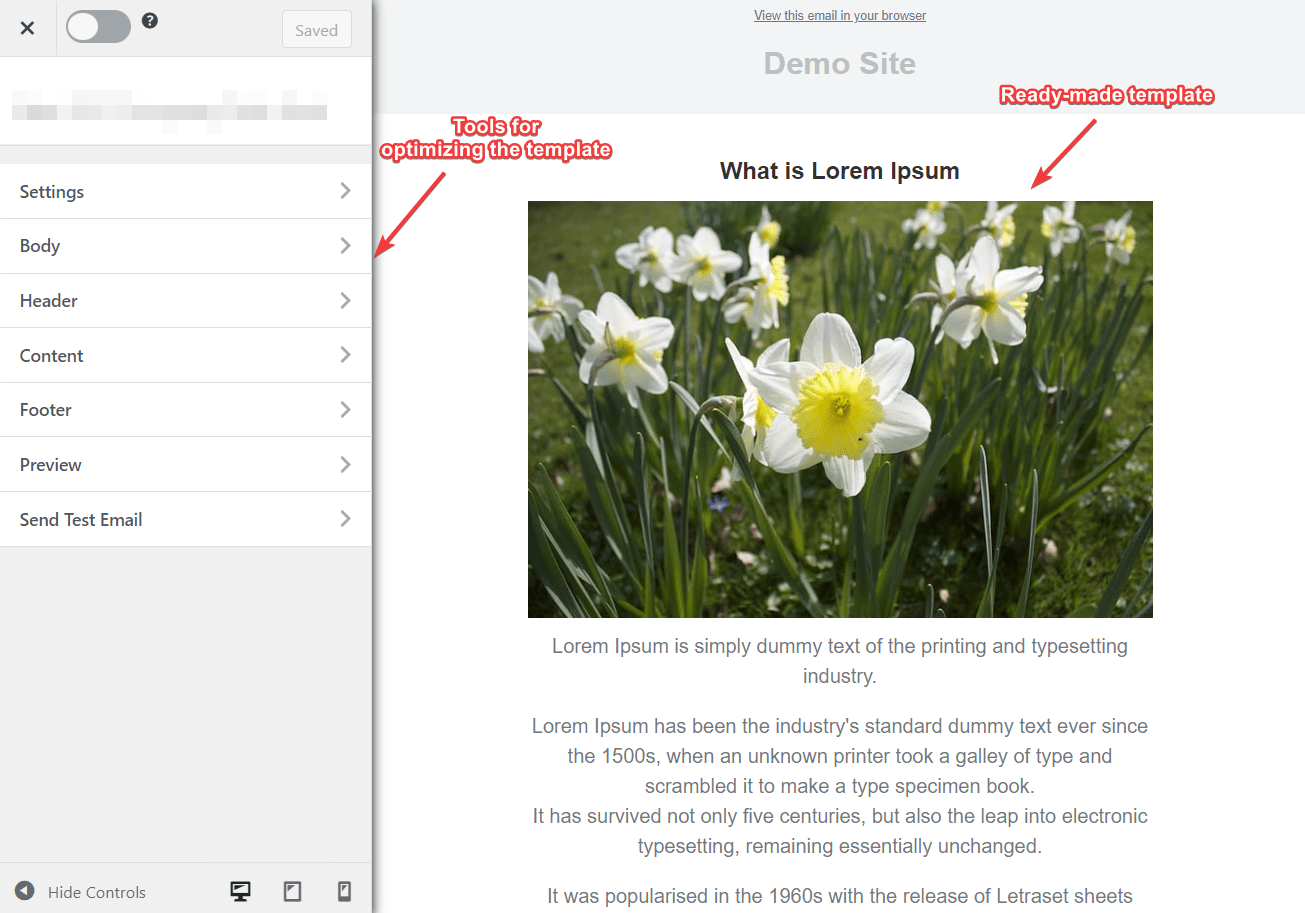
The template contains random text, titles, and images. You will need to modify them all to create a recurring email digest. We recommend looking into your inbox to seek inspiration.
After the email is ready, you will proceed to set the email up to be sent on a recurring basis.
Step 3: Set Up Automatic Recurring Emails
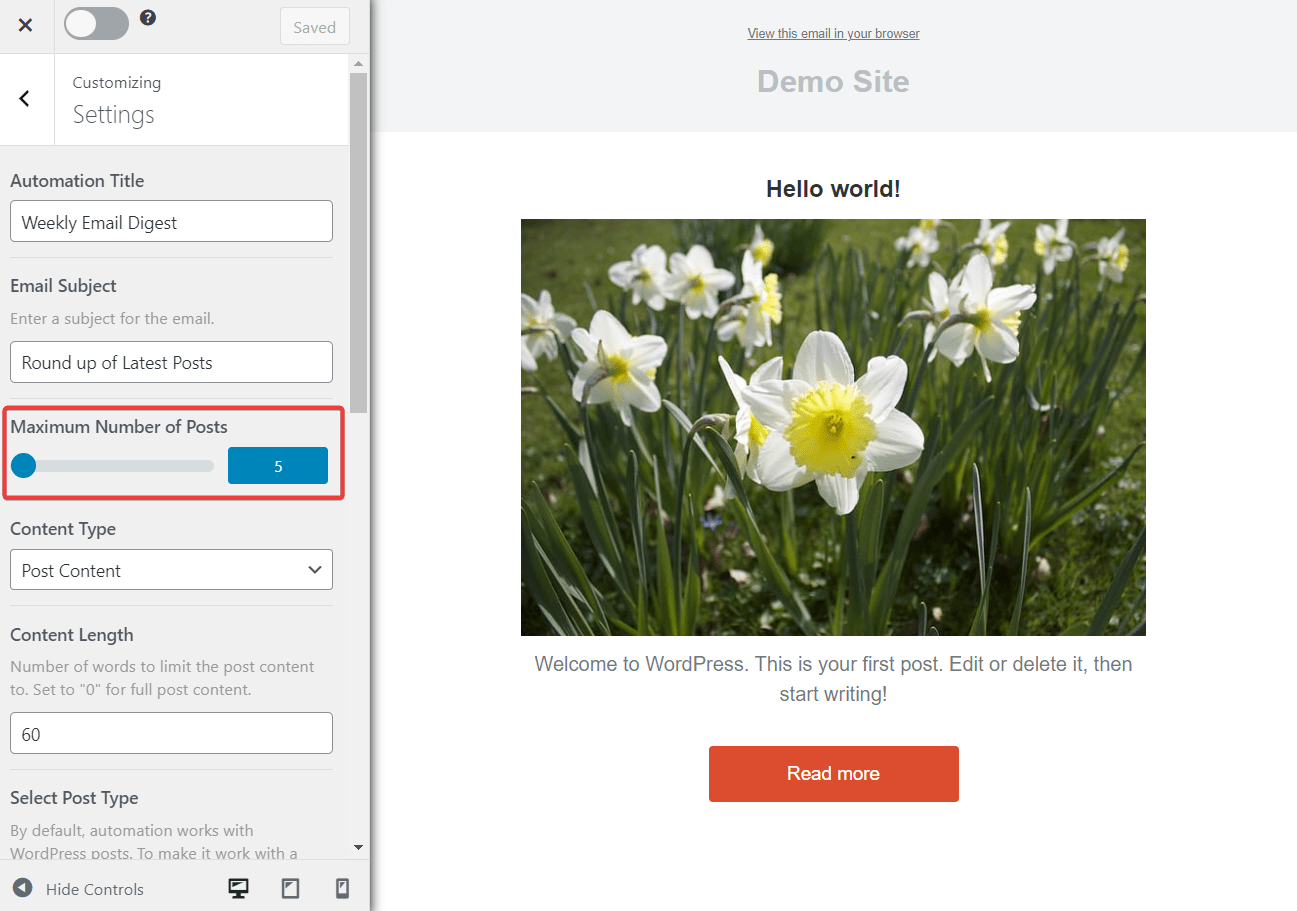
Go to Settings and scroll down to the Maximum Number of Posts section. By default, 5 posts are chosen. Increase or decrease the number of posts based on how many posts you plan to publish and share with the subscribers.
Scroll down further and ensure that WordPress Posts are chosen under Select Post Type.
Next, go to Select Connection and choose Mailchimp from the dropdown menu. On your Mailchimp account, users can store subscribers in groups called email lists. As soon as you choose the Mailchimp option, you will be shown all your email lists and be asked to choose one. Even if your account has a single email list, you will need to choose that from the dropdown menu.
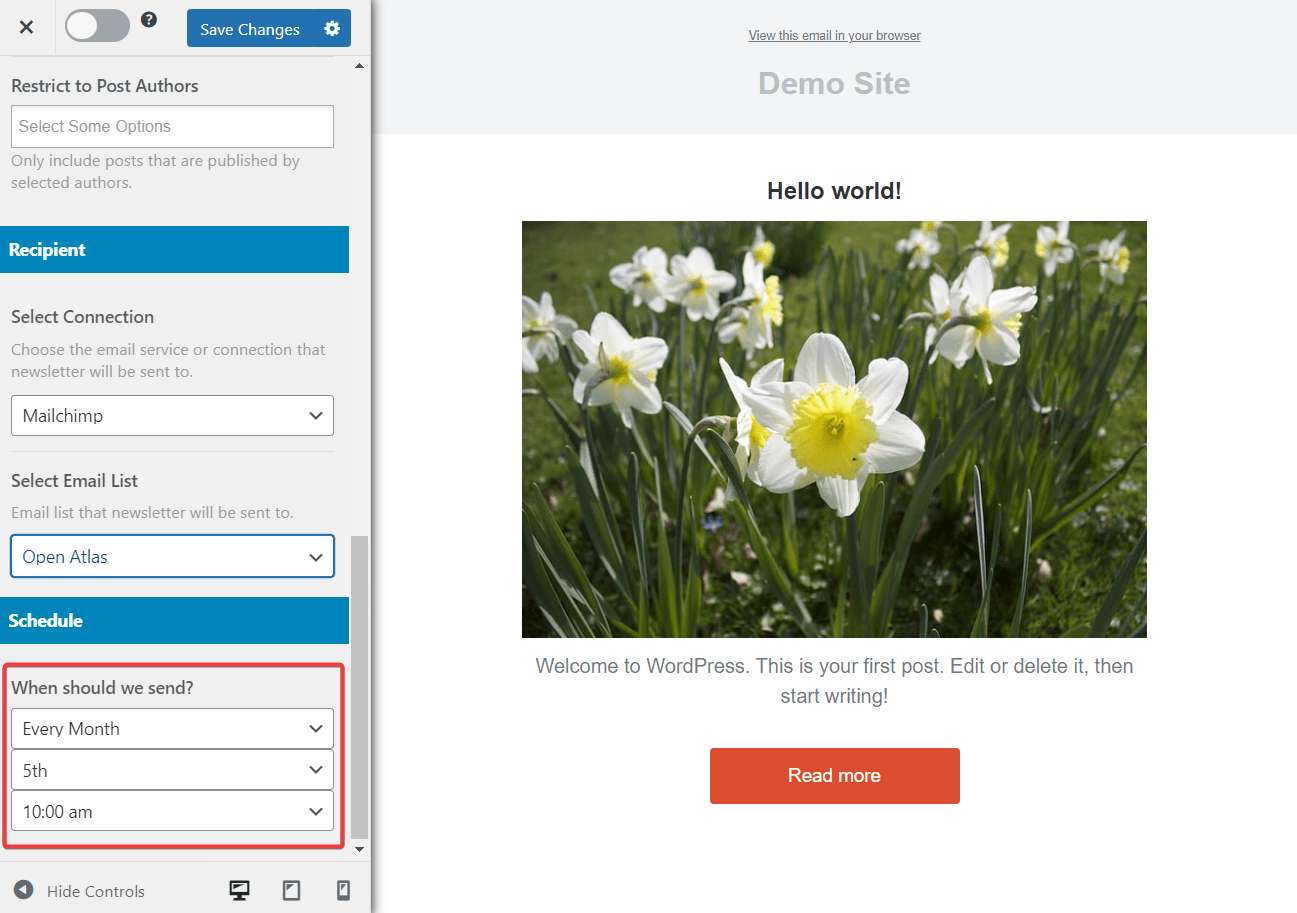
Now, it’s time to schedule the email digest using the When Should We Send option. You can choose to send emails every day, every week, or every month.
- If you choose to send emails every day, then you need to specify the time of sending.
- Choosing to send every week will need you to specify the day of the week and the time.
- And choosing to send every month will need to specify the date of the month and the time of sending.
Setting the maximum number of posts, selecting the post type, choosing your subscriber list, and setting a schedule are the most important steps that you need to take to set up a recurring email digest.
You can leave the rest of the settings as it is or choose to modify them according to your needs. For instance, you might want to change the default subject line to something catchy.
When you are ready, hit the Save Changes button on the top of the screen, and be sure to toggle the Active button on to start the campaign.
Send One-time Emails For Selected WordPress Posts
One-time emails are required when there are announcements to be made or news to be shared with your Mailchimp subscribers. You can also send one-time emails of select posts published on your WordPress site. Here’s how:
Step 1: Adding Selected Posts to Email
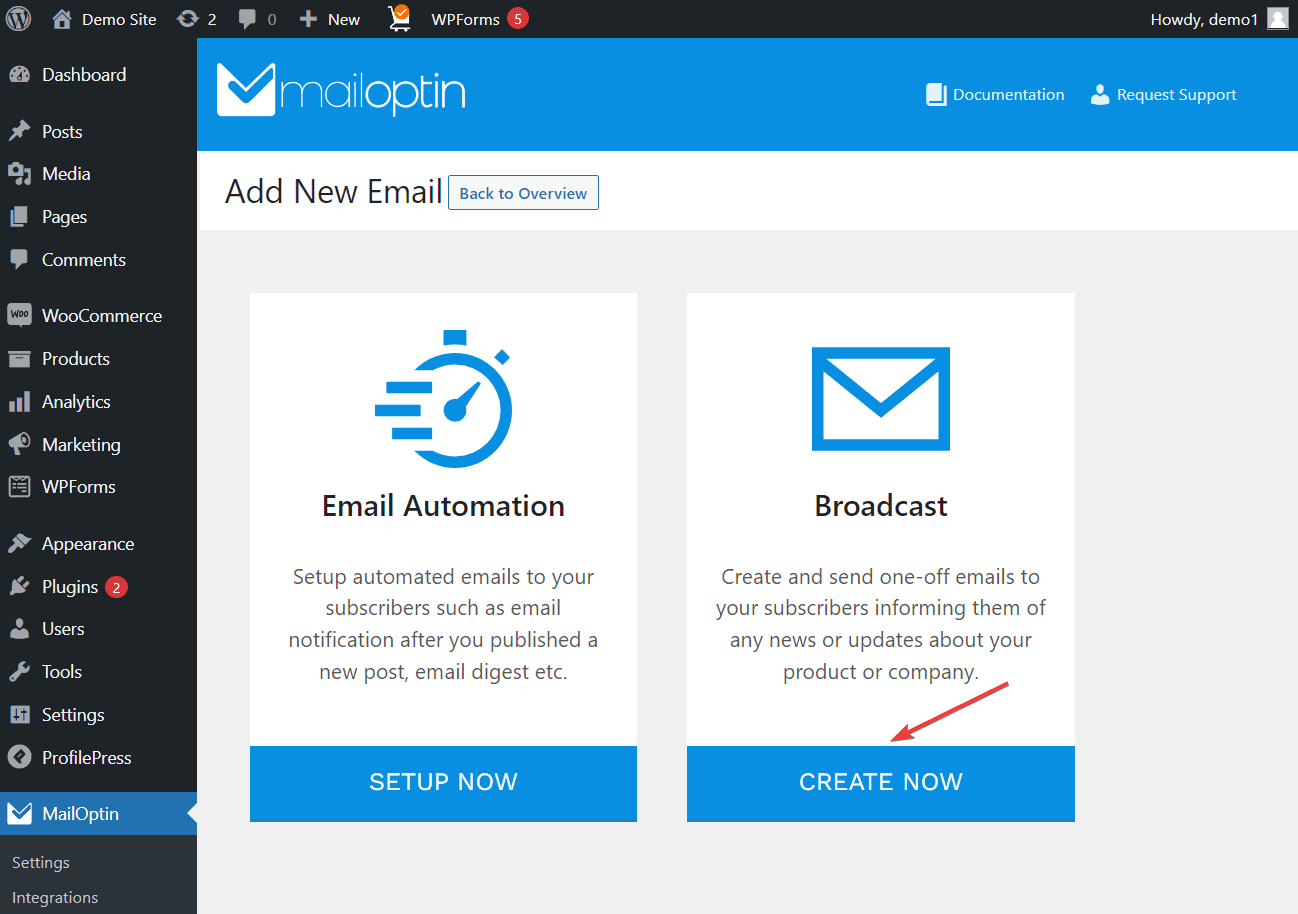
Go to MailOptin > Emails > Add New and select the Create Now button under Broadcast.
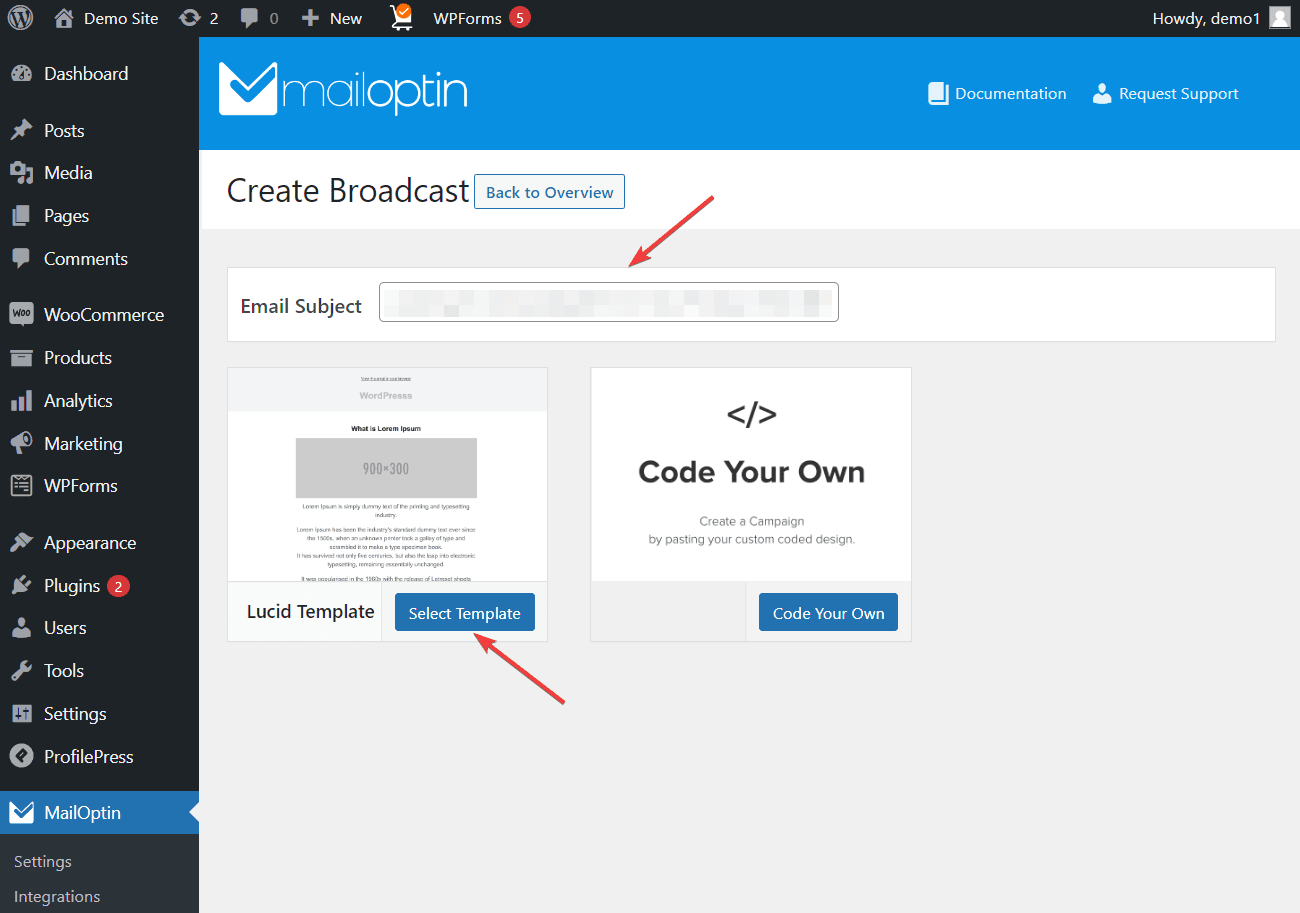
On the next page, you will be asked to write a subject line for the email. When that is done, choose the Lucid Template by clicking on the Select Template button.
After selecting the template, you will be redirected to a page with an editable email template. The template is on the right side of the screen, and the tools to modify it are on the left side of the screen.
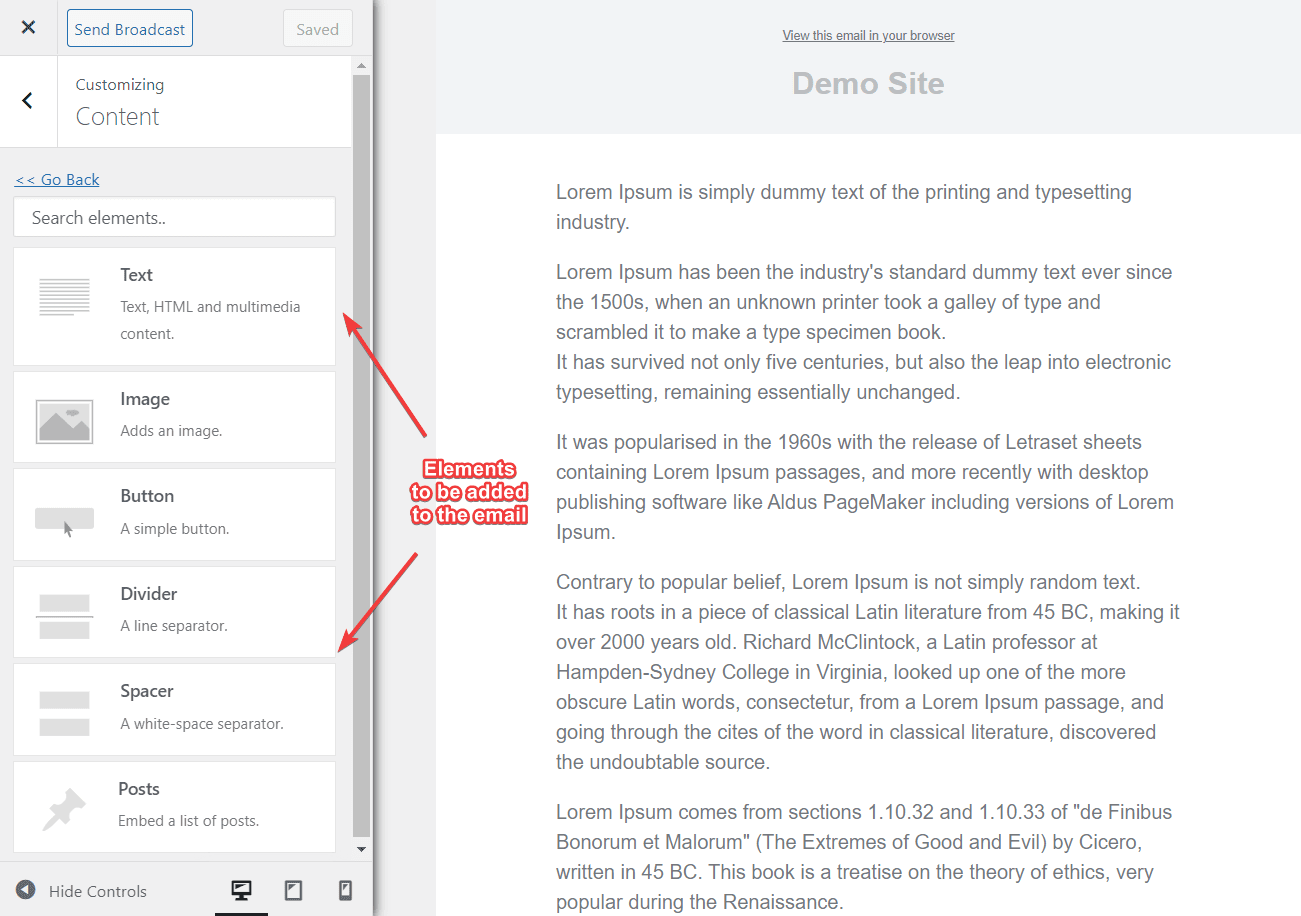
The text on the email template is gibberish, so you will first need to modify it by adding new headlines, text, images, buttons, dividers, and spacers. To add any of these elements, go to Content, select Add Element, and choose the element you want to insert into the email.
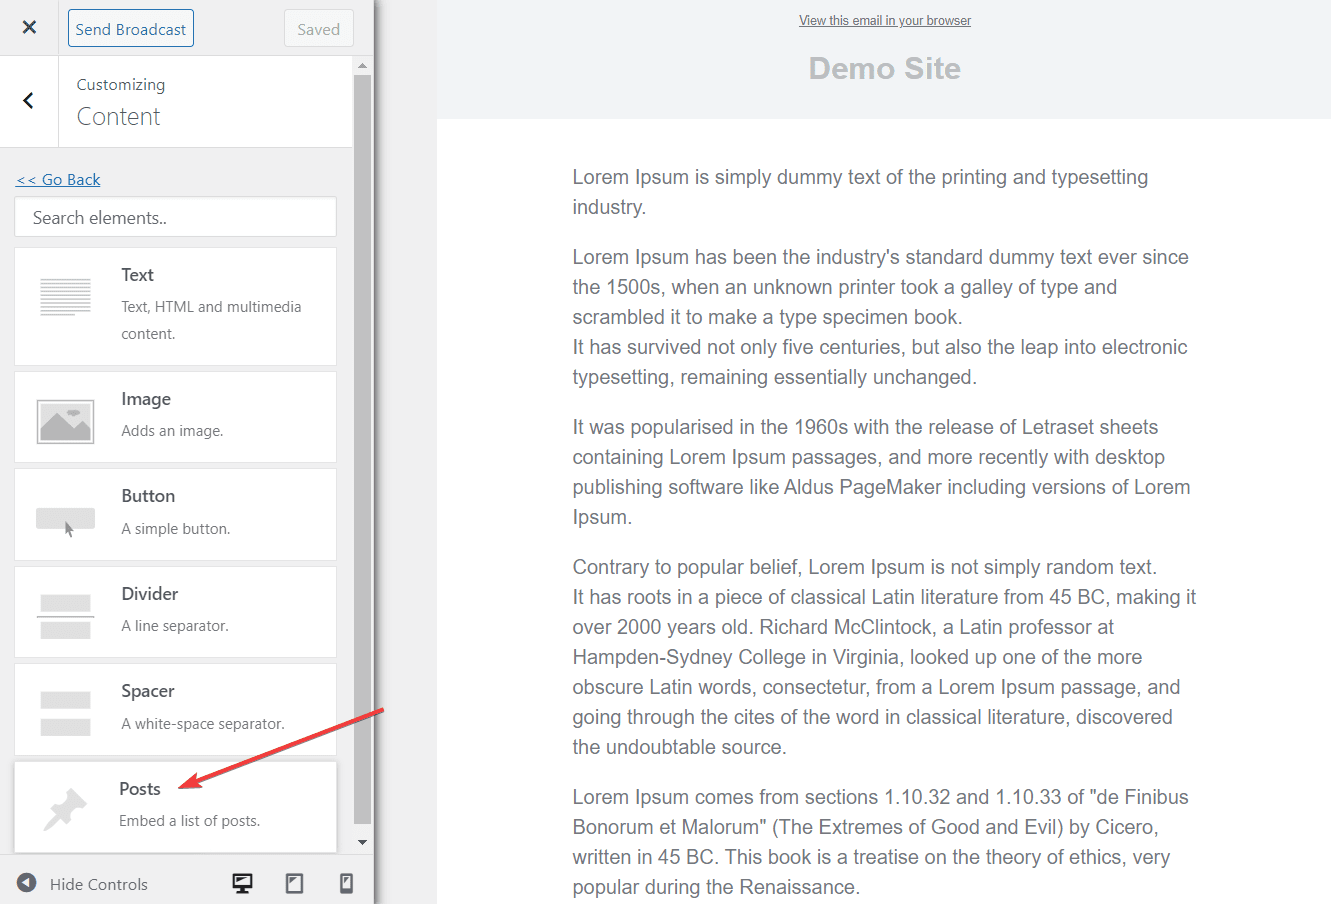
Next, you will add select posts from your site to the email by choosing the Posts option in the Content panel.
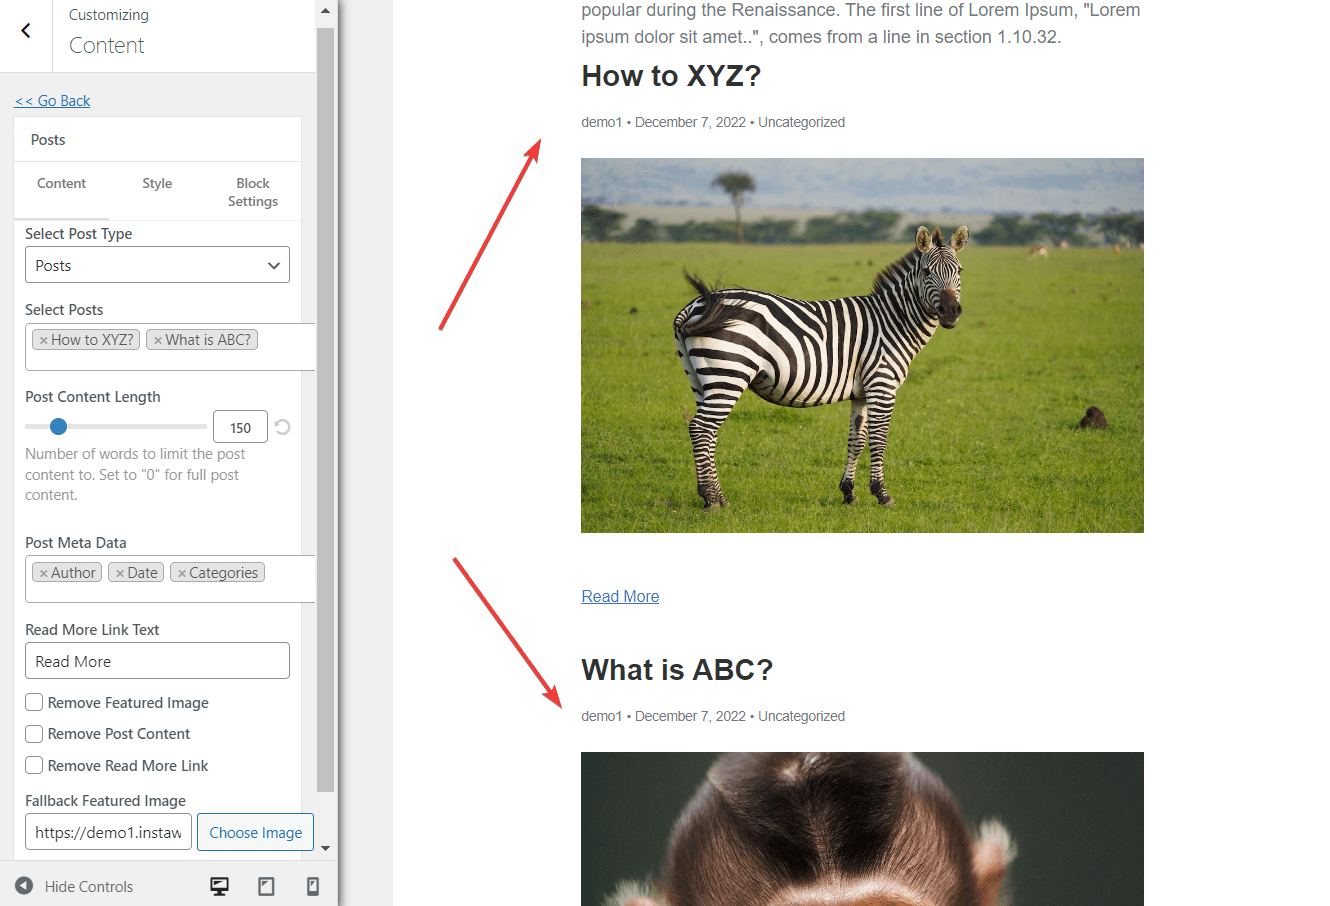
As soon as you choose the Posts option, the Posts panel will appear. Using this panel, you can add content, change the style of the email and add or remove padding around the posts.
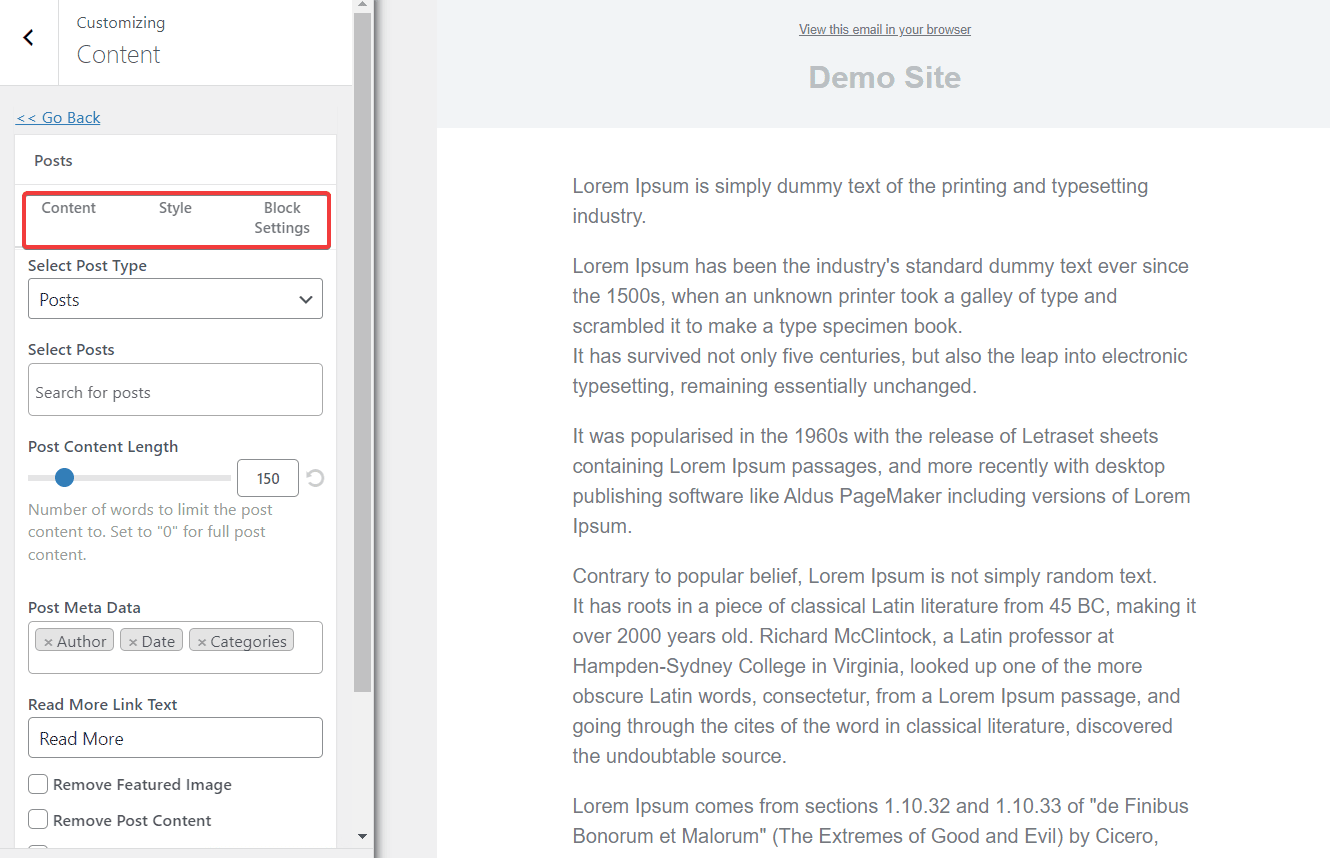
Let’s first modify the Content fields.
- Make sure you have the option Posts selected under the Select Post Type option.
- And then, add the name of the posts you want to send to the subscribers in the Select Posts option.
- The next three options: Post Content Length, Post Meta Data, and the Read More Link Text, are filled by default. You can choose to modify them or let them be as they are.

When you are ready, hit the Save Changes button at the top of the screen. As soon as you do that, you will see your selected WordPress posts appear on the email template on the right side of the screen.
When you are happy with the content, move on to the Style and the Block Settings panels. The first panel allows you to modify the font family used on the email, along with the colors of the post title and the “Read More” link color. The second panel allows you to add or remove padding around the WordPress posts in your email.
After crafting the content, style, and block settings, it’s time to choose the email list where this email will be sent.
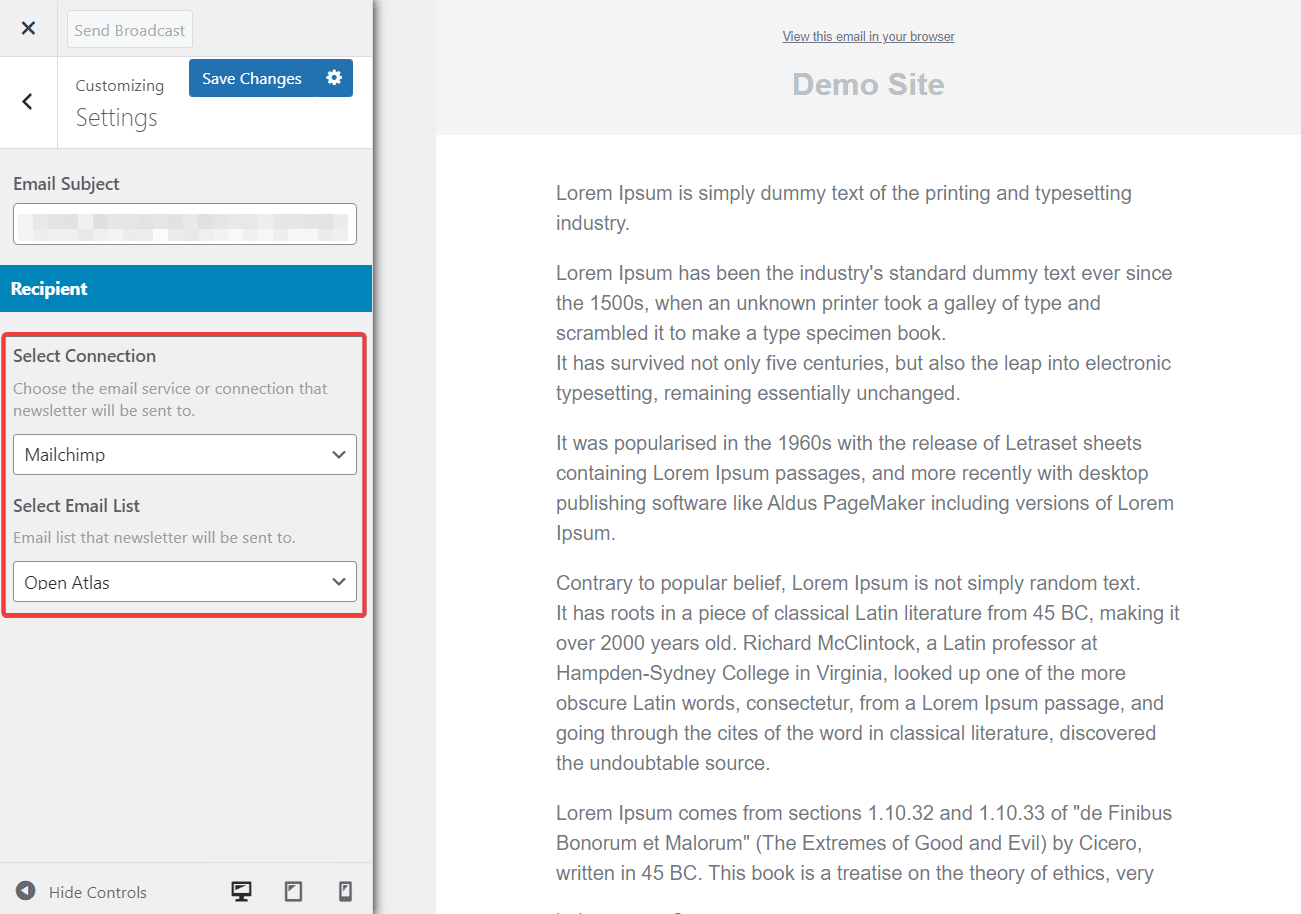
Step 2: Sending Selected Post to Mailchimp Subscribers
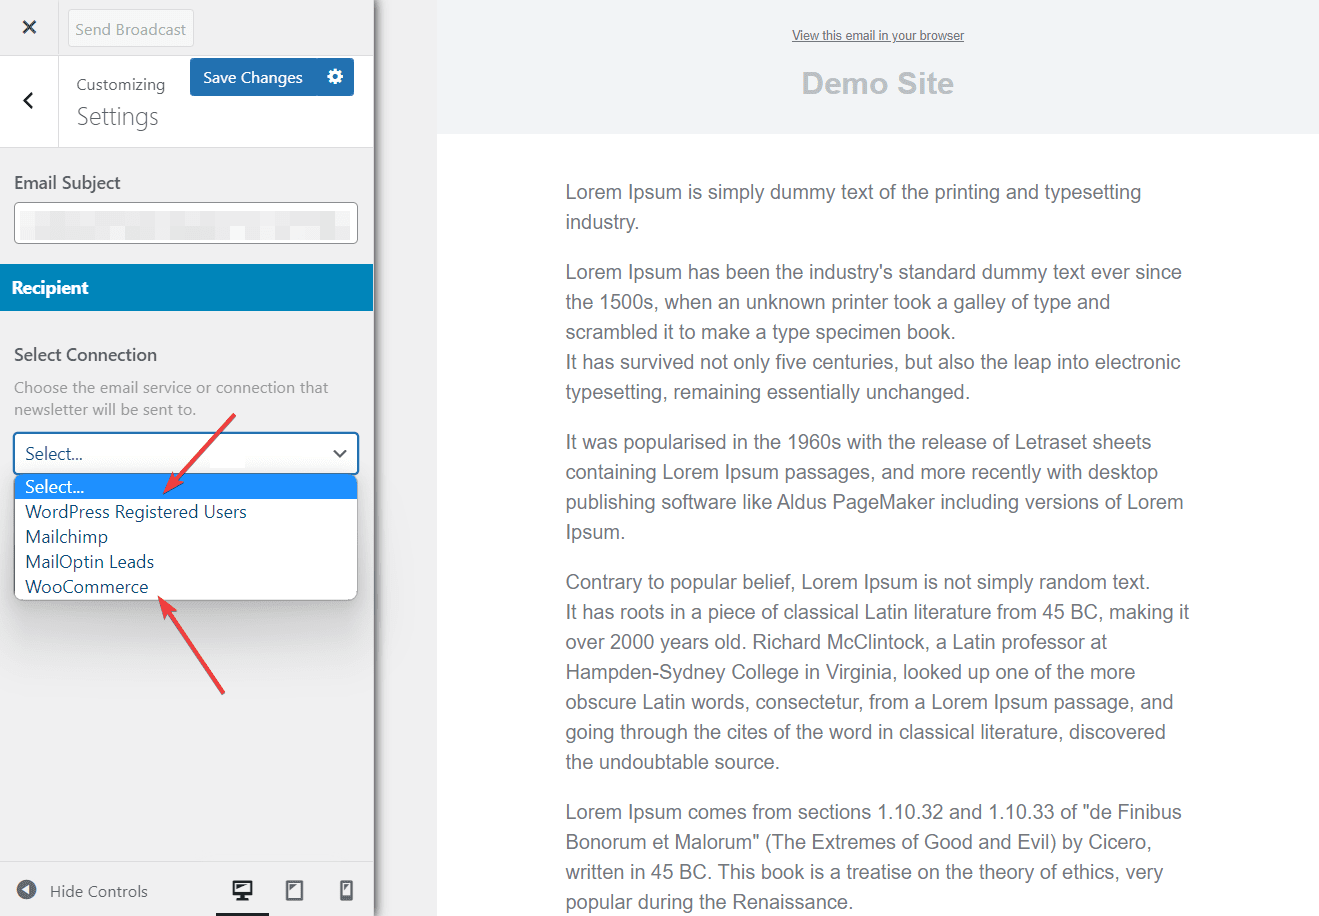
Go to Settings, and from the dropdown menu below, Select Connection, choose Mailchimp or the email service of your choice.
And as soon as you do that, you will be asked to choose an email list.
So far, you have carried out the two most important steps: preparing the email content and choosing an email list for sending the email.
Now comes the third and final step, i.e., sending the email.
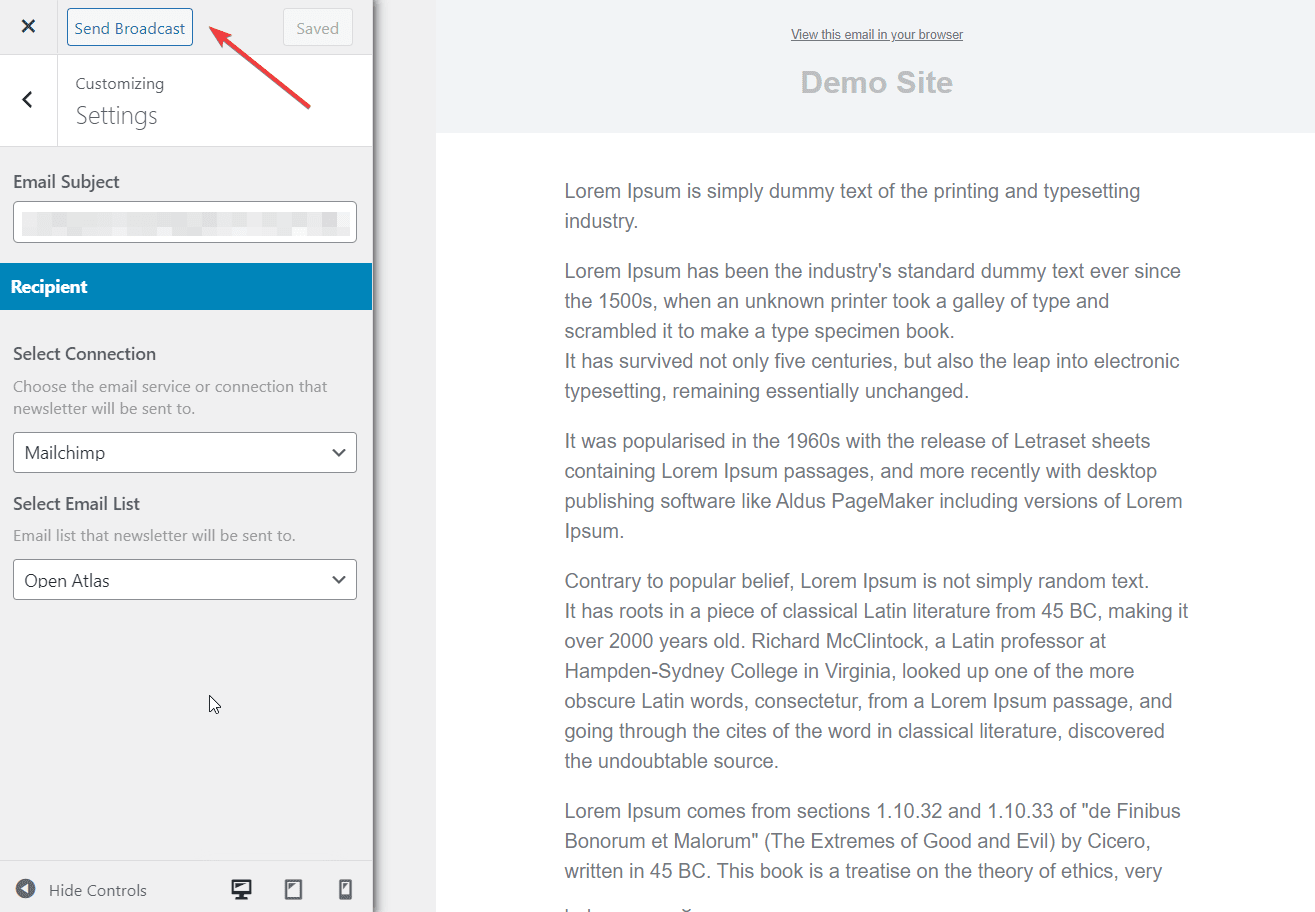
Step 3: Send the One-Time Email
To send the email, go to the top of the screen and hit the Save Changes button. All your modifications will be saved, and the greyed Send Broadcast button will become prominent.
Click on the Send Broadcast button, and the email will be sent to your subscribers.
Conclusion
MailOptin is a powerful lead generation and email automation tool. It allows you to send automated emails to your subscribers every time you publish an article on your website. It integrates with the most popular email marketing services, including Mailchimp.
We hope this article helped you learn how to email WordPress posts to your Mailchimp subscriber whenever a new post is published.