How to Create a Team Member Showcase Page in WordPress
A members page is a great way to showcase team members of your WordPress website.
Luckily building a members page is not too difficult. All you need to do is find the right tools, and you can get your team members page up and running in no time.
In this article, we will show you how to create a WordPress members page to showcase your team to anyone with access to the page.
Now let’s dive in.
How to Create a WordPress Team Members Page
Plenty of plugins can be used to create a WordPress team members page on your WordPress website. For this tutorial, we are using ProfilePress, a powerful WordPress team page plugin.
ProfilePress is a powerful WordPress team page plugin. However, it can do much more than building a team member page. You can use it to limit access to the members page, hide the admin bar for select users, and create custom profile pages, among other things.
Before we show you how to install and use ProfilePress on your WordPress website, you need to take a backup of your entire site. New plugins are known to break websites, so if something goes wrong after installing ProfilePress, the backup will come to your rescue.
Let’s get started.
Create Custom User Role
The first step is to create new user roles that will help identify which users to include on the team page.
Step 1: To create new user roles, you must install and activate the WPFront plugin on your site.
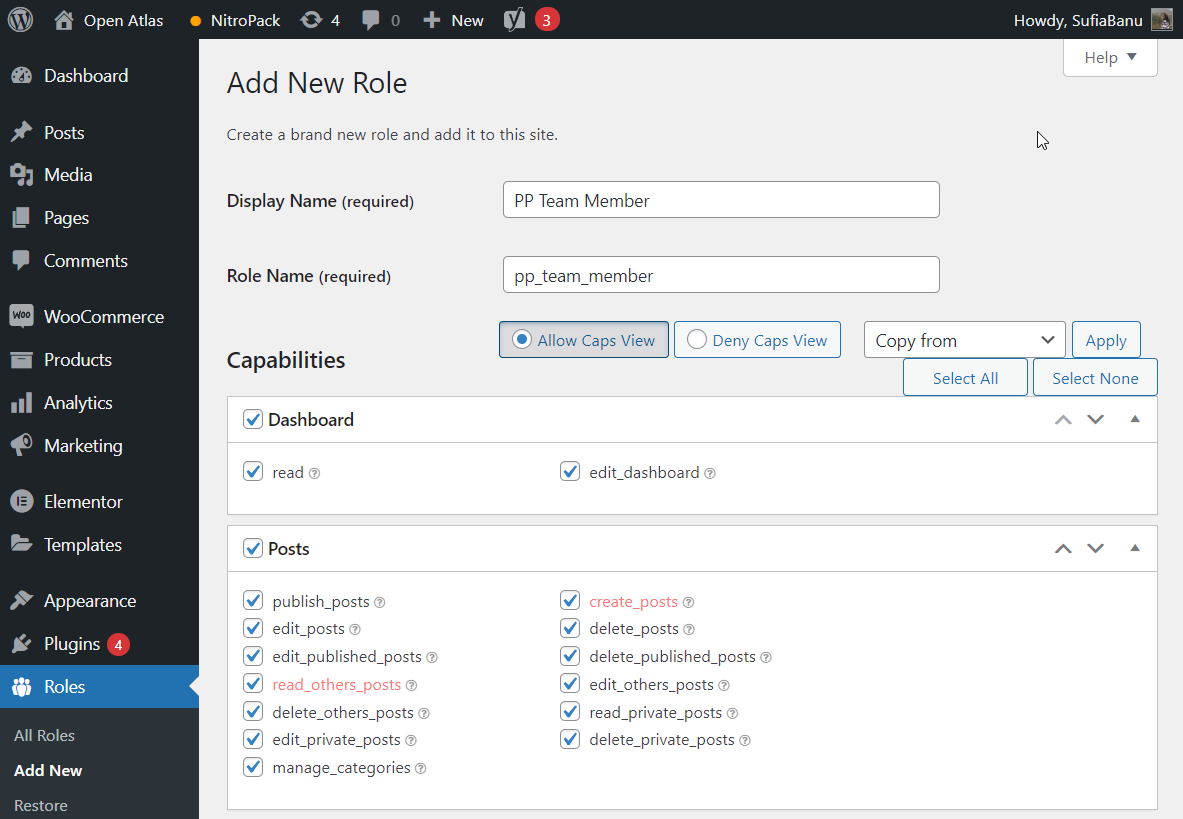
Step 2: Go to Roles, select Add New >> create a new role, and assign capabilities to the role.
Next, scroll down to the end of the page and hit the Save Changes button.
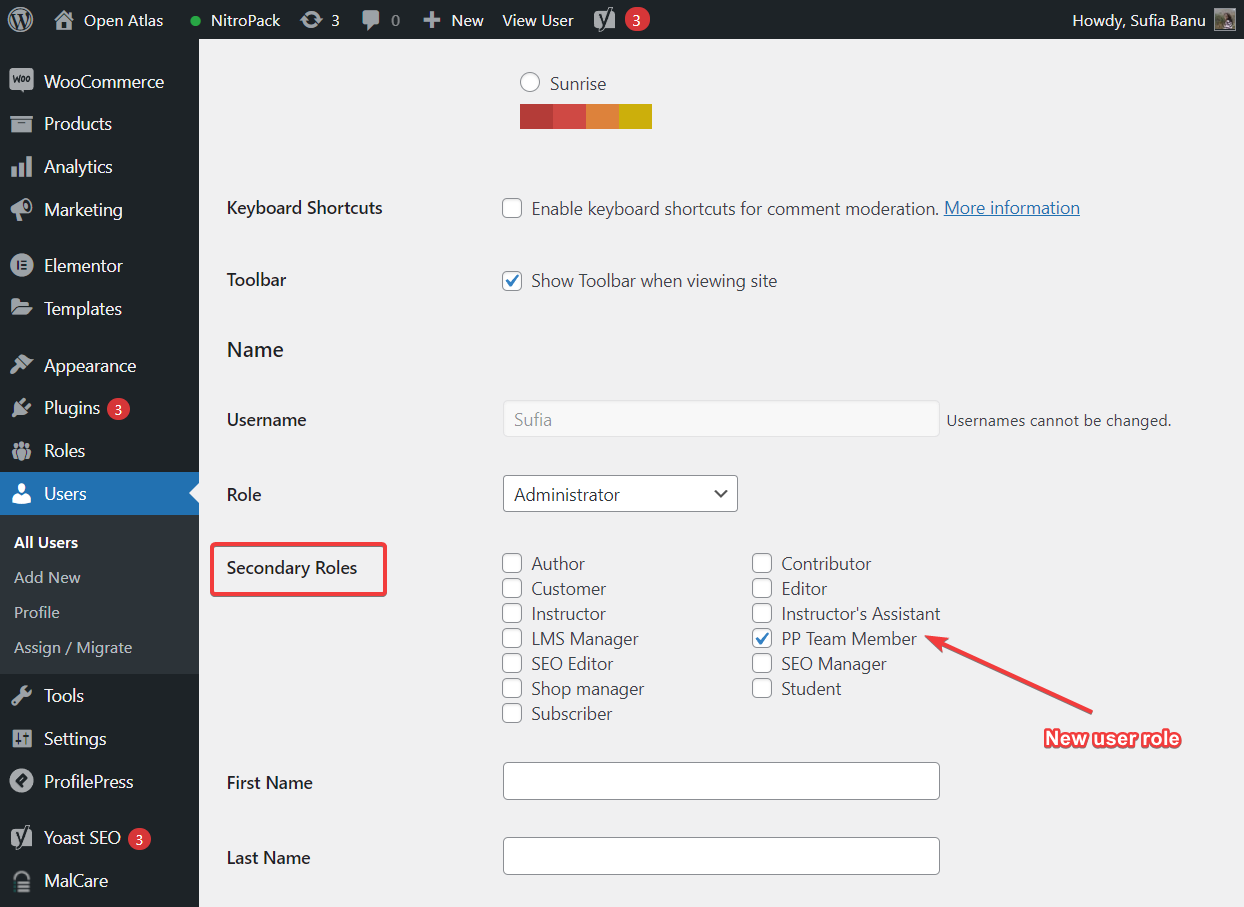
Step 3: You need to assign the new user role to members who will appear on the team members page. Go to Users > All Users and edit the members you want to add to the WordPress team members page.
Scroll down to the Secondary Roles option and select the new user role (as shown in the image below).
Don’t forget to save your settings.
Create a Team Members Page
Step 1:Install and activate ProfilePress on your WordPress site. It will add a new ProfilePress option on the left-hand menu of your WordPress dashboard.
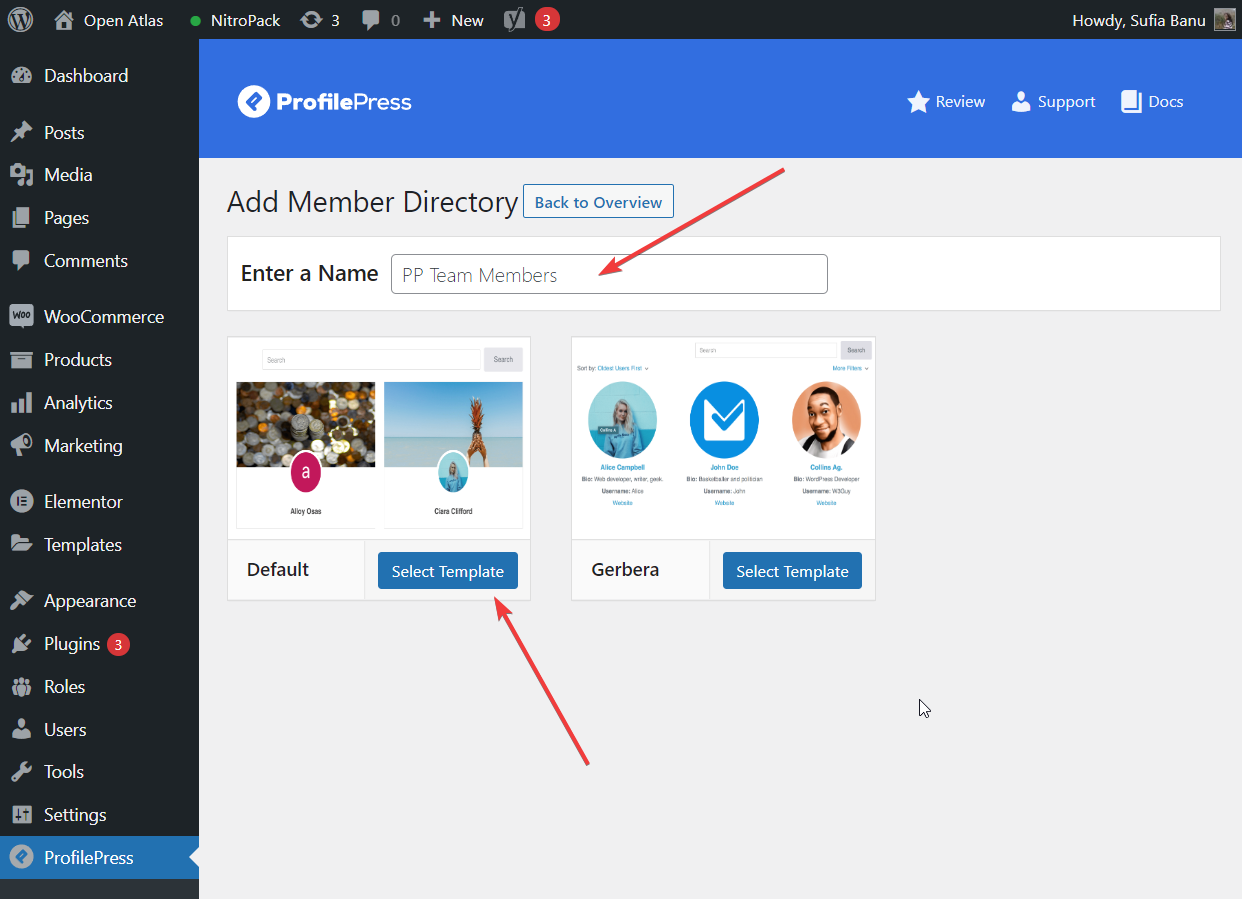
Step 2: Go to ProfilePress > Members Directories and select the Add New button.
On the next page, you will need to enter a name for the team member page and then select a template. It will determine how the user profiles will look on the team page.
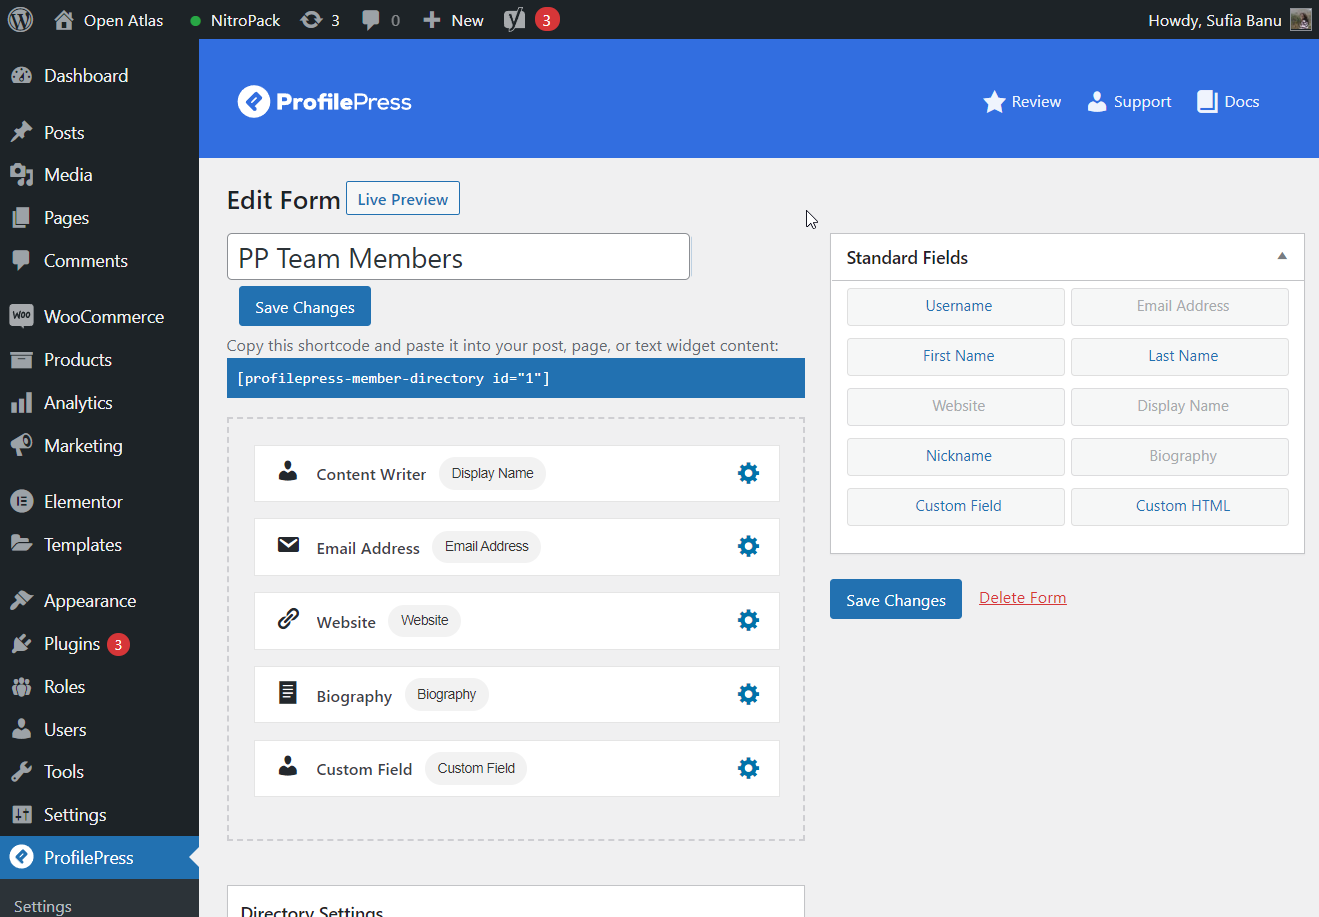
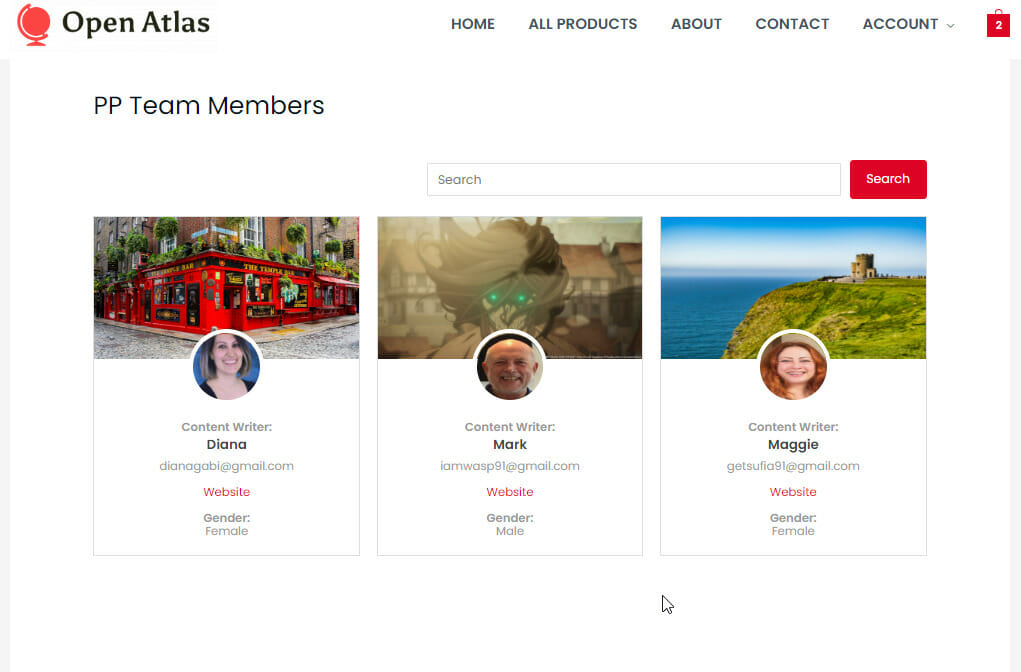
Step 3: You will see a drag and drop editor where you can select which fields will be shown on the team page. Look at how we have designed the team member page on our demo site.
This is how the page looks on the front end.
Quick Note About Custom Fields
The drag and drop editor has only a few standard fields to choose from. To add more fields, you need to use the Custom Fields option.
First, enable the custom field addon and then create new custom fields. Here’s a guide that will help you set up the custom fields.
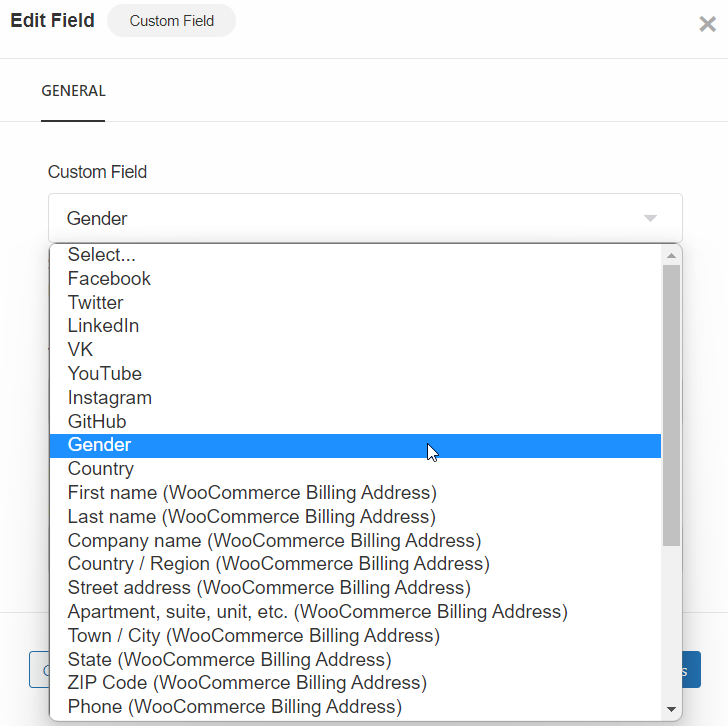
Next, open the editor and drag and drop the custom field option to the left side of the screen. You should see a gear icon in the custom field right beside the custom fields option. Select that.
A popup should appear with a dropdown menu. Select the custom field of your choice from the menu. That’s it.
With the help of the custom field option, you can create as many fields as you need.
Step 3: Scroll down to the Directory Settings, and you will see the five following options: Appearance, Sorting, Search, Result & Pagination, and Colours.
As you can guess, these options allow you to modify the page’s design and control how the team page will be sorted and filtered by the visitors.
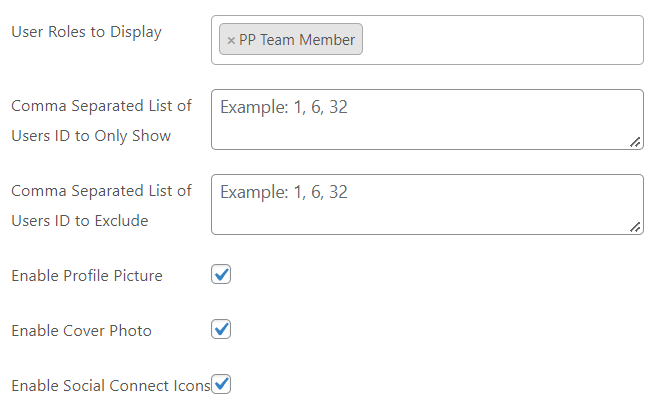
One of the most important options in this section is the User Roles to Display option under Appearance.
To showcase the custom user roles, you must go over to the Users Roles to Display option and select the custom user role from the dropdown menu (as shown in the image below).
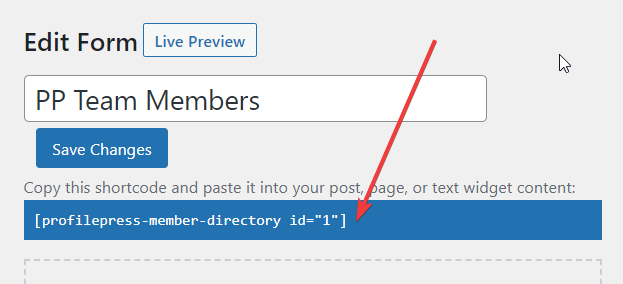
Step 4: When the team page is ready, hit the Save Changes button and copy the shortcode that appears right below the title.
Step 5: The design of the team member page is ready. Now all you need to do is publish the design on an actual page.
Go to Pages > Add New and paste the shortcode.
Add a title to the page and hit the Publish button.
You now have a team members page on your WordPress website. Here’s how the page looks on our demo site.
Check out this guide if you need more help setting up the team member page.
Create Custom User Profile Pages
When you build a team page using ProfilePress, the plugin ensures visitors can access the member profile pages by clicking on the profiles.
The default WordPress profile page offers only limited information. If you want to allow users of your website to showcase more information on their profile pages, you will need to build a custom profile page.
Luckily, ProfilePress is also a WordPress team profile plugin that can help you create custom user profile pages instantly.
Create Custom User Profile Page
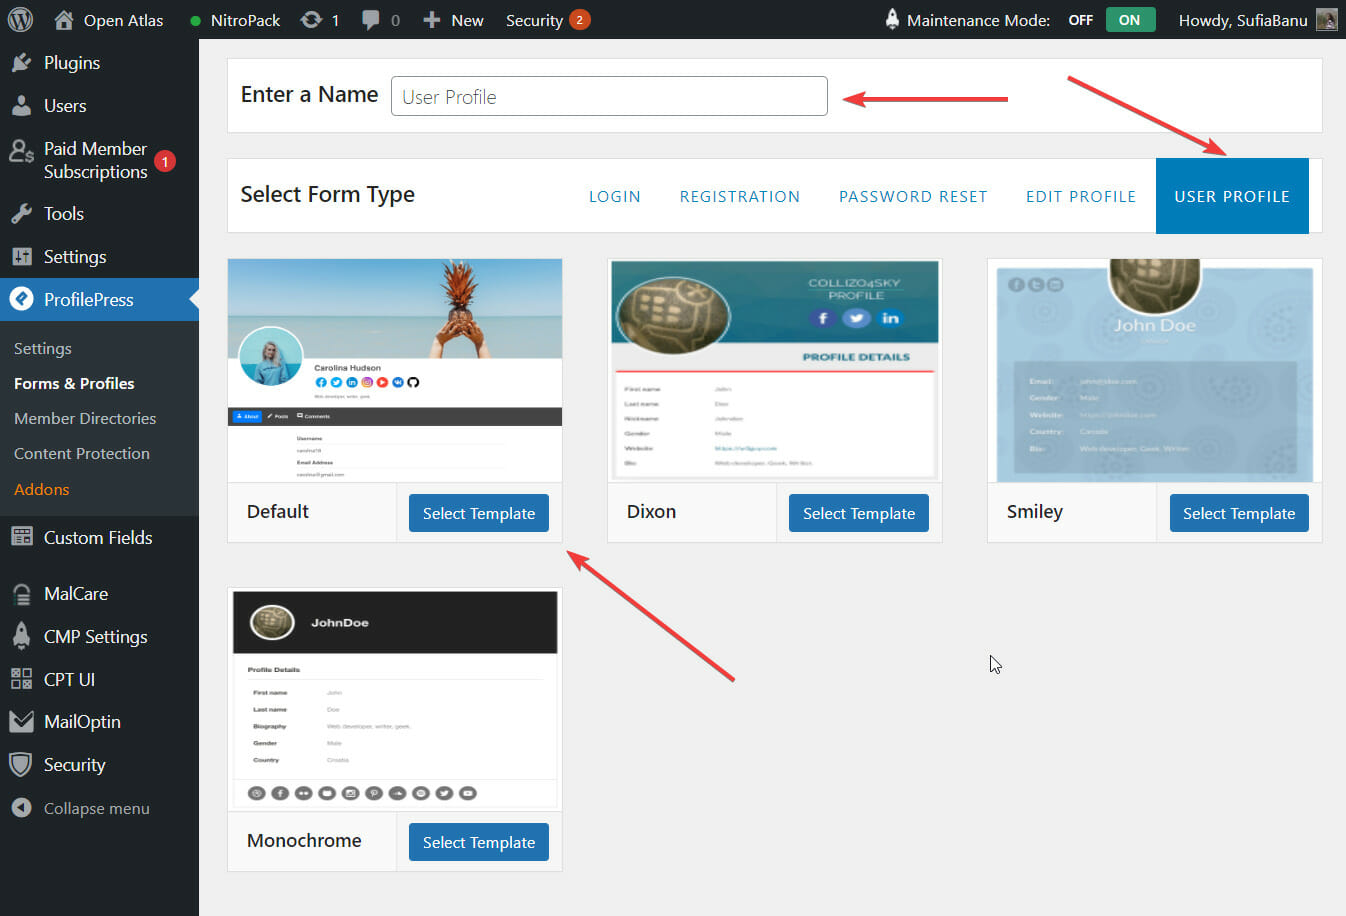
Step 1: Go to ProfilePress > Forms & Profiles. Click on Add New and go to Form Type and select User Profile.
Step 2: Enter a title and then choose a template. The template dictates how the custom profile pages look on your site.
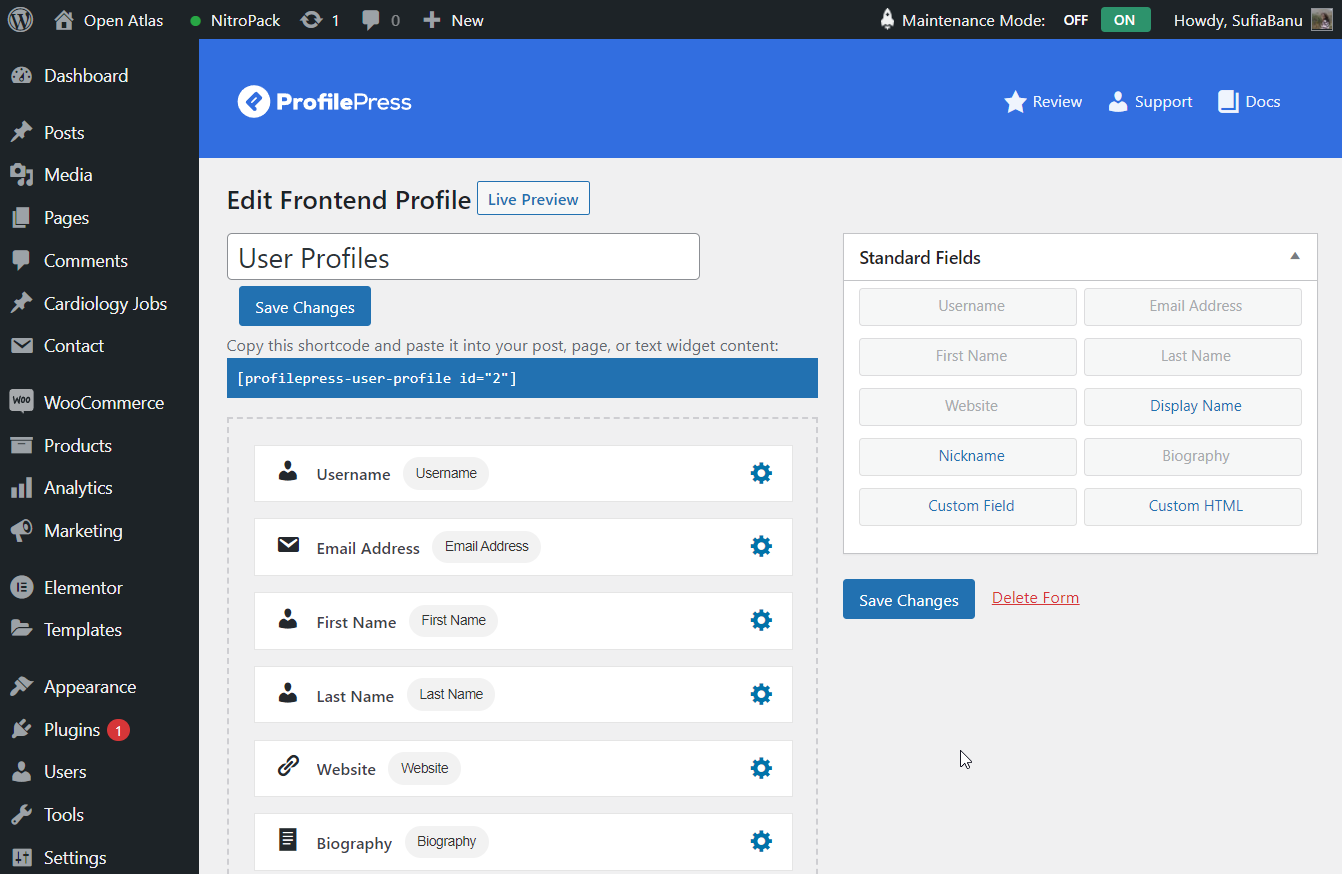
Step 3: Next comes the drag and drop editor, where you can design the user profile page using the fields on the screen’s right side.
Just drag and drop the fields you need to the left side of the screen as we have done on our demo site.
When ready, save the changes and click on the Live Preview button to preview the page.
Publish Custom User Profile on a Page
Step 4: Copy the shortcode that appears right below the title of the drag and drop builder.
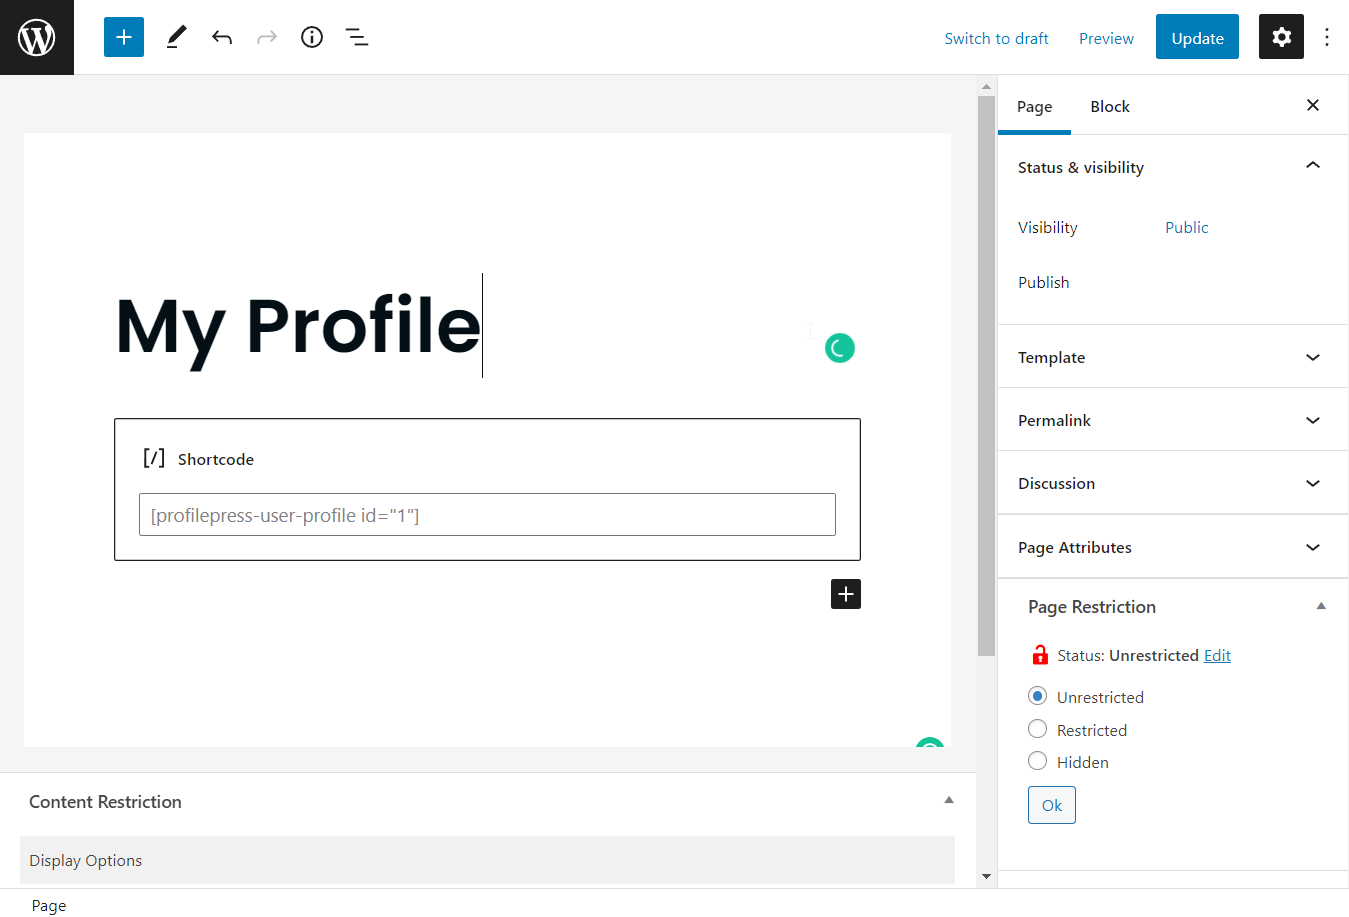
Step 5: Go to Pages, and select Add New. On the new page, paste the shortcode, insert a title, and Publish the page.
With that, you have created a custom profile page for the users of your site.
In the next step, you will set the new custom user profile page as your default user profile page.
Set New Custom User Profile as Default
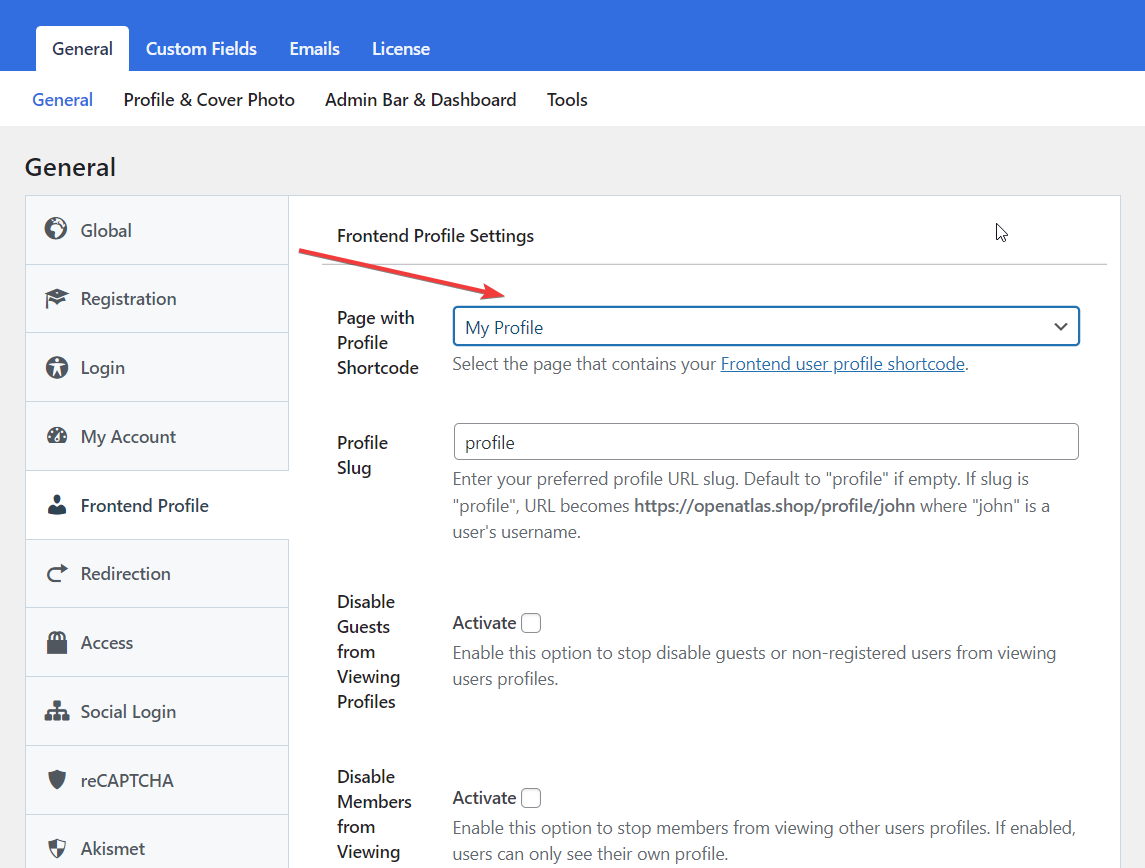
Step 6: Go to ProfilePress, select Settings, click on Frontend Profile and go to Page with Profile Shortcode, then select the user profile page you created in the previous step.
Hit the Save Changes button.
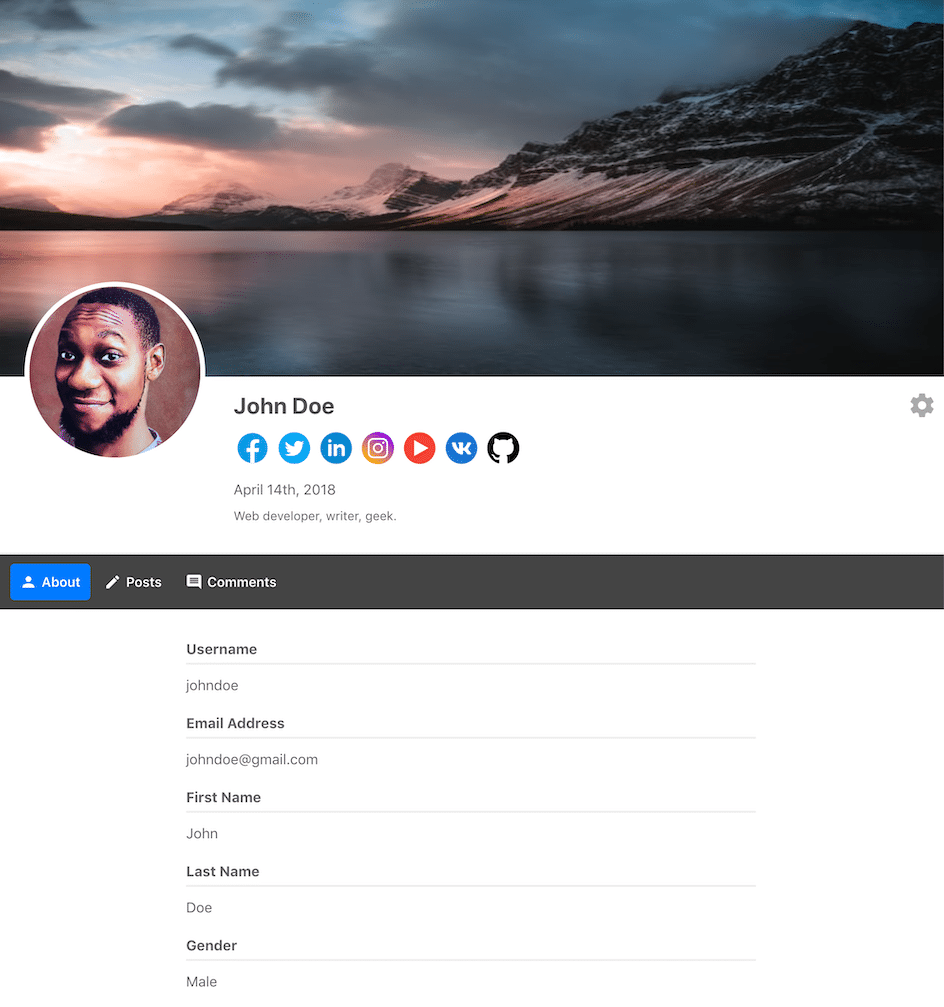
And, that’s it. Here’s how the new custom user profile page looks on our demo site:
Pro Tip: The new user profiles can be accessed using this URL: https://yoursite.com/profile/collins, where “collins” is the user’s username.
But you have the option to modify the URL. Change the word “profile” to something like “my profile,” or “user profile,” etc. Then, go to Settings, select the Frontend Profile, choose Profile Slug, and insert the new URL.
That’s it with this one folk. We have come to the end of this article.
Limit or Restrict Access to Team Member Page
Some of you reading this article probably want to limit or restrict access to the WordPress team members page you created.
ProfilePress has a Content Protection feature that you can use to limit or restrict access to the team members page. In this tutorial section, we will show you how to implement this feature on your website.
There are two ways to implement the Content Protection feature. You can either use a shortcode or go to the setting page and create a new rule. We will show you how to implement both methods.
Limit or Restrict Access Using Shortcodes
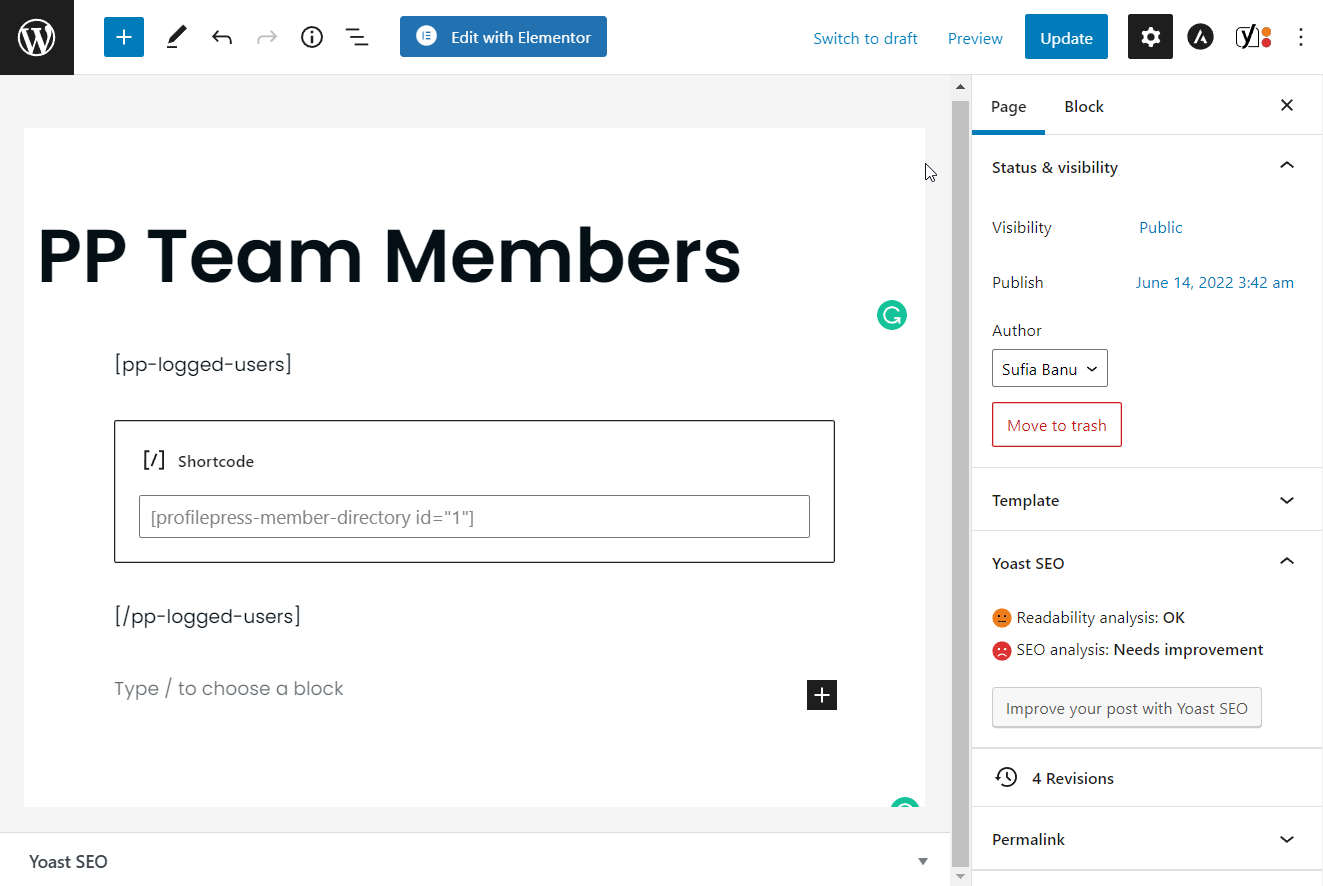
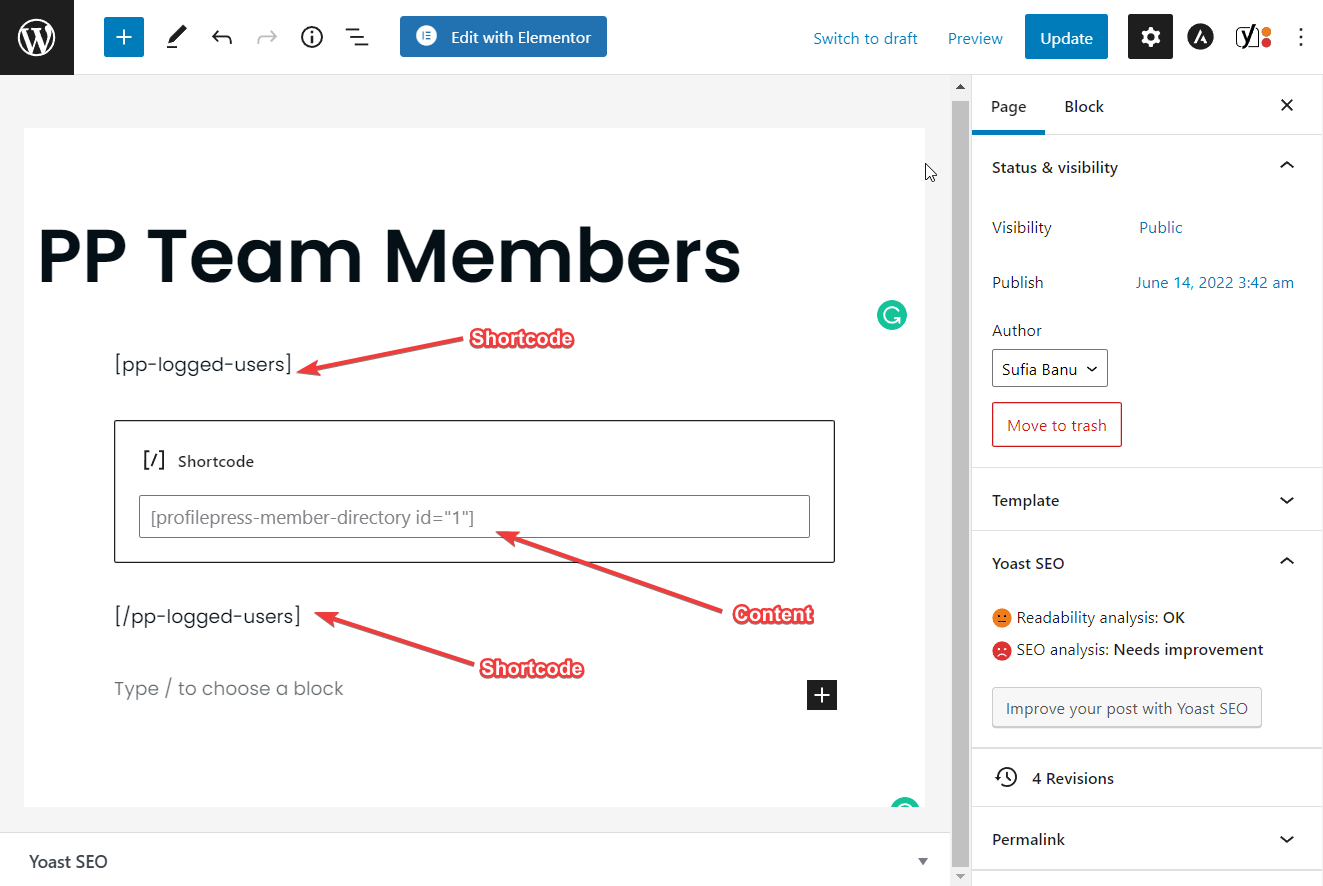
To allow access to the WordPress team members page to only logged-in members of the site, use this shortcode:
As you can see, the shortcodes have two parts. The front part must be inserted before the content, and the rear part will be inserted after the content, as shown in the image below.
To allow access to the team members page to only those who are logged out of your website, use this shortcode:
[pp-non-logged-users]content[/pp-non-logged-users]To restrict access to the team page to only a few select users, use this shortcode:
[pp-restrict-content users="[email protected]"] content [/pp-restrict-content]Replace the email address in this shortcode with an actual email address.
Besides using an email address, you can also use IDs, or usernames to restrict users like this:
[pp-restrict-content users="Sufia"] content [/pp-restrict-content]

[pp-restrict-content users="2"] content [/pp-restrict-content]
To restrict certain user roles from accessing the WordPress team members page use this shortcode:
[pp-restrict-content roles="editor"] content [/pp-restrict-content]Next, let’s look at how to implement the second method.
Limit or Restrict Access Using Rules
Step 1: Go to ProfilePress > Content Protection and select the Add a Protection Rule button.
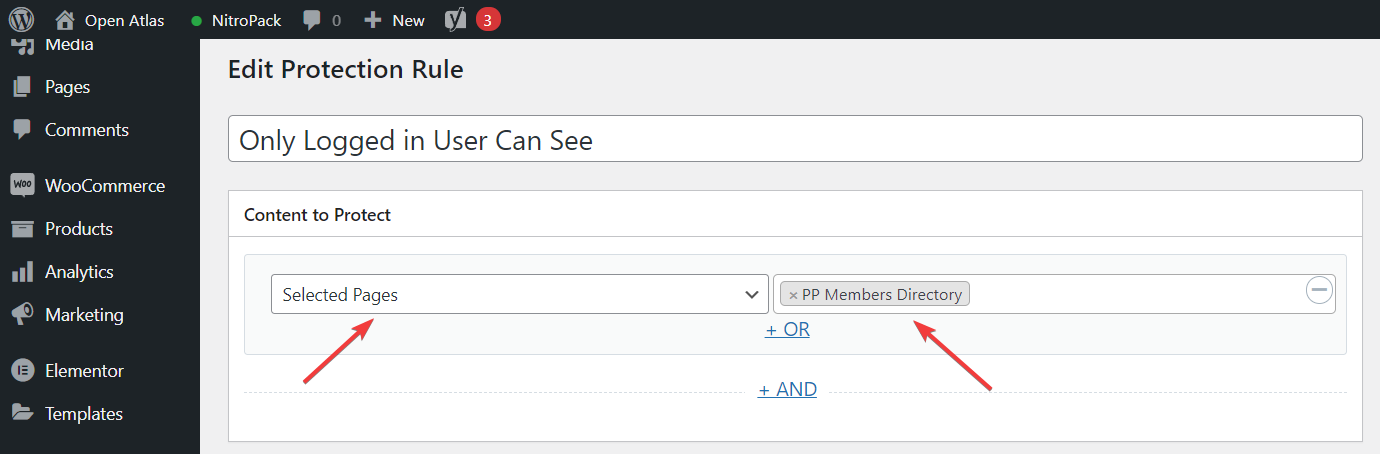
Step 2: On the next page, add a title and in the Content to Protect section, choose the Selected Page option from the dropdown menu.
Step 3: A new search box should appear on the right. In there, write down the name of the team members page you published in the previous section.
Step 4: Next, in the Access Control section, you should see three options: Everyone, Logged in users and Logged out users.
If you want only logged-in members of the site to access, select the “Logged in users” option. But if you wish only those who are not logged in to your website access the page, then go for “Logged out users.”
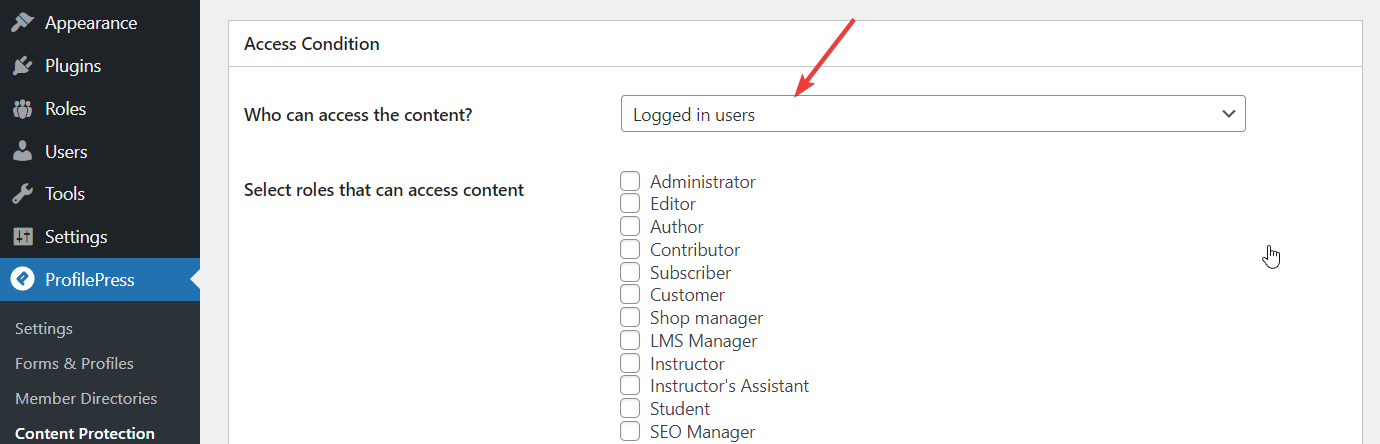
If you want only specific users to access the team members page, select Logged in user and write the user name in the Select specific users that can access content option (as shown in the image below).

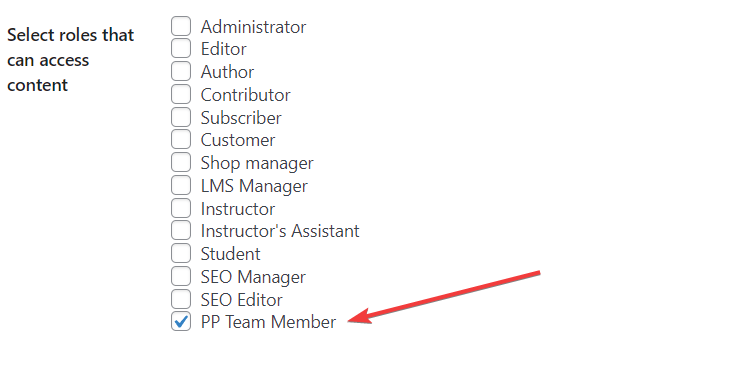
But if you want only specific user roles to access the team page, select the user roles under the Select roles that can access content option.
When you are ready, hit the Save Rule button.
Conclusion
Creating a custom WordPress team members page is not difficult if you have the right tool at your disposal.
ProfilePress is a powerful WordPress team page plugin.
Using ProfilePress, you can build a team members page, allow access to the page to only select users, create custom profile pages, and hide the admin bar for selected users, among other things.
Try ProfilePress right away!