How to Make a Staff Directory in WordPress (With Employee Profiles)
Do you want to create a WordPress staff directory for your website?
As a business owner, your organization will most likely comprise more than one or two individuals, which makes it necessary for you to maintain a staff directory.
A staff directory can be useful for your internal operations and also be beneficial to include on your website. A WordPress staff directory allows your customers to know and connect with your team members, and it also helps to win customer trust by showing the human side of your business.
If you are running an online business, your customers do not get to meet you or your team physically, but having a staff directory on your website helps to bridge this gap.
In this article, I will show you how to create a WordPress staff directory using the ProfilePress plugin and WPFront User Role Editor plugins.
ProfilePress is a premium WordPress membership plugin that allows you to build paid membership sites, amongst other features. It also gives you the ability to create unlimited WordPress member directories, making it the perfect WordPress staff directory plugin. It has powerful features that will make building a staff directory and a full-blown membership site easy.
WPFront User Role Editor is a WordPress plugin that allows you to easily manage user roles within your WordPress website. It enables you to create, edit, or delete user roles and manage role capabilities.
Setting Up The WordPress Staff Directory Plugins
Before building our WordPress staff directory, we need to install and set up both ProfilePress and WPFront user role editor plugins. Kindly follow the steps below for both plugin setups.
How to Install ProfilePress Plugin
Firstly, you will need to purchase a ProfilePress Pro License and install the ProfilePress plugin. To do that, head to the theProfilePress website to purchase a suitable license plan.
After purchasing your copy of the ProfilePress Plugin, you will receive a confirmation email with a link to download the plugin zip file and your license key. You can also download the plugin from your account page on the ProfilePress website.
Once you have downloaded the plugin, login to your WordPress admin dashboard, and navigate to the Plugins page; click on the “Add New” button and click “Upload Plugin“.
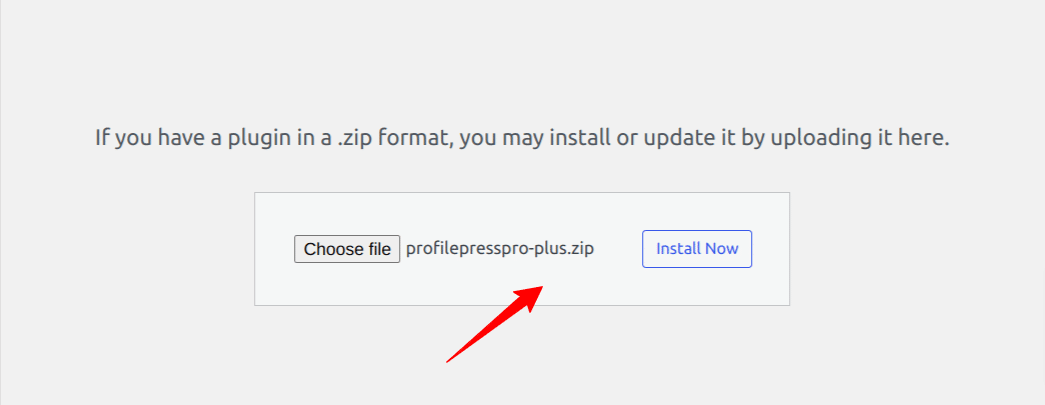
Next, click “Choose file” to select the previously downloaded plugin zip file. Click “Install Now.”
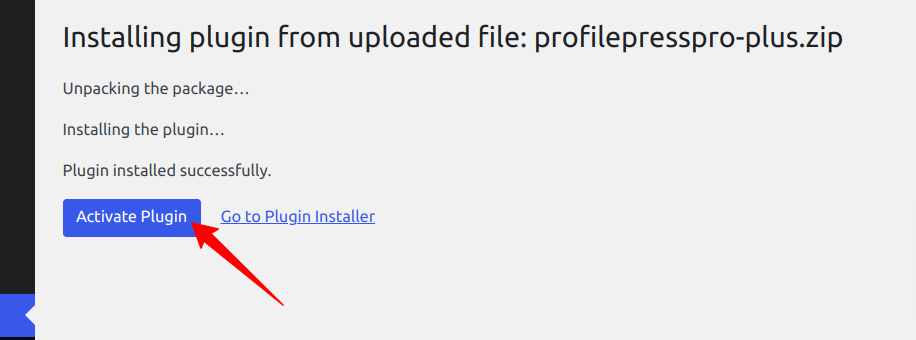
After installation is complete, click the Activate Plugin button.
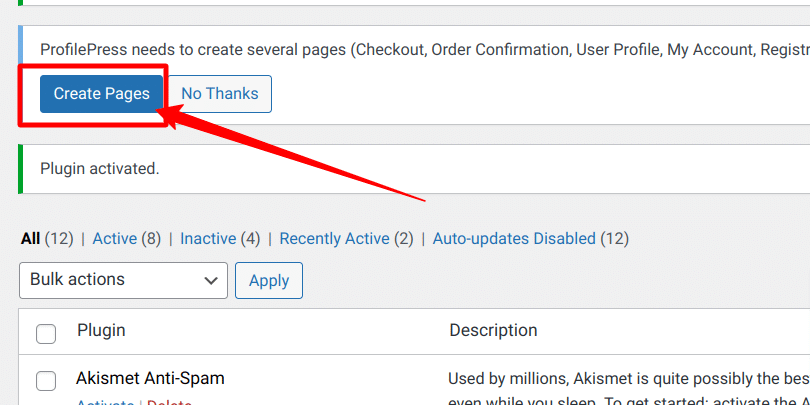
At the top of the page, you will see a notification that says, “ProfilePress needs to create several pages,” Click on the “Create Pages” button to complete the plugin setup.
If you do not see this notification, navigate to ProfilePress > Dashboard and click the “Create pages” button to complete the plugin setup.
With this done, we have completed the initial setup of the ProfilePress plugin on our WordPress site.
How to Install WPFront User Role Editor Plugin
To install the WPFront User Role Editor Plugin, go to your WordPress dashboard and Plugins > Add new.
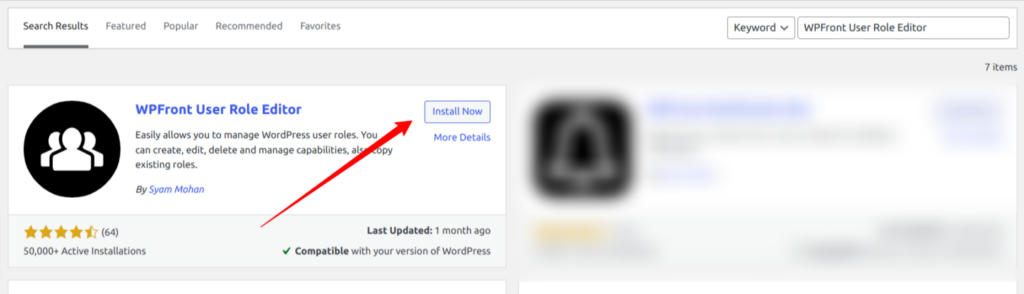
In the search box, type in “WPFront User Role Editor”, then click the “Install Now” button and then the Activate button.
After activating the plugin, you should see a new “Roles” menu item on your WordPress dashboard’s left-side menu pane.

How to Create a Staff User Role
Now that the staff directory WordPress plugins are set up, we can proceed with the next step. The next step in creating a WordPress staff directory is to create a user role for your staff. We will create a new role called – “Staff” on our site and then assign this role to all staff on the website. Follow the steps below to create a staff role on your site.
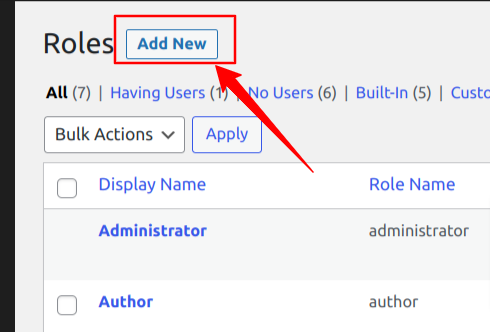
From your WordPress dashboard, navigate to Roles > Add New. Next, enter a name in the Display name field and move on to the Capabilities section.
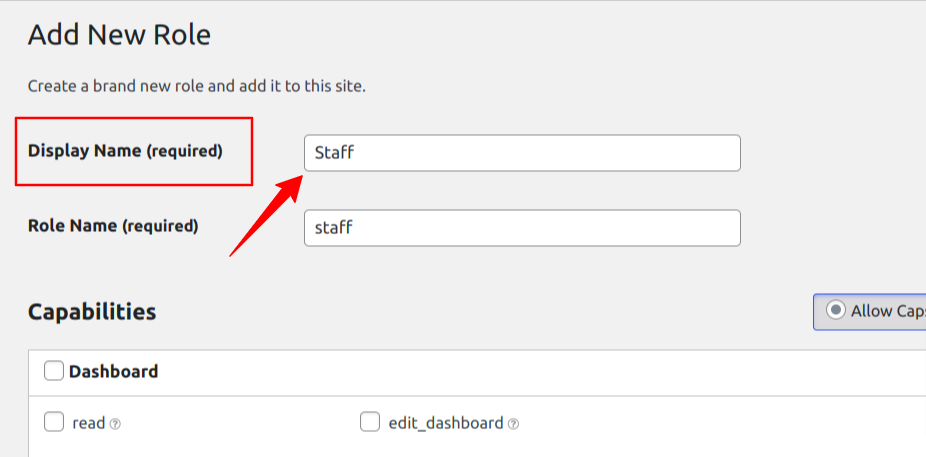
The Capabilities section allows you to configure which aspect of your WordPress site is accessible to the staff user role. You could configure it to allow your staff to edit posts, pages, and categories, or you could configure it to give them much more accessibility in the WordPress dashboard.
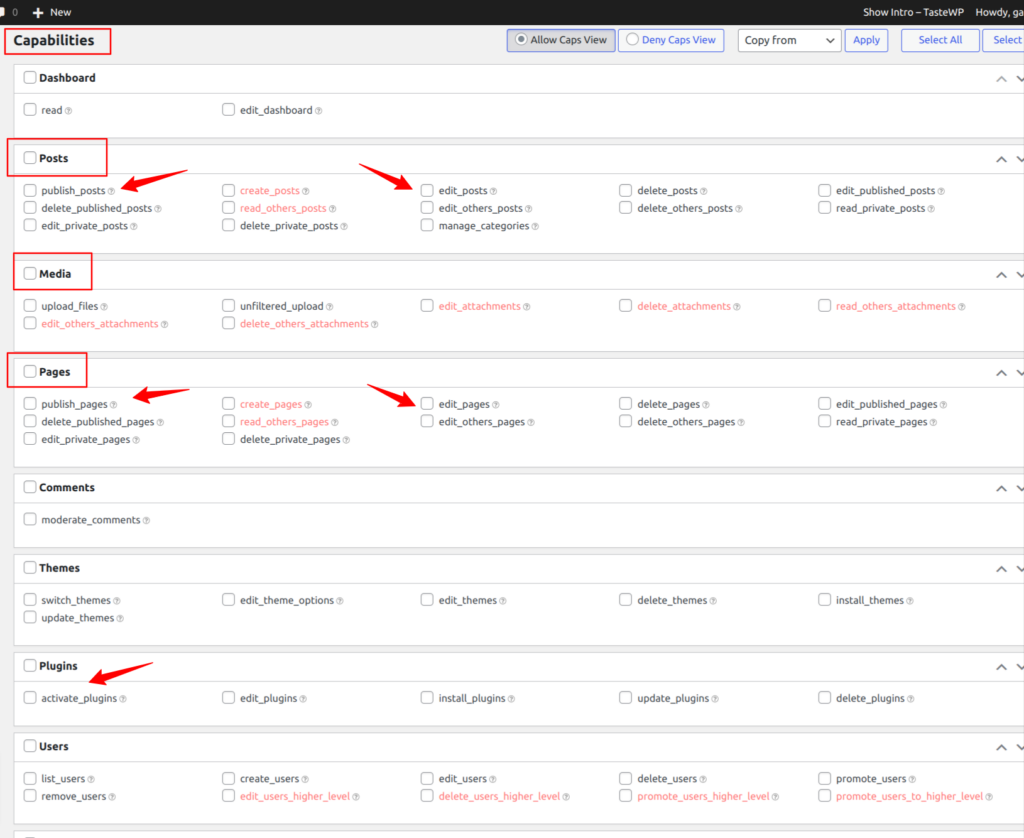
You can enable or disable many capabilities by just ticking applicable checkboxes. Select the capabilities you want and scroll down to click the “Add New Role” button.
How to Create a Custom Staff Registration Form with ProfilePress
In the previous section, you created a “Staff” user role for our staff members, but you need to register them on your WordPress website. To do that, you need to create a staff registration form that each staff member can fill out to create an account and profile on your site.
Creating a staff registration form is easy with a plugin like ProfilePress, and I will show you how to do that below.
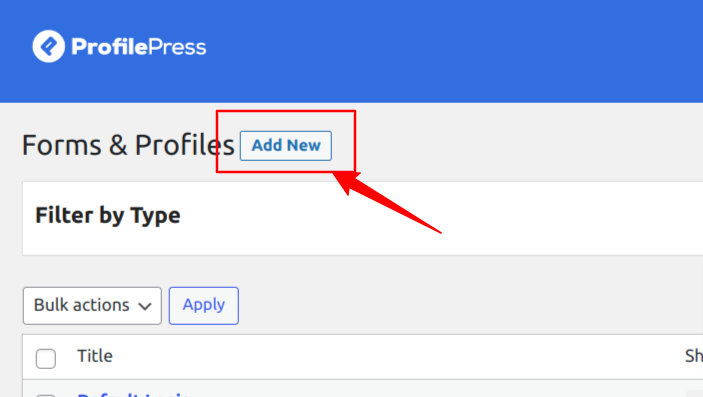
To create a form, navigate to ProfilePress > Forms & Profiles, and click “Add New”.
Then, you will need to select a builder type. For this article, we will use the “Drag & Drop Builder”.
Click the “Get Started” button under the Drag & Drop Builder. Now, you will see a field to enter the name for your form. Enter a name—you can call it “ Staff Registration Form. ” Next, change the form type to Registration by clicking the Registration tab.
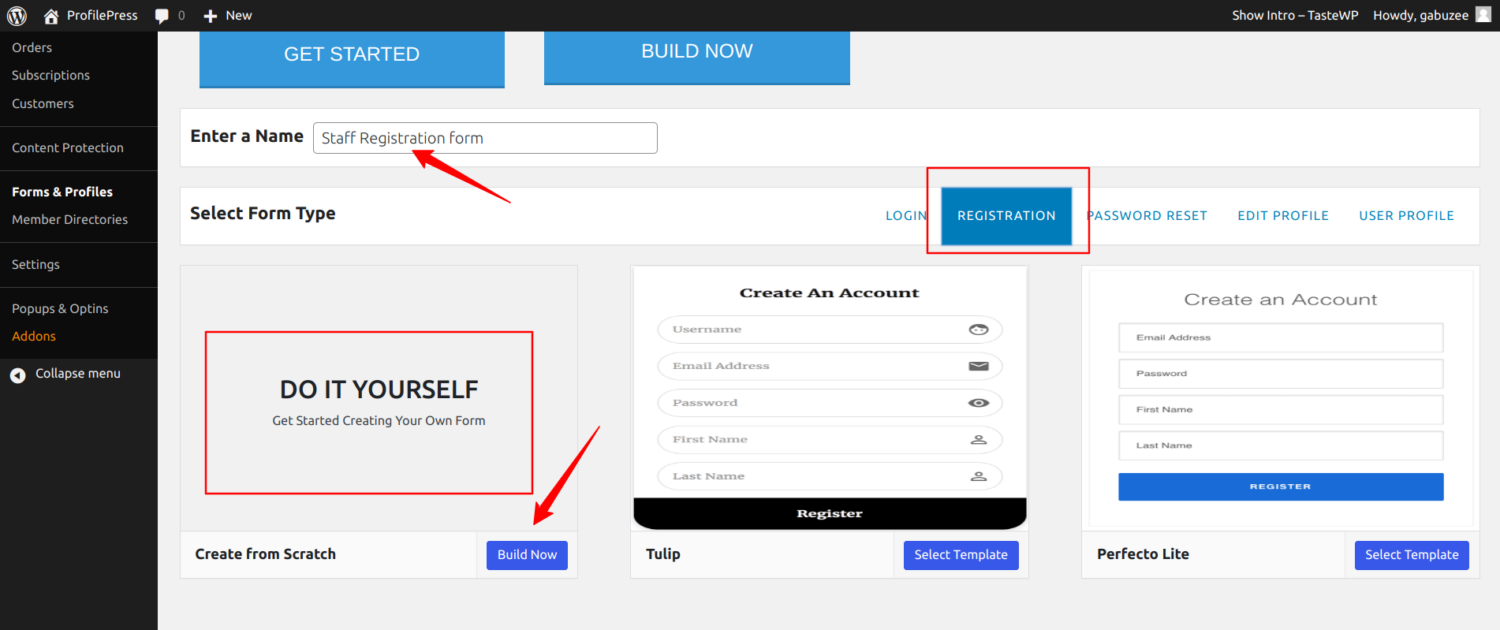
Now, you should see various pre-made registration form templates that you can choose from, and you should also see the “Do It Yourself” option. We will click the “Do It Yourself” option to build a registration form from scratch.
You will be taken to the form creation page, where you can see many form fields that we can use to build our form. We also have our form shortcode at the top of the fields and a live preview button to preview your form changes.
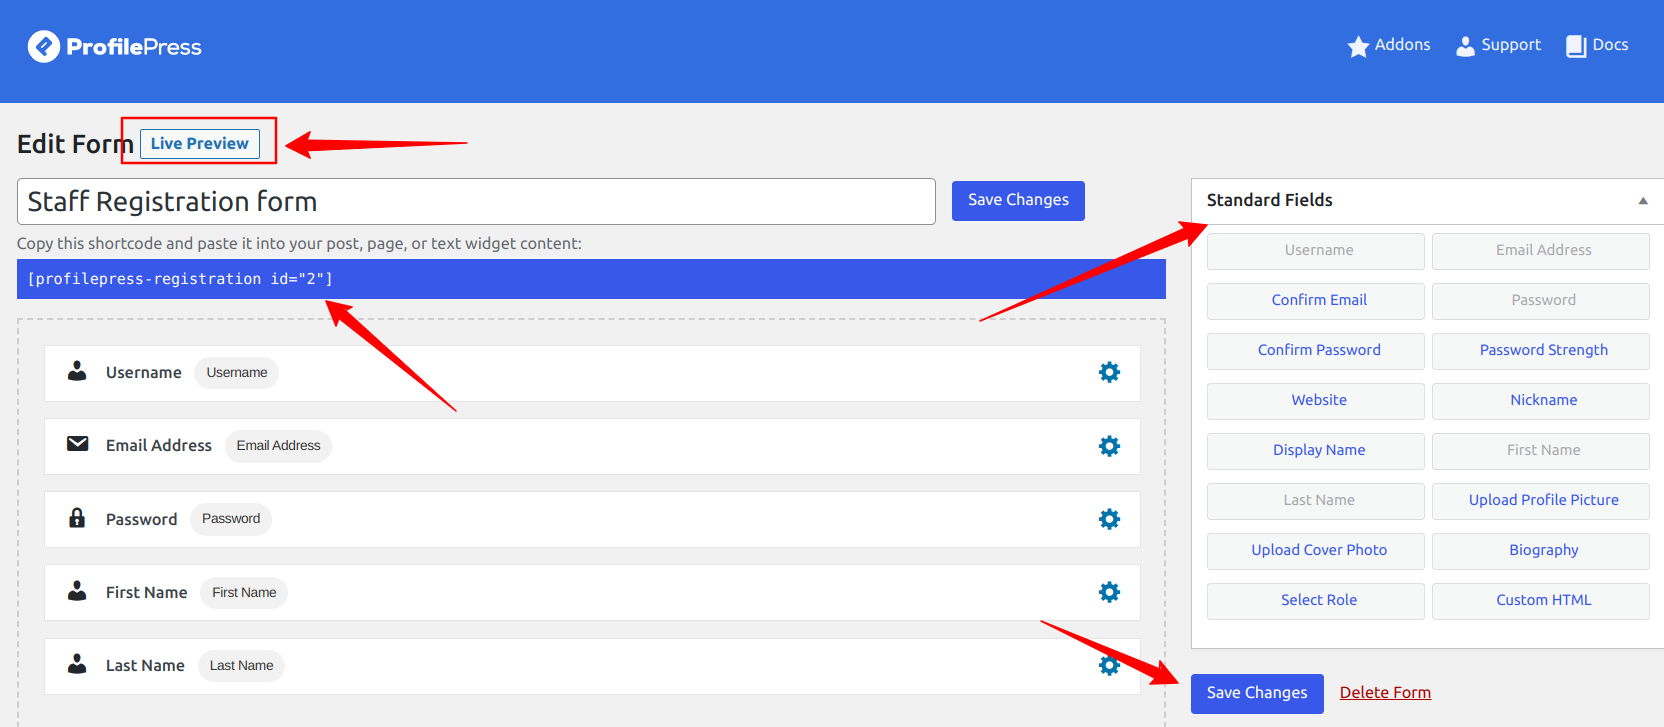
To customize our registration forms, we can drag and drop form fields from the Standard Fields sections on the page’s right sidebar.
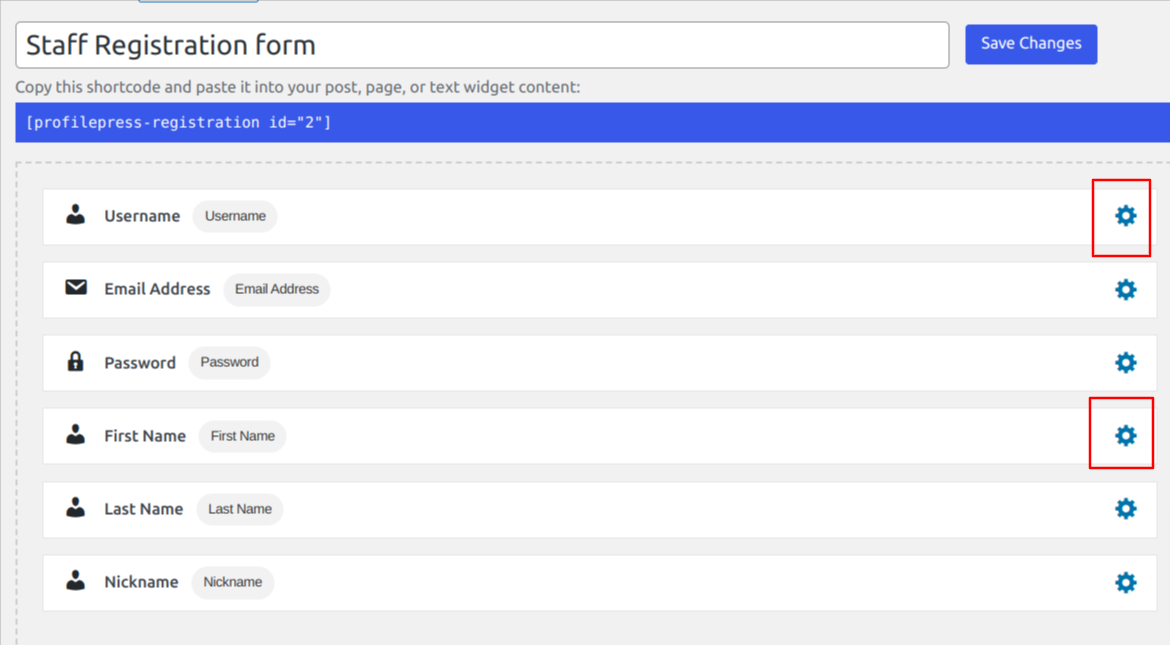
Drag and drop the Nickname field into the form builder area. This field will allow your staff to enter their nickname while filling out the staff registration form.
You can delete any unwanted fields from the form builder by hovering your mouse on a field and clicking the Binicon.
To adjust the settings for any form field, click on the Gear icon, and you will get a popup with the available settings for that form field. There are three sections that you can modify for each form field.
Next, configure our form to assign the “Staff” role to everyone who fills out this particular registration form. For that to happen, we will adjust the form settings.
Scroll down to the “Form Settings” section on the form builder page and click the “Registration settings” tab. Next, change the “New user role” to Staff from the drop-down selector.
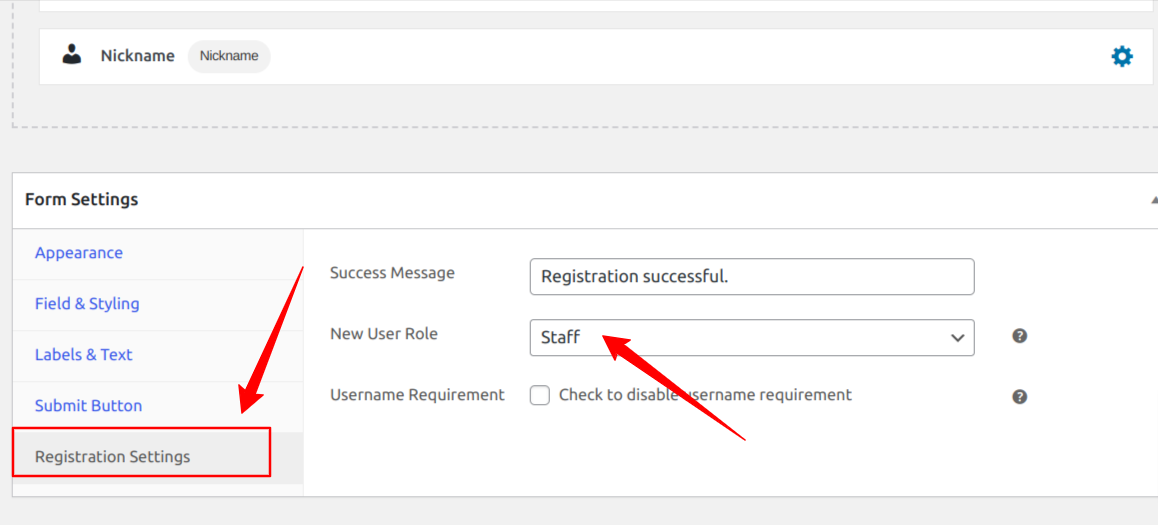
Click on the save changes button, and you have successfully created a staff registration form for your website.
Creating the Staff Registration WordPress Page
In this above section, we have created a custom registration form for our staff, but that doesn’t make this accessible to them. To make the form accessible, you need to create a registration page on your WordPress site that will display this form so that all your staff can access and fill out the form.
To do that, click Pages > Add New, and enter the page title. If you are using the WordPress block editor, click on the plus icon, select the shortcode block, and paste the copied form shortcode into this block.
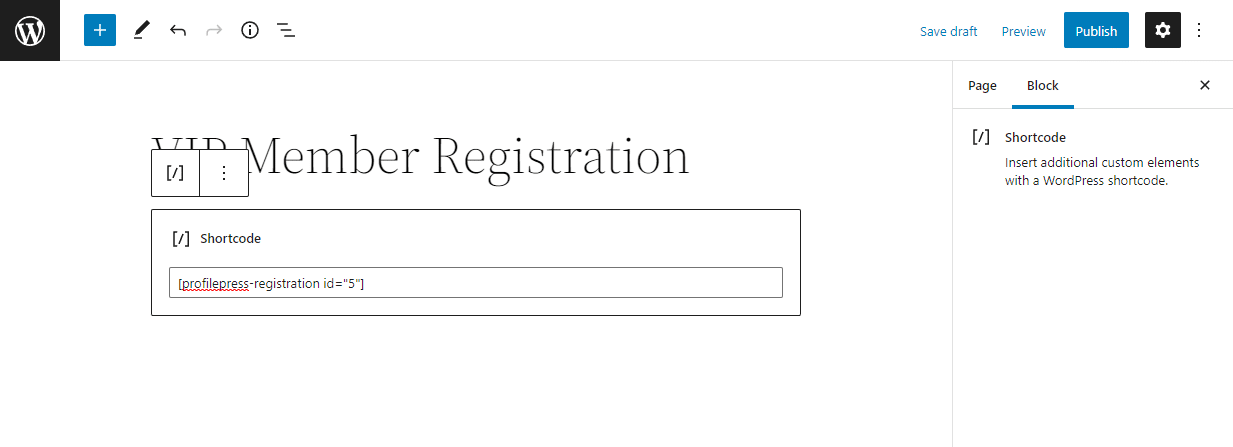
If you use the WordPress classic editor, paste the shortcode into the text editor. Next, click on Publish to publish your new Staff registration page.
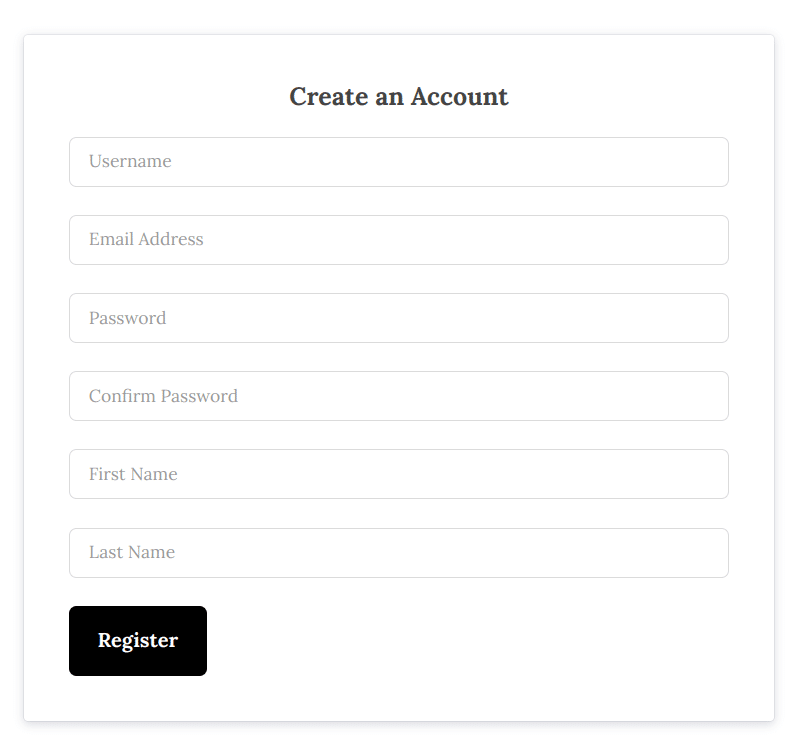
Now, open the registration page in a new incognito window to ensure that you are logged out, and you should see your user registration form displayed.
You can fill out this form, click the Register Button, and see the success message after successful submission.
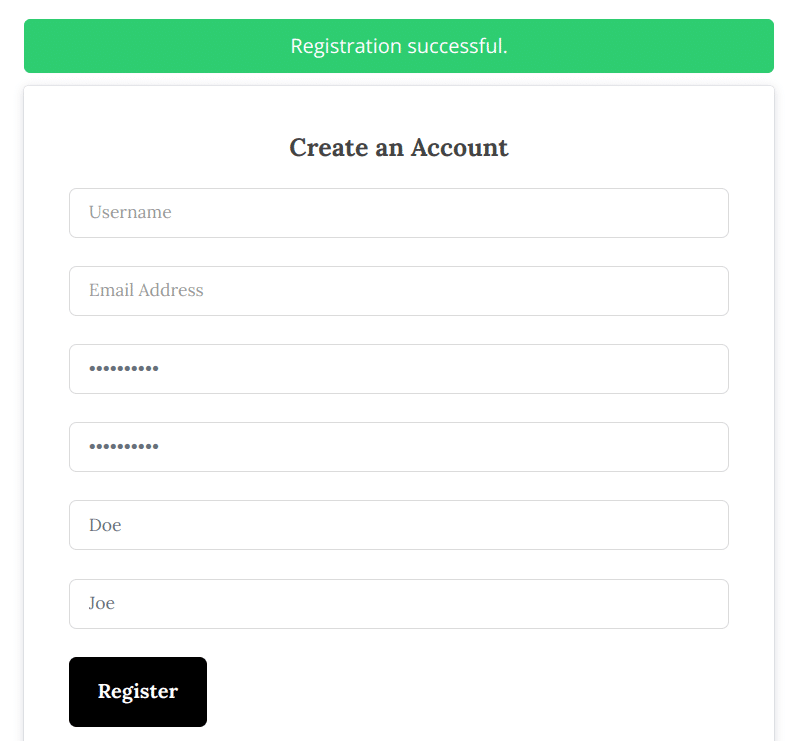
If you can see the success message, you have successfully created a Staff user registration form for your website. You now have a way to sign up all your staff and assign a “staff role” to them on your website.
How to Manually Add a Staff User from the WordPress Dashboard
For some reason, you may not want to have a registration form for your staff, or you prefer to manually add them by yourself. Then you can easily do it through your WordPress dashboard.
Login to your dashboard and navigate to Users > Add New. You will be presented with a user registration form requesting information about the new user.
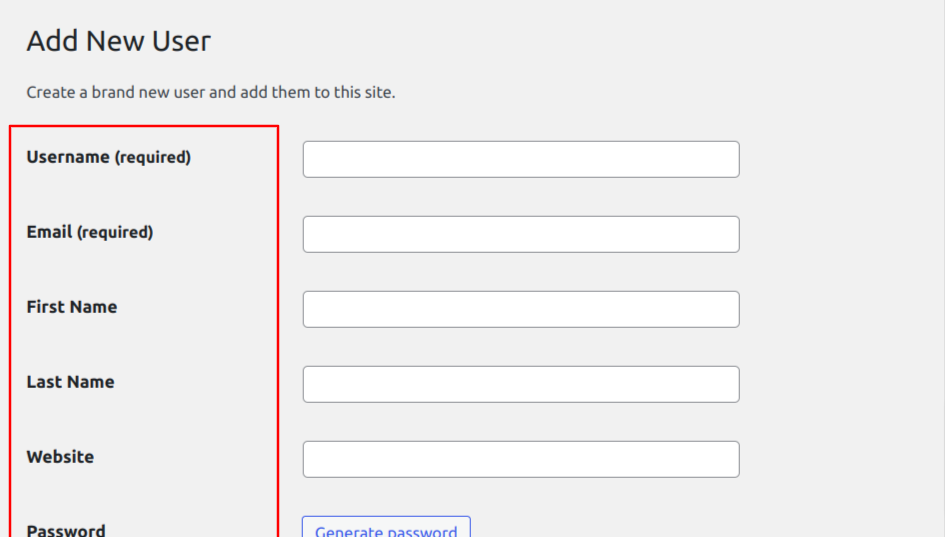
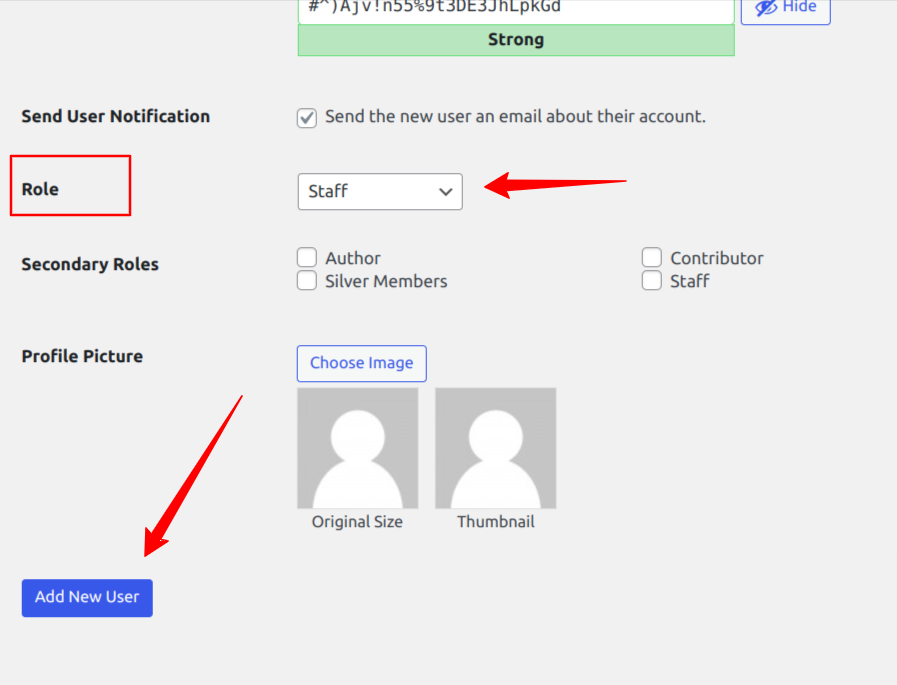
Fill in the username, email, and other information that pertains to your staff. Scroll down to the end of the page and find a section allowing you to assign a role to this user.
From the Role dropdown field, select “Staff”. This means that this user will have all the capabilities assigned to a staff user. Next, click the “Add New user” button to create an account for this staff.
How to Build a Staff Directory in WordPress using ProfilePress
So far, we have set up the required plugins, created a staff user role, created a custom registration form for our staff, and also learned how to add staff to our WordPress site manually.
The next thing is to build the WordPress Staff directory to show our staff and their details to our customers. To do that, we will be using the powerful ProfilePress plugin.
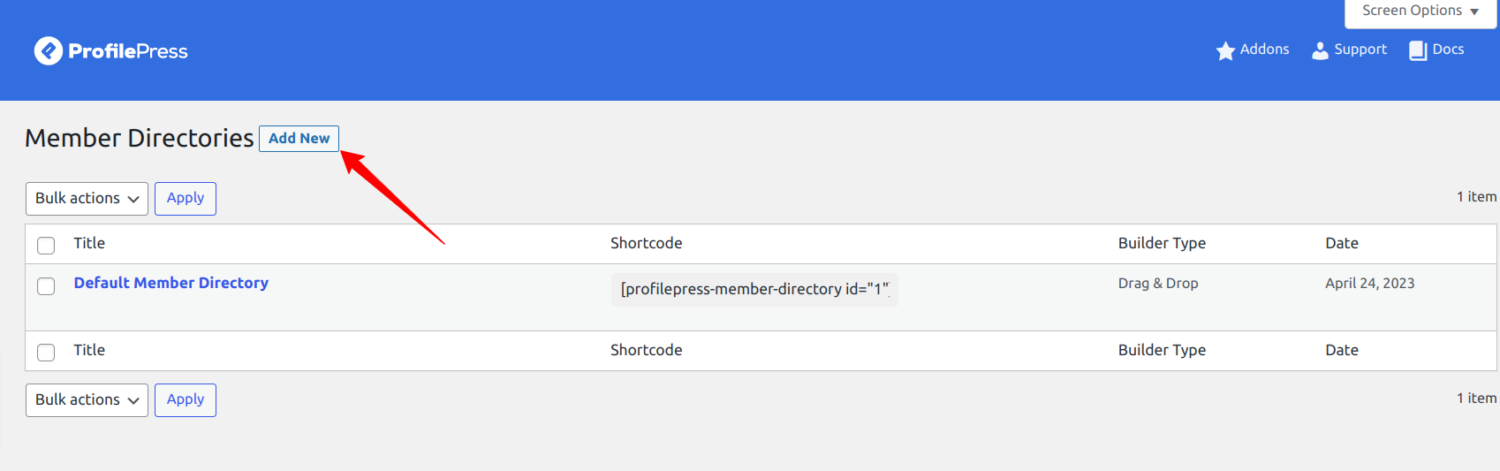
Navigate to ProfilePress > Member Directories and click on the Add New button.
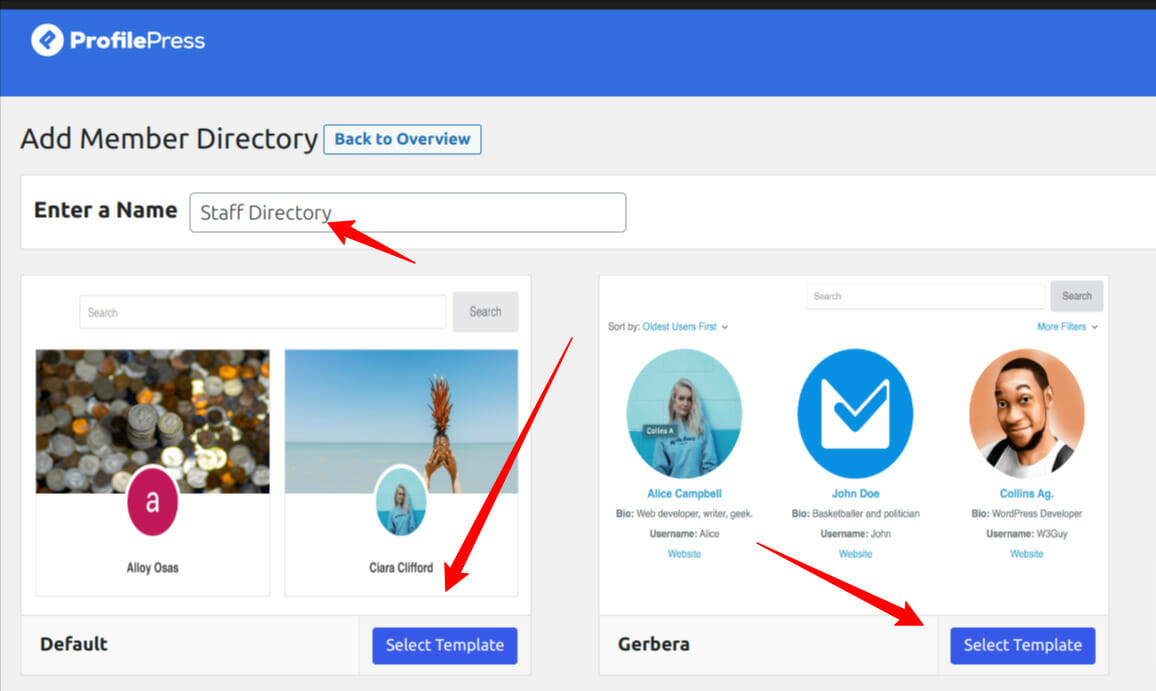
You will be taken to a page to create a new directory. Enter a name for your new member directory and click the Select Template button to create the directory.
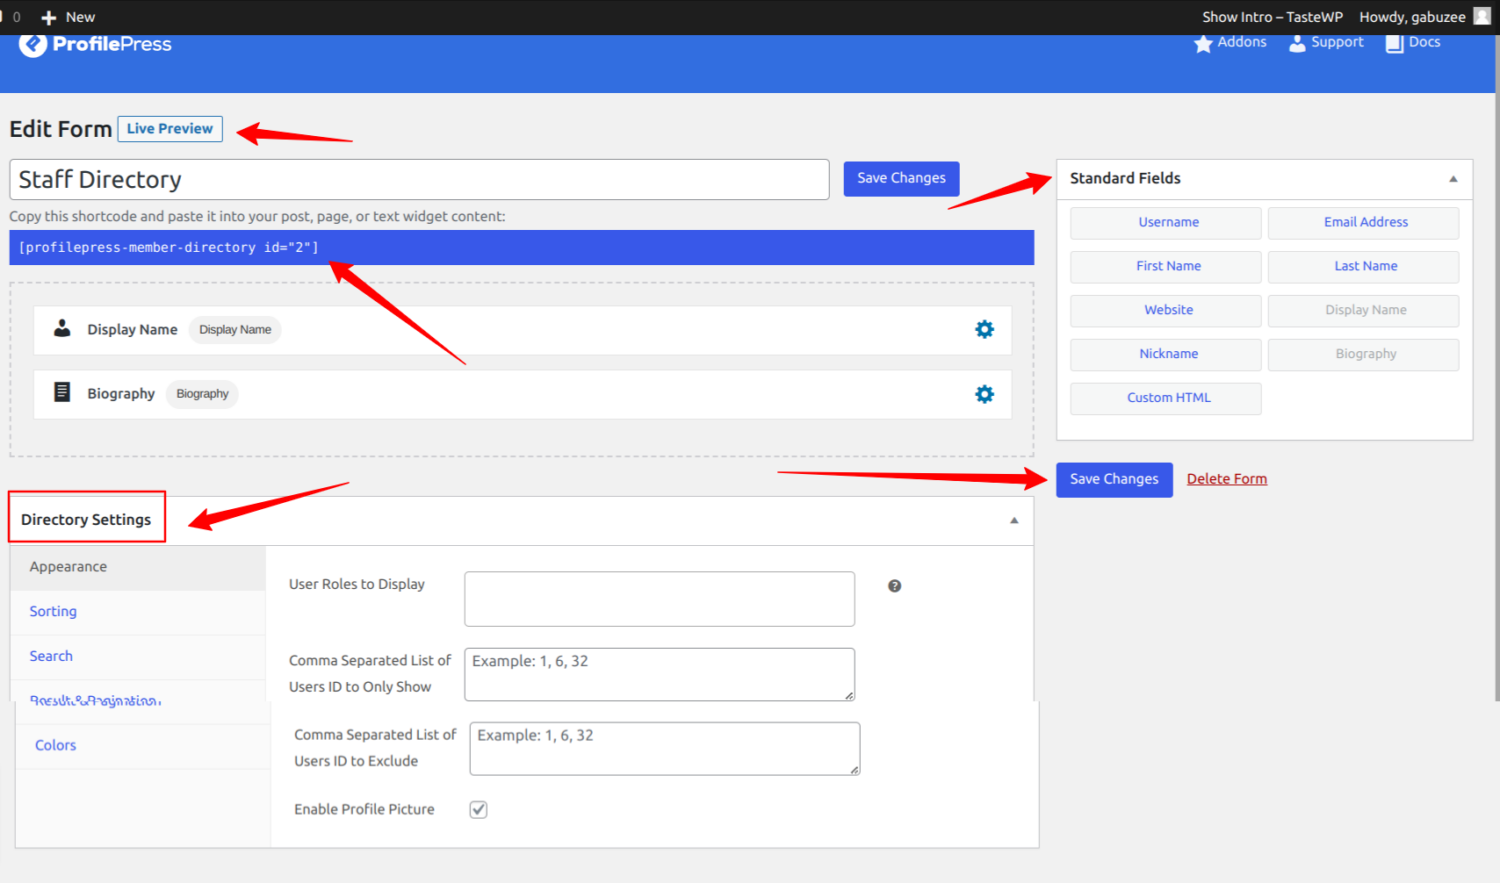
Next, you will be taken to your newly created member directory, where you can specify what fields to display in the directory and set up the criteria (directory settings).
Editing the Member Directory Fields.
You can specify what fields to display on a particular Member Directory. Simply drag the field from the Standard Fields section and drop it into the directory content area section.
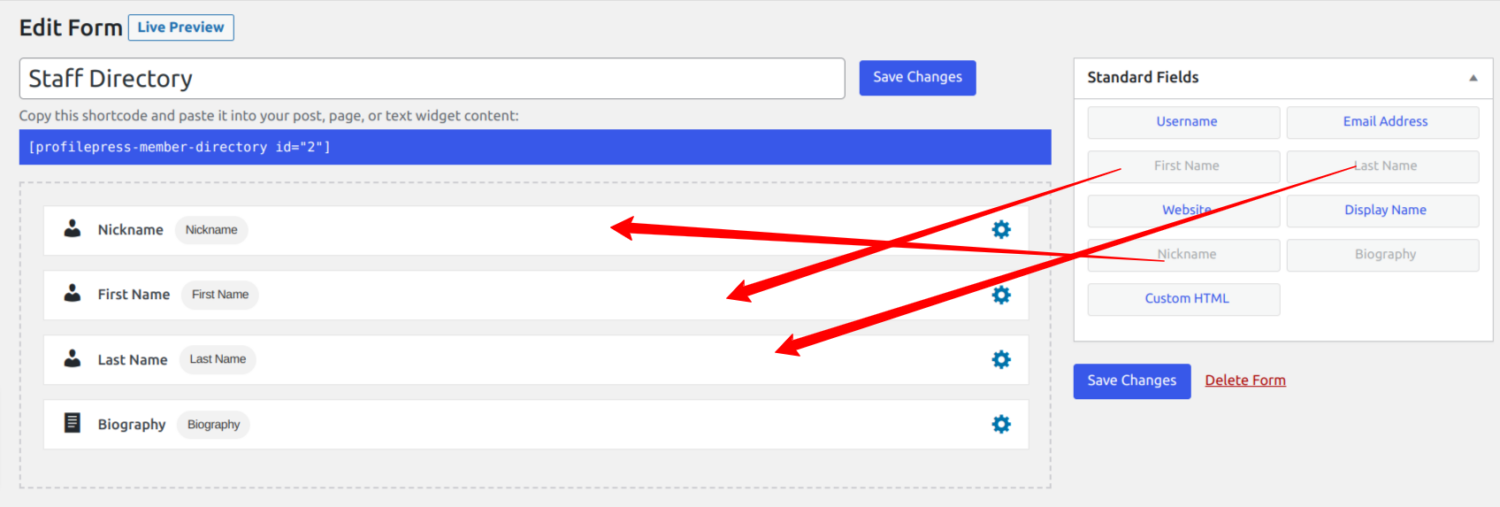
After making your modifications, click on the Save Changes button to save your changes. To preview your Member Directory, click on the Live Preview button.
ProfilePress allows you to customize the title of each directory field. You can customize each field title by clicking the Gear icon on each field, which will pop up a form that allows you to edit the field title.
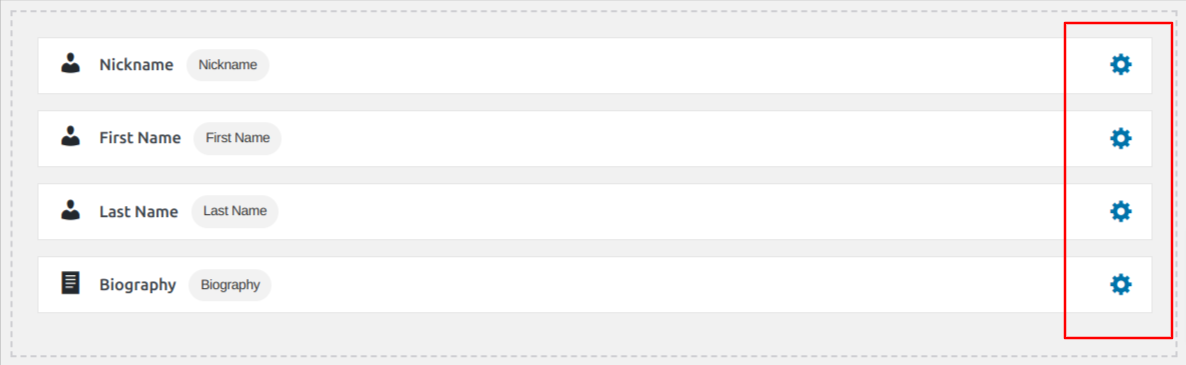

You can delete unwanted fields from the directory builder by hovering your mouse on a field and clicking the Bin icon.
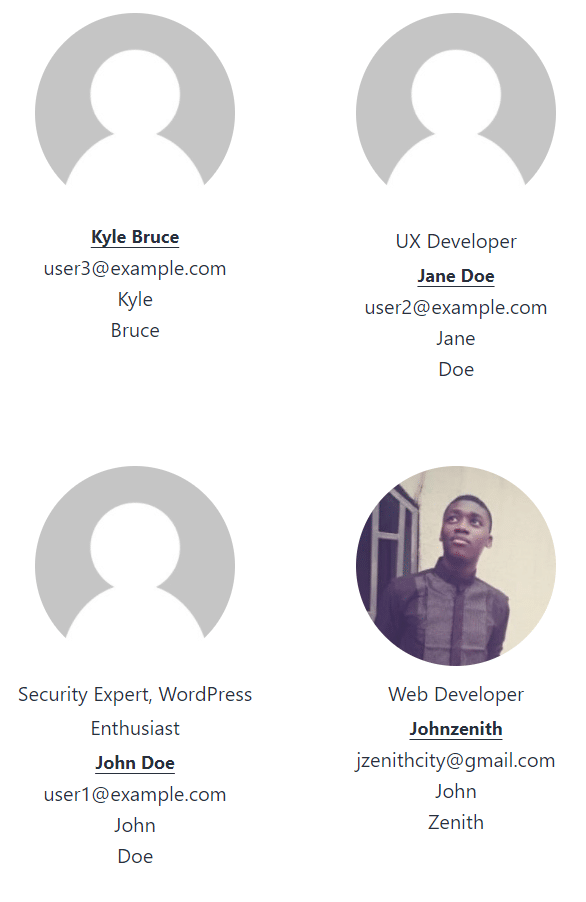
It is important to note that any blank fields will not be displayed on the staff directory page. So if the staff has not completed their profile, only the completed fields will be shown on your website.
Customizing the Staff Directory
You will find a Directory settings section on the ProfilePress members directory builder page, allowing you to customize your staff directory’s appearance and behavior.
The Directory Settings consists of five settings groups: Appearance, Sorting, Search, Result & Pagination, and Colours.
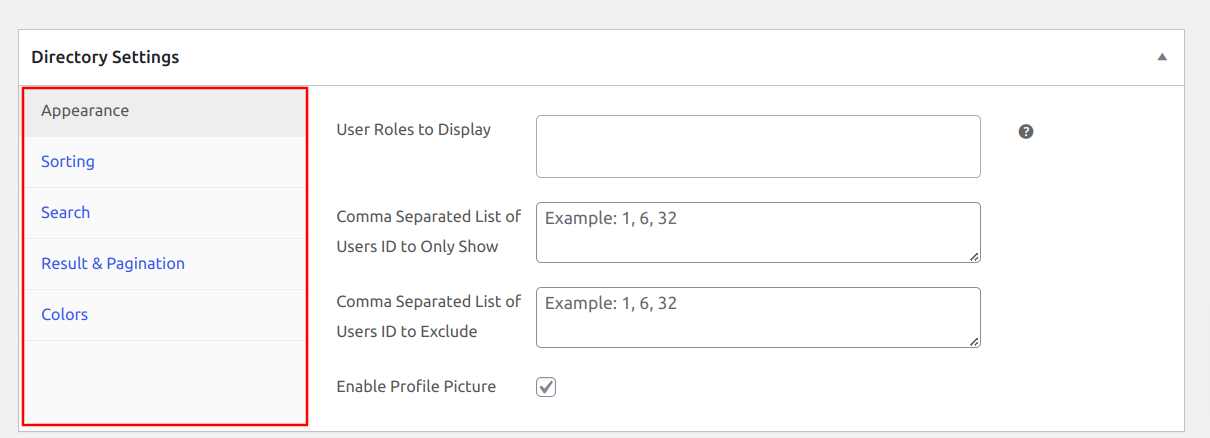
Directory Settings – Appearance
These settings are used to control members’ visibility. It consists of the following settings listed below.
User Roles to Display: This setting selects the user roles that should be visible or be part of the directory.

Comma Separated List of Users IDs to Only Show: This setting is used to specify a list of user IDs that should be shown in this directory. Suppose both the Comma Separated List of Users ID to Only Show and User Roles to Display settings are set, and the user’s role doesn’t exist in the User Roles to Display setting. In that case, that particular member will still not be visible in the Member Directory.
Comma Separated List of Users ID to Exclude: This setting specifies a list of user IDs to exclude from this directory.

Enable Profile Picture: This setting specifies whether the profile picture of the directory members should be visible. It is enabled by default.
If we disable the profile picture, the Member Directory will be displayed on the front end this way.
Directory Settings – Sorting
These settings control how the members in the directory are sorted. It consists of the following settings listed below.
Default Sorting Method: Specifies how the members in the directory will be sorted when viewed on the front end. By default, the newest members will be listed first in the directory. You can also sort by oldest users first.

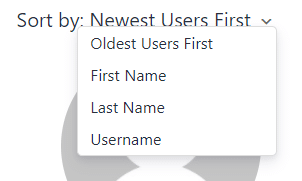
Enable custom sorting: Specify whether to show a sorting dropdown menu on the front end when the Members Directory is displayed.
With the above custom sorting, when the Members Directory is previewed, this is what the sorting dropdown menu will look like.
Directory Settings – Search
These settings control how the members in the directory can be searched or filtered out.
Important: For this to work correctly and display the correct search result, the Permalink Structure must not be set to Plain. To set the Permalink Structure, go to WordPress Dashboard>> Settings >> Permalinks, then select the structure you want, but don’t set it to Plain.
The Search Directory Settings consists of the following sub-settings listed below.
Search Fields: Specifies whether to enable or disable the search functionality of the Members Directory. This is enabled by default, meaning users can search and filter members in the directory.
Note: When disabled, all search-related functionalities (such as search form, members filters, etc.) will be removed completely when the Members Directory is displayed on the front end of your website.
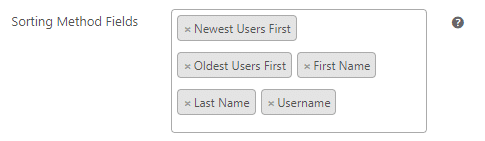
Search Fields: Specifies the user’s profile fields to search in. If no field is specified, the search keyword will be ignored, and the search result will always return all the members in the directory.

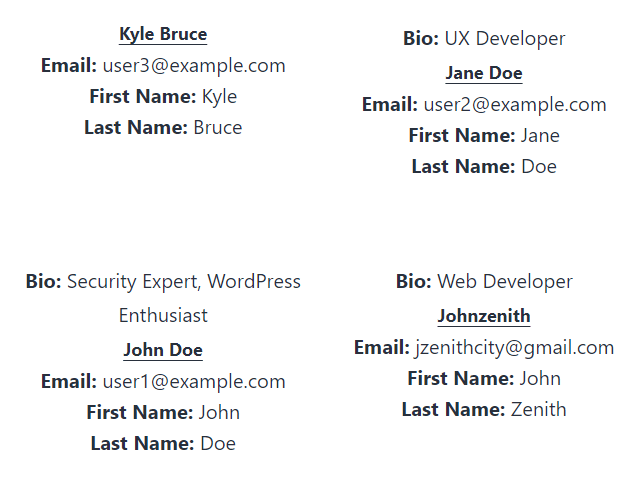
For example, by specifying the above fields as shown in the image above, users can search for a particular member by Email Address, Display Name, First Name, or Last Name. So when a member is searched for in the Members Directory, the result would look like this.
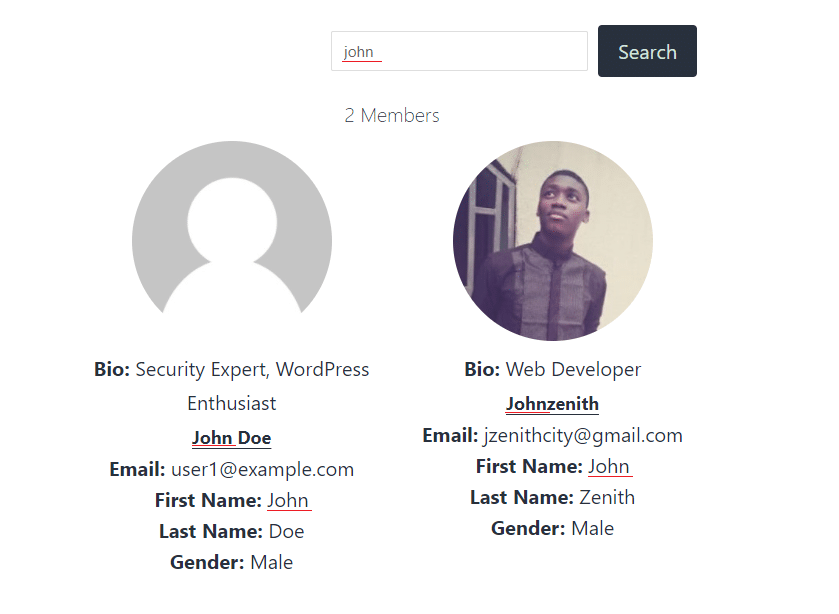
From the search results shown in the image above, two users were matched using the keyword john, and the fields where the matches occur have been marked out for demonstration purposes.
Enable Filters: Specifies whether to display a dropdown menu allowing users to filter members in the directory. Even if the Filters are enabled, the dropdown will not be displayed unless the Filter Fields are set, which we will discuss below.
Filter Fields: Specifies the custom fields that members can be filtered by.Note: Only Select, Checkbox, Radio, Country, and Date/Time fields are supported.
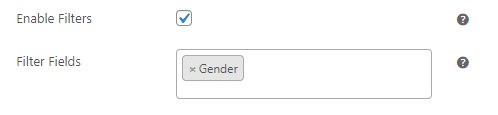
The Gender custom field has been added to the Filter Fields settings. This will enable users to filter the members in the directory by gender.

Directory Settings – Result & Pagination
These settings control members’ search results in the directory and set up the pagination limit.
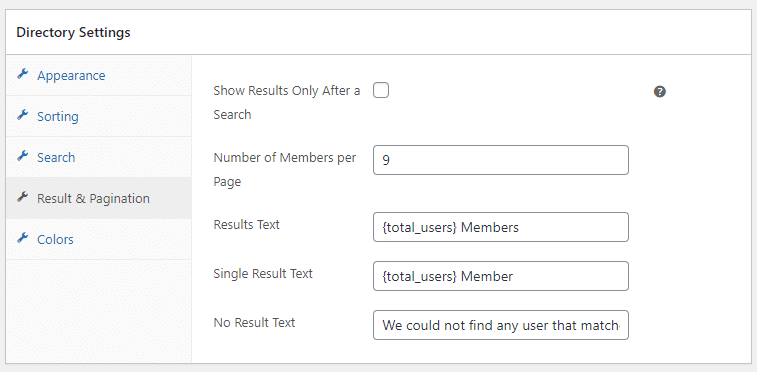
- Show Results Only After a Search: If enabled, members in the directory will only be visible or displayed after a search. The Directory Settings >> Search >> Display Search Form setting must be enabled for the search form to be visible.
- Number of Members per Page: Specifies the number of members to show per page when the members are displayed in the directory.
- Results Text: Specifies the results text to show after a search is performed. By default, this is set to “{total_users} Members”. The {total_users} placeholder represents the total number of members found in the search results.
- Single Result Text: This does the same thing as the Results Text but is used only when the search result returns a single member in the directory.
- No Result Text: Specifies the text to show when the search result is empty.
Directory Settings – Colors
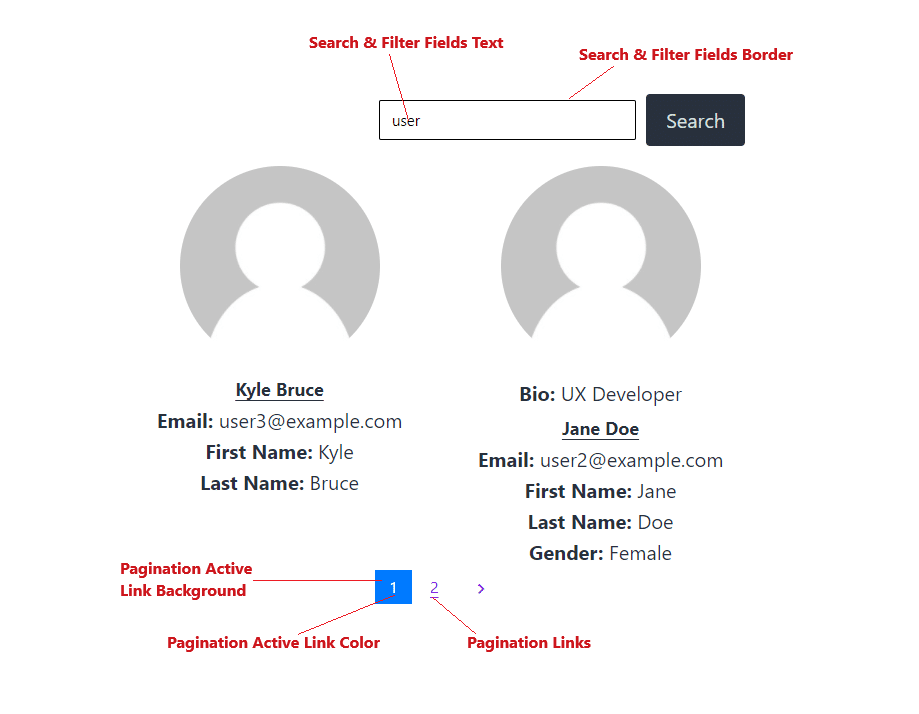
These settings control the text and background colors of search fields and pagination links.
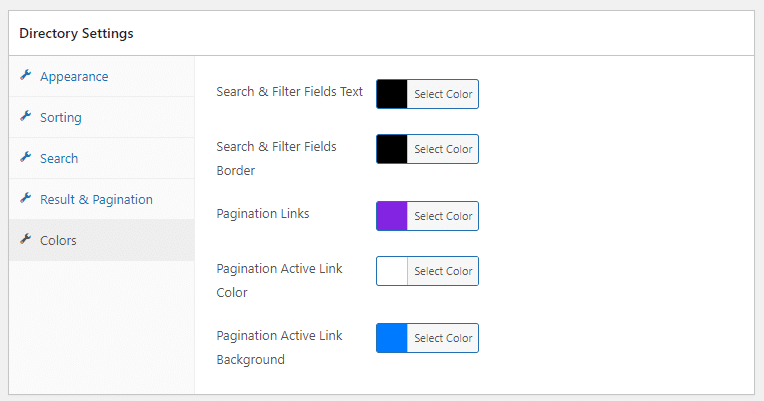
Based on the color settings in the image above, a descriptive image below shows how the colors are applied when the members’ directory is displayed.
Don’t forget to click the “save changes” button to save all your changes.
Publish Your Staff Member List in WordPress
In the previous section, we created a member directory template for all staff on our website, but this directory is not yet visible to the public. To make this directory accessible, we need to create a Staff Directory page in WordPress on our site and place the shortcode for this directory on the page.
To see the directory shortcode, navigate to ProfilePress > Member Directories, locate Staff Directory on the list, and copy the provided shortcode.

Next, click on Pages > Add New, and enter the page title – Staff Directory. If you are using the WordPress block editor, click on the plus icon, select the shortcode block, and paste the copied form shortcode into this block.
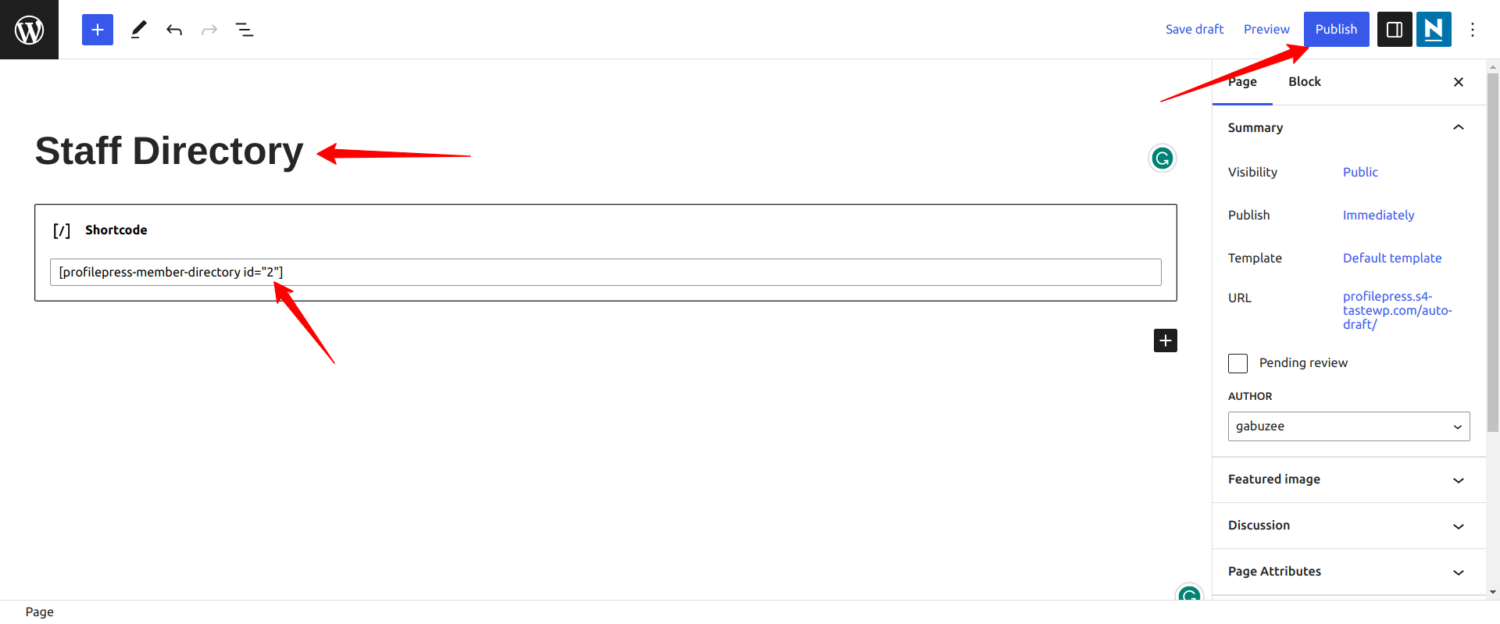
If you use the WordPress classic editor, paste the shortcode into the text editor. Next, click on Publish to publish your new WordPress user registration page.
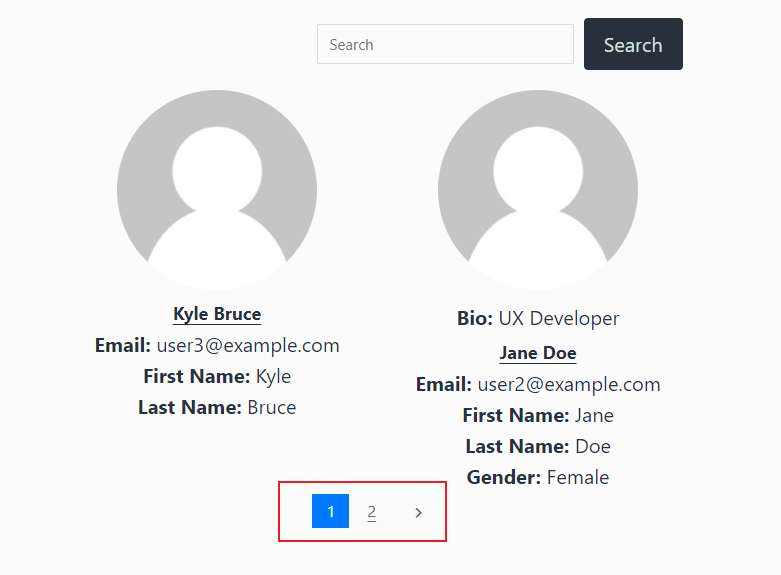
Now, open the staff directory WordPress page in a new window, and you should see a page with all registered staff users on your website.
Final Words
Displaying a staff directory on your WordPress website is an excellent way to share information about your team and connect with your customers.
In this article, you have learned how to install our WordPress staff directory plugin, ProfilePress. And then use it to create a custom staff registration form and a staff member directory template in WordPress, both customizable to suit your needs.
Creating a WordPress Staff Directory is easy when you use a plugin like ProfilePress, especially when combined with the free WPFront User roles plugin. The ready-made templates and drag-and-drop directory builder in ProfilePress give you the tools to create stunning member directories.
What are you waiting for? Get the ProfilePress WordPress plugin today.