5+ Best WordPress Member Directory Plugins Compared
A WordPress member directory plugin can make it surprisingly easy to create a fully functional user directory on your site without touching the code. However, you need to make sure it includes everything you’ll need.
You also want to have good control over your member directory and key customization options.
With a lot member directory plugins out there, we have done all the research and testing for you to find the best WordPress member directory plugins.
ProfilePress Member Directory WordPress Plugin
ProfilePress is simply the most complete member directory WordPress plugin out there since it goes well beyond being a member directory plugin to offer a lot of additional features, too.
Here’s a quick look at some of the biggest use cases of ProfilePress:
- Creating a fully functional member directory where you have full control over its backend, frontend, user profile display rules, and search results for the directory, without ever having to touch the code
- Creating custom user login, registration forms, reset password forms, the ability to send welcome emails on registration, and more
- Ability to restrict content for non-registered users so that they are encouraged to register and become a member or subscriber on your website
However, since this post is centered on member directory plugins, we will focus only on ProfilePress’s member directory functionality.
One of the best things about using ProfilePress to create a member directory is that you get full control over every element without any programming or coding knowledge. There are loads of customization options to help you create a member directory exactly the way you want.
Let us walk you through the process of creating a member directory with ProfilePress with all the custom features.
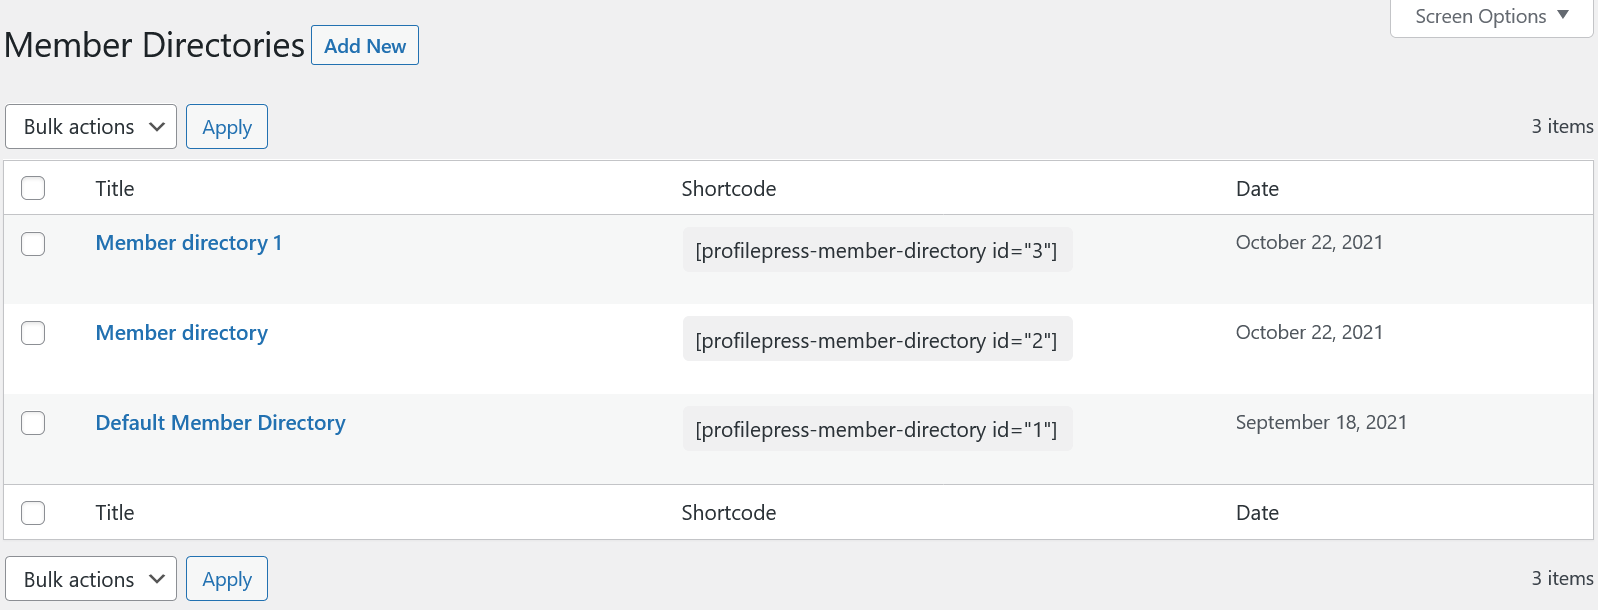
First things first, you need to install and activate the ProfilePress plugin if you haven’t already done so. Once activated, click on Member Directories under ProfilePress.
Click on the Add New button at the top.
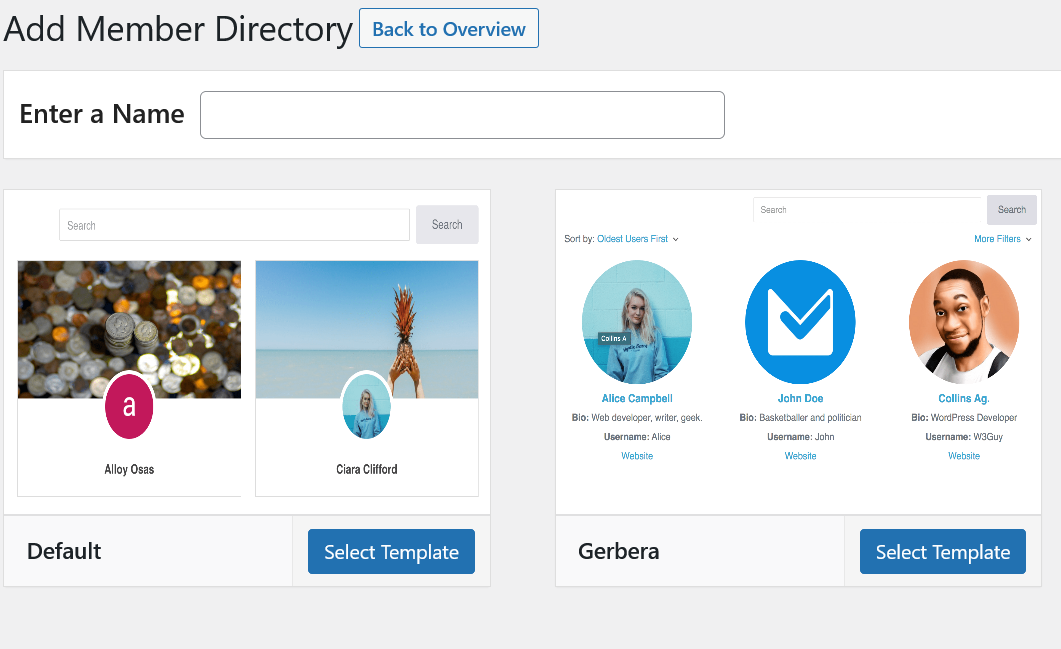
You will get to choose between two templates depending on the look you want for your member directory.
Give a name to your WordPress member directory and click on Select Template.
You would have a very simple user interface to work with here. As you can see in the image below, two fields are included by default in your member directory: Display name and Biography. You can remove one or both of them and add many other standard options on the right.
You just have to drag them into the section where these two pre-selected fields are listed.

You can also change the order of these fields by dragging them to the desired position on the list.
Appearance and Choosing User Roles
Now, let’s scroll down to see all the other user directory customizations and features available to you.
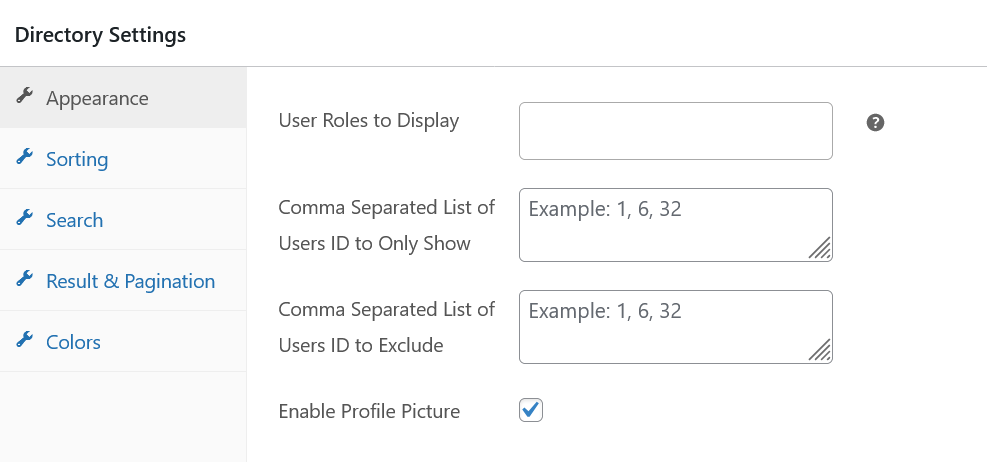
In the first field, select the user roles you want to include in the directory. You can choose your subscribers, authors, admins, and more to be included in your member directory.
The second and third fields above allow you to include or exclude specific users. The final option in the image above lets you enable or disable the profile picture for users in your member directory.
Sorting
The next tab you see on the list is the sorting tab. In simple terms, it lets you choose a standard way to sort users in your member directory.
You can sort them by newest registered users, oldest users, first name, username, and more. You can also enable custom sorting and add as many sorting options as you want.
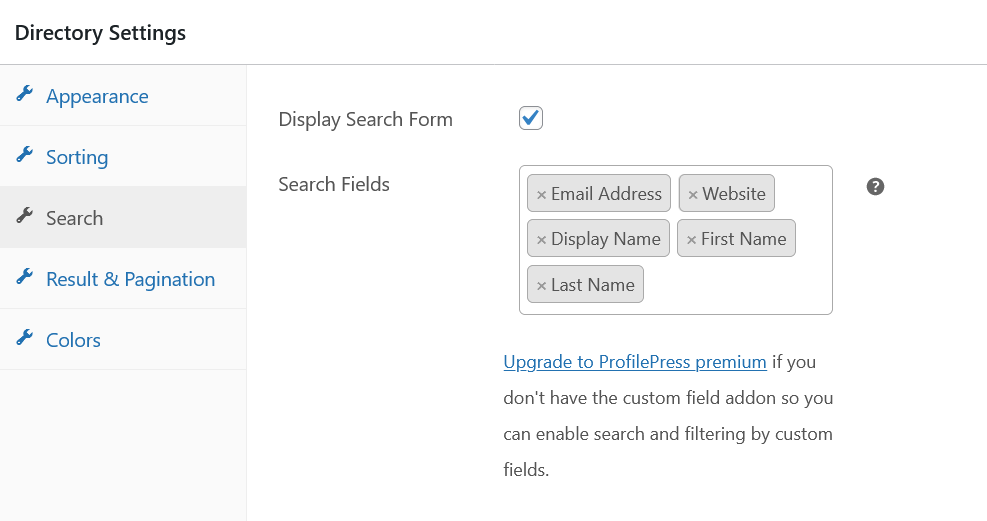
Search
You can choose whether other users visiting your website can search your member directory. In addition, you can choose the filtering options they can use to narrow down their search.
Pagination
ProfilePress offers a fair few pagination options as well. These features allow you to control the search results and how they appear.
You can also enable results to be shown by default, though this is not recommended for most websites. Some of the other options you will find here include:
- Number of members to be shown on each page
- Results text
- The result text for when the search returns a single result
- The result text for when the search cannot find any user for the search performed
Finally, you can also customize the colors for different elements of your member directory, including the search and filter fields, the border for those fields, the pagination links, and more.
You can click the Save Changes button once you’ve completed everything you want. However, to see exactly how your member directory will look before you create it, click the Live Preview button at the top.
This will allow you to see all changes and make any necessary modifications before you make the directory live.
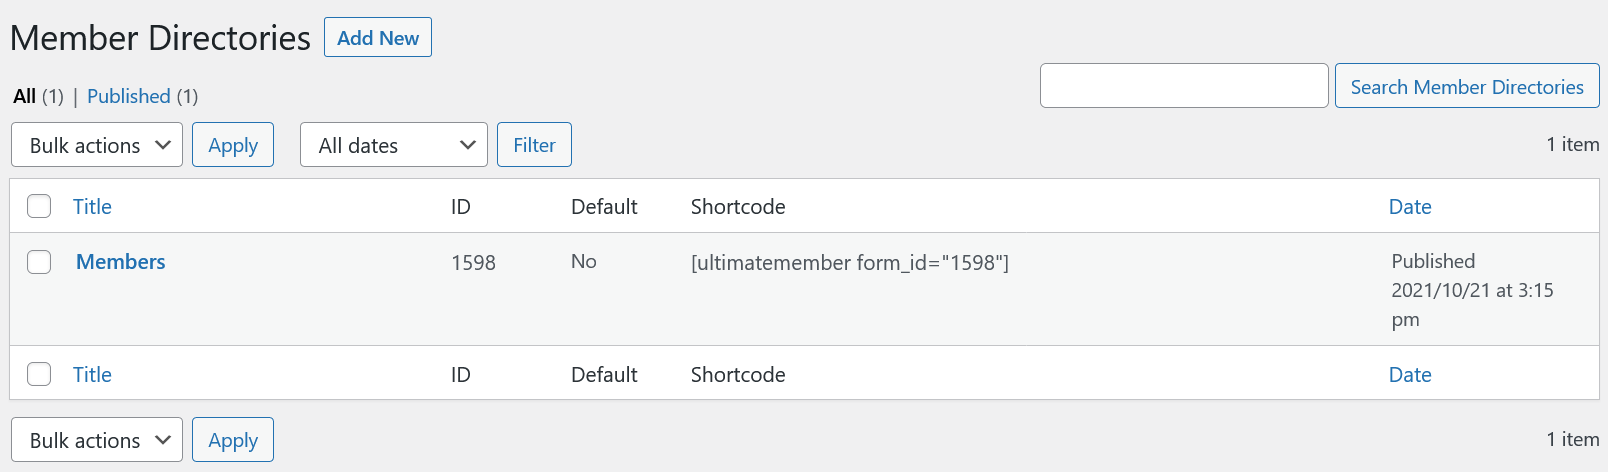
There’s one last step before you and other users can see the directory on your site. You need to copy the shortcode for your member directory and create a new page or post with the shortcode.
Of course, this was just a test. You may have many more users, and the search functionality would allow visitors to search for them and filter them by the metrics you choose when creating the directory.
You can add many more features in the form of ProfilePress add-ons. You would be able to integrate a variety of services and tools, including bbPress, Mailchimp, and WooCommerce.
But there’s going to be a lot more to it. Some of the additional pro features include:
- Custom fields to collect unlimited additional information from users besides the standard profile data.
- Social login via Facebook, Twitter, Google, LinkedIn, and more.
- User moderation lets you decide whether to approve newly registered users.
- Allowing users to select BuddyPress groups that they would like to join at the time of registration.
- Integration with Mailchimp and Campaign Monitor.
Ultimate Member
Ultimate Member is a popular user profile and membership directory plugin for WordPress websites. Let’s quickly look at all the menus listed under this plugin.
- Dashboard: It gives you an overview of the users registered on your website, as well as other nifty features like clearing user cache and purging temp files
- Settings: This is where you get to create user, login, registration, and other pages, enable or disable the members’ directory, set user display rules, and a whole lot of other useful features
- Forms: Here, you can create and manage your user registration, login, and profile forms
- User Roles: Create and manage user roles
- Member Directories: We will review this in detail below
- Extensions: You can purchase extensions for additional functionalities that you don’t get in the free version of the plugin
Now that you have a basic idea of the different menus and what you can use them for, let us create a membership directory using Ultimate Member and walk you through the entire process.
You can begin by clicking on the Member Directories menu under the Ultimate Member option on your WordPress dashboard. Then click on the Add New button at the top.
There are quite a few features and customizations, all self-explanatory. However, let us cover some of the key features you will find here:
- The ability to choose which user roles are included and which user roles are left out from the member directory
- Create a member directory only with specific users you want or exclude certain specific users from the directory
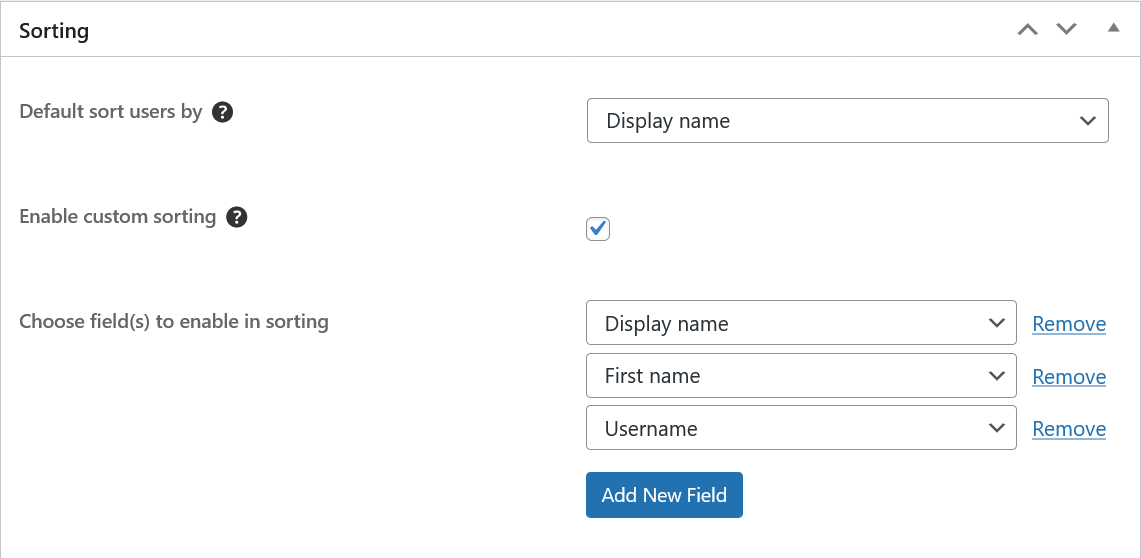
- You can sort users using a variety of different criteria, including the display name, username, first name, last name and many more
Sorting Criteria and Profile Control
You can also enable custom sorting and add as many sorting criteria as possible.
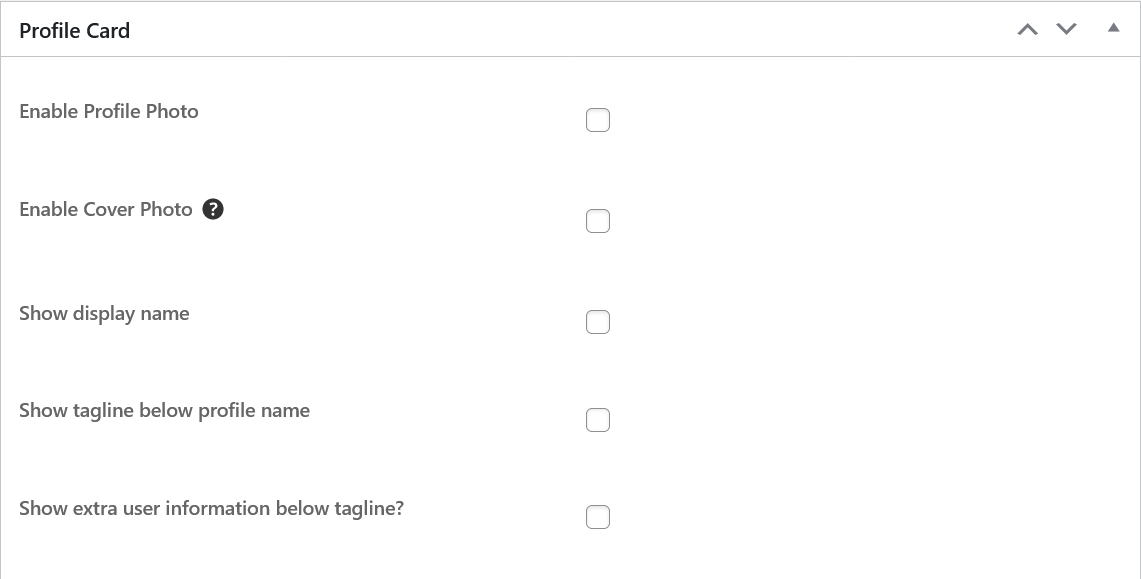
Ultimate Member also allows you to customize the profile display rules, meaning you can choose whether or not to show the profile photo, cover photo, display name, tagline, and extra information.
Search and Filter Options
Now, one really useful and essential feature you will find as you scroll down is Search Options. If you enable it, users and other visitors to your site will be able to search the directory for members.
But this search functionality is also pretty customizable. You can choose specific user roles that are searchable, specific filters for searching them (you can also disable the “filter” option for searching), and choose specific filter meta like age, country, and first name.

Pagination
You can control how the search results appear with the pagination options. Some of the essential things you can do using the pagination features include:
- Choose whether search results are shown by default or only if a search is performed
- Set the maximum number of profiles that would appear in the directory; not setting a number will show all user profiles by default.
- Number of profiles per search result page for both desktops and mobile devices
Once you have gone through the entire list of settings and customized everything the way you want, you can click the “Create” button at the top right to bring your member directory to life.
Your member directory has been created, but you need to create a new post or page with the shortcode you get. Once the post or page is created with the directory’s shortcode, you and the other chosen users can view the directory.
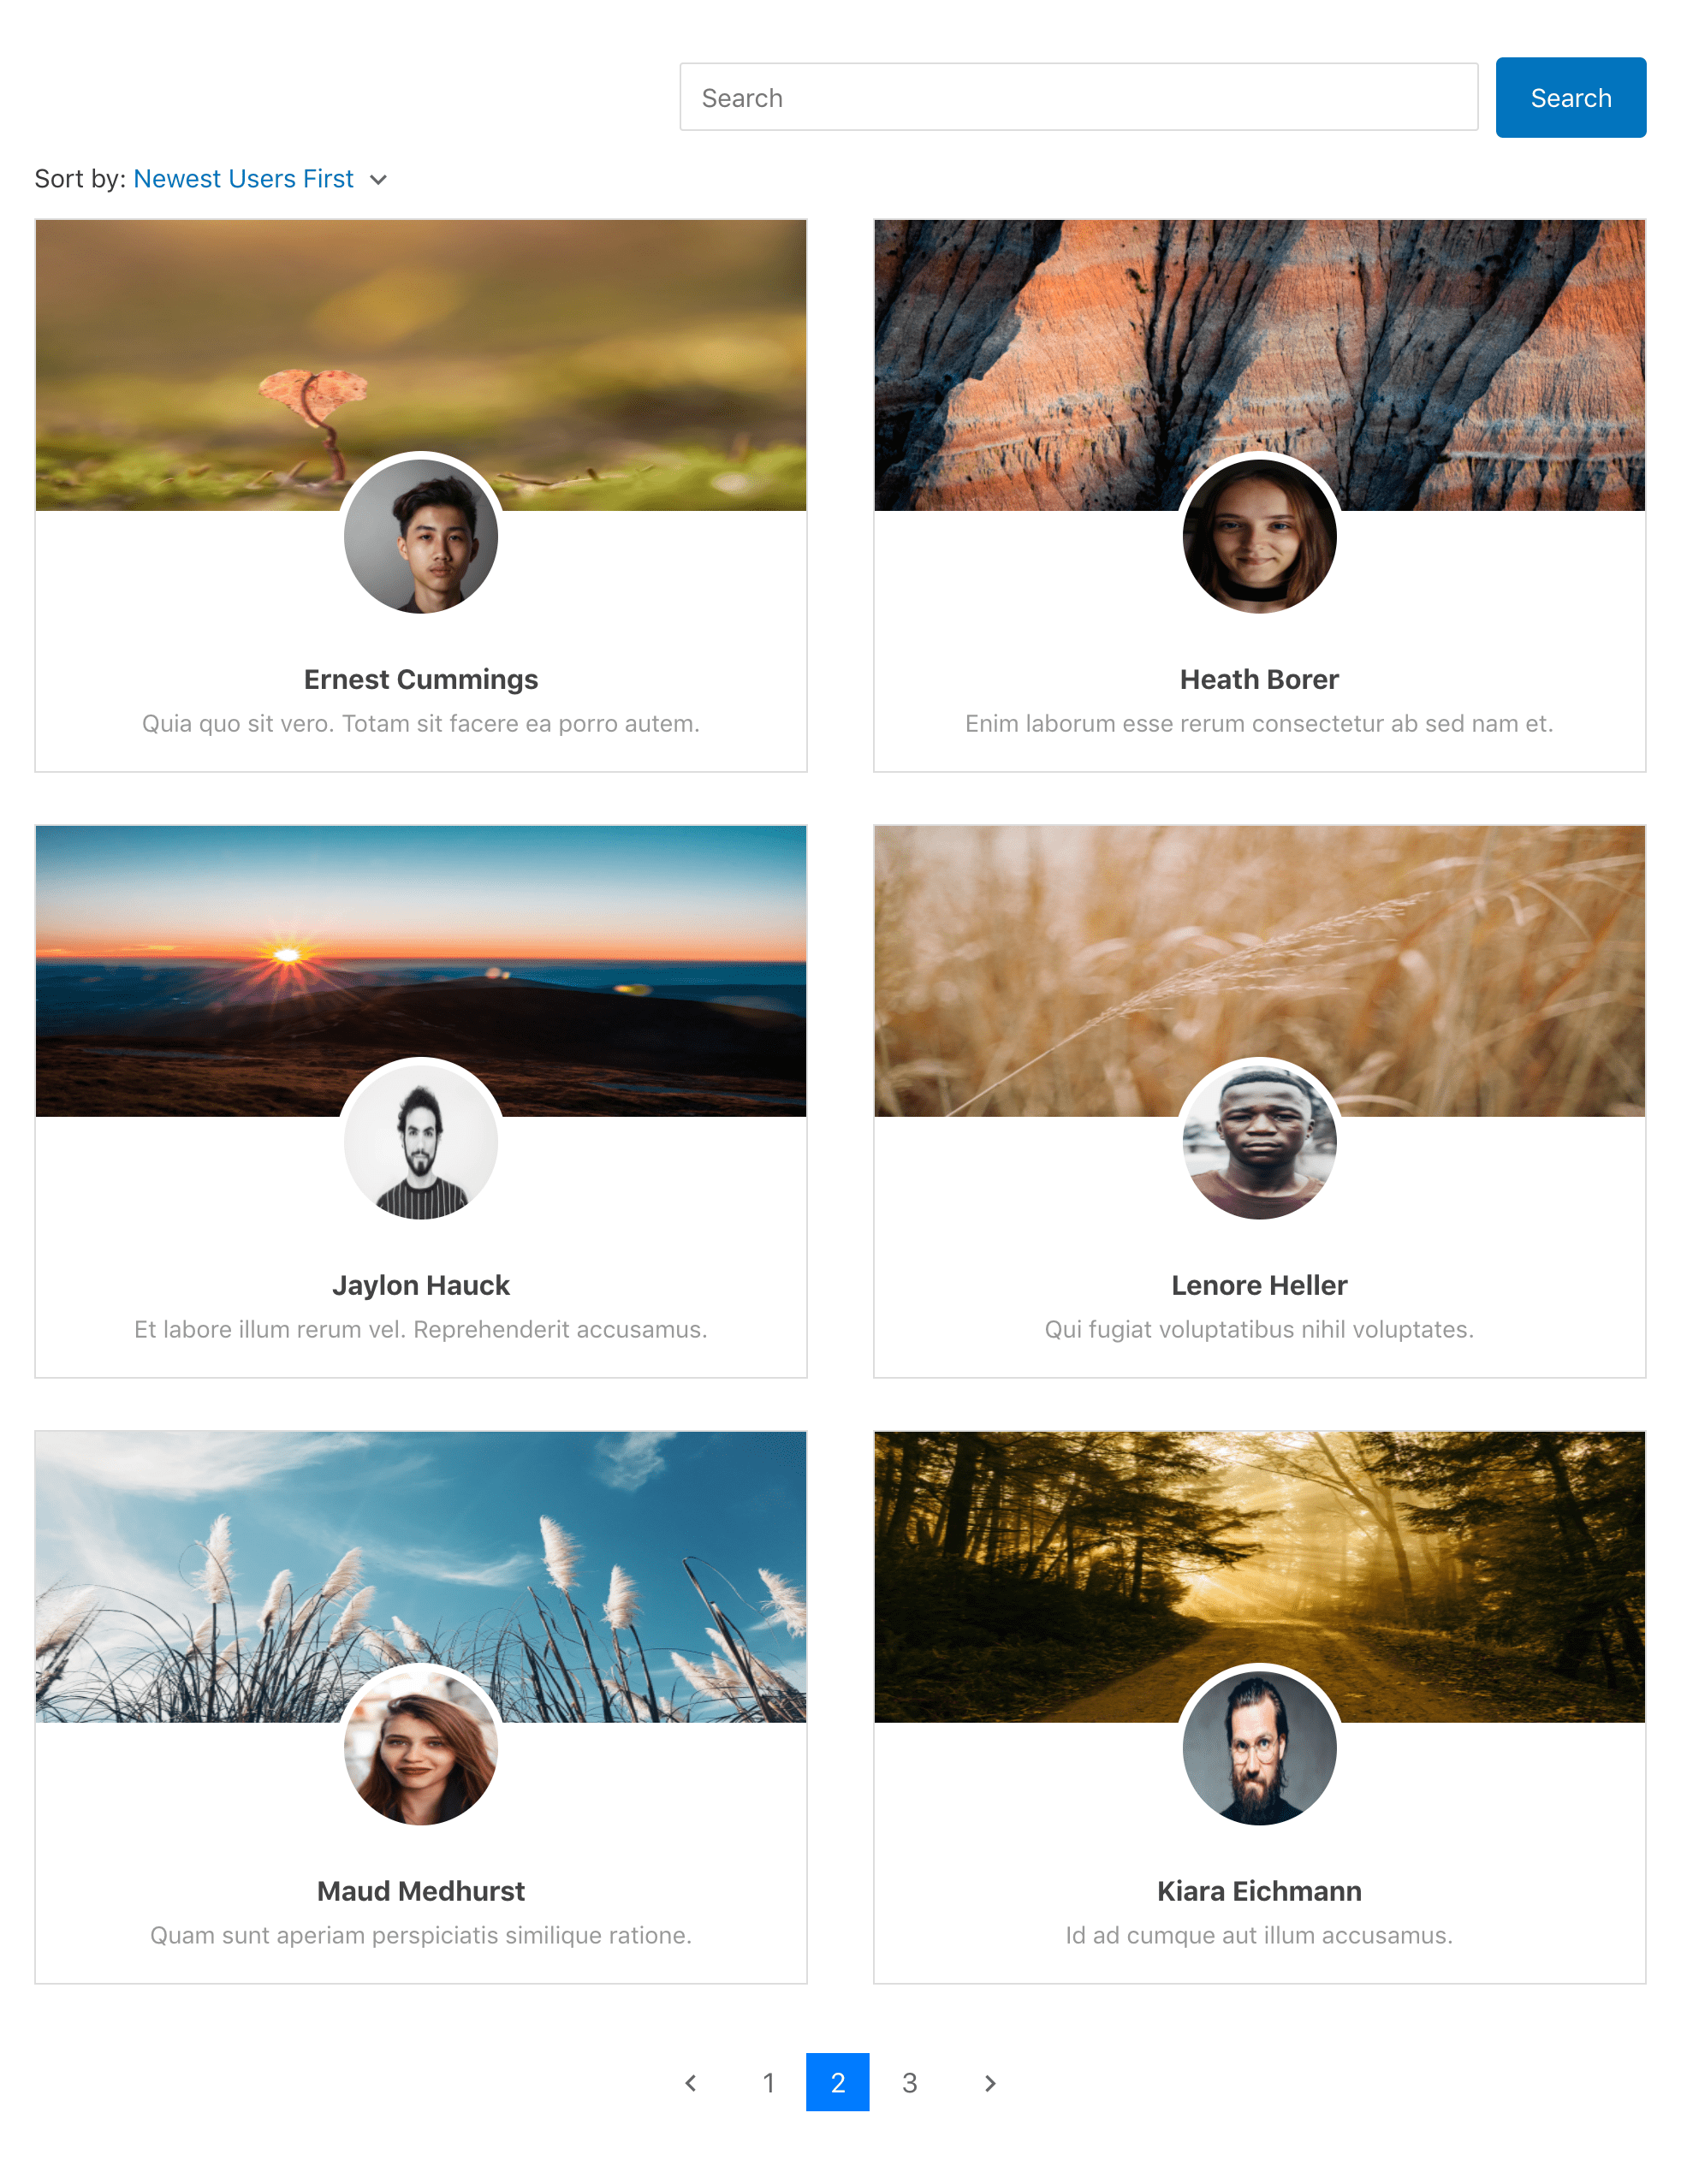
This is what the WordPress member directory will look like.
ProfileGrid
If you’re a developer who wouldn’t have a problem finding your way through different user management features, or perhaps someone with a little more technical knowledge, then ProfileGrid may be an impressive way to manage users and create a member directory on your WordPress website.
Feature List
While it certainly isn’t the most user-friendly member directory plugin on our list—and the documentation isn’t as helpful as it could be—it can still do the job pretty well. But as we said, you need some technical knowledge to understand all its features and functionality.
With that said, here’s what you get with ProfileGrid:
- Create a frontend member directory that has advanced filtering and search options
- Restrict premium content to encourage users to register or become a paid member
- One of the best plugins for managing WooCommerce user profiles and replacing the standard WooCommerce user profile page
- Create different groups and membership levels
- Integrate bbPress for free
Coming back to the member directory, you can create one with ProfileGrid simply by using the shortcode. The plugin would create a default group for you that you can use for different purposes.
You can then use different shortcodes to implement different functionalities on your WordPress website. These shortcodes can be used to create a frontend member directory page, a multipage registration form, a single user profile page, a login form, a password recovery form, and more.
Creating a Member Directory
To create a member directory, start by clicking the ProfileGrid menu in your WordPress dashboard.
If you want to proceed with the default group to display in your member directory, simply copy the shortcode you see there. Or you can create a new group and add the members you want.
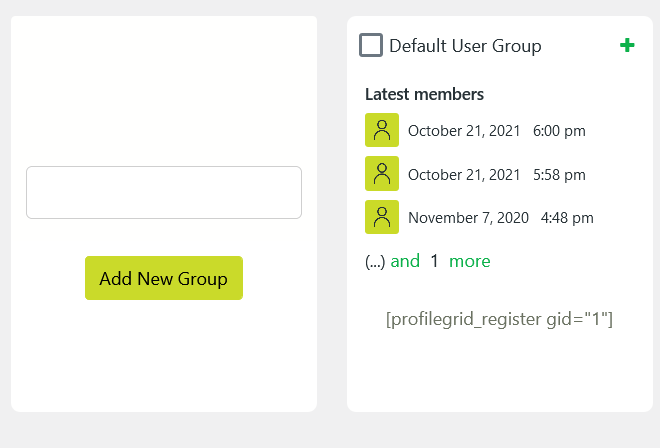
So the shortcode here is [profilegrid_register gid=”1″]. This shortcode is for the user registration form. To make it work to create a member directory, you need to replace the “register” part in the shortcode with “users.”
We have found this through ProfileGrid’s documentation, so you don’t have to do the grunt work.
So our shortcode would be [profilegrid_users gid=”1″]. You can even copy this shortcode; it should work on your WordPress website if you have the plugin installed and activated.
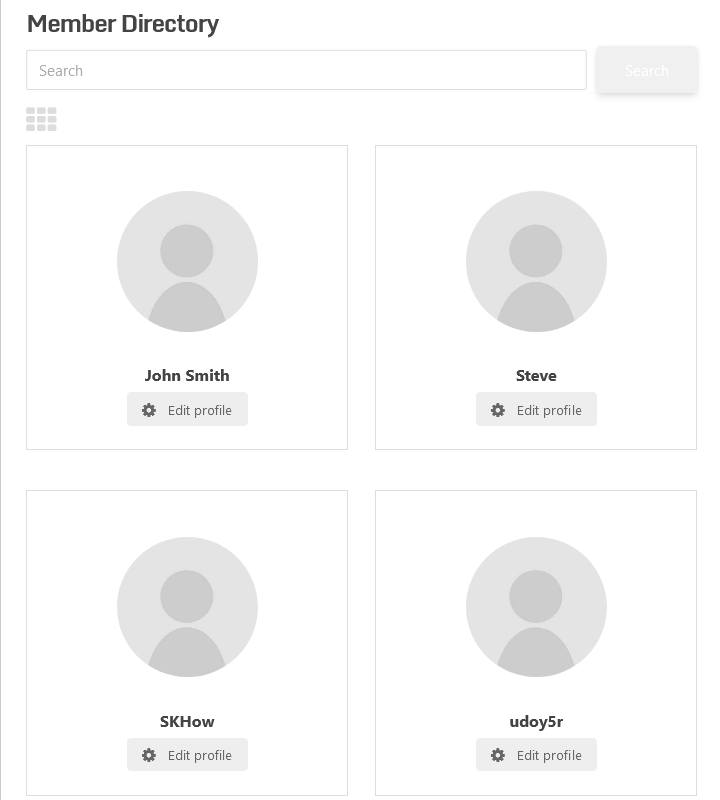
Like with some of the other plugins we discussed above, you must create a new post or page with this shortcode. Finally, this is how our directory looks.
As you can see, there’s also a search field where users can search for a particular user by typing a username into the field. Then there’s the sorting option, which would be very handy for large member directories.
Posts Table Pro
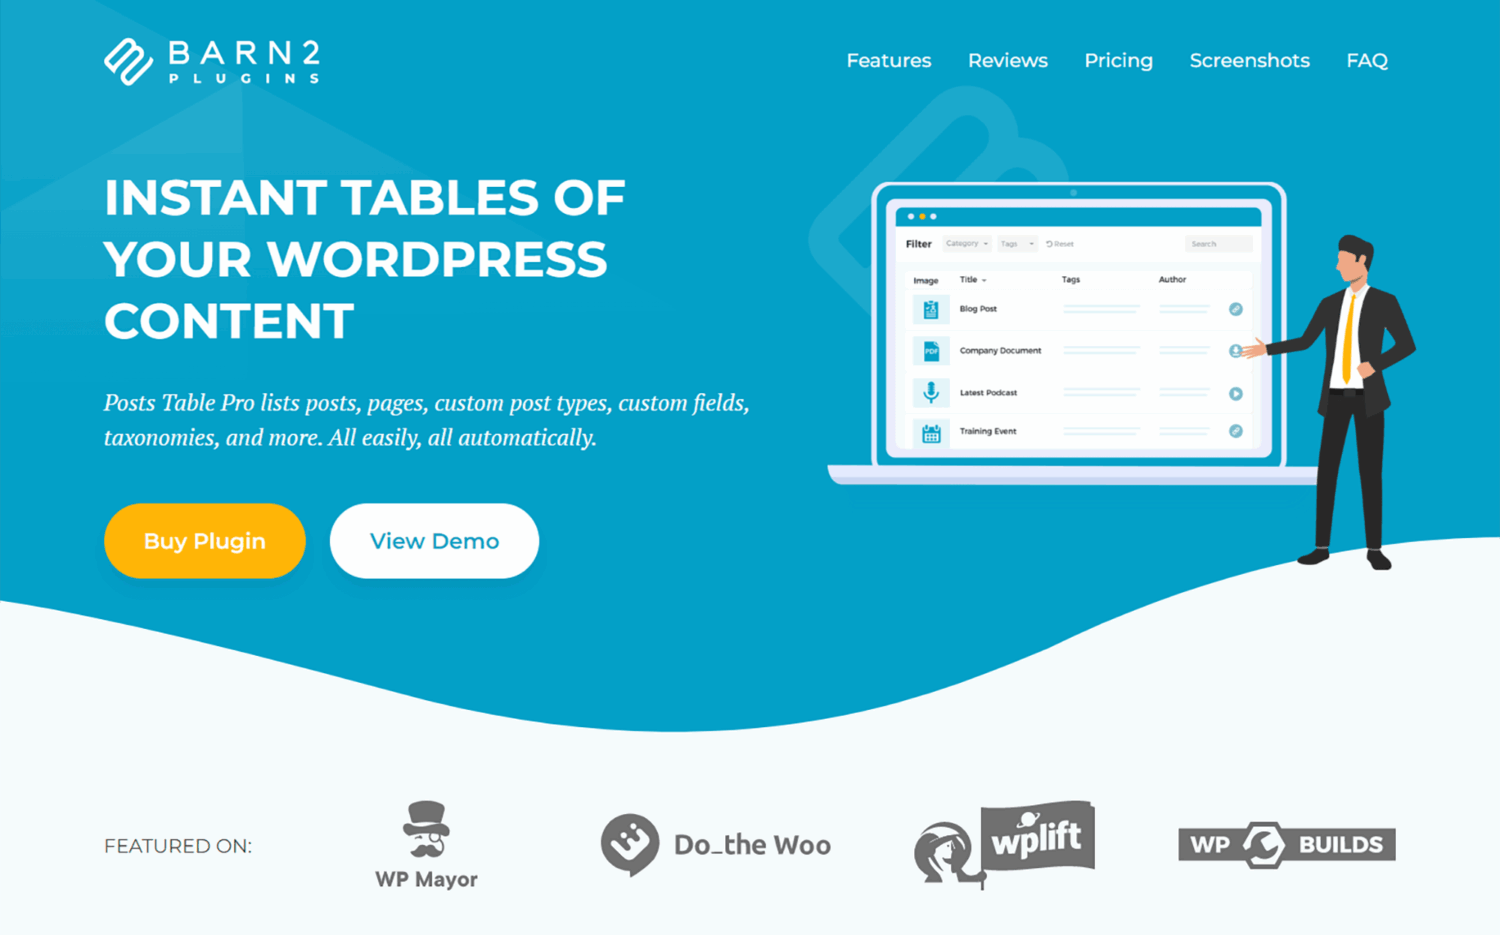
Posts Table Pro is a premium WordPress plugin that organizes and displays all WordPress content in fully customizable tables. Whether you want to list posts, pages, custom post types, taxonomies, or even custom fields, Posts Table Pro automates the process, making it easy to display your content visually appealing and user-friendly.
This plugin is ideal for building a member directory, helping you highlight your community while providing valuable information and resources for users. You can create searchable directories that display member profiles, including custom fields for personal details, roles, and contact information. This allows users to easily find and connect with specific individuals within your organization or community.
Creating a Member Directory
If you haven’t already, you’ll need to install and activate the Posts Table Pro plugin. Once that’s done, you can follow the steps below.
Part 1 guides you through the initial setup for creating a WordPress member directory. You can watch the tutorial here, which covers:
- Creating a ‘Members’ custom post type
- Setting up categories, tags, and custom taxonomies
- Adding custom fields
- Adding members to the directory
Part 2 covers creating a WordPress member directory with profiles. Members will be displayed in a table, allowing users to quickly sort, search, or filter to locate a specific member. Once the desired member is found in the directory, users can click on the member’s name to view their complete profile, which appears as follows:
UsersWP
UsersWP is not only creating a member directory but also for other user management features like a registration page, login page, password reset page, and more.
All you need to do is install and activate the plugin on your WordPress website and walk through their start-up activation process, and you will be done. UsersWP would automatically create all the user-related pages for you, including a member directory.
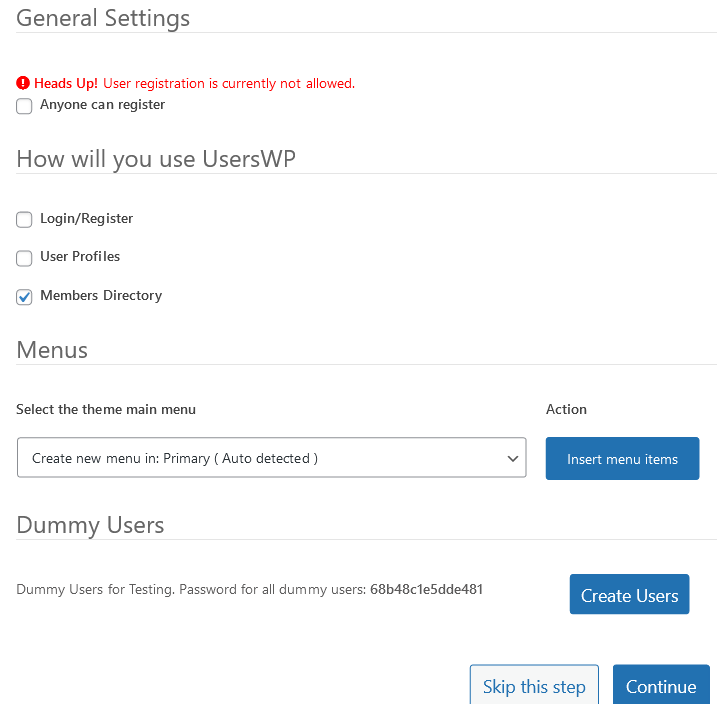
Some of them will be created and published, while others will be saved as a draft.
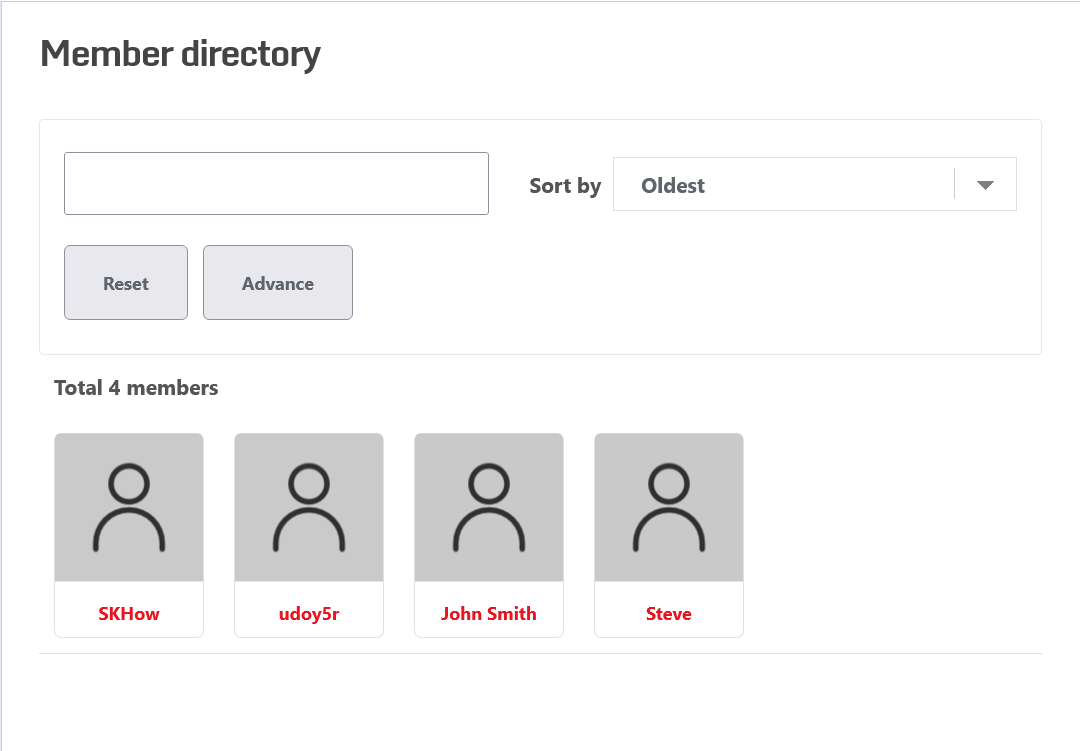
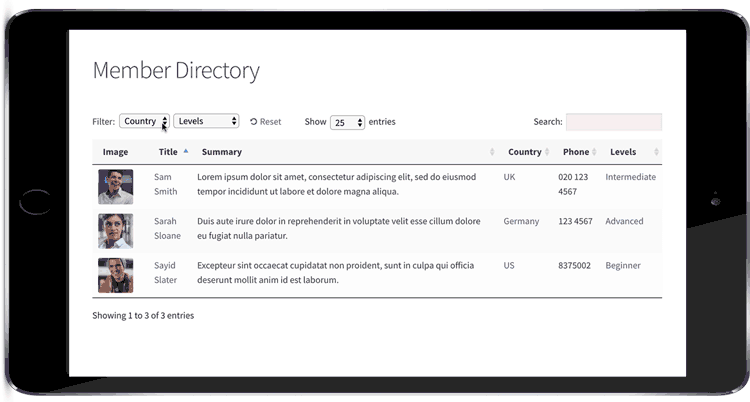
Coming back to the user directory, here’s what the member directory automatically created by UsersWP looks like.
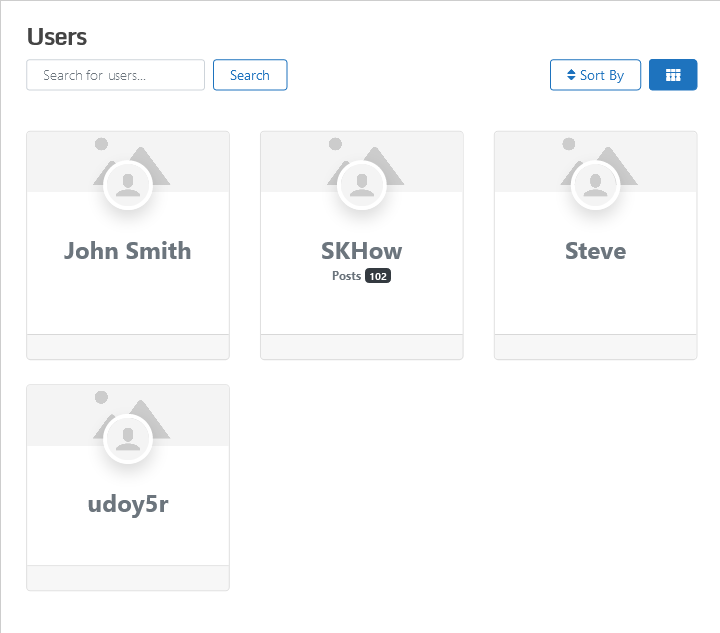
As you can see, there’s also a search and sorting option. Quite a few sorting options will be very useful for accessing user information from large member directories.
The user listing can also be formatted differently. Users on the page can view the directory in five formats.
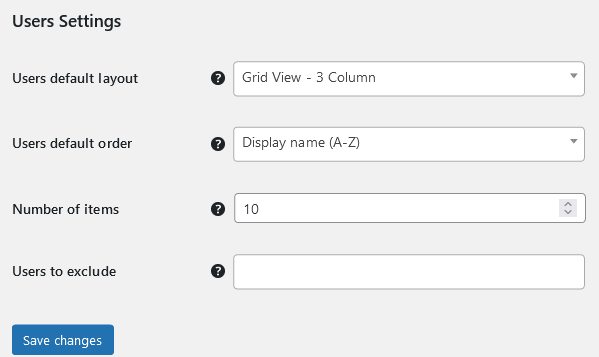
You can also modify the member directory. However, compared to our top plugin choice, ProfilePress, UsersWP offers a limited range of customizations.
However, you can customize the directory by changing its default format, displaying the number of users on a single page, and excluding certain users.
WP User Frontend

WP User Frontend include member directory plugin that allows users to build and manage their own listings directly from the frontend, no WordPress dashboard, no admin access needed. This means users can create, edit, and update their profiles or submissions at any time without relying on site administrators, making the experience smoother and more engaging.
It works especially well for directories that rely on user-generated content, such as business listings, freelancer profiles, or community platforms. Instead of the admin doing all the work behind the scenes, users take control of their own information, keeping your directory active and up to date.
With support for custom forms, subscriptions, and role-based access, you can also control how users interact with your site and even charge for listings or premium features, turning your member directory into a more dynamic and scalable platform.
Features of WP User Frontend
User Directory: It includes a built-in user directory that allows visitors to browse members. You can add search and filtering options to help users quickly find specific profiles.
User-Managed Listings: This is one unique feature of WP User Frontend. It doesn’t just display a directory; it allows users to build and manage their own listings from the frontend.
Subscription Packs and Pay-Per-Post: You can charge users to join or post content by creating subscription plans or one-time payment options. This works well if your directory is part of a paid membership site.
Content Restriction: You can control who sees certain content based on user roles or subscription levels. This is useful if you want to offer exclusive content to paying members.
Post Expiration and Access Control: You can set posts or listings to expire after a certain time, especially for paid plans. This keeps your directory fresh and encourages renewals.
Creating a Member Directory
First, install and activate WP User Frontend on your WordPress site.
Next, go to WP User Frontend > User Directory and click Add New Directory. This will open the setup wizard.
Start with the basics: give your directory a title and choose which users you want to include or exclude.
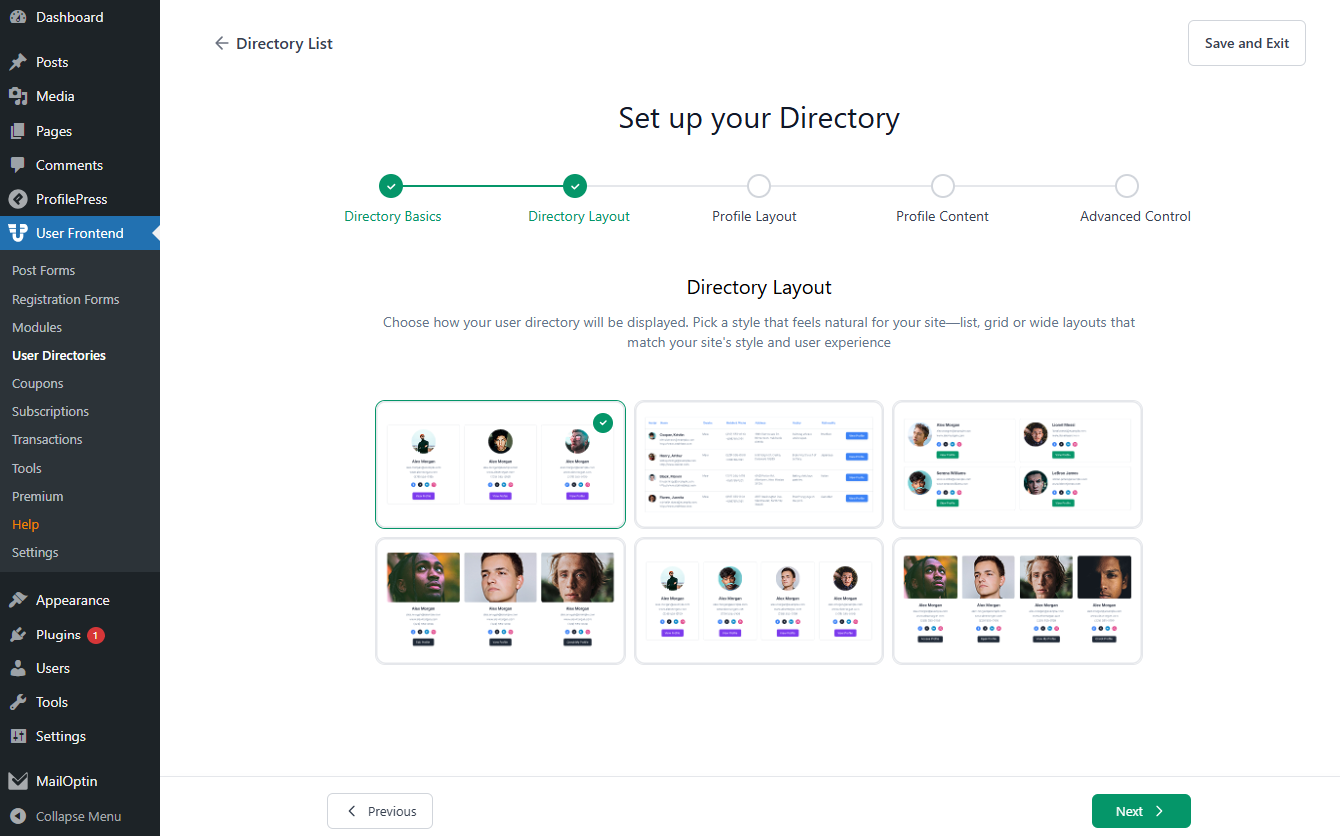
When done, click Next to continue to the next step, and select a directory layout. Then pick your profile layout and customize the user tab layout to your preference.
When done, click Next again to go to the advanced control page. On the Advanced Control page, you can:
- Choose how many Users Per Page
- Set the Number of Users in Directory
- Pick the sorting type and sorting order
- Control how profile links are generated
- Set image dimensions, social profile options, and other display preferences
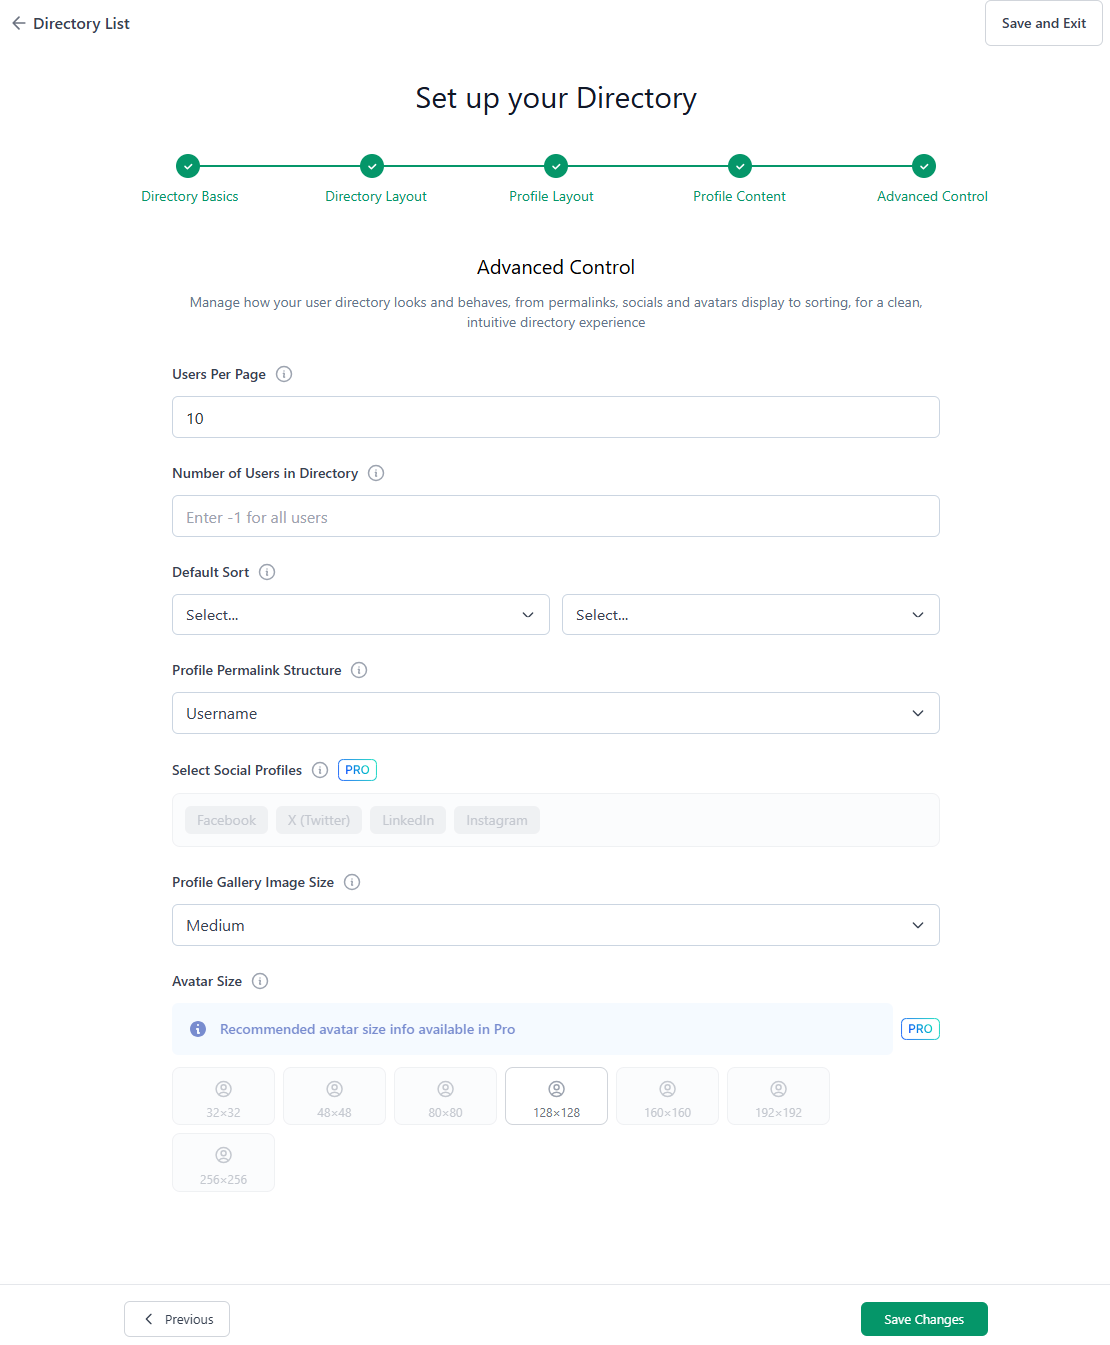
Once you’re satisfied with your setup, click Save Changes.
Your directory will now be created. Copy the shortcode from the listing page.
Next, go to the page where you want the member directory to appear (or create a new page). Insert the shortcode you copied into the page content, then publish or update the page.
When visitors go to that page, they’ll see your directory with member profiles, profile pictures, and all the fields you selected.
The screenshot below shows our member directory page.

GS Team Members

The GS Team Members Plugin showcases your team members beautifully and effectively on your website. With over 50 customizable templates, including Grid, Circle, Horizontal, Drawer, Table, List, Slider, Popup, Filter, Panel, and Gray View, you can create a layout that perfectly matches your site’s style and branding.
It is designed to be SEO-friendly and fully responsive, ensuring optimal visibility and a stunning appearance across all devices. The Shortcode Generator with a live preview simplifies customization, while the re-order feature ensures effortless organization.
Leave behind outdated team pages and showcase your team with stunning layouts that truly impress!
Features:
Diversified Display Layouts
GS Team Members offers a variety of stunning layout options, including Grid, Circle, Horizontal, Drawer, Table, List, Slider, Popup, Filter, Panel, and Gray view that blend seamlessly with your website design, giving you maximum flexibility to showcase your team in a visually appealing way.
Interactive and Dynamic Team Filters
The built-in filters let visitors sort team members by departments, roles, or categories, enhancing the user experience and making it easy to display large teams without overwhelming your audience.

Adjustable Popup Profiles
GS Team Members features a sleek popup option to showcase detailed team profiles without redirecting visitors. Include bios, expertise, contact details, and social media links, offering in-depth insights while keeping your site clean and user-friendly.
Integration with Social Media
This plugin lets you add customizable social media icons to each profile. It supports platforms like LinkedIn, Twitter, and Instagram, making it easy for visitors to connect with your team.
Responsive and SEO-Friendly Design
GS Team Members offers responsive designs that look great on any device. Its SEO optimization boosts your team profiles’ search rankings, enhancing your brand’s visibility and credibility.
GS Team Members is designed to be intuitive and ideal for all website owners. Each feature is paired with clear instructions and resources, ensuring you can effortlessly showcase your team and enhance your site’s professionalism.
Dynamic User Directory Plugin
This simple plugin is designed to help WordPress site owners create a member directory. While it’s not the most user-friendly, it does offer a fair few features you would be pleased to have in the free version of a member directory plugin.
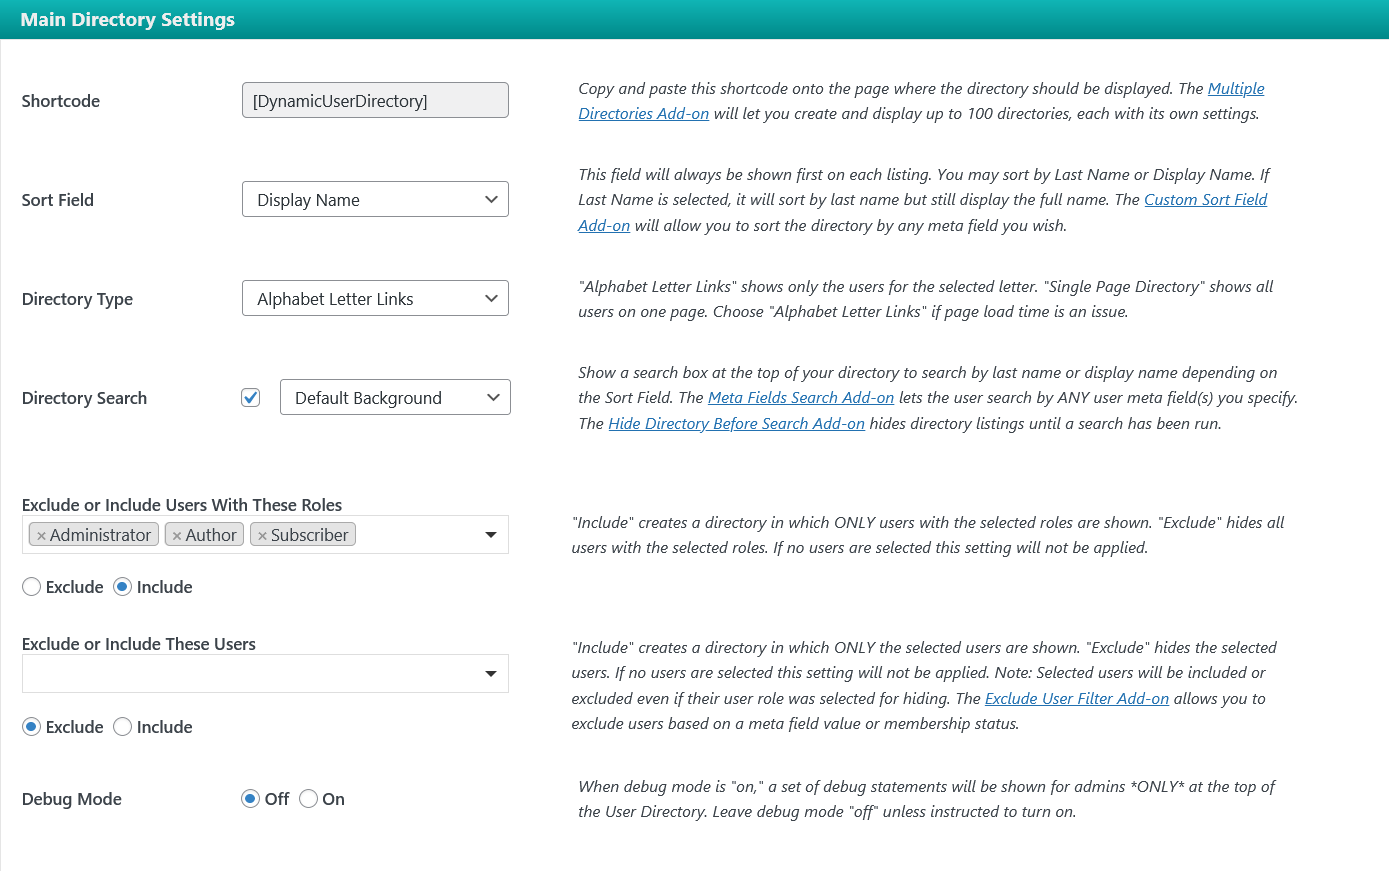
The interface and settings can be a bit tricky to decode, though. However, it lists explanations next to every feature or setting, which can help you get through the process, though it will be time-consuming.
With that said, here’s a quick look at some of its highlighting features:
- Ability to include or exclude the search option easily
- Include or exclude specific user roles in the directory
- Include or exclude certain users specifically
- Some impressive customization options with respect to display name, profile picture, color, and size of the user profiles, and other design and appearance-related elements
- A fair bit of control over how the search results appear, though not as detailed as the top two plugins above
- A dedicated pagination section that lets you decide the number of users per page, position, font size, pagination links, and more
- Ability to include some unique details about the users, such as the website, date registered, and more
Once you have gone through the settings, click the Save Options button at the end. Once that’s done, you need to copy the directory shortcode, which appears at the top, and put it into the post or page where you want the member directory published.
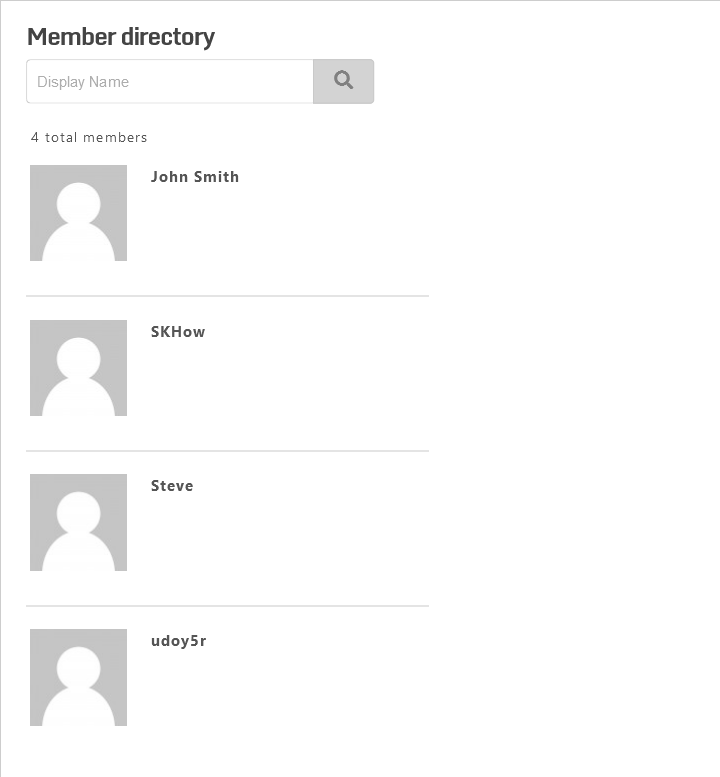
Finally, this is how it looks once the page with the directory shortcode is published.
Summary of the Best WordPress Member Directory Plugins
It always helps to choose a WordPress member directory plugin that offers many customization options and, more importantly, covers other user management functionalities, such as creating custom registration and login pages.
ProfilePress ticks all the boxes here. It offers all the member directory features you will ever need, plus many others to help you build a fully functional membership site.
Needless to add, using multiple plugins for different user functions would make your site bloated and slow. So, unless you’re fine with a simple WordPress user directory plugin, you need to go with a single plugin that covers all areas of user management on your website.