How to Create a WordPress Frontend Edit Profile Form
Do you want to learn how to create a WordPress frontend edit profile form?
Allowing users to edit and manage profile information is vital to running a WordPress website, especially for membership sites, online communities, or e-commerce platforms.
While WordPress provides basic profile management functionality through the admin dashboard, having your users access the backend to update their information is not ideal. This is where front-end profile editing becomes essential, offering a more user-friendly approach.
ProfilePress is a powerful WordPress membership plugin that allows you to create custom frontend forms for login, registration, password reset, and profile editing—all without writing a single line of code.
In this article, we’ll explore the benefits of a WordPress frontend edit profile form and how to create one using ProfilePress.
Benefits of WordPress Frontend Edit Profile Form
Better User Experience: Frontend forms let WordPress users update their profiles without accessing the WordPress dashboard, offering a more intuitive and seamless process.
Security: Limiting backend access reduces the risk of unauthorized changes or accidental errors, enhancing your site’s overall security.
Improved Workflow: Admins no longer have to handle constant profile update requests. Users can easily update their information themselves.
Creating a Frontend Edit Profile Form in WordPress
To create a frontend edit profile form for your WordPress website, install and activate the ProfilePress plugin.
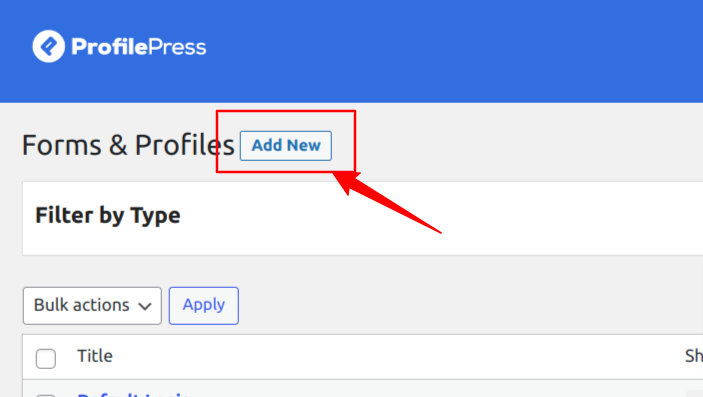
After activating the plugin, go to ProfilePress > Forms & Profiles in your WordPress dashboard, then click the Add New button.
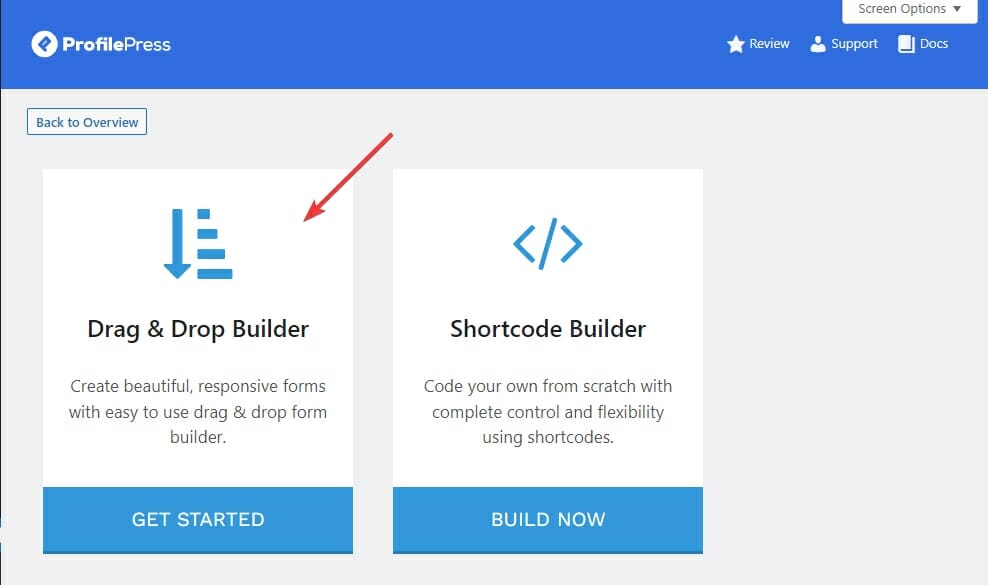
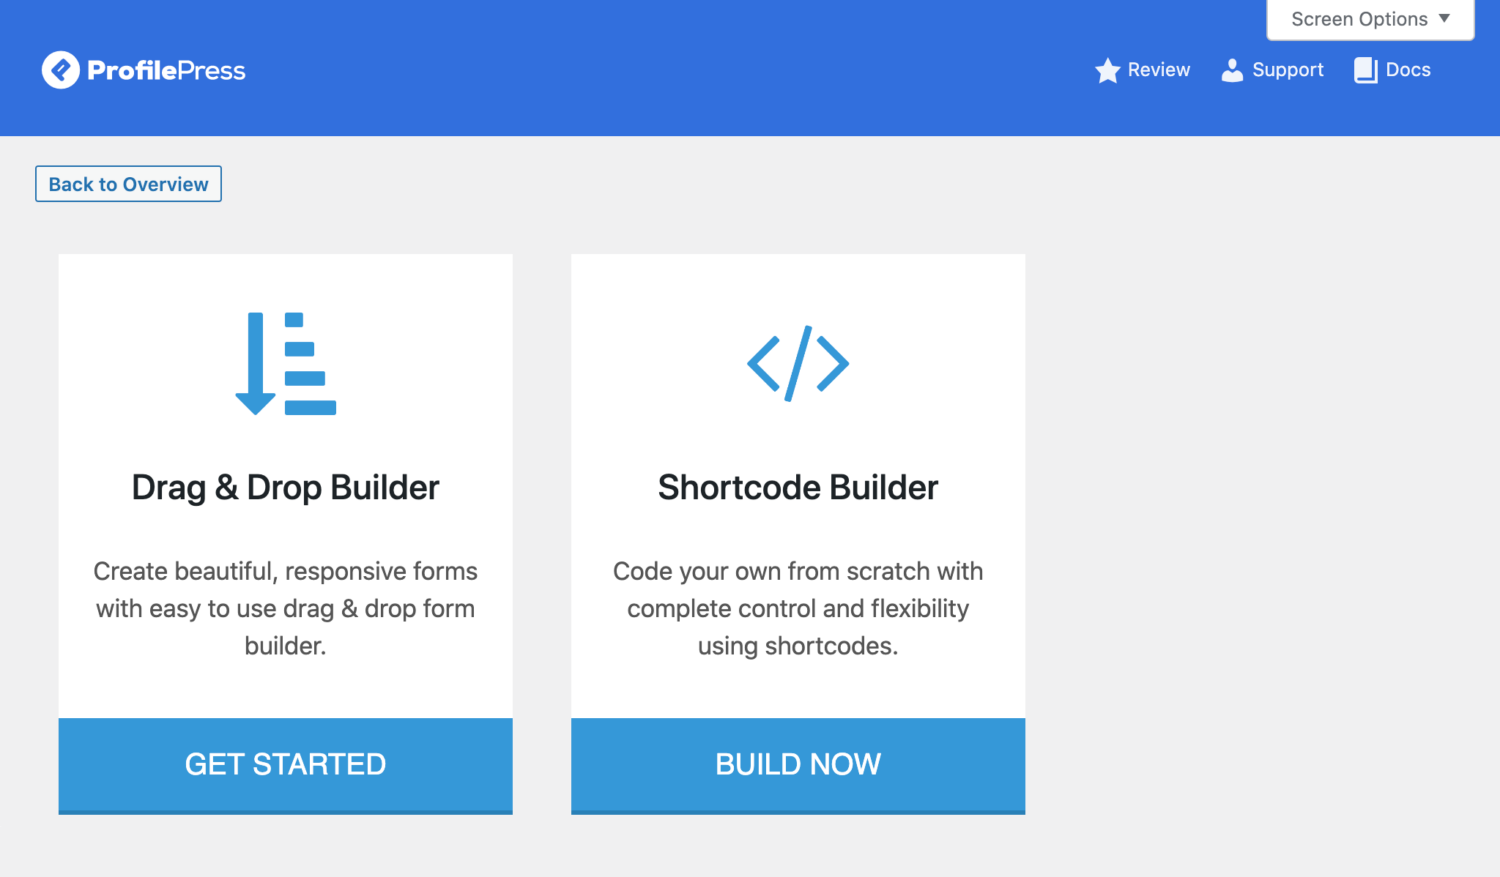
Next, you can choose between using the drag-and-drop form builder or the shortcode builder to create your WordPress profile edit form. This guide will show you how to use both options.
Using the Drag & Drop Builder
Click the “Get Started” button to begin.
Type in the desired name for your frontend edit profile form and click on the Edit Profile tab.
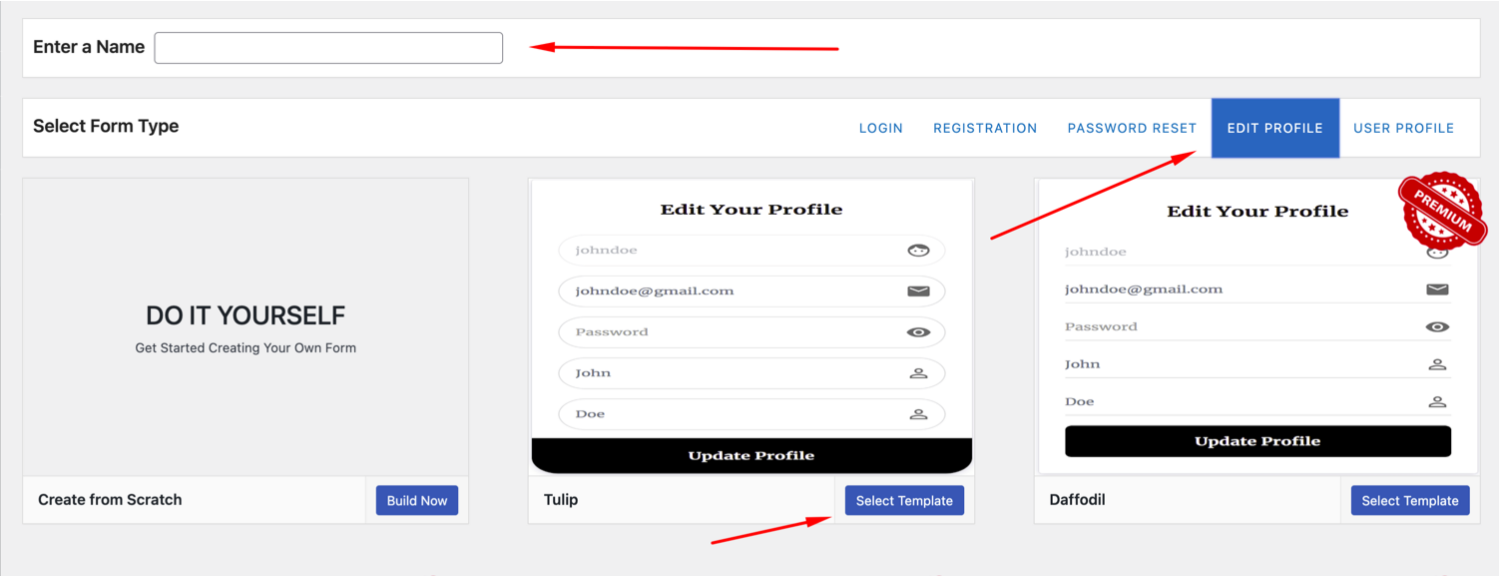
Next, select your desired template and use the drag & drop builder to customize the form using the intuitive drag & drop builder.
You can effortlessly rearrange the form elements, such as text fields, checkboxes, dropdown menus, and more, simply by dragging and dropping them into place.
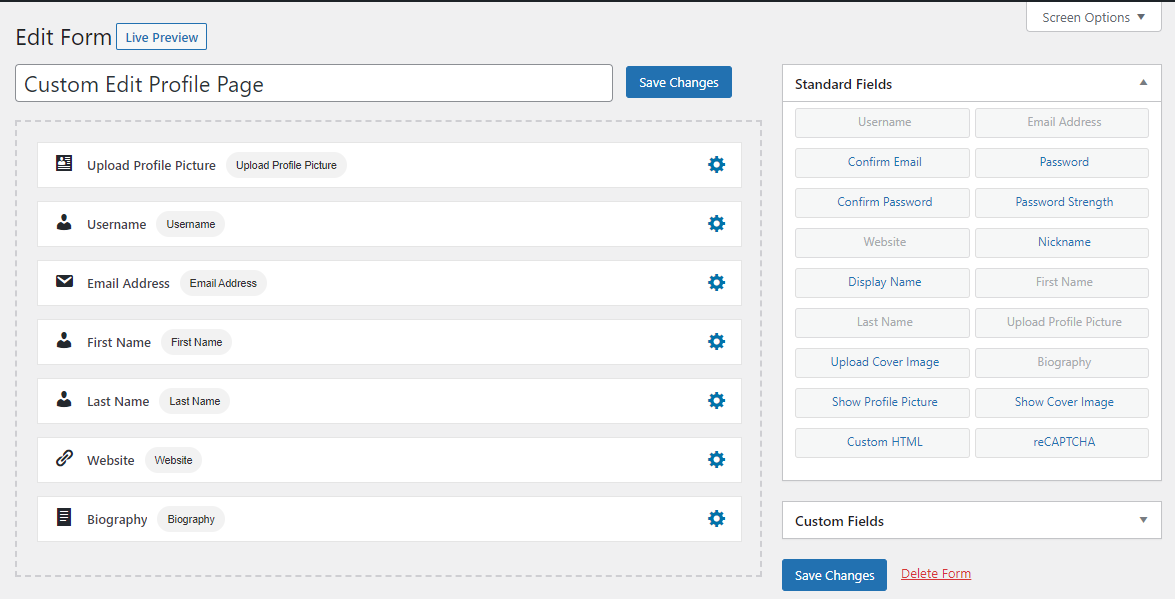
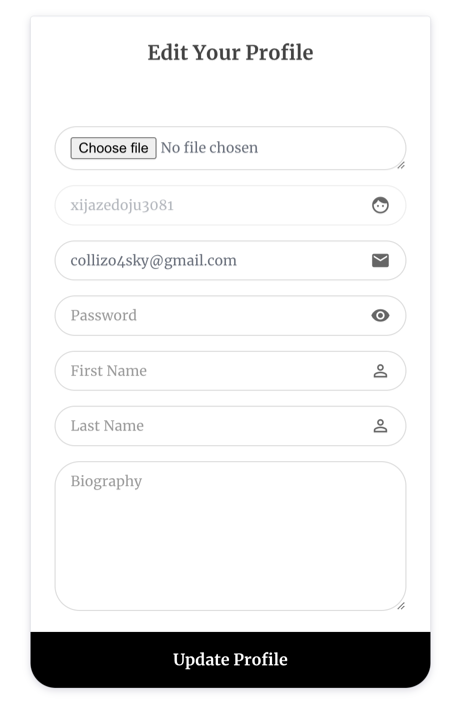
You can preview how the form will look by clicking on the “Live Preview” button.
Customize Your Form’s Settings
In Form Settings, you can completely customize various aspects of your form to align with your preferences. For example, you can modify the form headline to craft a compelling message that resonates with your users.
You can also adjust the colors, button labels, and profile settings. Additionally, you can set a success message that will appear when the form is successfully saved.
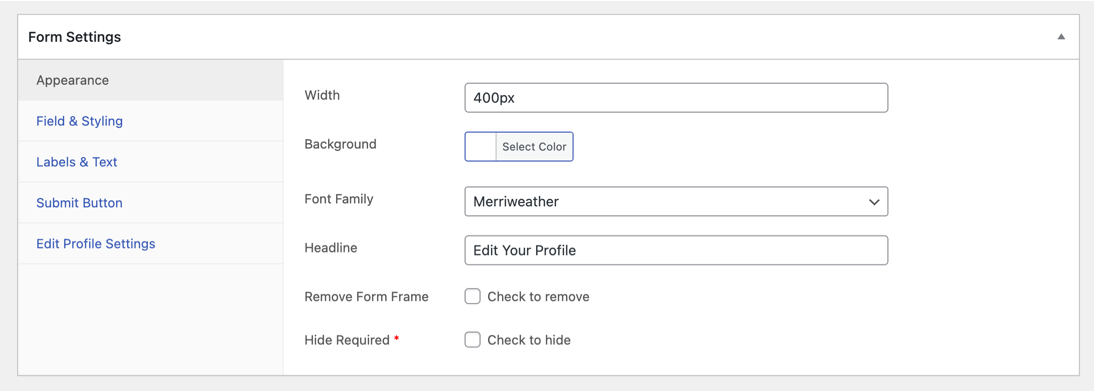
Once you have finished customizing your WordPress frontend edit profile form, click the “Save Changes” button to save it.
Using the Shortcode Builder
If you want more control over the form’s design, the shortcode builder allows you to add custom code to the form while using our field shortcodes to build your form.
To get started, navigate to the Shortcode Builder section and click the “Build Now” button.
Enter the desired name for your form, then click the Edit Profile tab to select a theme or template.
Use the shortcode builder to build and customize the form using shortcodes.
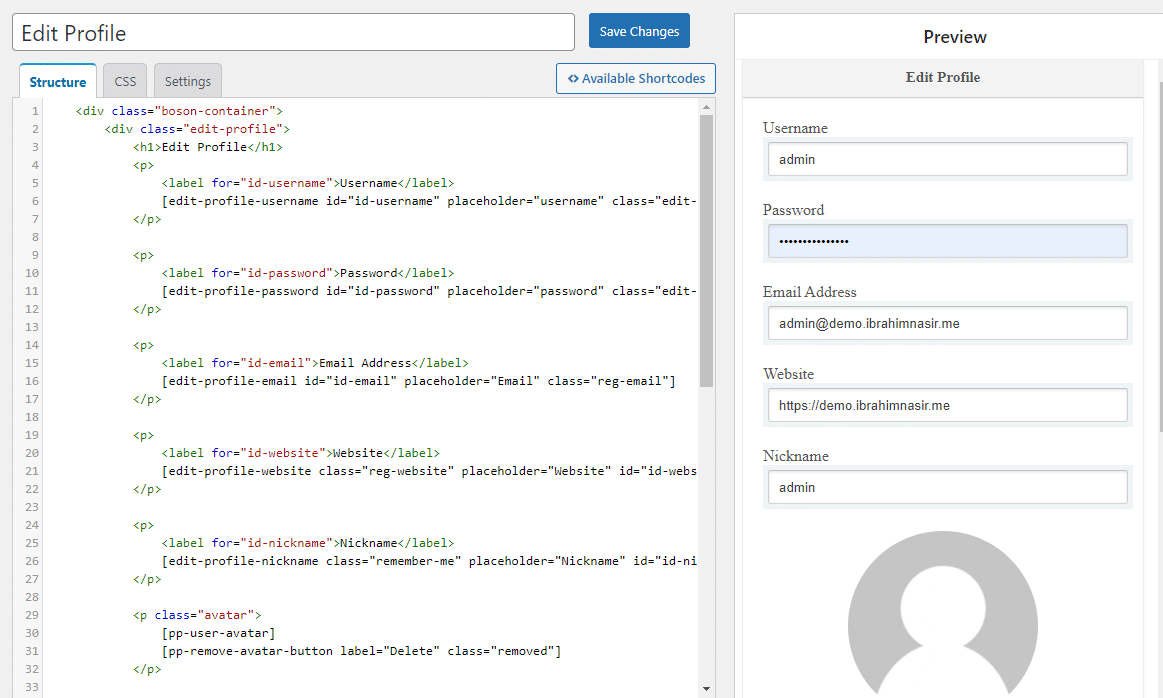
The shortcode builder allows unparalleled freedom to construct and customize your edit profile forms precisely to your liking. You can use the full potential of HTML and CSS, giving you total control of the form to achieve your desired visual and functional outcomes.
The advanced builder provides several shortcodes for adding fields to your form. These shortcodes simplify incorporating form elements such as text fields, checkboxes, radio buttons, dropdown menus, and more.
Once you have finished customizing your form, click the “Save Changes” button to save it.
NB: It is important to remember that when using the shortcode builder in ProfilePress, you should refrain from using a <form> tag. The inclusion and handling of the <form> tag are automatically managed by ProfilePress, eliminating the need for manual implementation.
Creating the WordPress Edit Profile Form Page
After saving the edit profile form, a shortcode will be generated for that particular form.
Click on Forms & Profiles>>Edit Profile and copy the shortcode for the newly created form.
The last step is to add the edit profile shortcode to a page.

Setting the Default Edit Profile Page in WordPress
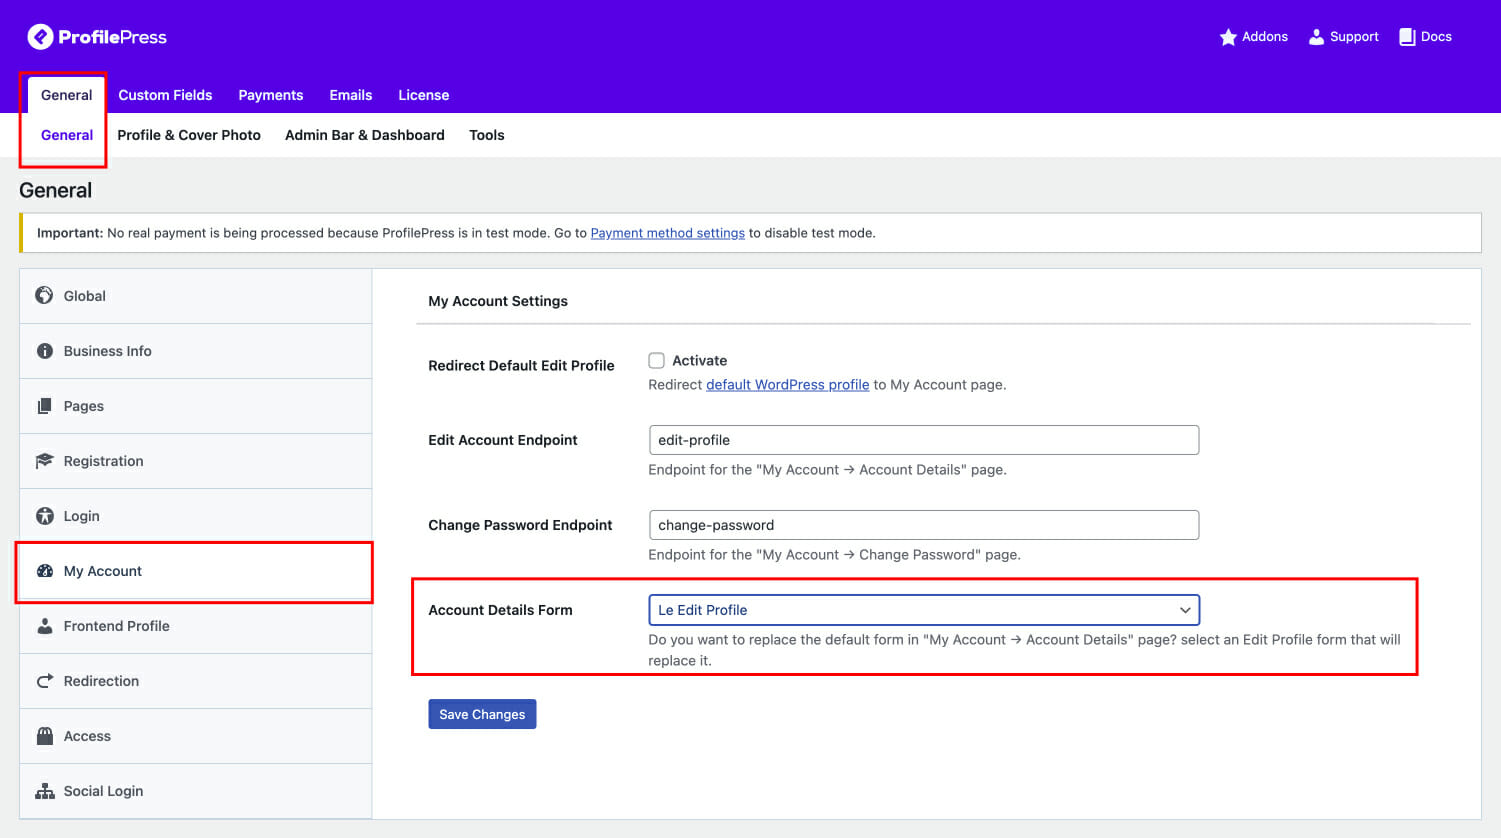
After creating the page, you need to set the page as the default edit profile page in the global settings section of ProfilePress.
To do this, navigate to ProfilePress >> Settings >> General, then click on “My Account” in the vertical tabs.
Scroll to the Account Details Form section, select the newly created edit profile page, and save your changes.
Create a Frontend Edit Profile Form for WordPress Today
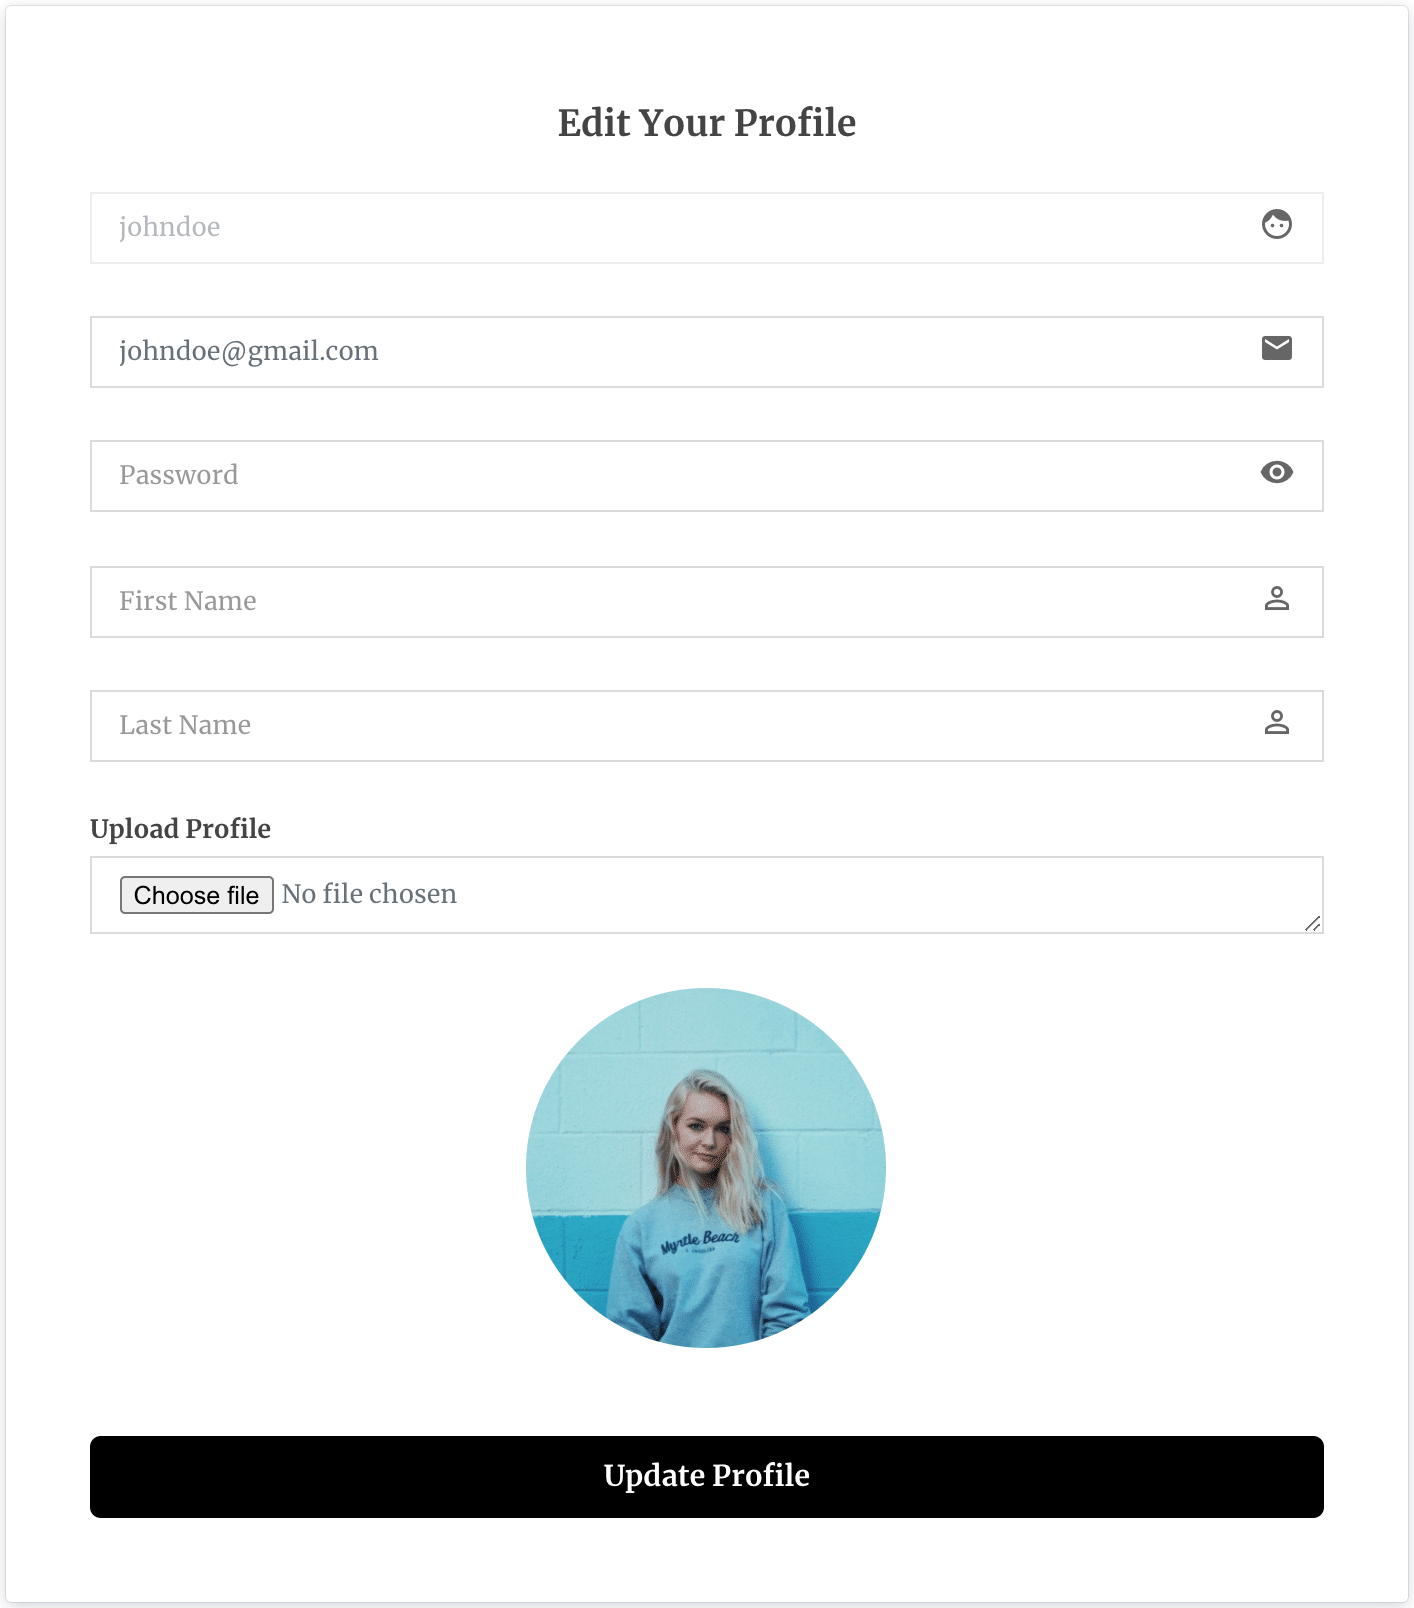
Creating a WordPress frontend edit profile form enhances user experience and improves your site’s user profile management. You provide a more professional and user-friendly website environment by allowing users to update their information without accessing the backend.
Setting up a front-end edit profile form with the ProfilePress plugin is easy. Whether you choose the intuitive drag-and-drop builder or the advanced shortcode builder, you can customize every detail to match your branding.