How to Restrict Access to your WordPress Site
Are you looking to restrict access to your WordPress site and ensure only the right users can view your content?
Whether managing a membership site, offering online courses, or safeguarding sensitive company information, controlling access to your WordPress content is essential for maintaining security and exclusivity.
With ProfilePress, you can easily restrict unauthorized users from accessing your site, ensuring your content is protected and available only to your target audience.
In this article, we’ll explore the benefits of restricting access to your WordPress site and provide a guide on setting up restrictions using ProfilePress.
Benefits of Restricting Access to Your WordPress Site
Here are the benefits of restricting access to your WordPress site:
Enhanced Security: Restricting access helps protect sensitive data from unauthorized users.
Exclusive Content Delivery: You can create and deliver exclusive content for paying members, subscribers, or specific user roles, ensuring only authorized users access valuable resources.
Revenue Generation: Restricting access is essential for monetization models like memberships, online courses, or premium subscriptions, as it encourages users to pay for exclusive access.
Preventing Resource Misuse: Restricting access reduces the risk of content theft, bandwidth overuse, or unauthorized redistribution of your resources.
Restricting Access Using ProfilePress
To restrict access to your WordPress site, ensure that you have installed and activated the ProfilePress plugin on your site.
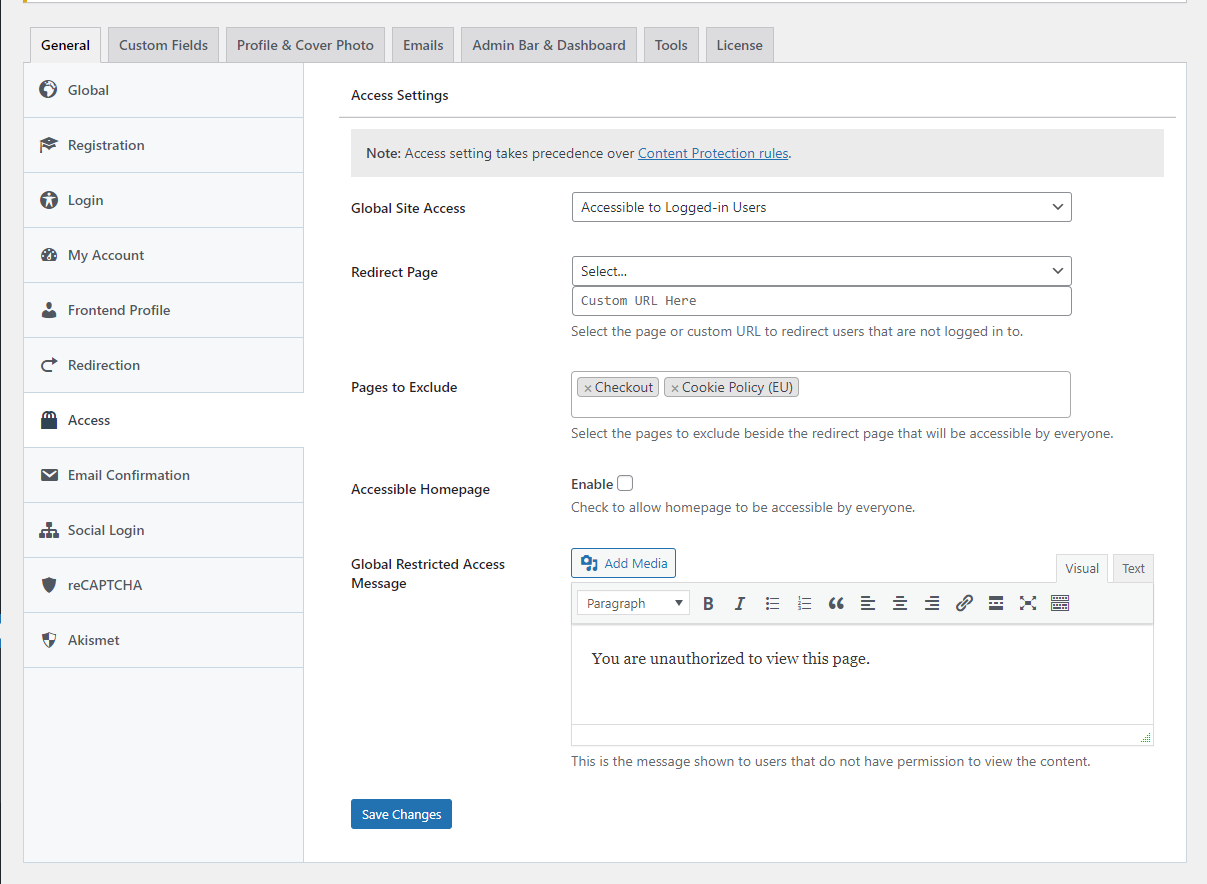
Next, navigate to your WordPress dashboard and go to ProfilePress > Settings > Access.

In the following section, we will discuss each of the available options.
Global Site Access
This option allows you to make your WordPress site accessible to everyone or to logged-in users only.
Redirect Page
When you restrict access to your WordPress website, you need to redirect users who try to access the site to another page or custom URL. Select the page from the drop-down or provide a custom URL to redirect WordPress users who are not logged in.
Pages to Exclude
You might decide to exclude additional WordPress pages besides the redirect page that will be accessible to everyone. You can select as many as you want here.
Accessible Homepage
This option allows you to make your WordPress site’s homepage accessible to everyone. To activate it, check the box.
Global Restricted Access Message
This message will be displayed to users when they try to access a WordPress page they don’t have access to. You can customize it as needed.
Make sure to click on save changes when done.
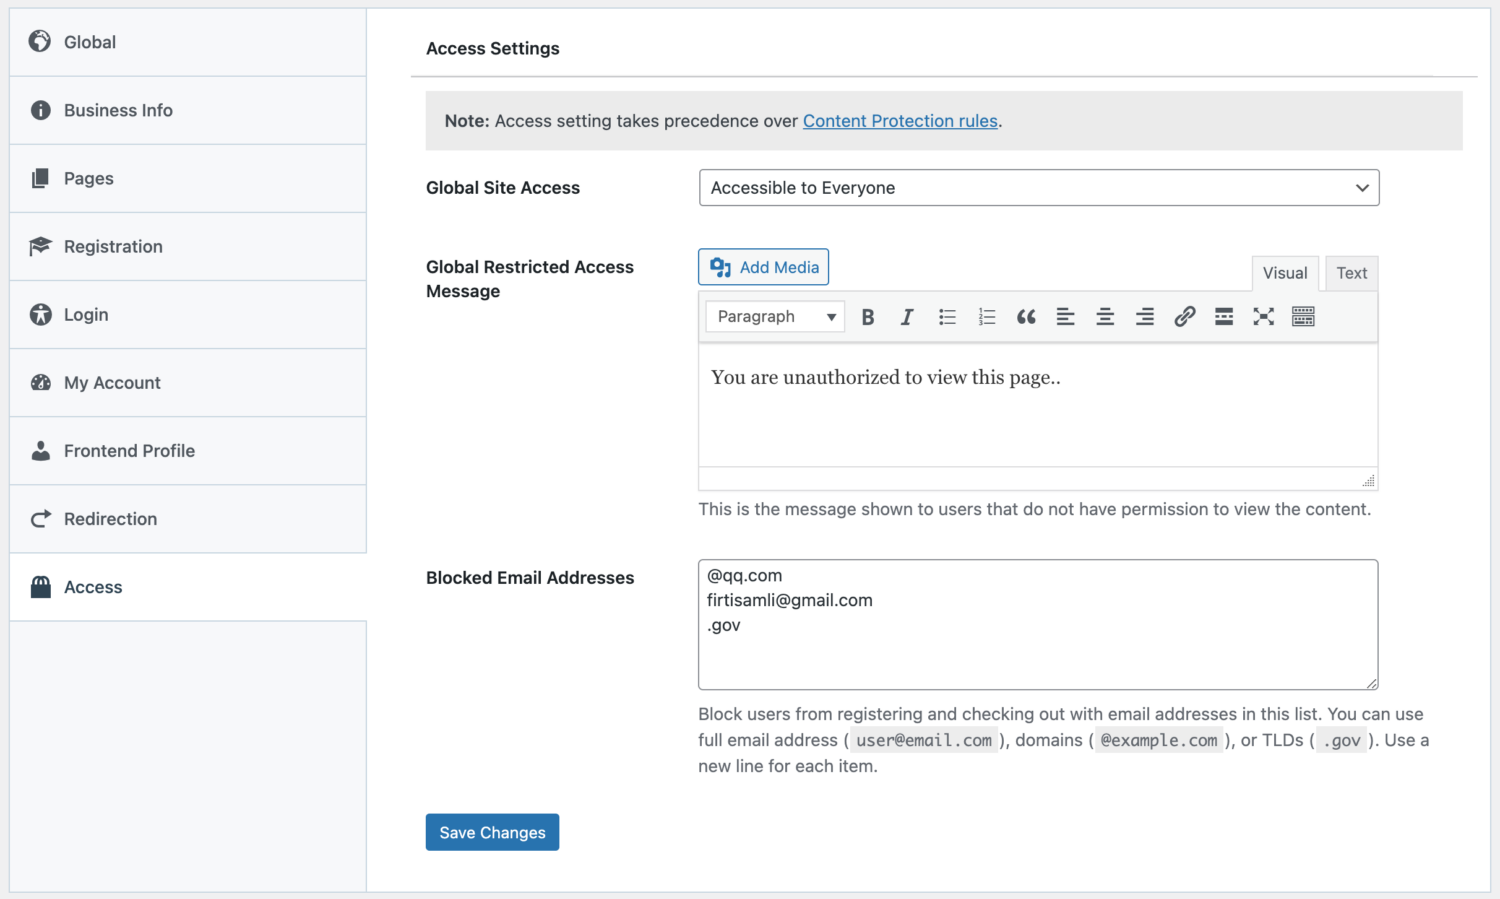
Blocking WordPress Registrations from Specific Email Domains
ProfilePress also lets you block specific email domains from being able to register on your WordPress site.
Still, on the ProfilePress >> Settings >> Access settings page, scroll down to the “Blocked Email Addresses” section and enter the email addresses to block, one per line, into the text area.
Say you want to block WordPress registration and checkout from Yahoo email addresses; enter into the box @yahoo.com.
To block user registrations in WordPress from emails ending with a .gov TLD e.g. [email protected], enter .gov in the box.
Restricting WordPress Registrations to Specific Email Addresses
If you only want to allow WordPress user registration from specific email addresses, email domains, or TLDs, use the “Allowed Email Addresses” setting to specify the email addresses to allow.
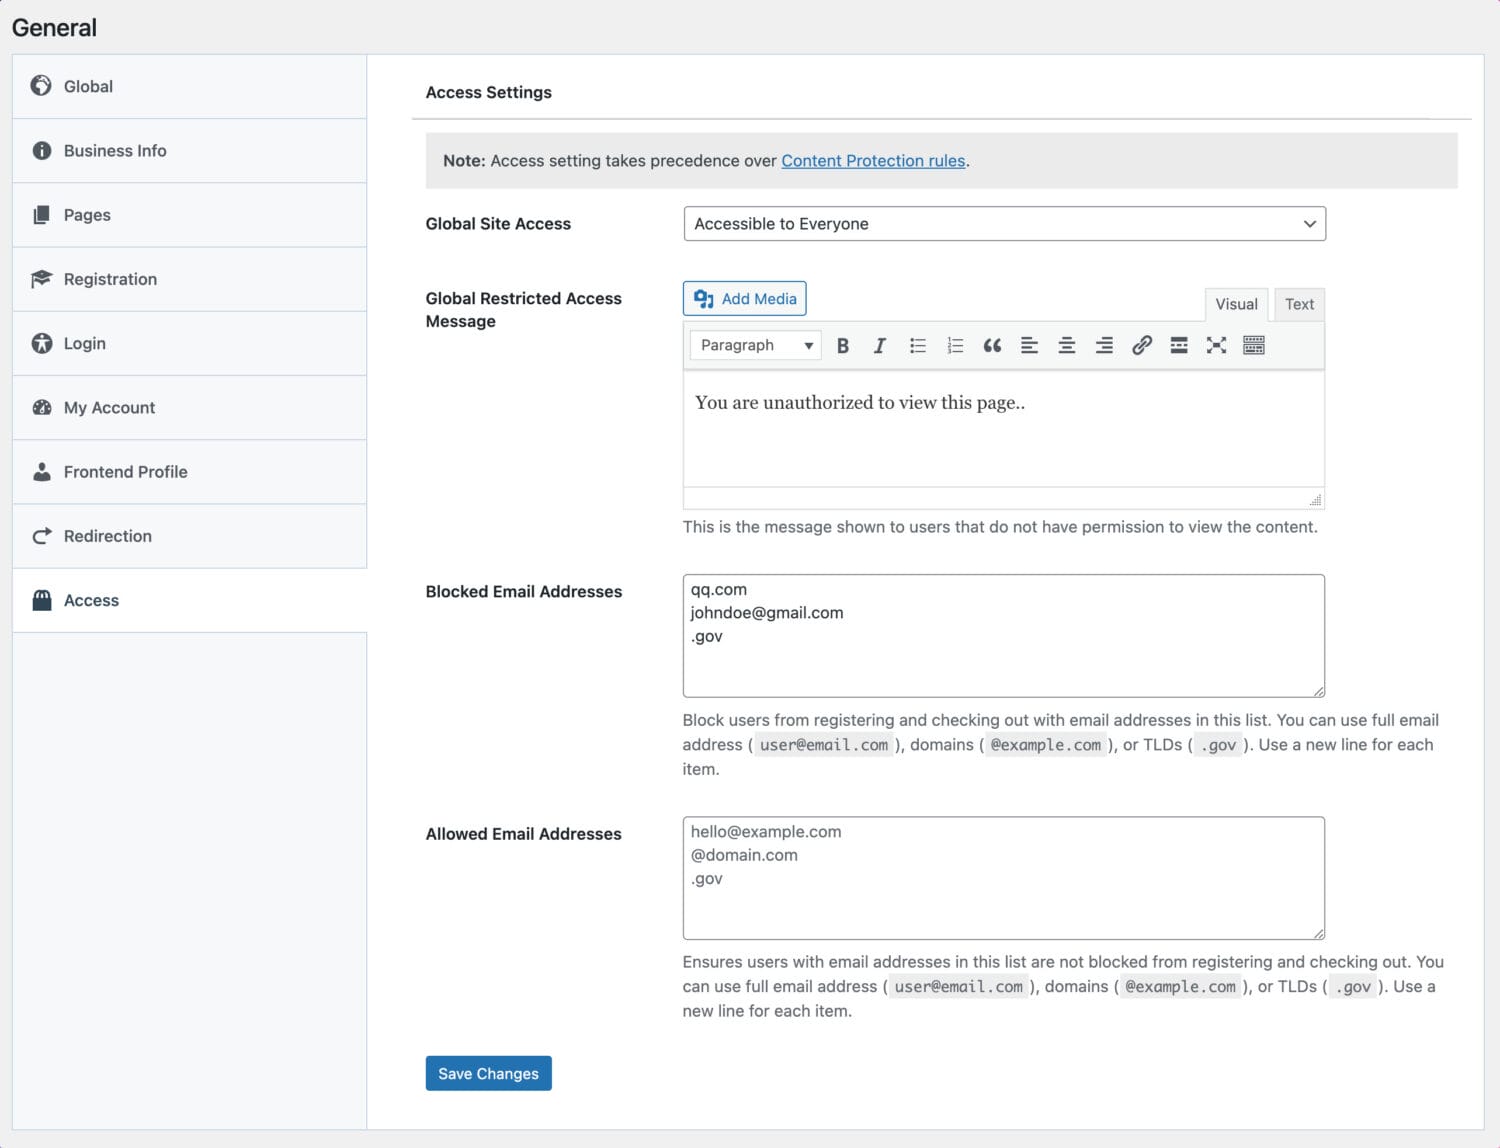
You can use ‘Blocked Email Addresses’ and ‘Allowed Email Addresses’ together if, for example, you want to block certain email domains while allowing specific ones or restrict user registration to certain email addresses but still prevent specific users with an allowed email from registering in WordPress. The choice is yours.
Don’t forget to save your changes.
We hope this article has helped you learn how to restrict access to your WordPress website. Our support team is always here to help if you need further assistance.