Setting up Taxes
Do you want to learn how to set up taxes on your WordPress site easily?
Setting up taxes and tax rates is one of the first tasks you want to perform when setting up a store. Taxes can be complex, but ProfilePress aims to make the setup as straightforward as possible in WordPress.
The team at ProfilePress can help with setting up tax rates in the ProfilePress settings and how the platform handles taxes/VAT/GST based on these settings, but not when or what to charge.
We’re not tax professionals so our advice is how to use our software. For specific advice when it comes to what or when to charge tax/VAT/GST etc, we recommend consulting with a tax professional or an accountant on what may be your best options.
Each business is unique, and there’s no way we can cover every possibility.
Setting Up Tax Collection in WordPress
To begin collecting taxes in your WordPress membership/ecommerce website powered by ProfilePress, navigate to ProfilePress > Settings > Payments > Taxes, and select the Enable Taxes checkbox to access the tax settings page.
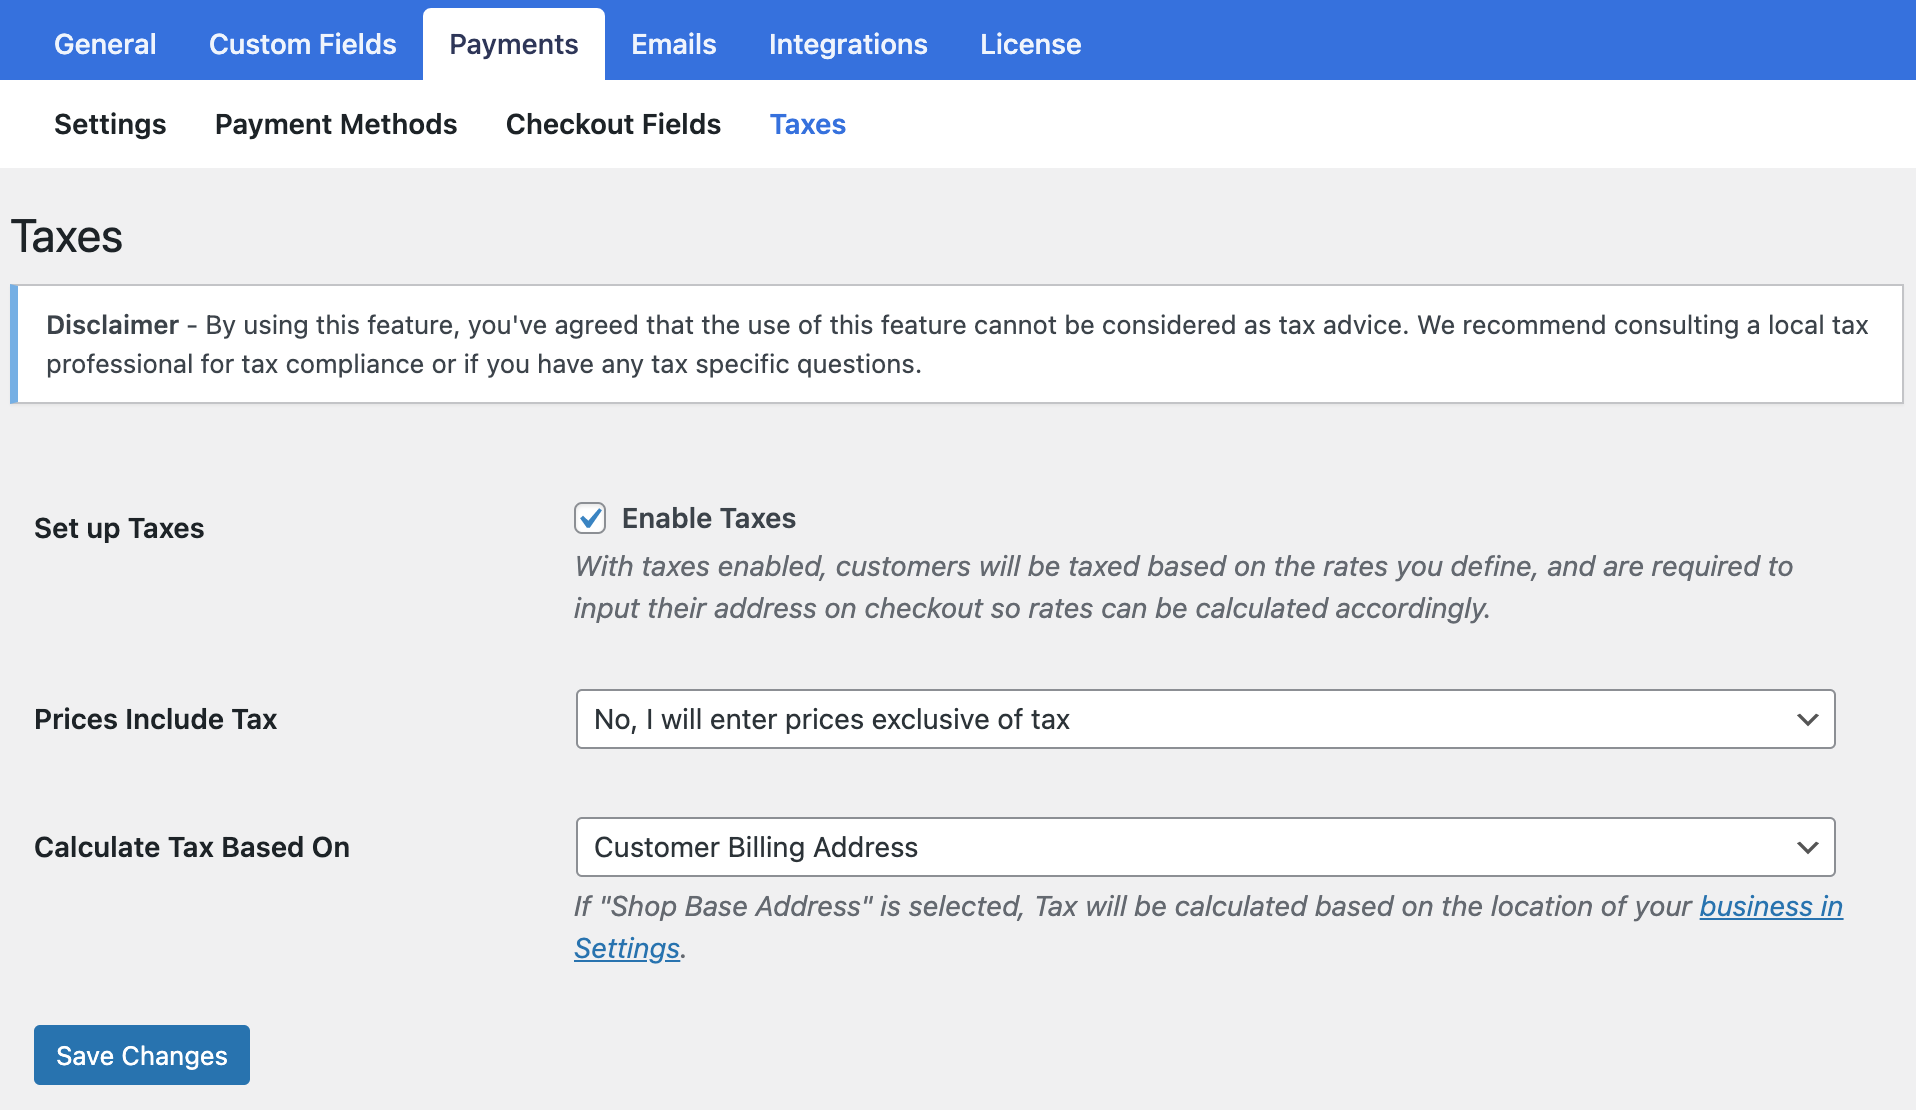
Next, select whether to charge tax inclusive or exclusive of tax and whether to charge tax based on the customer’s billing address or your shop address as defined in Business Info settings.
EU VAT Setup
If your business is based in the European Union (EU), you can enable the EU VAT setting to automatically charge VAT or taxes based on the customer’s base country.
Note that you don’t have to set up the VAT rate for each EU country; the rates are already included in ProfilePress. We ensure the rates are current, so you won’t have to worry.
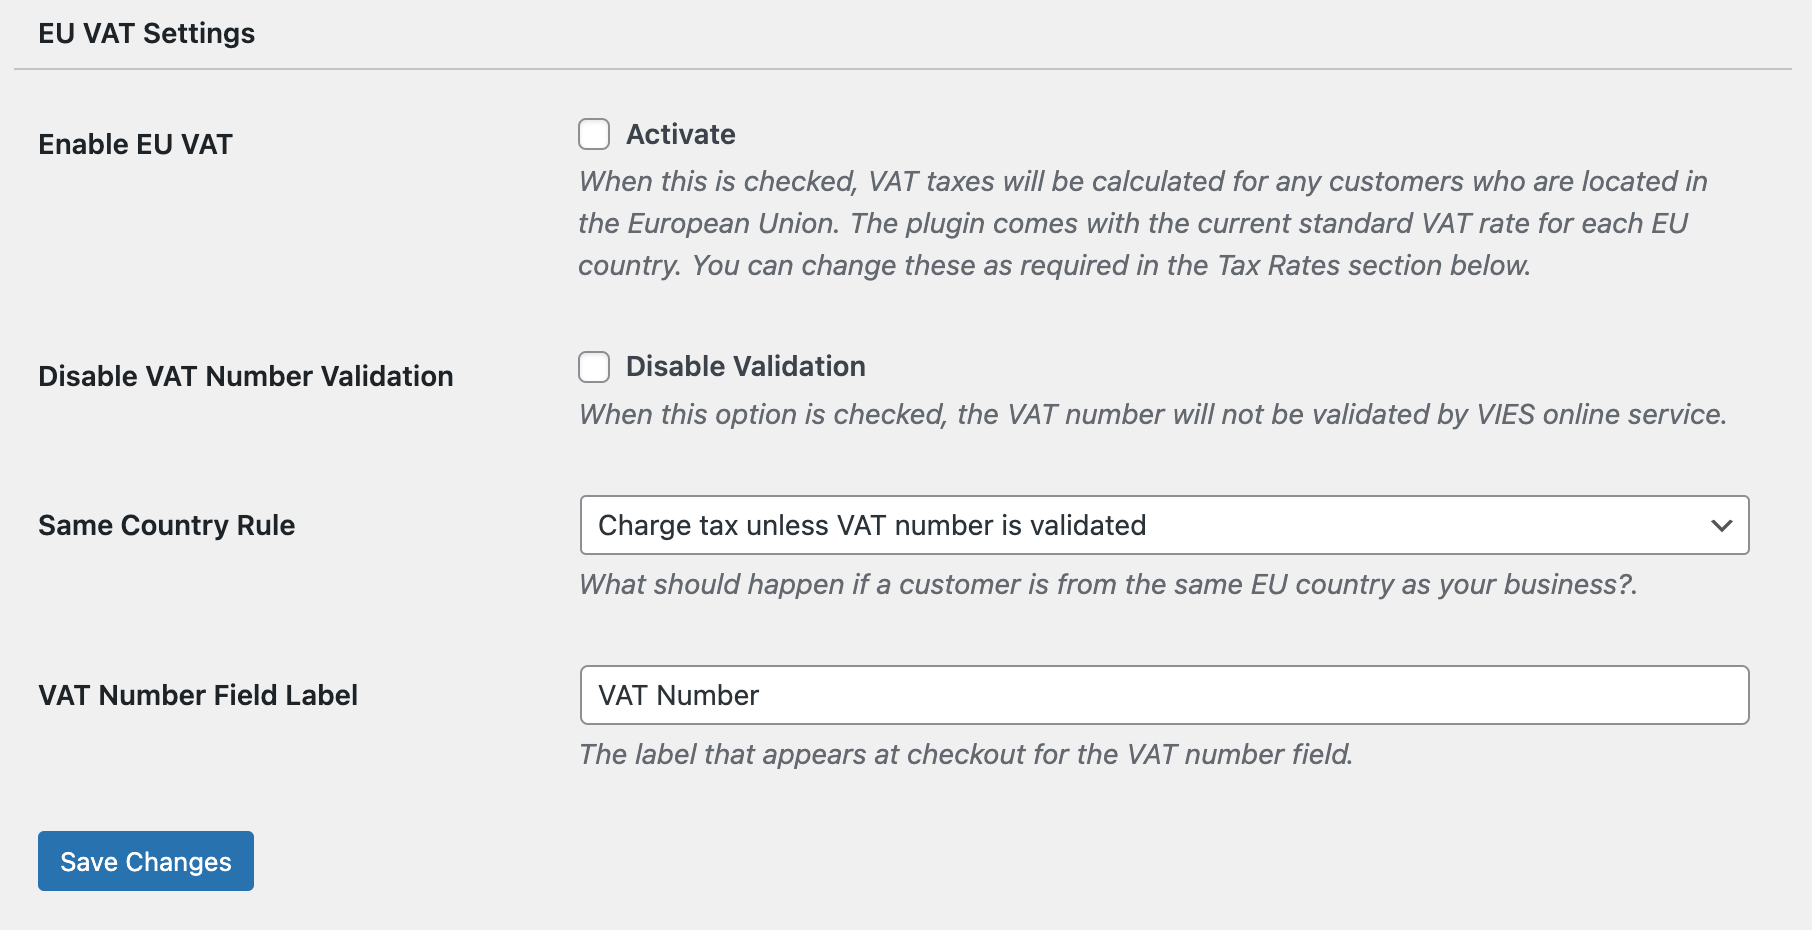
If an EU customer provides their VAT number, it will be validated using the EU VIES online service. If the VAT number is deemed valid, VAT will not be charged.
You can disable this validation by enabling the “Disable VAT Number Validation” setting. Any VAT ID the customer provides will be considered valid when this option is enabled.
To manage VAT charges for customers from the same country as your business, use the “Same Country Rule” setting.
Finally, to customize the VAT label displayed on the checkout page, adjust the “VAT Number Field Label” setting.
Setting Up Tax Rates
This section allows you to set up tax rates for every country you want to charge tax. All you need do is add the country and specify the specific state to target. If you want to charge every region or state, ensure you check “Apply to whole country.”
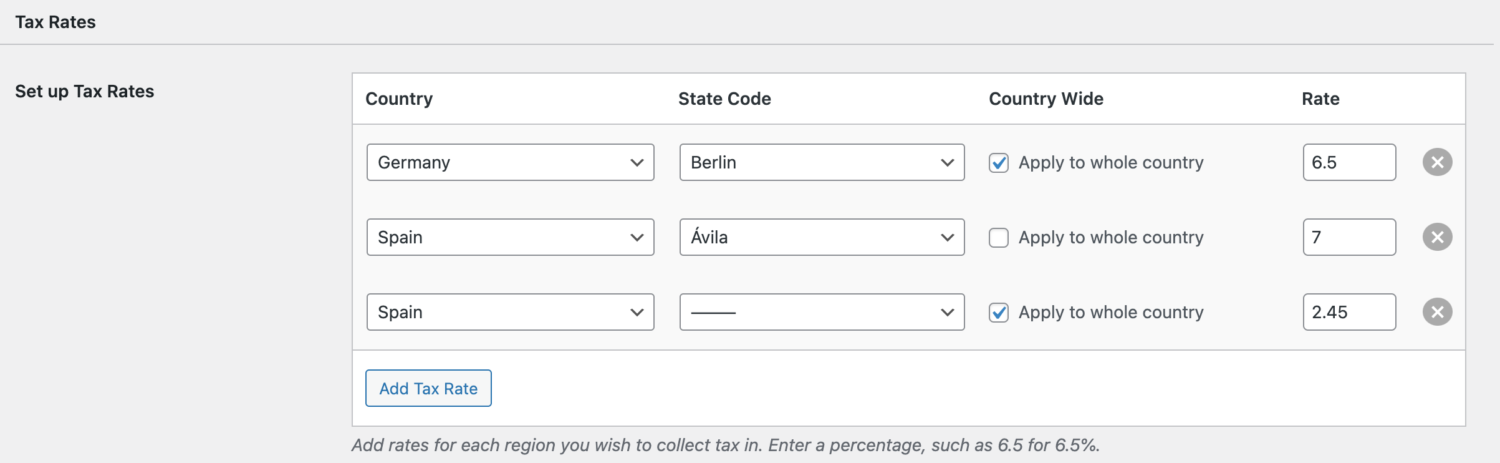
Remember, I mentioned that we automatically set up the VAT rate for EU countries for you. If you want to apply a custom tax rate to specific countries, you can set it up for those countries, which will override the default rate in our plugin.
Finally, you can set a fallback rate to charge customers from countries with no defined tax rate.

That’s how to set up taxes on your WordPress site!
Configuring tax settings for your WordPress site within ProfilePress is relatively straightforward. By following the steps outlined in this guide, you can establish the foundation for accurate tax calculations on your WordPress site.
With your tax settings now configured in ProfilePress, you can focus on growing your business with the confidence that your tax calculations are being handled systematically.