How To Create a WooCommerce Members-Only Store – Full Guide
Do you want to create a WooCommerce members-only store?
Creating a members-only WooCommerce store is perfect for cultivating a loyal customer base and offering exclusive deals to your audience. By restricting access to your products to registered or paying members only, you can create a sense of exclusivity and drive customer engagement.
When you create a members-only store, regular site visitors cannot view and buy products on your WooCommerce website. Only registered or paid members can access products and order at your store.
In this article, we will show you how to set up a WooCommerce members-only store using the ProfilePress WooCommerce membership plugin. We will walk you through the process from installing and configuring the plugin to integrating a payment gateway and creating membership plans.
Why a WooCommerce Members-Only Store?
There are several reasons to create a members-only store, such as offering exclusive deals to members or hiding products from regular site visitors, especially when dealing with wholesalers.
Some other reasons to create a members-only online store are:
- You want to sell different products to different membership levels.
- You want to sell products only to registered members or paying members.
- You want to create a hidden WooCommerce store on your company website, which staff can access.
There are probably other reasons why you would want a members-only WooCommerce store. Whatever your reasons, this article will show you how to do it in simple steps.
Creating a WooCommerce Members-Only Store
Creating a WooCommerce members-only store is easy with a membership plugin like ProfilePress that integrates smoothly with WooCommerce and provides various member management and content restriction tools.
1. Install and Activate ProfilePress
The first step in this process is to install and activate the ProfilePress plugin. To do that, go to the ProfilePress pricing page to purchase a suitable license plan.
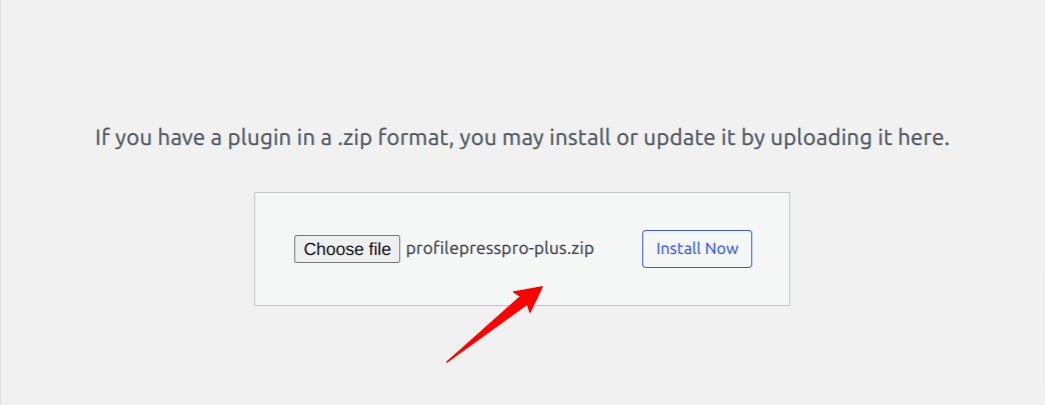
Login to your WordPress admin dashboard, and navigate to the Plugins page; click on the “Add New” button and click “Upload Plugin“.
Next, click “Choose file” to select the previously downloaded plugin zip file. Click “Install Now.”
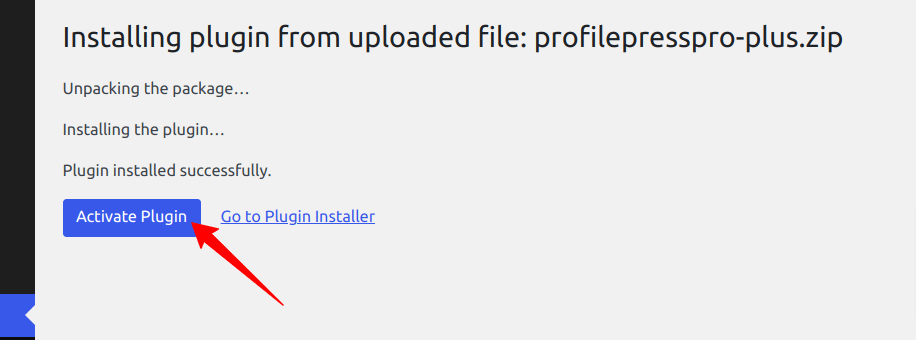
After the installation is complete, click the Activate Plugin button.
2. Integrate Stripe Payment Gateway
After installing and setting up ProfilePress, the next step is to set up a payment gateway for our membership plans. We will use Stripe. You can skip this step if you do not require a paid membership for your WooCommerce store.
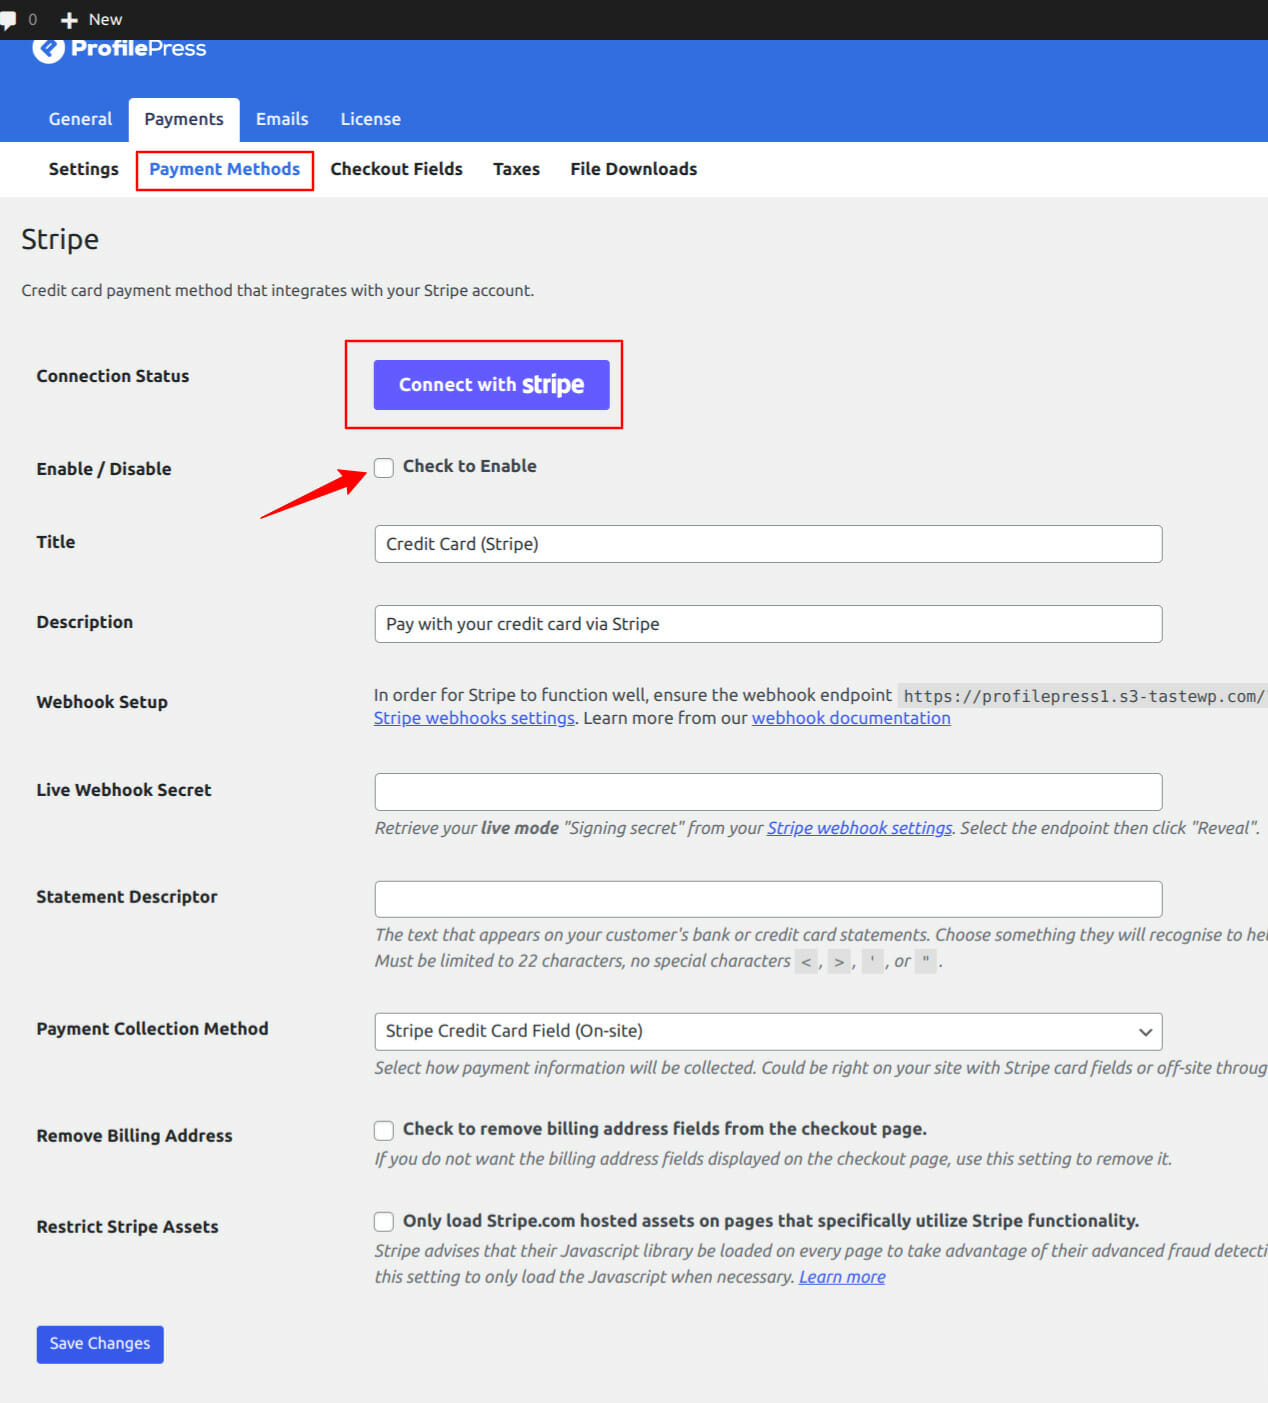
To configure the Stripe payments on your site, go to ProfilePress > Settings > Payments > Payment Methods and choose Stripe.
Click on the “Connect Stripe” button, follow the prompts, and you will be all set to start accepting payments from customers at your WooCommerce members-only store.
Aside from Stripe, ProfilePress supports other popular payment gateways like PayPal, Razorpay, Paystack, and Mollie. So, feel free to set up your desired payment gateway.
3. Create a Membership Plan
So far, we have set up ProfilePress and added a way for our customers to pay on our site. The next step is to create a membership plan for our customers.
For you to have a members-only store, you need to have membership plans for your customers. These membership plans will be used to control access to our WooCommerce store. Anyone accessing the store must be subscribed to this membership plan.
Go to ProfilePress >> Membership Plans >> Add New to do this. Enter a name for the plan, and provide a description and price.
Under the subscription settings, select your desired billing frequency and length and adjust other settings to your liking.
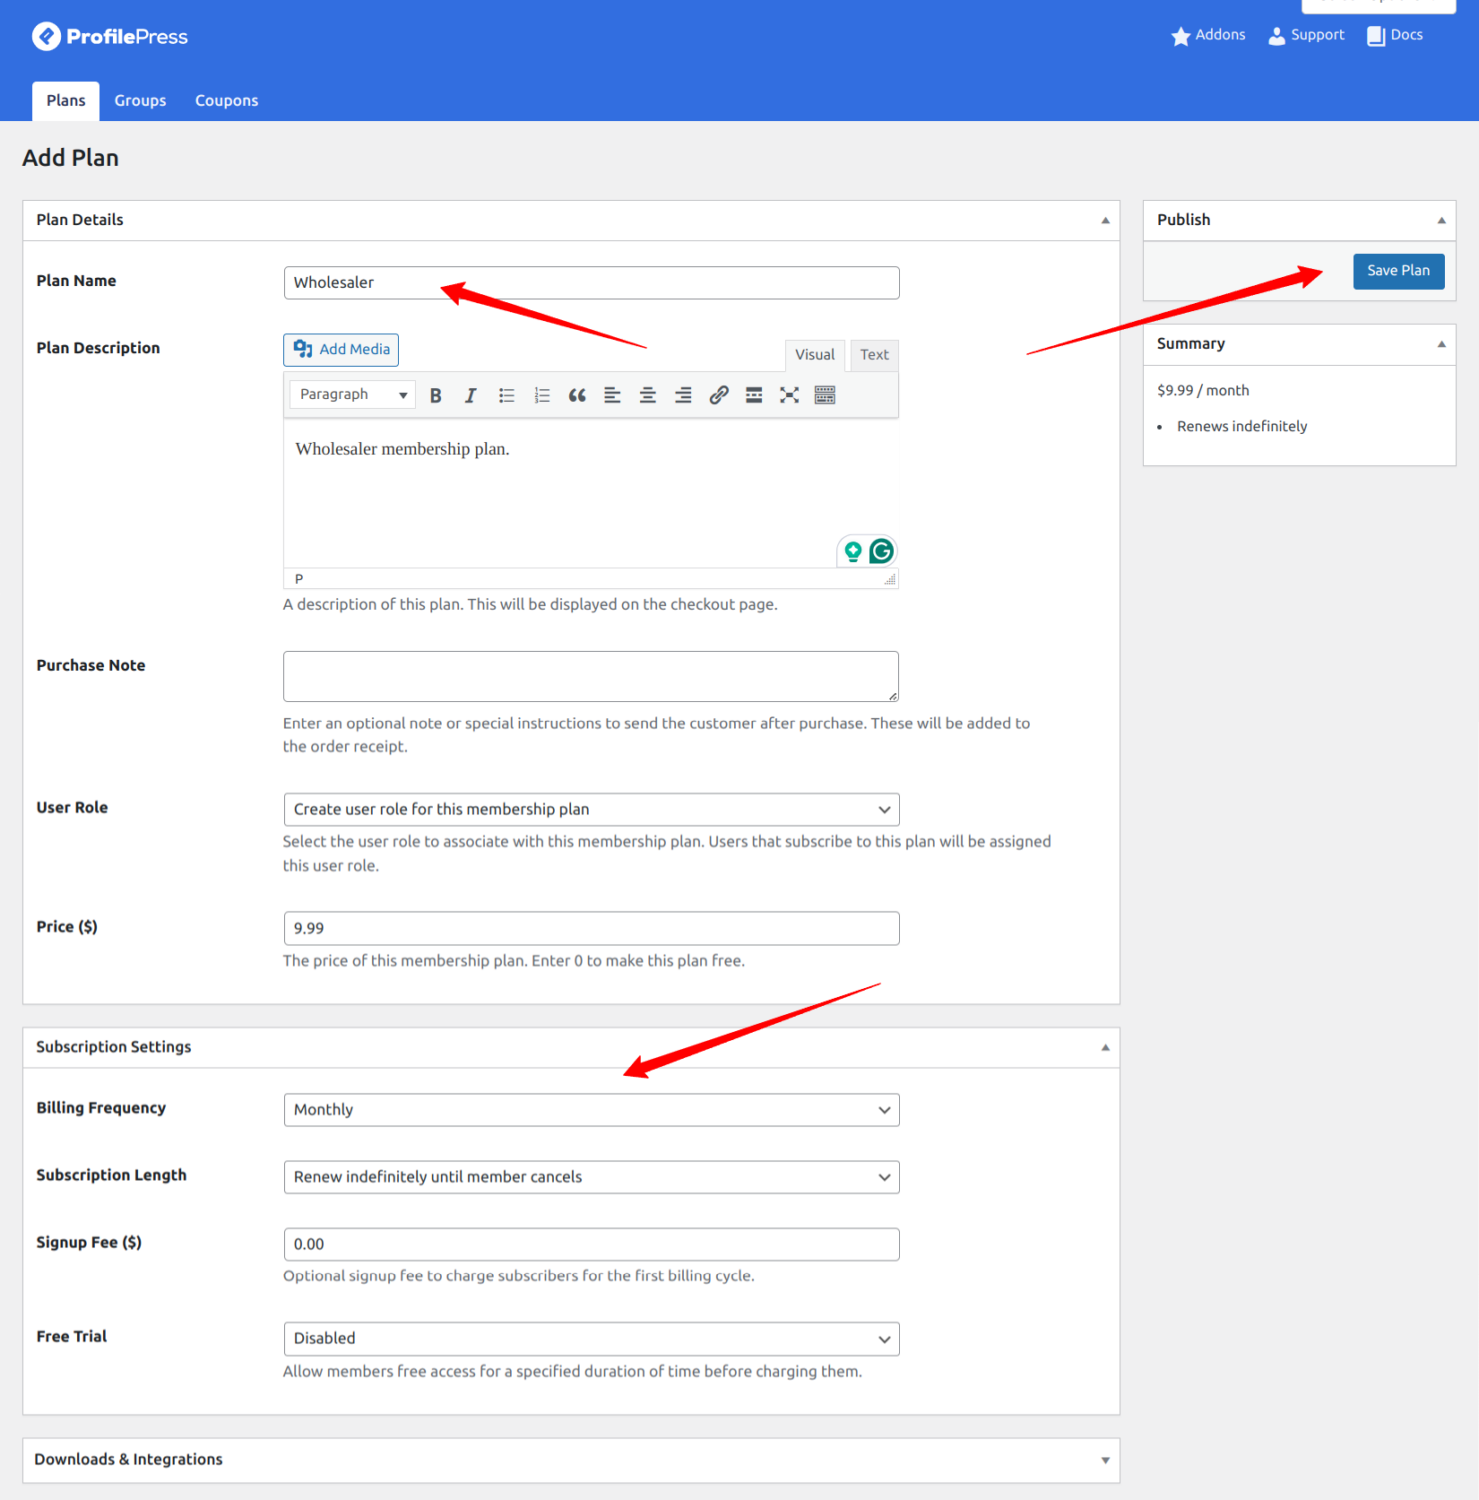
If you are offering free membership, set the price to $0.00. When you are done, click the “Save Plan” button.
You can follow the steps above to create more membership plans as required.
Next, go to ProfilePress > Membership Plans, and you should see a checkout page link associated with the membership plan we created above.

Now that we have created a membership plan and have a checkout URL, we only need to place this URL where our site visitors can find it. Clicking the checkout link will take customers to the checkout page, where they will pay and subscribe to the membership plan.
3.1 Using WooCommerce to Sell Paid Memberships
Instead of using ProfilePress checkout and payment methods to sell our membership plans, we can use WooCommerce instead.
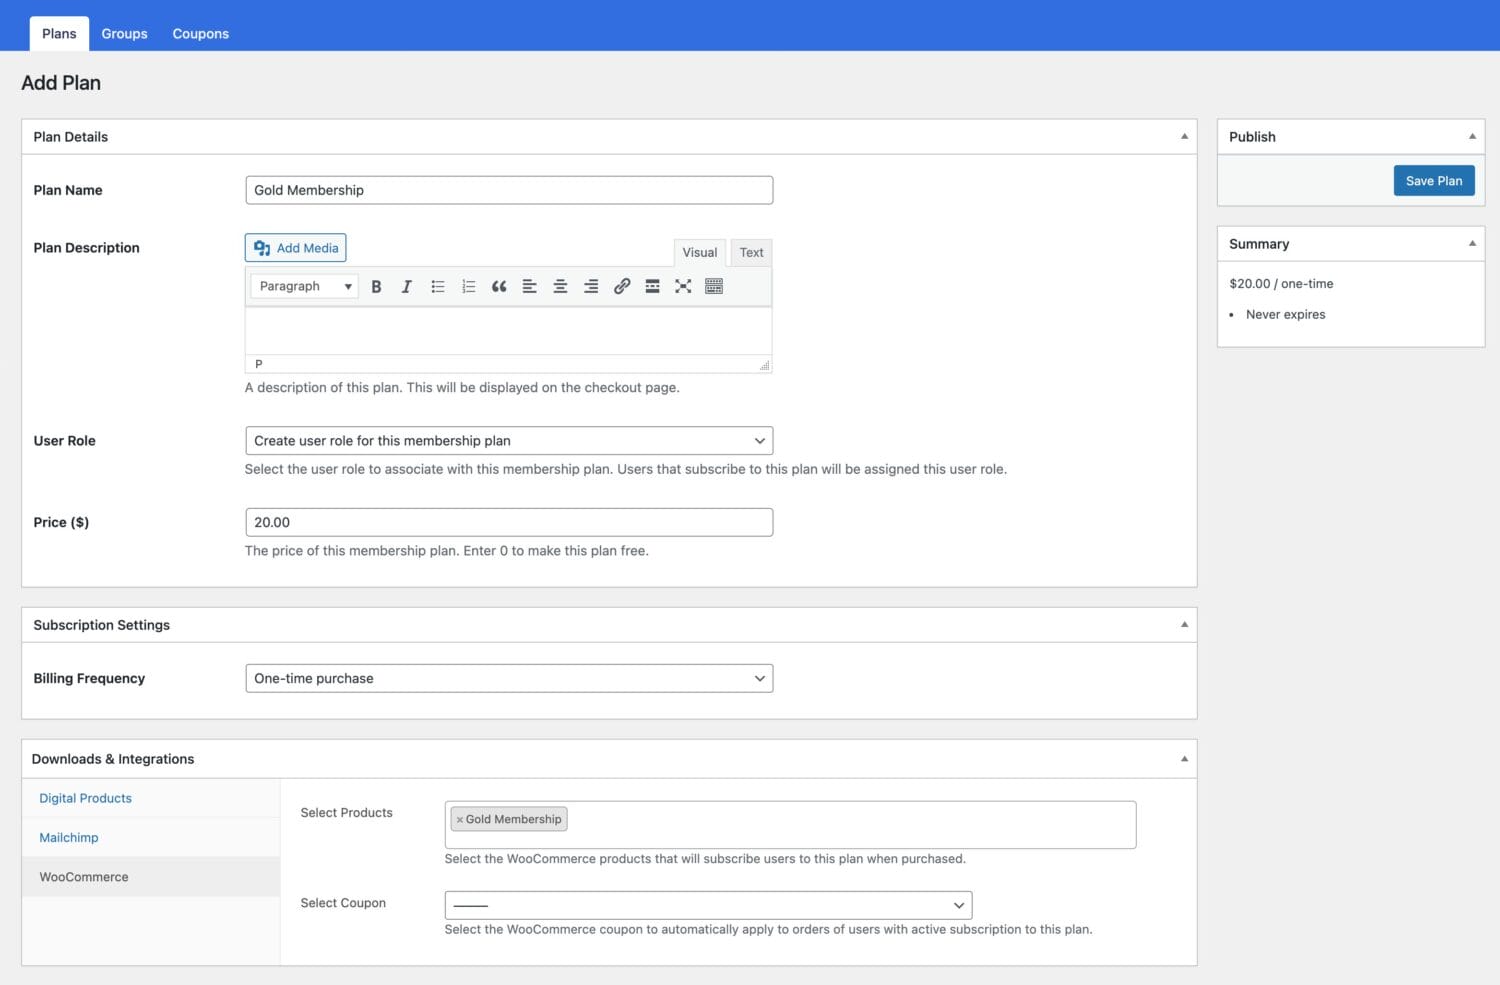
To achieve this, create new products in WooCommerce and set their visibility to hidden so they do not appear on WooCommerce shop and product listing pages.
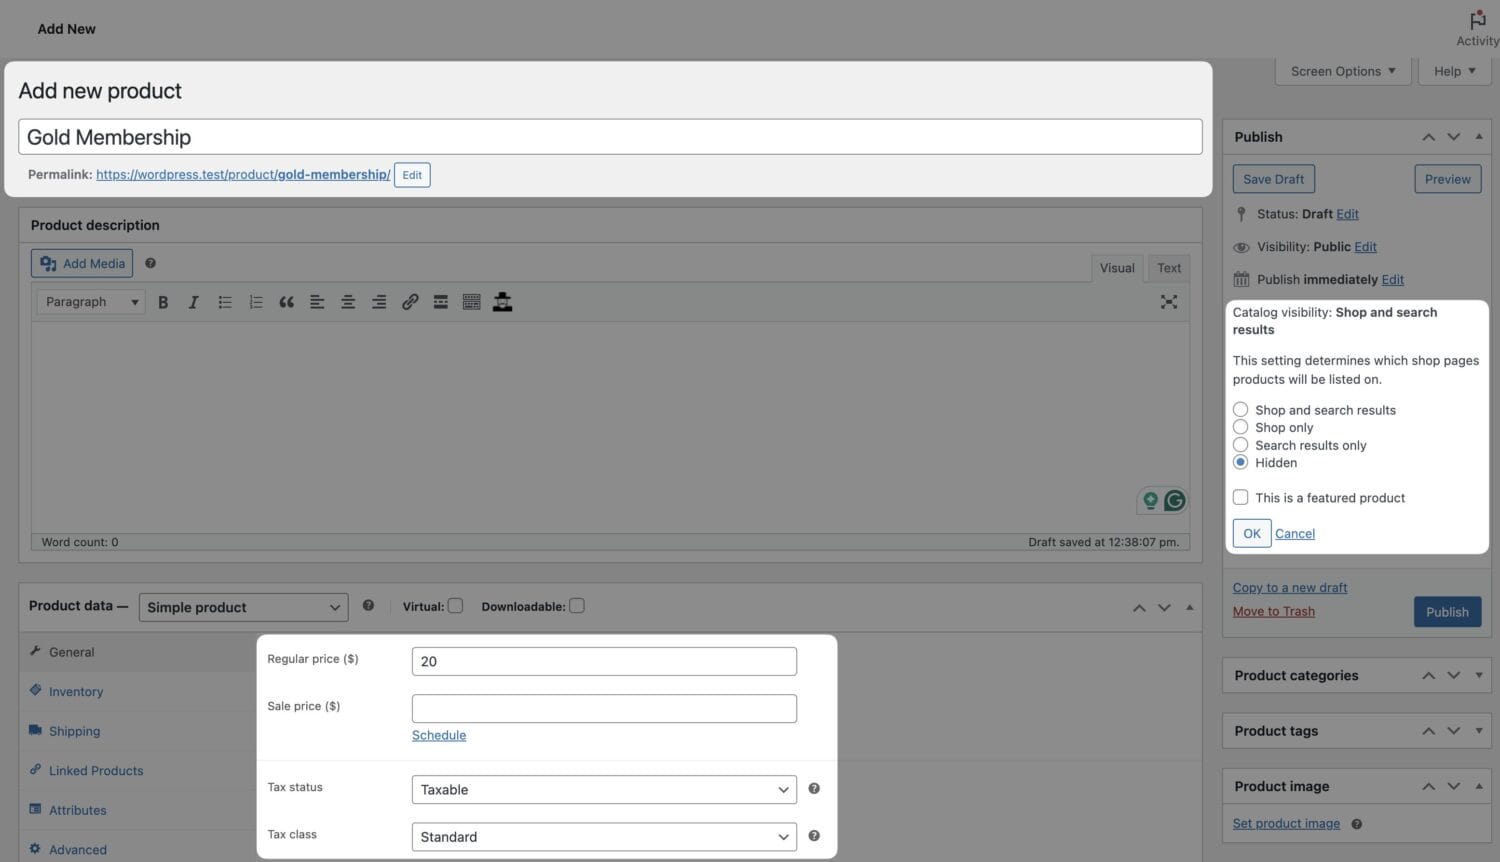
Map the products to their corresponding membership plans in ProfilePress. This way, when your customers purchase the WooCommerce products, they are automatically subscribed to the plan.
For more information on selling paid membership plans via WooCommerce, see How to Create WooCommerce Membership Website.
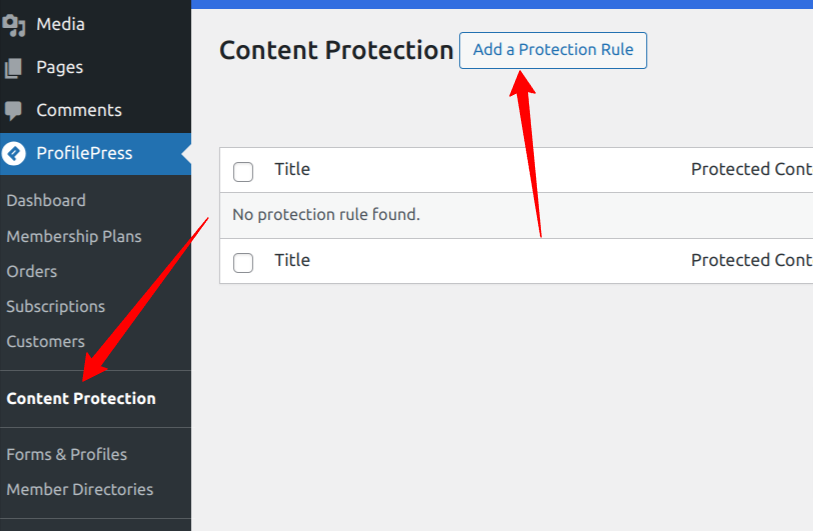
4. Restrict Access To WooCommerce Store
The next step in creating a WooCommerce members-only website is restricting access to our WooCommerce store and making it available only to customers or members subscribed to the Wholesaler membership plan.
To do this, go to ProfilePress >> Content Protection and add a new protection rule.
On the content protection rule page, we will add the protection rules for our WooCommerce store.
Provide a name for this rule, and in the “Content to protect” section, click the dropdown menu and select All Products.
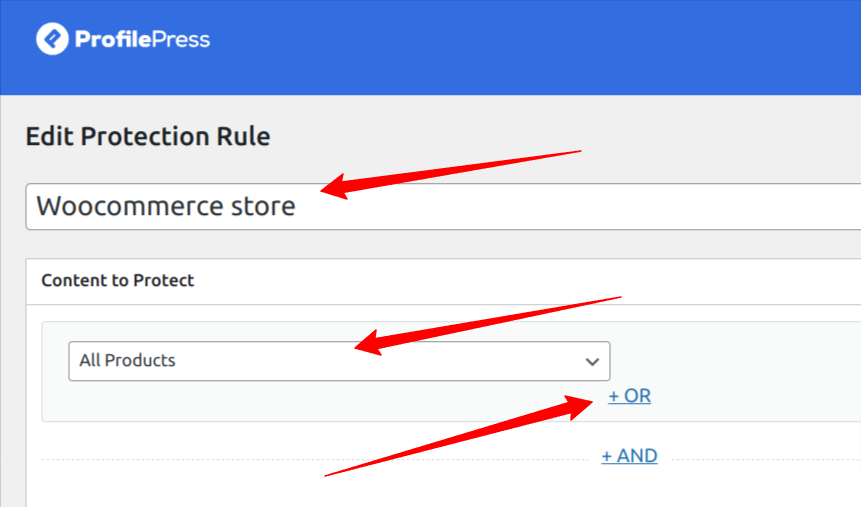
Click the “OR” option to include other WooCommerce product pages and hide them. A new dropdown will pop up; click it and select all product archive pages.
There are three options above, so you will click the “OR” option thrice and select each archive page under each dropdown. So, you will eventually have something like the image below.

Next, move on to the “Access Condition” Section on this page. This section controls who can access our WooCommerce store and products.
Select “Logged in users” from the dropdown, and some new options will appear. You will need to choose the roles or membership plans that will have access to your WooCommerce store.
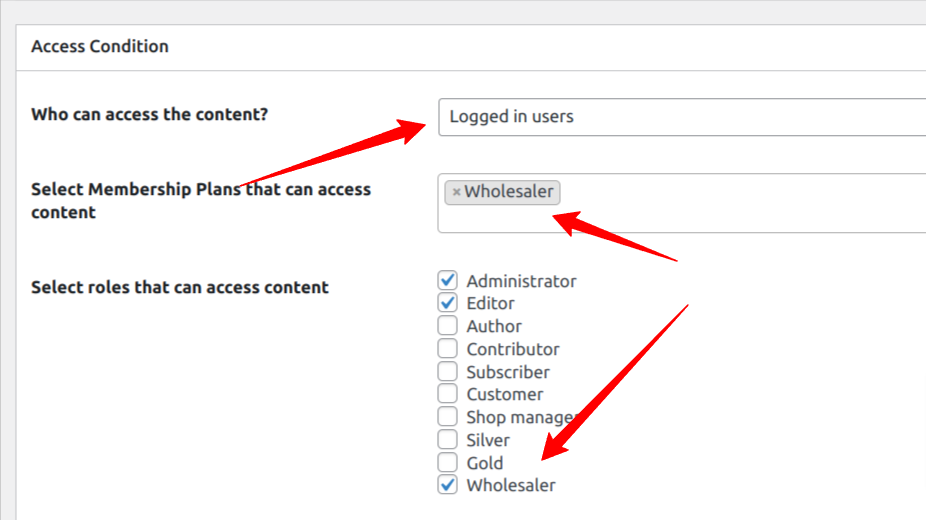
For this article, we will select the “Wholesaler” membership plan we created in the previous step. The Access condition section is quite simple to configure. Click on the various dropdown menus to choose the best options for you.
For this article, we will redirect users who do not have access to the login page when they try to access our WooCommerce product pages, as shown below.
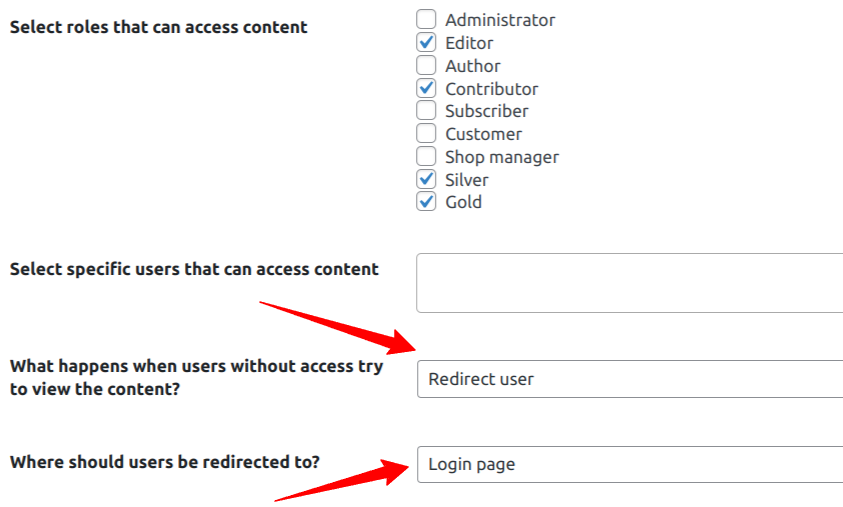
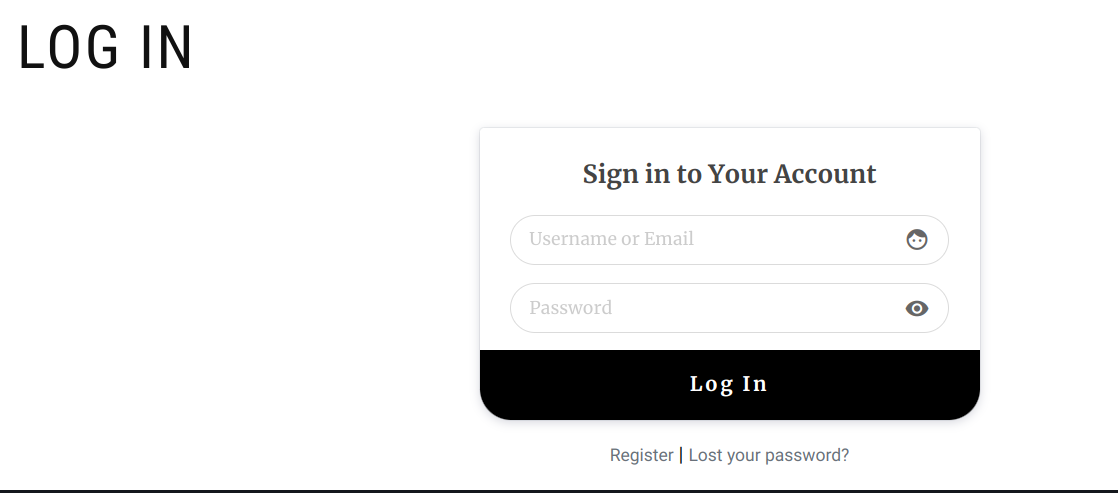
Now, log out or use another browser to access your WooCommerce store, and you will be redirected to a login page.
This behavior will apply to anyone who tries to access your WooCommerce store. They must have an active “wholesaler” membership account before they can view and purchase any item from your WooCommerce store.
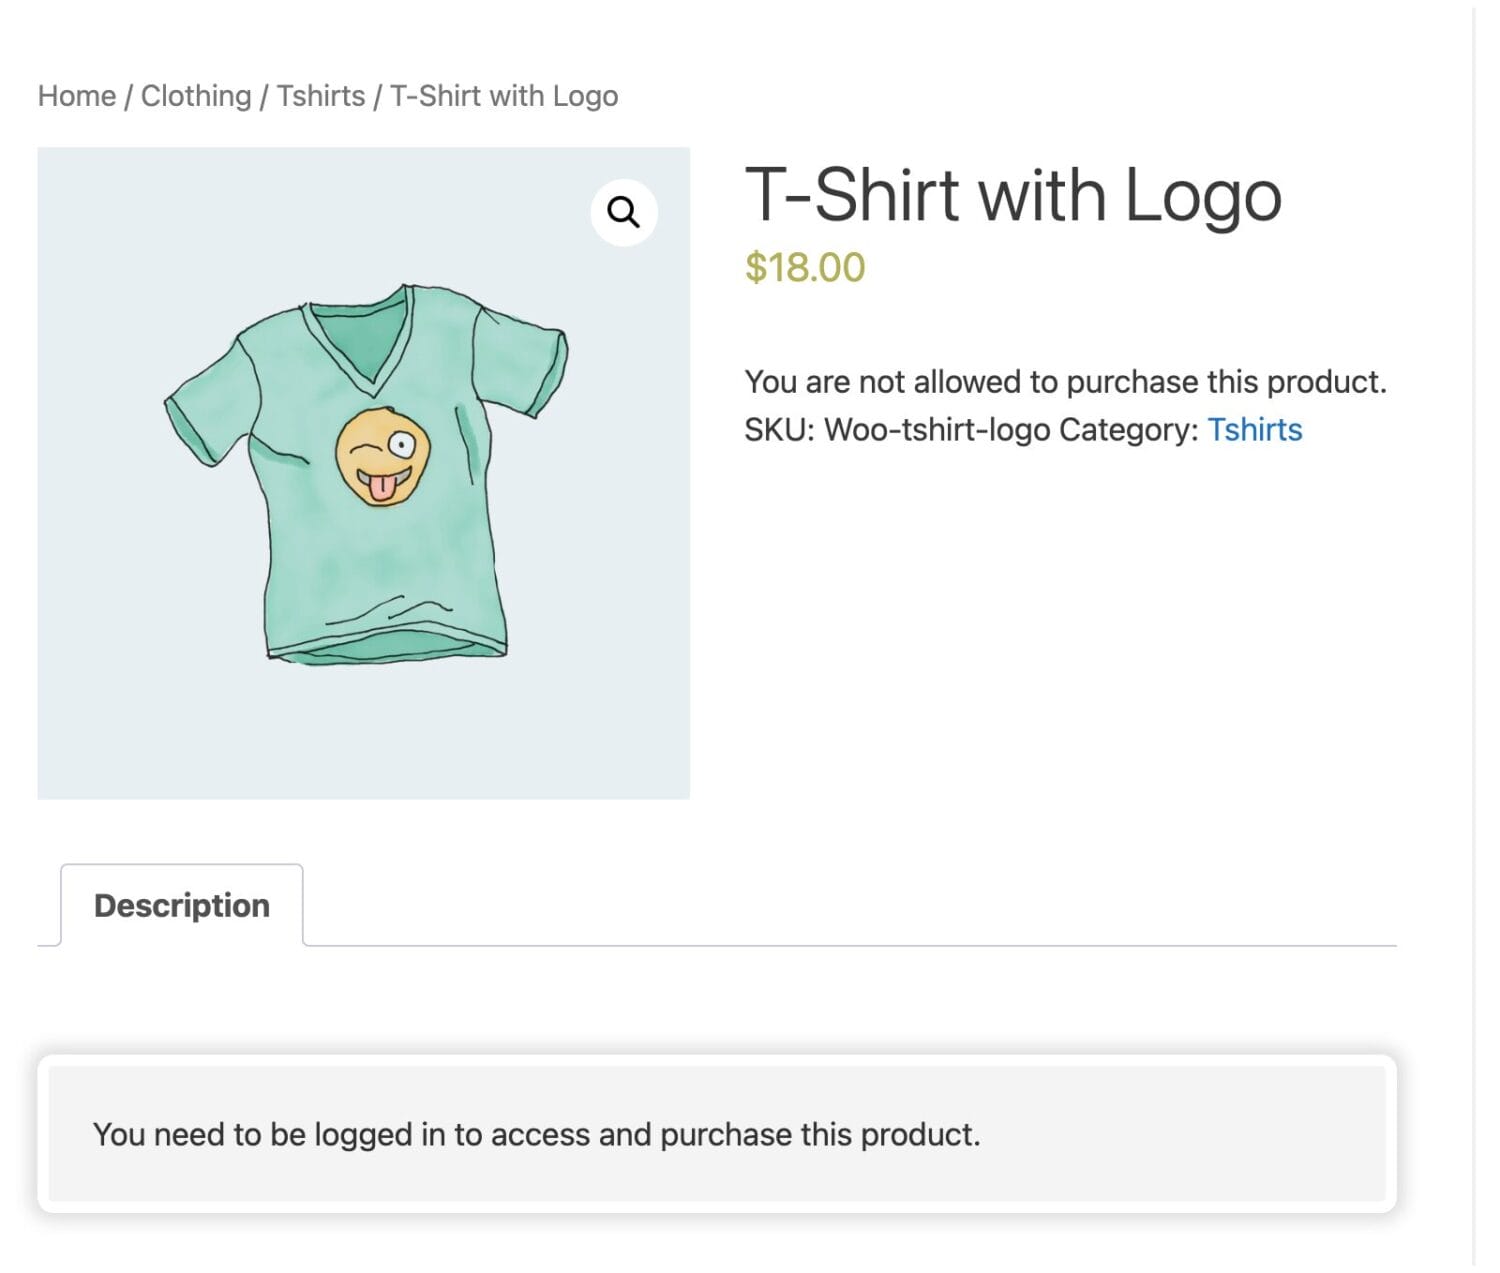
Alternatively, you can select “Show access restricted message” as “What happens when users without access try to view the content?” instead of “Redirect user”.
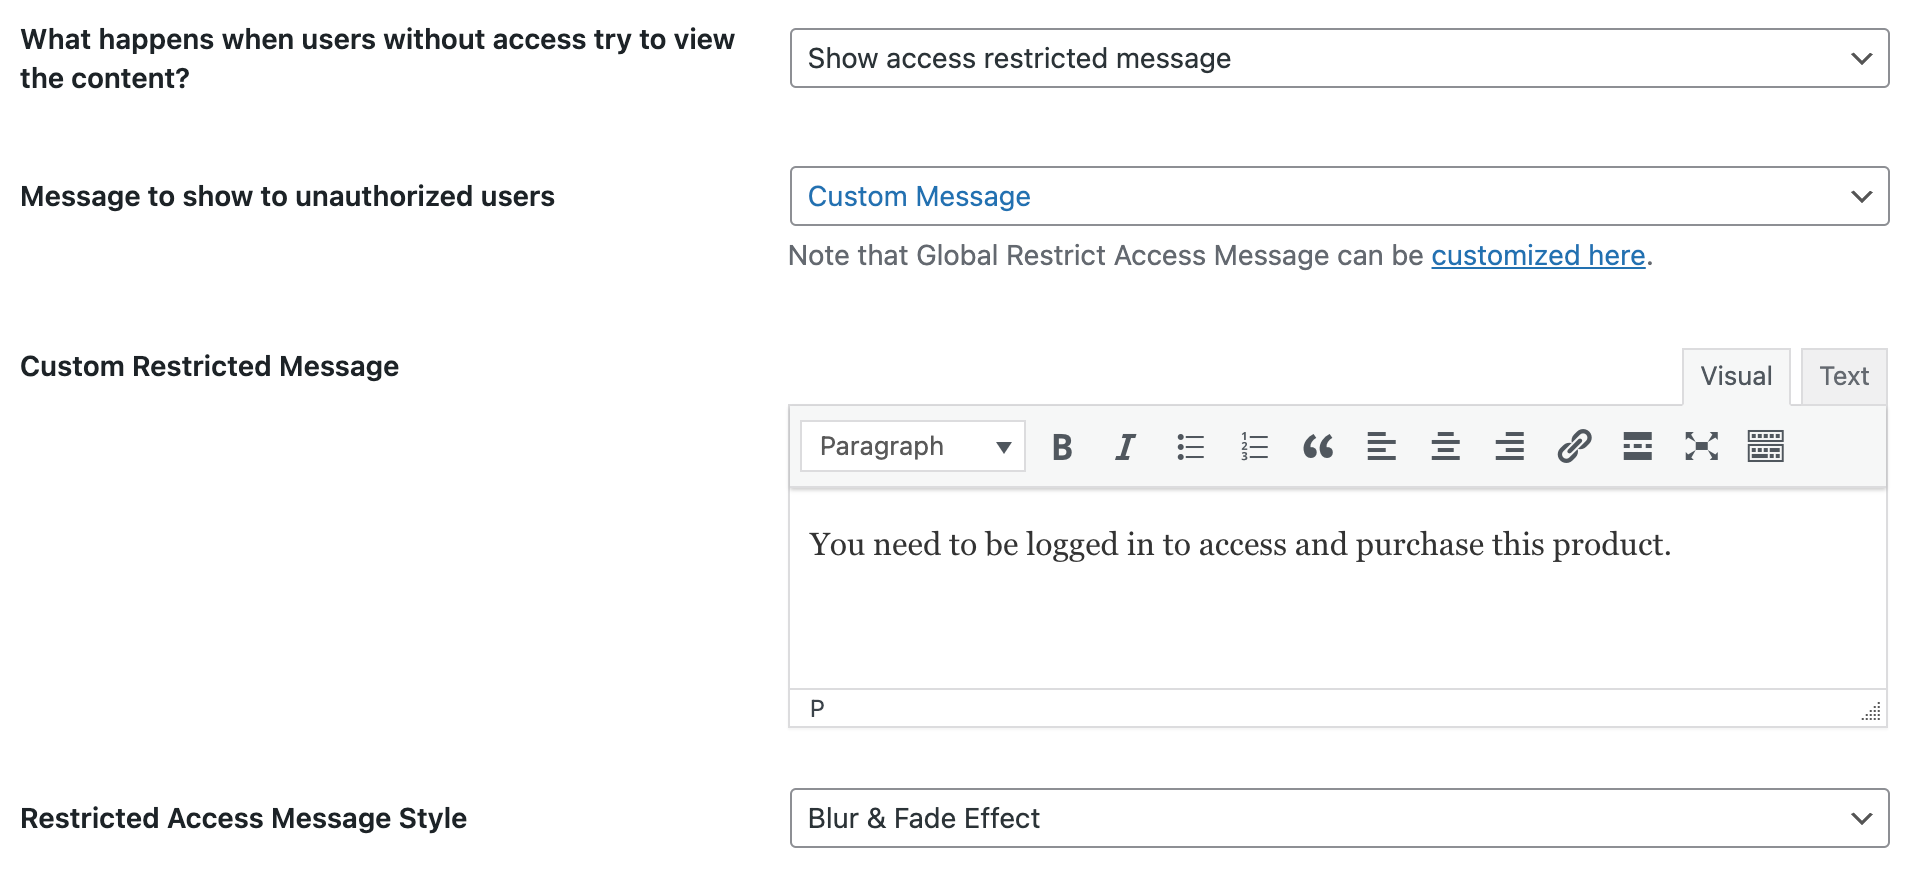
When visitors access a restricted or protected WooCommerce product page, they will encounter a message you have configured. Furthermore, the “Add to Cart” button for the product will be hidden or removed, and an error message will be displayed, informing them that they cannot make a purchase.
Create WooCommerce Members-Only Store Today
Creating a WooCommerce members-only store is relatively easy with a plugin like ProfilePress. ProfilePress is an all-in-one membership plugin with all the necessary features for managing members-only WooCommerce stores.
In this article, we have covered the process of creating a members-only WooCommerce store, and we hope this article will help you create your desired WooCommerce membership site.