How to Sell Memberships and Subscriptions With WordPress
Selling memberships and subscription plans on your site is a great way to grow an online business. It enables you to sell products or services to visitors to your WordPress website and generate consistent income.
In this article, we will show you how to sell membership and subscription plans on your WordPress website using our powerful e-commerce plugin called ProfilePress.
Should You Sell Membership or Subscription Plans?
Before we show you how to create a membership/subscription plan, you need to select a business model for your WordPress website.
Although membership and subscription are used interchangeably, they are two different business models.
Let’s take a look at the critical distinctions between the two:
The user is expected to engage with a community in the membership model. For instance, courses sold under the membership model encourage students to engage with teachers and fellow learners.
The subscription model can be used when you sell a service or a product where users don’t have to interact with each other. For instance, Amazon Prime works on a subscription model where Prime members pay a certain fee annually to access benefits like free delivery, early access, exclusive deals, Amazon Music, and Prime videos, among other things.
The subscription model is very transactional, while the membership model is relationship-focused. The membership model is also supported by user-generated content (like comments and forum threads). The subscription model requires you to consistently create new content (like sales, deals, etc.).
How to Sell Memberships & Subscriptions in WordPress
By now, you must have decided what type of plan you want to sell on your WordPress website. In this section, you will learn how to add these subscription plans to your website using the ProfilePress WordPress membership plugin.
There are a ton of things you can do using this plugin.
- You can create one-time or recurring payment plans.
- You can create a conversion-optimized checkout form to improve your membership revenue.
- Create coupon codes and discounts based on a percentage or a flat rate.
- Hide your content and display only a preview to encourage people to sign up.
- Create searchable and filterable member directories.
- Use premium addons to customize your site, among other things, further.
Let’s use ProfilePress to sell membership and subscription plans on your WordPress website.
Step 1: Create Membership or Subscription Plans
Install ProfilePress into your WordPress website and activate the license. ProfilePress is a premium plugin, and you can get it here.
After installation, a ProfilePress option appears on your WordPress dashboard. Go over the ProfilePress option and select Membership Plans >> Add New Plan.
The next page is divided into Plan Details and Subscription Settings. Let’s go ahead and complete these sections.
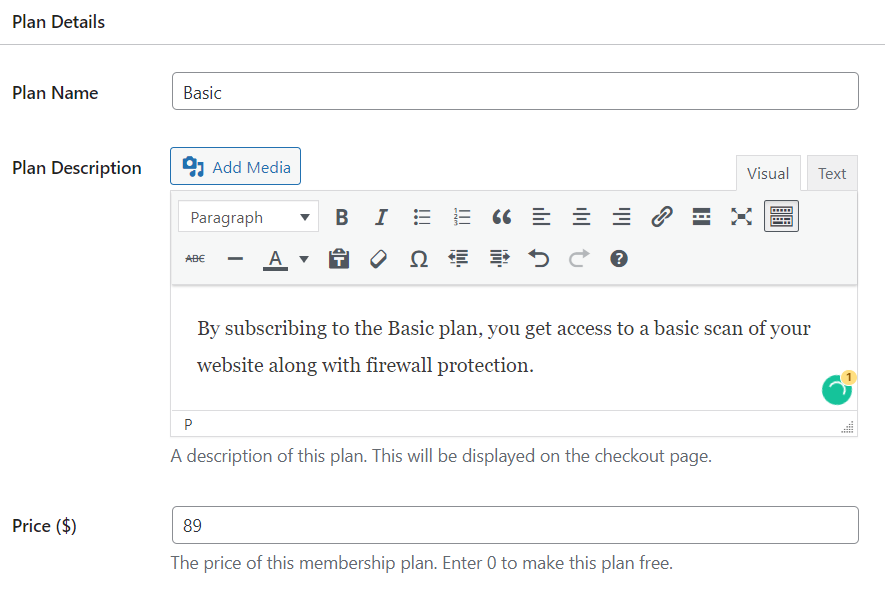
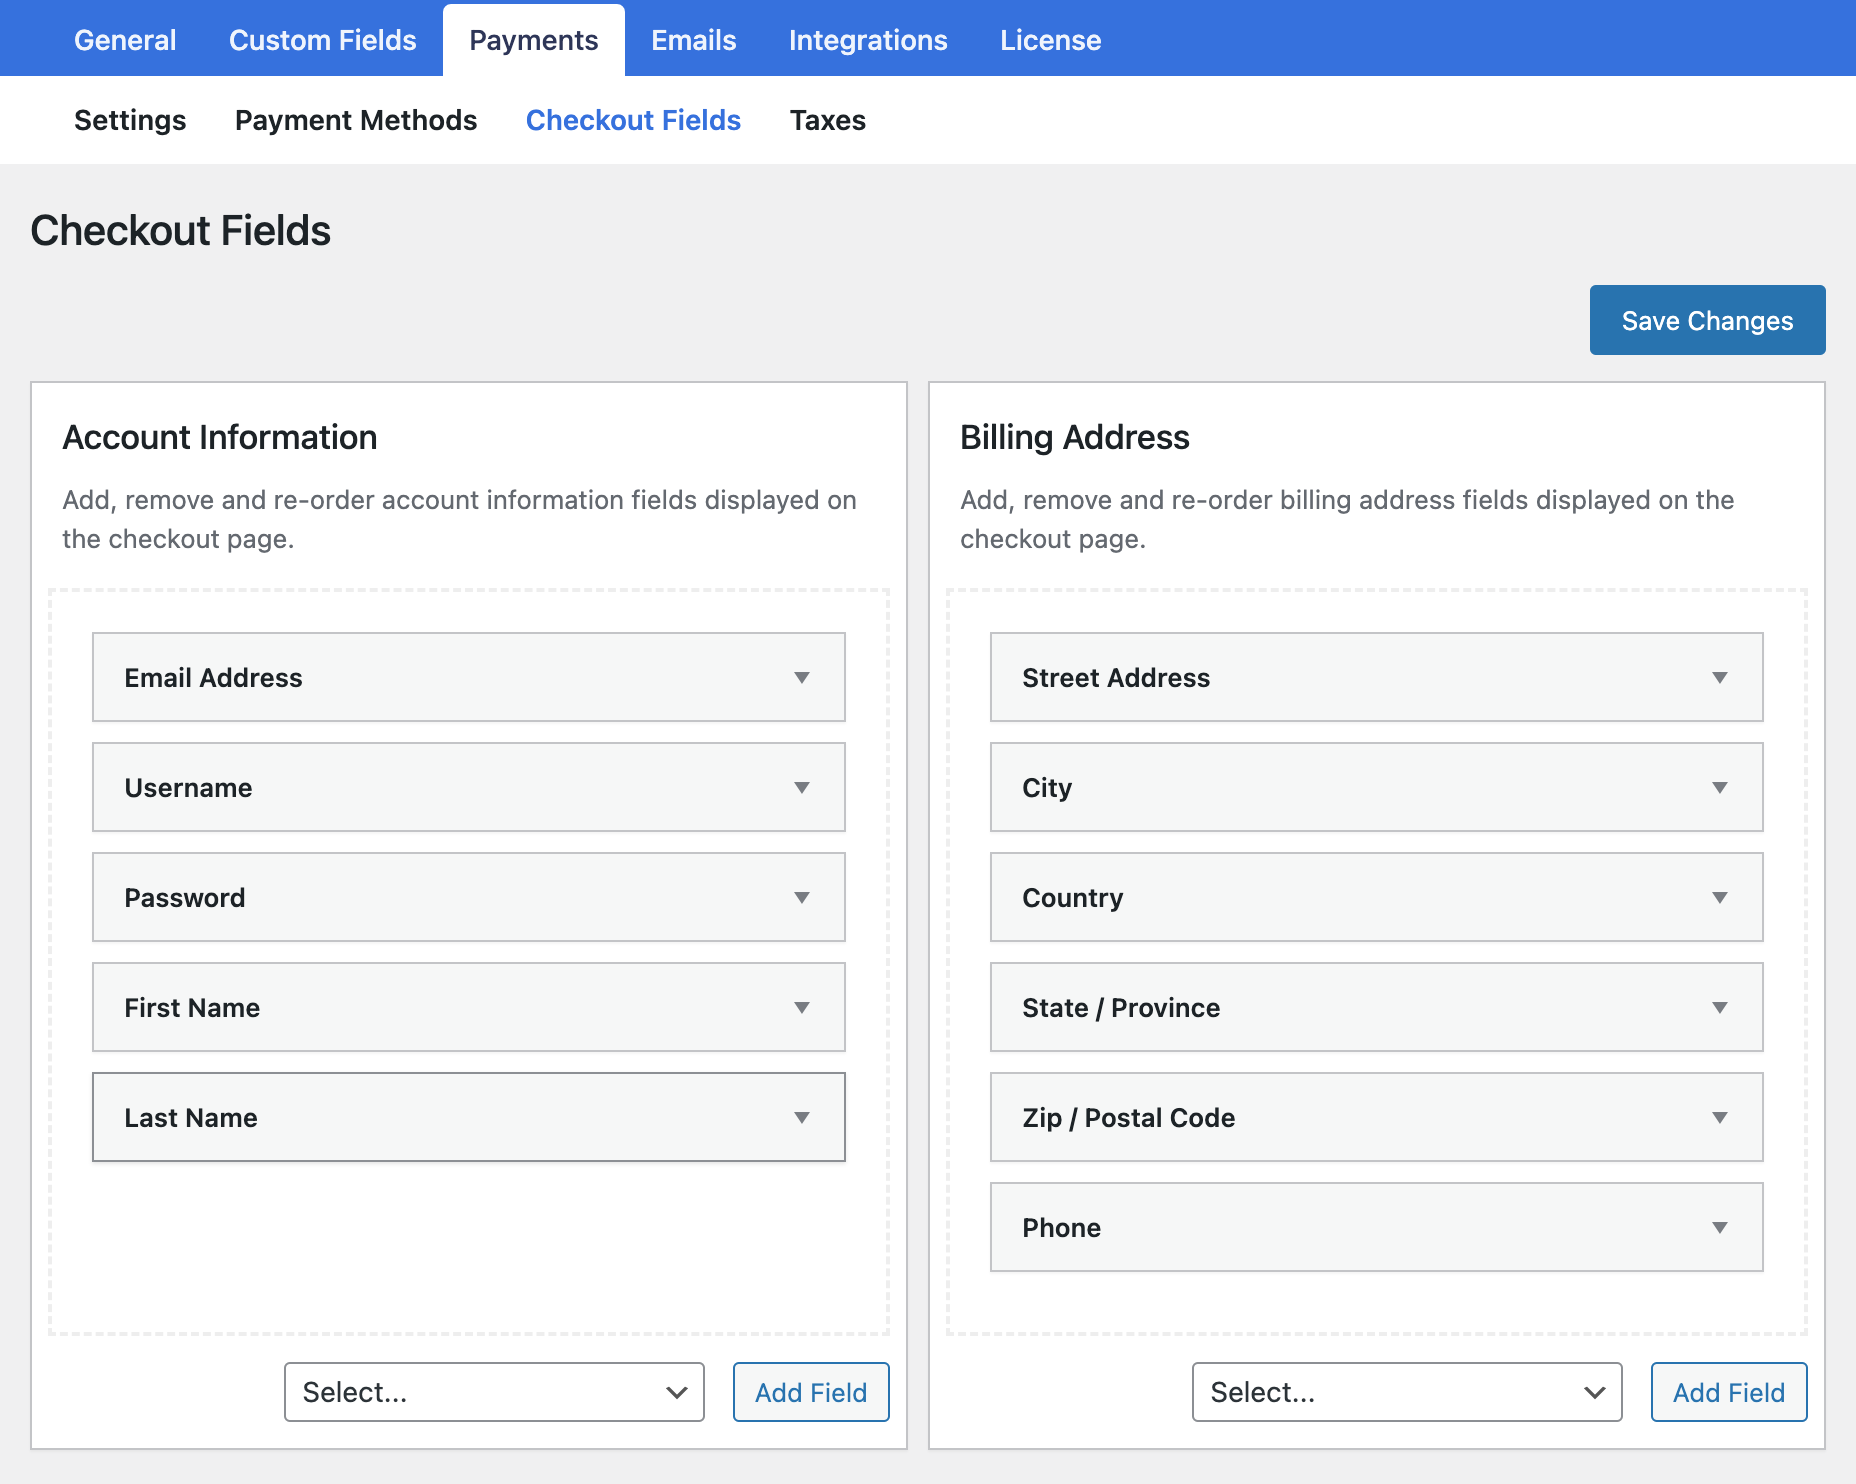
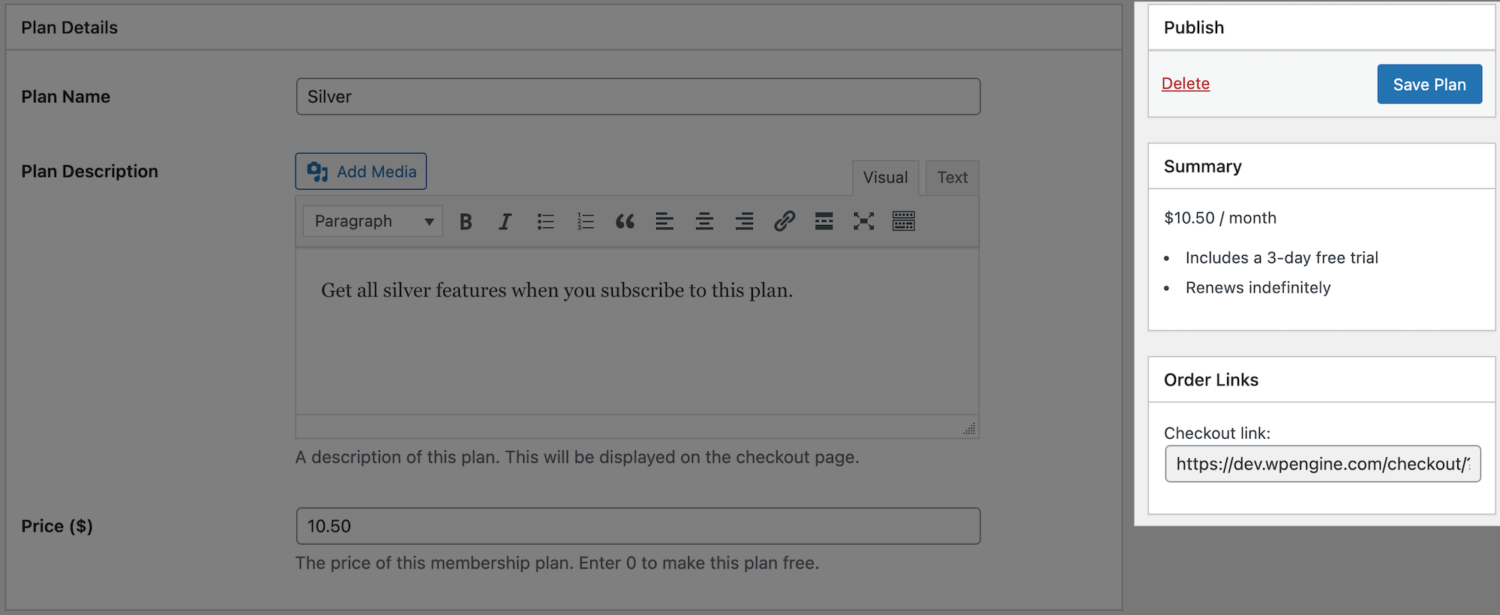
In the Plan Details section, you can name the plan, write a description of the plan which will be shown to the potential customer, and set the plan’s price, as we have done in the image below.
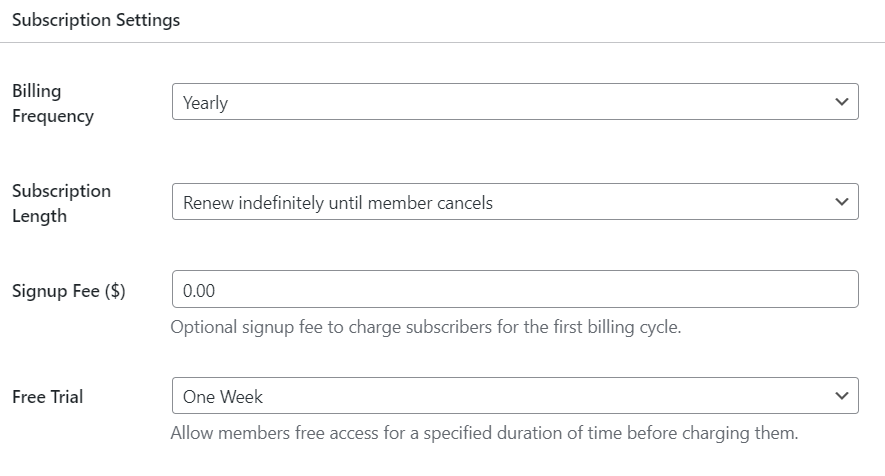
In the Subscription Settings section, you get the select the billing frequency. You can ask your potential customers for a one-time payment or allow them to subscribe monthly, quarterly, half-yearly, or yearly.
In the subscription length option, you can allow the customer to renew indefinitely until they cancel or set a fixed number of payments.
Depending on your business type, you can offer a free trial and a one-time signup fee.
Hit the Save Plan button after setting up the plan.
You can create more than one plan using the above steps.
Step 2: Create Checkout & Order Confirmation Pages
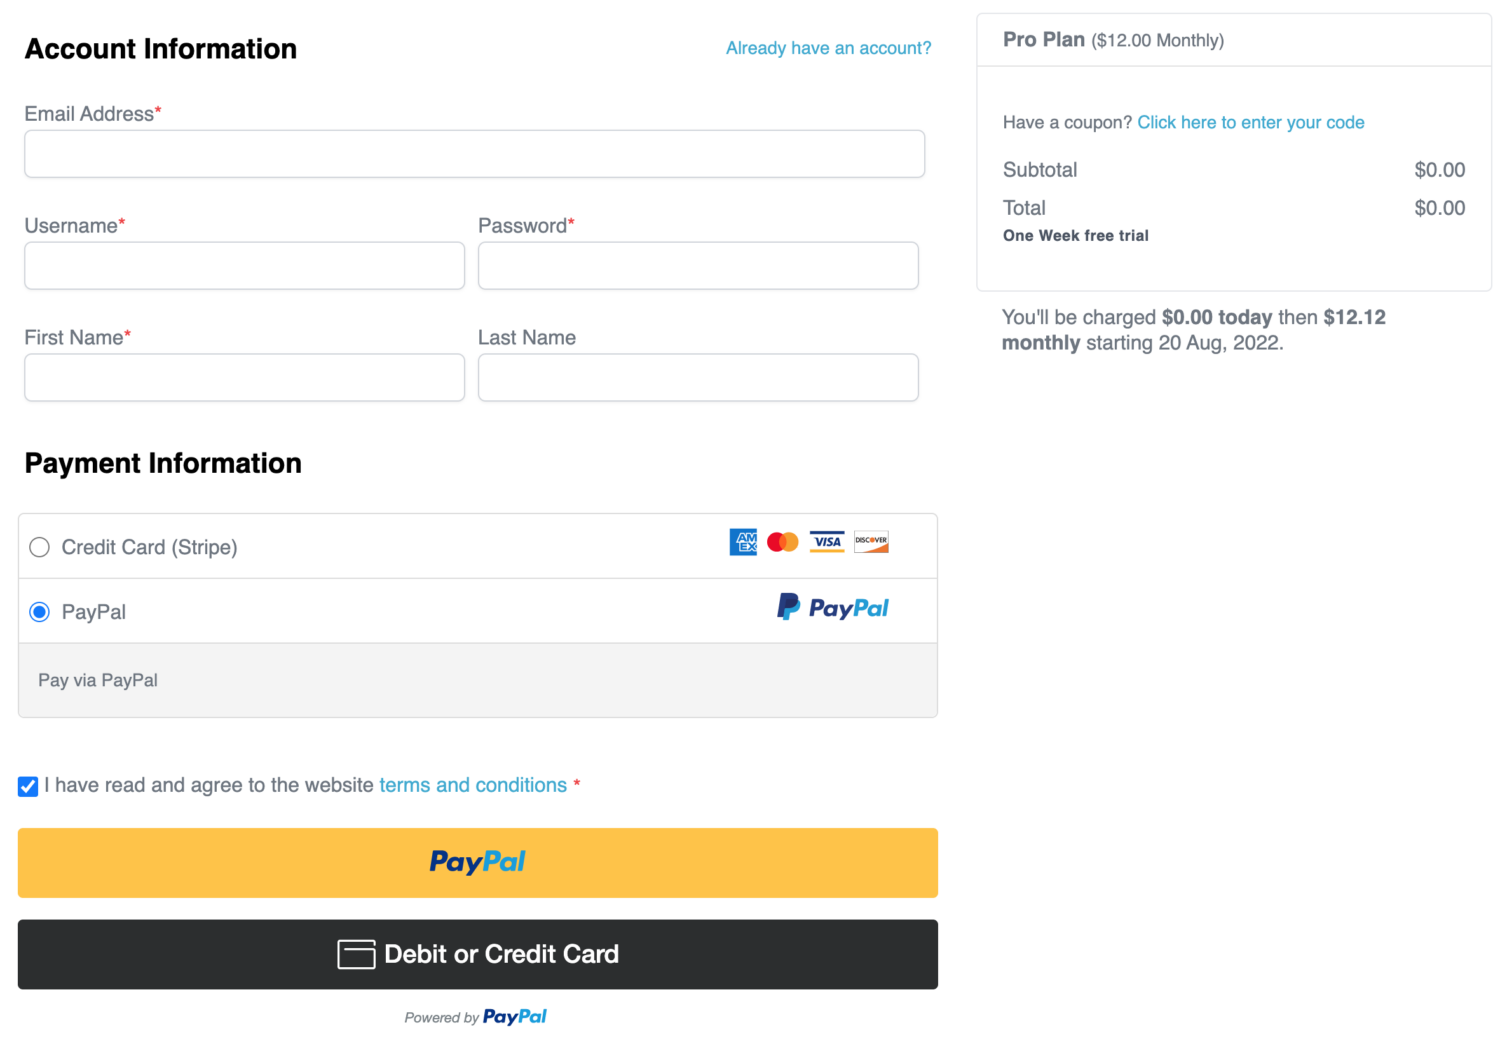
The checkout page allows customers to enter payment and billing details before signing up for the membership or subscription plan, while the order confirmation page displays the order details, including the order status and amount paid.
By default, these pages are created on installation. If they are missing on your site, go to Pages > Add New. Name the page as Checkout and then add the shortcode:
[profilepress-checkout]Also, create an “Order Success” page and add the shortcode:
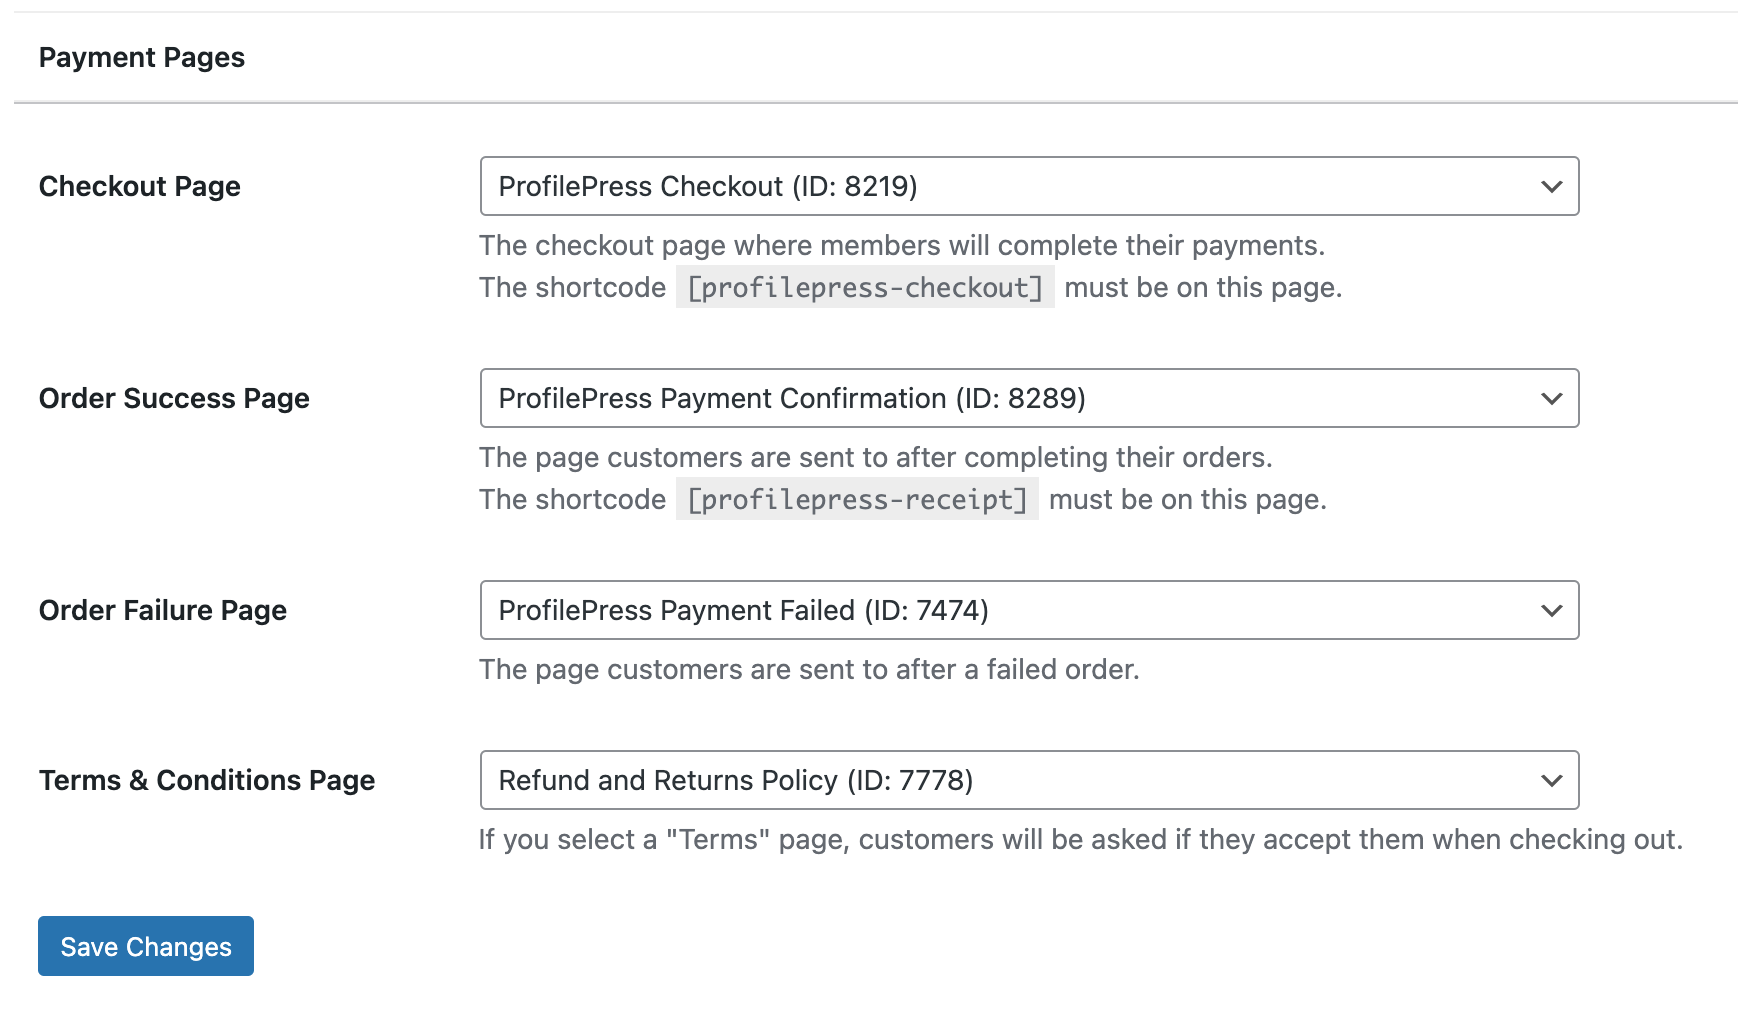
[profilepress-receipt]Finally, go to ProfilePress > Settings > Pages. Scroll to the “Payment Pages” section and select the “Checkout Page” and “Order Success Page”.
If you wish to modify the checkout fields for selling your website memberships and subscriptions, you can go to ProfilePress > Settings > Payments > Checkout Fields and add or remove fields according to your needs.
Step 3: Integrate Payments
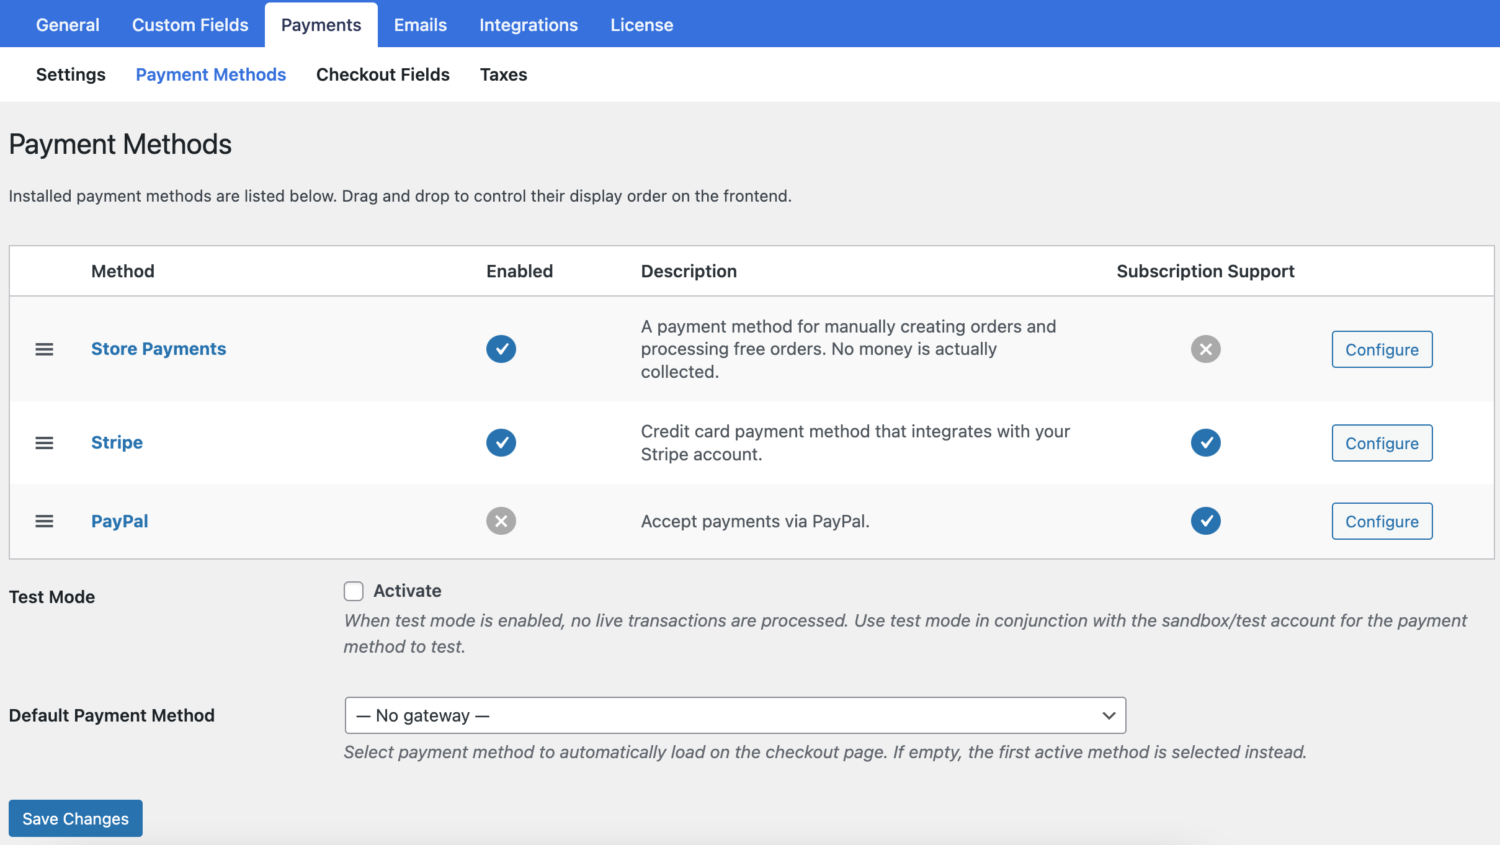
ProfilePress supports Stripe, PayPal, Razorpay, Paddle, Paystack, Direct Bank Transfer, Mollie. You will need to enable payment collection by going to ProfilePress > Settings > Payments > Payment Methods.
Select your preferred payment methods and connect them with your account.
Step 4: Create a Pricing Page & Add the Plans
By now, your membership or subscription plans are ready along with the checkout page. The next step is to create a pricing page and add the plans to your pricing page.
Here’s an excellent guide on how to create a pricing page. When the page is ready, it’s time to add the plans to your pricing page.
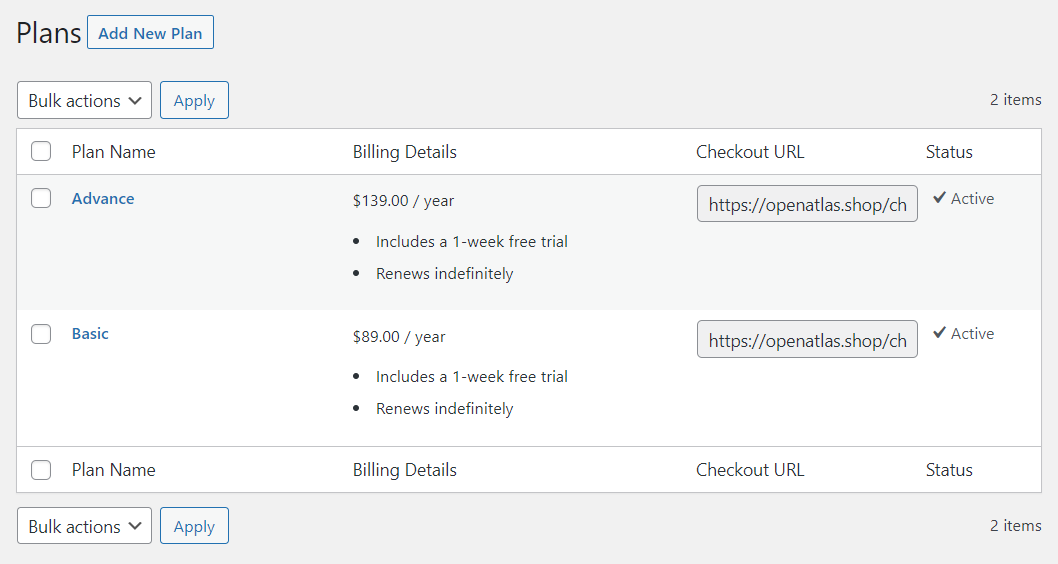
All you need to do is go to ProfilePress > Membership Plans and open the plans you created in Step 1.
You should find a checkout link in the right-hand corner of the page. Copy that link and insert it on your pricing page.
IMPORTANT: If you can’t find the checkout link on your membership plan page, go to ProfilePress > Settings > General > Pages and scroll down to the Payment Pages section. Ensure you have chosen the Checkout page you just created under the Checkout Page option. Now, if you go back to your membership plans, you should see the checkout link.
When a potential customer clicks on that link on your pricing page, he will be redirected to the checkout page of that particular plan.
Step 5: Management, Reports, and Tax Support
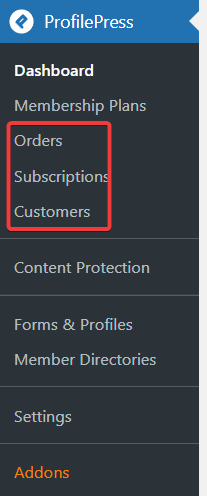
Options like Orders, Subscriptions, and Customers offer you a bird’s eye view of all the activities going on on your website. And being the site’s admin, you have the power to edit the orders, subscriptions, and profile pages of your customers.
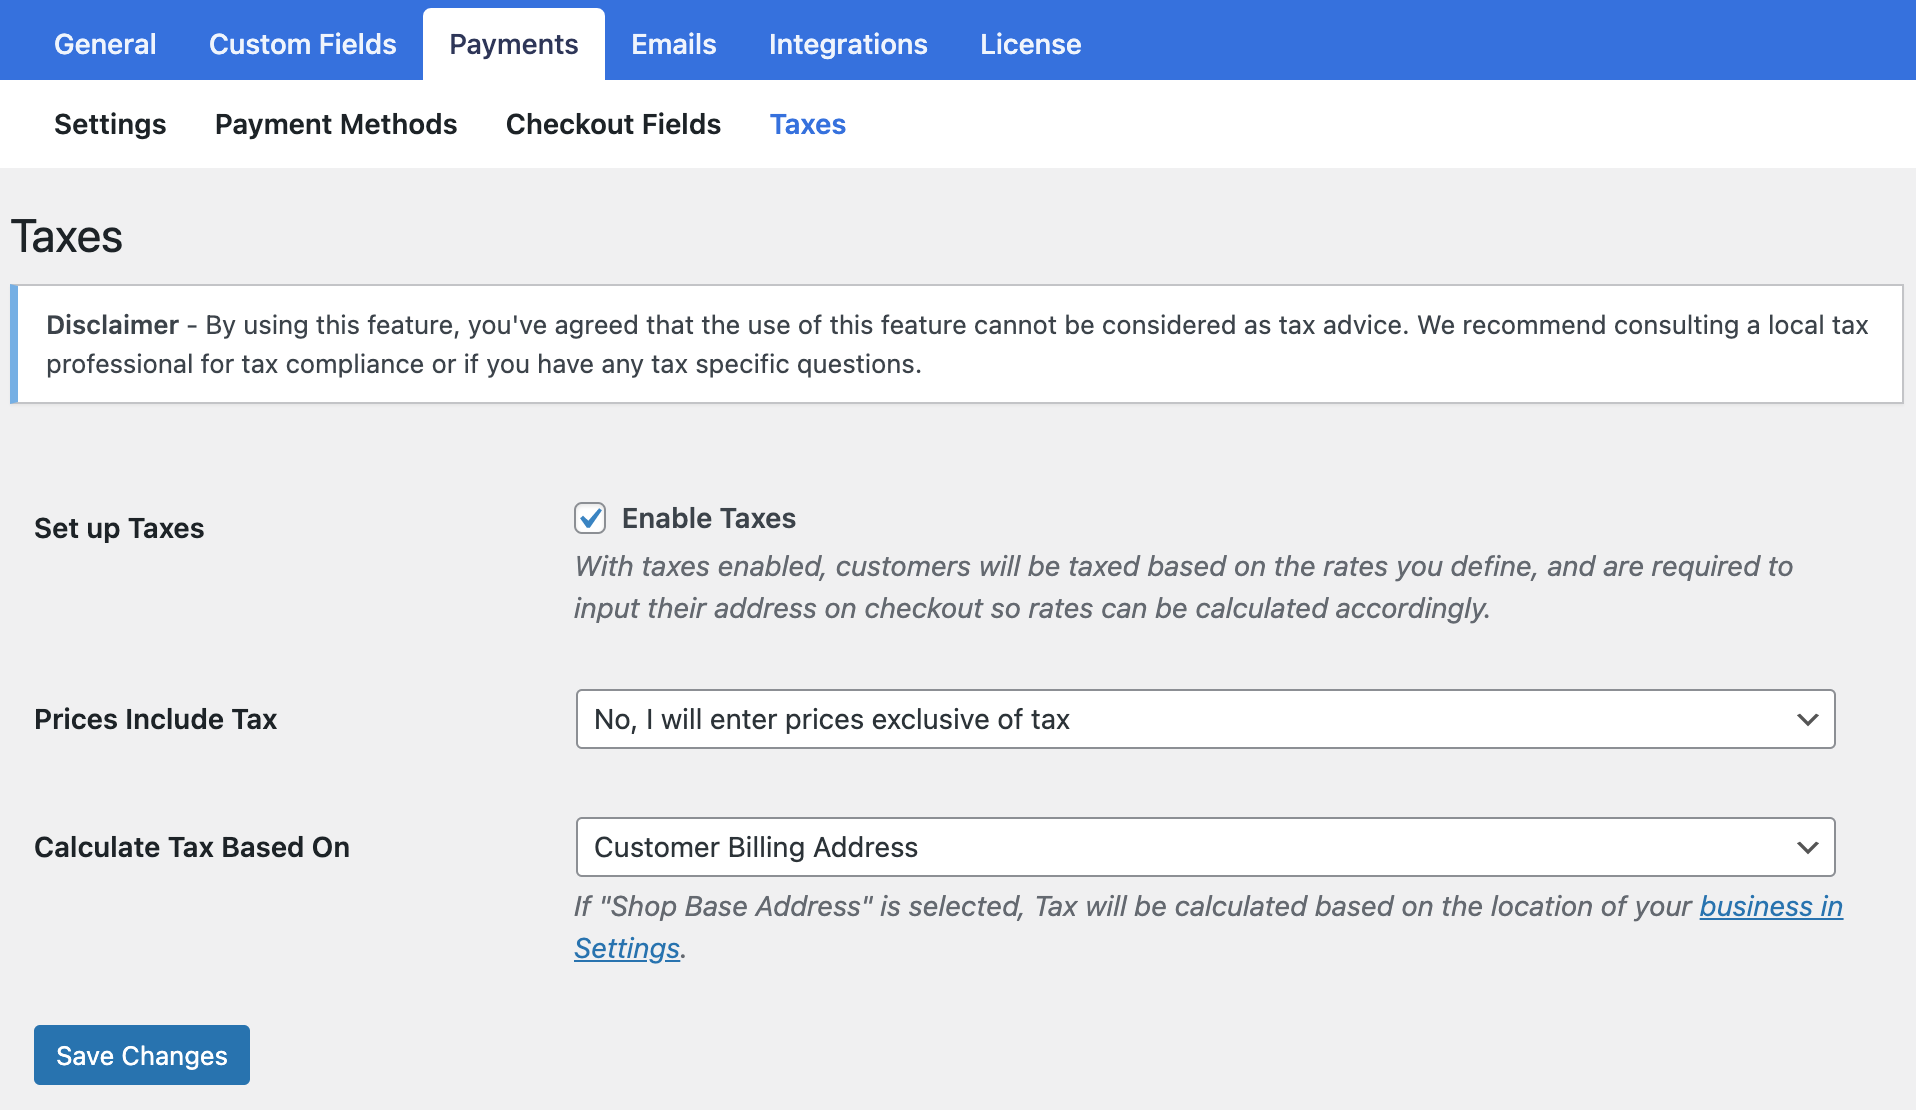
The Taxes option allows you to charge taxes or EU VATs if your business is based in the EU. However, it’s worth noting that although the plugin allows you to handle taxes, you decide when and what to charge.
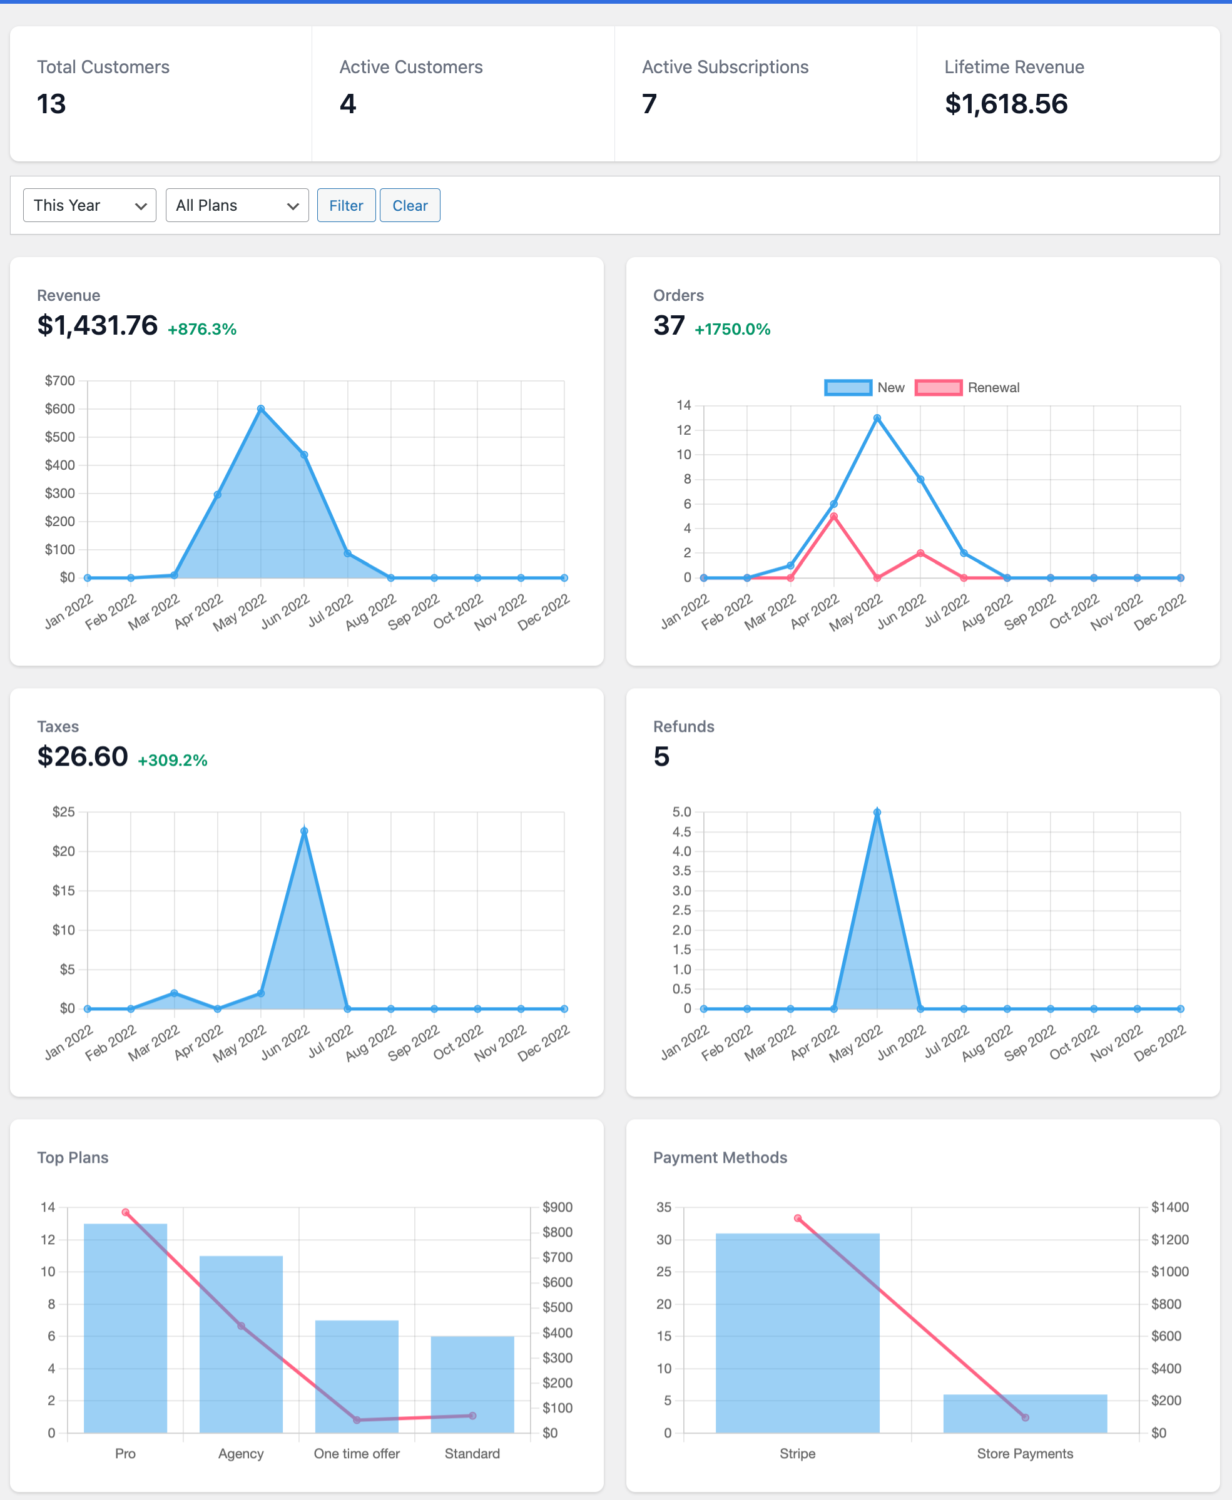
If you go to ProfilePress > Dashboard, you will see detailed reports on your plans’ performance, the number of orders you have, and the revenue you are collecting, among other things.
Step 6: Build a Facebook Group or Community Forum
If you are building a membership website, consider creating a platform for customers to interact with each other.
The comment section of your product pages can enable users to interact with each other, but to build a real sense of community, you need to create a Facebook group or a community forum.
Here’s a guide on how to create a forum on your WordPress website. If you don’t want to clutter your site, you can build a Facebook group.
Step 7: Create Members Directory
You can enable users who purchase a membership or subscription on your site to communicate with each other through community forums. However, it can be hard for them to find each other without a comprehensive member directory.
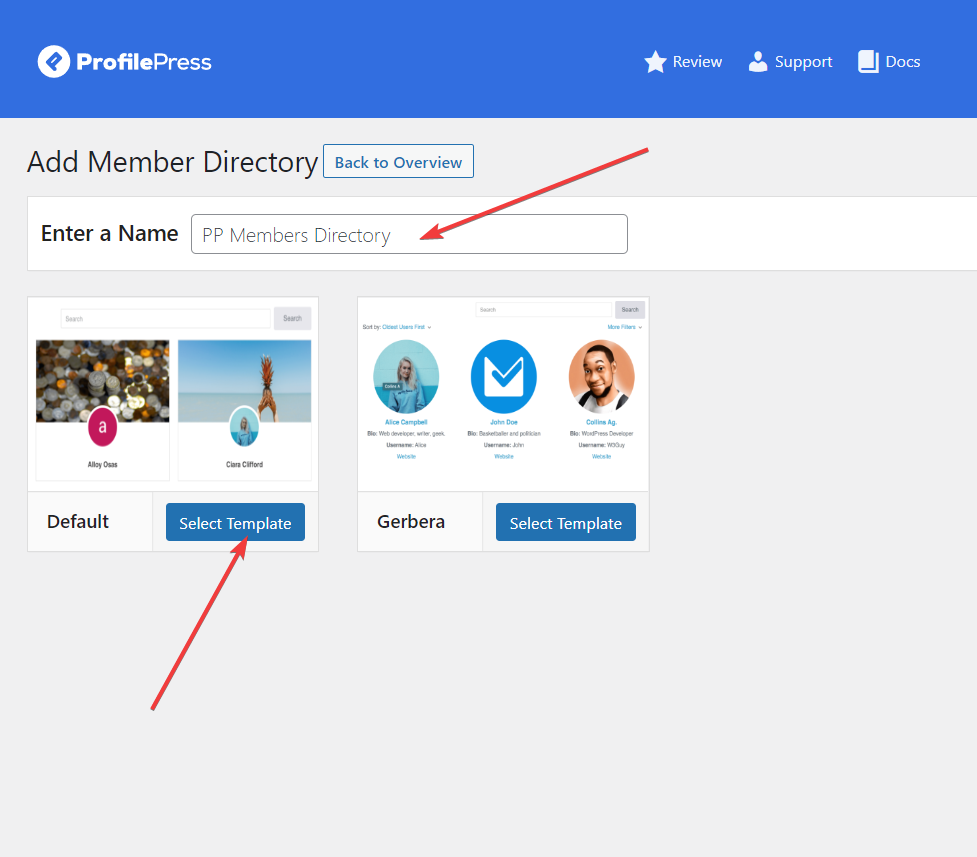
Go to ProfilePress > Members Directories and select the Add New button.
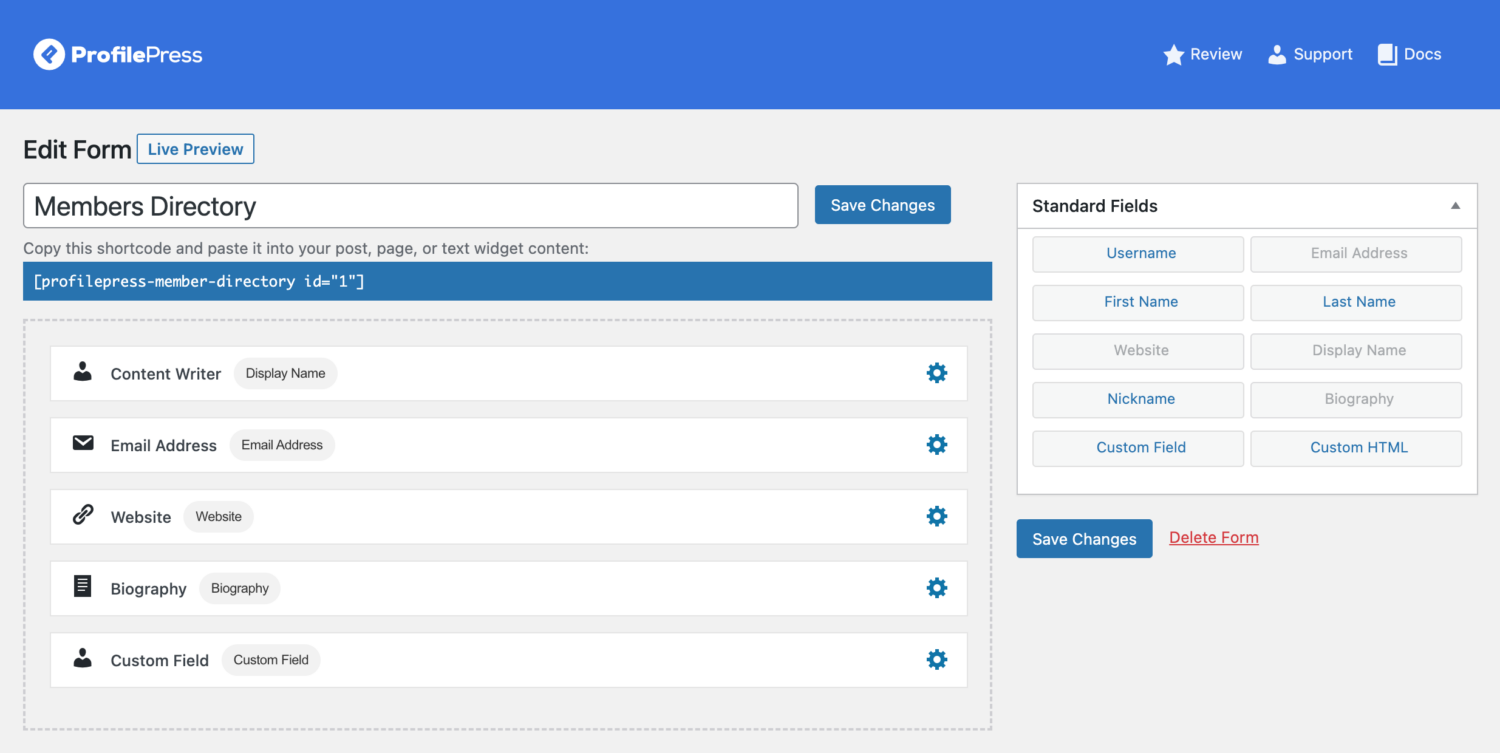
On the next page, you will need to enter a name for the member’s directory and select a template. It will determine how the user profiles will look on the member directory page.
You will see a drag-and-drop editor where you can select which fields will be shown on the directory page.
This is how we designed our directory page on our demo site.
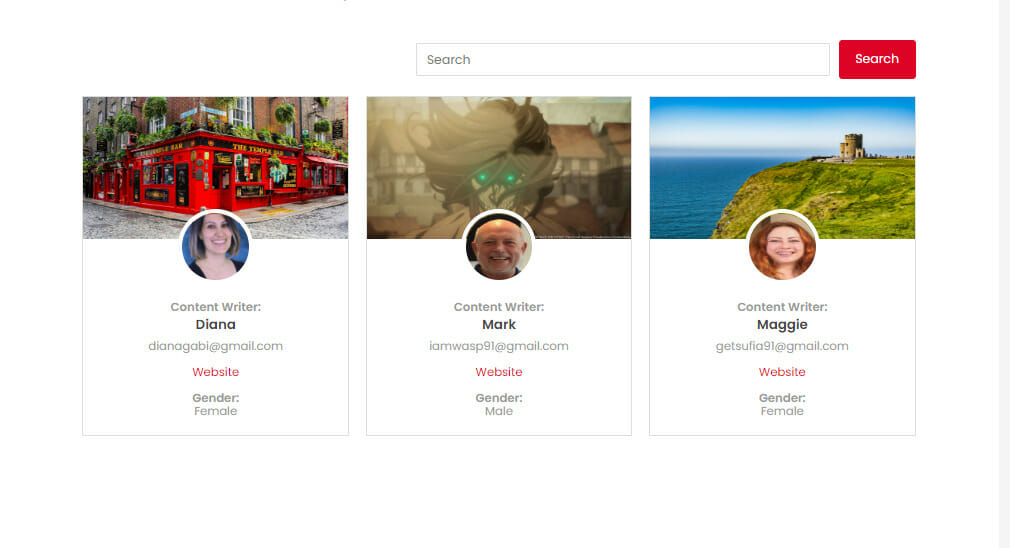
And this is how the directory looks on the front end. As you can see, the fields we inserted in the editor appear on the frontend.
Quick Note About Custom Fields
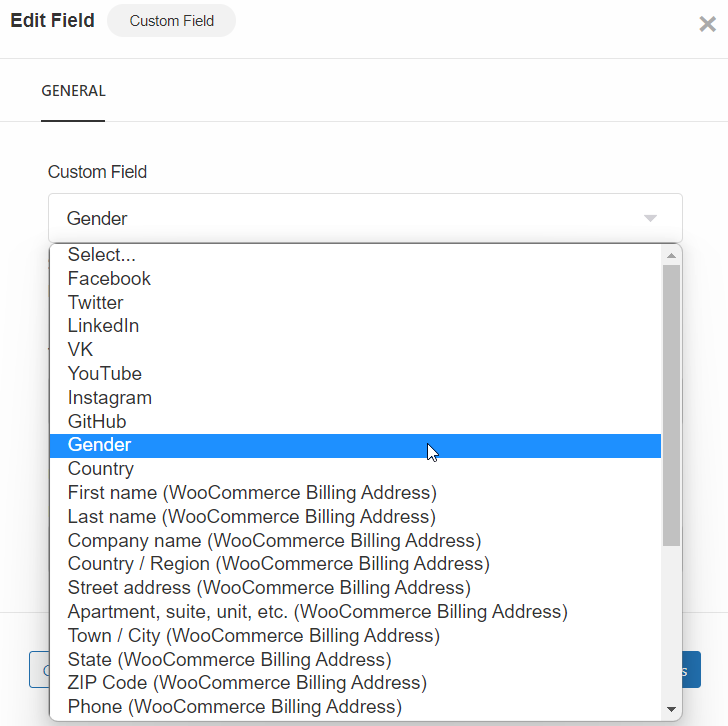
The drag-and-drop editor has only a few standard fields to choose from. To add more fields, you need to use the custom fields option. First, enable the custom field add-on and then create new custom fields. This guide will help you set up custom fields.
Next, open the editor and drag and drop the custom field option to the left side of the screen. You should see a gear icon in the custom field right beside the custom fields option. Select that. A popup will appear with the dropdown menu. Select the custom field of your choice from the menu.
The custom fields option allows you to create as many custom fields as you want.
Scroll down to the Directory Settings, and you should see the five following options: Appearance, Sorting, Search, Result & Pagination, and Colours.
Use these options to modify the directory’s design and control how visitors will sort and filter it.
We recommend reading this guide if you need further help with the Directory Settings.
Start Selling Memberships & Subscriptions with WordPress Today
Adding a subscription or membership plan to your WordPress website is easy if you have the right tools.
There are a ton of subscription and membership plugins to choose from, but ProfilePress is the most powerful plugin out there.
It’s a complete solution for your membership or subscription site. Using ProfilePress, you can create as many memberships or subscription plans as you want. In addition, the plugin supports Mollie (Credit Card, iDEAL, SEPA Direct Debit, Apple Pay, Klarna, Bancontact, Bank transfer, Gift Card, and more), Stripe, PayPal integration, and more.
You can set up taxes and manage orders, subscriptions, and user profiles from the dashboard. You can create a members directory and customize the checkout page according to your needs.
Try ProfilePress right now!