Offering Free Trial Membership & Subscription Plans in WordPress
Do you want to offer a free trial or paid subscription memberships in WordPress?
When running a membership website, providing free trials and subscription plans is a great way to attract and retain users. This is a great way to give potential customers a chance to experience your membership site’s benefits before they subscribe. An excellent tool for this purpose is the ProfilePress WordPress plugin.
ProfilePress is a simple yet powerful eCommerce and paid membership plugin for accepting one-time and recurring payments selling subscriptions, and digital products on your WordPress website.
If you want to create free trial membership & subscription plans with ProfilePress, please read on.
Install and Activate ProfilePress
The first step is to install ProfilePress. Once you’ve gotten your copy of ProfilePress here, you should download the ZIP file. ProfilePress will also send you a license key to your registered email.
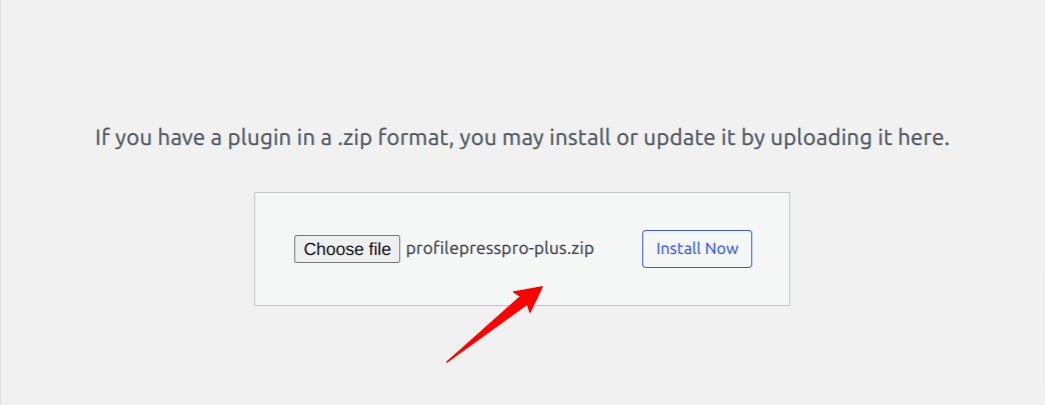
Next, go to Plugins > Add New in your WordPress dashboard and select Upload Plugin.
Select the plugin’s zip file and click Install Now.
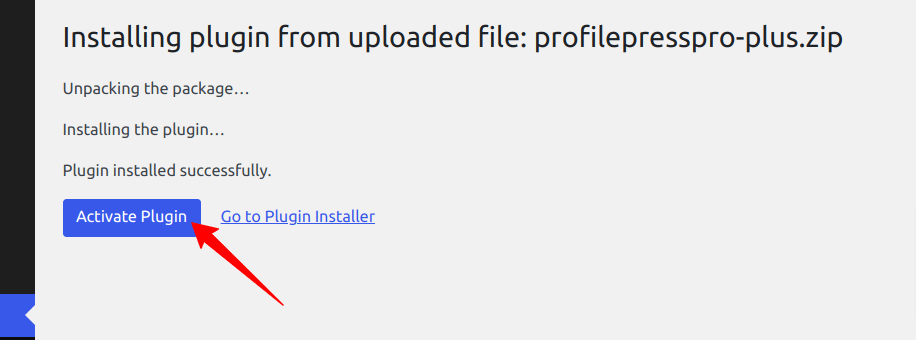
When the installation is complete, click Activate Plugin.
After that, you must activate your license key to use premium features and get updates. To do that, navigate to the plugin settings and click on the License tab. Enter your license key in the License Key field and click Save Changes.
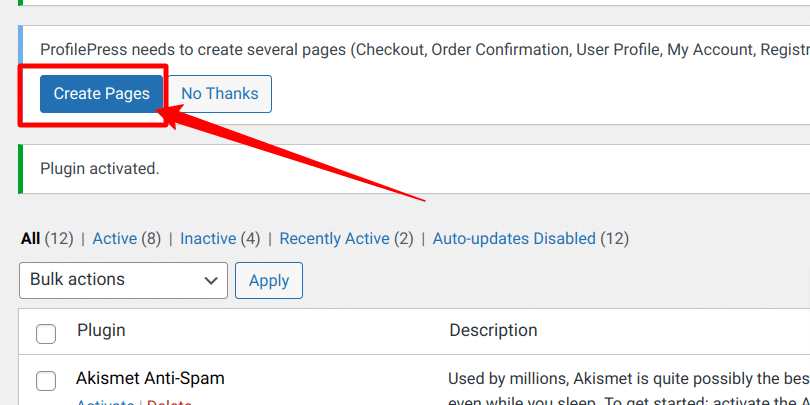
To complete the plugin setup, you will notice a notification that reads, ‘ProfilePress needs to create several pages. Click on the ‘Create Pages‘ button.
Configuring a Payment Method(s)
To accept payment for your subscription plans, you need to configure a payment method for your users. ProfilePress supports various payment methods, including Paypal, Stripe, RazorPay, Paystack, etc.
For this article, we will use the Stripe Payment method.
Setting up Stripe Payment Method
Configuring Stripe is simple and only takes a few moments.
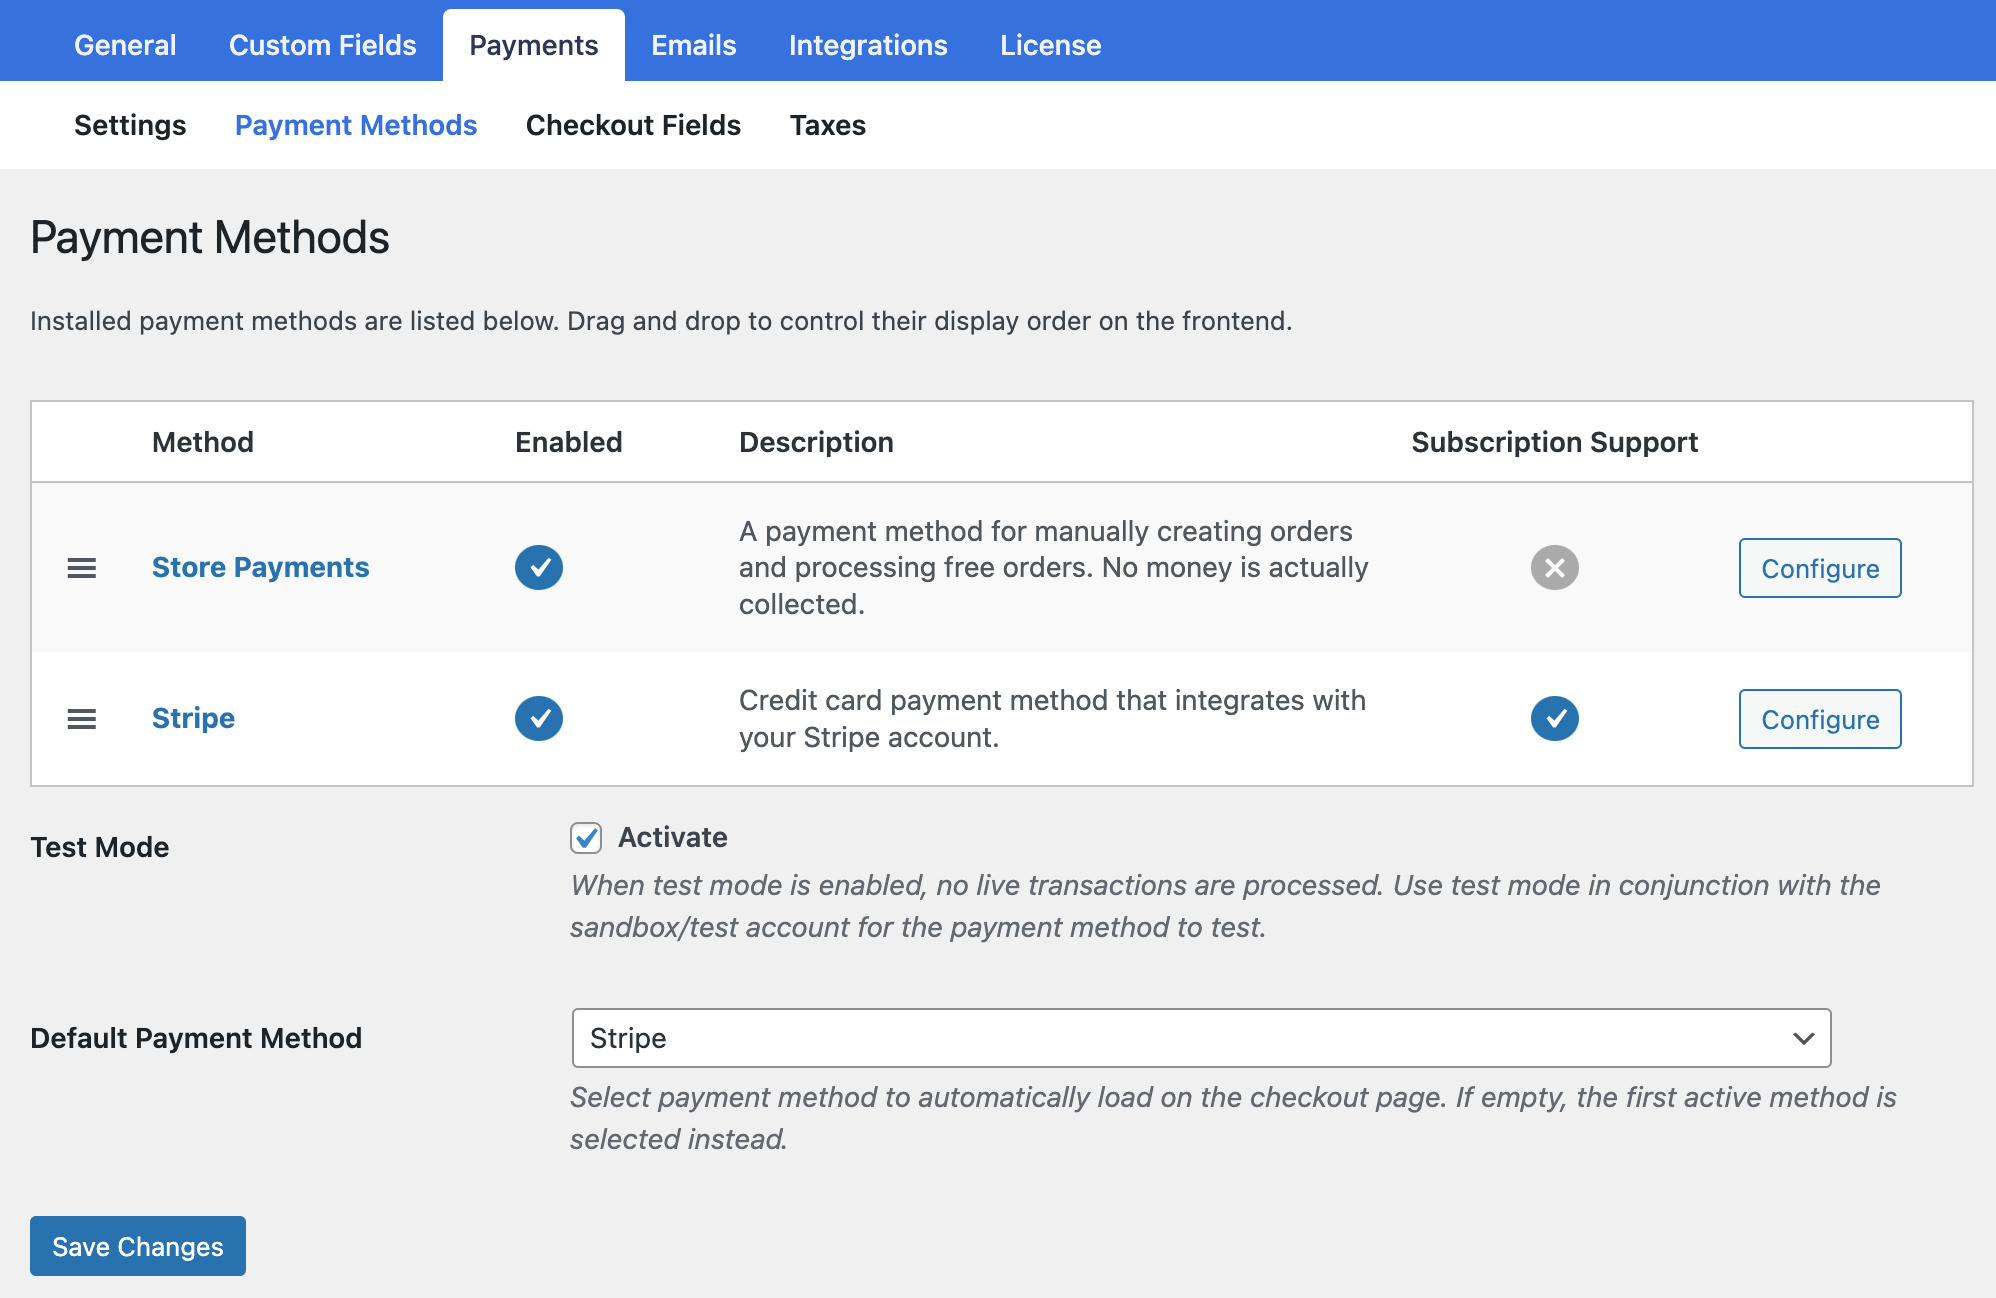
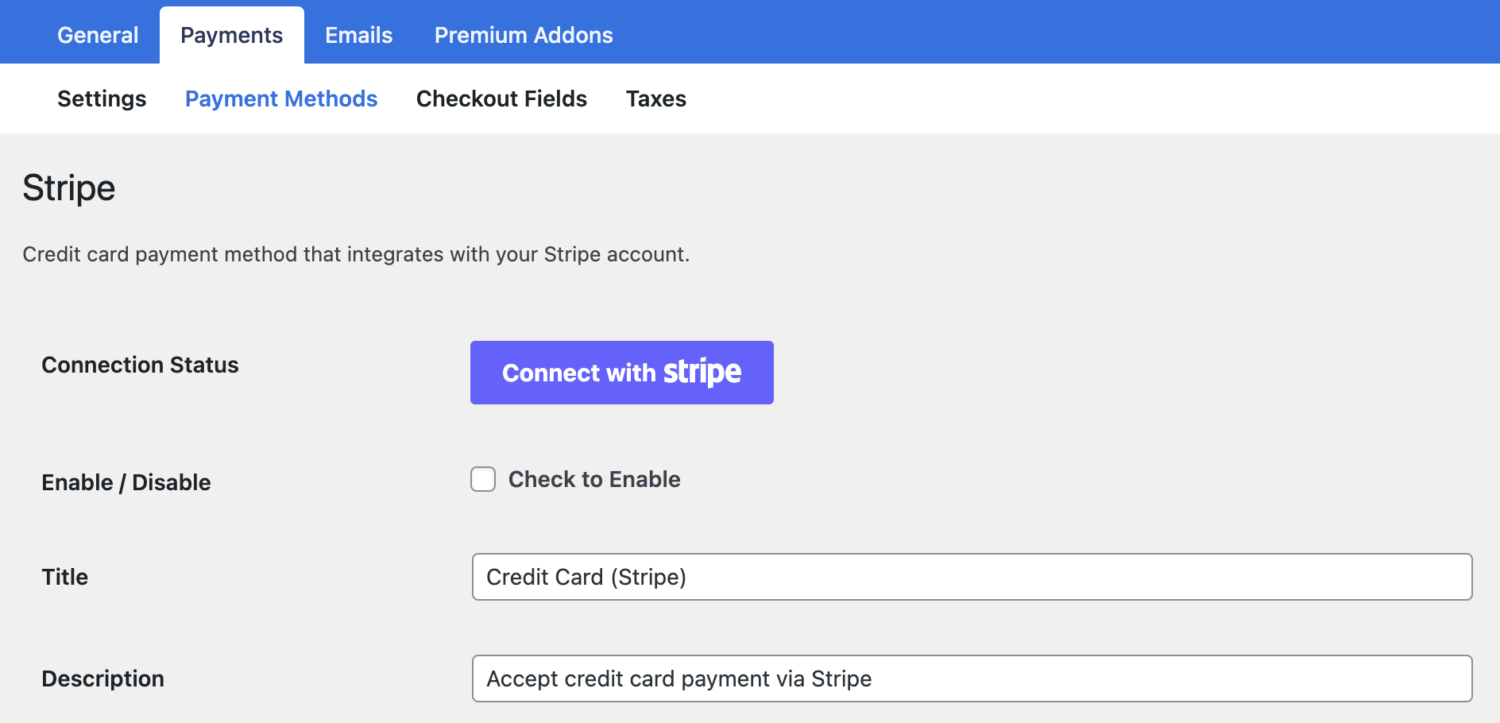
First, go to ProfilePress > Settings > Payments >> Payment Methods and click the Configure button for Stripe.
If you want to test the setup before going live, ensure you activate “test mode” before going through the Stripe setup.
Next, click the “Connect with Stripe” button to connect ProfilePress to your Stripe account.
You’ll be taken to Stripe.com, where you’ll be prompted to either create a new Stripe account or log in to your existing one.
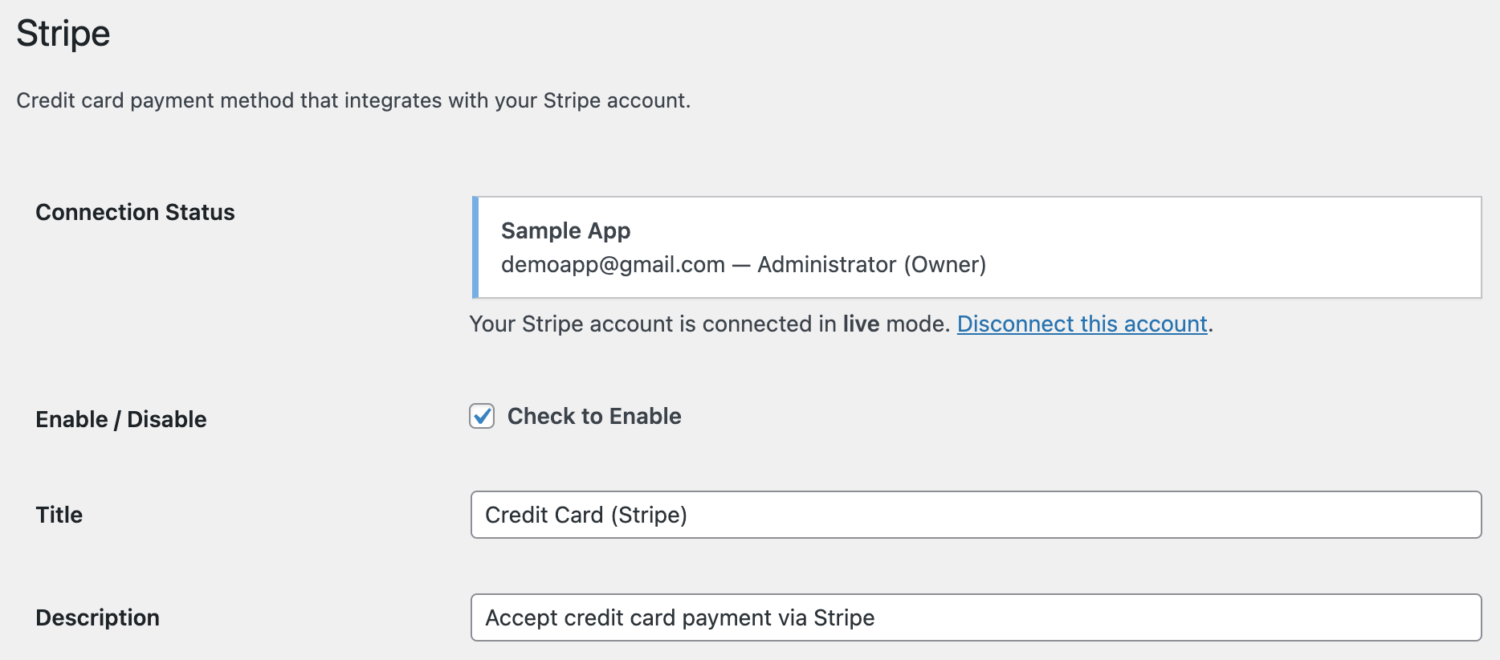
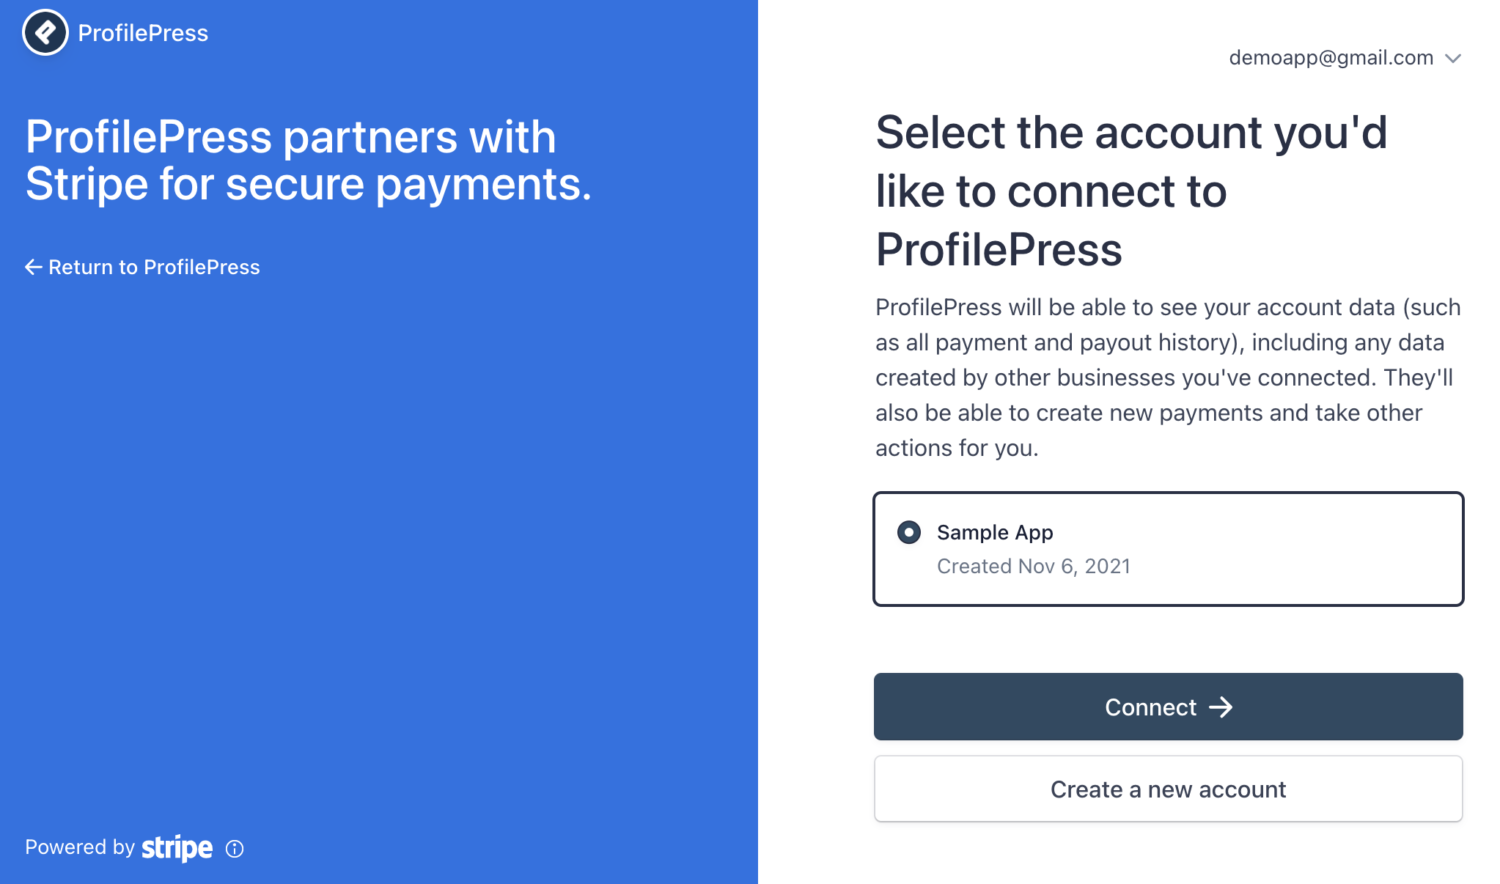 Once you complete the form, you’ll be taken back to your website.
Enable the Stripe integration by checking “Enable / Disable,” Don’t forget to set a title and description.
You can read more about the Stripe payment method here.
Creating a Membership Plan
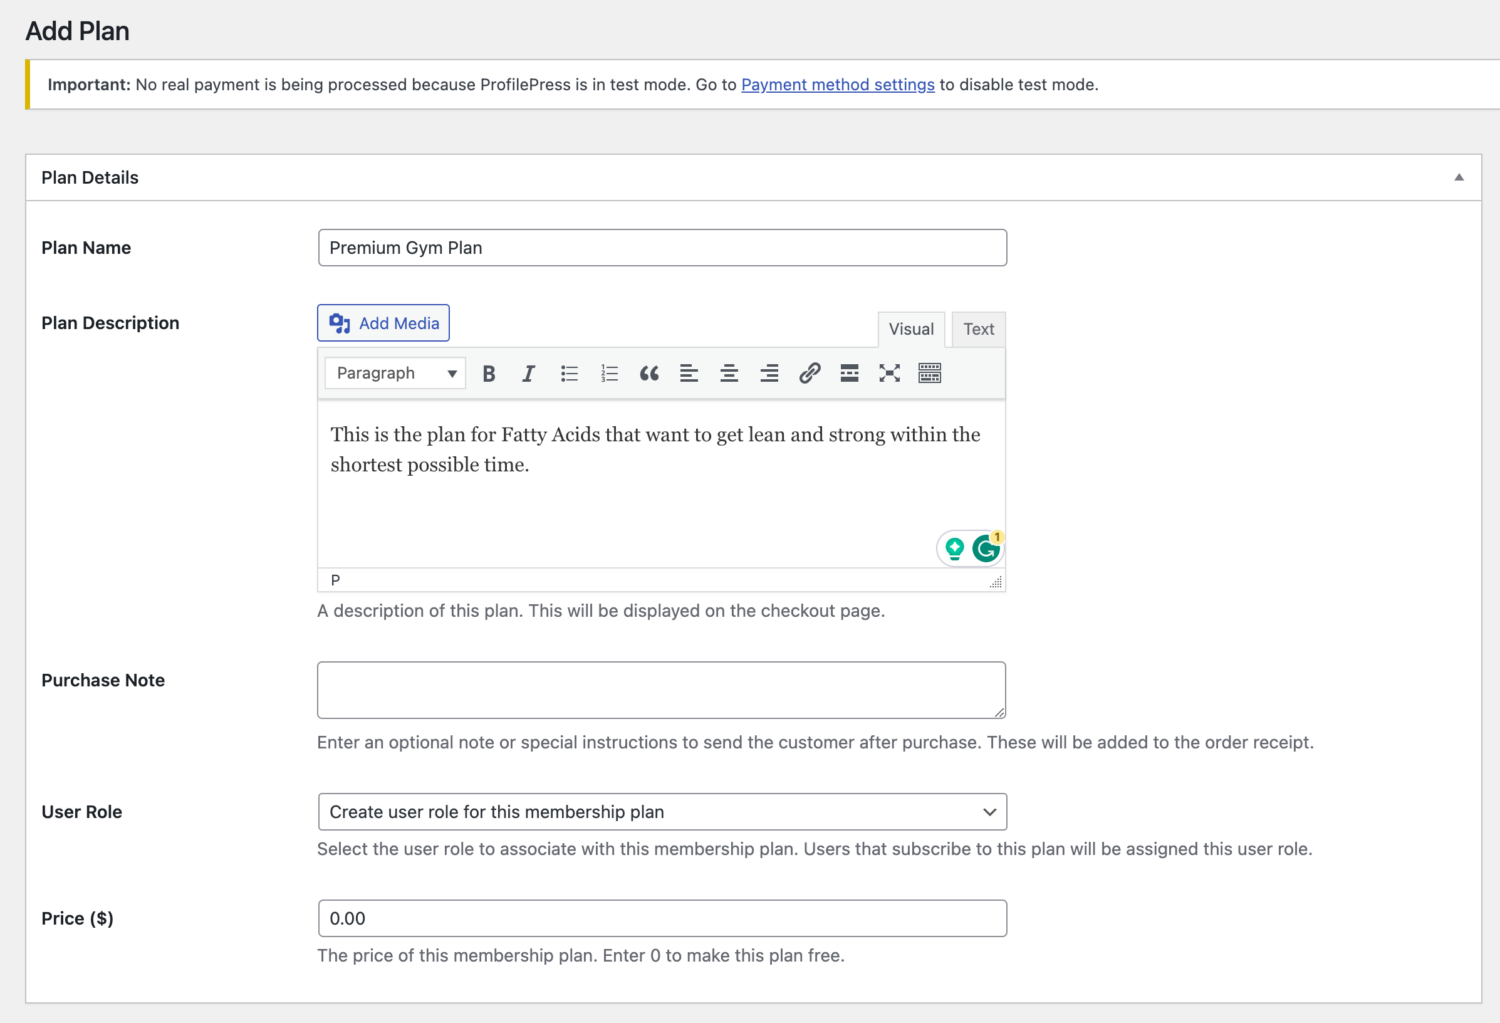
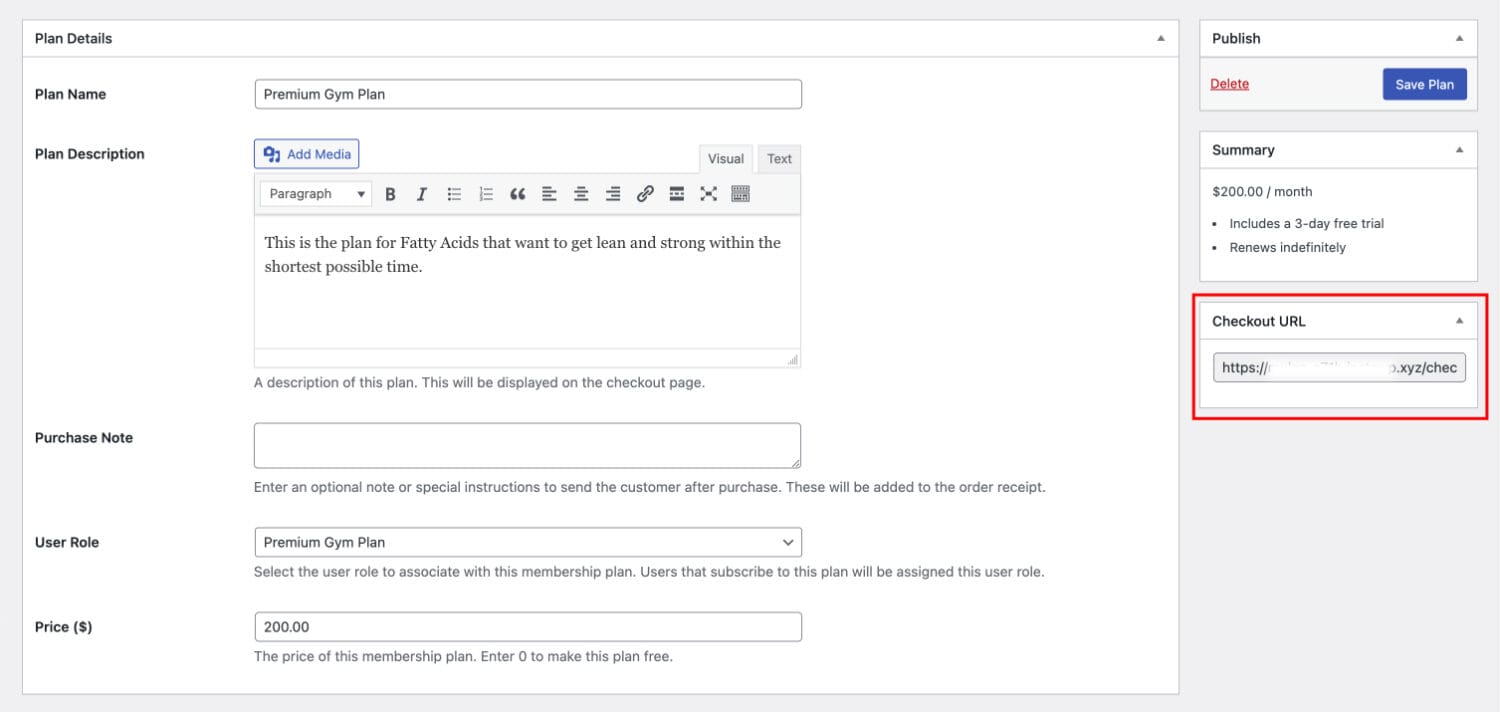
After configuring your preferred payment method(s), the next thing to do is to create membership plans. To do that, navigate to ProfilePress > Membership Plans > Add New Plan and give your membership plan a name, description, and price.
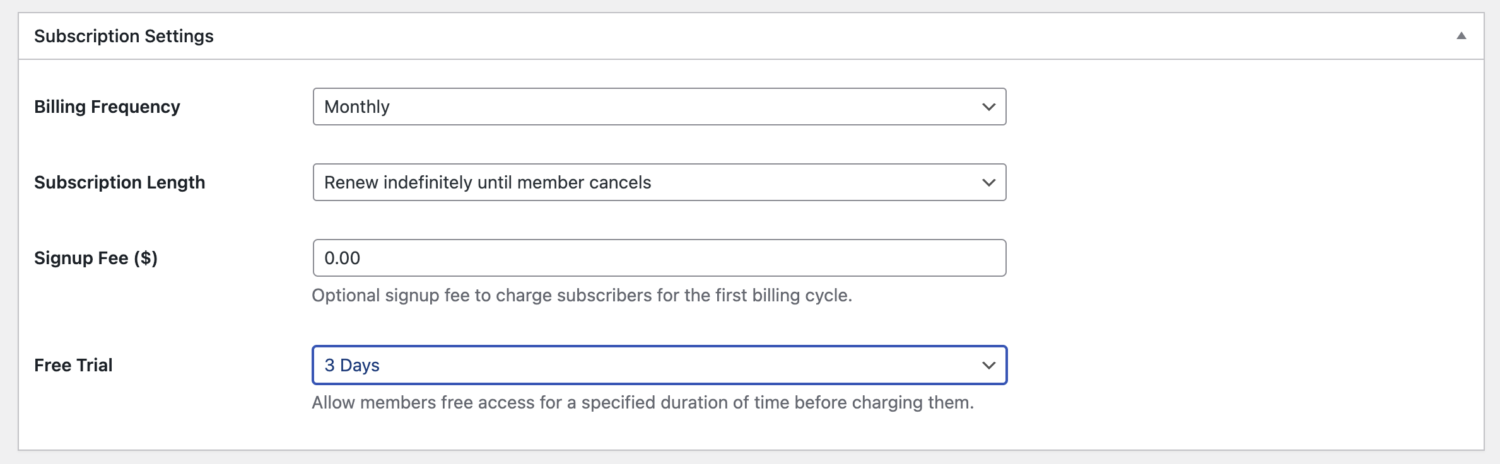
In the Subscription Settings box, set your membership plan’s duration and also choose the desired Free Trial duration.
Save your plan and copy your checkout URL.
You can add your URL to any button on your website, and when users click on it, they will see your trial subscription plan, as shown below.

Conclusion
ProfilePress is a powerful and easy-to-use WordPress membership plugin that allows you to create and manage free trial memberships and subscription plans. By following the steps outlined above, you can easily give potential customers a chance to experience the benefits of your membership site before they commit to subscribing to a membership site that offers exclusive content, discounts, and other benefits to them.
If you’re ready to get started, download ProfilePress today!