How to Allow WordPress Users to Upload Profile Pictures
Do you want users to upload their profile pictures or avatars on your WordPress site?
Allowing users to upload profile pictures or avatars to their profile on your website is an important functionality. Even if you’re not running a membership website but allow user registrations, you must ensure they can upload profile pictures.
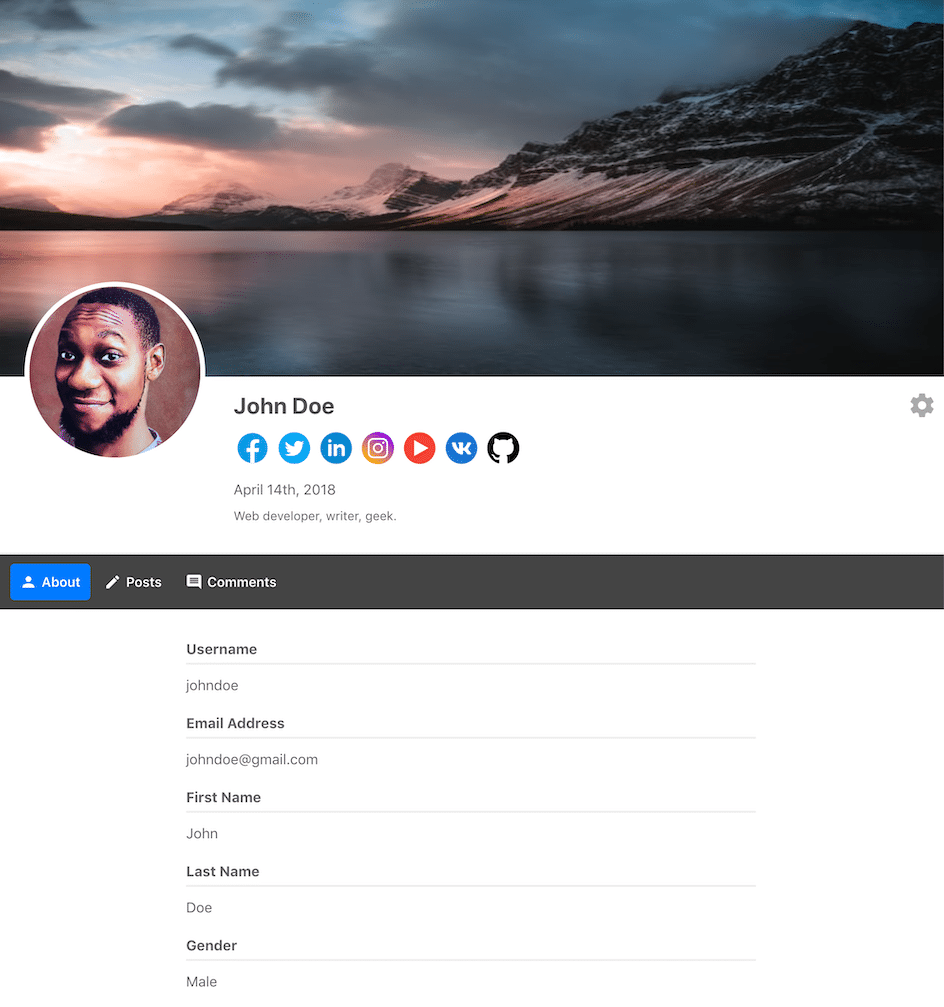
Don’t you love how the user below has a profile picture? Here’s how to create a frontend user profile page.
ProfilePress is a complete user management plugin that allows you to offer and customize almost every user-related functionality, including allowing users to upload a profile picture.
Let us explain in detail how to allow your users to upload a profile picture to their profile on your WordPress website.
Profile and Cover Image Settings
Before you jump into creating and customizing a functionality for your WordPress users to upload profile pictures and user avatars, you may want to check out the profile and cover image settings. Depending on your user preferences and other factors, you can customize these settings the way you want.
Click on the ProfilePress menu on your WordPress dashboard. Next, click on the Profile & Cover Photo tab.
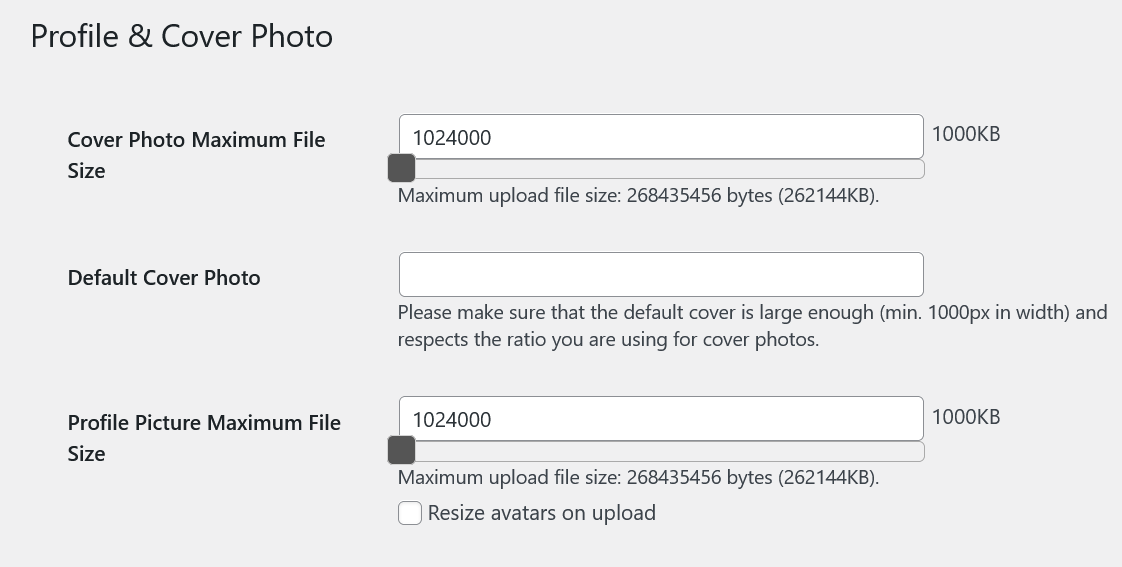
You can set the maximum file size, upload file size, and height and width for both the cover photo and profile picture. For changing the maximum file size, you need to put the maximum file size you want in the field. By default, the max file size is set to 1024000 KB, or 1 GB, for both the cover photo and profile picture.
However, this is different from the max upload file size, which you can choose by dragging the slider below the file size field. This should be the maximum upload file size allowed by your website’s hosting server.
If you want the profile pictures uploaded on your website to have a specific size dimension, click on the Resize avatars option in the upload checkbox.
This allows you to choose a specific width and height and crop the uploaded pictures to these exact dimensions if you want.
Now, as you scroll down the page, you will also find the settings to help you control the use of Gravatar profile pictures by your users.
![]()
You can choose to entirely disable the use of the Gravatar profile picture by ticking the checkbox you see at the top in the above image. The next set of options allows you to choose a generic profile picture for users who do not upload a profile picture themselves and do not have a Gravatar profile linked to the email they used to sign up on your website.
Once you’re done choosing your settings, click the Save Changes button at the bottom of the page.
How to Allow Users to Upload Profile Pictures & Avatars
ProfilePress has built-in functionality to let registered users on your WordPress website manage their profile, including the ability to upload a profile picture.
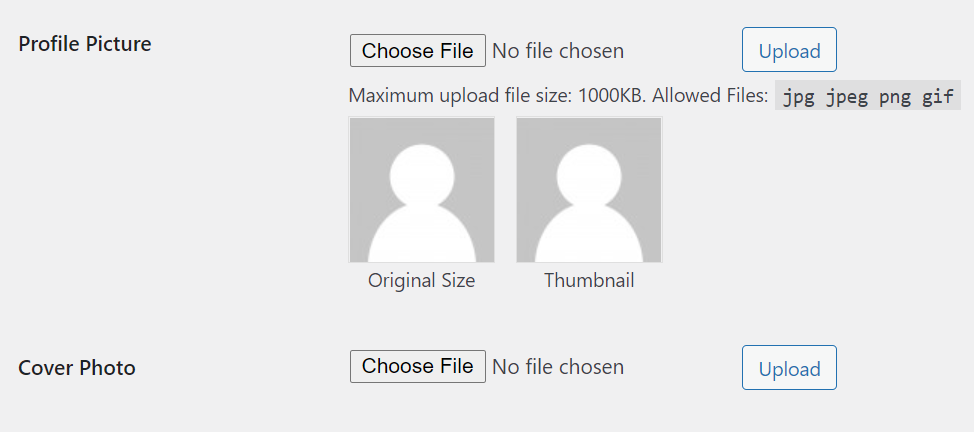
All they need to do is log in to the WordPress dashboard on your site using their login credentials, and they will be able to access all the customization options related to their profile on the default profile page.
They will also find the option to upload/update a profile and cover image as they scroll down the page.
Allowing Users to Upload a Profile Picture from the Frontend
While the ability to upload a profile picture using the backend works just fine and is very easy, as we explained above, you can also allow users to upload a profile picture from the frontend. This can not only be an essential functionality for WordPress websites where access to the WordPress dashboard of the website is completely blocked but also a good feature in general as it adds to the overall user experience for your users.
To enable this functionality, you need to create a post or a page with the profile picture uploader shortcode provided by ProfilePress. The shortcodes are on the same settings page for the profile and cover picture pages discussed above.
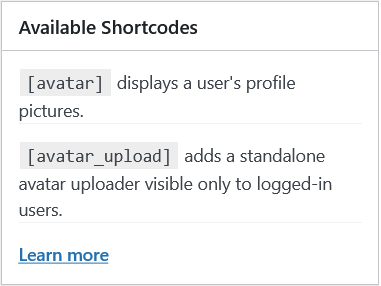
The [avatar_upload] shortcode would allow you to create the functionality for your users to upload their profile picture right from the frontend of your website. You can create a new page with this shortcode, and your users will be able to upload their profile pictures from that page.
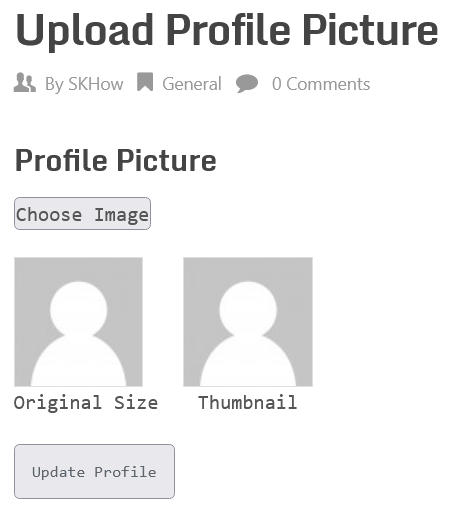
The users need to click on the Choose Image button, select an image saved on their computer, and then click the Update Profile button.
In addition to creating a new post or page, you can add the functionality to upload a profile picture on your sidebar.
You need to create a widget with the same shortcode we used above and add it as a sidebar. Let us break this down in a few easy steps below.
- Click on the Widgets option under the Appearance menu
- Click on the “+” icon under the Sidebar section to create a new sidebar element
- Scroll down until you find the Shortcode option under Widgets
- Paste the [avatar_upload] shortcode
- Click on the Update button at the top
When you finish performing the steps listed above, you will see the option to update a profile picture in the sidebar of your website, just like what you see below.
Displaying User Profile Pictures
ProfilePress also lets you display user profile pictures in simple steps. As you can see in the image we posted above, you need to use the other avatar shortcode to create this functionality on your WordPress website.
Just like the ability to upload a profile picture, you can also create the ability to display user profile pictures anywhere on your website, be it a post, page, sidebar, widget, or any other area of your website.
You need to copy the shortcode and paste it where you want to display the user profile pictures. We just did this in a post, and here’s what we got.
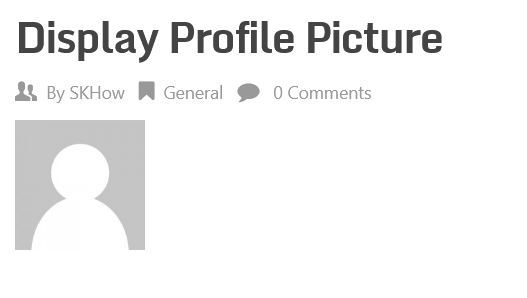
When a user doesn’t have a profile picture uploaded, you will see a generic logo like the one you see above in our case.
Summary
Allowing users to upload their user avatars or profile pictures and even a cover photo is surprisingly easy with the ProfilePress membership plugin for WordPress. In addition, you can also just as quickly display the user profile pictures.
You can add these functionalities anywhere you want on your website. Furthermore, you also have complete control over all the settings and can use a lot of customizations.
ProfilePress also offers a lot more in terms of user management, and you should check out all the features it provides.
To recap, here’s how you can let users upload their profile pictures or user avatars in WordPress
- Install and activate the ProfilePress WordPress user avatar plugin
- Go through the profile picture settings
- Add the avatar and profile picture and upload shortcodes to a page
- Test that everything is working as it should.
Do you have any questions about how to create a subscription website using WordPress? Let’s talk about them in the comments section below!
.