How to Create a Custom WordPress Login Page
Want to create a custom WordPress login page for your website? We’ve got you covered.
By creating a custom login page for your WordPress website, you cannot only add a touch of professionalism to your website but also improve its security. Custom login pages can help protect your website from brute-force attacks and unauthorized access attempts.
The login page can be customized to provide additional features, such as social login and password reset forms in WordPress.
In this tutorial, you will learn how to create a custom WordPress login page using our powerful ProfilePress plugin.
ProfilePress is one of the best WordPress login plugins and a perfect alternative to LoginPress and other WordPress login customizer plugins that only customize the default WordPress login screen, not for creating a custom WordPress login page.
Creating a Custom Login Page in WordPress
To create a custom WordPress login page for your website using the ProfilePress plugin, we first need to create the registration form and then create a WordPress page and embed the registration form in it.
Building the WordPress Login Form
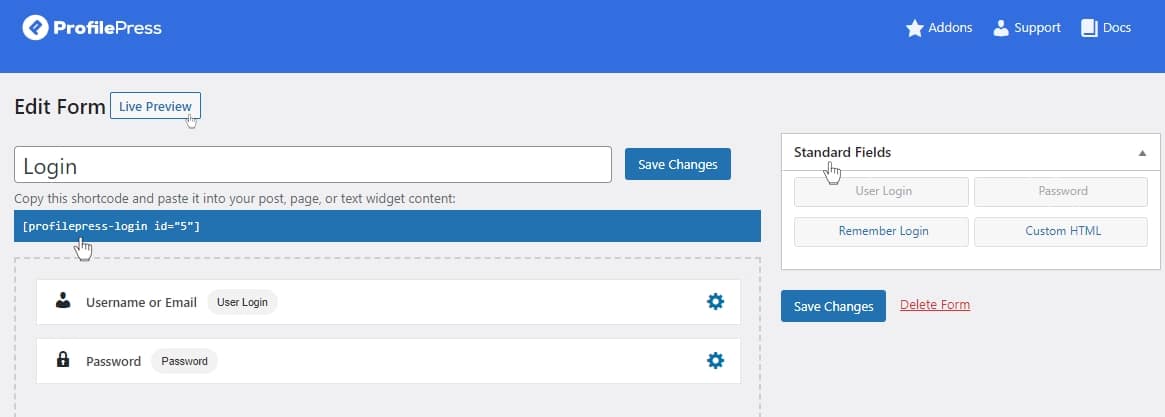
Navigate to ProfilePress > Forms & Profiles in your WordPress dashboard and click the Add New button.
You can choose between the Drag & Drop and the Advanced Shortcode Builder. For this guide, we’ll use the Drag & Drop Builder.
Next, give your login form a name and select a template.
At the top, you’ll see the WordPress login form shortcode and a live preview button, which allows you to preview any changes you make.
To customize the WordPress login form, drag and drop fields from the Standard Fields section on the right sidebar. For instance, move the Remember Login field under the Password field in the form builder area.
To delete any unwanted fields from the form builder, hover over a field and click the Bin icon.
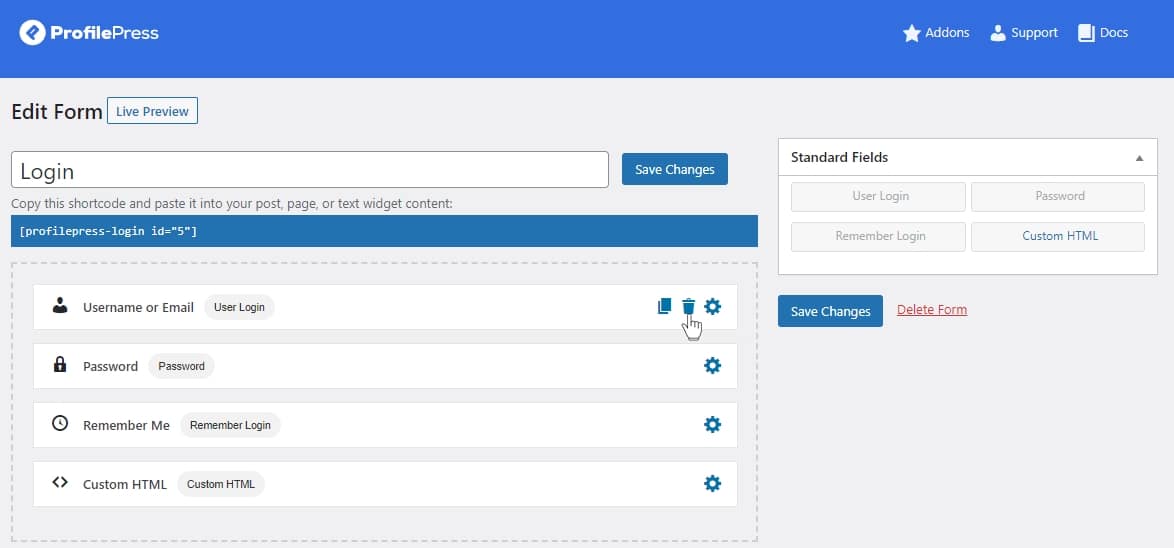
To adjust the settings for any form field, click the Gear icon. A popup will appear with the available settings for that field.
When you’re done customizing your login form, click on Save Changes.
You can also decide to use the Advanced Shortcode Builder.

After saving the WordPress login form, copy the shortcode for the newly created form.
Creating the WordPress Login Page
To create a WordPress login page, navigate to Pages > Add New in your WordPress dashboard.
Give the page a title, and embed the form shortcode you copied earlier in the page content.
Then, save the page to complete the process. Your website now has a custom WordPress login URL.
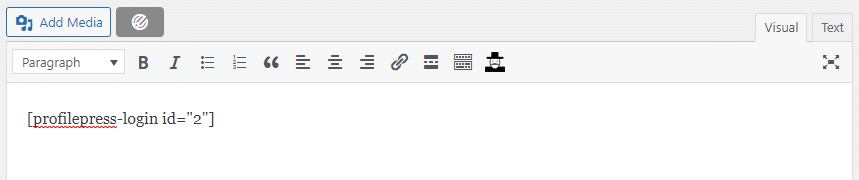
NB: If you are using Gutenberg Block Editor, you need to add the Shortcode block and then paste the shortcode into the field

The ease of creating a custom login page is why ProfilePress is considered the best WordPress login plugin.
Setting The Custom WordPress Login Page as the Default
Once you’ve created the page, you’ll need to set it as the default login page in the global settings, ensuring that users are redirected to it when they visit the default WordPress login page at wp-login.php
To do this, go to ProfilePress and click on Settings.
Then, select the Global Settings tab. Scroll down to the login page section, and choose the newly created custom login page.

Finally, click on Save Changes to apply the settings.
Conclusion
Creating a custom WordPress login page for your website enhances its professional appearance and bolsters security against unauthorized access.
ProfilePress is the perfect alternative to WordPress login plugins such as LoginPress, Theme My Login, and Login Customizer.
We hope this article has helped you create a custom login page for your WordPress site.