Access LifterLMS Courses & Memberships After Payment & Registration
Do you want to learn how to access LifterLMS courses and memberships after payment and registration?
The LifterLMS addon integrates LifterLMS with ProfilePress, making monetizing your courses and memberships easy. With this addon, you can charge for access to your LifterLMS courses and memberships, automatically enroll users into specific courses upon registration, and even allow them to view their enrolled courses directly from their My Account page.
In this guide, we’ll walk you through activating and setting up the LifterLMS addon. We’ll also show you how to sell course and membership access, enroll users through the registration form, and configure your LifterLMS courses and memberships.
Activating the Addon
To get started, ensure you have installed and activated the ProfilePress plugin on your WordPress site.
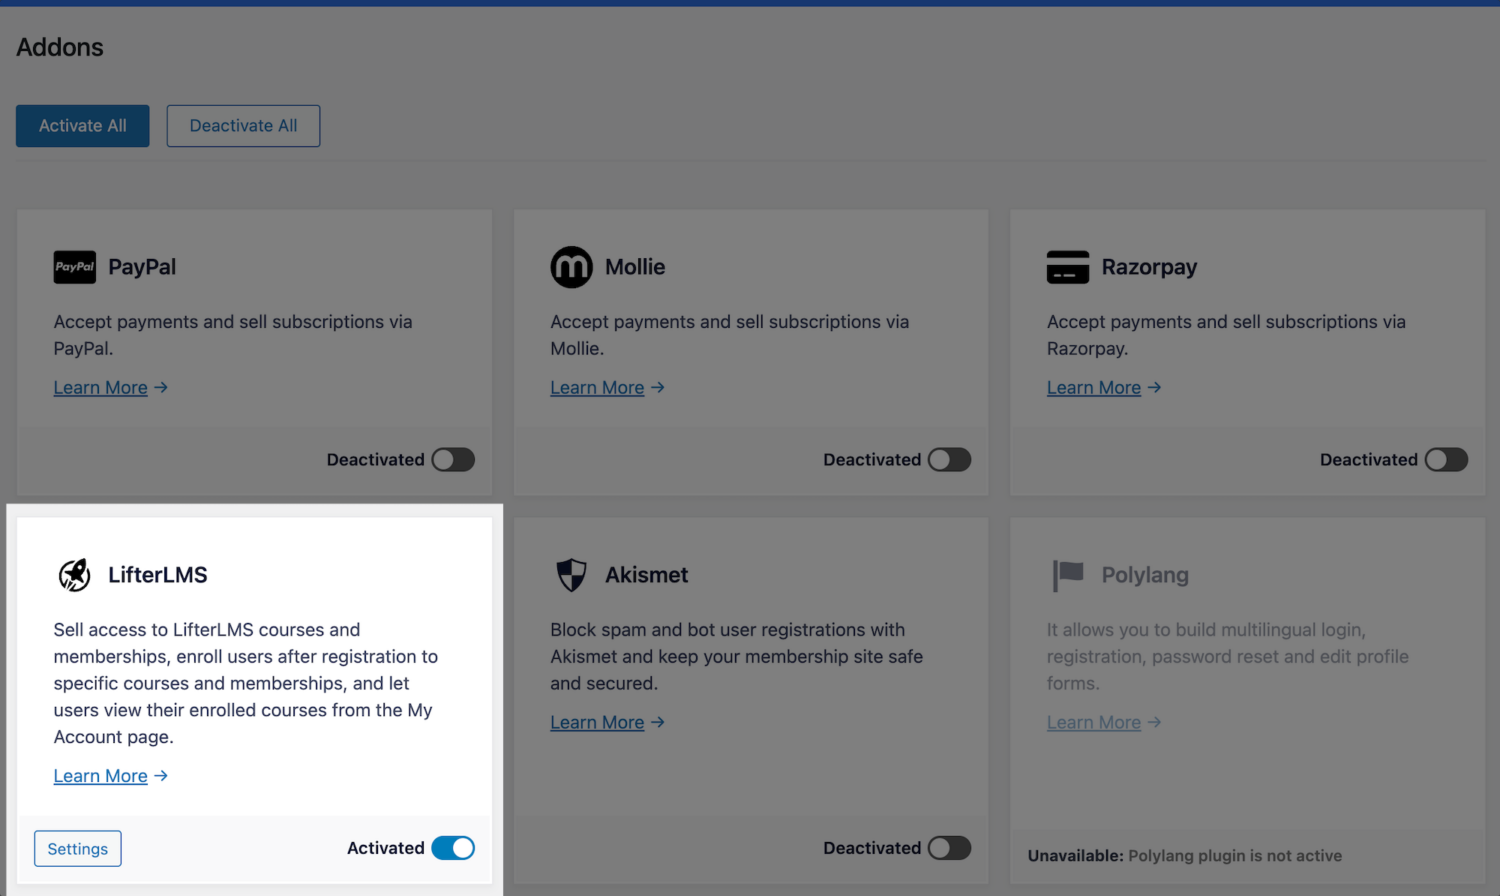
Next, in your WordPress dashboard, go to ProfilePress > Addons. This page contains a list of available ProfilePress addons. Locate the LifterLMS Addon and activate it.
LifterLMS Addon Settings
After activating the addon, you can find its settings by navigating to ProfilePress >> Settings >> LifterLMS.
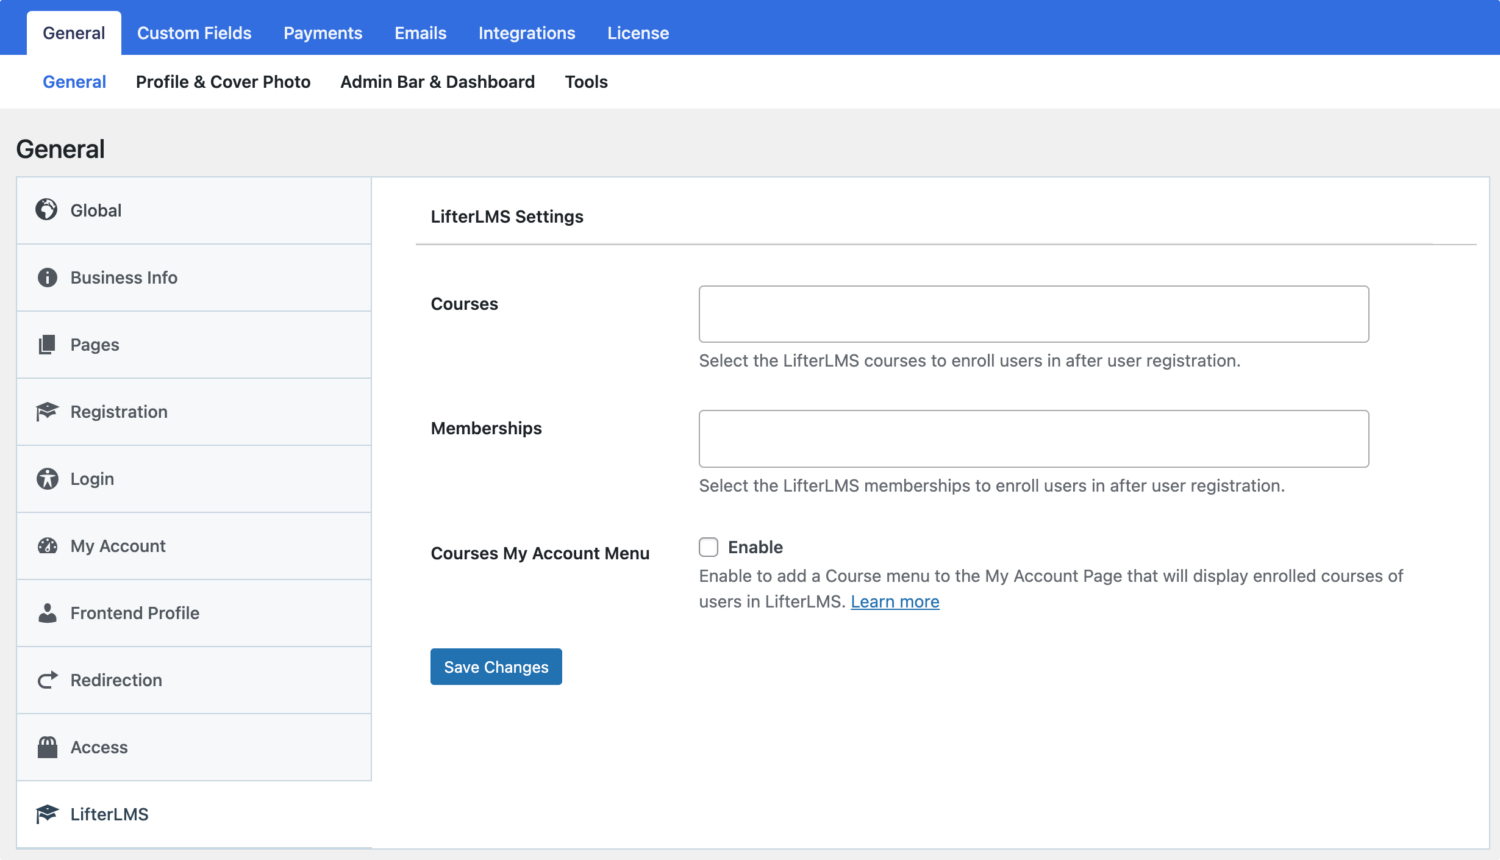
To enroll users to specific courses and/or memberships in LifterLMS after registration, regardless of the custom registration form they registered through, use the Courses and LifterLMS settings.
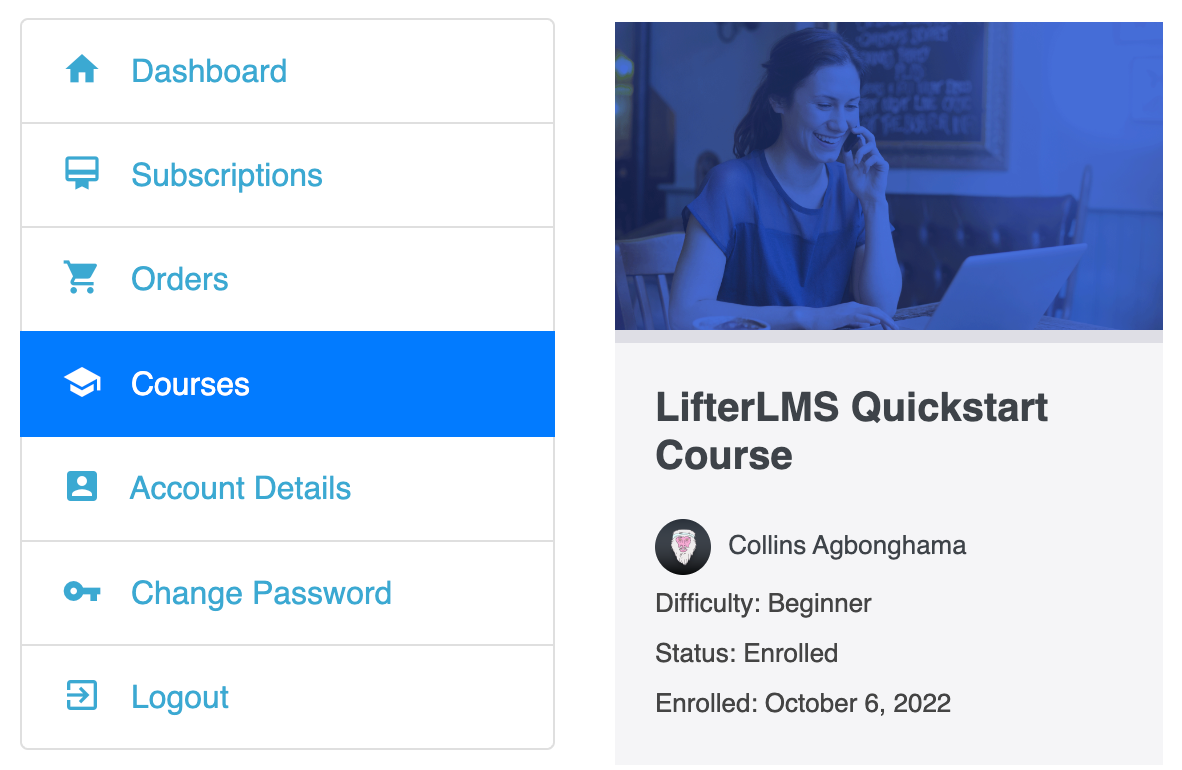
If you want to add a menu to the My Account page that displays users’ enrolled courses, enable the “Courses My Account Menu” setting.
Selling LifterLMS Courses and Memberships Access
The LifterLMS addon lets you sell your courses and membership access in LifterLMS. It works by associating one or multiple courses and memberships with a ProfilePress membership plan.
You can package two or more related courses into a bundle, price it lower than the cost individually, and watch your sales grow.
If the membership plan is a subscription that charges a recurring fee, access is revoked if the subscription is refunded, expired, or canceled.
Follow the instructions below to sell LifterLMS courses and Membership access with ProfilePress.
Go to ProfilePress >> Membership Plans to create a new membership plan or open up the edit screen of an existing plan that you want to use to sell your course.
Give the plan a name, description, and price.
ProfilePress has a built-in field called “Purchase Note” shown to the customer after a successful purchase on the order confirmation page and in the customer’s receipt email. Consider using this field to provide instructions or the next steps for taking your course, along with a link to the course page.
This field accepts HTML. Here’s an example of creating a link to your course. Replace the URL with the URL to your specific course.
<a href="https://yoursite.com/course/build-websites-wordpress/">Start this Course</a>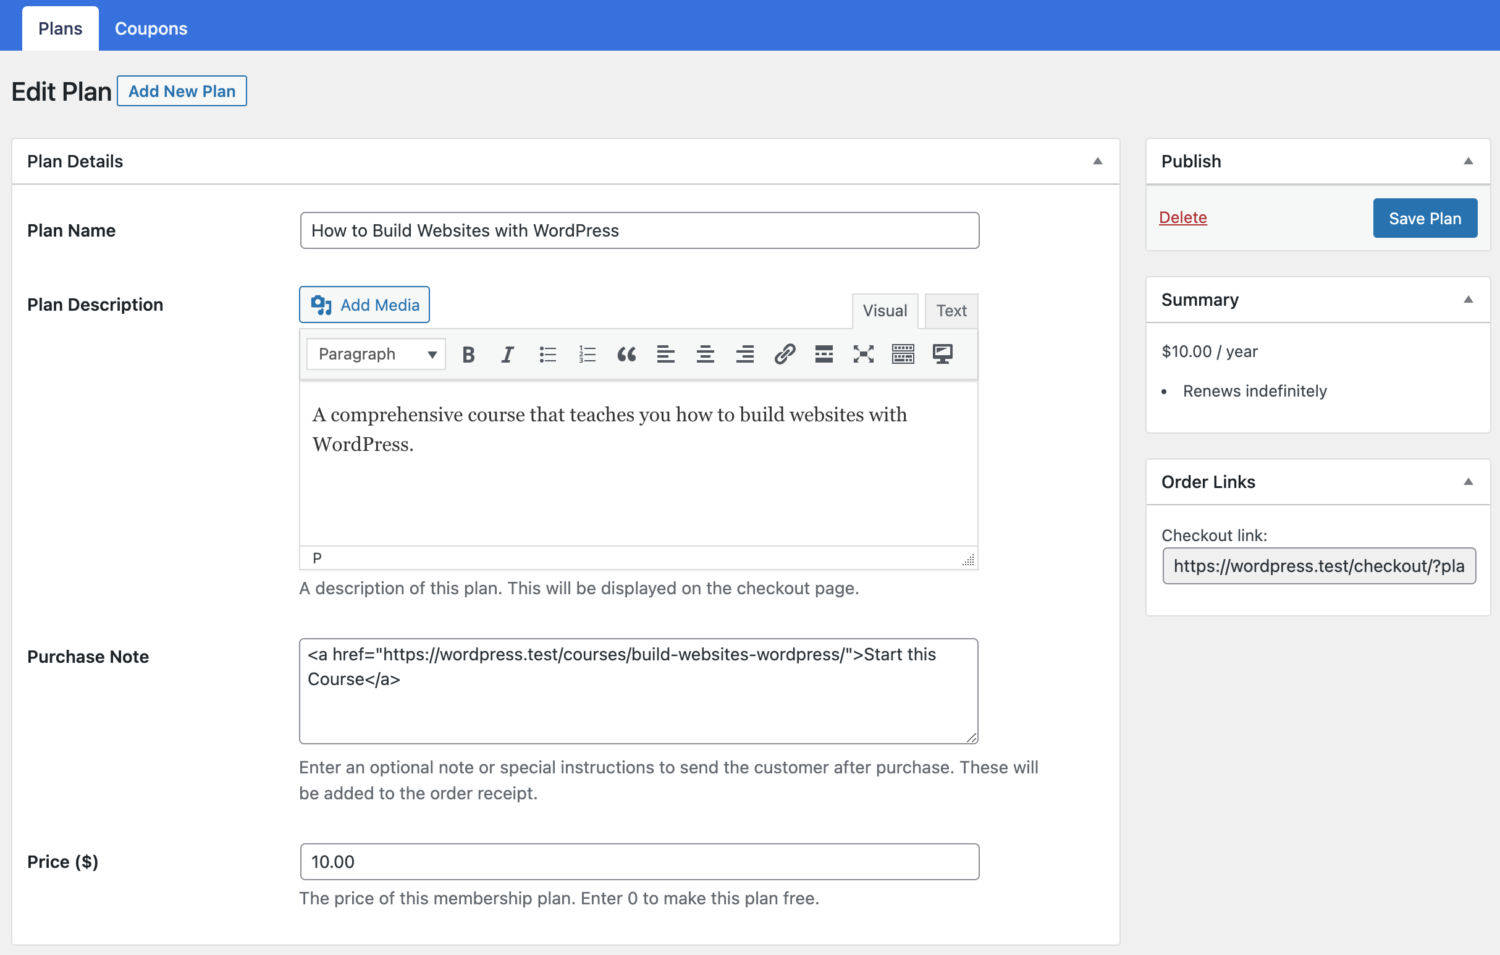
Use the Subscription Settings section to set the plan or course fee as a recurring payment that can be charged daily, weekly, monthly, quarterly, every 6 months, or yearly.
Finally, on the Downloads & Integrations section, select the LifterLMS courses and memberships to grant users access after purchasing the membership plan.
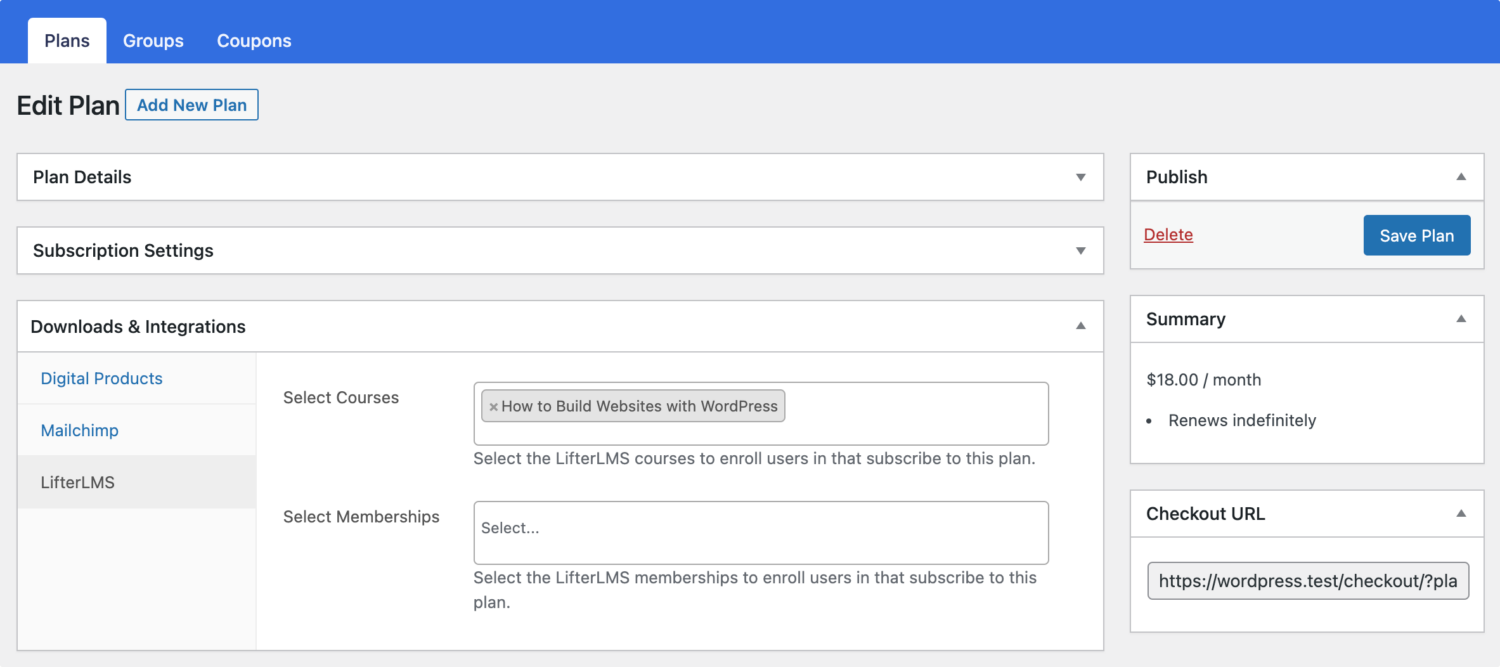
Don’t forget to save your changes.
Take note of the Checkout URL on the right side. You can include it on a pricing page on your website, send it to your prospective customer, or make it your course purchase button URL, as described below.
Enrollment Based on the Registration Form
The LifterLMS addon also integrates with our custom WordPress registration forms to enroll users in specific courses and memberships based on the registration form they signed up through.
To do this, go to Forms & Profiles in ProfilePress and create registration forms for each course or membership plan. For example, you might create one form for a beginner-level course and another for an advanced membership.
When setting up each registration form, go to the Form Settings and click on LifterLMS. Here, you can select which courses and memberships should be linked to that form. This way, users who register through a particular form will be automatically enrolled in the associated courses and/or memberships.
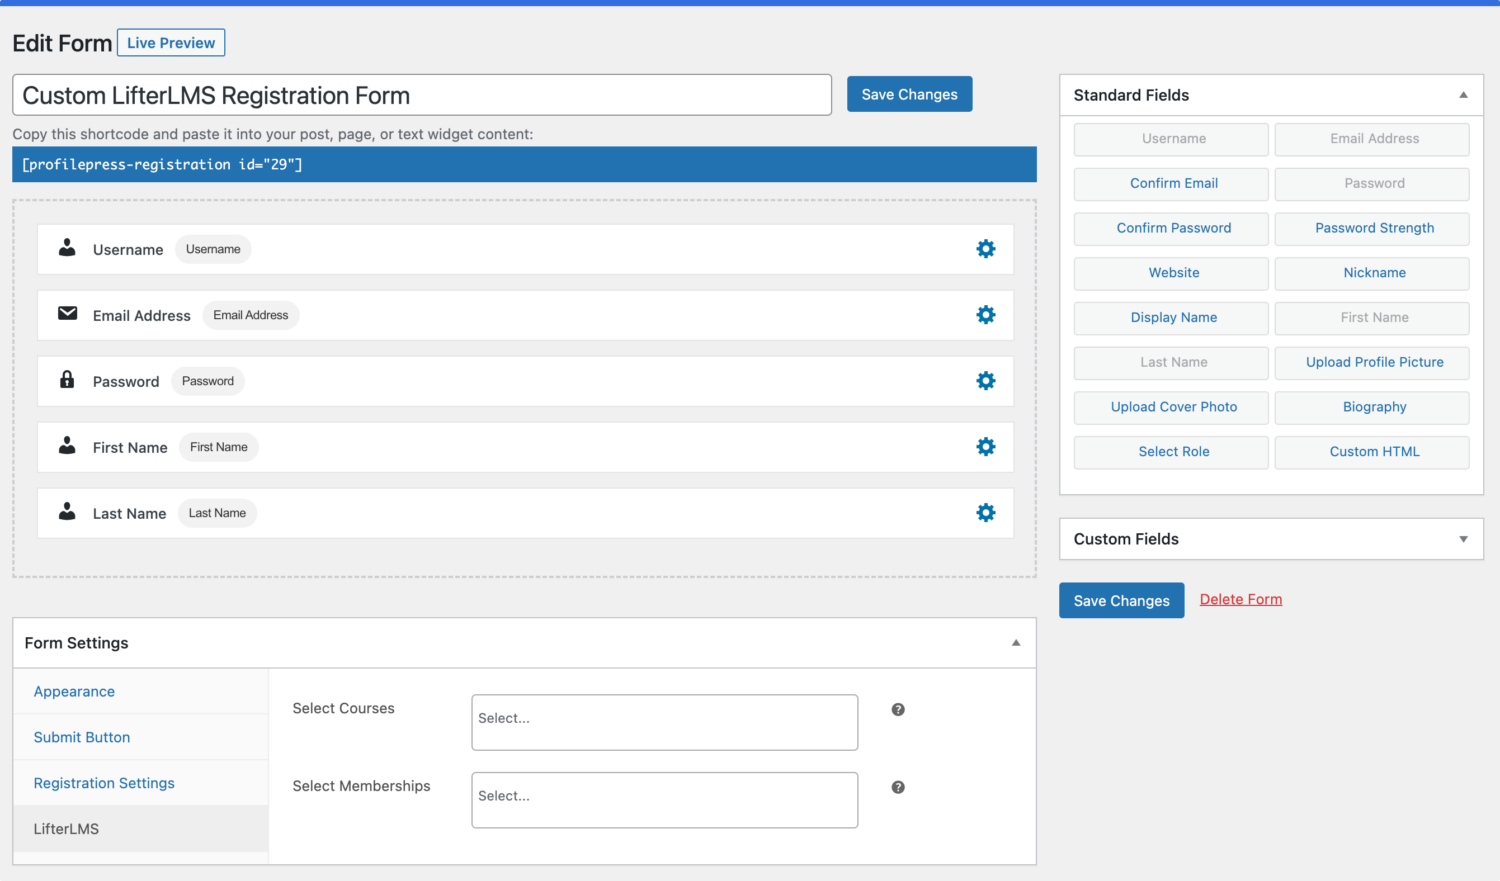
Linking specific courses and memberships to different registration forms ensures that users are automatically enrolled in the correct course without any manual intervention., saving time and creating a seamless experience for students, allowing them to access their selected courses immediately after registration.
LifterLMS Courses and Memberships Setup
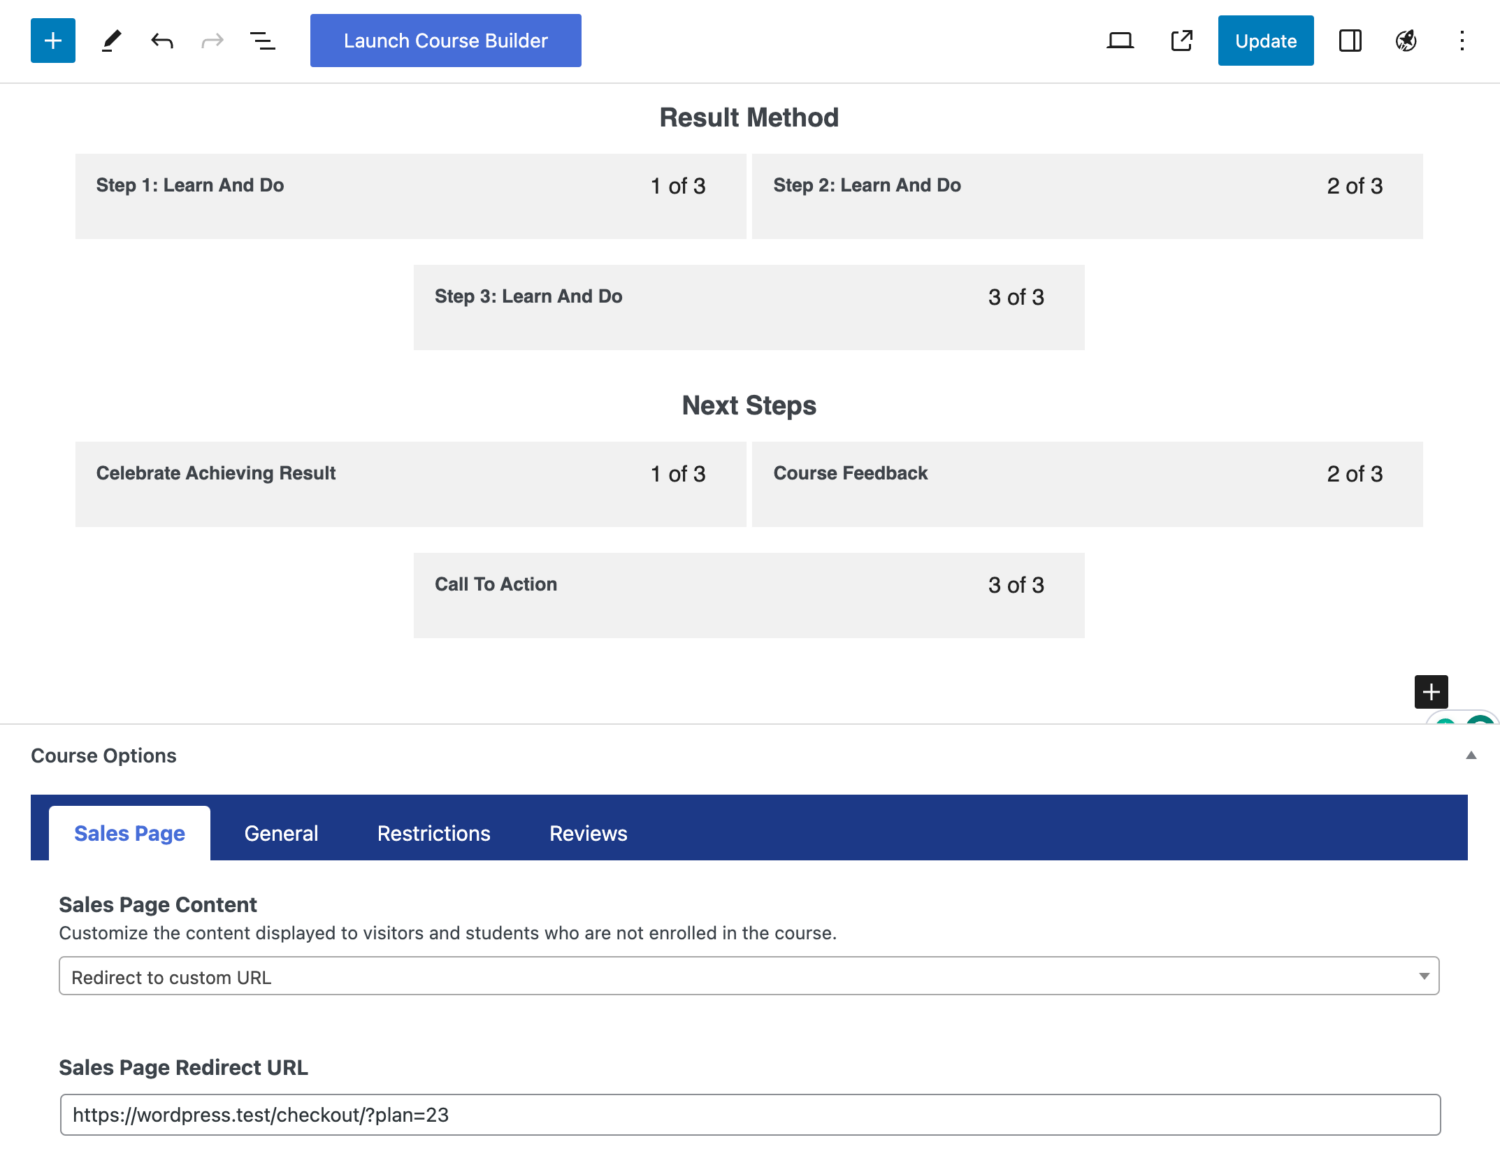
After you’ve associated your courses and memberships to a ProfilePress membership plan or registration form in ProfilePress, you’ll need to make a few adjustments to the courses and memberships in LifterLMS so that your users are redirected to the checkout URL of the ProfilePress membership plan that will grant access to the courses and memberships after payments.
Click the Courses menu, open the edit screen, and set the checkout URL of the ProfilePress membership plan as the Sales Page URL.
For Memberships, click the Memberships menu, open the edit screen, and set the checkout URL of the ProfilePress membership plan as the Sales Page URL. 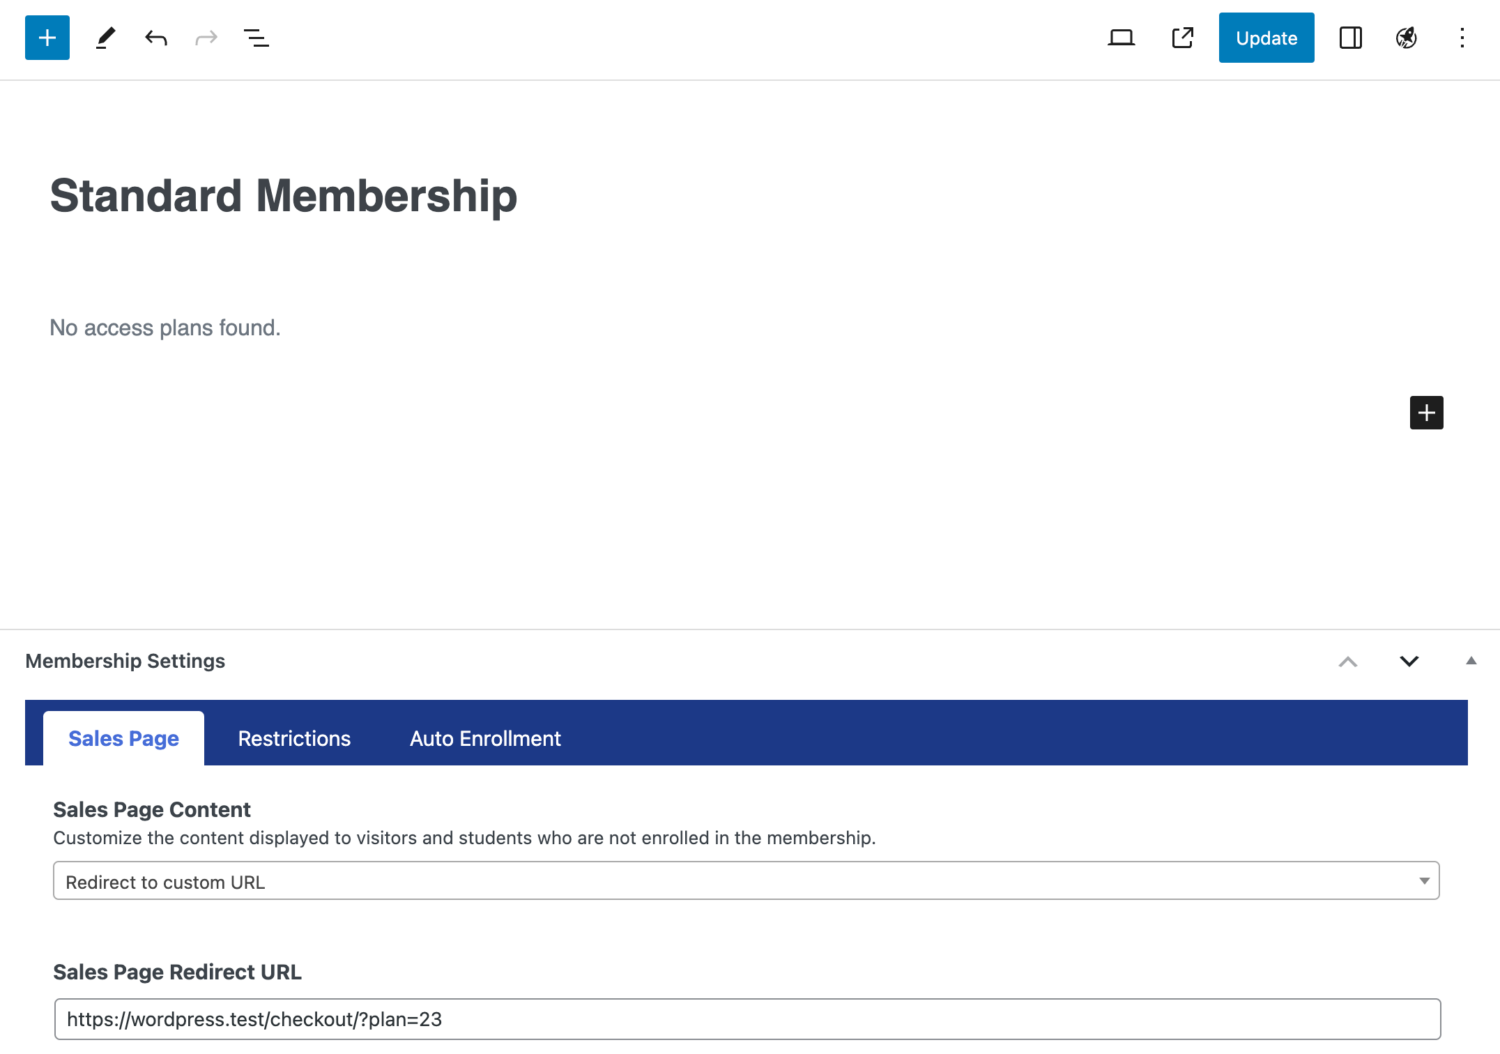
After your users subscribe to the ProfilePress membership plan, they will automatically be enrolled in the specified courses and memberships in LifterLMS.
Integrating LifterLMS with ProfilePress empowers you to effortlessly manage course and membership access while providing a seamless experience for your users.
Following the steps outlined in this guide, you can efficiently set up and sell your courses, ensuring that users are automatically enrolled after payment and user registration using the ProfilePress LifterLMS addon.