How to Create a Private WooCommerce Store – Complete Guide
Do you want to create a private WooCommerce store?
WooCommerce is one of the most popular eCommerce platforms out there, powering over 3.5 million online stores. WooCommerce’s popularity is due to its ease of use and highly customizable, thanks to the hundreds of available WooCommerce plugins and extensions.
Creating a private store in WooCommerce is an excellent idea for several reasons. It could be for a members-only site, a niche service business, or a need-to-know online store.
The functionality of creating a private WooCommerce store does not ship out of the box with WooCommerce. To achieve this, you must use a WordPress plugin that provides a private store capability.
ProfilePress is a powerful private WooCommerce store plugin that allows you to control access to your content, including restricting access to your WooCommerce store and making it private.
Without much ado, let’s get into the process of creating a private WooCommerce store.
Creating a Private WooCommerce Store with ProfilePress
Profilepress provides a couple of ways by which you can restrict access to your website. You can make the entire WooCommerce site private, make only the store products private, or restrict certain products by categories or tags.
In this guide, we will cover all of these use cases so that you will have multiple options for making your WooCommerce store private and choose the best one for your business.
But first, we need to install and set up the ProfilePress Plugin.
Install and Activate ProfilePress
The first thing to do is install and activate the ProfilePress plugin. You must purchase a ProfilePress Pro License and install the ProfilePress plugin.
After getting your copy of ProfilePress, you will receive a confirmation email with a link to download the plugin zip file and your license key.
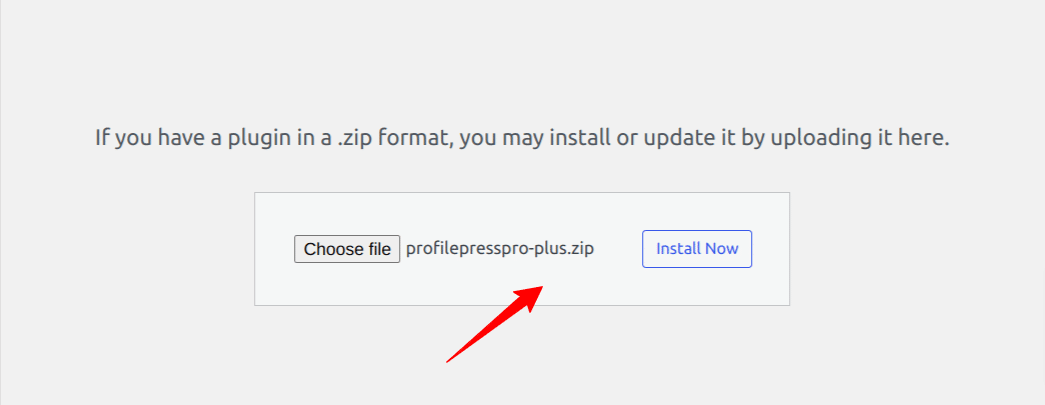
Once you have downloaded the plugin, login to your WordPress admin dashboard, and navigate to the Plugins page; click on the “Add New” button and click “Upload Plugin“.
Next, click “Choose file” to select the previously downloaded plugin zip file. Click “Install Now.”
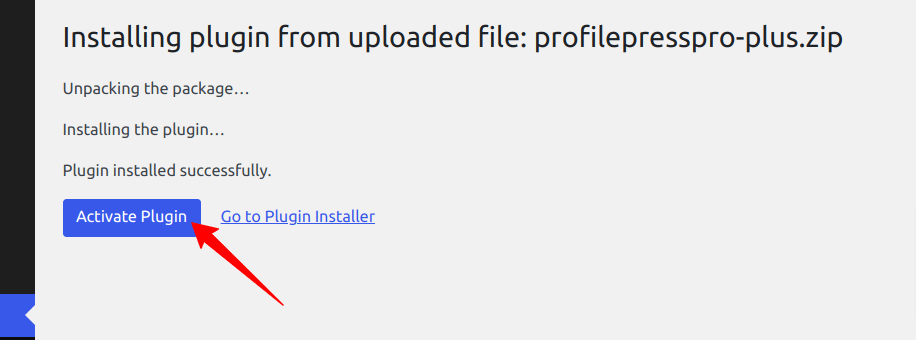
After installation is complete, click the Activate Plugin button.
How to make the Entire WooCommerce Store Private
In this section, we will restrict our entire WooCommerce store so that only logged-in WordPress users can access the site. If a user who isn’t logged in to your WooCommerce website tries to access it, they will be redirected to your WooCommerce login page, a custom page, or you can display a message to the visitor.
From your WordPress admin dashboard, go to ProfilePress >> Settings>> Access and select the Accessible to logged-in users option.
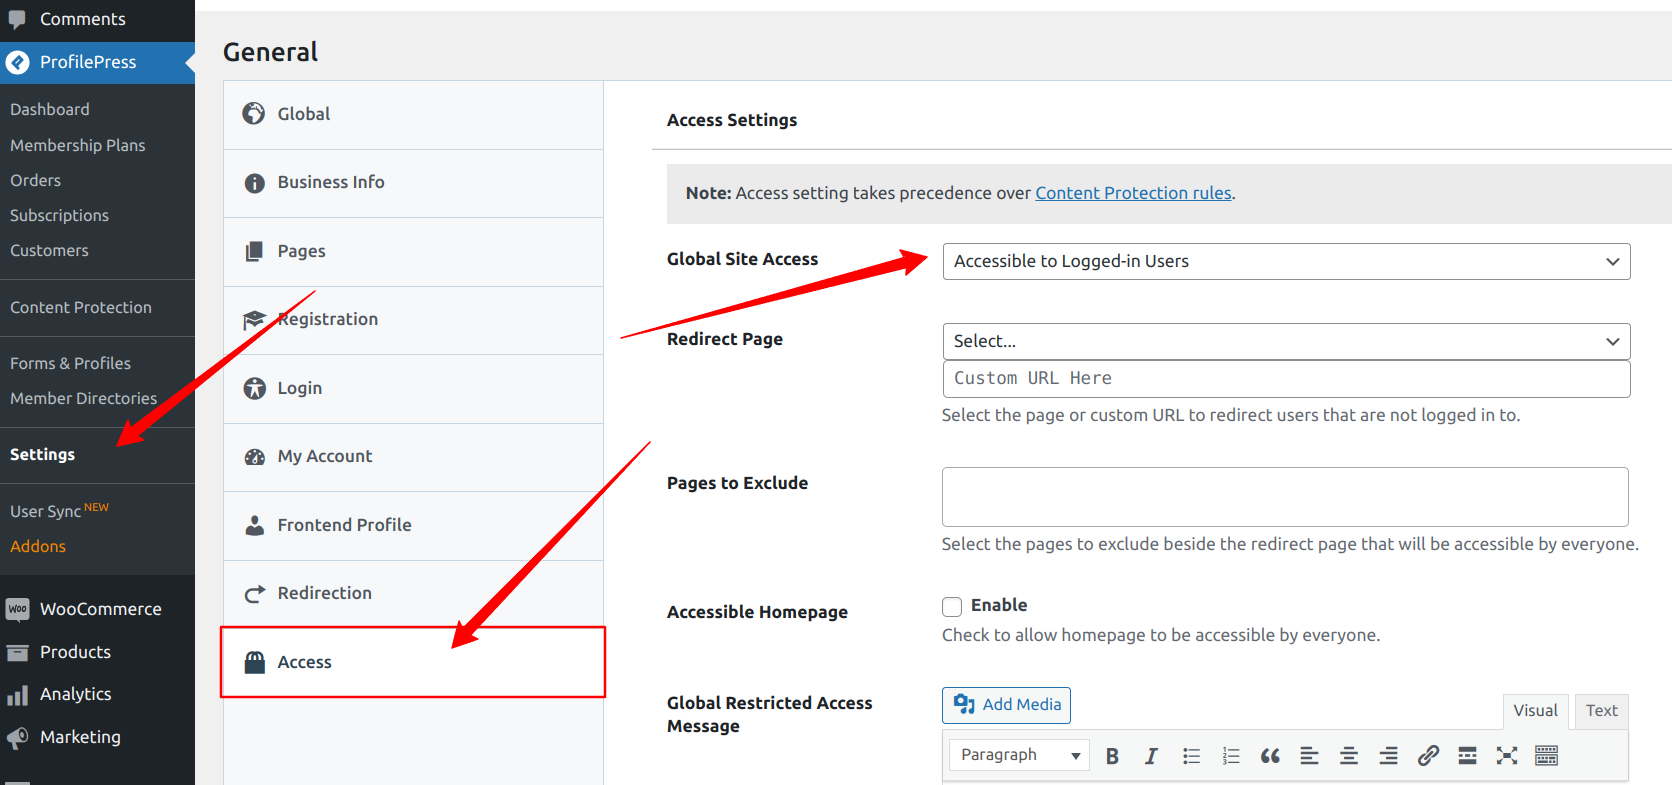
Next, you need to specify where to redirect visitors who try to access your website. You can redirect them to a login page or a custom page on your WooCommerce site, select a page from the drop-down, or provide a custom URL to redirect users who are not logged in.

If you would like to make the homepage of your WooCommerce store accessible to everyone and use it as a landing page, ProfilePress allows you to do just that. To activate, tick the checkbox as shown below.

If you log out or use another browser to access your store, you will be redirected to your WooCommerce login page.

How to Make All WooCommerce Products Private
In the previous section, we restricted access to the entire WooCommerce store, but in this section, we will restrict access only to WooCommerce product pages on your private store website.
To do this, navigate to ProfilePres >> Content Protection and add a new protection rule.
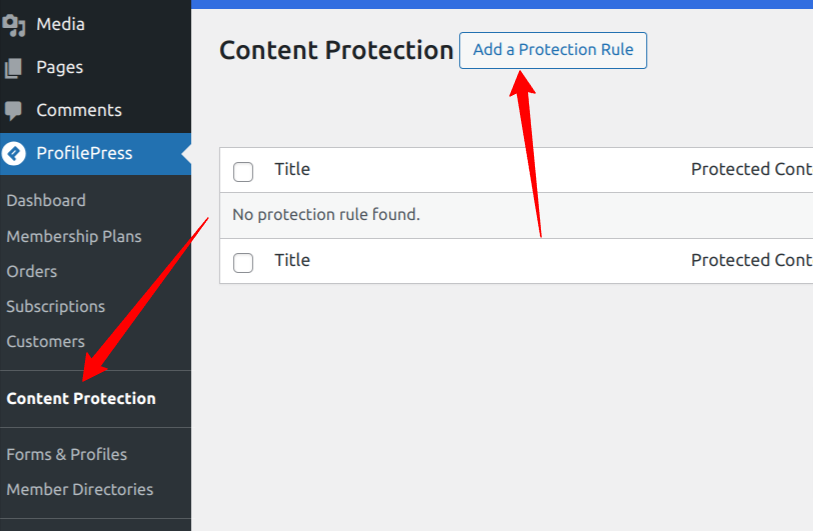
You will be taken to the content protection rules page, where you can add the protection rules for your WooCommerce store.
Provide a name for this rule, and in the “Content to protect” section, click the dropdown menu and select All Products.
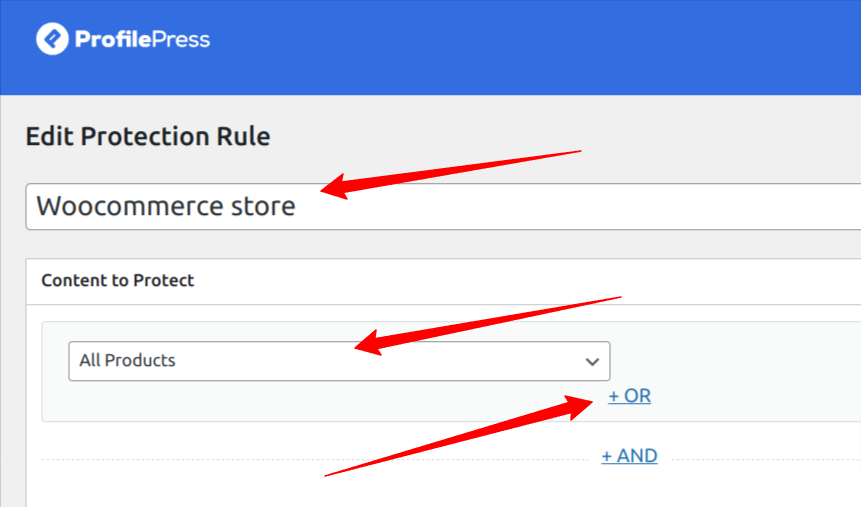
Click the “OR” option to include other WooCommerce product pages and hide them. A new dropdown will pop up. Click it and select all product archive pages.
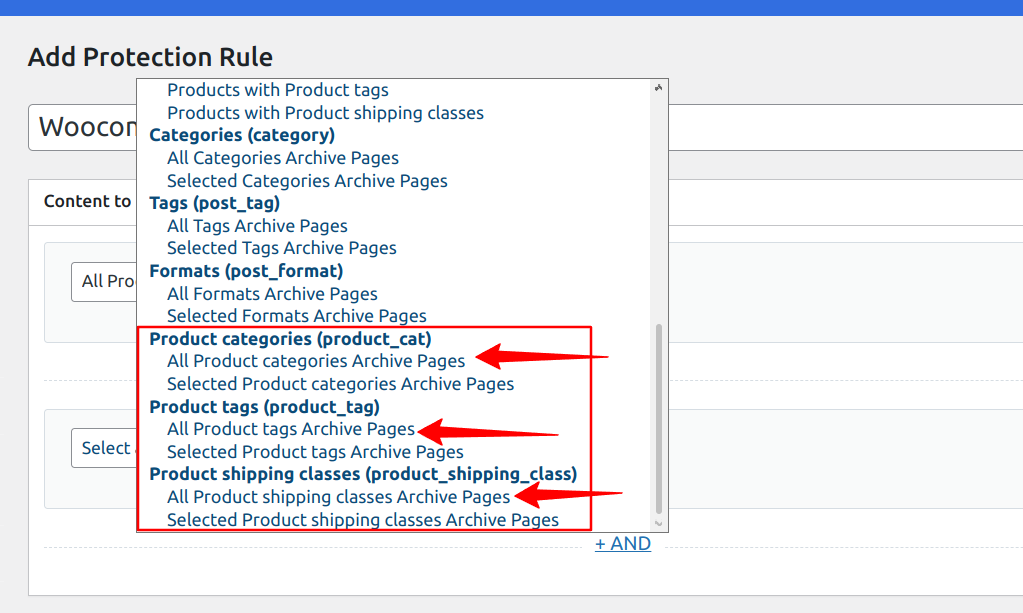
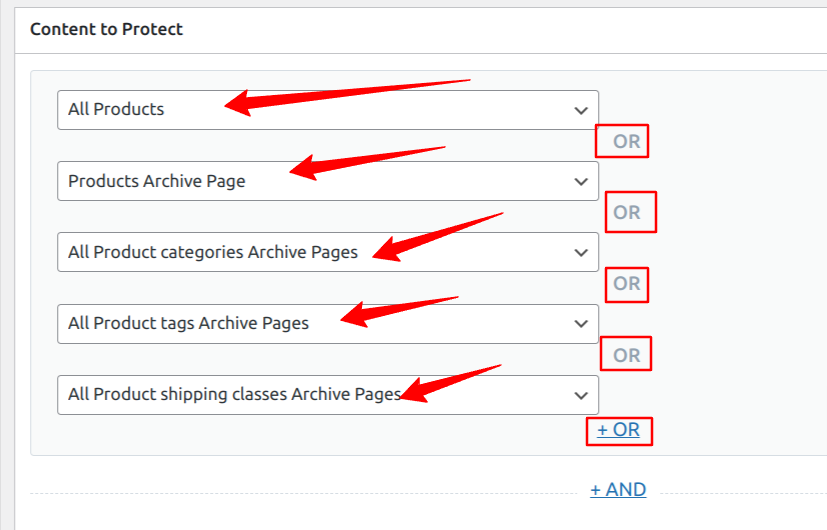
As you can see, there are three options above, meaning you will click the “OR” option thrice and select each archive page under each dropdown. So, you will eventually have something like the image below.
Next, scroll down to the “Access Condition” Section on this page. This section is where we will specify who can access our WooCommerce store and products.
From the dropdown, select “Logged in users”, and some new options will pop up. You will need to choose the roles or membership plans that will have access to your WooCommerce store.
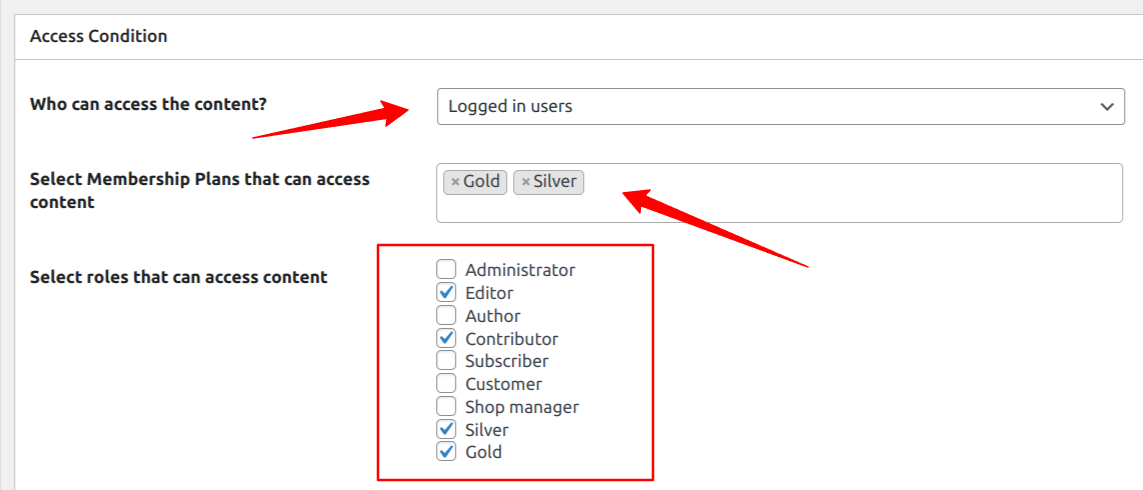
The Access condition section has pretty simple settings. You should click on the various dropdown fields to choose the best options. For this guide, we will redirect users without access to the login page when they try to access our WooCommerce product pages.
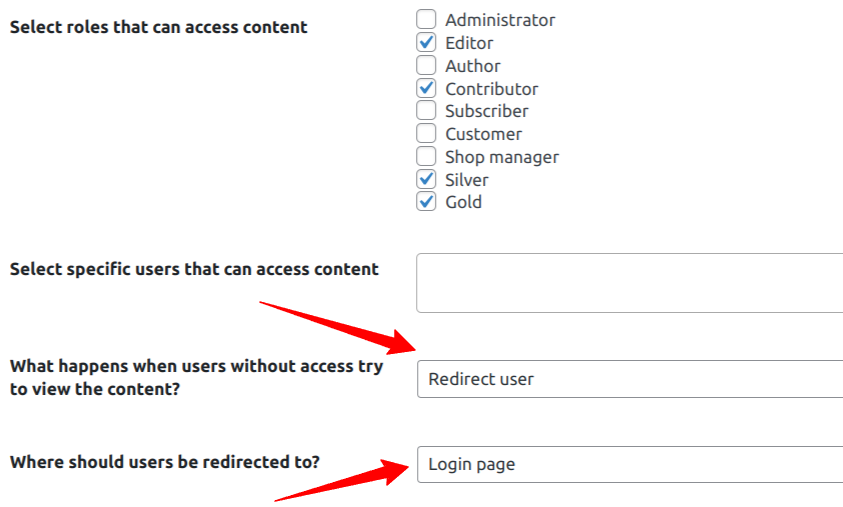
If you log out or use another browser to access your WooCommerce store, you will be redirected to a login page.
Alternatively, you can select “Show access restricted message” as “What happens when users without access try to view the content?” instead of “Redirect user”.
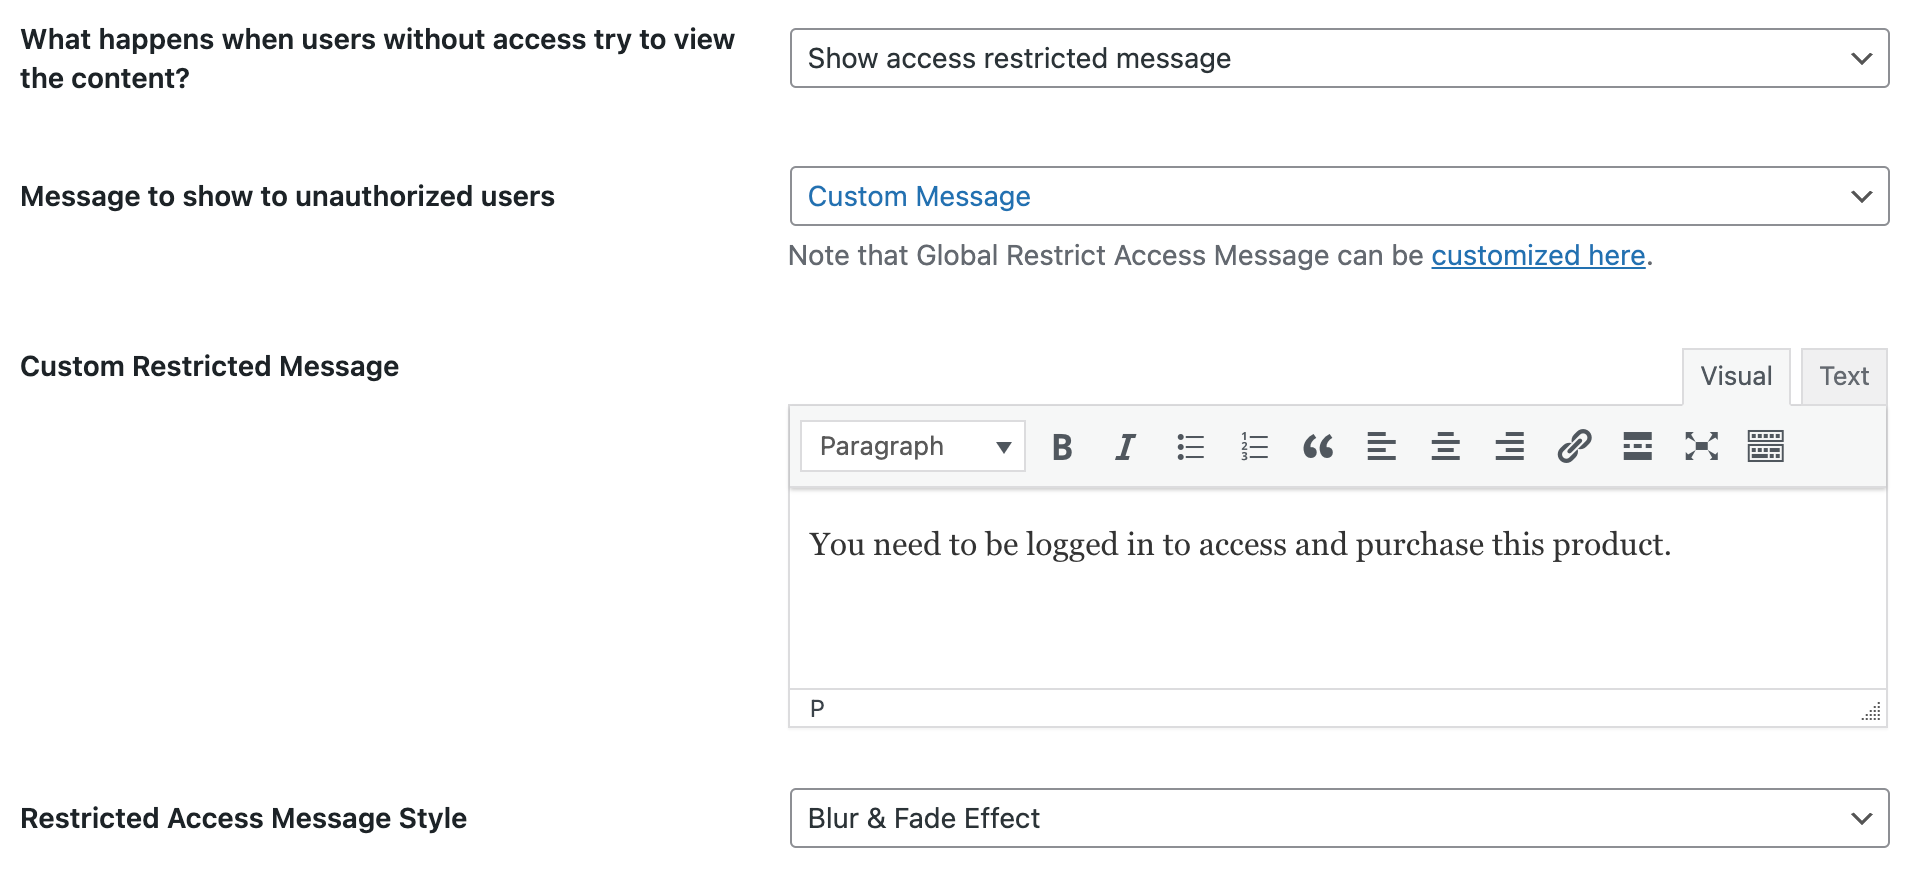
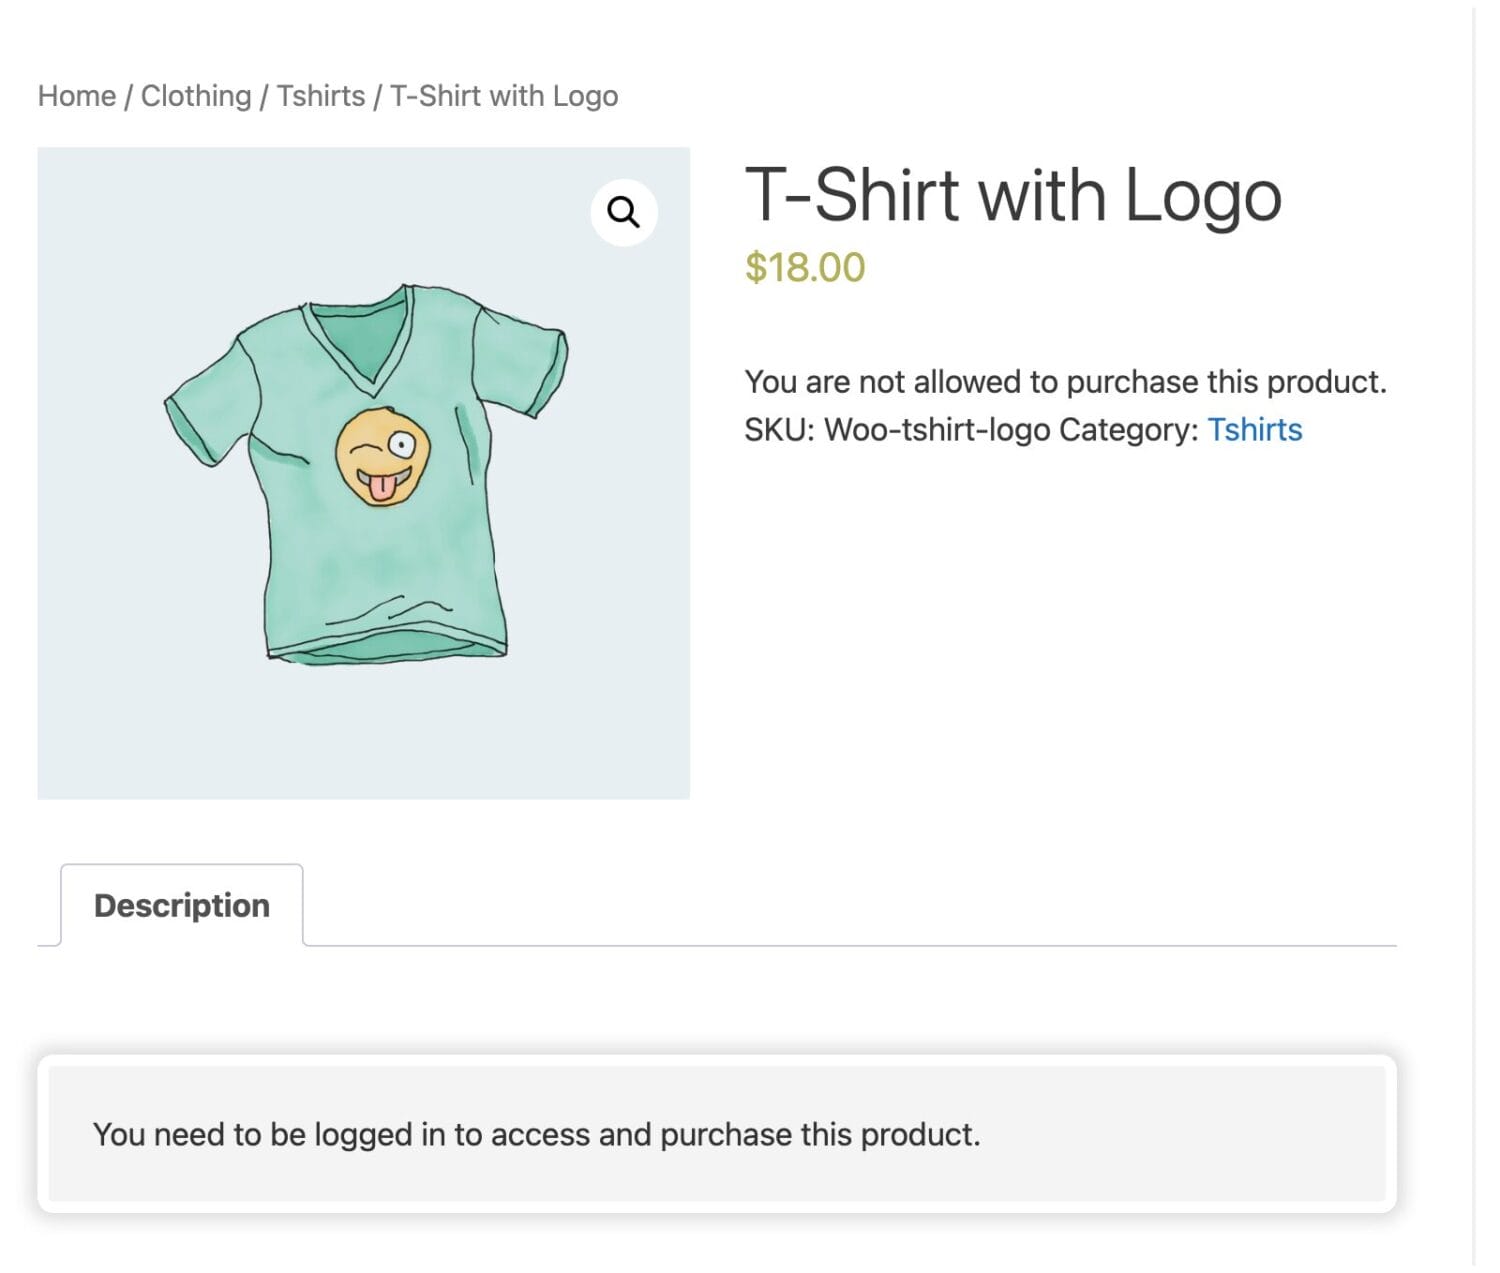
Users who visit a restricted or protected WooCommerce product page will see a message you have set up. Also, the “Add to Cart” button for the product is hidden or removed, with an error message informing them that they can’t purchase the product.
Protecting WooCommerce Products by Categories and Tags
Making specific WooCommerce products private based on assigned categories and tags is similar to the process in the last section. We will still use the content protection feature of ProfilePress to achieve this for your private WooCommerce store.
To do this, go to ProfilePres >> Content Protection and add a new protection rule.

On the content protection rules page, provide a name for this rule. In the “Content to protect” section, click the dropdown and select Products with Product categories.
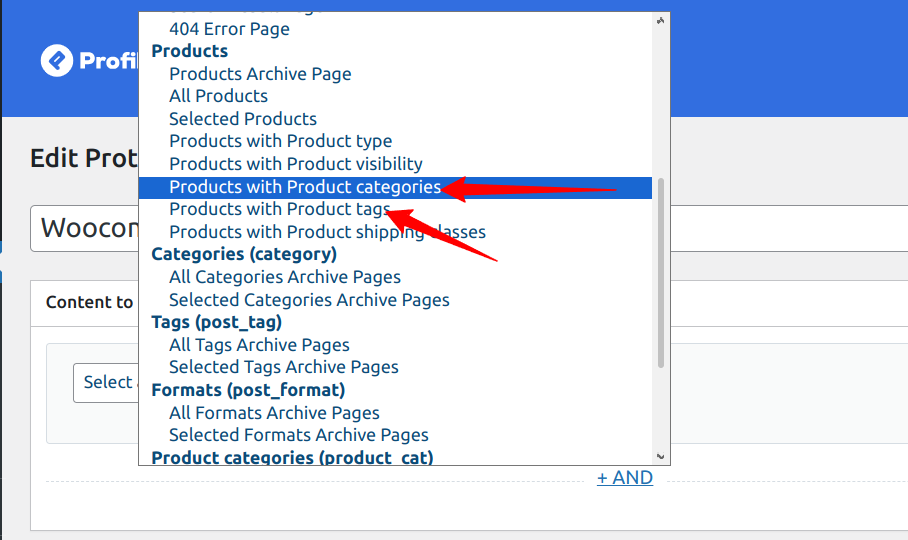
Click the “OR” option to include other WooCommerce product tags and hide them. A new dropdown will pop up. Click it and select the Product with Product tags option.
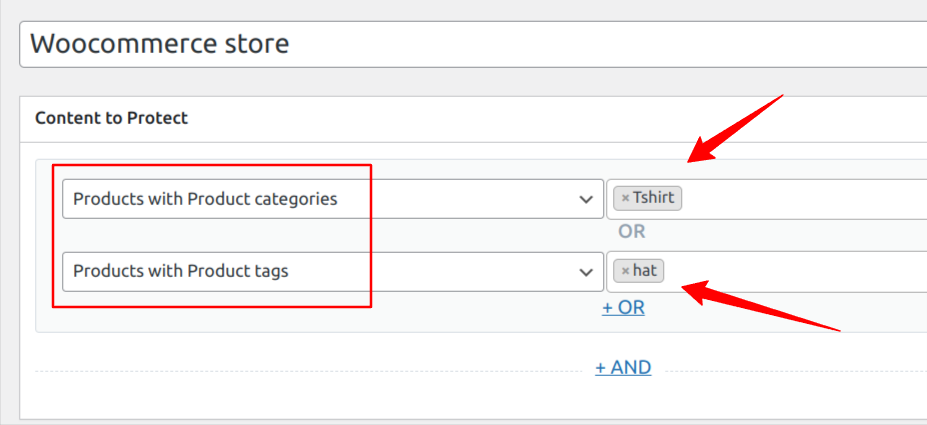
As you can see in the image above, we have two rules that control the content we want to protect. The rules state that “all products in the T-shirt category or with the hat tag is protected”.
Next, scroll down to the “Access Condition” Section, where we will specify who can access products in this category or tags.
From the dropdown, select “Logged in users”, and some new options will pop up. You will need to choose the roles or membership plans that will have access to your WooCommerce store.

The Access condition section has simple settings; you should click on the various dropdown fields to choose your suitable option.
In the Access condition section, we will set it up to redirect users without access to the login page when they try to access any products that belong to the category or tag we selected above.

Now, if you log out or use another browser to access your WooCommerce store, try to visit any product belonging to the “Tshirt” category or “hat” tag, and you will be redirected to a login page.
Privatizing WooCommerce Store via User Moderation
User moderation allows you to review, approve, and manage user accounts before they can log in. If you have created a private store in WooCommerce, user moderation can help you have more control over your store and ensure that only the right users gain access to your private WooCommerce store.
ProfilePress comes with a User Moderation addon that allows you to approve or disapprove newly registered users. You can also block and unblock users at any time.
To get started, activate the User Moderation addon, go to ProfilePress >> Addons, Scroll to User Moderation, and switch it ON.
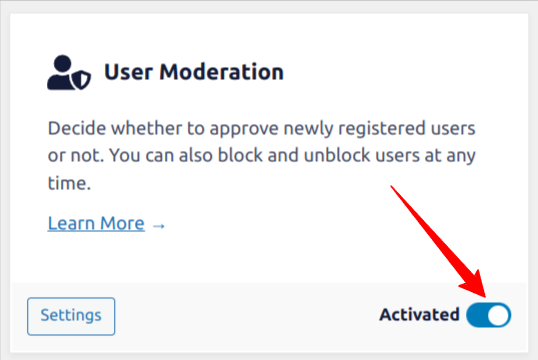
After activating the addon, you will receive an email notification each time a user registers on your website, and you can choose to either approve or reject their account. New user accounts will be pending until you approve or block them.
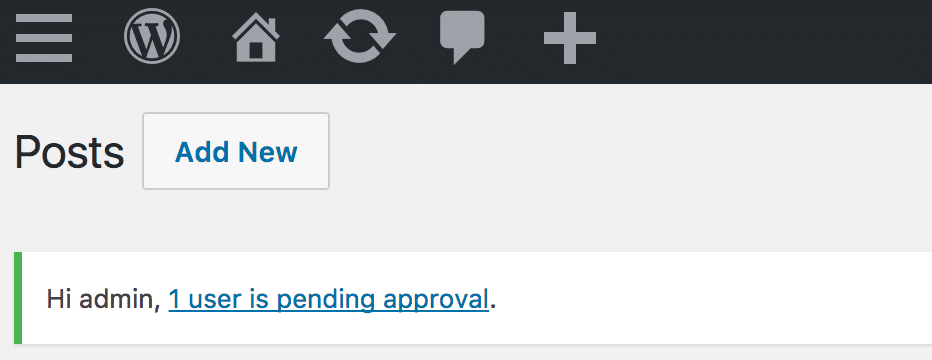
If users are awaiting approval, you will also see an admin notice on the dashboard widget informing you about it.
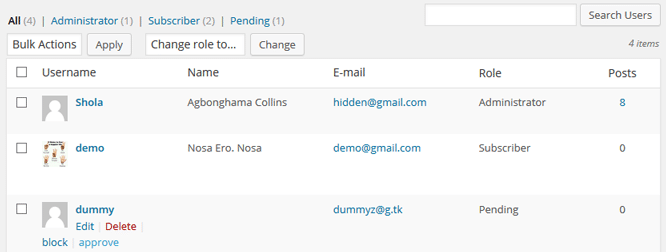
To approve new users or block/delete them from your WordPress dashboard, go to the Users >> All Users. Find the pending users and approve them.
ProfilePress also provides email notifications to users; when a user is approved or rejected, the user will receive an approval or rejection notification email.
Considering setting up a Private WooCommerce Store?
Creating a private WooCommerce store using ProfilePress allows you to restrict access to your entire store, specific product pages, or products based on categories and tags, ensuring that only authorized users can view and purchase your products.
We hope this article helped you learn how to create a private WooCommerce store that creates a secure and exclusive online shopping experience for your customers.