How to Create a Subscription Website (Complete Guide)
Do you want to create a subscription website to monetize your content, offer members-only perks, or build a private membership community?
Creating a subscription website is an invaluable way to monetize your content, engage your audience, and cultivate a thriving online community. Whether you’re looking to offer exclusive benefits to loyal subscribers, provide premium content, or foster a members-only space, setting up a subscription site has never been easier.
With WordPress, the world’s leading content management system that powers over 43% of all websites, you can effortlessly launch your subscription platform without needing any technical expertise or coding skills.
In this guide, you will learn how to easily create a subscription website using WordPress and our powerful WordPress subscription plugin, ProfilePress.
Steps to Create a Subscription Website
1. A WordPress website
As mentioned earlier, we will be building our subscription website on WordPress. If you already have a WordPress website, skip this section and move on to the next step.
To set up a WordPress site, you will need:
- A domain name for your website
- A WordPress host like Pressable, Kinsta, GoDaddy, Bluehost, etc.
- A WordPress installation (easily created in a few clicks at most web hosting).
Visit your preferred web hosting provider to purchase your domain and hosting. If you don’t have a preferred host, consider checking out Interserver.
After buying the hosting and domain, use the one-click installer to install WordPress on your server and choose your preferred WordPress theme. There are a lot of free WordPress themes in the WordPress theme directory.
2. Install and Set Up ProfilePress Subscription Plugin
As you may have noticed, your WordPress website looks like a regular content website with no expected features in a membership website. To transform your website into a subscription site, you will need a WordPress subscription plugin.
Many WordPress subscription plugins exist, but ProfilePress stands tall among them with over 200,000 active installs. Therefore, we will use the ProfilePress plugin for this guide to build our subscription website.
Install and Activate ProfilePress
The next step is to install and activate the ProfilePress plugin; go to the ProfilePress pricing page to purchase your preferred license plan.
After getting your copy of ProfilePress, you will receive a confirmation email with a link to download the plugin zip file and your license key. You can also download the plugin from your account page on the ProfilePress website.
Next, log in to your WordPress admin dashboard and navigate to the Plugins page; click on the “Add New” button and click “Upload Plugin.”
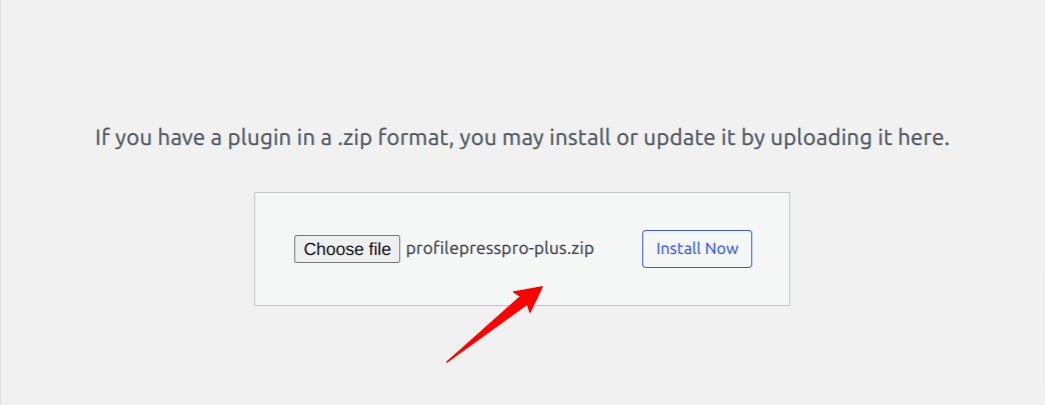
Next, click “Choose file” to select the previously downloaded plugin zip file.
Click “Install Now.”
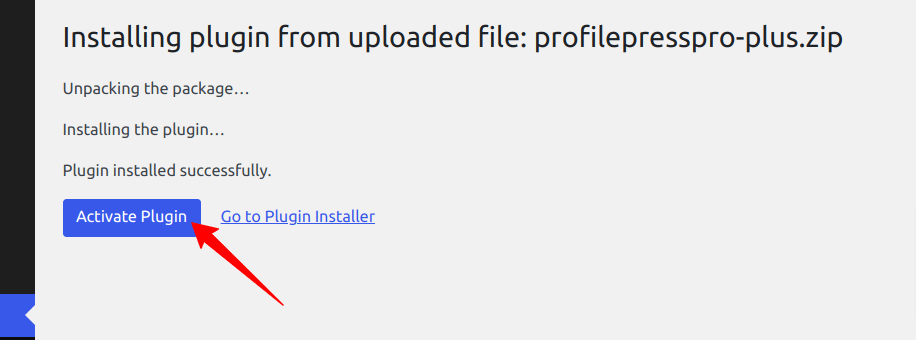
After the installation is complete, click the Activate Plugin button.
You will see a notification that says, “ProfilePress needs to create several pages.” Click on the “Create Pages” button to complete the plugin setup.
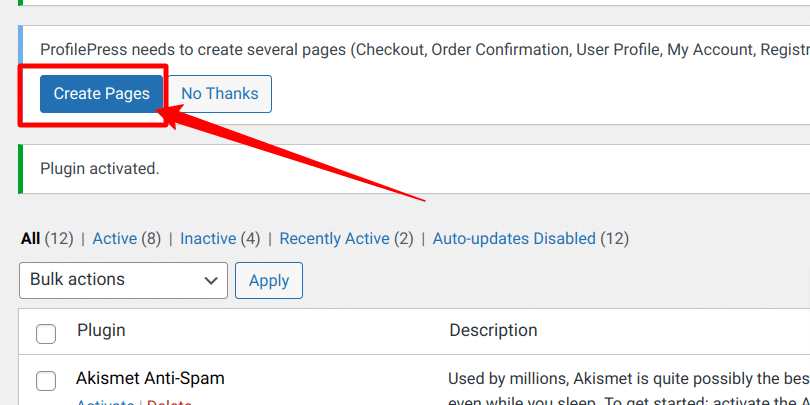
If you do not see this notification, go to ProfilePress > Dashboard and click the “Create pages” button to complete the plugin setup.
Set up a Payment Gateway
The final step in the plugin setup is to enable a payment gateway. If you are building a membership or subscription website, you will need a way for your users to pay or subscribe.
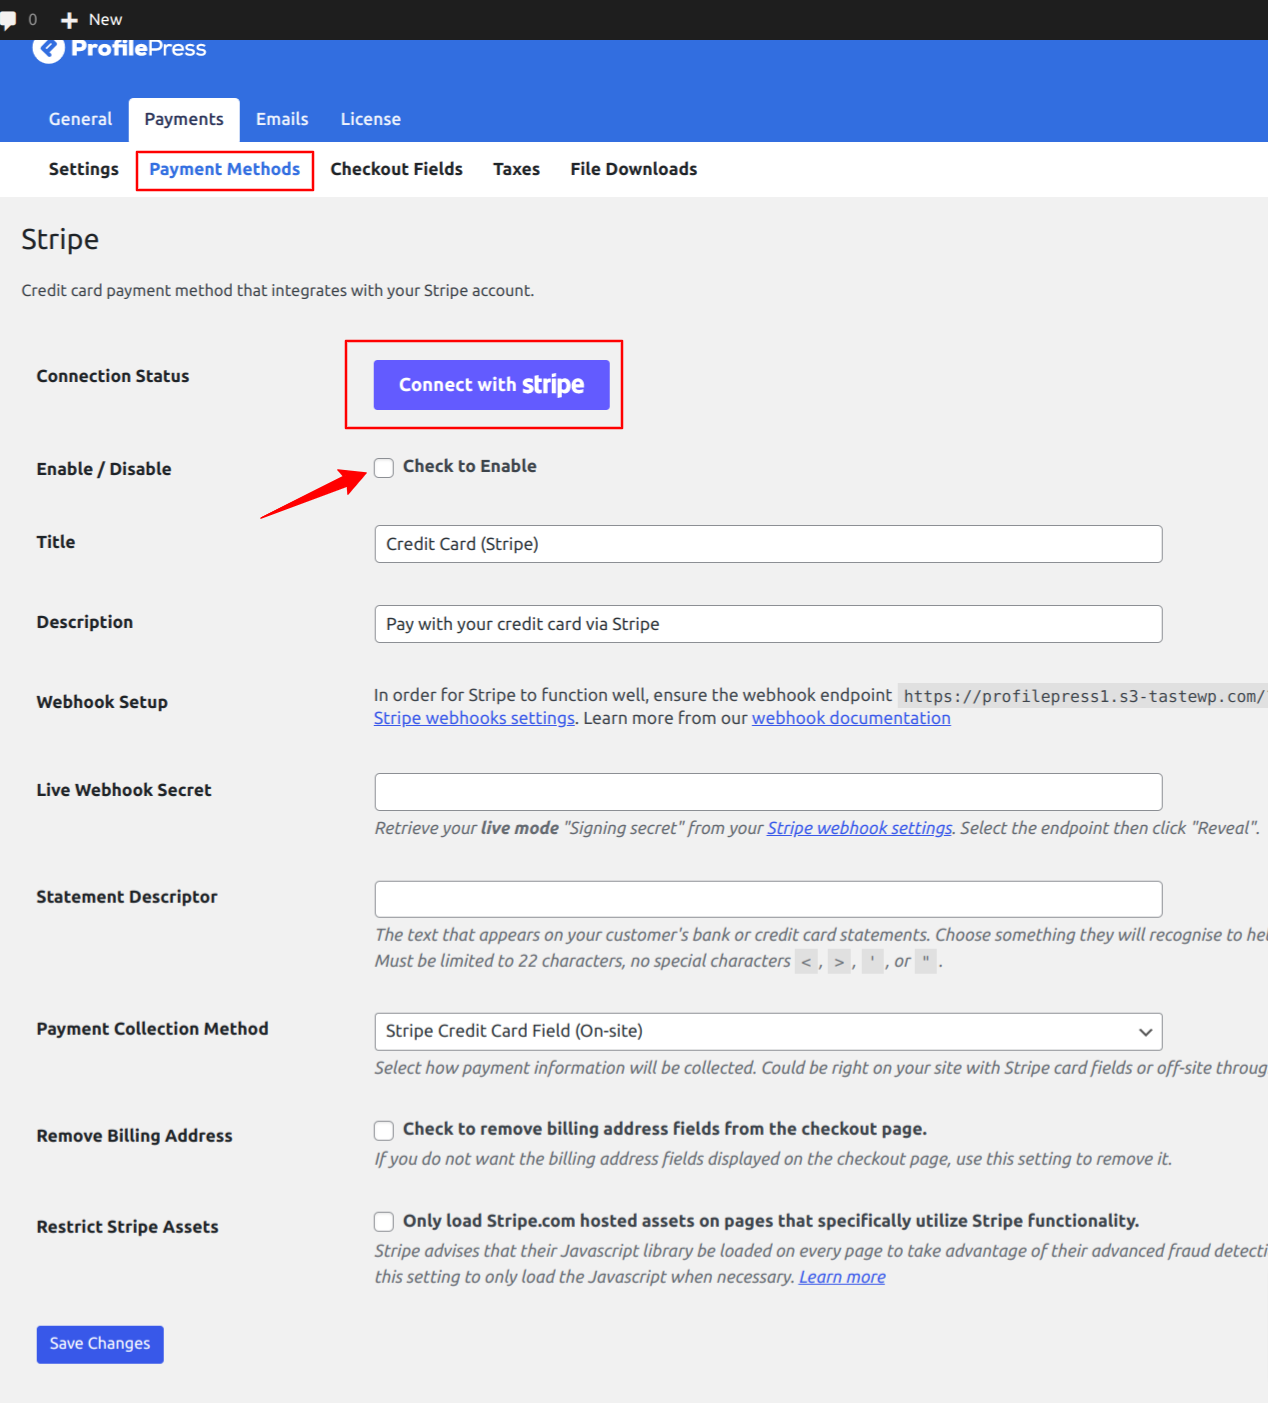
In this guide, we will configure the Stripe payment gateway that ships with the ProfilePress plugin. Go to ProfilePress > Settings > Payments > Payment Methods and choose Stripe.
Click the “Connect Stripe” button and follow the prompts to enable Stripe payments to start recurring payments on your WordPress subscription website.
In addition to Stripe, ProfilePress supports other popular payment gateways like PayPal, Razorpay, Paystack, and Mollie. So feel free to set up any other desired payment gateway.
3. Create a Subscription Plan
A subscription needs to have subscription plans that users will subscribe to. Each subscription plan will have its description, access level, price, and more. Below is how to create a subscription plan on your website.
- Go to ProfilePress >> Membership Plans
- Click on Add new to open the plan creation page
- Enter a name for the plan and provide a description and price.
- Under the subscription settings, select your desired billing frequency and subscription length.

To allow users to subscribe for free, set the price to $0.00 and enable the free trial option if you want to offer a free trial.

Click the “Save Plan” button.
You can follow the steps above to create various subscription plans as required for your WordPress-powered subscription website.
Get Your Checkout Link
After saving your subscription plan, the next thing is to copy your checkout page link, which is the page where users will view and pay for a subscription plan. ProfilePress will automatically generate a checkout link for your plans once you hit the “save plan” button.
- Go to ProfilePress > Membership Plans
- Look at the Checkout URL column and copy the checkout link.

Now, you can place this checkout link anywhere across your website where visitors can find it. Clicking the checkout link will take customers to a page where they can pay and subscribe to your website.

4. Setup Content Restriction
One of the key reasons for setting up a subscription website is to provide exclusive content and control who can access specific content based on their subscribed plan. With the ProfilePress plugin, you can easily set up content restrictions on your website and have total control over who views what on your website.
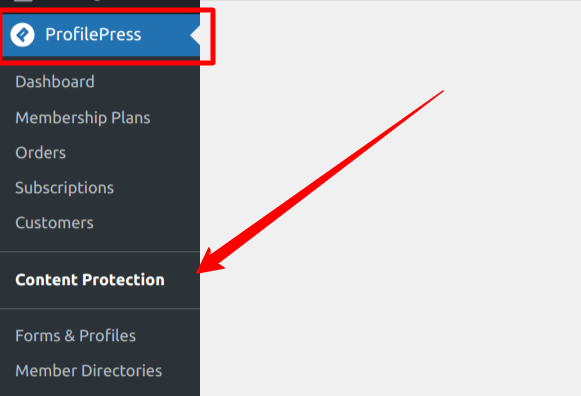
To restrict content, go to ProfilePress >> Content Protection to add a new protection rule. You can restrict access to pages, posts, WooCommerce products, categories, tags, and more.
How to Restrict Content by Category
Restricting access by category allows you to control who can view the pages assigned to a particular category; any page or post assigned to this category becomes hidden and requires authorization before it can be viewed.
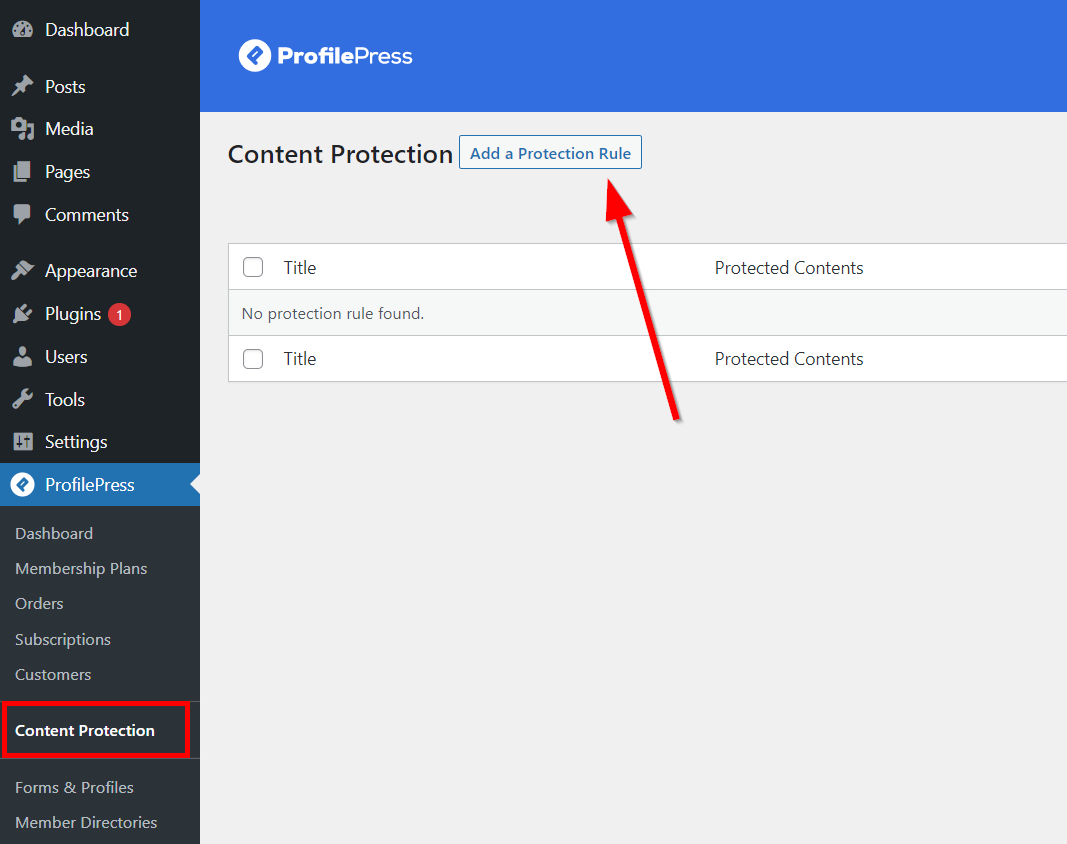
To do this, navigate to ProfilePress > Content Protection.
Click on the Add a Protection Rule button. You will be taken to the Protection Rule editing page, where we will build our content protection rule.
Enter a descriptive title for the rule you are creating, select the content you want to make private, use the logical OR to set the rules, and use the access condition to select who can access the content.
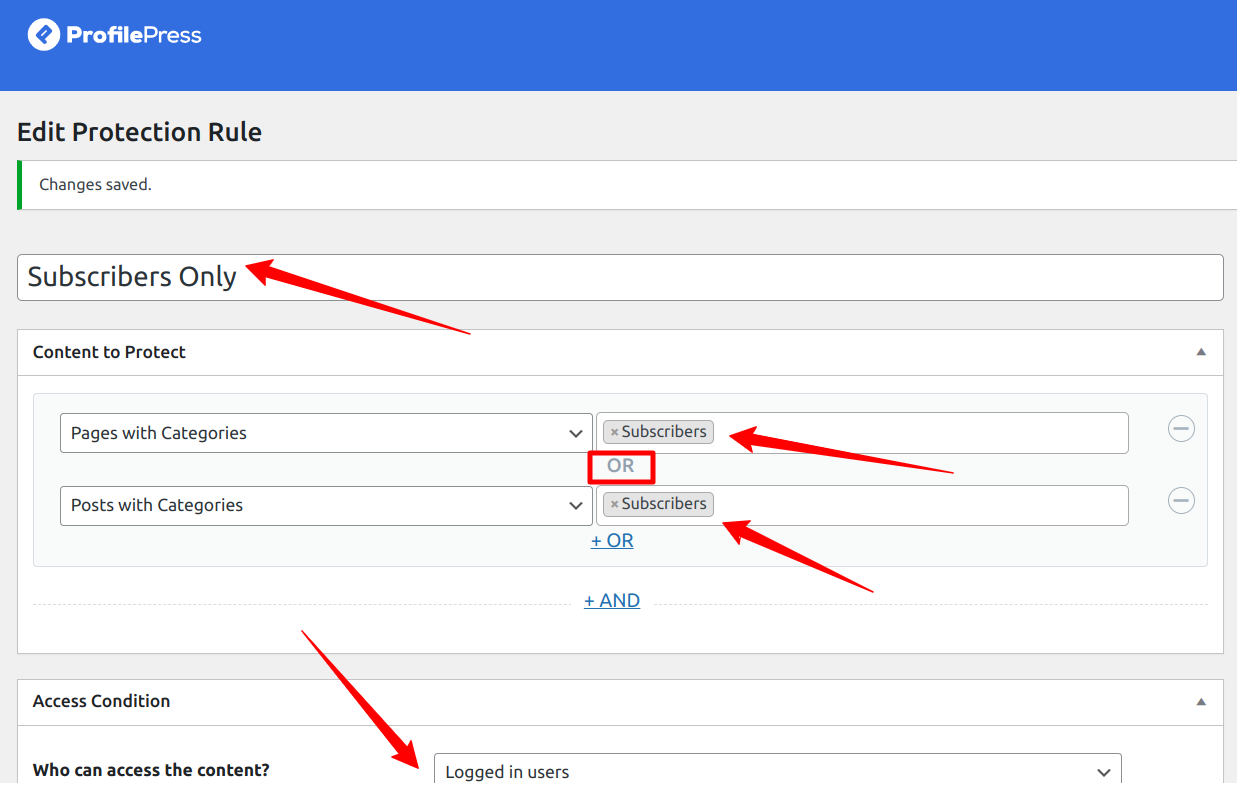
In the “Content to protect” section, we will choose the “Posts with Categories” and “Pages with Categories” options and select our “Subscribers” category.
The Access Condition section allows you to assign a category to the content you want to protect, such as:
- Everyone (all users will have access to the content).
- Logged-in users (only those who are logged in can access the content)
- Logged-out users (only those not logged in to your website can access the protected content).
We used the “OR” logic for this content restriction rule, where the protection rule will kick in when users try to access posts or pages in our subscribers’ category.
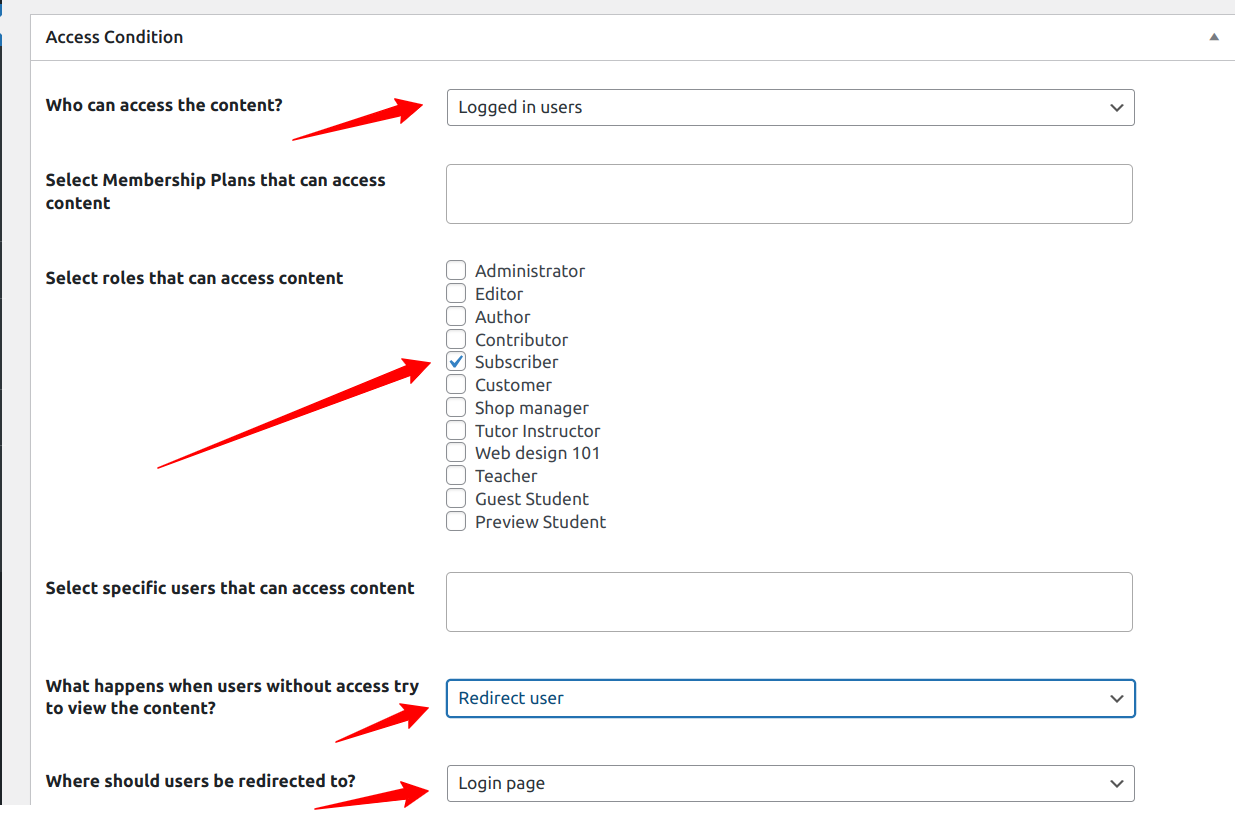
We selected “Logged in users” and “Subscriber” as our user roles; this means that only logged-in users with a subscriber role can access this category’s contents.
With this setup, any new post or page added to our “Subscriber” category will also become protected.

Under the “What happens when users without access try to view the content?” option, you can choose whether to “Show access restricted message” or “Redirect user” to another page.
If you choose the “Redirect user” option, you can select an existing page on your WordPress site or redirect the user to a custom URL.
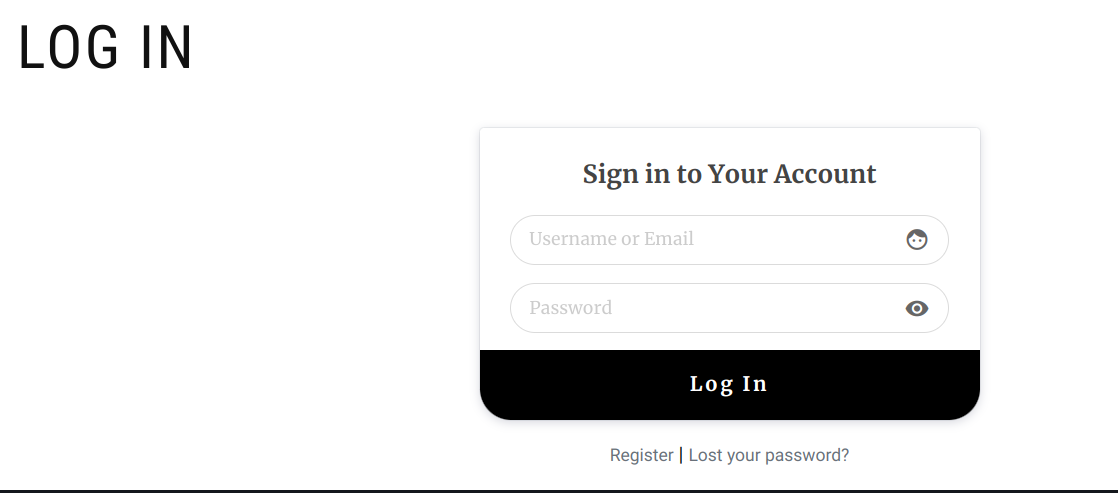
In the example below, we will redirect the user to a login page where they can access their subscriber account to gain access to the content.
Hit the Save Rule button to save your settings.
Next, go to Posts >> Add New to create a new post and assign it to the subscriber category.

If you visit this post or any posts assigned to the subscriber category in an incognito browser, you will be redirected to a login page, as shown below.
If we choose the “Show access restricted message” option with the Global Restrict Access Message, we can show a message to our users when they try to access restricted content. An example is shown below.

There are other message options that you can explore. You can choose the custom message option if you want to input your custom message or select the post excerpt option to show a snippet of the post to the user before they subscribe.

This demonstrates how simple it is to restrict content based on post categories and user subscriptions on your WordPress site.
You can follow the same steps to restrict access to various sections of your website. ProfilePress allows you to set up multiple content protection rules so that you can have a rule restricting access to a category and another rule restricting access to a single page or all pages on your website.
How to Add Metered Paywall to Membership Website
ProfilePress comes with a metered paywall add-on that allows you to give your users free content before asking them to subscribe to your website. With a metered paywall, you can let your site visitors access 2-3 articles for free over a specified period (daily, weekly, or monthly) before asking them to subscribe.
- To set this up, go to ProfilePress >>Addons and enable the metered paywall add-on.

- Then go to ProfilePress >> Content Protection and click the Metered Paywall tab.

- Next is to configure the metered paywall to your liking; the settings are straightforward.

- Reset Limitation After: Use this to set how long before the visitor can once again start reading your post for free after exceeding the free limit.
- Restrictions: Select the posts, pages, or products that are restricted.
- Total Free Views: the total number of free pages or content users can consume in a specified period.
- IP Blocker: to improve paywall security and prevent people from bypassing the metered paywall.
Save your changes when satisfied with your configuration, and your metered paywall should be activated.
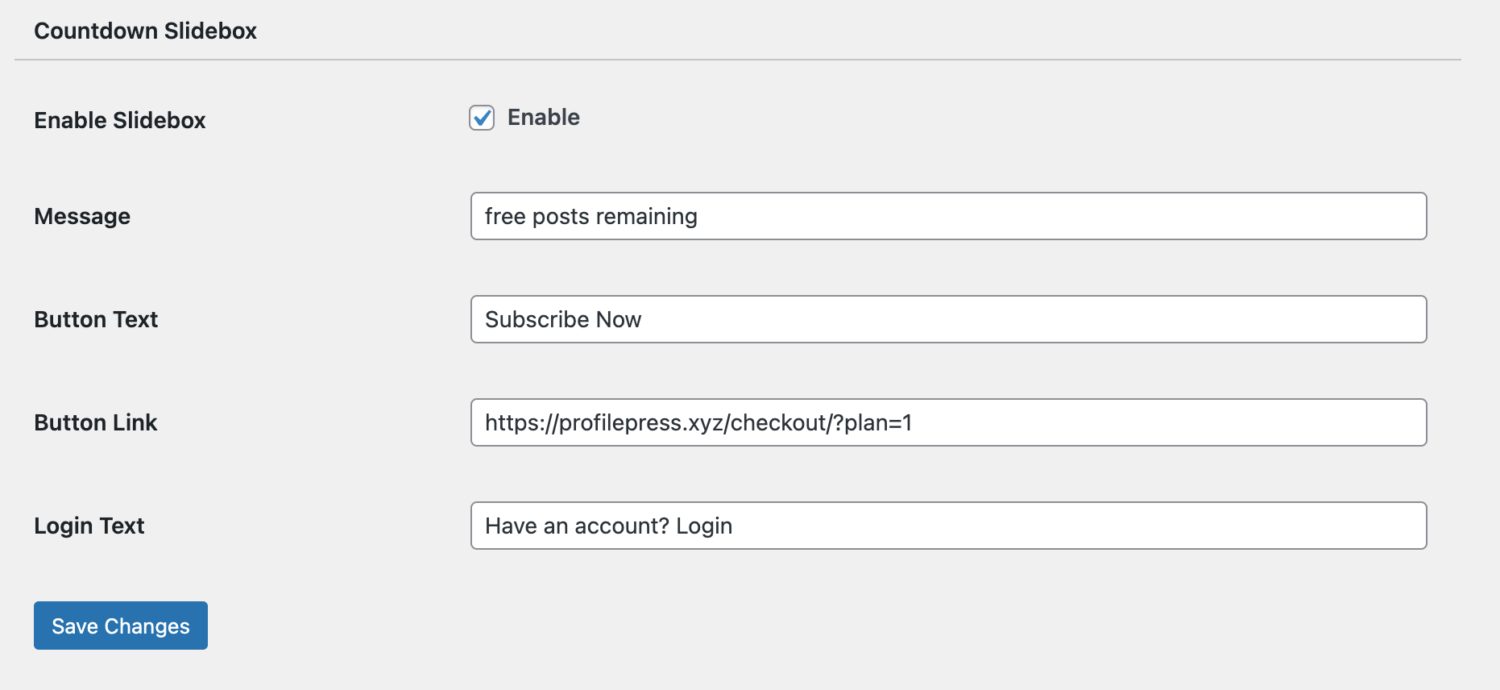
Additionally, you could add the countdown slidebox provided by ProfilePress to show your users how much free content they have left. This is good for user experience; it helps them know how much free content you offer and displays to them the link to subscribe to become a paid member.
Final Thoughts
WordPress, combined with the ProfilePress membership plugin, makes creating a subscription website easy, allowing you to leverage its features to build a robust income-generating subscription business.
ProfilePress includes everything you need to make your subscription website a success. It has payment gateways, member directories, unlimited membership plans, email marketing integration, and LMS integrations.
By following the steps in this guide, you should be able to create a subscription website that attracts and retains paid subscribers.