How to Create a Video Membership Site in WordPress
Do you want to create a premium video membership website? Do you want to restrict access to the video content on your WordPress website?
If you are making YouTube videos, creating a premium membership site with exclusive content is an easy way to create a passive income stream.
You can also create a video membership WordPress website to sell an online course. Your membership website can be a collection of articles, podcasts, and videos.
I’ll teach you everything you need to know about building a video membership site with WordPress in this article.
What is a Video Membership Website? (Examples)
A video membership website lets you monetize your audience by selling them access to your videos. For example, most video membership websites sell access to online courses. But that’s not the only type of content you can sell via a video membership website.
A great example of a video membership website is a service called Side+. Launched by a popular YouTube group called Sidemen, this website lets you watch exclusive and uncensored content produced by the group for about $7 a month:

Their website is an excellent example of what you could build. Their service looks and feels like it’s created by a giant like Netflix:
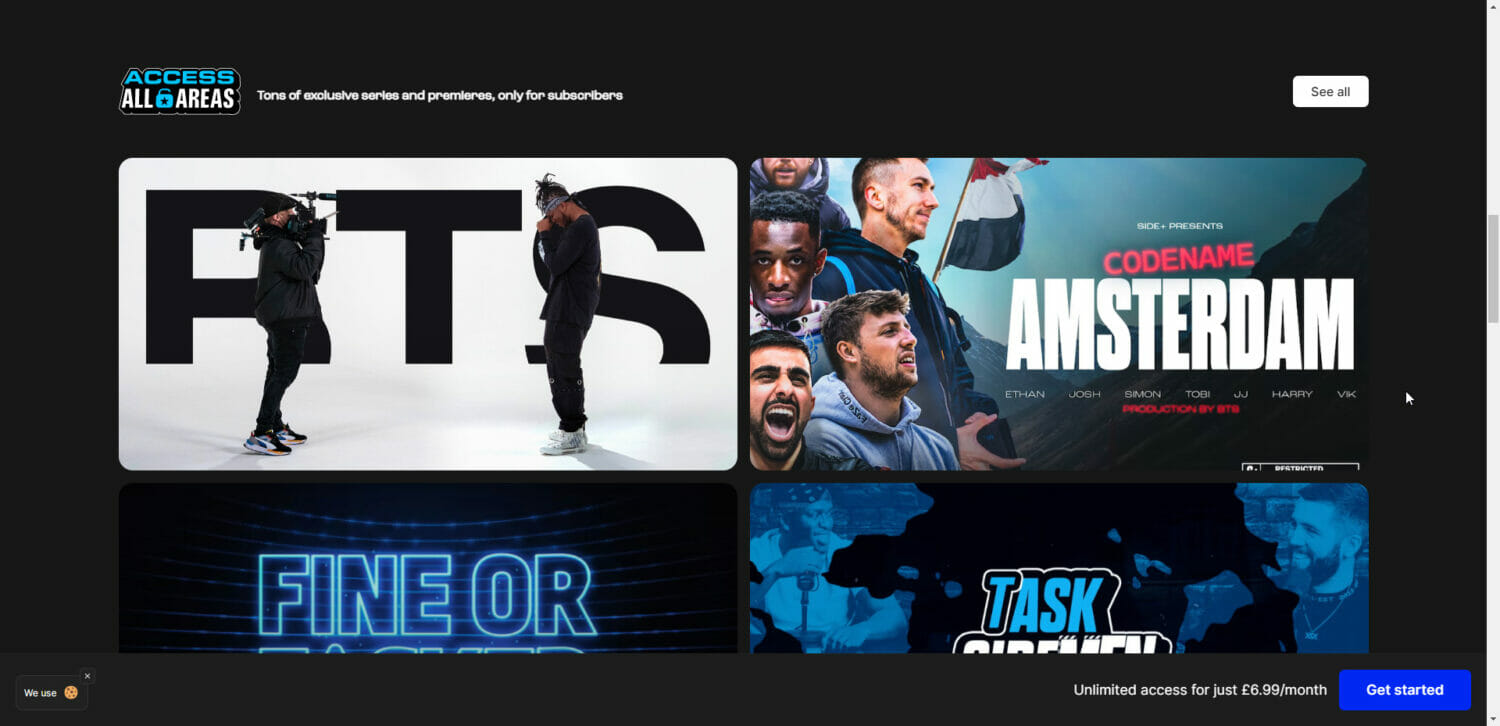
But it’s simply a video membership website—the like of which I’ll teach you how to make in this guide.
Another excellent example of a video membership website is Fireship.io. This site sells video courses on building websites for web developers:

Their membership plans start at $29 per month:
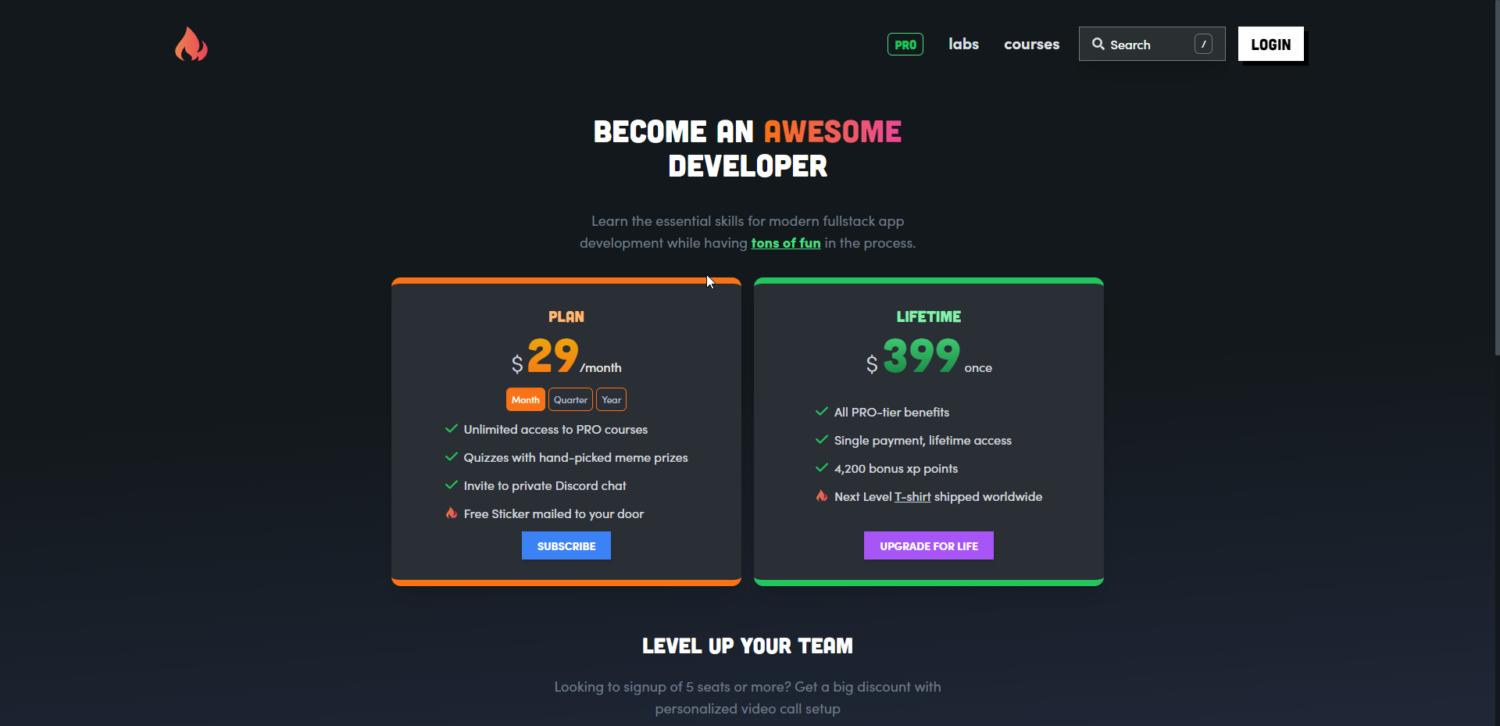
Yes! You read that right. Their plans start at $29 per month. This is the power of a video membership website. As you add new content to your website, it increases the value of your subscription. Fireship started with just a few courses and is now a complete resource for web developers who want to level up their skills. That’s why they can charge so much.
Why You Should Create a Membership Site
If you have built an audience, it’s time to monetize it. And the easiest way to do it is by creating a membership site. Your membership site doesn’t have to be limited to video. You can create a membership website with a mix of articles, videos, and podcasts that people can pay to access.
The best part of monetizing your audience with a membership website is that you can charge your customers a monthly fee if you consistently publish new, premium content to your site. And the more content you add, the more people will be willing to pay.
A membership site can give you the freedom to create content for your audience without worrying about money. Many creators now make content full-time using this strategy.
The Easiest Way To Create a Video Membership Site
If you have done any research on creating a video membership site, you’ve probably seen dozens of plugins that help you build a membership website.
However, the biggest flaw with all the popular membership site plugins is that they aren’t beginner-friendly. They also take a long time to set up and require extensive technical expertise.
This is why we created ProfilePress. It has ALL the features you’ll need to run a membership website and is designed with beginners in mind. The best part? Creating a membership site with ProfilePress takes less than 30 minutes and requires no technical knowledge.
Even though ProfilePress is made with beginners in mind, if you are a WordPress pro, you’ll love exploring the advanced features packed with ProfilePress.
So, What are you waiting for? Download and install ProfilePress right now, and let’s start building your membership website!
How To Create Your Membership Plans
To create a video membership site with WordPress using ProfilePress, you need to first create some membership plans.
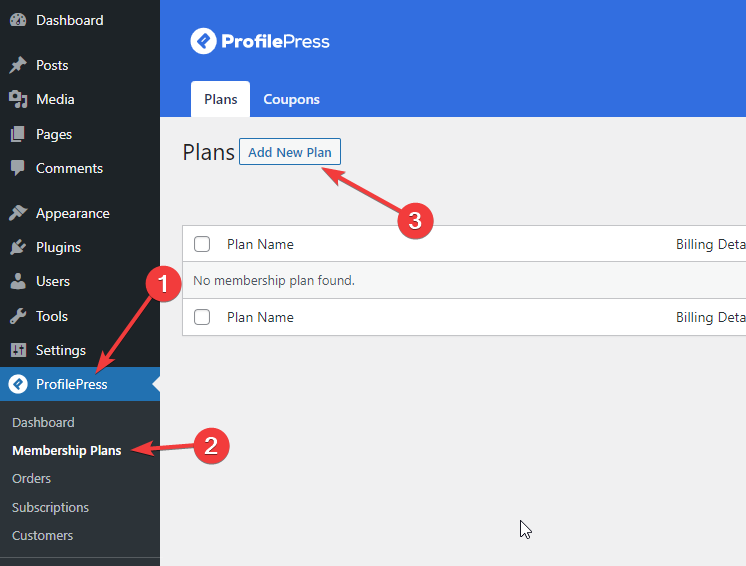
To create a new membership plan, log into your WordPress dashboard and navigate to the Membership Plans sub-section under the ProfilePress menu in the sidebar. Then click the Add New Plan button:
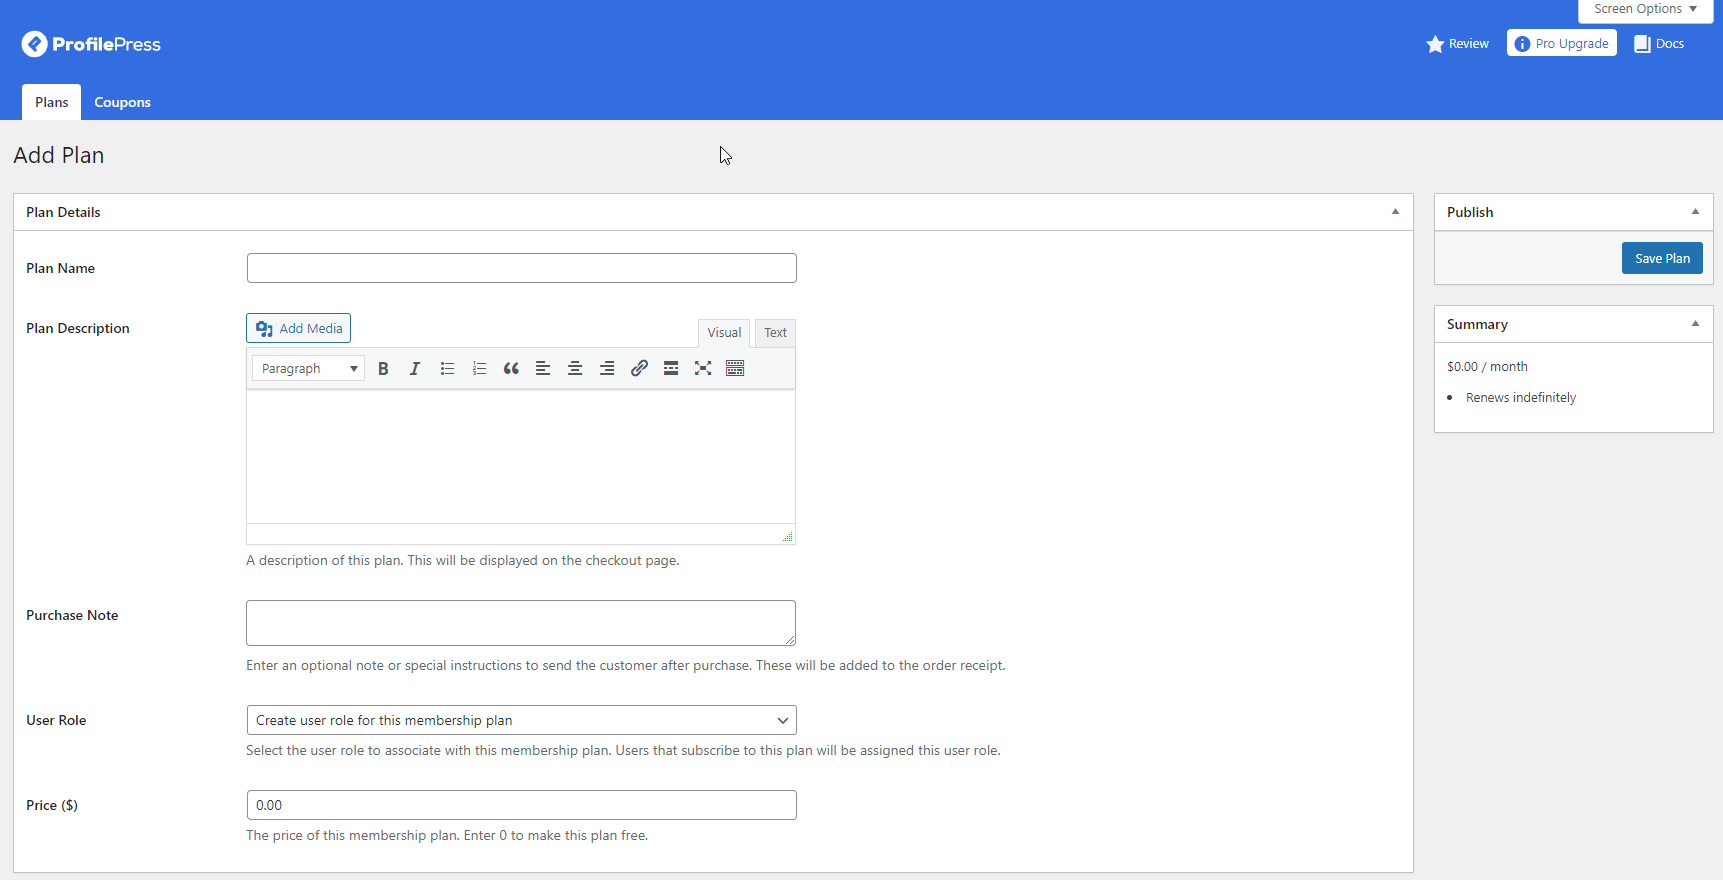
You’ll now see the Add Plan page:
Let me take you through the settings one by one.
First, the Plan Details section:
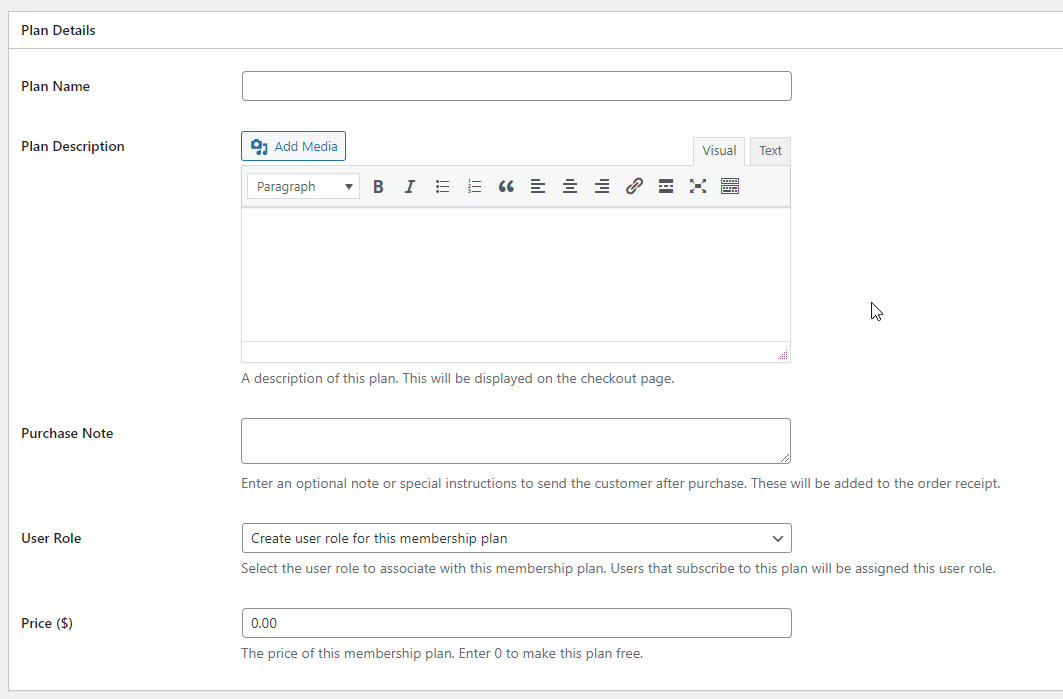
- Plan Name: The name of your plan. Make sure it’s descriptive. It will be shown to your customers. Example: Monthly Subscription.
- Plan Description: This is what customers will see on the checkout page. Ensure you describe everything included in the plan and anything else your customers might need to know before subscribing.
- Purchase Note: This note will be sent to the customer after the purchase. Use this space for instructions or to explain your process.
- User Role: ProfilePress will create a unique user role for this plan. It will then add that role to any user subscribing to this plan. It will also remove the role when the user’s subscription expires. This gives you an easy way to check who is a paid subscriber and who isn’t.
- Price: Pick a fee for this plan. If you want to make a monthly plan, then enter a monthly subscription price here.
Now, let’s go through the Subscription Settings section:
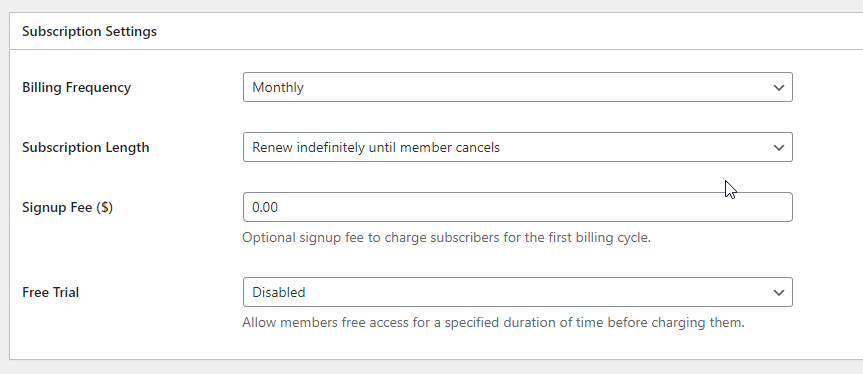
- Billing Frequency: This is how frequently your customer will be charged. Select Monthly to create a monthly subscription, annual for an annual subscription, and so on. You can also select one-time if you only want to charge your customer once.
- Subscription Length: How many times do you want this subscription to renew? You’ll likely want it to renew indefinitely until the customer cancels it.
- Sign Up Fee: An additional fee you can charge. This will only get charged when the user signs up. It will be added to the first charge.
- Free Trial: ProfilePress lets you offer a free trial. If you choose a free trial duration, your customers will only be charged for this plan after the free trial period is over. If they cancel their subscription before that, they won’t be charged.
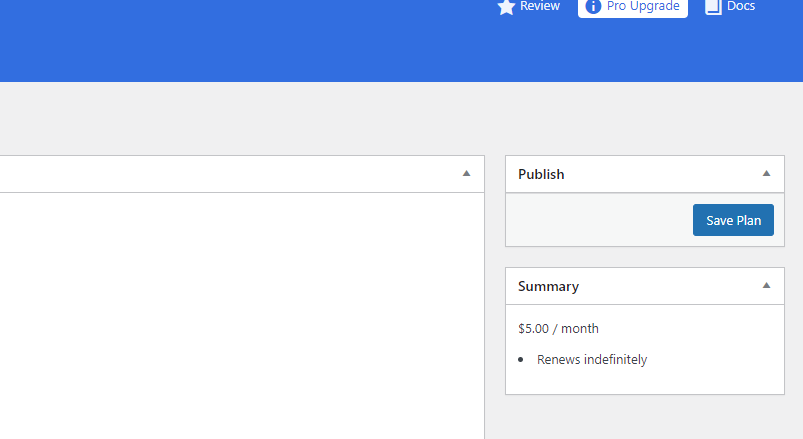
Once you’re done customizing the options, click the Save Plan button on the top right:
Feel free to create as many variations for your membership as you want. For example, you can create three plans if you’re going to offer three different tiers. In the next section, you’ll learn how to make sure only pro members can access your premium, subscriber-only content.
Restrict Access To Video Content (Hide Content Behind Paywall)
Now that you have created a membership plan, you can restrict access to your premium video content. I’ll show you how you can ensure that only people subscribed to your membership plans can access your videos.
How To Restrict Access To Certain Pages
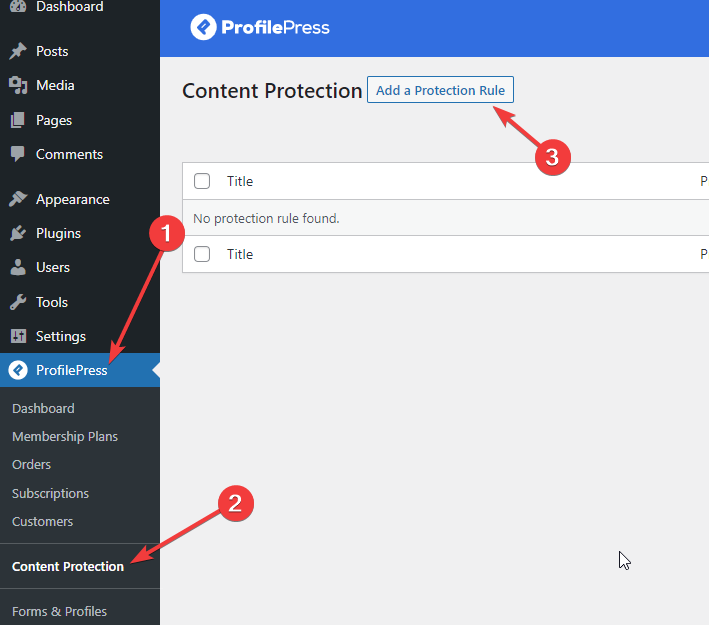
First, navigate to the Content Protection sub-section under ProfilePress settings and click the Add a Protection Rule button:
Now, you’ll see the content protection rule creator page:
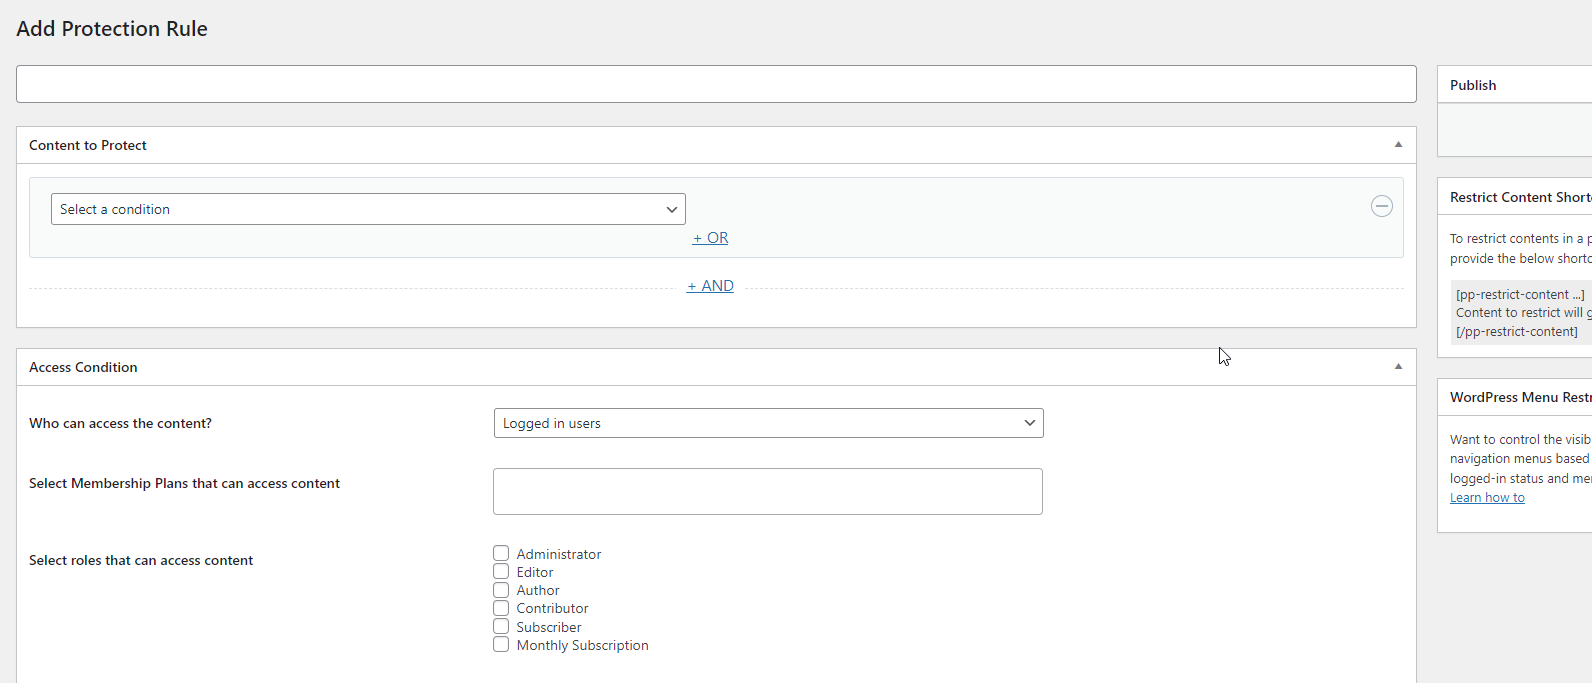
On this page, you can decide who can and cannot access specific pages on your website.
First, let’s go over the Content to Protect section:

In this section, you can select specific posts and pages that you want to hide behind a premium plan. This likely would be the pages with your premium video embedded.
Click on the Select a condition drop-down menu to see a list of available conditions:
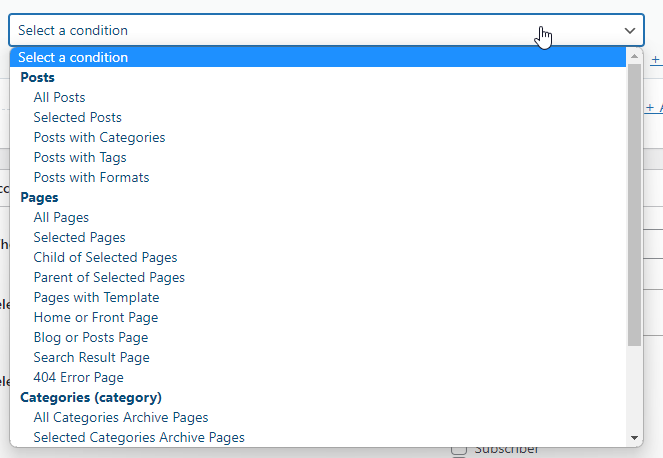
Now, select the Selected Posts option.
You can now enter the names of posts that you want to protect in the new input that has appeared next to the drop-down:

Start typing the name of the post you want to protect/hide (restrict access to), and you will see its name as an option. Click the option to select the post. You can select as many posts as you want here.
To select specific pages you want to protect, click the +And button and select the Selected Pages option, this time from the Select a Condition drop down. You can now enter the names of specific pages you want to protect.
Now, let’s go over the Access Condition section:
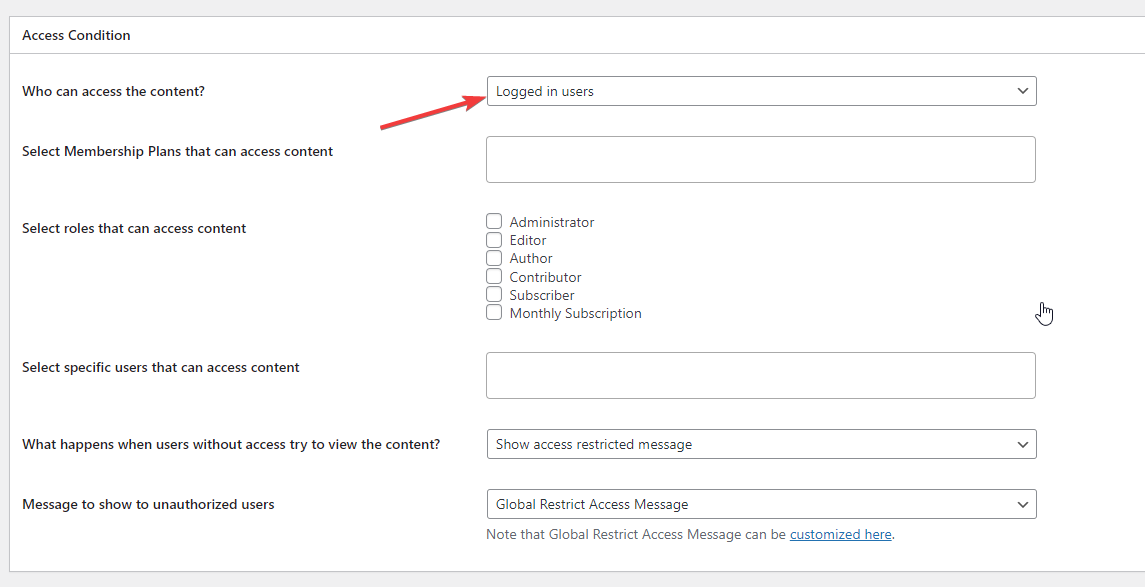
First, select Logged In Users in the first drop-down.
Now, let’s go over the options:
- Select Membership Plans that can access content: Type the name of the membership plans that you want to allow access to your selected pages and posts. Any logged-in user subscribed to that plan will have access to these pages.
- Select roles that can access content: This is just an option for convenience. You can select roles to grant access to your selected pages and posts. You’ll want to choose Administrator at a minimum to see these pages yourself. You can either select your membership plan’s role or enter the plan’s name in the previous input.
- Select specific users that can access content: Enter the names of and select particular users you want to give access to your selected pages.
- What happens when users without access try to view the content? You can either display a message or redirect the user. You can customize the error message and the redirection URL using the next option.
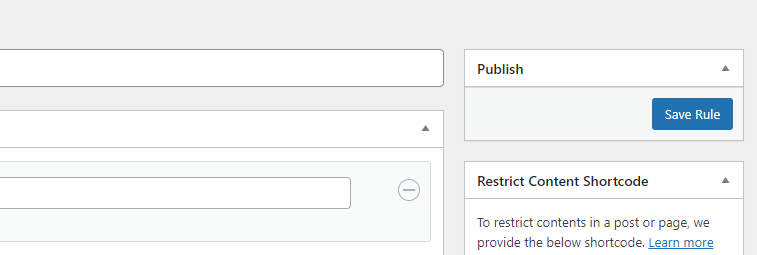
Once you are done customizing the options, enter a name for this rule and click the Save Rule button:
An Easier Way To Restrict Access To Your Posts
Editing your content restriction rules every time you create a new page can be time-consuming. An easy way to restrict access to your content is to create a category or tag and limit access to any posts with it.
This way, all you have to do to restrict a post is add this tag or category.
First, create a new category that you’ll use to hide your premium content. I’m simply going to call mine ‘Premium Content.’
Follow the instructions in the previous section to open the Add New Protection Rule page. Then, select the Posts With Categories option from the drop-down, and enter the name of the category you just created:
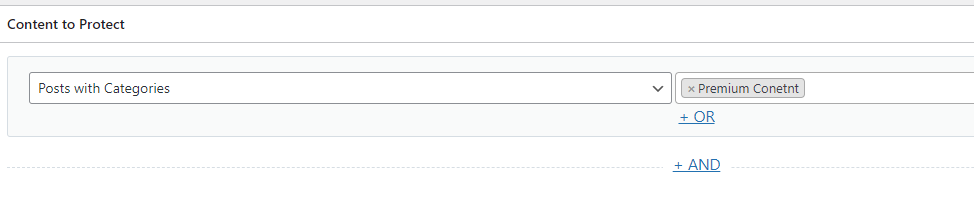
Now, you can add this category to any posts you want to restrict access to.
Similarly, you can create a parent page that will house all the pages you want to restrict and restrict access to it like this:

Now, make it a child of this parent page whenever you want to restrict a new page.
Follow the steps in the previous section to finish setting up this rule.
How To Only Hide Parts of a Page
ProfilePress also allows you to hide only parts of a page. This way, you can give your audience a little taste of your video content rather than completely turning them away if they don’t have an active subscription.
This is what news sites do. They let you read the first couple of paragraphs, and when you scroll down, they ask you to subscribe if you want to read the rest.
To restrict content this way, you can use the pp-restrict-content shortcode. Whatever content you put between this shortcode’s opening and closing tags will be restricted.
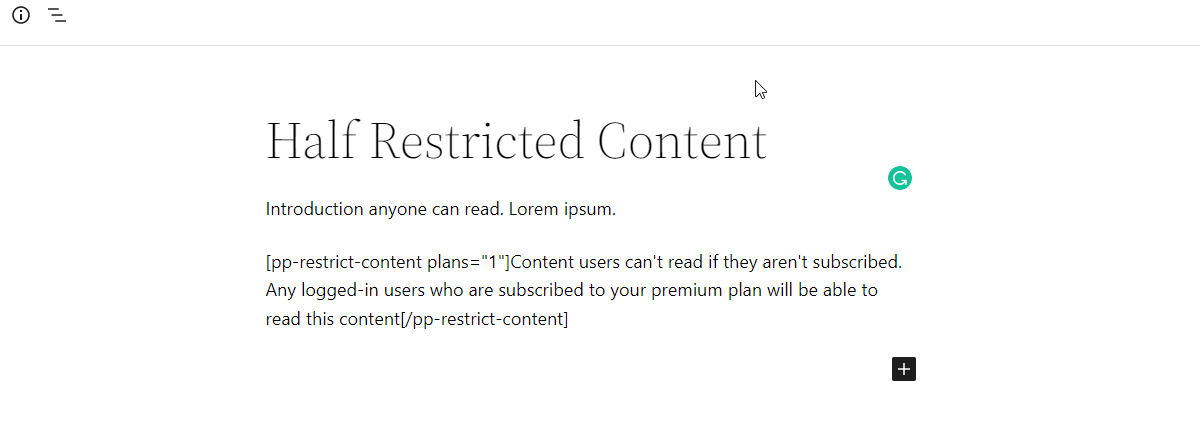
You can enter a comma-separated list of plans and roles as attributes to this shortcode. To allow access to this content to people who are subscribed to plans 1 and 5, use this shortcode:
[pp-restrict-content plans="1,5"]Content users can't read if they aren't subscribed. Any logged-in users who are subscribed to your premium plan will be able to read this content[/pp-restrict-content]Read the documentation to learn more about other options available for this shortcode.
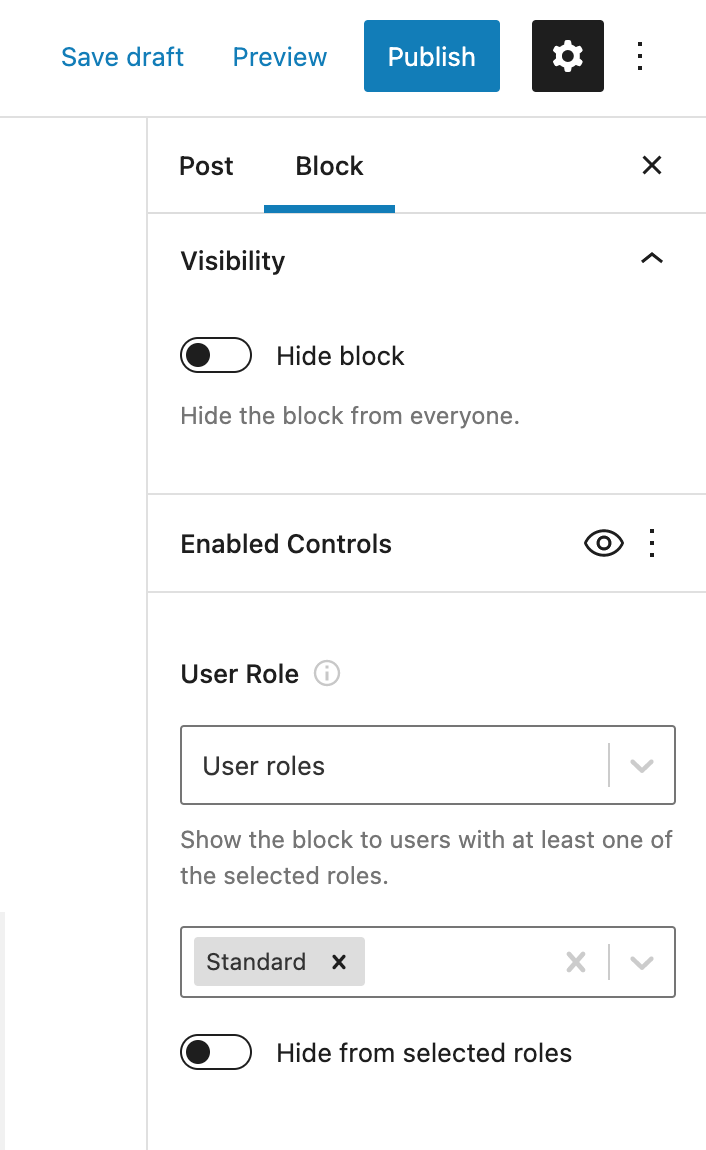
If you are using the WordPress block editor, we also provide ways you could restrict your content in it.
There are many other ways you can restrict your content. Read the documentation for more information.
How To Create a Simple Pricing Table
Now that you have created some membership plans and restricted access to your content, you need to create a pricing page that allows your users to subscribe.
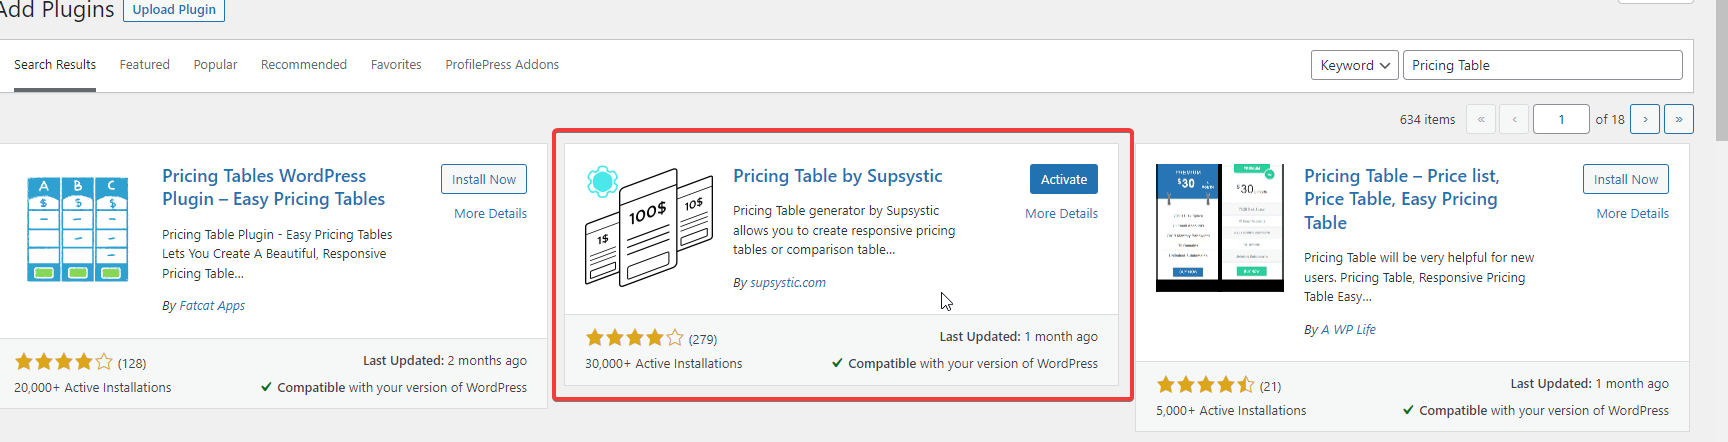
First, install and activate the ‘Pricing Table by Supsystic’ plugin. It’s free and offers a quick and easy way to create a pricing table:
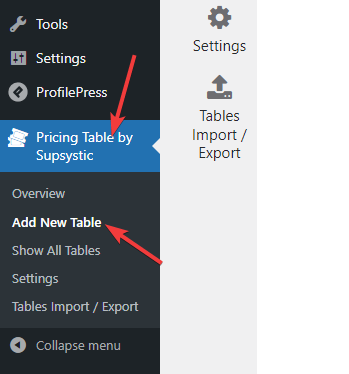
Now, navigate to the Add New Table subsection of the pricing table plugin:
Enter a name for the new table and select a template:
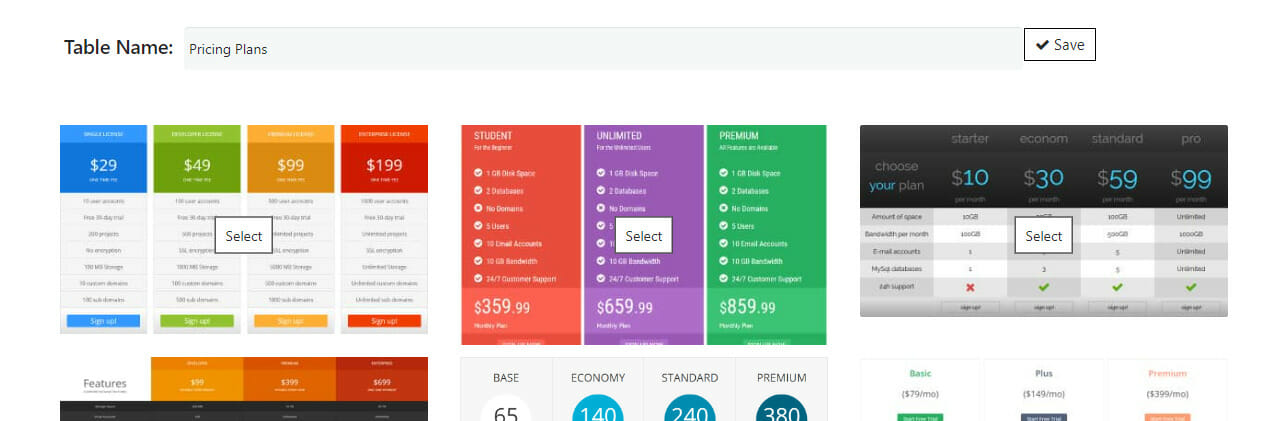
Click the Save button to start customizing this new pricing table.
Take your mouse over any element of your table to edit it. You can also add or delete columns. Enter the names and prices of your membership plans, and enter the details of each plan.
Once you are done customizing the pricing table, click the Sign-Up button under the first plan and click the Link button:

Now, open the ProfilePress membership plans subsection in another tab and look for the checkout link of the plan that you are editing in your pricing table:
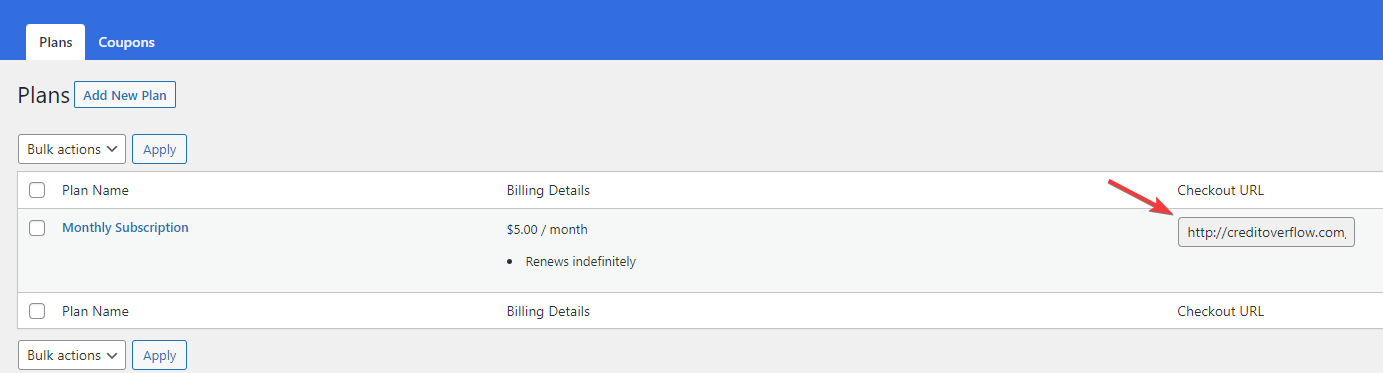
Copy this checkout link and paste it into the Link form, and press enter:

Now, click the Save button on top of the page, and copy the shortcode that you see:
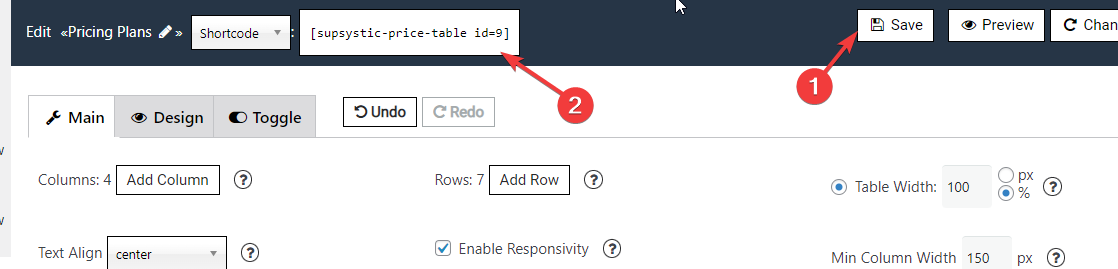
Now, create a new page called Pricing and enter the shortcode you copied as its content:
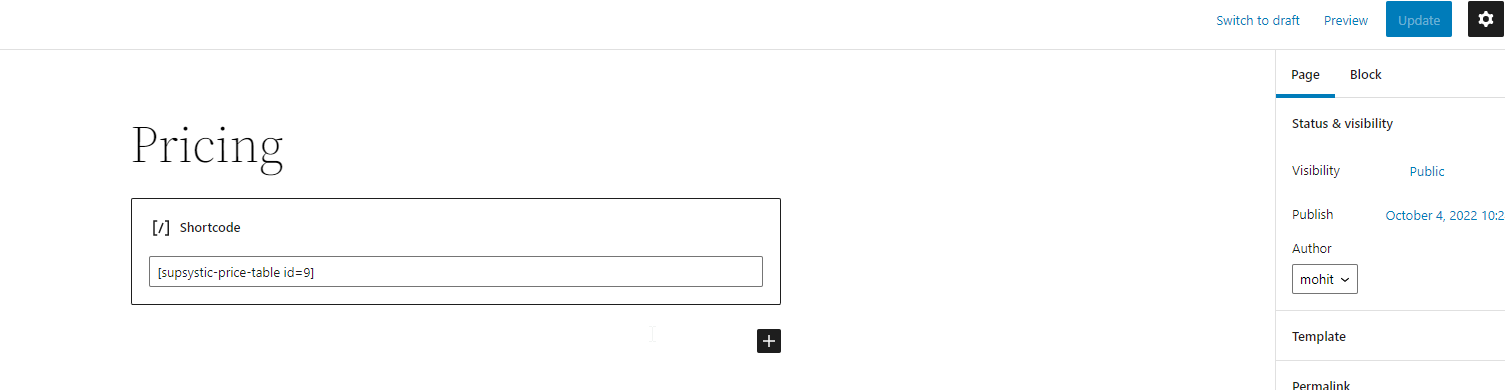
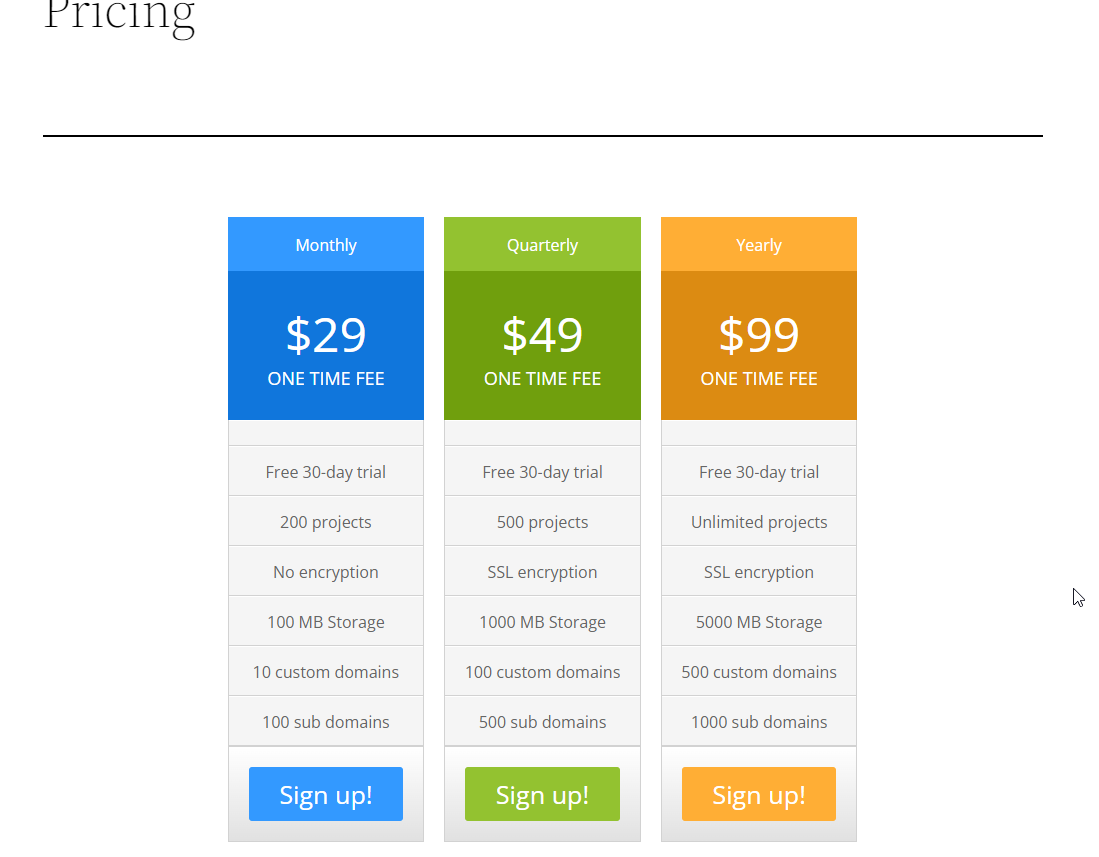
Visit this new page to see what your pricing table looks like:
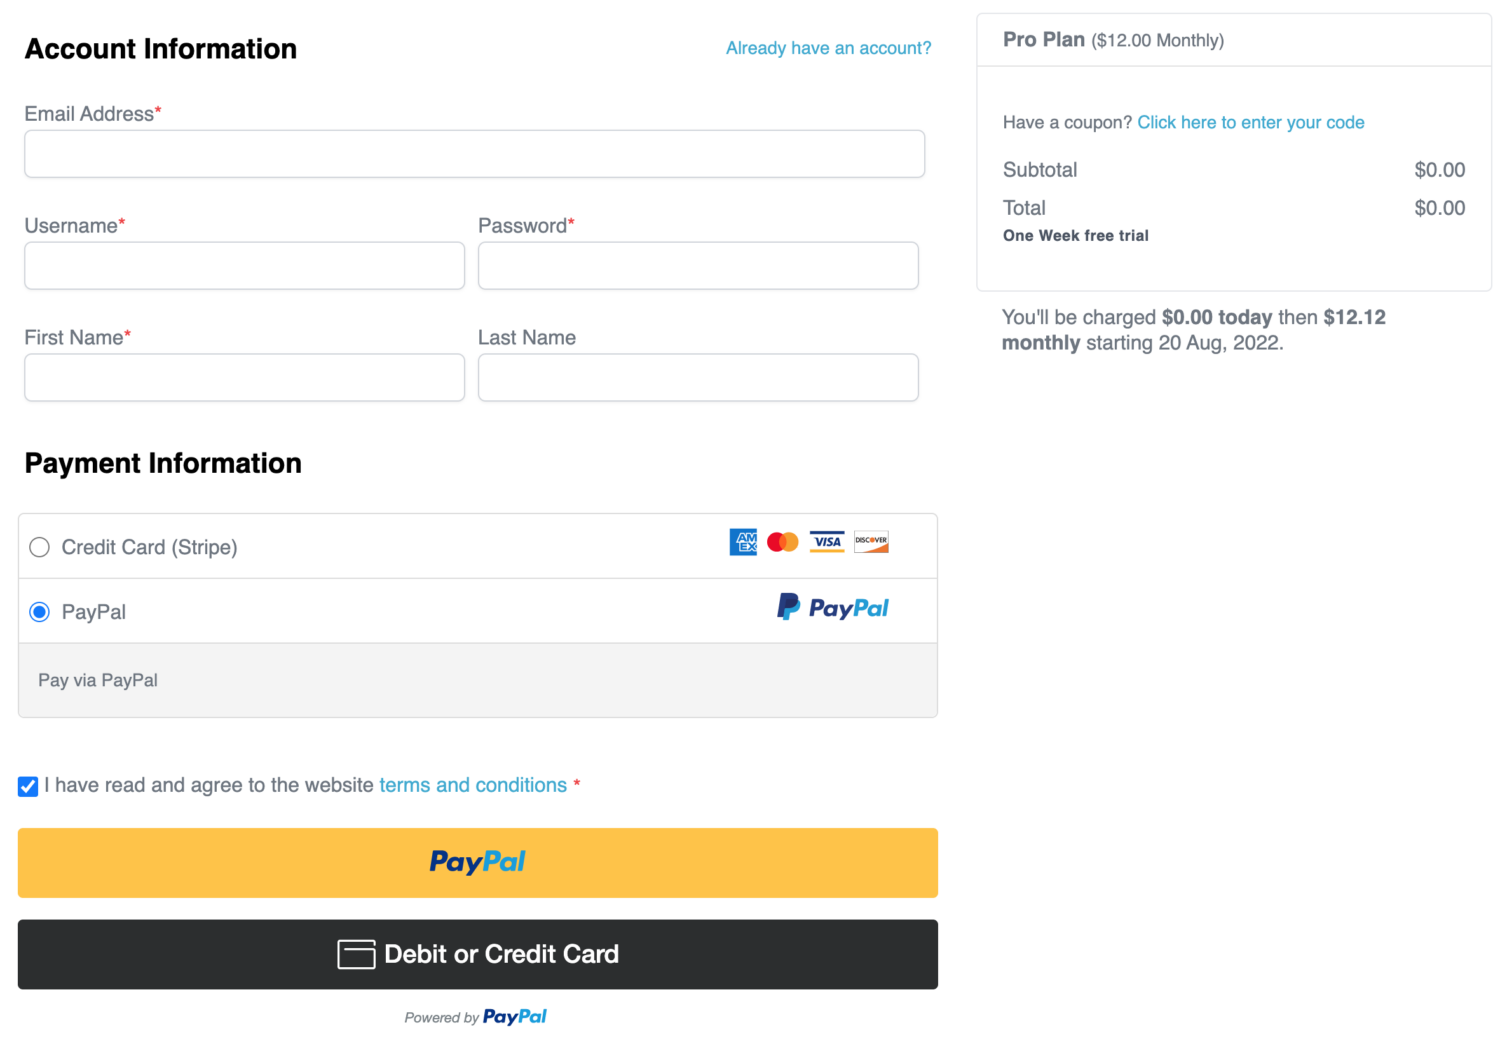
You can visit the Sign-Up link to see what your customers will see. Here’s what your checkout page should look like:
Conclusion
Creating a video membership site is one of the easiest ways to monetize your audience. It’s quick to set up and requires little to no effort to maintain. If you are already producing video content and giving it to your audience for free, it’s the fastest way to start making a full-time income from your passion.
Purchase the ProfilePress membership plugin today to create a video WordPress membership site.