How to Create a Mailchimp Subscribe Popup Form in WordPress
Are you looking to add a Mailchimp subscribe popup form to your WordPress website?
Mailchimp is a popular email marketing tool that allows you to send automated emails and store subscribers.
This tutorial will guide you through creating a WordPress popup form on your WordPress website to collect subscribers and connecting it to your Mailchimp account to store those subscribers.
Popup forms effectively draw attention and encourage visitors to subscribe to your newsletters and mailing lists with a solid call to action.
Follow the steps below to create a Mailchimp subscribe popup form on WordPress.
How to Create a Mailchimp Popup Subscription Form in WordPress
To create a Mailchimp popup subscription form, follow these four steps:
- Install and activate the MailOptin plugin.
- Use MailOptin to create a Mailchimp popup subscription form.
- Integrate the MailOptin plugin with your Mailchimp account.
- Connect the popup subscription form with Mailchimp.
Step1: Install & Activate MailOptin
MailOptin is an excellent choice for lead generation and email automation. It allows you to create a popup form and automatically stores the subscribers you collect in your Mailchimp account.
MailOptin has a free version and a premium version. You will need the latter to integrate with your Mailchimp account.
So purchase a MailOptin license and download the plugin from the welcome email or your MailOptin account. Then upload and install the plugin into your WordPress website.
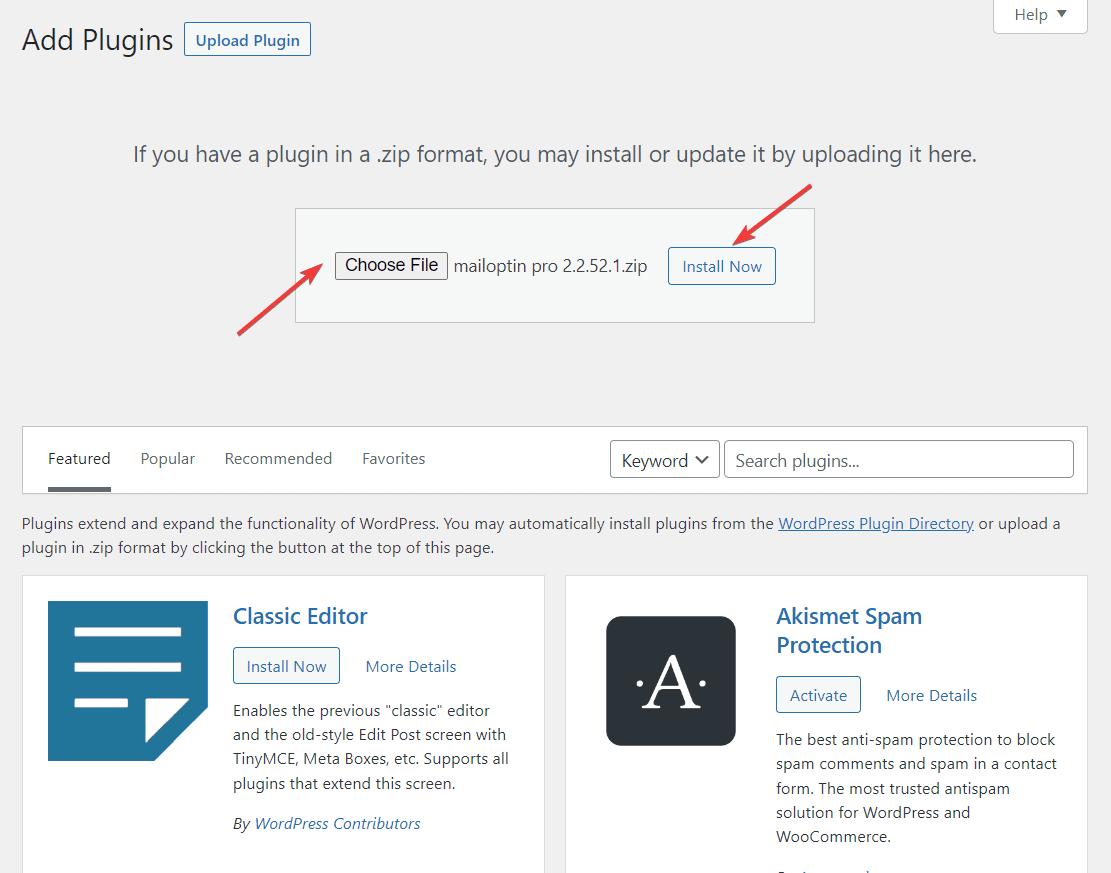
Next, you will need to activate the MailOptin license. Here’s how:
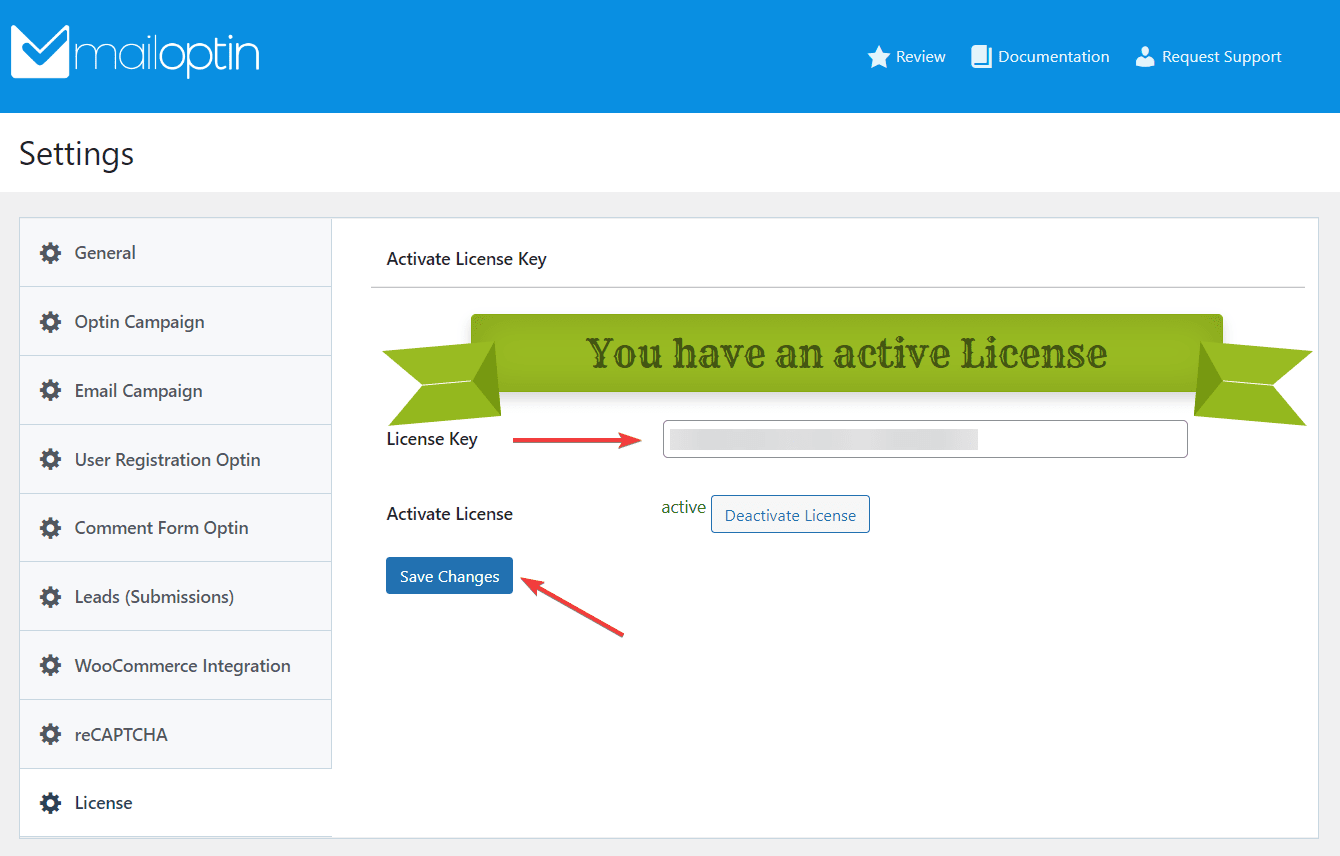
Open your WordPress dashboard and go to MailOptin > Settings > License. First, you must copy the license key from your welcome email or MailOptin account. Then, paste the license key in the white box beside the License Key field.
Hit the Save Changes button, and the license will be activated.
Step 2: Create Popup Subscription Form Using MailOptin
To create a subscription form that pops up, go to the MailOptin section of your WordPress dashboard and select “Optin Campaigns,” then click on “Add New.”
A page will appear that allows you to input a title and offers various templates for the form.
Type in a title and choose “LightBox” from the “Select Optin Type” option.
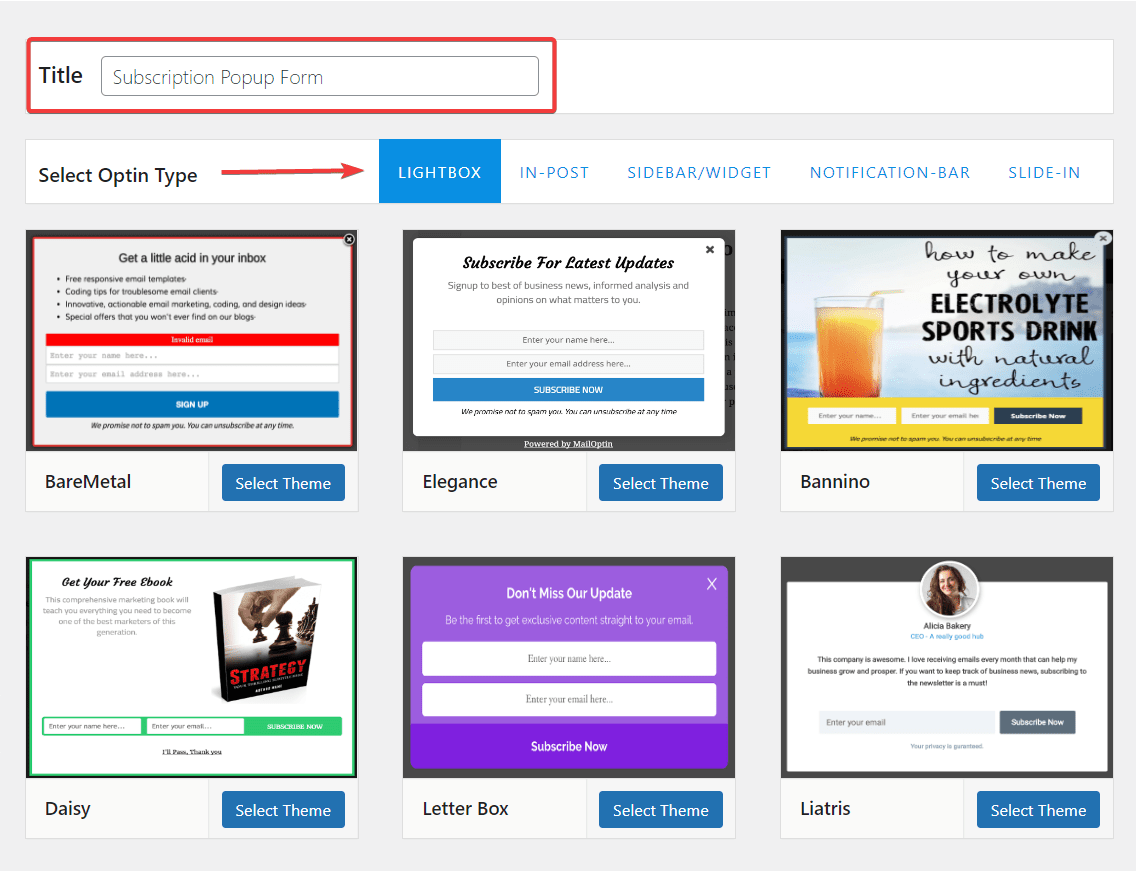
All of the form templates in the LightBox section are popups. If you decide to use a different type of opt-in form in the future, such as a sidebar, slide-in, notification bar, or in-post form, feel free to try those options. However, for now, select one of the templates under LightBox and click the “Select Theme” button on the desired template.
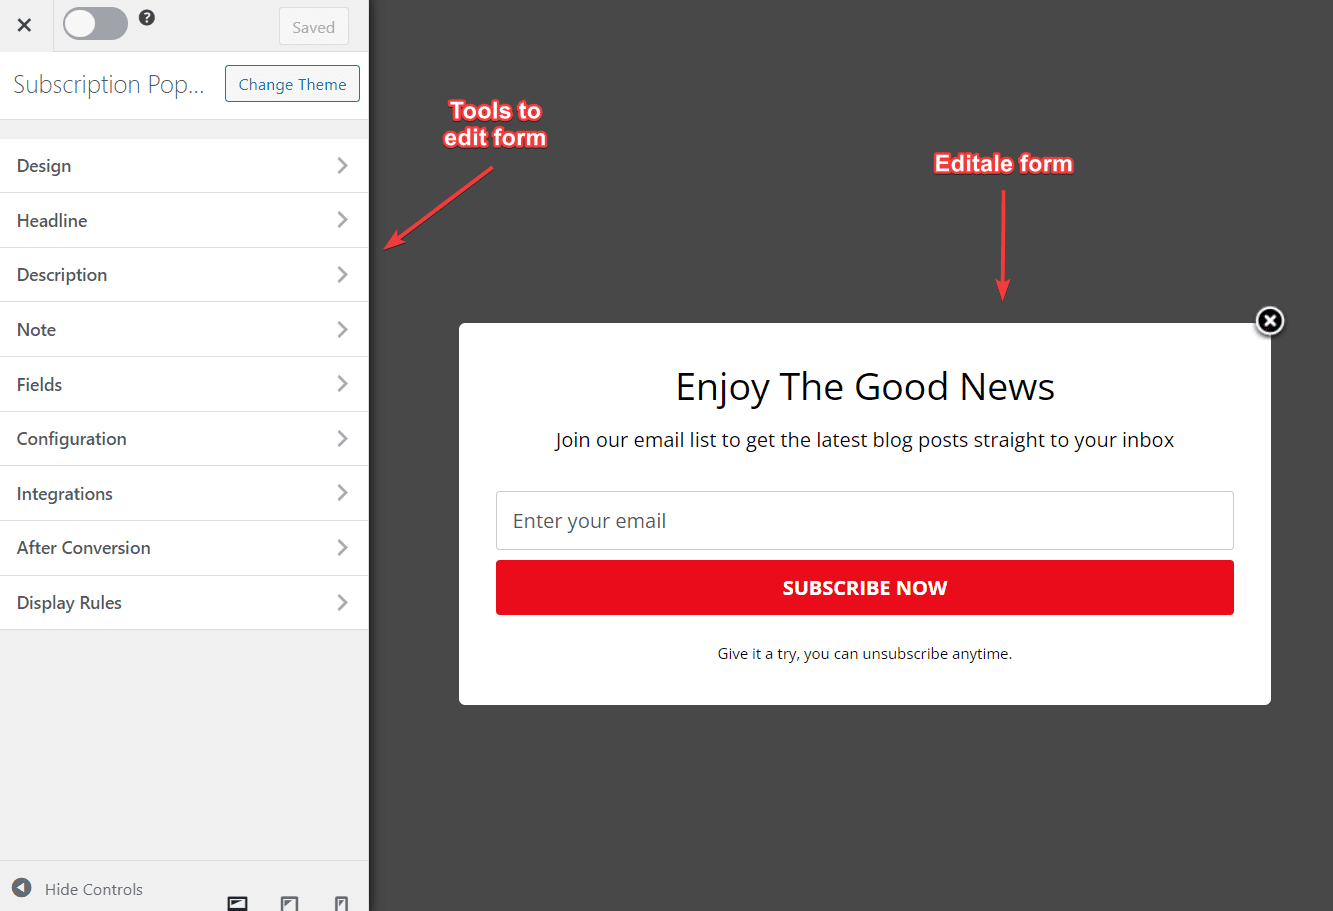
This will take you to a page where you can customize the form.
On this page, you will find the form on the right side and the necessary tools for modifying the form on the left side.
We implemented a yes or no popup opt-in form on our demo site to allow visitors to either sign up for our newsletter or reject the signup offer and remove the popup from the page.
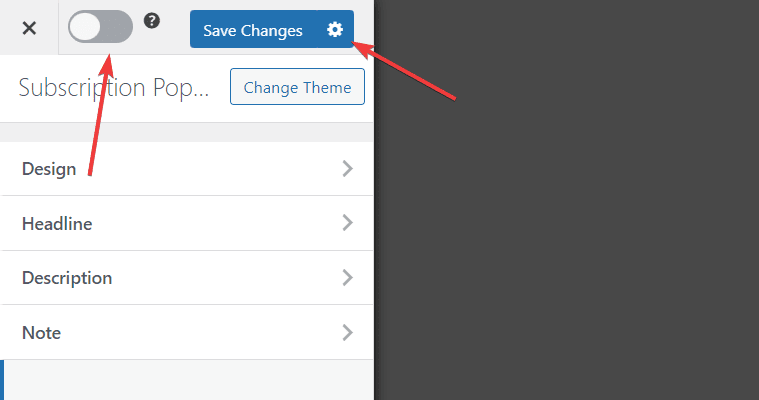
To save all your changes, click the Save Changes button at the top of the screen once your form is ready. Additionally, toggle on the Activate button next to the Save Changes button to activate the form.
Step 3: Integrate MailOptin Plugin With Mailchimp Account
To ensure that visitors who sign up for your popup subscription form on your WordPress website are stored in your Mailchimp account, you must first create a Mailchimp account.
Go to the Mailchimp website and select a free or paid plan option to sign up. Once you have signed up, you will be taken to the dashboard of your Mailchimp account.
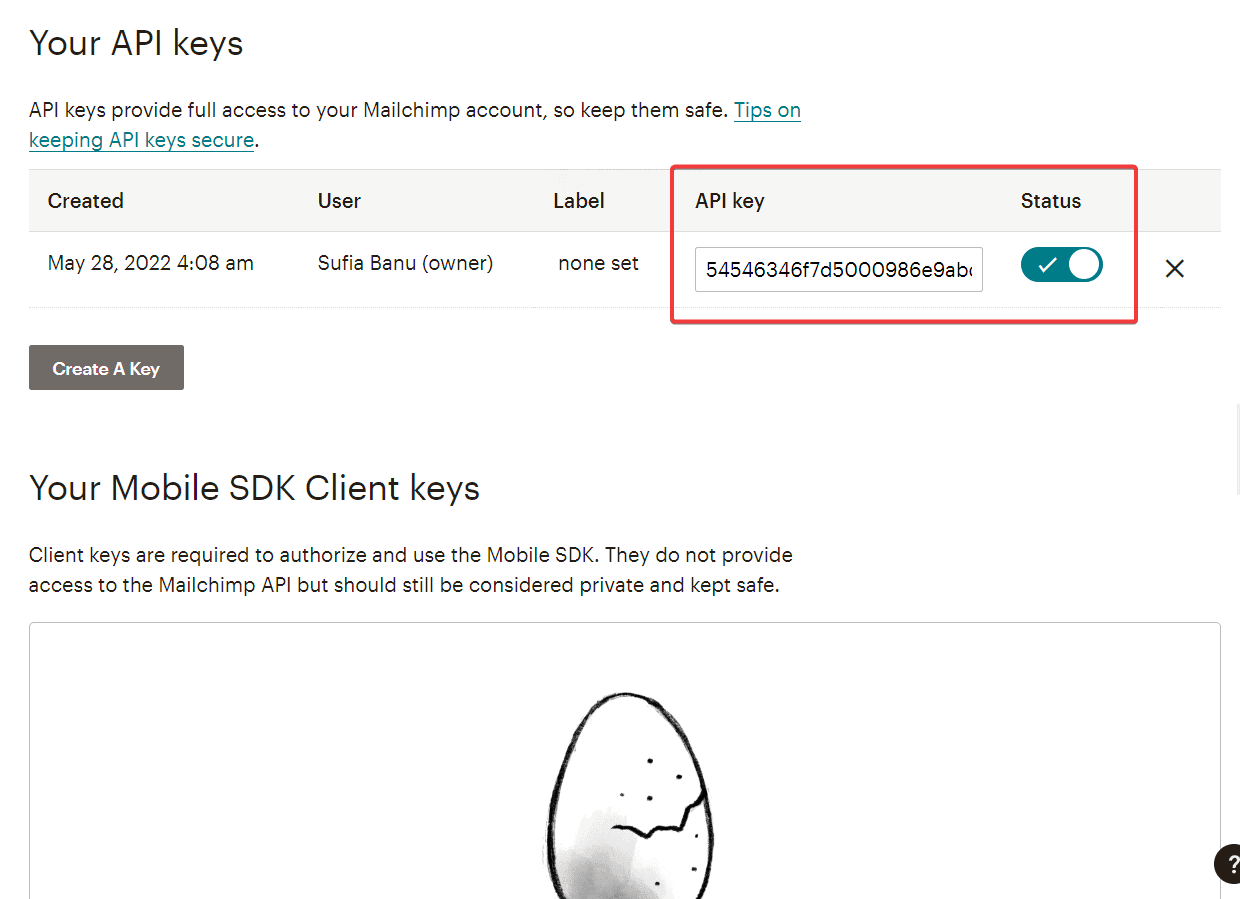
From there, go to the Accounts option on the left menu and select Extra > API Keys. Mailchimp will then take you to a page called Your API Keys, where you can click on the Create A Key button to generate a new API key.
This key will allow you to connect your Mailchimp account to the MailOptin plugin on your WordPress website.
After a few seconds, the new API Key will appear on the screen, along with a Status bar on its right. Make sure to copy the API key and turn the status bar on.
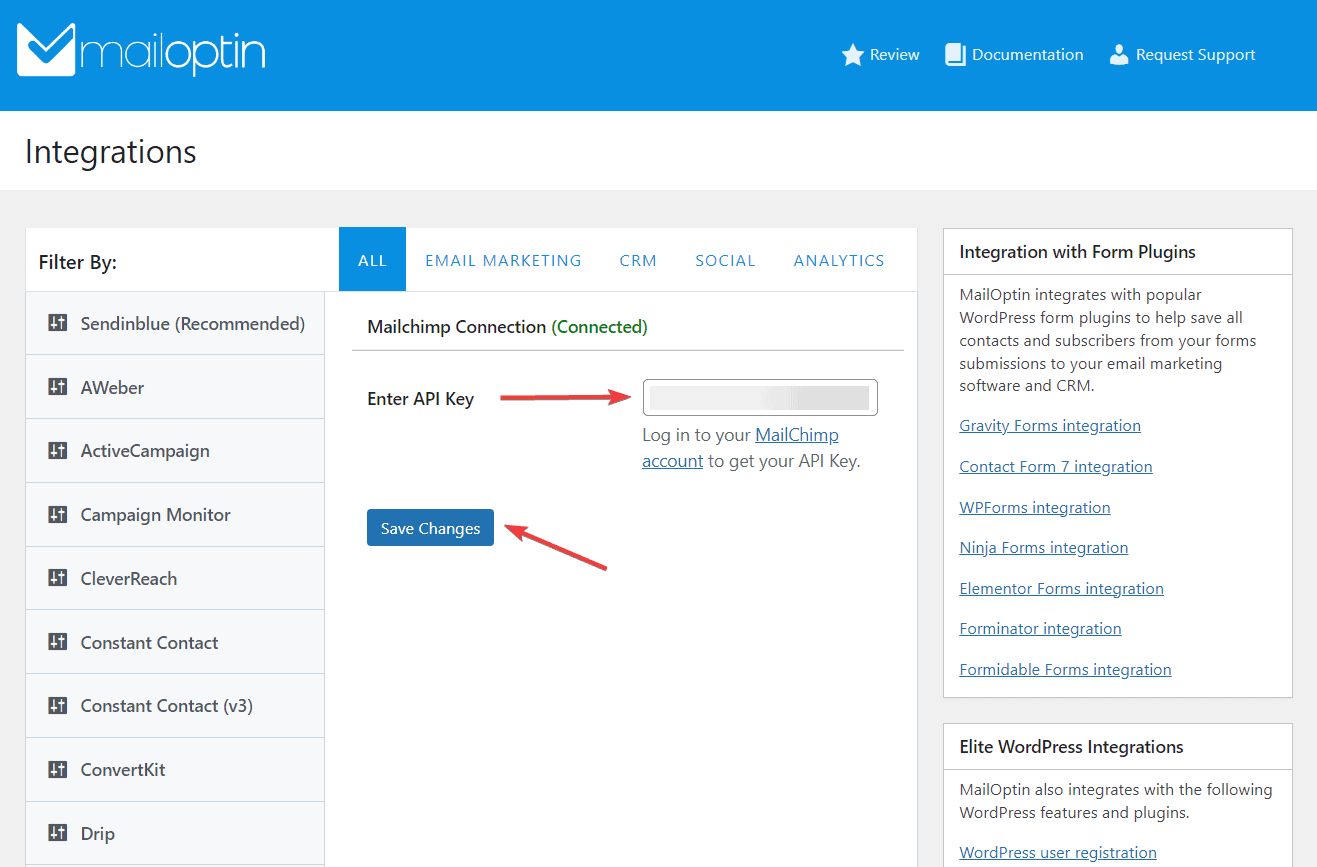
Next, open your WordPress dashboard and go to MailOptin > Integrations. The integrations page has numerous email marketing software listed. Next, you need to find the Mailchimp option and select it.
As soon as you do that, a Mailchimp connection box will appear, asking you to enter the API key. So enter the Mailchimp API key and hit the Save Changes button.
That’s it. You have now connected the MailOptin plugin with your Mailchimp account.
All that’s left is instructing the popup subscription form to store subscriber emails to the new Mailchimp account. More on that in the next section.
It is important to note that MailOptin is compatible with a variety of email marketing software, such as Drip, AWeber, ConvertKit, MailerLite, Constant Contact, GetResponse, Sendy, Campaign Monitor, ActiveCampaign, Sendinblue, Klaviyo, Mailjet, HubSpot, Ontraport, Moosend, MailPoet, Zoho CRM, Zoho Campaigns, Keap, SendFox, SendGrid, and CleverReach.
Step 4: Connect Popup Subscription Form With Mailchimp
To ensure subscribers’ data to your newsletter is stored in your Mailchimp account, you need to connect your popup subscription form with Mailchimp. Here is how to do it:
1) Go to MailOptin > Optin Campaigns and click on the form you created.
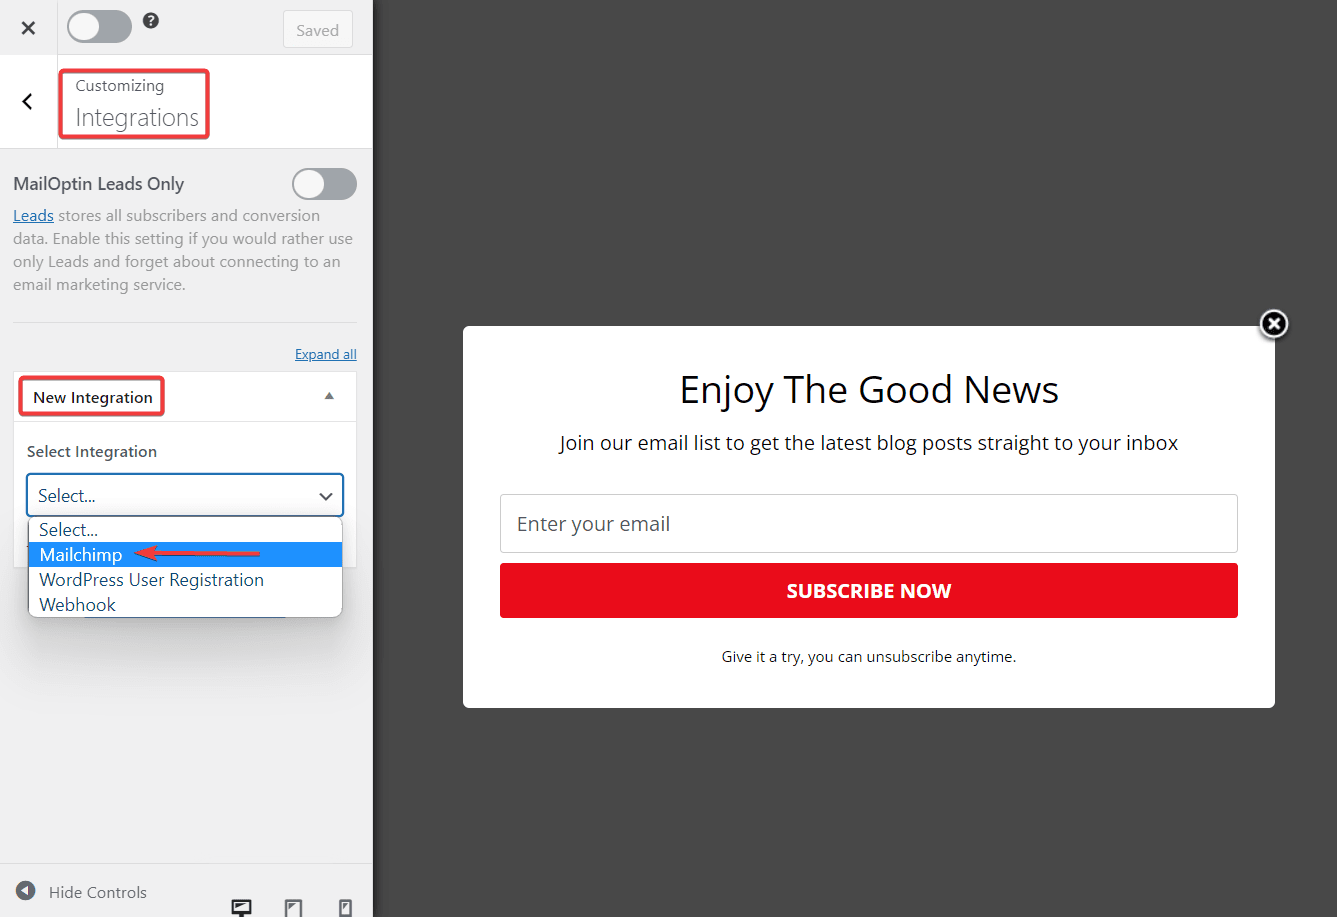
2) On the next page, select Integrations from the tools on the left side of the screen and click on New Integrations.
3) From the drop-down menu, choose Mailchimp as the integration.
4) Remember to save your changes before leaving the page. This will ensure that whenever someone signs up for your newsletter, their name, email address, or both will be stored in your Mailchimp account.
That’s it, folk. You now have a Mailchimp popup subscribe form on your WordPress website.
Conclusion
If you want to add a popup form to your WordPress website, you can use a plugin like MailOptin. This plugin is easy to use and allows you to connect your form to your Mailchimp account to store subscribers.
Not only is MailOptin great for creating Mailchimp subscribe popup forms, but it is also a powerful lead generation and email automation tool. Simply install the plugin, customize your form, and start collecting subscribers.