How to Unpublish WordPress Pages and Posts
Do you want to unpublish WordPress pages and posts without deleting your content?
As your website grows, you may need to hide content from the public. You might be updating old posts, removing outdated information, creating members-only content, or temporarily taking your site offline.
Whatever the reason, knowing how to unpublish content in WordPress gives you full control over what your visitors can see.
The good news is that WordPress makes this process simple. You can quickly unpublish individual pages or posts using built-in settings, or take things further by restricting access with plugins.
In this guide, you’ll learn the different ways to unpublish content in WordPress, including how to unpublish pages and posts using default visibility settings, protect content with ProfilePress, and hide your site from search engines.
What Unpublishing Means in WordPress
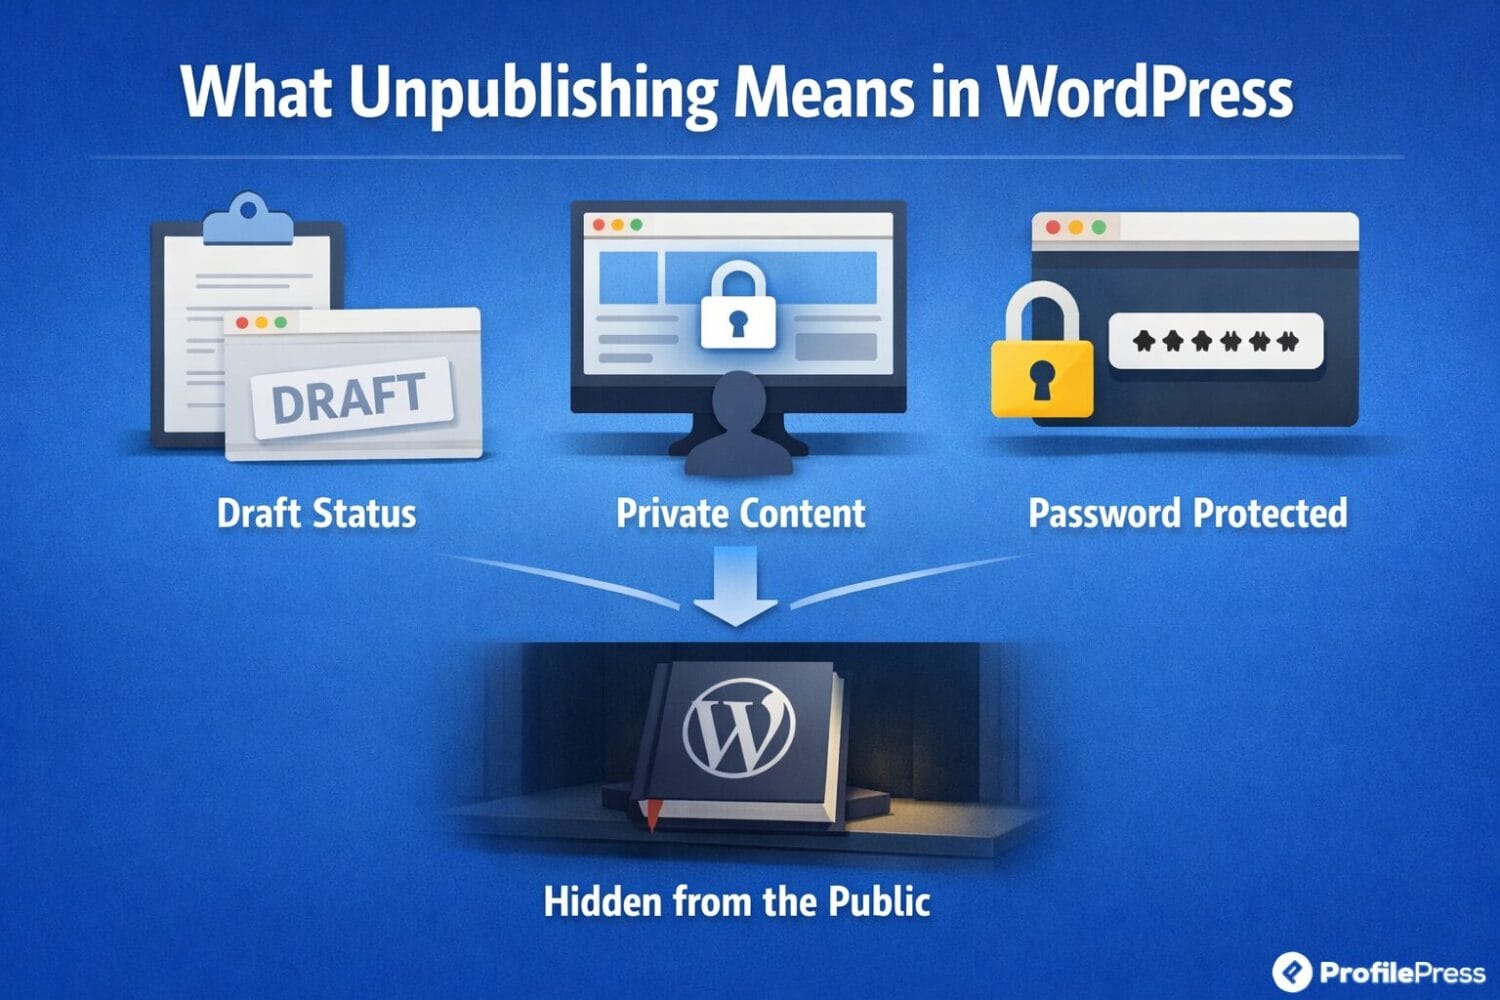
Unpublishing in WordPress means removing content from public view without deleting it. Your pages and posts remain safely stored in your dashboard, where you can edit, update, or republish them whenever you’re ready.
WordPress gives you 3 built-in ways to unpublish content:
- Draft Status: Switching a post or page to draft removes it from your live site. Visitors can no longer access it, but it remains in your dashboard for editing or future publication.
- Private Content: Setting WordPress posts and pages as private allows only logged-in users with the appropriate permissions to view it. This is useful for creating members-only posts or internal documentation.
- Password-Protected Content: You can require a password for certain pages or posts, granting access only to users who know the password.
For more control, you can use a WordPress membership plugin such as ProfilePress, which lets you restrict content by user roles, membership plans, or login status, giving you greater flexibility over who can view your content.
Unpublish Pages & Posts Using WordPress Default Visibility
The simplest way to unpublish content in WordPress is by switching your published posts or pages to Draft or Private status. This method quickly removes your content from public view without deleting it.
To do this, go to the Pages or Posts section in your WordPress admin dashboard.
Open the post or page you want to unpublish and locate the Publish box on the edit screen. Click Status to see some options.
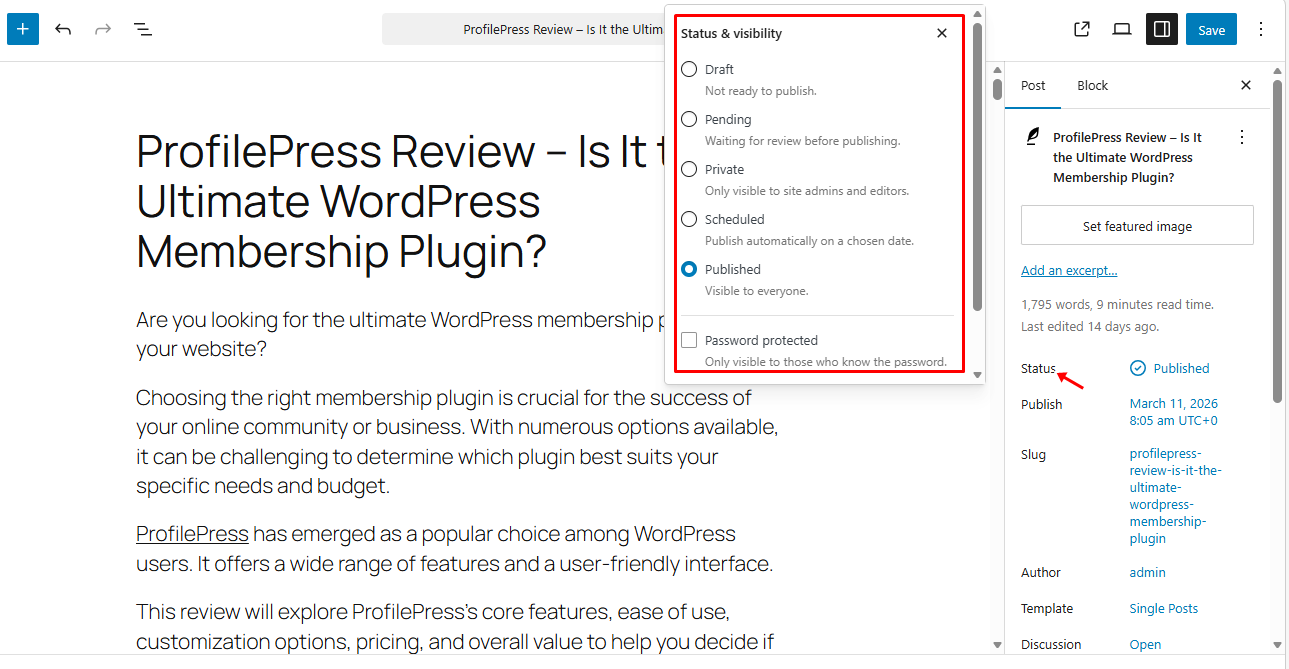
Choose either Draft or Private, then click Update.
Once updated, your content is no longer accessible to the public but remains fully editable in your dashboard. This is the quickest way to unpublish a WordPress post or page.
Hide Pages and Posts Using ProfilePress Plugin
If you want more control over who can access your content, the ProfilePress plugin is an excellent solution. Unlike the default WordPress options, which only let you set content to Draft or Private, ProfilePress lets you restrict pages and posts to specific users, membership plans, or user roles.
To hide content with ProfilePress, you’ll first need to purchase a license.
Once your purchase is complete, you’ll receive an email containing the plugin download link and your license key. You can also download the plugin directly from your ProfilePress account page.
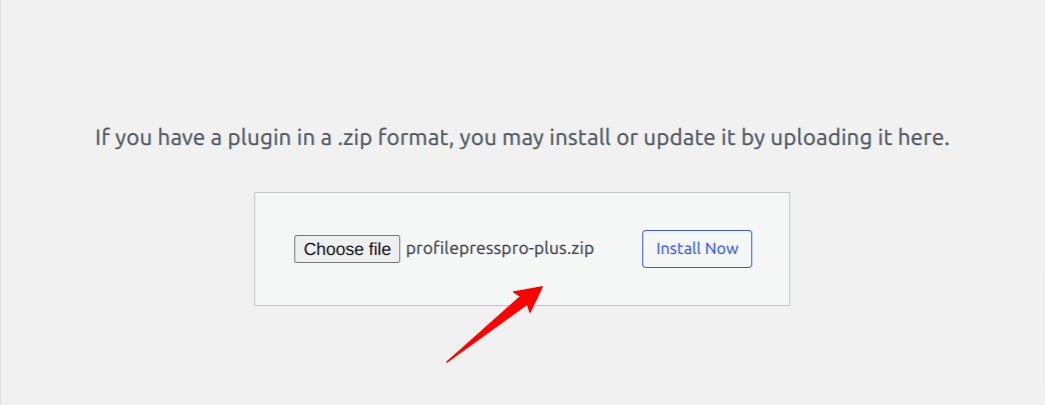
To install the plugin, log in to your WordPress admin dashboard and navigate to Plugins > Add New. Click Upload Plugin, select the ProfilePress zip file you downloaded, and then click Install Now.
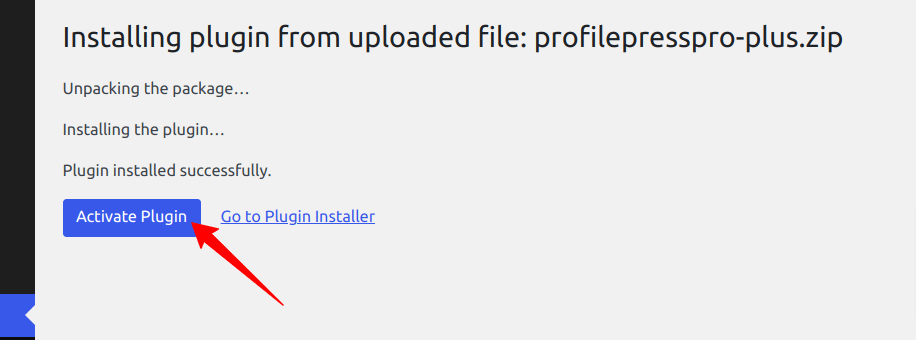
Wait a few moments for the installation to finish. Once it’s complete, click Activate Plugin to enable it on your site.
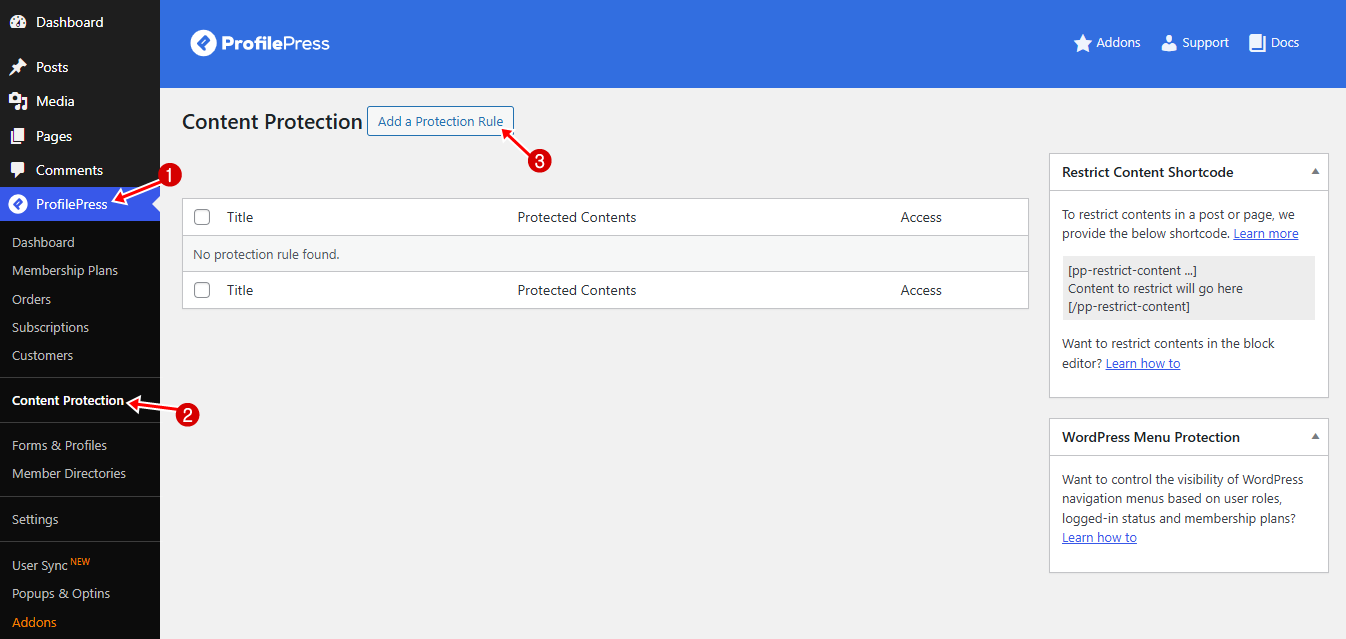
Next, navigate to ProfilePress > Content Protection, then click Add a Protection Rule to create a new content restriction rule.
Enter a descriptive title for the rule so you can easily identify it later.
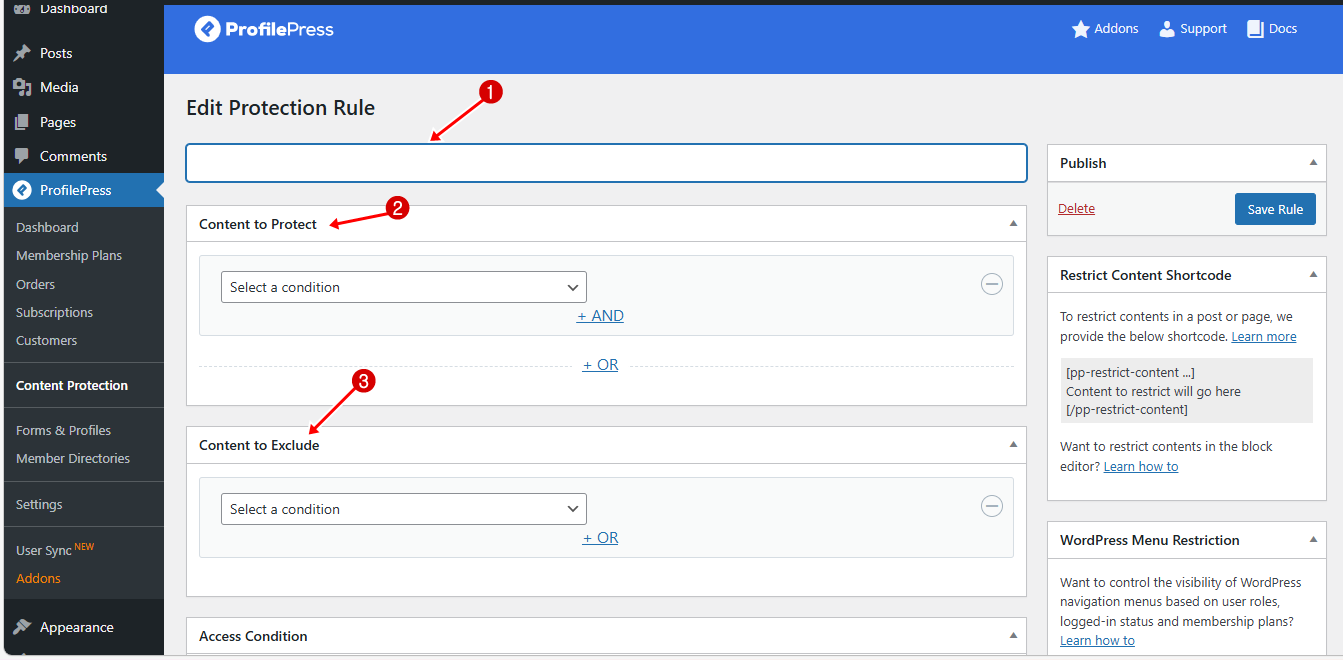
Scroll down to the Content to Protect section. Here, you can select specific pages, posts, categories, or other content types to protect. ProfilePress lets you combine multiple selections using AND or OR conditions for more precise control.
You’ll also find a Content to Exclude option. This allows you to exclude certain pages or posts from the rule, even if they match the protection criteria. For example, you could protect all posts in a category but exclude a few posts you want to remain public.
After selecting the content to protect and any items to exclude, scroll down to the Access Condition section to specify who can view the protected content.
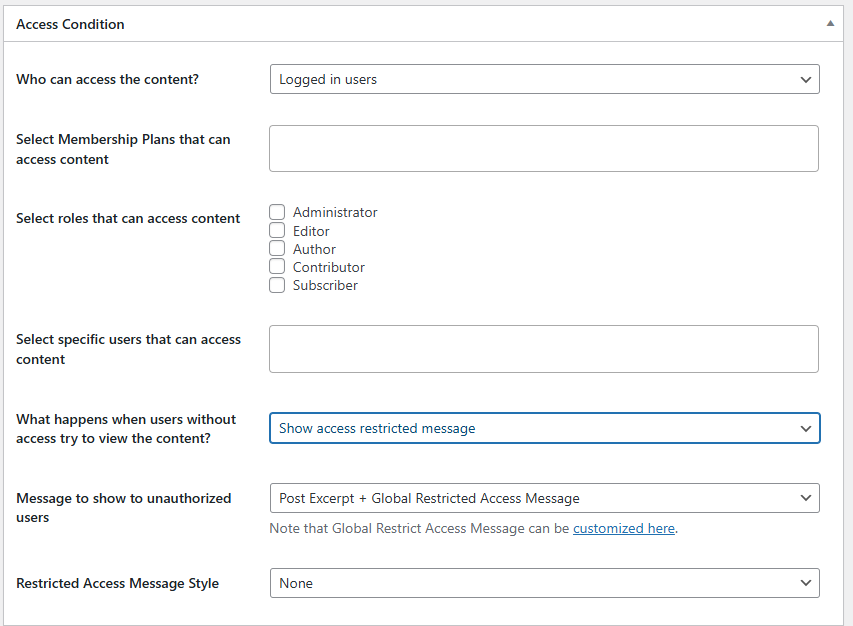
In this section, you determine who can view the protected content.
Start by choosing the general access level: Everyone, Logged-in Users, or Logged-out Users. For instance, if you want only registered members to see the content, select Logged-in Users.
You can further refine access by selecting specific membership plans that are allowed to view the content. Additionally, you can restrict content based on user roles, giving access only to certain roles. If necessary, you can even specify individual users who are allowed to access the content.
After defining who can view the content, you can decide what happens when someone without permission tries to access it. ProfilePress provides two options:
- Show an Access-Restricted Message: Display a custom message to unauthorized visitors. For example: “This content is available to members only. Log in or subscribe to access it.” You can also customize the Restricted Access Message Style to match your site’s design.
- Redirect User: Send unauthorized visitors to a specific page, such as a login, registration, or pricing page, where they can sign up to gain access.
Once you’ve configured all the settings, click Save Rule to apply the content protection rule.
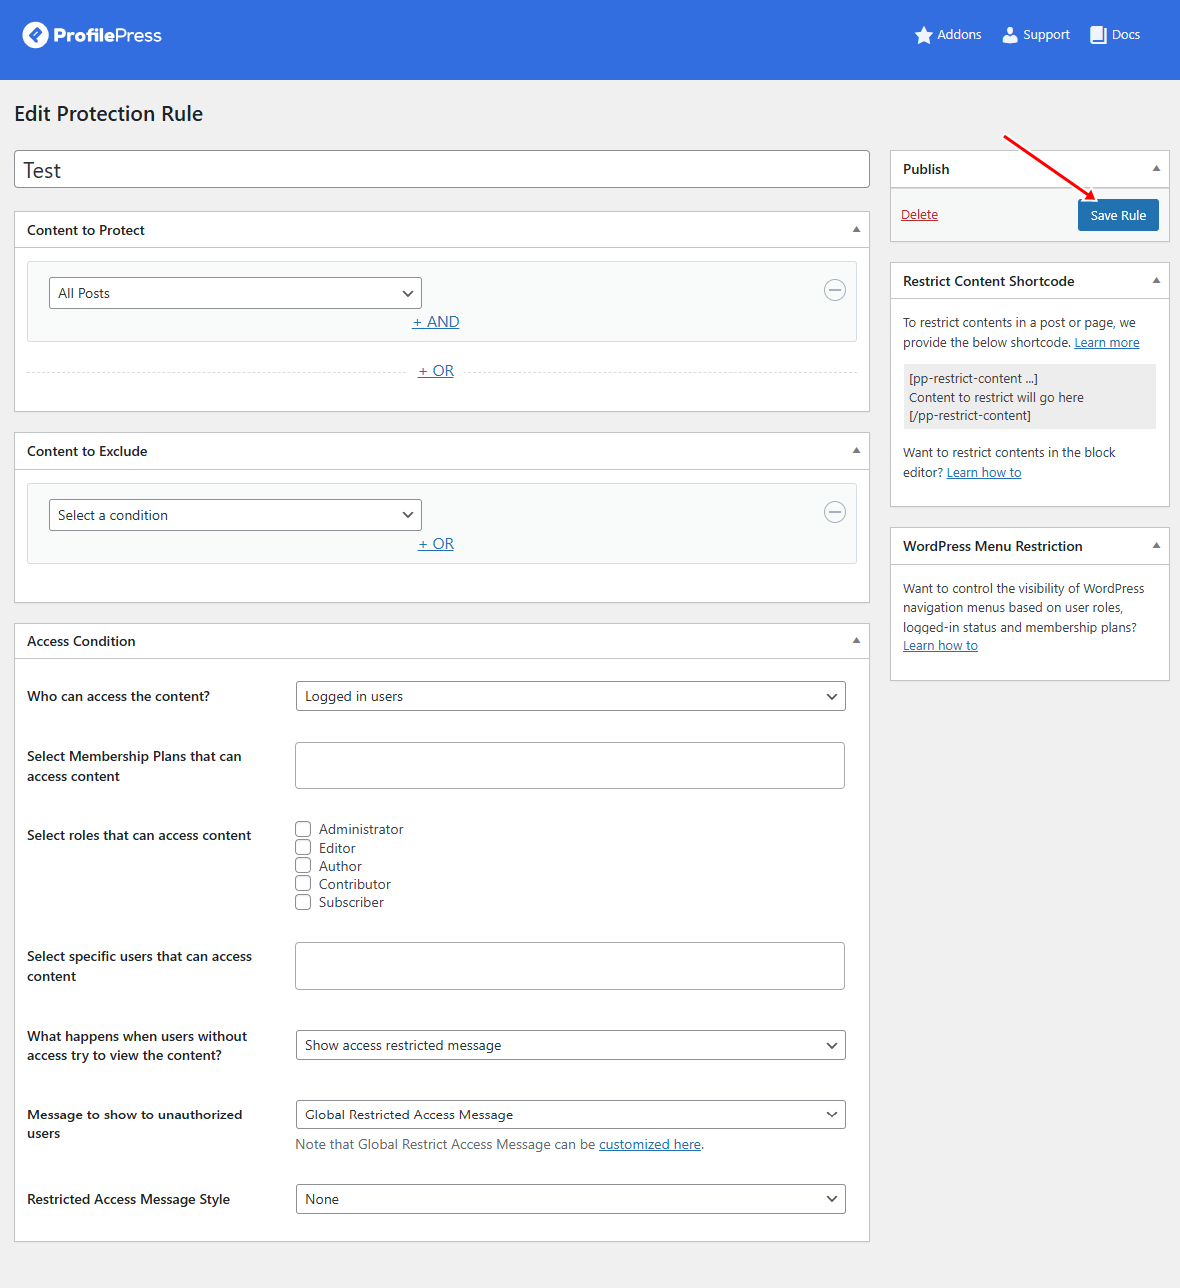
In the screenshot shown above, we are protecting all posts on the website, without excluding any content from the rule.
For the Access Condition, we chose Logged-in Users, meaning only signed-in users can view the posts.
Under the option “What happens when users without access try to view the content?”, we selected Show Access Restricted Message.
This ensures that anyone who is not logged in will see a restriction message instead of the content.
Below is an example of what visitors who are not signed in will see when they attempt to access any post on the website.
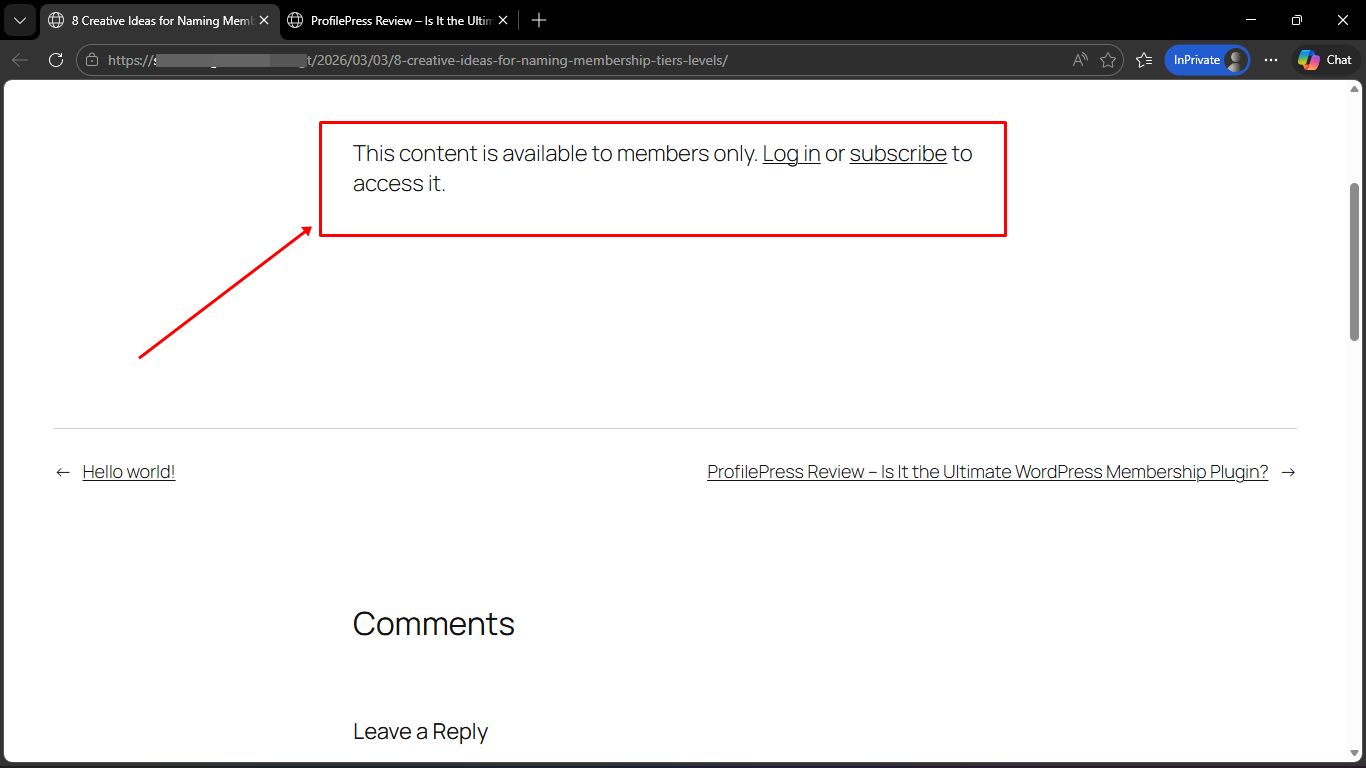
With these flexible protection options, ProfilePress gives you full control over who can view your website’s content.
Unpublish WordPress Site from Search Engines
Sometimes, when people talk about unpublishing their WordPress site, they mean making it invisible to search engines rather than deleting it entirely.
WordPress makes it easy to discourage search engines like Google, Bing, and Yahoo from indexing your site.
To do this, log in to your WordPress dashboard. Then navigate to Settings > Reading and scroll down to the Search Engine Visibility section.
Next, tick the checkbox labeled “Discourage search engines from indexing this site” and click Save Changes to apply the setting.
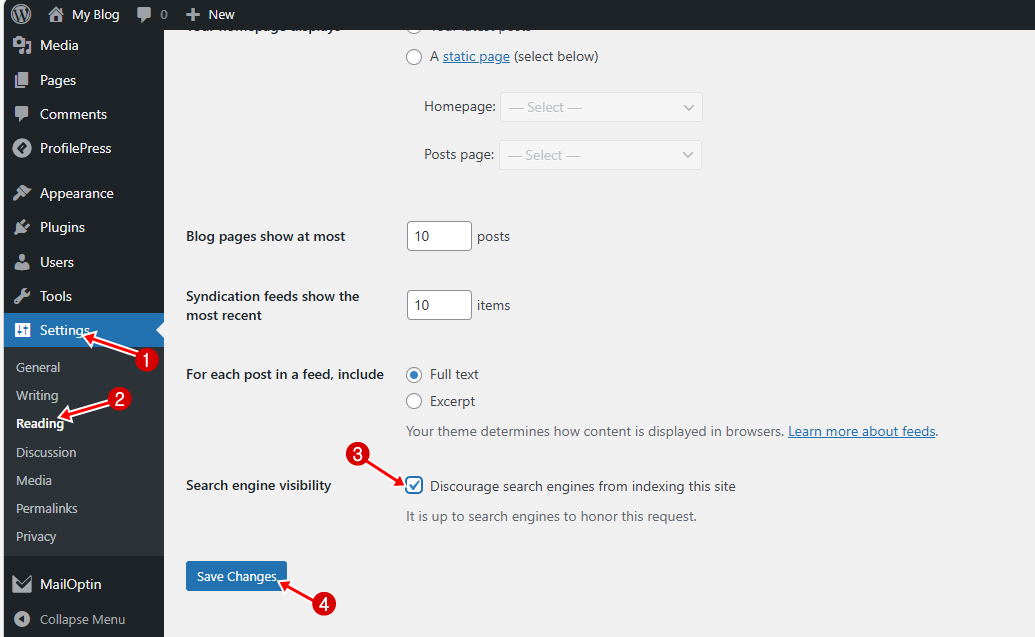
This will signal search engines not to display your site in search results, helping keep your content private while still online.
Frequently Asked Questions About Unpublishing WordPress Pages and Posts
Q1. Can I republish a page after unpublishing it?
Yes, you can easily republish any page or post by changing its status from Draft or Private back to Published.
Q2. Will unpublishing affect my SEO rankings?
It can, especially if the page was already indexed. Use redirects to minimize the impact.
Q3. What’s the difference between Draft and Private in WordPress?
A Draft removes the content completely from your live site, while a Private post is still published but only visible to logged-in users with the right permissions.
Q4. How can I hide content from specific users only?
You can use a plugin like ProfilePress to restrict content based on user roles, membership plans, or login status.
Q5. Is password protection better than unpublishing?
It depends on your goal. Password protection allows limited access, while unpublishing completely removes public access. Choose based on how you want users to interact with your content.
Q6. Can people still access unpublished content with a direct link?
No, once a post is set to Draft, it is no longer accessible via a direct link. However, Private or password-protected content can still be accessed under specific conditions.
Conclusion
We hope this article helped you learn how to unpublish WordPress pages and posts without losing your content.
As you’ve seen, WordPress offers simple built-in options like Draft and Private status to quickly hide content, while plugins like ProfilePress give you more control over who can access your pages and posts.
Whether you’re removing outdated content, creating a members-only experience, or temporarily taking your site offline, the right approach depends on your goal.
By following the methods shared in this guide, you can manage your content confidently while maintaining a smooth experience for your visitors.