How to Restrict Content in WordPress (Complete Guide)
Do you want to restrict content in WordPress to specific users?
Whether you want to create a paid membership for your content, sell an online course, or create an in-house knowledge base with WordPress, you’ll need a plugin to restrict user access. That’s because WordPress doesn’t offer a built-in way to restrict content.
It’s straightforward to restrict access to your content in WordPress with the help of the right plugin. In this article, I’ll show you how to restrict user access to your content in WordPress.
Why Restrict WordPress Content
Restricting access to your website’s content opens up many monetization opportunities. For example, you can sell memberships to your website’s content and only allow users with an active subscription to view the “premium” pages.
An excellent example of this business model comes from Farnam Street’s website. Their blog is free to read. You can read all the articles for free and even listen to most of their podcast episodes. But if you want access to some of their best content, you’ll need to purchase a monthly subscription:
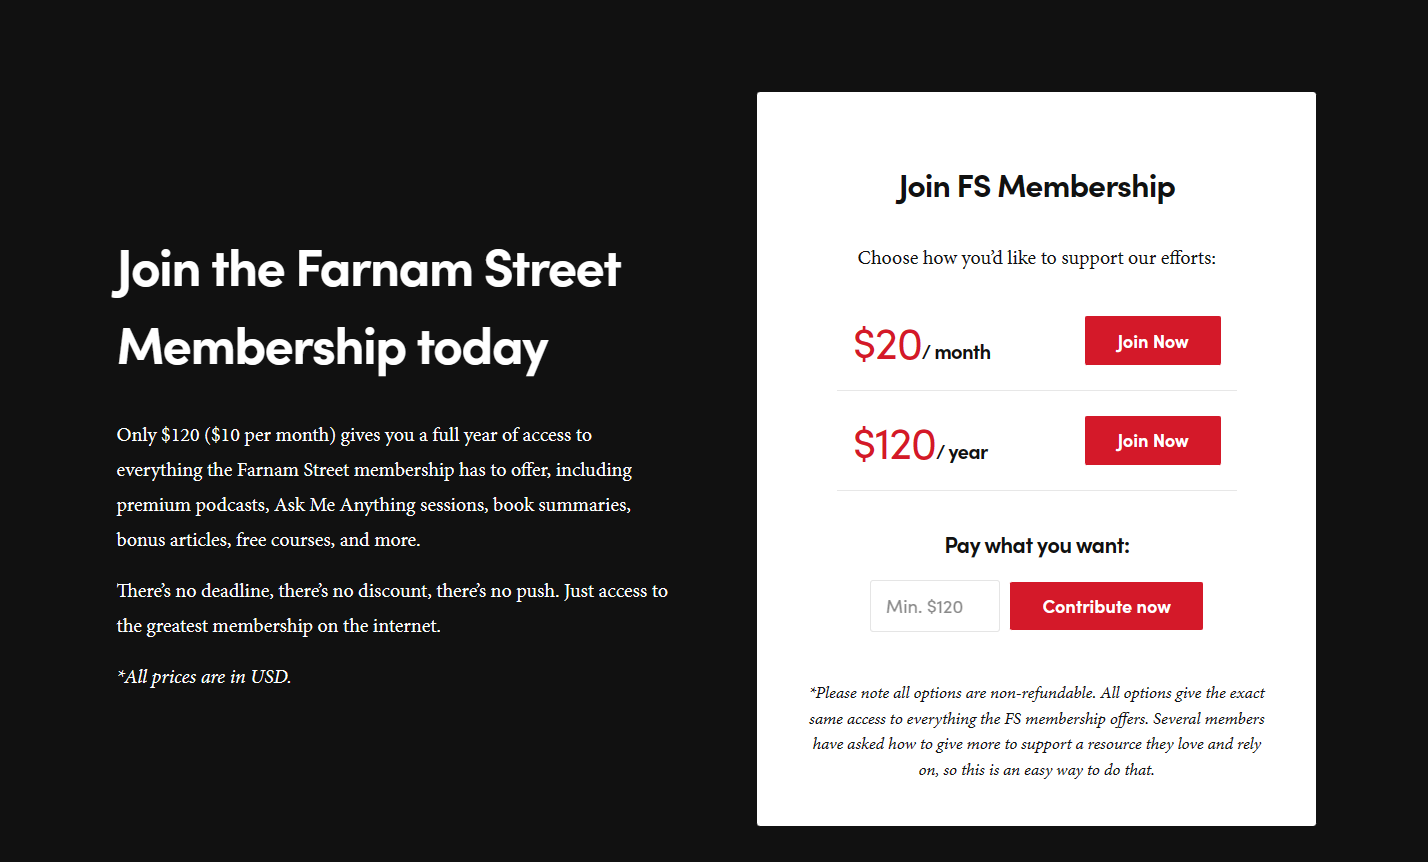
Now, Farnam Street’s subscription is a little on the higher end because of its audience size and how many benefits its membership offers.
You don’t have to start with $20 a month. For most websites, that would be a bad idea.
Ness Labs is a blog about Productivity that employs the same business model. Their pricing is only $49 per year:

You can read most of Ness Labs’ blog content for free, but if you want access to additional goodies, you’ll need to buy a subscription:
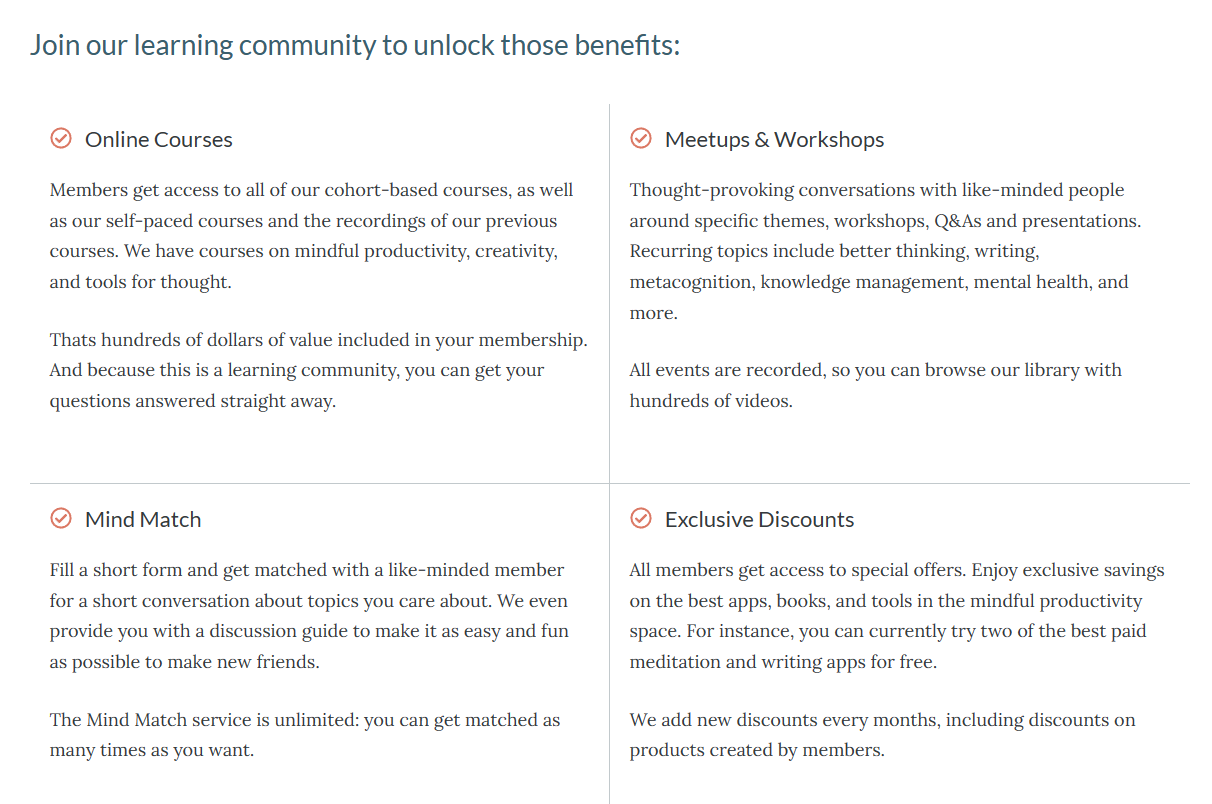
Ness Labs’ premium subscription not only gives you access to their premium blog articles but also to their online courses.
Most news sites operate on the same business model. For example, the New Yorker does it:
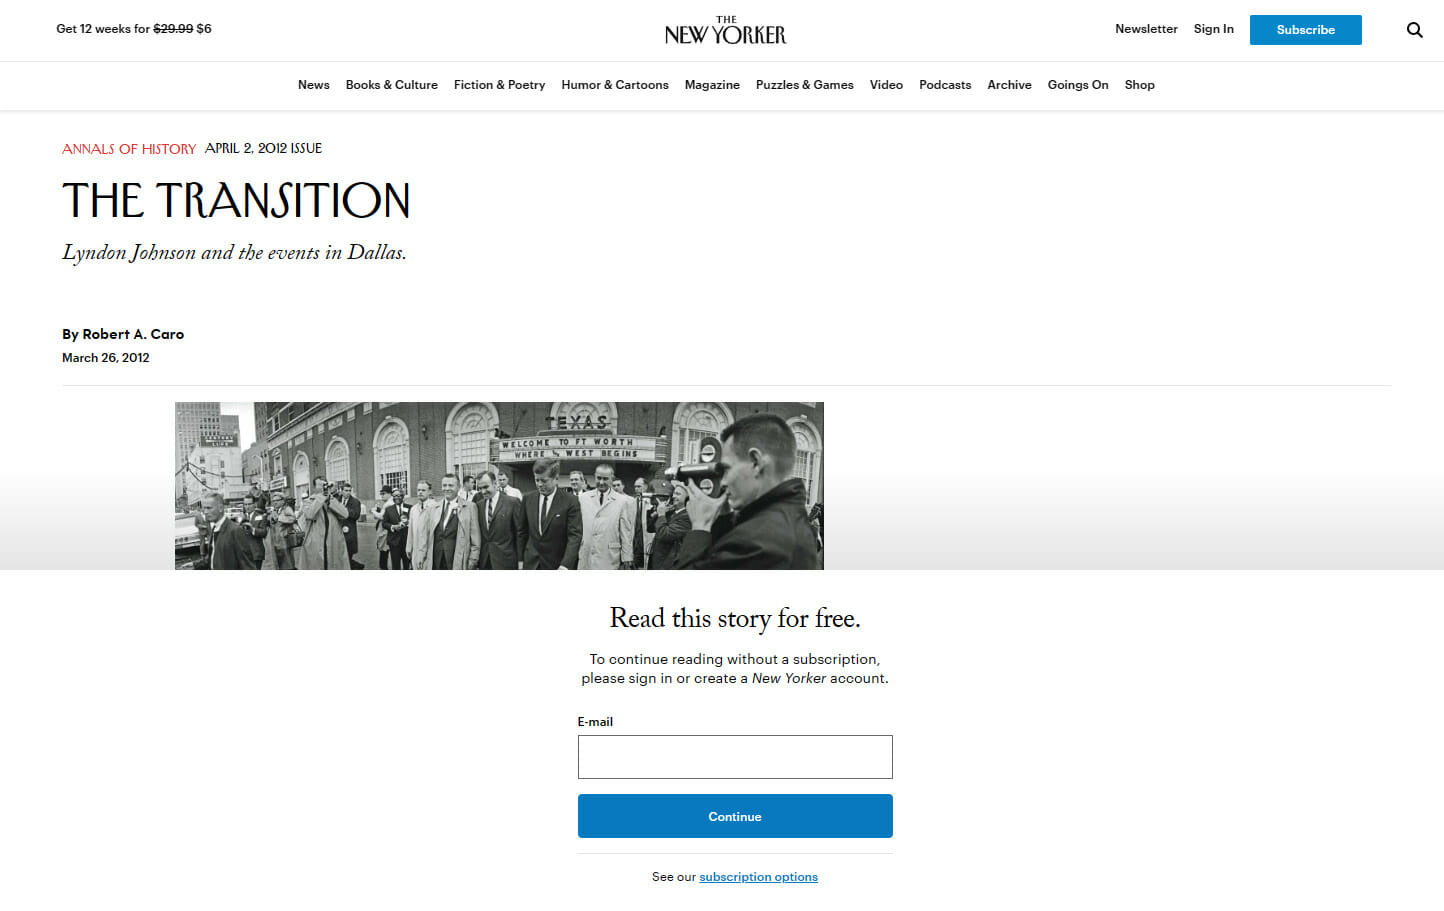
They let you read a few pages for free but require you to buy a subscription if you want to read more. This is called a metered paywall. And it’s straightforward to set up on your WordPress website.
Whether you want to sell online courses, eBooks, or paid memberships to your content, I’ll show you the easiest way to do it all below.
The Easiest Way To Restrict Access To WordPress Content
If you search for WordPress plugins that allow you to protect content or restrict user access to content, you’ll find hundreds of contenders. But most of them are challenging to learn and not very beginner-friendly. This is why we recommend ProfilePress.
ProfilePress is a perfect restrict content WordPress plugin for also selling memberships, digital products, and subscriptions on your WordPress website. So whether you want to sell an eBook or an online course, you can easily do it with ProfilePress. It also allows you to build a paid membership site where your visitors need an active subscription to view your premium content.
The best part about ProfilePress is that it makes restricting access to your content a cakewalk. It’ll take a few minutes to set up and is built for beginners.
How To Create a Membership Plan (Optional)
If you are building a membership website, you’ll want to create at least one paid subscription plan. ProfilePress allows you to create both one-time and recurring plans. For example, you can sell a subscription that costs $5 per month or $50 per year. Or you can sell a $20 one-time payment subscription.
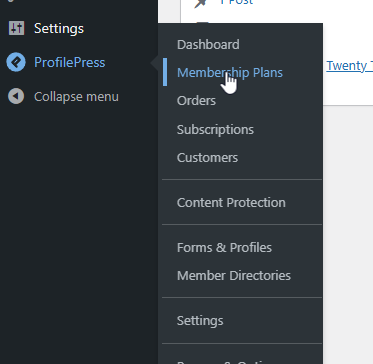
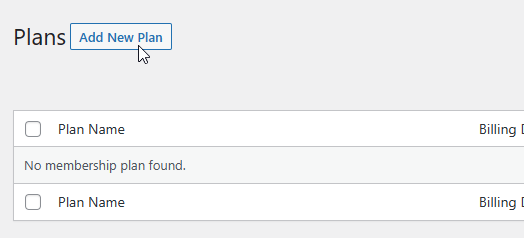
To create a new membership plan in ProfilePress, log into your WordPress dashboard and navigate to ProfilePress > Membership Plans:
Click the Add New Plan button:
This will take you to the New Plan screen:
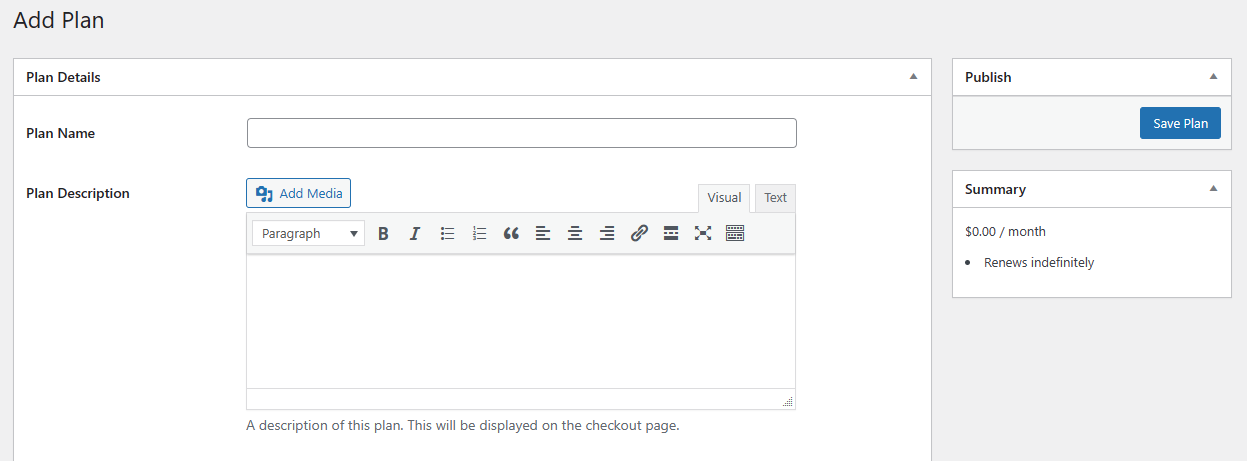
This page has three sections: Plan Details, Subscription Settings, and Downloads & Integrations.
Let’s go over these three sections one-by-one:
Plan Details
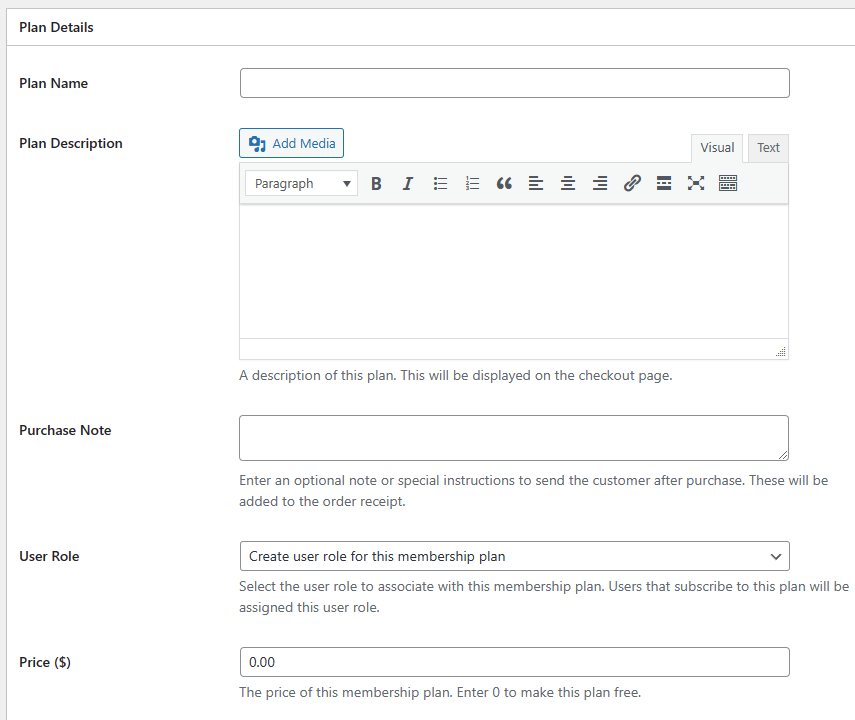
This section defines the basic details of your plan. First, enter a name and a description for this new plan. Both of these will be visible to your visitors and your customers. They aren’t just for internal purposes.
Next, enter a price for this plan. In the next section, you’ll be able to choose whether this is a one-time payment plan or a recurring (monthly, yearly, etc.) subscription plan. If you are creating a monthly plan, this is how much the user will be charged every month. You can leave the Purchase Note and User Role fields as they are.
Subscription Settings
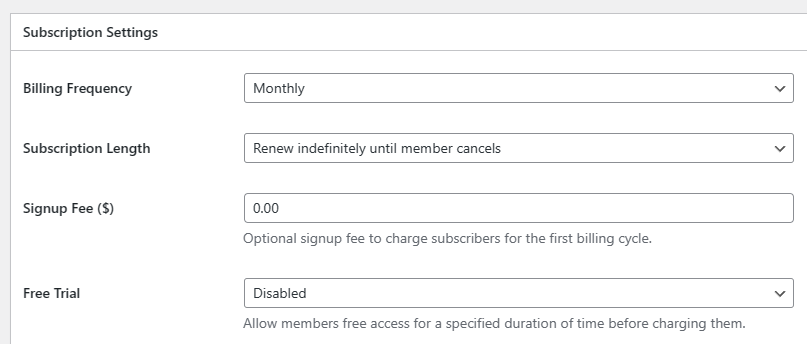
If you want to create a one-time payment plan, then select one-time as the Billing Frequency. If you’re going to charge the user recurringly, select Monthly, Annual, or any other frequency you want.
The second option, Subscription Length, is how many times a customer gets charged on this plan. Leave this option if you want to charge the customer indefinitely until they cancel their subscription.
The Signup Fee option allows you to charge an additional fee to your customers when they sign up/purchase this plan. Your customers will only be charged this amount once they sign up for this plan.
The Free Trial option allows you to offer a free trial to your customers. If you select One Month as the free trial duration, your customers won’t be charged until one month is over. Keep it disabled if you don’t want to offer a free trial.
Downloads & Integrations
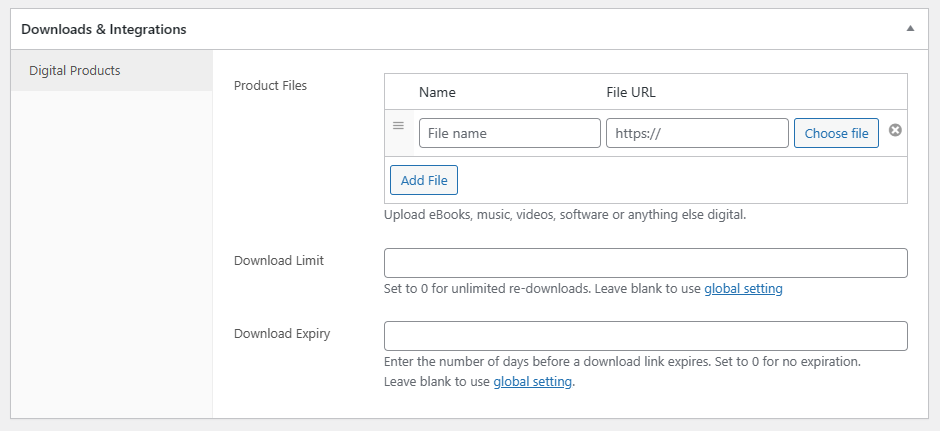
This section is only helpful if you sell a digital download such as an eBook. If you are doing so, click the Choose file button to upload your digital download file. This file will be sent to your customers via email when they subscribe to this plan.
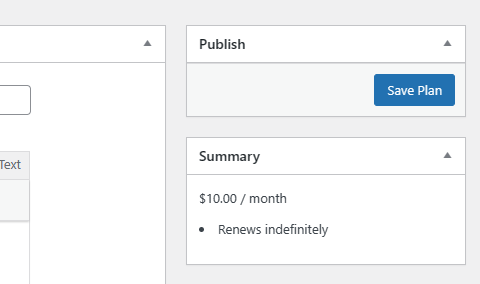
When you’re done playing around with the options, click the Save Plan button on the top right of the page:
How To Restrict Content In WordPress
ProfilePress allows you to create content restriction rules. These rules enable you to define specific pages and the type of pages you want to restrict user access to. This allows you to easily restrict access to all the pages that fall under a particular category, tag, or custom post type.
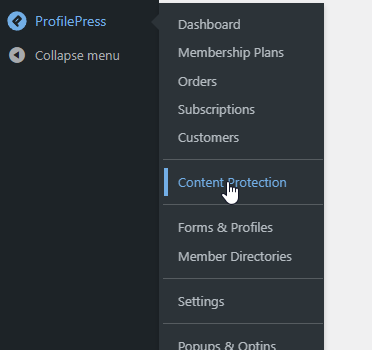
To create a content restriction rule in WordPress, navigate to ProfilePress > Content Protection:
Now, click the Add a Protection Rule button:

This will take you to ProfilePress’s content protection rule creator:
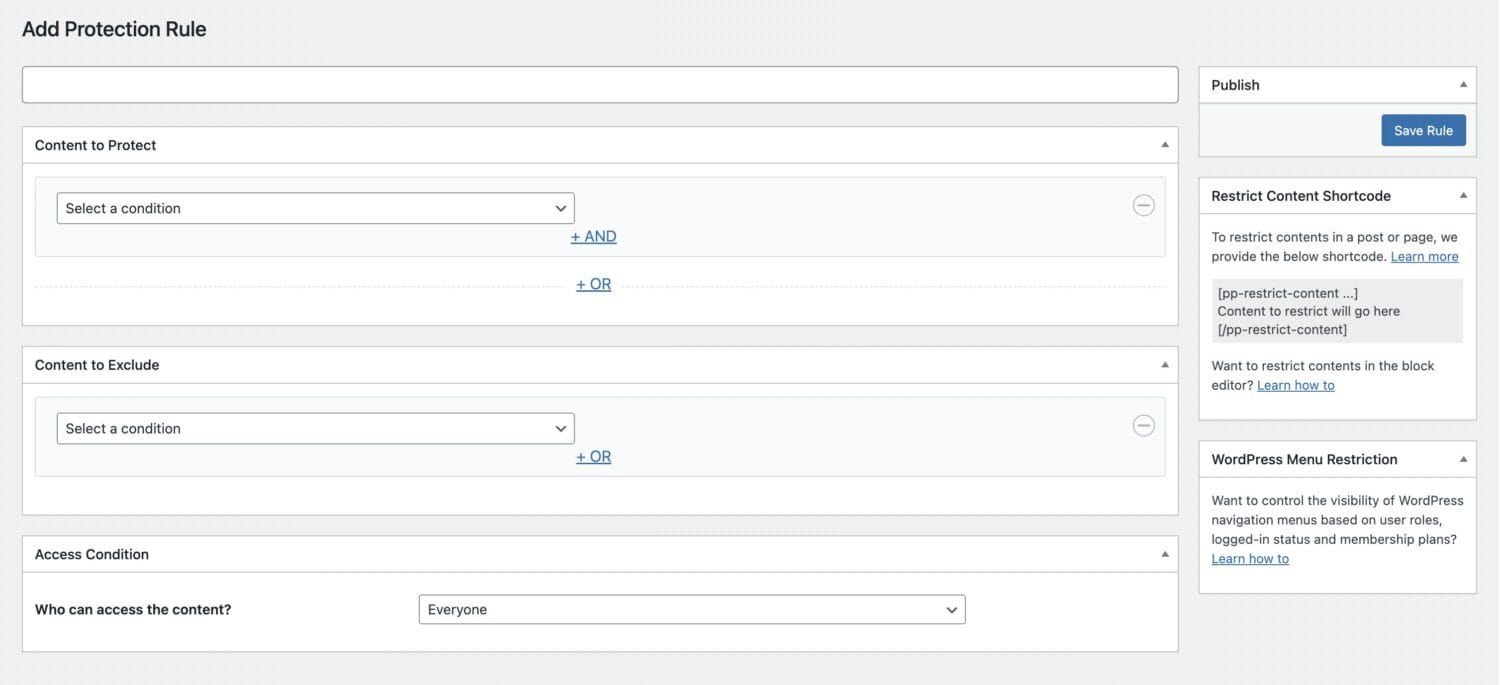
You can use this page to create rules that are as simple or complex as you need.
First, enter a name for this rule at the top.
Now, select one of the conditions in the dropdown menu in the Content to Protect section:
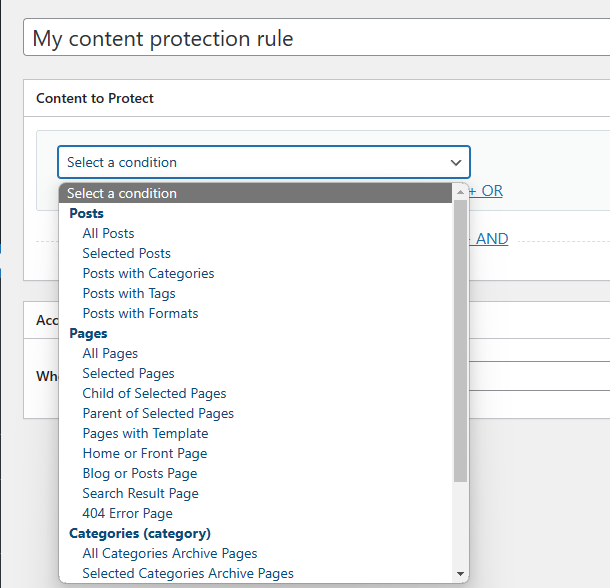
If you select All Posts as the condition, then ProfilePress will apply this rule to all Posts and restrict access to them. The same goes for All pages.
If you want to restrict user access to specific WordPress posts, select the “Selected Posts” condition:
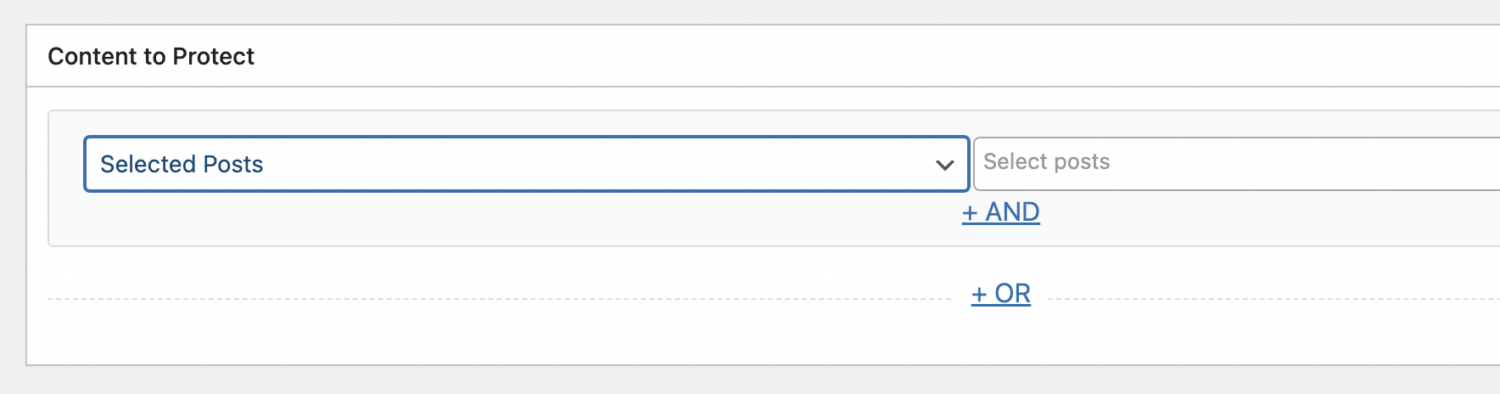
You’ll see a new input field next to the dropdown menu when you do. Enter the names of the posts you want to restrict in this field, and hit Enter to select them. You can enter as many posts as you wish.
You can have more than one condition in a rule.
Click the +OR link to add another condition.
This time, I’ve selected Selected Pages as the condition:
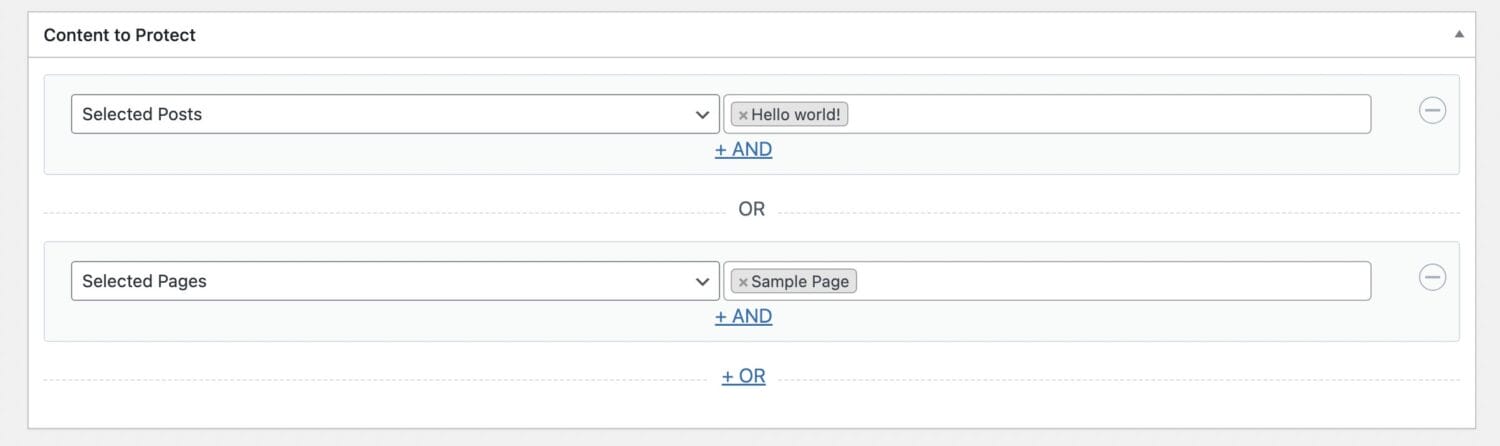
You can use this builder to create complex AND/OR logic. For now, all you need is the OR button. You can use it to add as many conditions as you’d like.
Once you are done selecting the pages and posts you’d like to restrict in WordPress, scroll down to the Access Condition section:
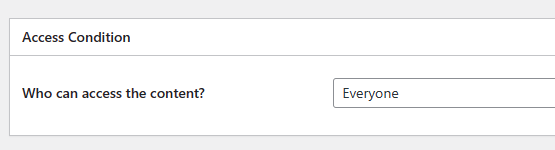
ProfilePress will allow anyone to visit the pages you selected above. This is because this Content Protection Rule allows access to Everyone, as you can see in the above screenshot.
To restrict access to selected WordPress pages, change the condition to Logged In users:
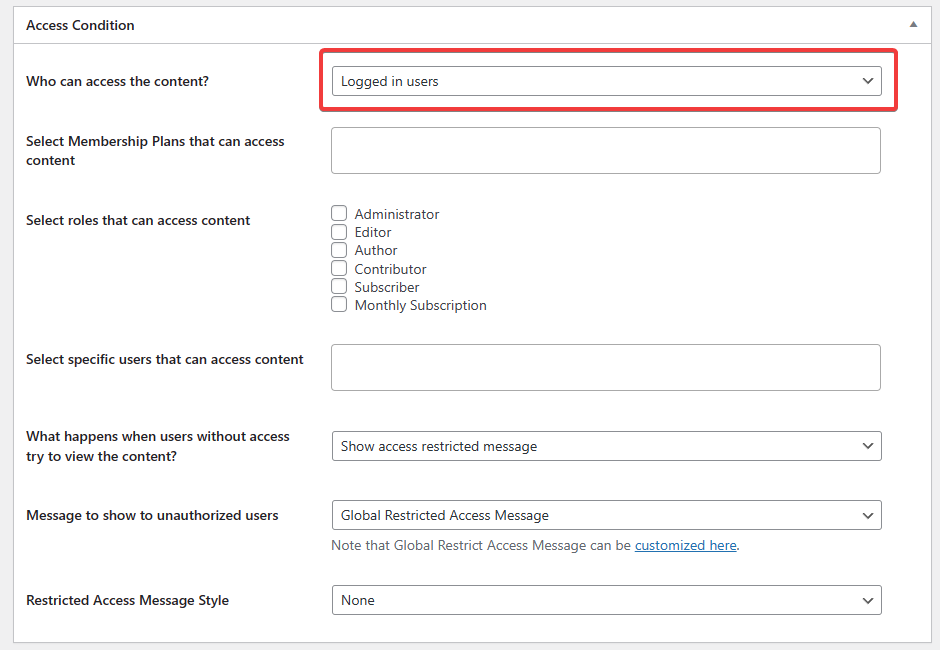
If you leave these settings as is, anyone logged in can see your selected pages. This is the way to go if you want to make some website pages private.
If you want to allow access only to people who have purchased a paid subscription to your website, then you can select the membership plans you want access to. Type the names of the plans you want to give access to and hit Enter to select them.
Alternatively, you can select the roles associated with your paid membership plans. ProfilePress creates a new role for every membership plan that you make. Likewise, you’ll see a role for every membership plan you have created.
You can also select specific users to whom you want to give access.
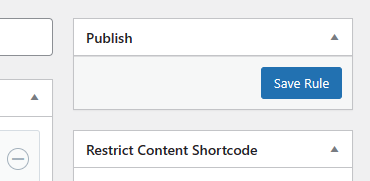
Once you are done configuring your Content Protection Rule, click the Save Rule button on the top right:
Selecting pages and posts one by one can get a little tiresome. A better and more straightforward approach is to target a new category and target that category in your Content Protection Rule.
To do this, first, create a new category. You can call it anything. I’ll call mine Premium Content.
Now, select Post With Categories as the condition, and enter the name of your newly created category:
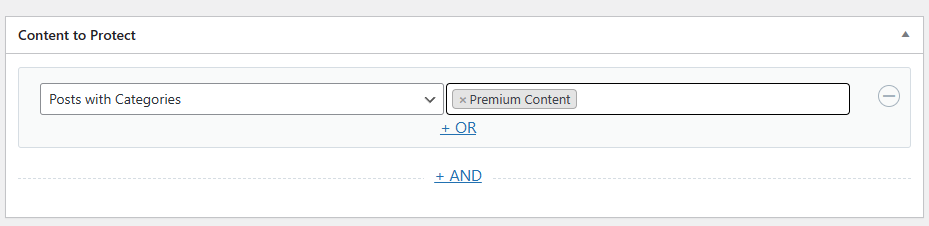
Now, you can add this category whenever you want to restrict a new blog post on your website.
How To Check If a User Has an Active Subscription In Your Theme’s Code
ProfilePress provides a versatile visual system for controlling access to content on your WordPress website, allowing you to restrict user access to entire pages or specific parts of a page’s content.
But you might want to restrict access to pages on your website directly from the code of your custom theme or plugin. In that case, you can use some simple PHP functions that ProfilePress exposes.
To check if the currently logged-in user has an active subscription, you can use the current_user_can function. This is a function that comes with WordPress. It allows you to check if a user is assigned a particular role. To check if a user has an active subscription, you can pass the name of the role that was created for that subscription to this function like this:
current_user_can('premium_monthly_subscription');ProfilePress creates a role for every new plan that you make. For example, creating a Premium Monthly Subscription plan will create a role by the same name. Any user that has this role assigned to them has an active subscription. This role is removed when the user’s subscription expires or is canceled.
If you want to check if a particular user has an active subscription to a specific plan, you can use the user_can function. It takes the ID of the user as the first argument and the role you want to check for as the second argument:
user_can(32, 'premium_monthly_subscription');This function will return true if the user with ID 32 has an active subscription. You can check it like this:
if ( user_can(32, 'premium_monthly_subscription') ) {
// User has an active subscription.
// You can display the content to this user.
}
To check if the currently logged-in user has an active subscription, use the following code:
if ( current_user_can('premium_monthly_subscription') ) {
// User has an active subscription.
// You can display the content to this user.
}
How To Restrict Access To Beaver Builder Content
Restricting access to Beaver Builder content with ProfilePress is easy.
First, open the page that contains the content you want to restrict access to in Beaver Builder:
Now, take your mouse over the element you wish to restrict user access to and click the Wrench icon to edit its settings:
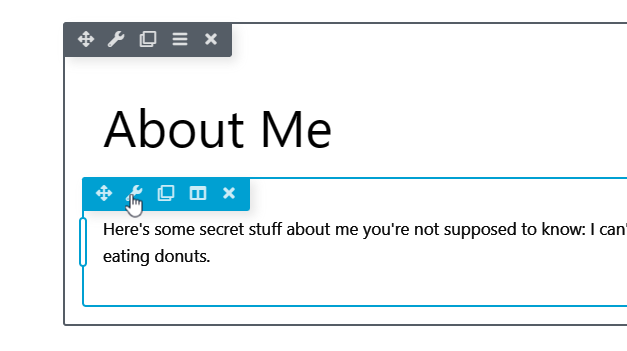
Change the Display setting to ‘Logged In User’:
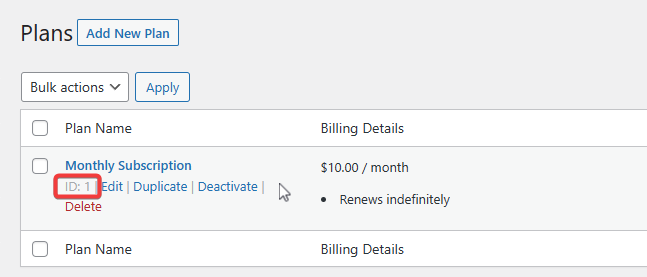
In the User Capability field, enter ‘ppress_plan_{PLAN_ID}‘. If the plan you want to give access to this content has the ID 24, then you’ll enter the string ‘ppress_plan_24‘. Click Save, and then click Done to save the page.
To find the ID of the plans you’ve created in ProfilePress, navigate to ProfilePress > Membership Plans. You’ll see a list of all the plans you’ve created. Take your mouse over the plan you want to know the ID for, and you’ll see it under the name of the plan:
How To Restrict Access To Elementor Content
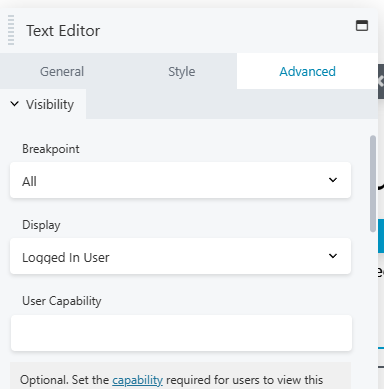
To restrict access to content you’ve created with the Elementor page builder, open the page in the Elementor editor:

Now, click on the element you want to restrict user access to and go to the advanced tab in the sidebar:
Click on the ProfilePress Content Restriction section, and select ‘Logged In Users’ as the Target Audience:
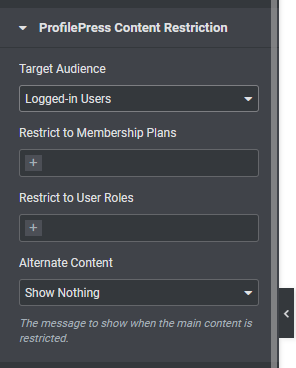
Now, click on the ‘Restrict to Membership Plans’ input field and select the plans you want to allow access to this element. You can also choose roles that are associated with your membership plans.
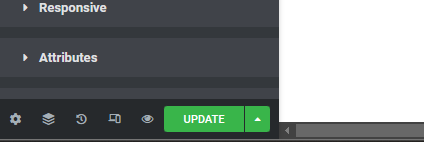
When you’re done, click the Update button on the bottom of the Sidebar to save your changes:
How To Restrict Access To WordPress Navigation Menu Items
If you’re building a membership site, you will want to restrict user access to certain pages on your website. In doing so, you might not want to display certain WordPress navigation menus to users who don’t have an active subscription to one of your membership plans.
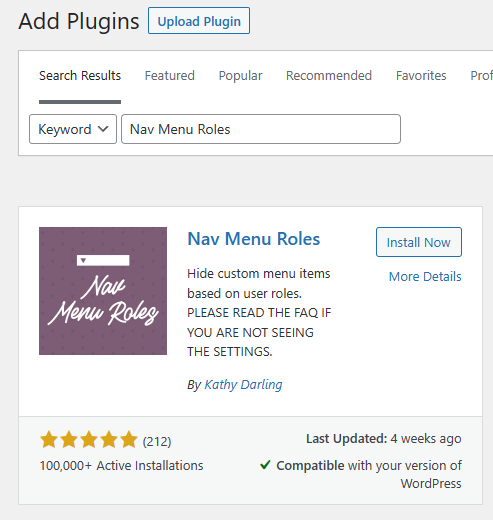
To restrict user access to navigation menu items, you’ll need to install a free plugin called Nav Menu Roles:
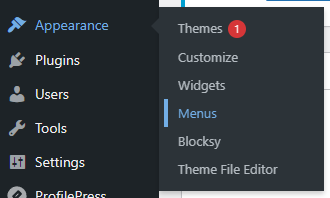
Once you’ve installed the plugin, navigate to Appearance > Menus in your WordPress dashboard:
Now, click the menu item you want to restrict user access to from the list of menu items:
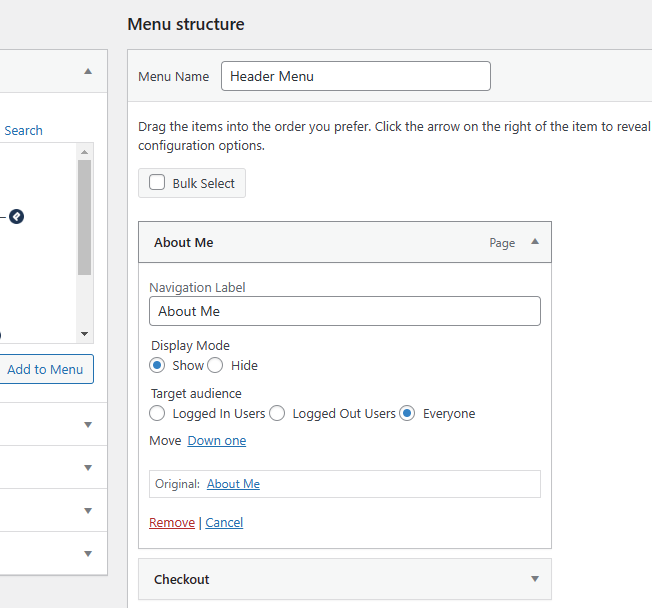
Now, select Logged In Users as the target audience. Next, select the user role that is associated with the Membership plan you want to display this navigation menu item to:
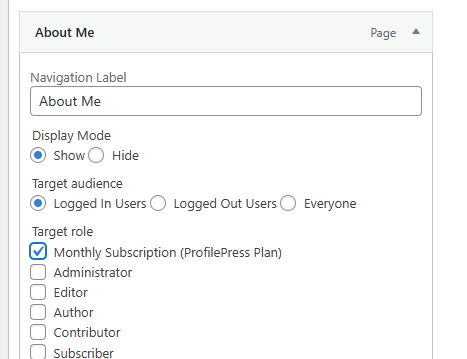
Finally, click the Save Menu button to save your changes.
How To Restrict Access To WordPress Gutenberg Editor Content Blocks
If you want to restrict user access to Gutenberg Content Blocks, you’ll need to install a free plugin called Conditional Blocks:

It offers a built-in integration for ProfilePress and makes it easy to restrict user access to Gutenberg Content.
After installing the plugin, open any page in Gutenberg Editor and click on the block you want to limit access to:
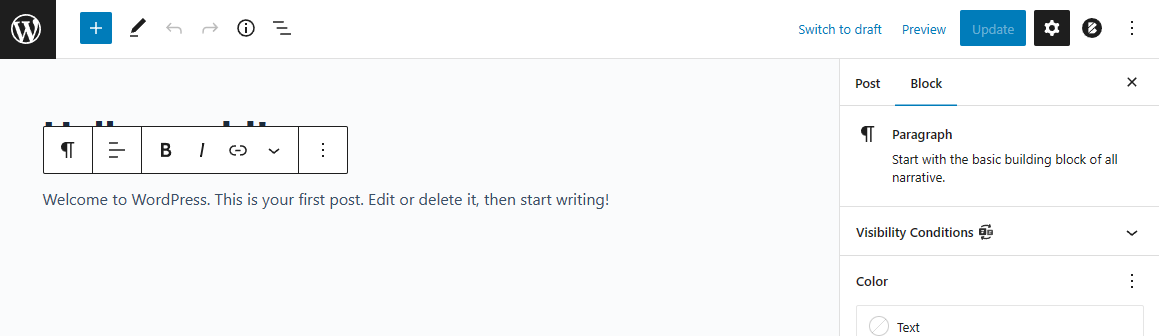
Now, click the ‘Visibility Conditions’ section in the right sidebar, and click the Configure Conditions button:
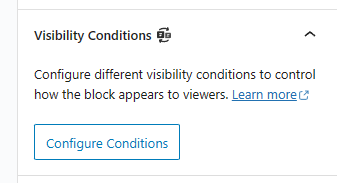
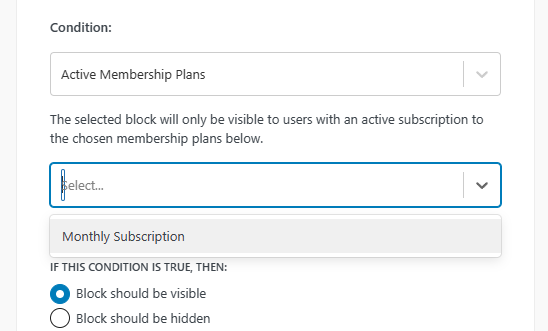
Now, select ‘Active Membership Plans’ as the condition:
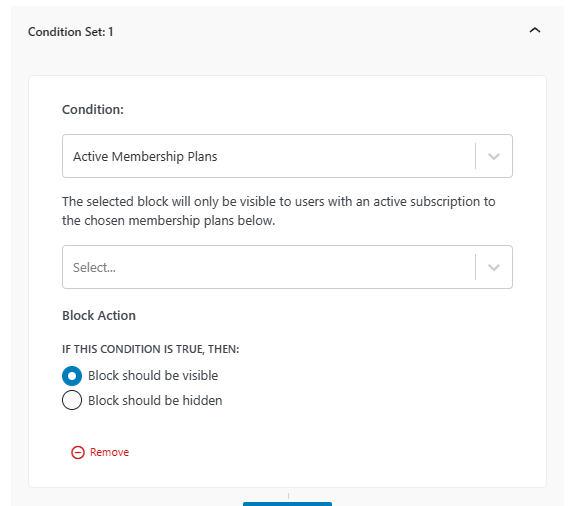
In the second drop-down, select the membership plan you want to give access to:
Now, click the close (X) button on top, and then click the Update button to save your changes to this page.
How To Restrict Access To Content Using ProfilePress Shortcode
One easy way to restrict access to your content is by using ProfilePress’s shortcode.
Place any content you want to hide from your users between the opening and closing tags of this shortcode:
[pp-restrict-content]Content To Hide...[/pp-restrict-content]To specify what plans have access to this content, you can use the plans attribute, which excepts plan IDs separated by commas like this:
[pp-restrict-content plans='1']Content To Hide...[/pp-restrict-content]You can also use the roles attribute to enter roles that can access this content:
[pp-restrict-content roles='editor']Content To Hide...[/pp-restrict-content]To find the ID of a ProfilePress membership plan, navigate to ProfilePress > Membership Plans, and take your mouse over the plan you want to see the ID of:
How To Restrict Access To Your Entire Website
ProfilePress gives you an easy way to restrict access to your entire website. Rather than restricting access to pages, you allow the pages you want to be available to all your website visitors.
This is a good option if you’re building a membership site with only a few pages that should be accessible to the general public.
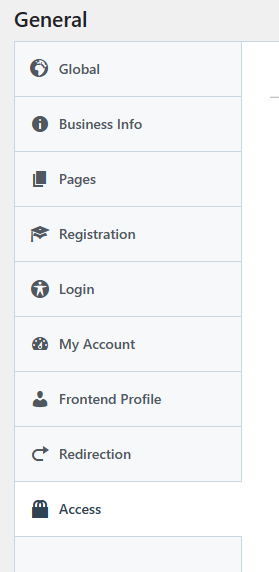
To restrict access to your entire website, navigate to ProfilePress > Settings in your WordPress dashboard and select the Access tab at the bottom:
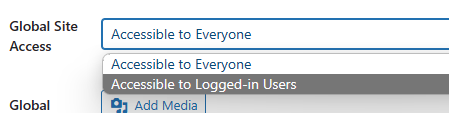
Now, select ‘Accessible To Logged-In Users’ as the value for the Global Site Access drop-down:
There are only three settings for this feature that you’ll need to configure:
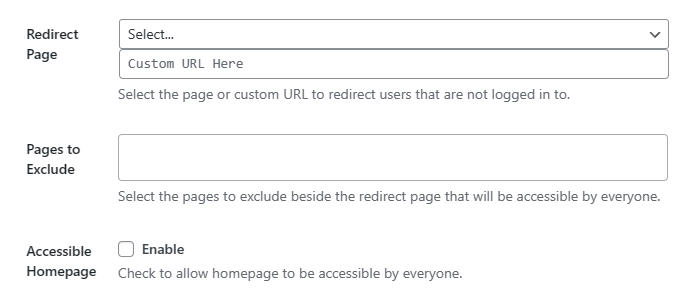
You can select any page on your website for the Redirect Page or enter a URL. This is where you should send users who aren’t logged in to your website.
In Pages to Exclude, type the name of any page you want to exclude and click on it when you see it as an option. You can exclude as many pages as you wish using this setting.
Finally, if you want to make your website’s homepage accessible to non-logged-in users, enable the Accessible Homepage setting.
Conclusion
Restricting access to your content in WordPress doesn’t have to be complicated or time-consuming. Whether you are a beginner or an advanced WordPress user, ProfilePress is all you need. It can not only help you restrict access to your content with granular controls, but it can also help you sell access to your content.
You can also use ProfilePress to sell subscriptions to your content, such as podcasts, music, articles, eBooks, and online courses. It’s an all-in-one tool that is regularly updated.
We hope this article helped you learn how to restrict content in WordPress. Get ProfilePress now!