Membership Segmentation with Mailchimp Tags
By default, The Mailchimp addon segments members in Mailchimp with audiences or lists. Every membership plan is associated with unique audiences or lists such that when a user or customer subscribes to a membership plan, they will be added to the Mailchimp audience of that plan. And when their subscription to the plan expires or is canceled, they are automatically removed.
However, if you want to segment your users or members with tags only, such that users are added to the same Mailchimp audience regardless of the membership plan they are subscribed to but are only segmented or segregated by tags, read this guide below.
Say you have two plans – Gold and Silver – on your site, and you want users subscribed to any of the plans to be added to a Mailchimp audience named “Paid Members” but segmented by the tags “gold” and “silver” respectively. Below is how you will set it up.
Mailchimp Segmentation by Tags
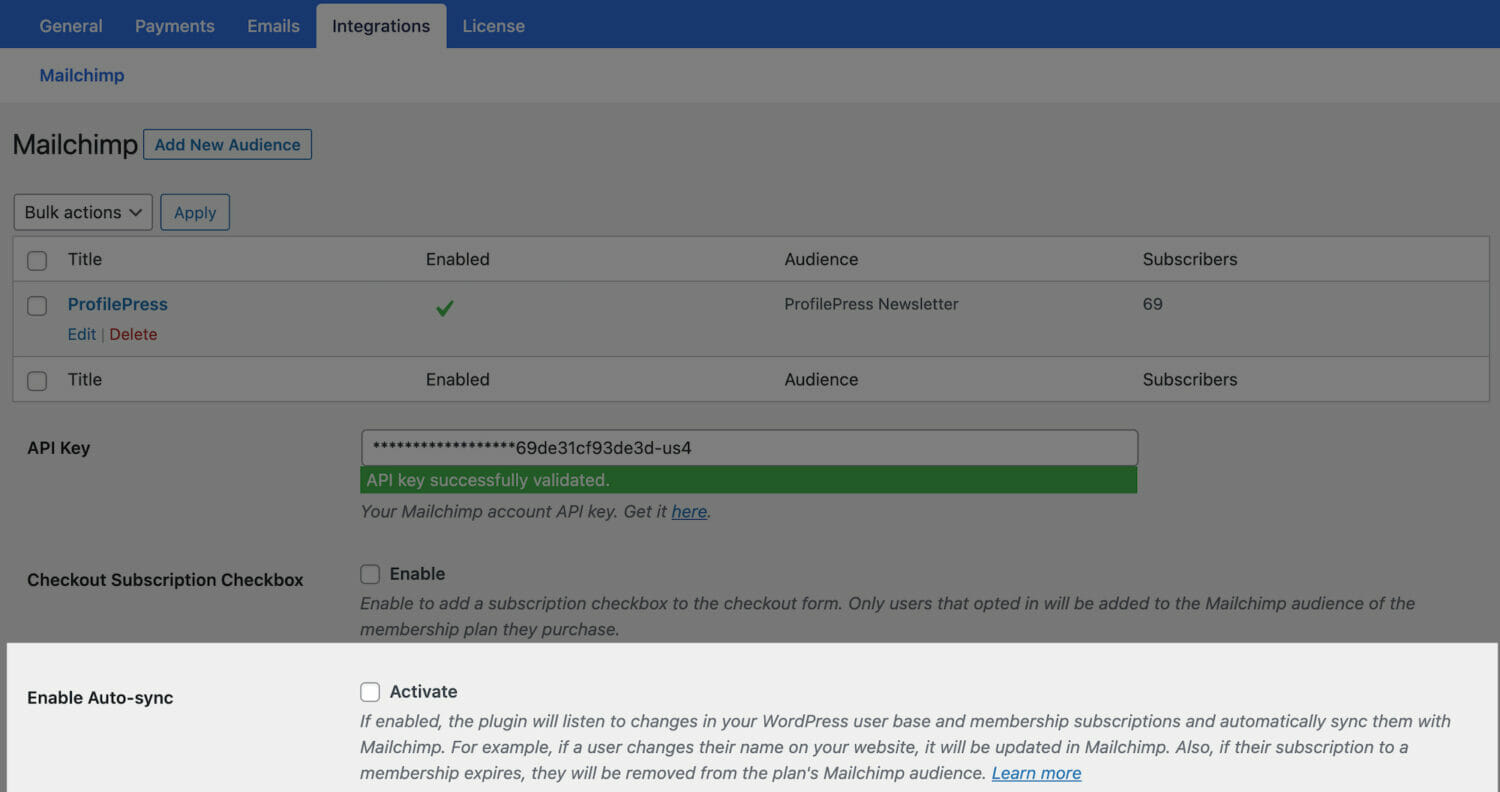
Go to ProfilePress >> Settings >> integrations
For this to work, you need to enable Auto Sync. So please enable it.
Next, you need to create two audiences in ProfilePress, tracking the same Mailchimp audience.
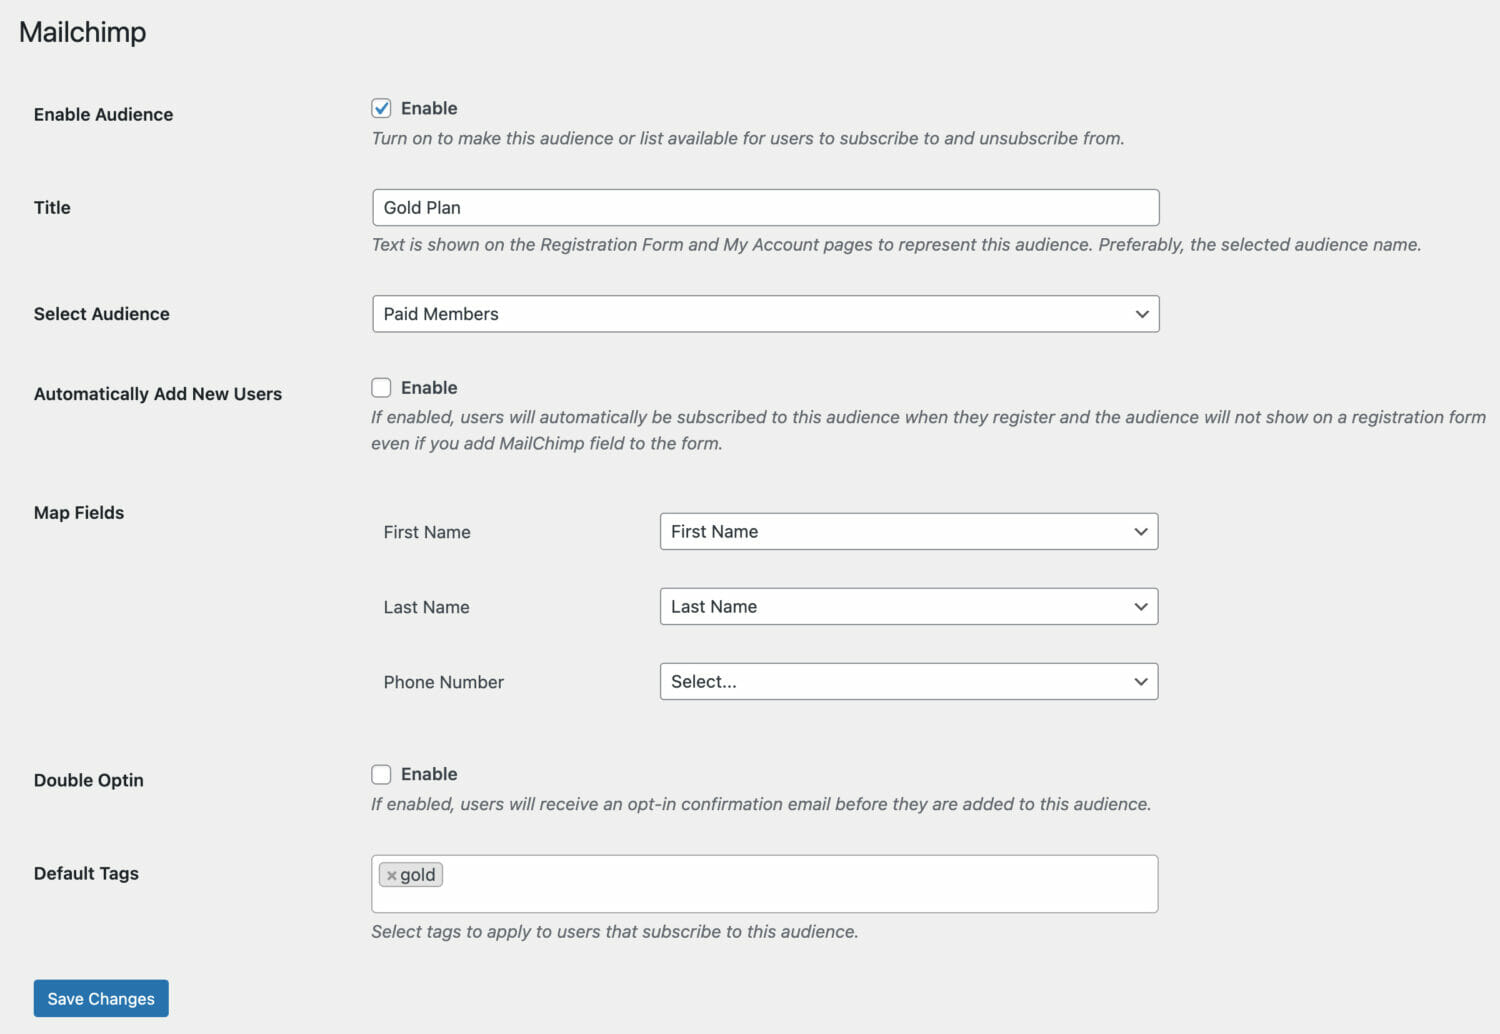
Still on ProfilePress >> Settings >> integrations, click the “Add New Audience” button at the top.
Enter a name and select the “Paid Members” Mailchimp audience. Finally, select the tag “silver” in the Default Tags setting. If your desired tag isn’t in the select dropdown, follow this guide to create the tag inside Mailchimp, it will become available in ProfilePress.

Ensure the “Enable Audience” is checked.
Click the “Save Changes” button to add the audience.
Follow the same steps above to create an audience for the Gold plan.
Now that we have both Audiences for the Silver and Gold plans created, the next is to integrate them with their respective plans.
Go to ProfilePress >> Membership Plans.
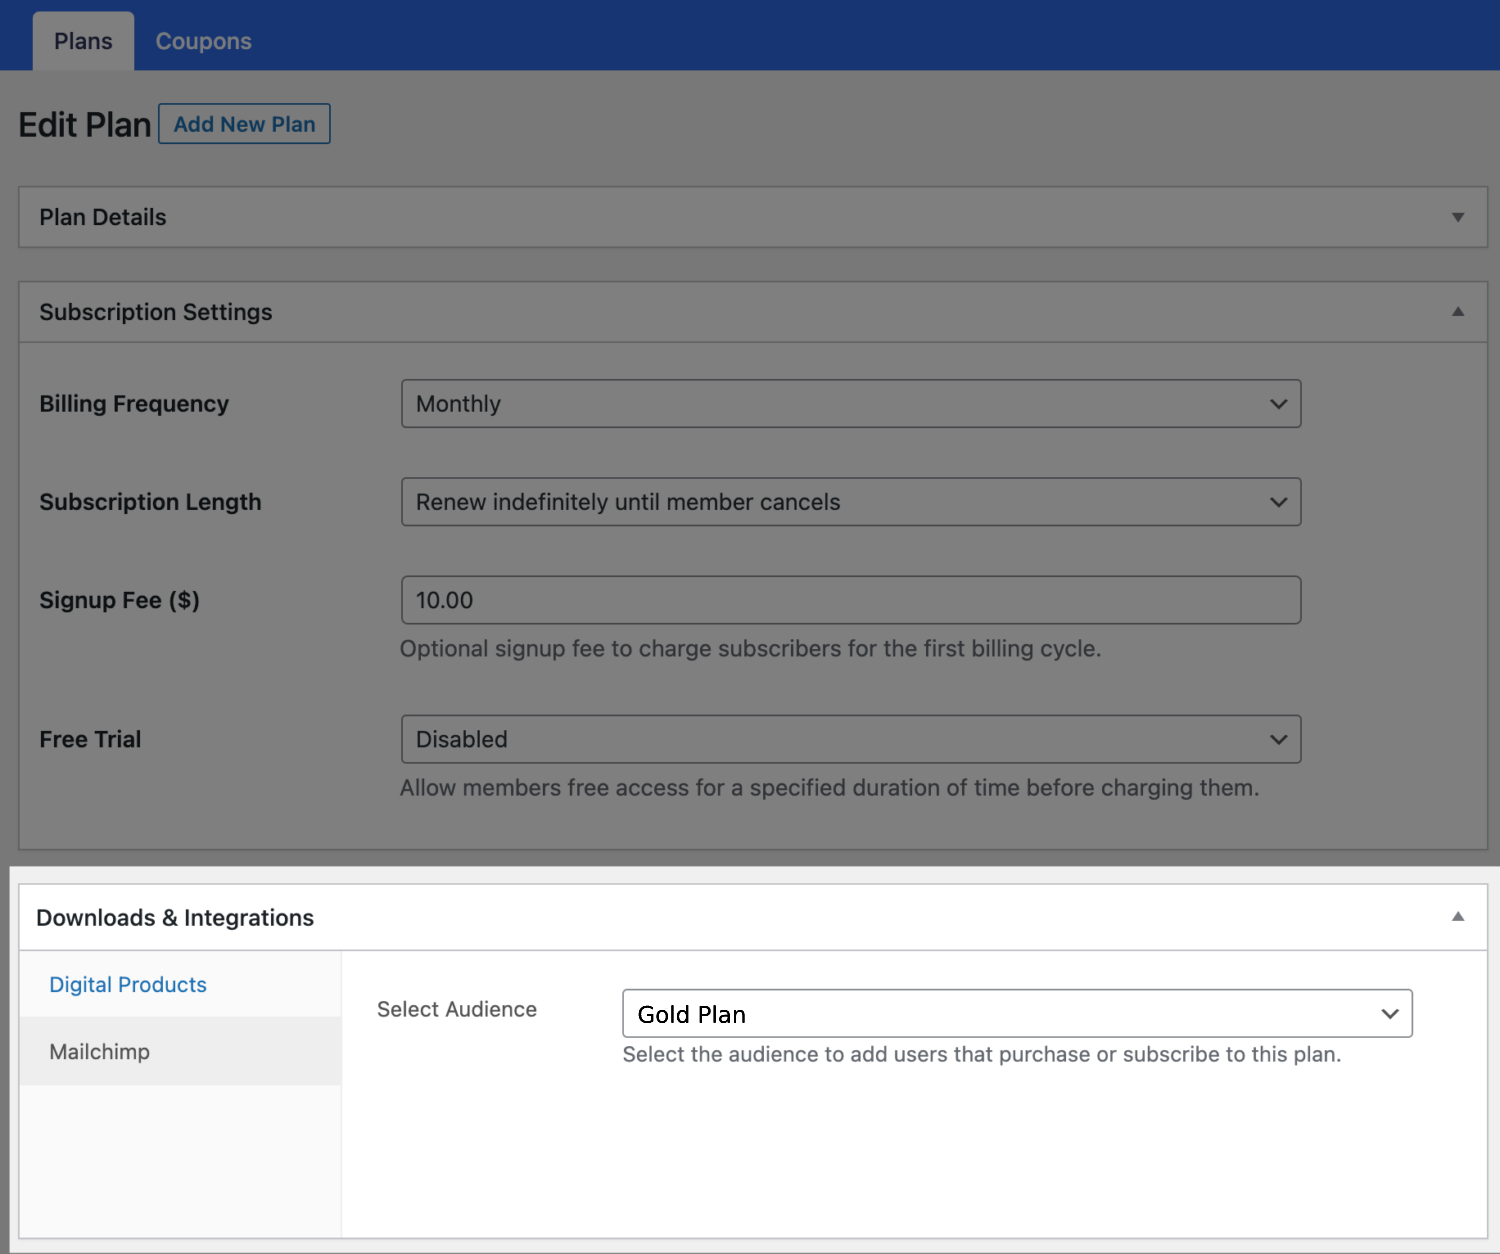
Create a new plan for Gold and Silver memberships or click the title of existing ones to open up the edit page.
Scroll down to the “Downloads & Integrations” metabox. Next, click on the Mailchimp tab and select the Mailchimp audience to add members and customers that subscribe to the plan.

Final Piece of the Puzzle
To cause ProfilePress to use tags instead of the Mailchimp audience for segmentation, add the code below to your active WordPress theme’s functions.php file or use the code snippet plugin to implement the code.
add_filter('ppress_mailchimp_is_tagging_segmentation', '__return_true');The end.
So now, when users subscribe to either Silver or Gold membership plans, they will be added to the “Paid Members” Mailchimp audience but tagged “silver” and “gold” respectively.
And when their subscription to either plan expires or when they are removed from either membership plan, the tag (silver or gold, depending on their plan) will be removed from their Mailchimp profile.
This way, you can send targeted message emails to the active subscribers of your membership plans via Mailchimp.