How to Register Users Through the Membership Checkout Page
User registration is a crucial aspect of any membership website. Instead of having members go through a two-step process of registering and subscribing to a membership plan, ProfilePress allows them to do it all in one step.
In this article, we’ll guide you through replacing your registration page with a single checkout process using the ProfilePress plugin.
Create the Membership Plans
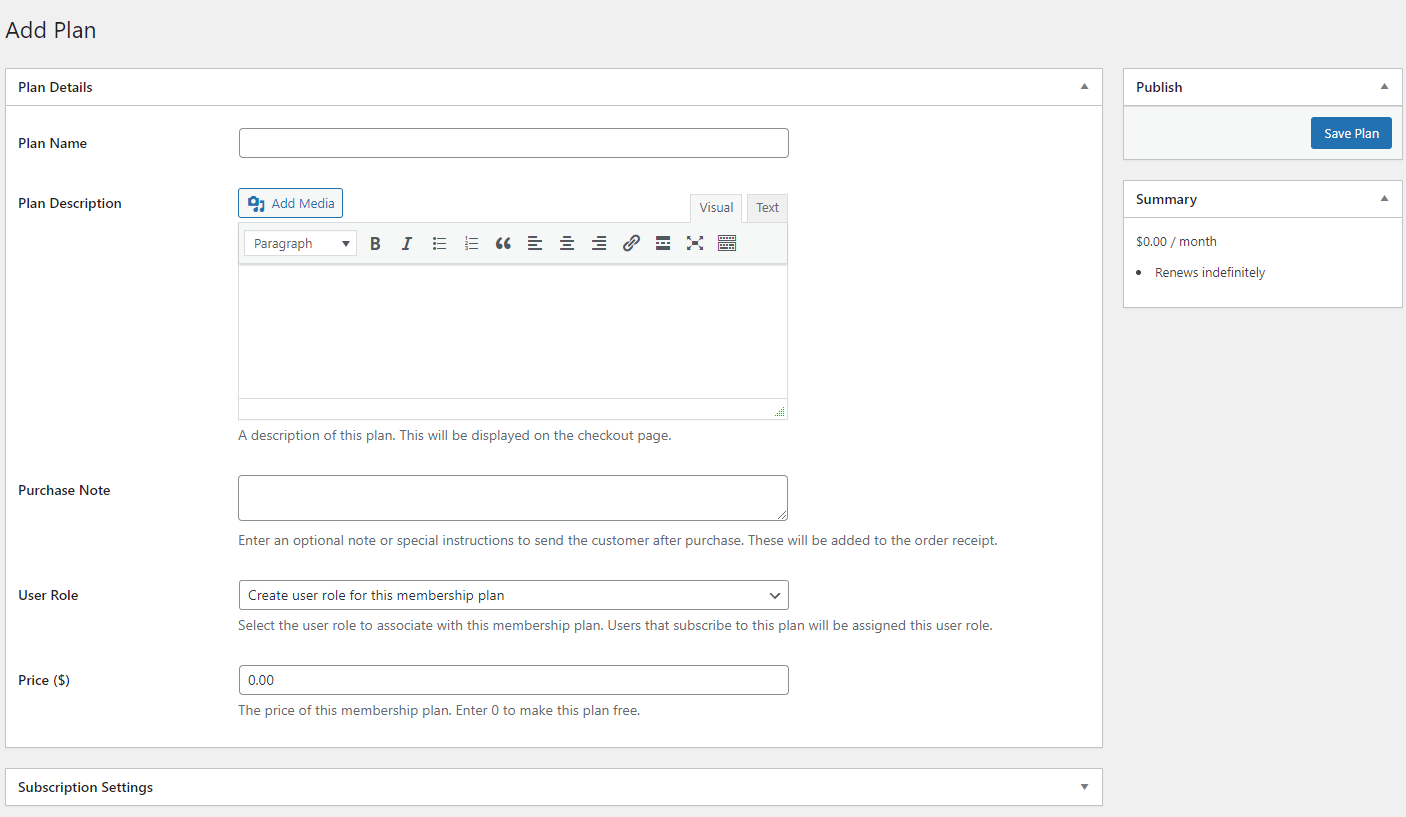
To create a membership plan using ProfilePress, go to ProfilePress → Membership Plans and click the Add New button.

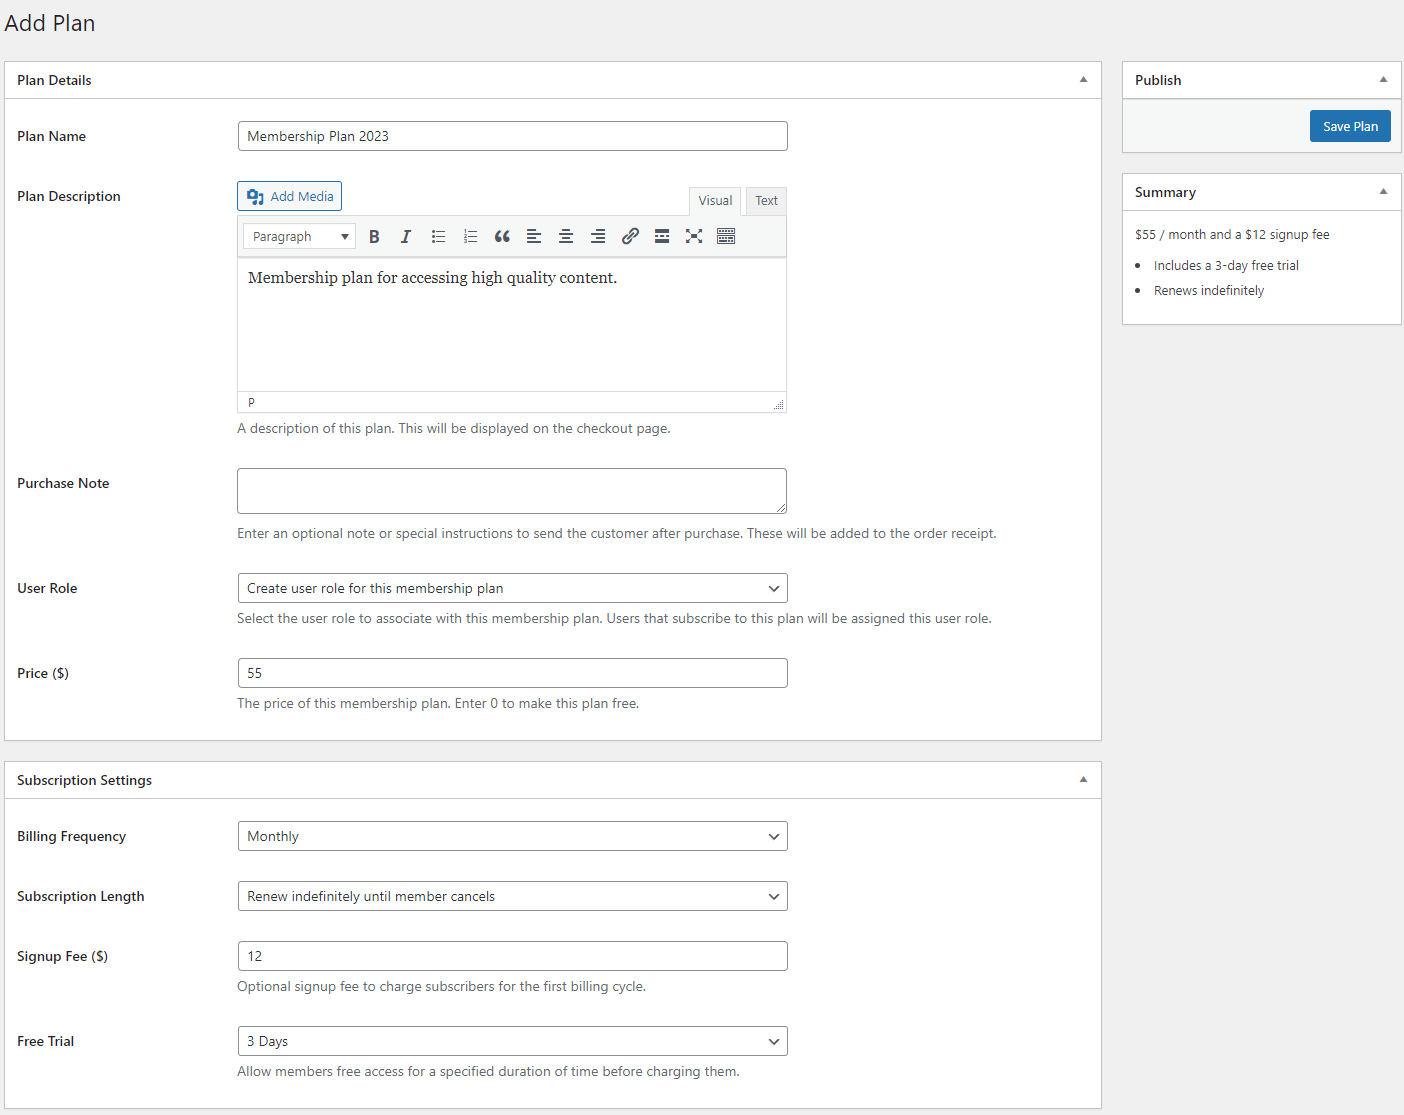
After giving your membership plan a name, description, and price, you can use the Subscription Settings meta box to define your membership plan’s duration.

The Billing Frequency dropdown menu lets you decide the length of your membership plan. For instance, you can create a monthly membership plan or charge customers a one-time fee.
In addition to setting a Signup Fee, users can try out the membership plan using the Free Trial dropdown field. Once you’re done, make sure to click on the Save Changes button to continue.
After saving your changes, a checkout URL for the plan will be generated. Please take note of the URL, as we will need it later.

Registering Users at Checkout
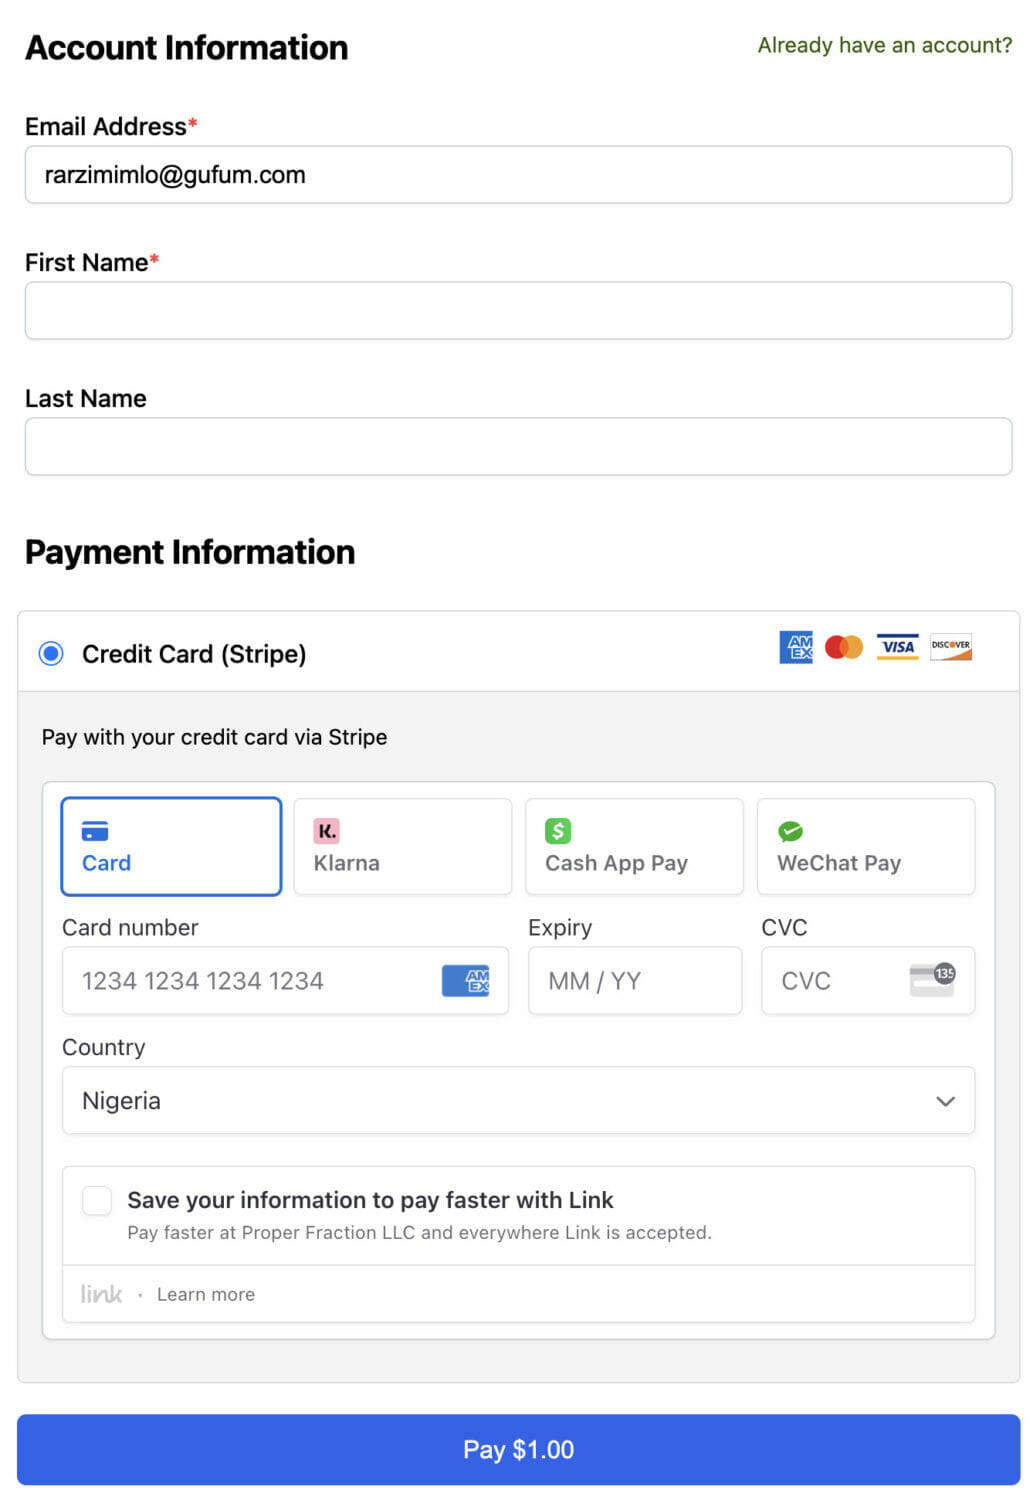
After creating a membership plan, a checkout URL is auto-generated for you that can be used by aspiring members to purchase a membership plan. All you need to do is share the URL directly or add it to your membership page, and when users click on the link, they will be taken to the checkout page.
When a user who doesn’t have an account on your site visits the checkout page, an account will be automatically created for them during checkout.

Conclusion
ProfilePress offers a seamless one-step checkout for user registration and membership subscriptions. Following the steps outlined in this article, you can replace the traditional registration process with a more efficient checkout process.
Ready to take advantage of this easy-to-use plugin? Get ProfilePress now.