Setting Up User Moderation in WordPress
Do you want to set up user moderation in WordPress?
User moderation allows you to review and approve new user registrations before they gain access to your WordPress website. This helps prevent spam accounts, protect your community, and ensure that only genuine users can participate and use your website.
In this article, we will guide you through the process of moderating users in WordPress using the ProfilePress membership plugin, enabling you to create a safe and engaging environment for your community.
How to Moderate New User Registrations in WordPress
ProfilePress is a powerful WordPress membership plugin designed to help you build paid membership sites, sell digital products, manage access to your posts and pages, and add paywall to your content.
ProfilePress comes with a User Moderation addon that allows you to review and manage registrations for your WordPress website. This feature enables you to approve or deny new user sign-ups, helping maintain your community’s integrity and protect your site from spam accounts and unwanted users.
With ProfilePress, you can block or unblock WordPress users anytime, giving you complete control over who can participate and use your website.
Activating the User Moderation Addon in WordPress
To start moderating registered users in WordPress, first install and activate the ProfilePress plugin on your WordPress site.
Then, navigate to ProfilePress > Addons in your WordPress dashboard. You’ll find a list of available ProfilePress addons, including the User Moderation addon.
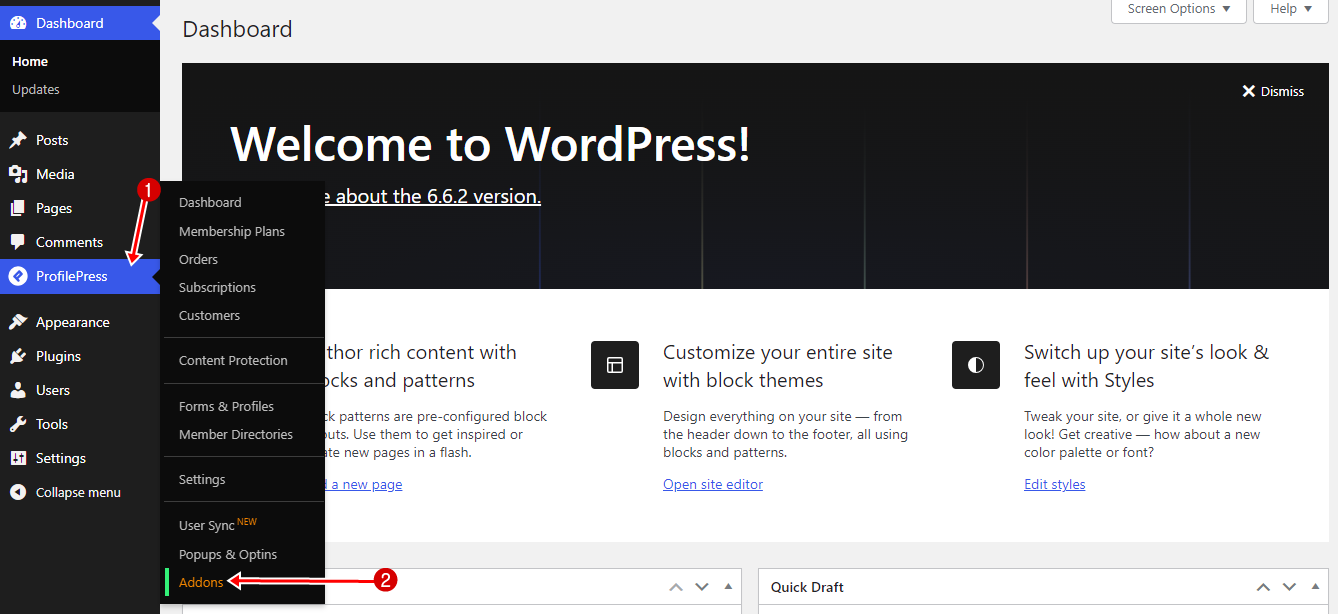
Scroll to User Moderation and activate it.
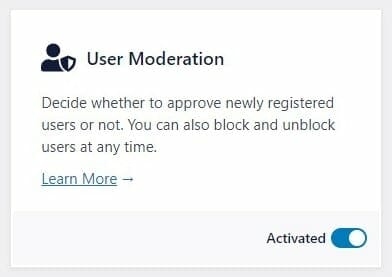
Once you activate the addon, you will begin receiving email notifications for each new user registration in WordPress. This allows you to decide whether to approve or reject the WordPress user. New user accounts will remain in a pending state until you either approve or block them.
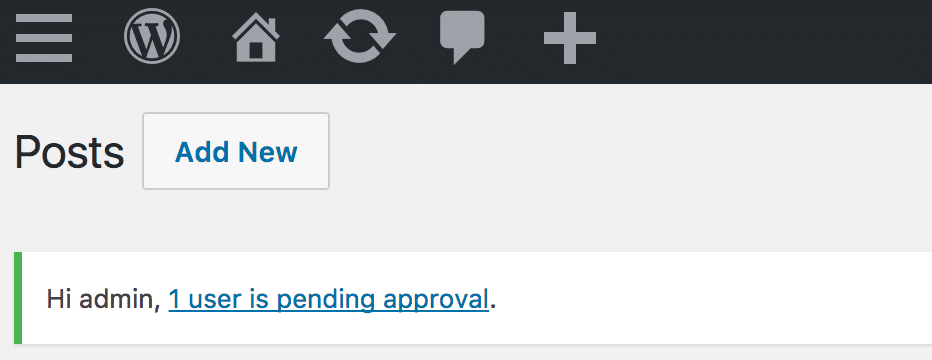
If users are awaiting approval, you will see an admin notice and a note in the “At a Glance” dashboard widget informing you of their status.

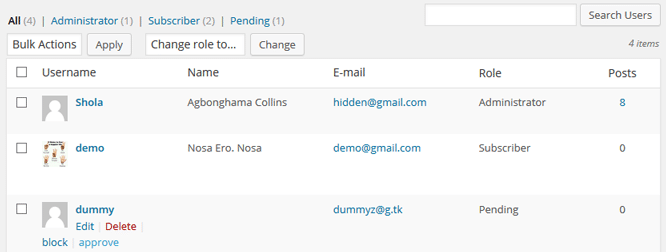
To approve new users or block/delete them, go to the Users → All Users. Find the pending users and approve them.
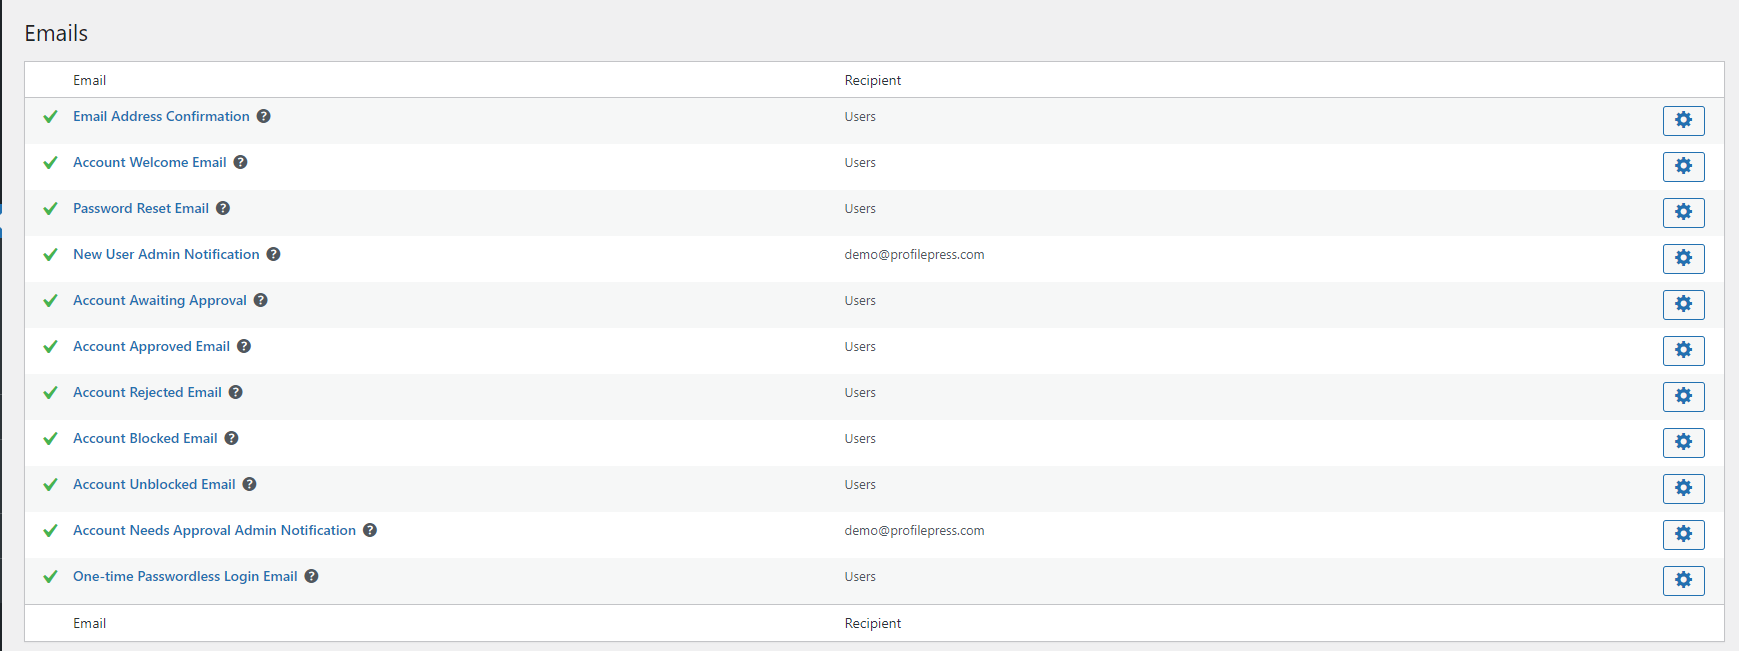
When a user is approved/rejected, the user will receive an approval/rejection email sent to his registered email. The same thing happens when a user is blocked/unblocked. To customize the email content, please check our Email Settings article.
Moderation Settings
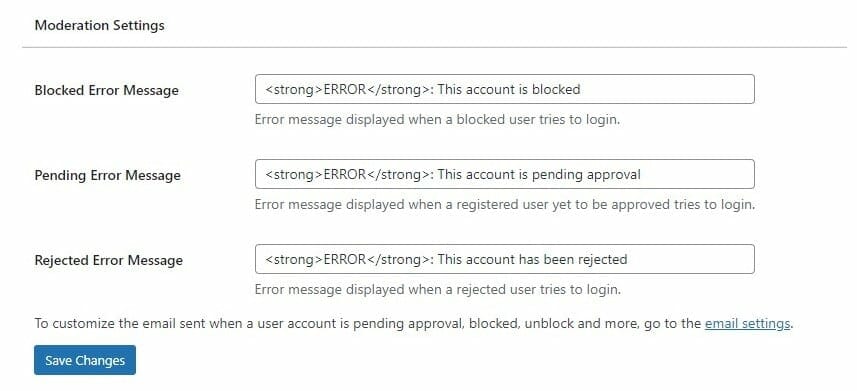
The Moderation Settings feature allows you to customize the error messages displayed to WordPress users based on their registration status. You can configure the following messages:
Blocked Error Message: This message is displayed when a blocked user attempts to log in to WordPress, informing them of their restricted access.
Pending Error Message: This message appears when a registered user who has not yet been approved tries to log in to WordPress, indicating that their account is still under review.
Rejected Error Message: This message is shown when a rejected WordPress user attempts to log in, clearly stating that their registration was unsuccessful.
Set Up User Moderation on Your WordPress Site Today
Implementing user moderation on your WordPress site is crucial in creating a secure and welcoming environment for your community. By using the ProfilePress user moderation feature, you gain the ability to carefully vet new users, ensuring that your platform remains free from spam and inappropriate accounts.
We hope this article helped you learn how to set up user moderation so you can moderate every new user that registers to your WordPress site.