How to Set Up a WordPress Paywall for Your Content
Looking for ways to set up a paywall on your WordPress website?
Setting up a WordPress paywall is a great way to generate revenue from the content of your website. Unfortunately, WordPress does not offer a native paywall feature, so you will need a paywall plugin to set one up on your site.
This article will demonstrate how to set up a paywall using the ProfilePress membership plugin. It’s easy to use and needs only 30 mins to get a paywall up and running on a WordPress website.
Types of Paywall
A hard paywall involves hiding all your posts behind the paywall. Visitors are only shown the title and a few introductory paragraphs before being prompted to pay to read the entire article. The paywall will apply to all articles.
A soft paywall involves making a selection of articles or posts available for free, while the others require paid subscriptions to access. Visitors trying to access the premium content are prompted to pay. For example, articles tagged as free can be accessed without any hindrance or payment required, with the paywall only applying to premium articles.
Metered paywall, also known as the porous or leaky paywall model, allows visitors to access all articles, but they are assigned a limited number of views. For instance, a visitor can read any two articles in 24 hours without paying a single penny. But if they want access to more than two articles in a day, they will need to pay or become a paid subscriber.
Pros & Cons of Using Paywalls
You are probably aware of the many advantages of using a paywall, but did you know that there are downsides too? This section will look at the primary advantages and disadvantages of adding a paywall to your site’s content. Before setting up a paywall on your WordPress website, you must carefully consider both.
Pros of Using Paywalls
Consistent revenue: There are many ways to generate revenue from a WordPress website. You can embed advertisements and affiliate links to sell merchandise, write sponsored posts or create your content and hide it behind a paywall. For many website owners, paywalls are the preferred mode of revenue generation because it ensures recurring revenue, as visitors who subscribe to your website will pay a monthly or annual fee to access your content.
Community building: For many online businesses, community building is a great way to make your business future-proof. Adding a paywall to your website could create an illusion of exclusive access to your content. You can further promote your Facebook and Discord groups to anyone who subscribes to your service. You can create a forum on your website to encourage engagement and interest in your brand.
Cons of Paywalls
Low traffic & high bounce rates: Some of your visitors will likely leave your website as soon as they encounter the paywall. These visitors will never return to your website and will go straight to a competitor site for their free content. This means that after adding a paywall to your WordPress website, you will experience a drop in your traffic as your regular visitors will stop coming to your site.
You will also notice a spike in your bounce rates because many visitors will leave your site as soon as they hit the paywall.
That said, there are several ways to increase traffic, reduce bounce rates, and manage the downsides of adding a paywall to your WordPress site. For instance, you can create a content strategy that involves publishing plenty of good quality free content to help draw high traffic and reduce bounce rates. You can even use the free content to promote your premium content behind the paywall and draw more subscribers to your WordPress site.
Unmet expectations: When visitors subscribe to your WordPress site, they have high expectations from your premium content. If the content fails to meet their expectations, you will experience a massive backlash in the form of bad reviews on public forums and abusive emails from existing customers. It might just spell the end of your online business.
How to Set Up a Paywall on Your WordPress Website
To set up a paywall on your WordPress website, we need to install and activate the ProfilePress plugin.
Step 1: Install & Activate ProfilePress
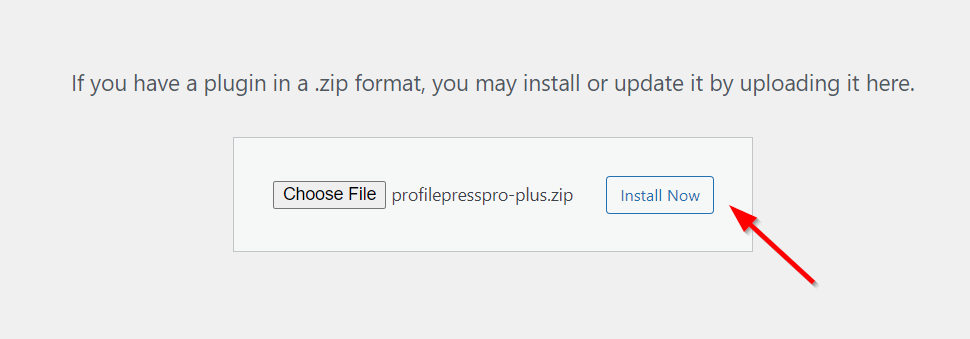
Purchase the ProfilePress plugin and install it on your WordPress site.
Step 2: Setup Paid Memberships
You will need a checkout and a pricing page to enable visitors to make payments and subscribe to your website.
We have covered how to create a pricing page previously. This tutorial will show you how to create paid membership plans and the checkout page (if one was not automatically created for your site).
i. Create a Membership Plan
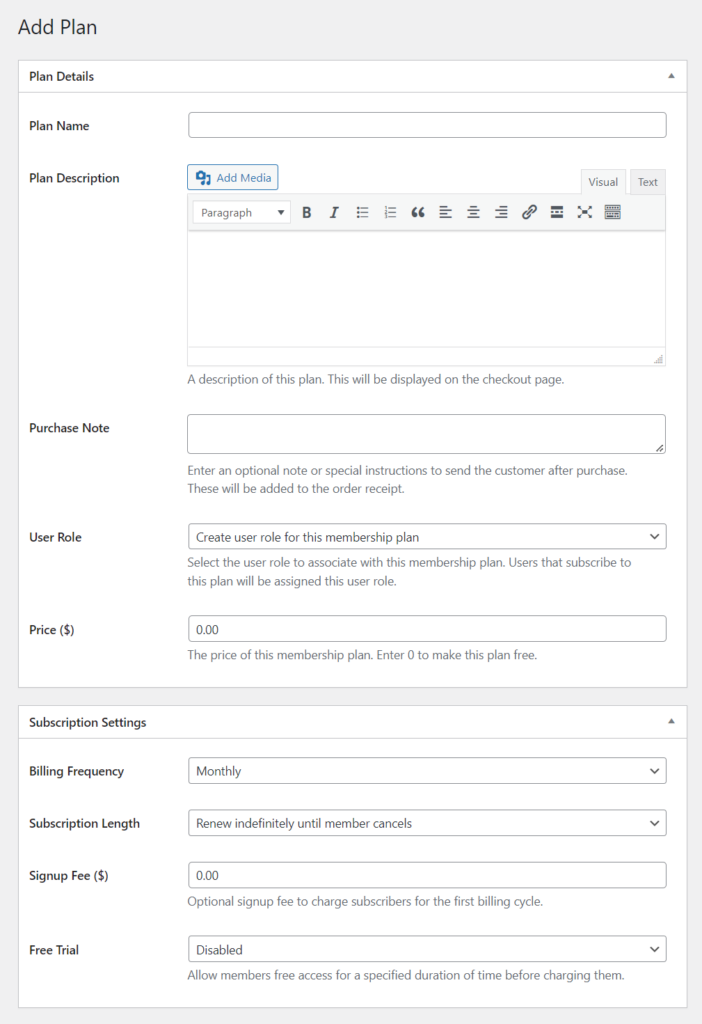
Go to ProfilePress > Membership Plans > Add New Plan.
On the next page, you will be asked to fill in the details of your subscription plan.
After filling in the details, set the price, subscription length, and billing frequency you want to associate with this plan.
Save all your changes before exiting the page.
If you need further help creating the plan, please look at this guide.
ii. Copy Checkout Link
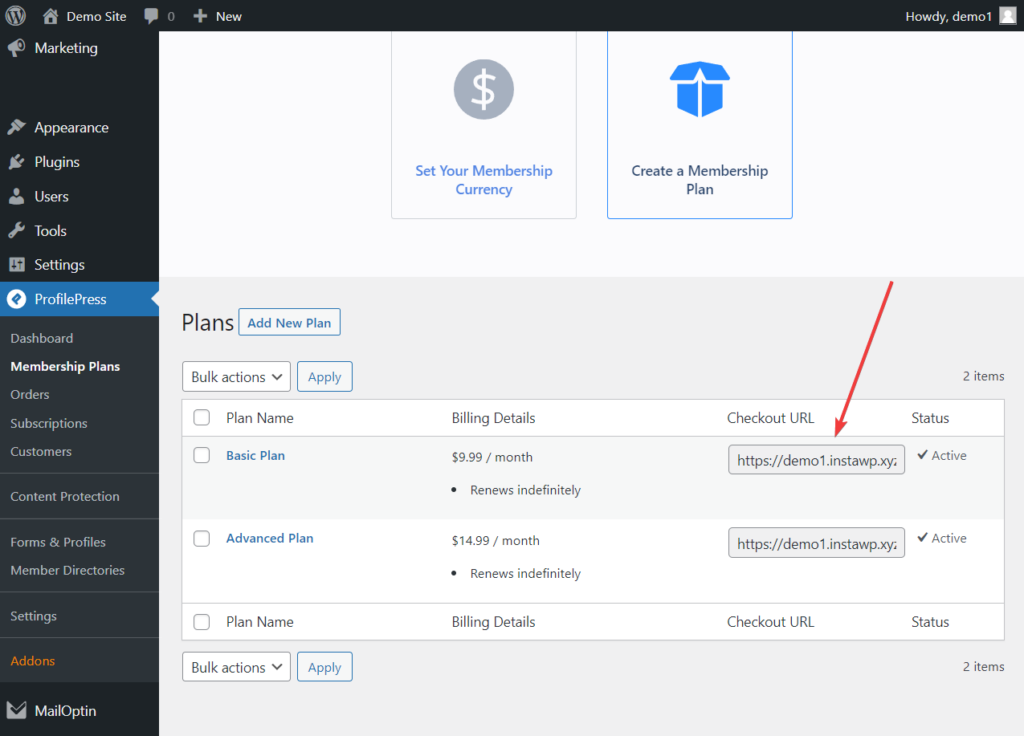
Go to ProfilePress > Membership Plans, and you should see a checkout page link associated with the membership plan you created a few steps back. Copy that link and paste it on a notebook or sticky note page where you can access the link whenever you need it.
iii. Connect Payment Gateway
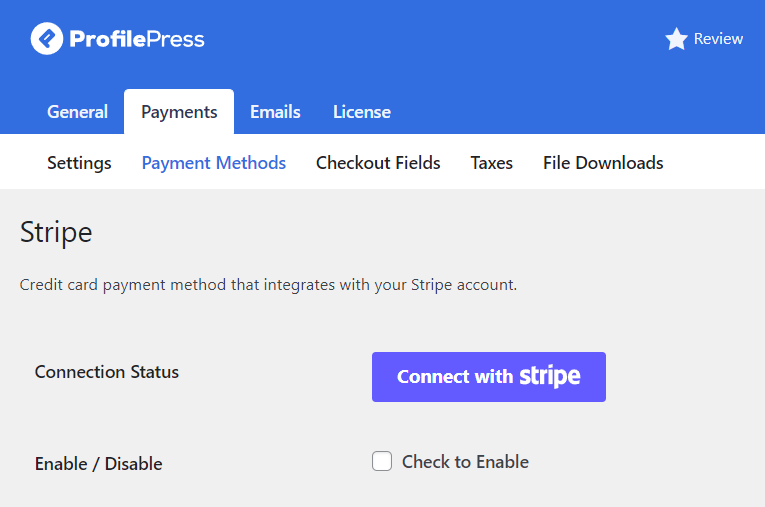
Next, you need to set up a payment gateway so people can purchase the product. Go to ProfilePress > Settings > Payments > Payment Methods.
You will be given the option to connect with Stripe, PayPal, Razorpay, Paddle, Paystack, Direct Bank Transfer, Mollie.
After setting up the payment methods of your choice, ensure you check the Check to Enable checkbox to activate them.
Setting Up Hard, Soft & Metered Paywalls
Activate Paywall Addon
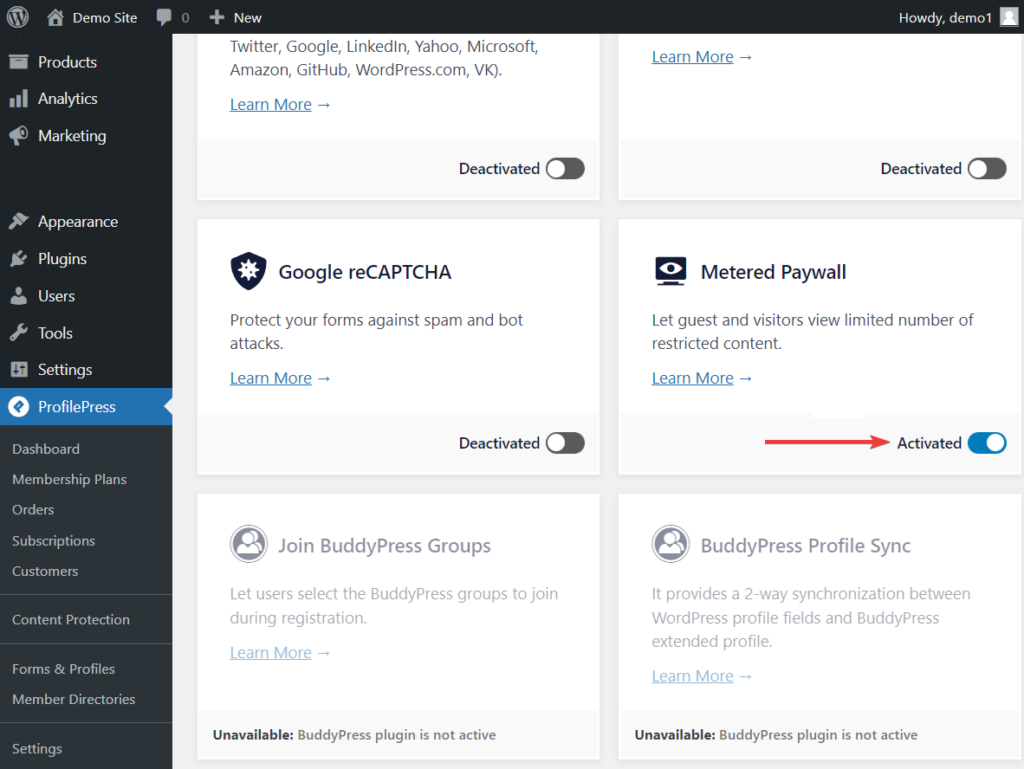
To activate the paywall feature, go to ProfilePress > Addons and toggle on the Activate button in the Metered Paywall section.
Hard Paywall Setup
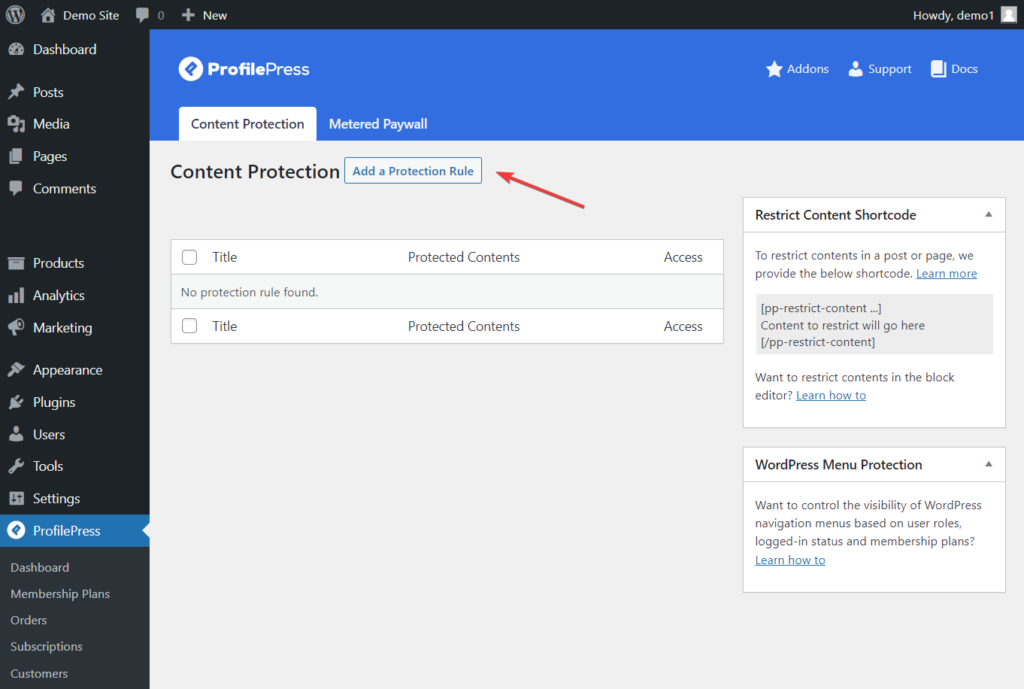
To set up a hard paywall, you need to go to ProfilePress > Content Protection and click on the Add a New Protection Rule button.
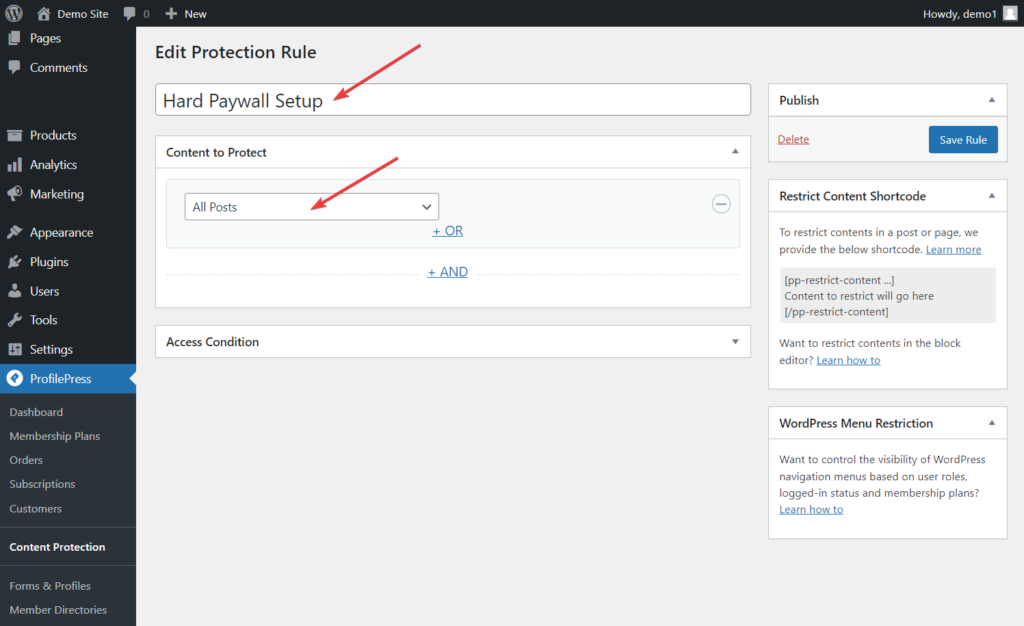
On the next page, add a title and from the dropdown menu under Content to Protect, select All Posts.
Do note that aside from “all posts”, you can protect selected post types, posts belonging to certain categories and taxonomies and much more
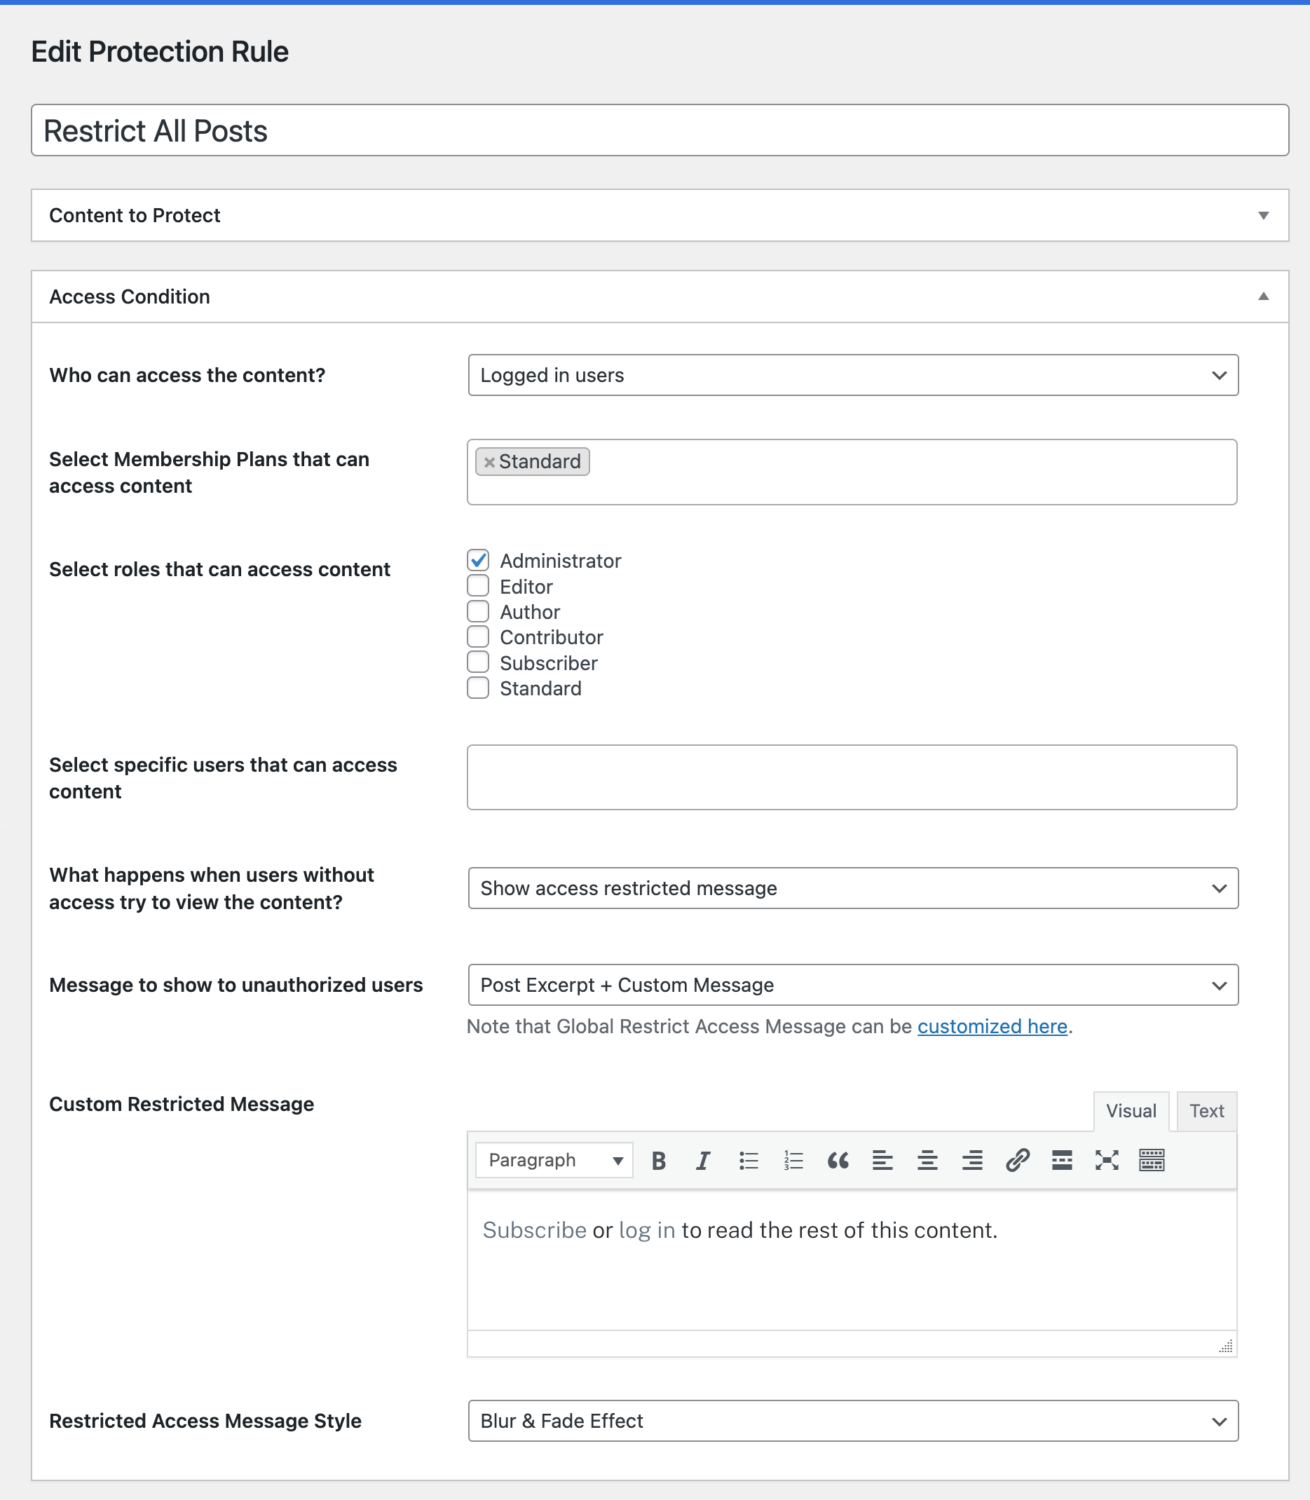
Scroll down to the Access Condition section, and from the dropdown menu against the Who Can Access the Content option, select Logged in user.
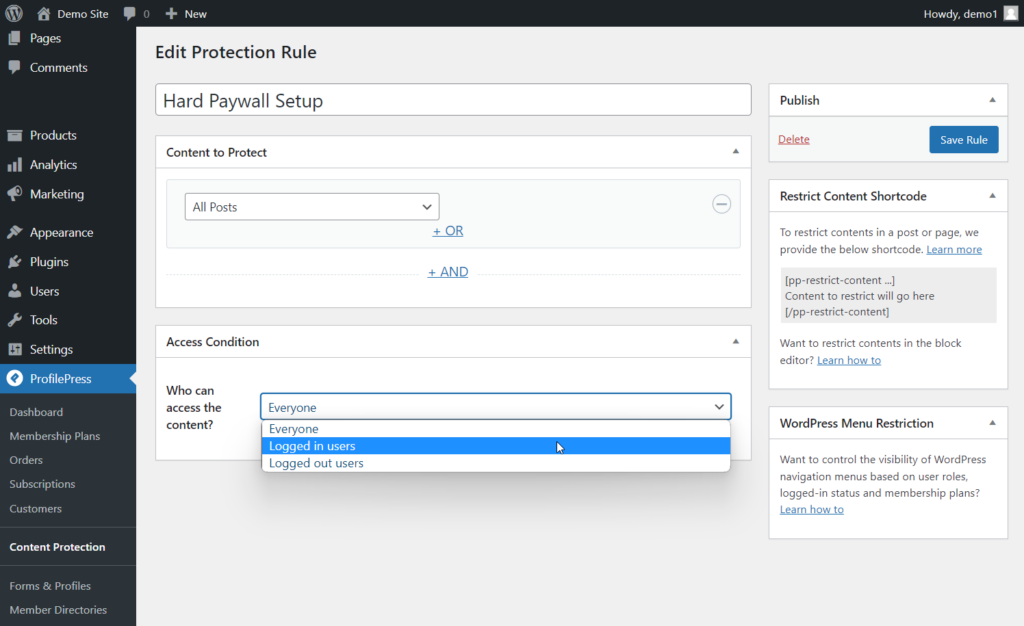
As soon as you select the Logged in users option, several new options will appear in the Access Condition section.
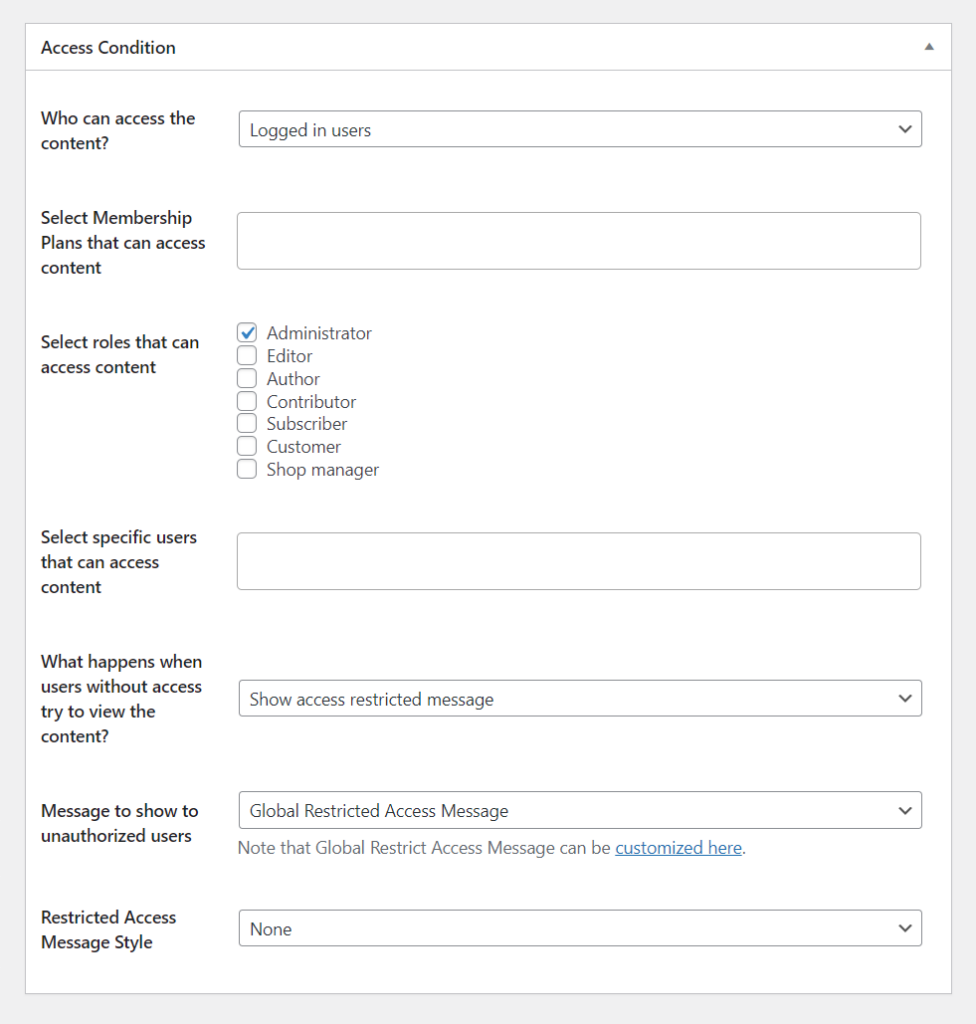
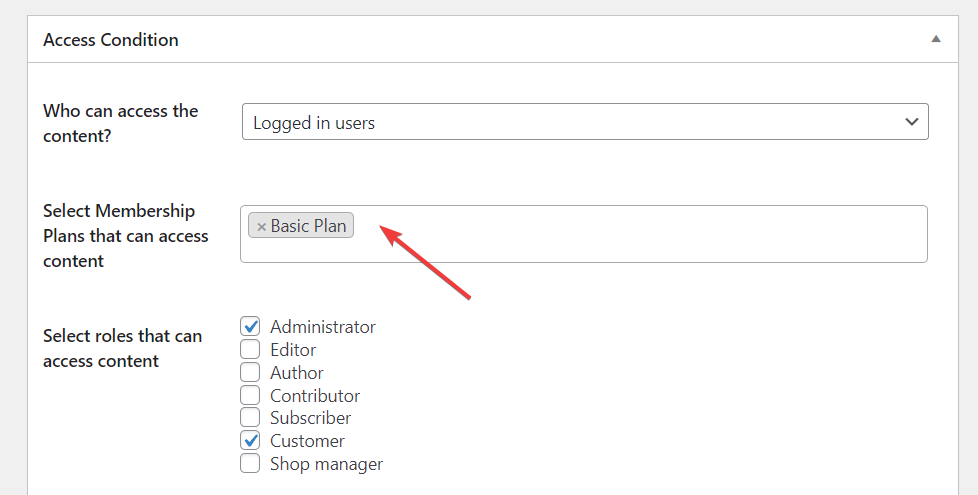
You first need to go to the Select Membership Plans That Can Access Content option and add the membership plan you created in step 2.
You might want to select the Roles that can also access the content besides paid members with an active subscription to selected membership plans.
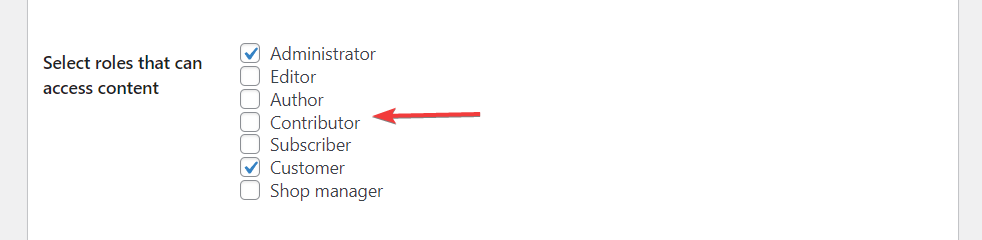
Pro Tip: Whichever user role you select, make sure to choose Administrators as well because you would want admins to access the content of your site.
Then go to the Restricted Access Message Style Option and select Blur & Fade Effect from the dropdown menu. Next, under Message to Show to Unauthorized Users, select the Post Excerpt + Global Restricted Access Message.
Hit the Save Rule button to save your setting.
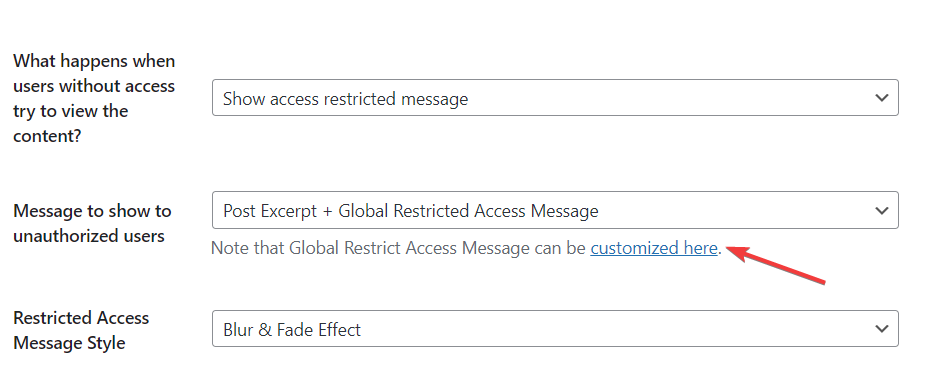
Click on the customized here link to add a custom message indicating visitors need to become paying subscribers to read the entire article.
Make sure to include the plan checkout or pricing page URL you copied in step 2 in this custom message. Visitors will use that link to make payments and subscribe to your website.
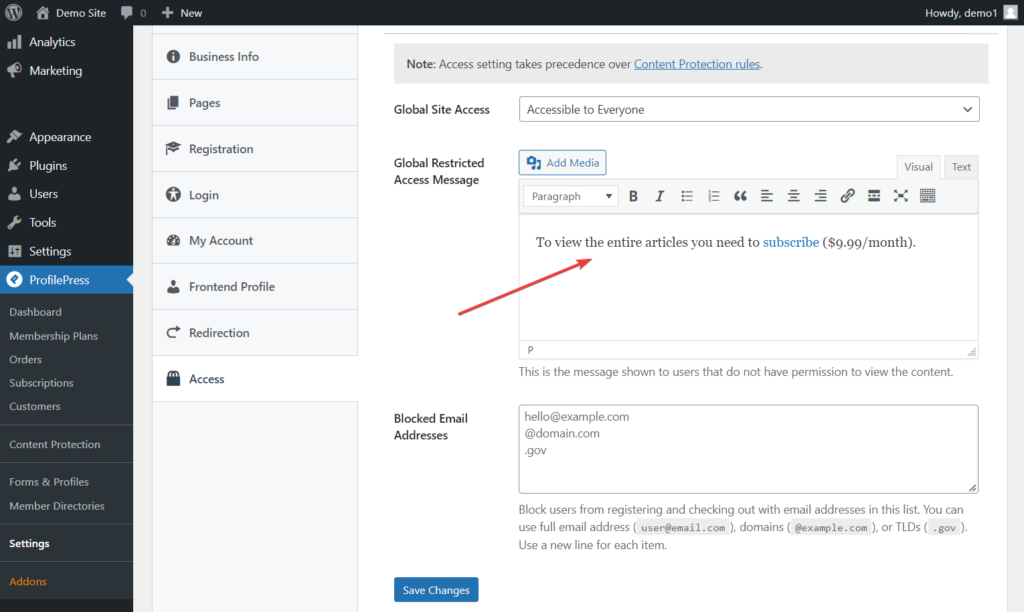
Alternatively, you can select “Post Excerpt + Custom Message” as the Message to show to unauthorized users if you don’t want to use the global restricted message.
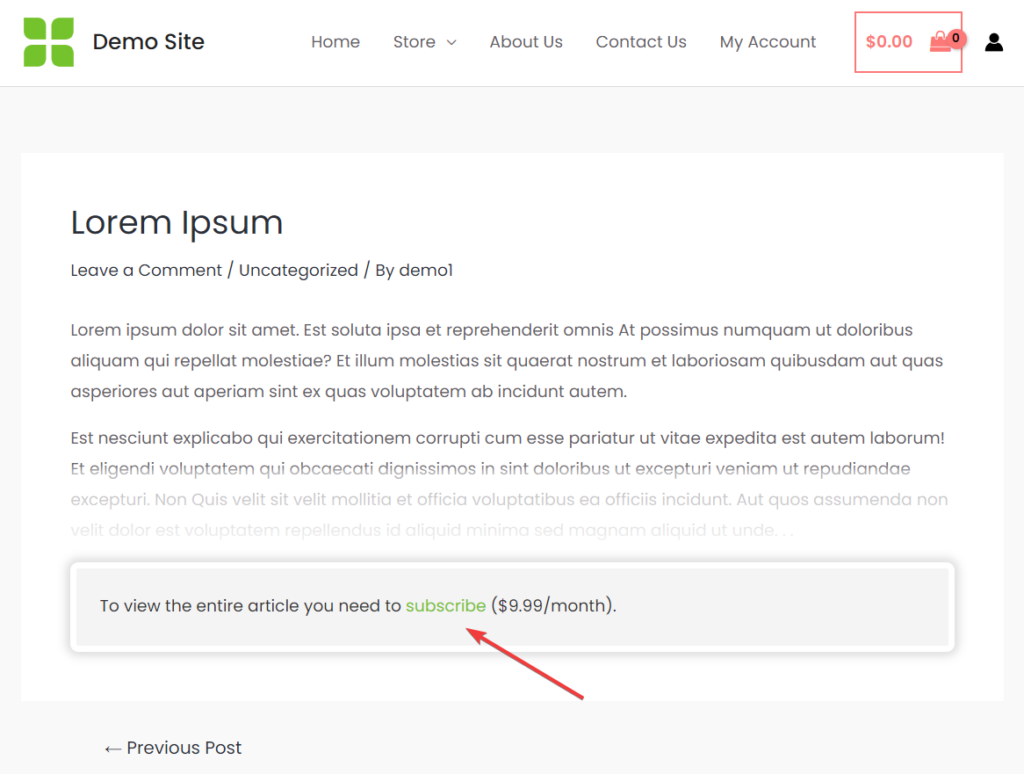
That’s it. You have set up a hard paywall on your WordPress website.
Users can only read excerpts or a few paragraphs when they visit your published posts. They will need to subscribe to a membership plan to view the entire content of every post. This is Hard Paywall in action.
Soft Paywall Setup
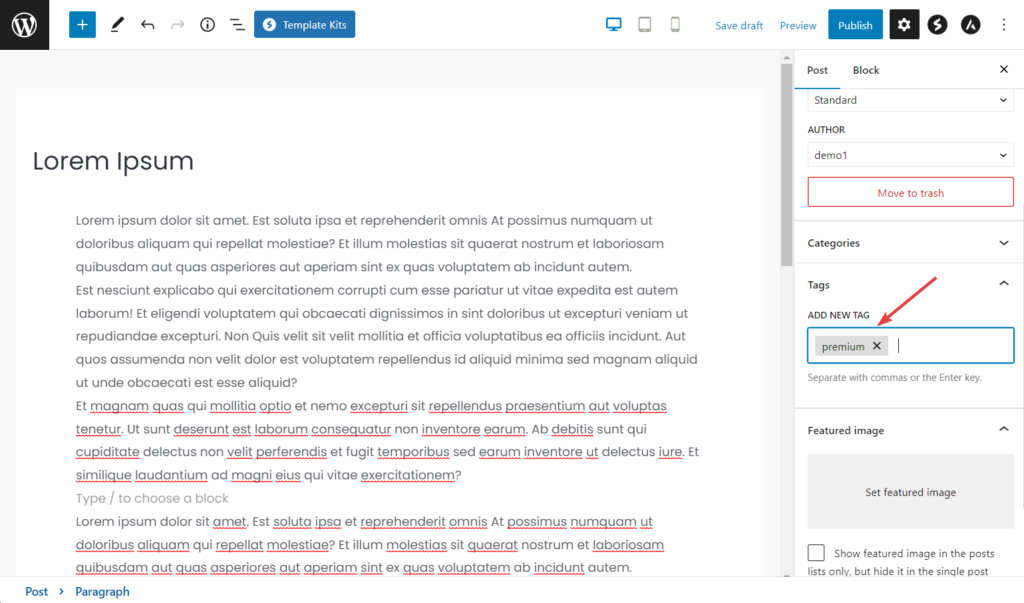
To implement a soft paywall on your WordPress website, you must first segregate the premium content from the free ones. Then tag the premium content as “paid” or “premium.”. Instead of the use of tags, you can also use categories.
The tagging happens in the WordPress content editor. Open the page or post, go to Tag, write paid or premium, and hit enter. You will need to tag all your premium posts and pages this way.
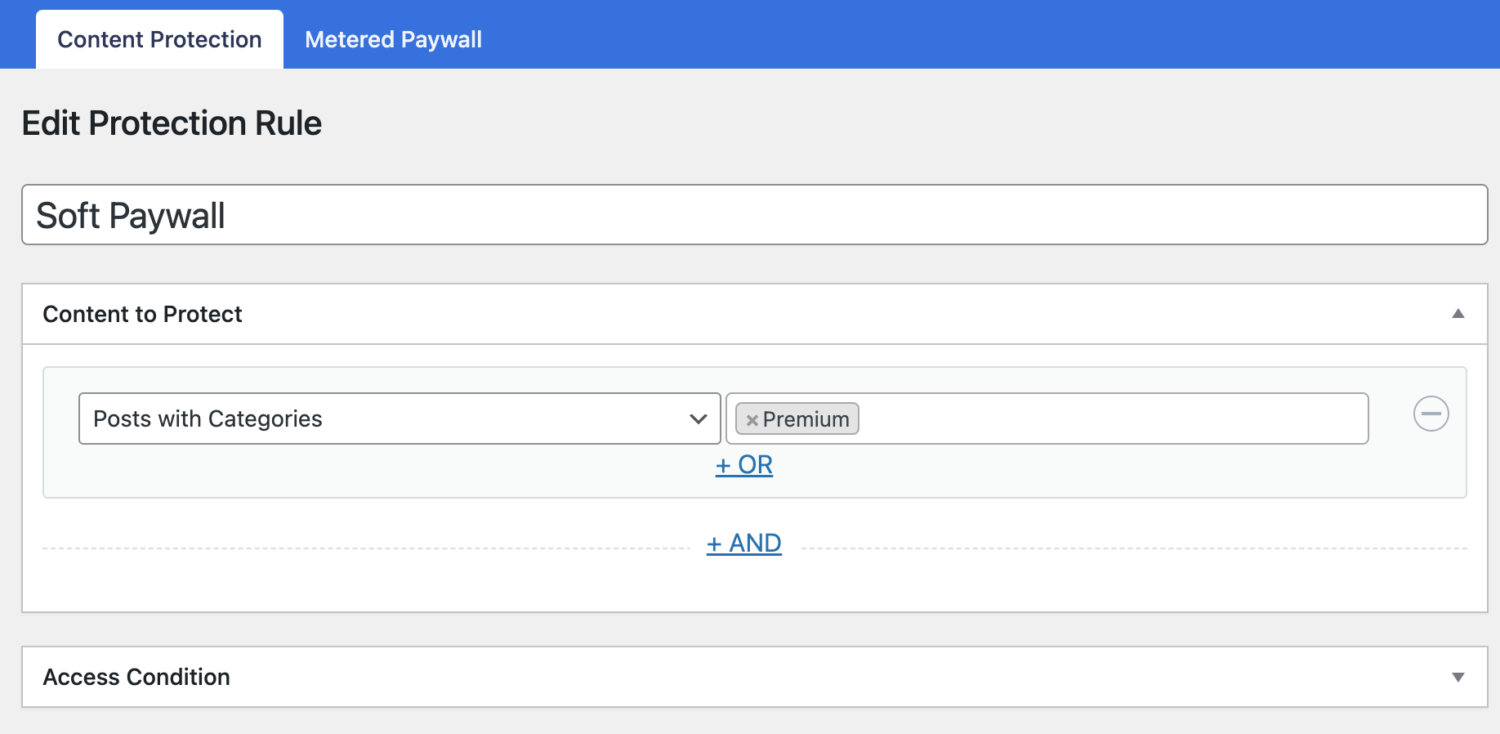
Go to ProfilePress > Content Protection and click the Add a New Protection Rule button.
On the next page, add a title and from the dropdown menu under Content to Protect, choose Posts with Tags or Posts with Categories if you used categories to define premium content.
A search box will appear on the right as soon as you do that. In the search box, look for the tag you just created. Then, select the tag and hit the Save Rule button.
Next, you must go to the Access Condition section to set up or configure who can access the premium content. For example, it could be members with an active subscription to selected membership plans.
Since we have already covered it in the previous section (hard paywall setup) and don’t want to repeat the same things here.
By completing this setup, all posts tagged premium can only be accessed by paid subscribers or selected user roles, with the rest of the posts available for free.
Leaky, Porous, or Metered Paywall Setup
The metered paywall model involves four steps:
- Restricting content
- Setting up a metered paywall
- Preventing abuse of paywall
- Adding countdown slider
Let’s dive into each step.
i. Restrict Content
You need to restrict WordPress site content using the guidelines laid out in the hard paywall setup section.
When that is done, hit the Save Rule button and proceed to the second step, which involves opening the Metered Paywall settings page right beside the Content Protection menu tab at the top.
ii. Set Up Metered Paywall
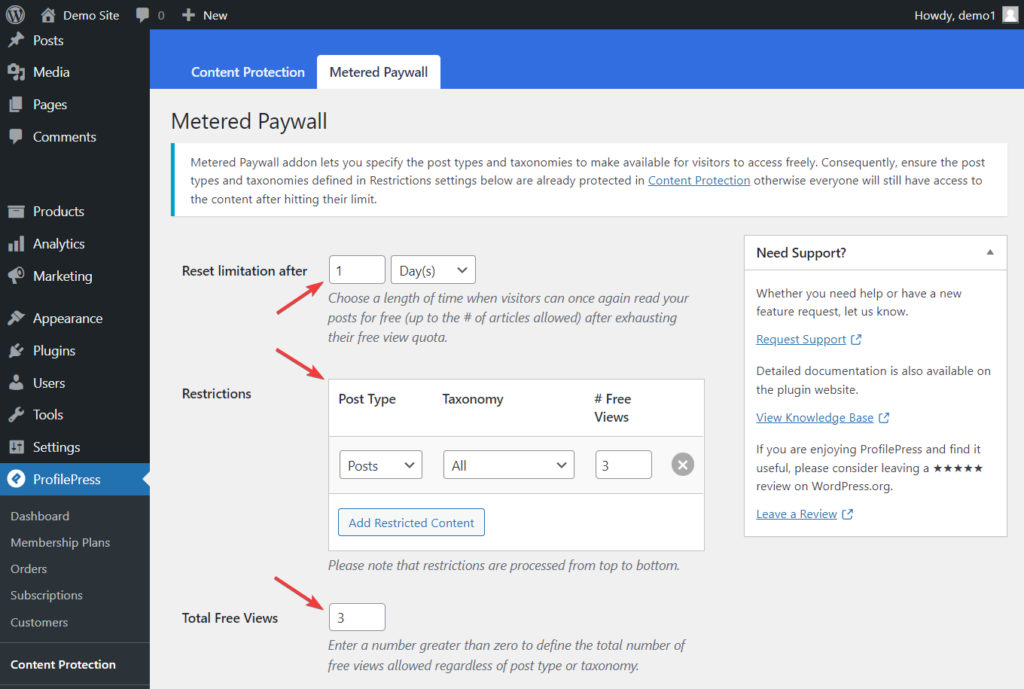
You need to modify the first three options on the Metered Paywall page. Let’s take a look at each option and try and understand what they mean:
- Reset limitation after allows you to choose a length of time when visitors can once again read your posts for free.
- Restrictions allow you to choose which post types you plan to restrict and how many posts, pages, or custom post types you will offer for free.
- Total free views allow you to define the number of posts a visitor can view for free. This is a global setting, and it will override the previous setting on free views.
Hit the Save Changes button to save the modifications.
iii. Prevent Abuse of Paywall
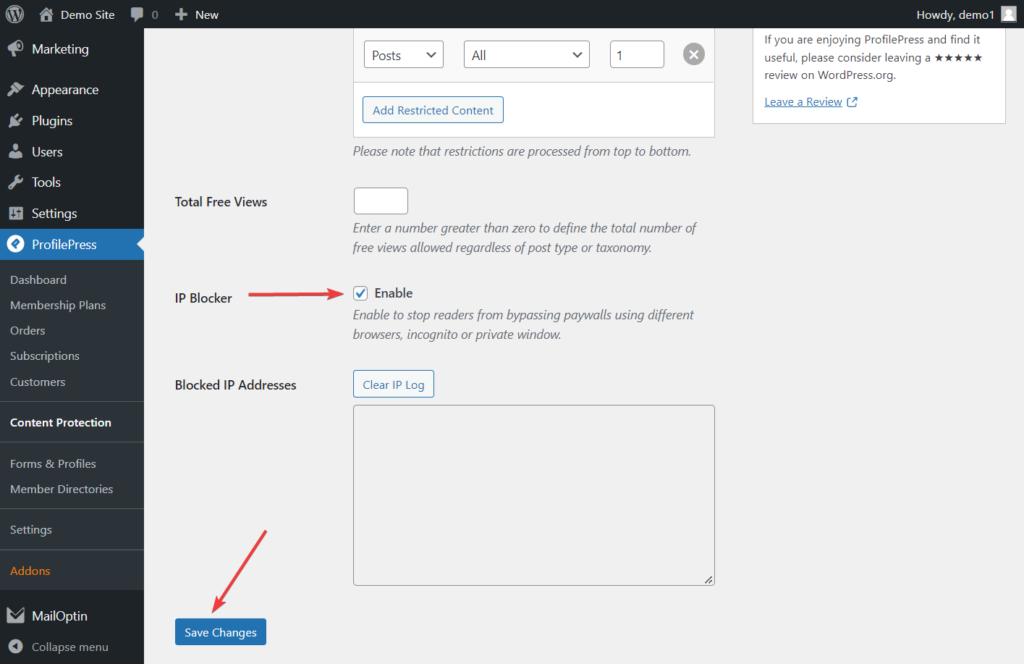
After setting up the metered paywall, you need to ensure that your premium content is protected from access via an incognito browser.
You need to activate the IP Blocker feature to prevent this abuse. First, go to the Metered Paywall > IP Blocker and select the Enable option to enable the feature. Then, hit the Save Changes button before exiting the page.
iv. Add a Countdown Slider
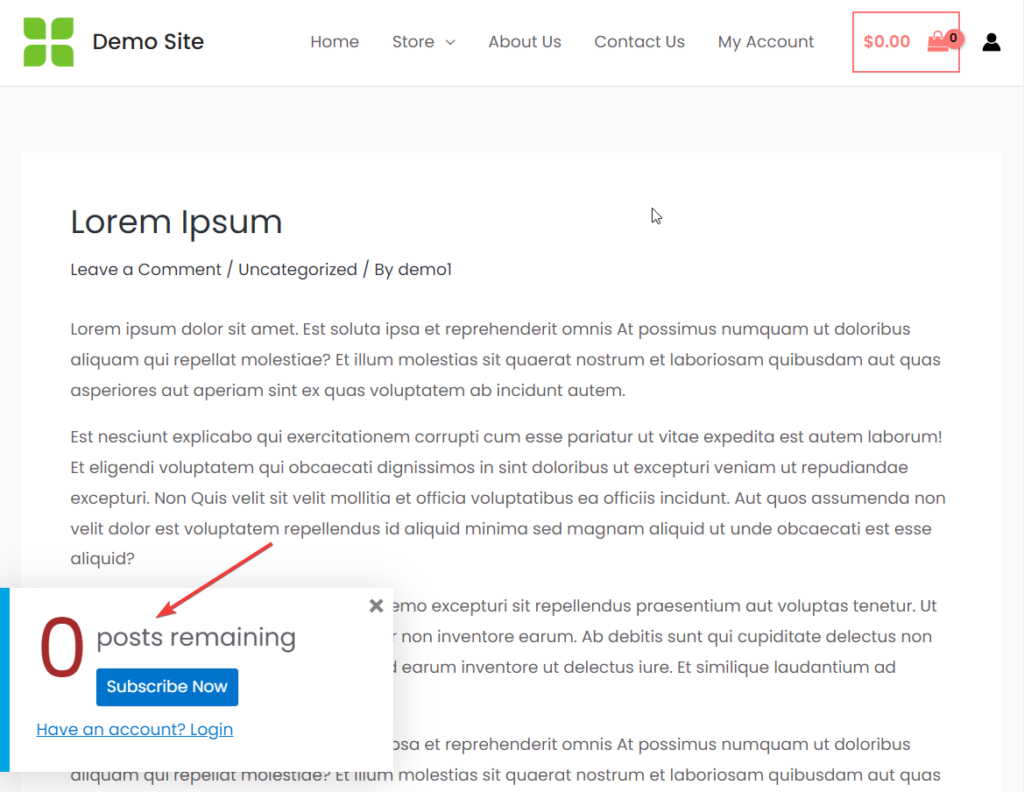
Popular websites like The New York Times and Medium allow visitors to read a few premium articles for free before asking them to sign up for a subscription. Then, they inform the visitor of how many views are left using a countdown slider.
You can also create a countdown slider on your WordPress website and inform visitors how many views are left before they subscribe.
Open the Metered Paywall option on your WordPress dashboard and go to the Countdown Slidebox section.
Select the Enable option and add the link to your pricing or checkout page in the Button Link option. Visitors will use this link to go to a page where they can sign up and make payments.
You can change the button text and message and log in to the text if you feel the need to.
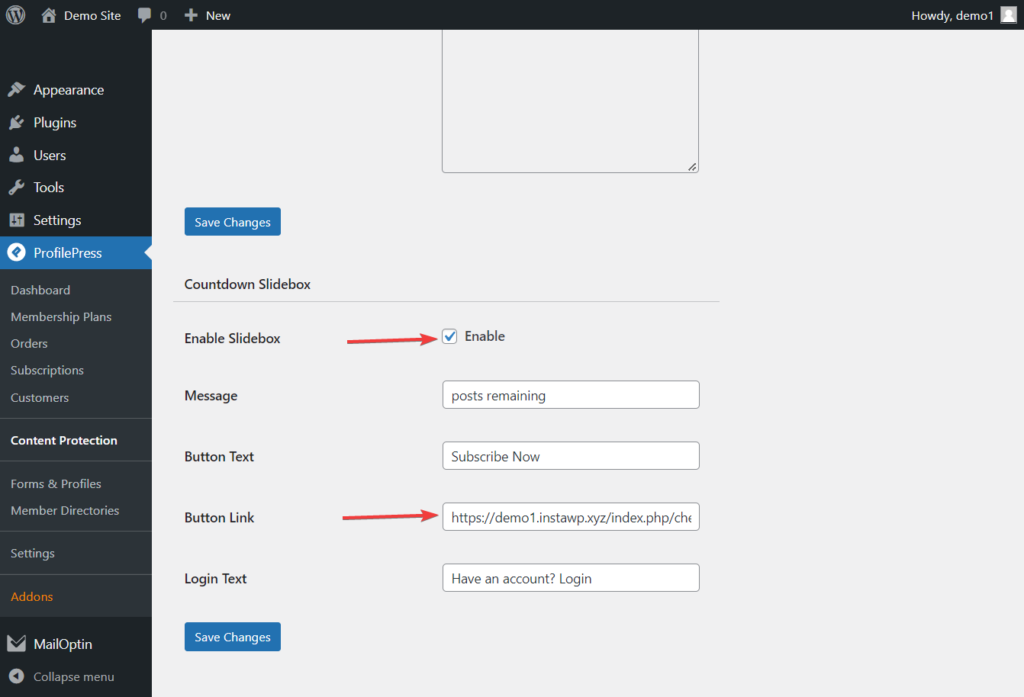
When you are ready, hit the Save Changes button, and the countdown slider will be added to your WordPress site.
That’s it, folk. With that, you have completed the setup of a metered paywall on your WordPress website.
Conclusion
Setting up a paywall is a great way to monetize your content, give your users access to exclusive, premium content and generate revenue from your WordPress website.
Some WordPress paywall plugins are hard to use but not ProfilePress. It’s a powerful WordPress paywall plugin and super easy to use.