How to Build Email List in WordPress – Complete Guide
Do you want to build an email list in WordPress?
An email list enables you to communicate with your audience long after they have left your website. It gives you direct access to people who have once visited your website and loved your content or services.
When you build an email list, you gain access to a targeted list of people who are interested in what you do. With your email list, you can promote your services, share valuable insights, drive traffic to your website, and build a loyal following.
Building an email list is primarily about collecting the email addresses of people who visit your website. There are various strategies for collecting these emails, but the most popular one is to offer them a freebie or an exclusive deal in exchange for their email address.
In this article, you will learn how to capture your audience’s emails and build an email list from your WordPress website.
Benefits of Building an Email List
Email marketing has been around for a long time; it was one of the earliest forms of internet marketing, and the good news is that it still works today.
While you are working on other forms of marketing like SEO, social media, or paid ads, email marketing can still help you reach your customers and bring them to your website for more sales or traffic.
There are many reasons why people build an email list, but we’ll mention a few prominent benefits today.
Cheaper Traffic Source
When you compare the cost of paid ads, SEO, and social media campaigns to an email newsletter, you will quickly discover it to be a very cheap alternative to any of the other channels of marketing. An email list offers a pocket-friendly and effective way to promote your services, products, or content to your audience.
Total Control
When you build an email list, you have total control over your asset. Every other form of marketing puts you at the mercy of the platform owners; your social media accounts could be disabled, and your website’s SEO traffic could disappear overnight, but your email list will always be yours.
Better Targeting
Email marketing software allows you to segment your lists based on various criteria, such as location, interest, or any other custom criteria. By grouping your list subscribers, you can send targeted messages to your list, helping you reach the exact audience for your offers.
Revenue Bump
The ultimate goal of building a business is to generate revenue, and your email list can help you do just that. With your email list, you get a guaranteed reach for your targeted messages and promotions, thereby bringing you traffic and sales from your website.
What You Need to Build an Email List in WordPress
When it comes to building an email list in WordPress, having a WordPress website is not enough; you also need an email service provider and an email capture plugin.
Email Service Provider
An email service provider is a company that specializes in managing and delivering emails. These companies offer tools for managing your email list, composing messages, and sending messages to your subscribers.
There is a growing list of email service providers, but some of the most popular ones include Mailchimp, MailerLite, Brevo, and Constant Contact. You can choose any of the available options as your email marketing platform; they usually offer similar services, so any of them should work.
Email Capture Plugin
The second thing you will need is a WordPress list-building plugin, also known as an email capture plugin. A WordPress list-building plugin helps you collect emails, generate leads, and synchronize them with your email service provider.
Most WordPress email capture plugins have integration with various email service providers, providing a seamless connection between your website and your email marketing platform. When it comes to WordPress mailing lists, there are numerous options available, including MailOptin, FuseWP, ProfilePress, WP Subscriber, and Mailchimp for WordPress.
How to Build an Email List in WordPress with ProfilePress
ProfilePress is a popular WordPress membership plugin that provides all the tools necessary to build and manage a membership site. Among the tools included with ProfilePress are the Campaign Monitor and Mailchimp addons, which allow you to connect your WordPress site to Mailchimp and automatically subscribe members or users to your mailing list.
To begin, go to ProfilePress >> Addons and activate the Mailchimp addon.
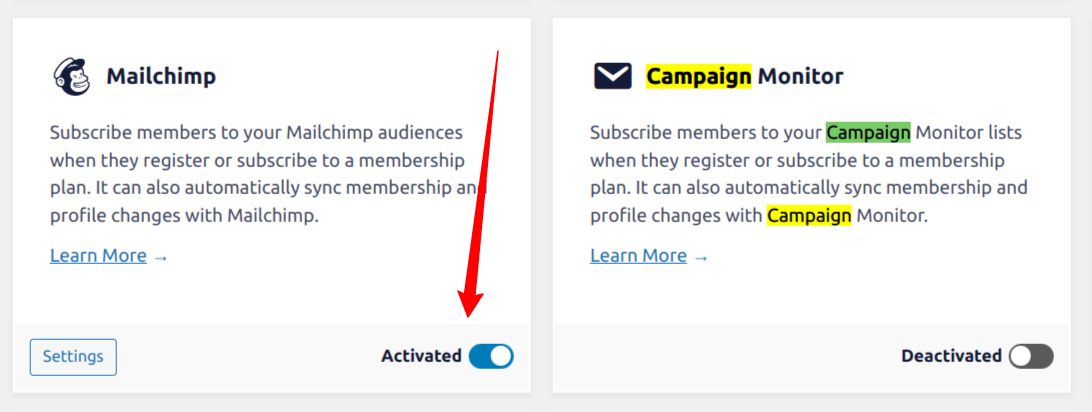
Next, click the “Settings” button on the MailChimp add-on or go to ProfilePress >> Settings >> Integrations and select MailChimp.
If you already have a Mailchimp API key, paste it into the field or click on “Get it Here” below the field to visit the API page of Mailchimp and retrieve your API key.
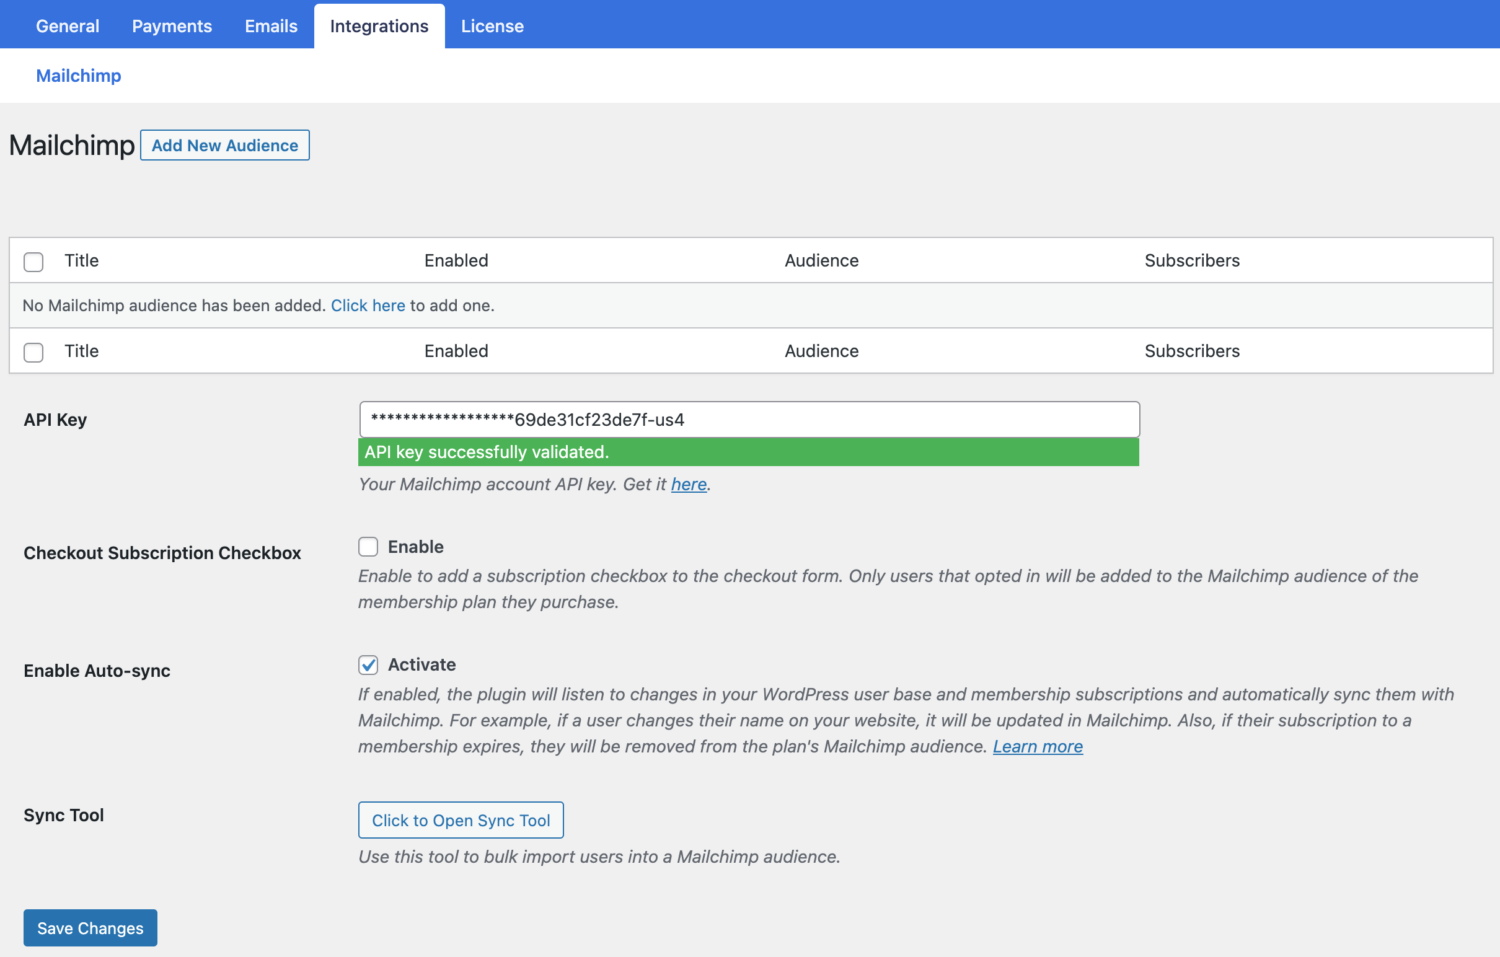
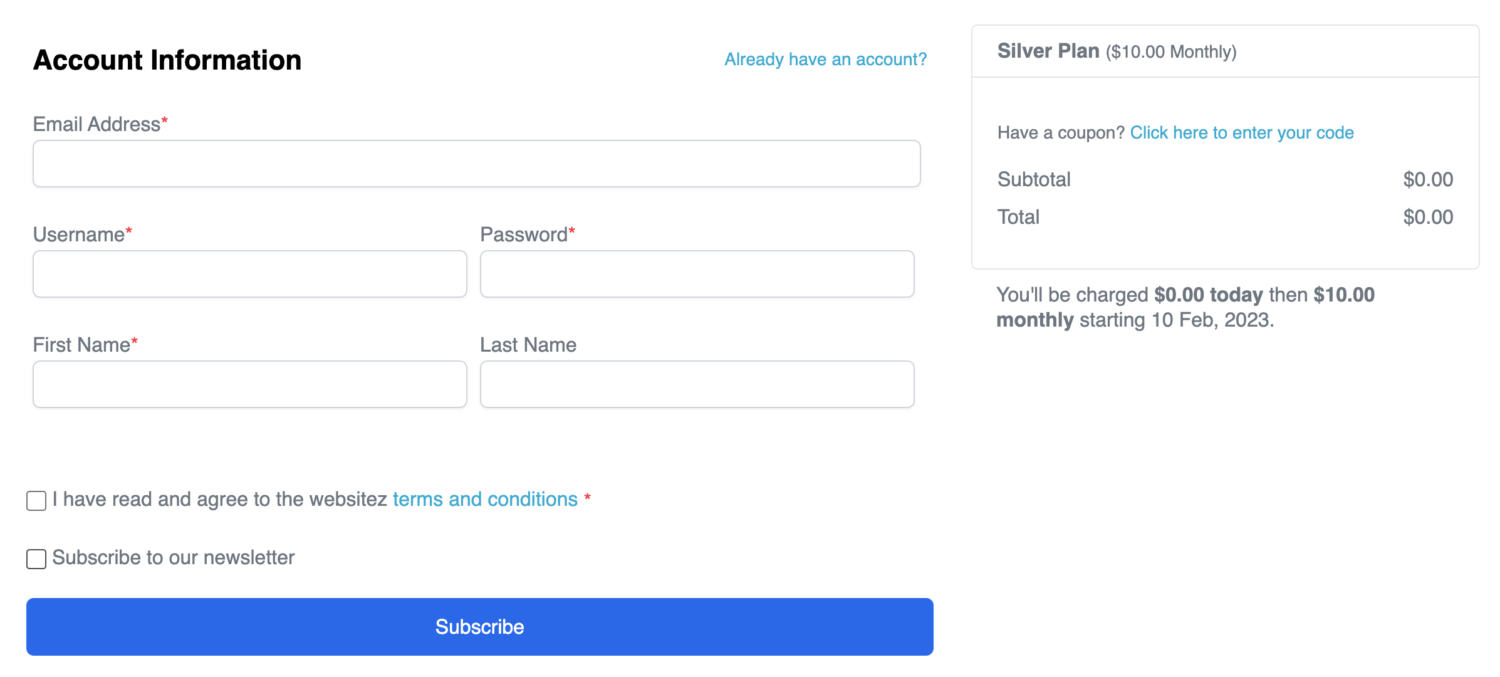
From the Mailchimp settings page, you can enable the “Checkout Subscription Checkbox” option to add a subscription checkbox to the checkout pages.
You can also enable Auto-sync to add users from your WordPress site to Mailchimp lists automatically.
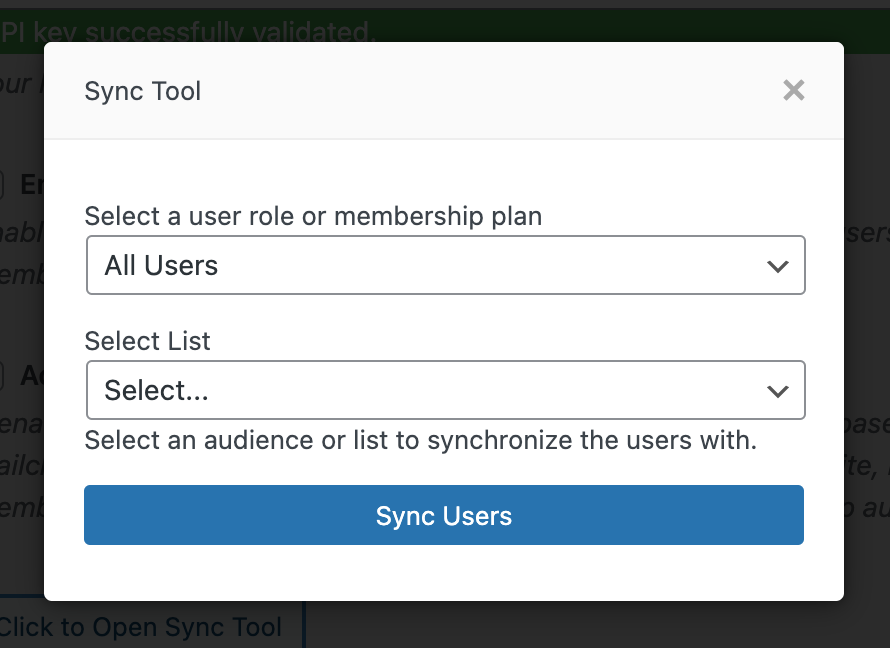
With this setup, you can automatically build an email list with all your registered WordPress users and start driving targeted traffic to your website.
Building an Email List in WordPress with MailOptin
In this section, we will follow a step-by-step process to set up the MailOptin plugin, connect it to Mailchimp, and start building our email list in WordPress.
1. Install & Activate MailOptin
The first step in this process is to install and activate the MailOptin plugin. MailOptin is one of the best WordPress email capture plugins; it helps you capture emails through popups, sidebar widgets, post embedding, and more.
It also has exit-intent technology that helps you convert users who are about to leave your website into subscribers.
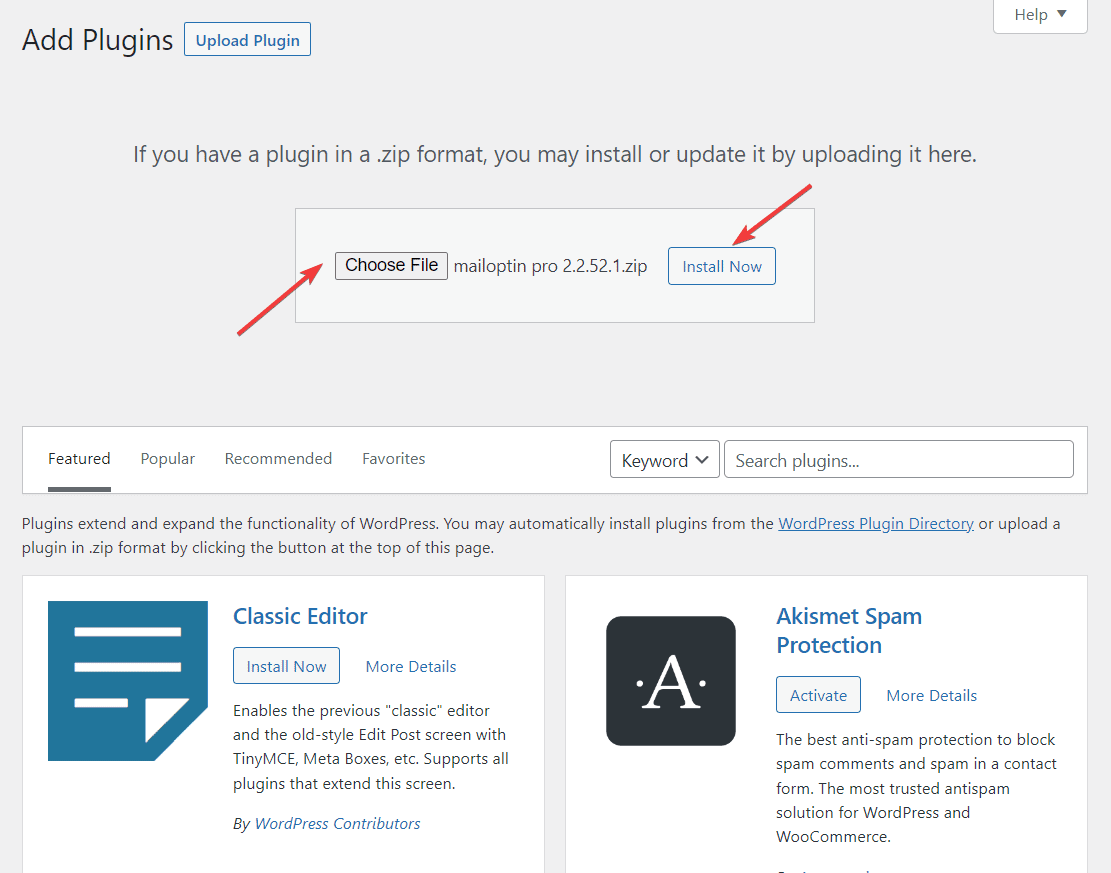
Get a copy of MailOptin and download the plugin from the welcome email or your MailOptin account. Then, upload and install the plugin into your WordPress website.
2. Connect MailOptin to MailChimp
The next step in using MailOptin to build an email list in WordPress is to connect it to your Mailchimp account. This connection will allow you to manage your email list with MailChimp.
After registration, you will be taken to your MailChimp account dashboard. On the left side of the dashboard, you’ll find a menu with various options. You need to go to the Accounts option and select Extra > API Keys.
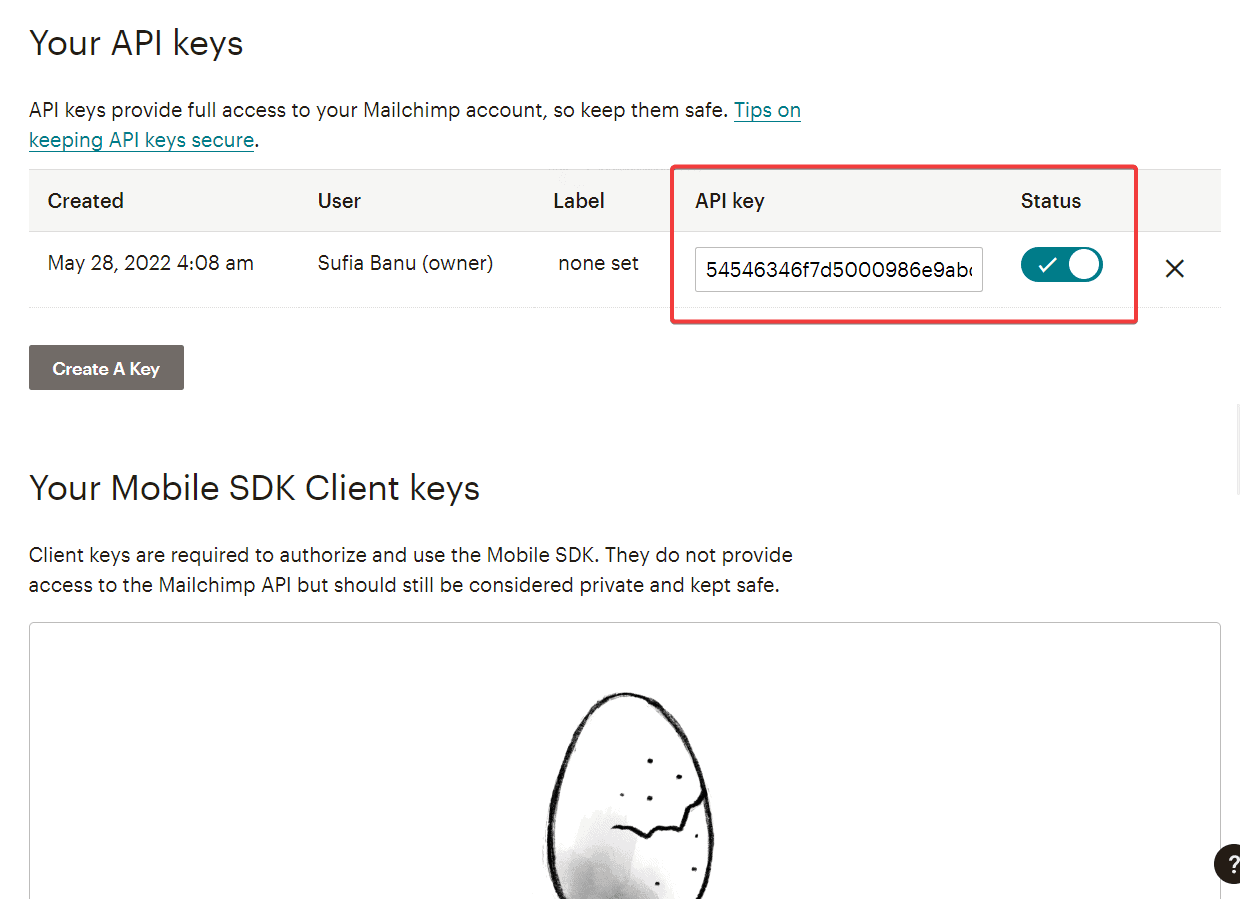
You will be redirected to a page called Your API Keys. Here, you should find a button called Create a Key. Click on it, and Mailchimp will take a few seconds to create a brand new API key. You will use this API key to connect your MailChimp account with the MailOptin plugin installed on your WordPress website.
The new API Key will appear on the screen within a few seconds, along with a status bar on its right. Copy the API key and toggle the status bar on.
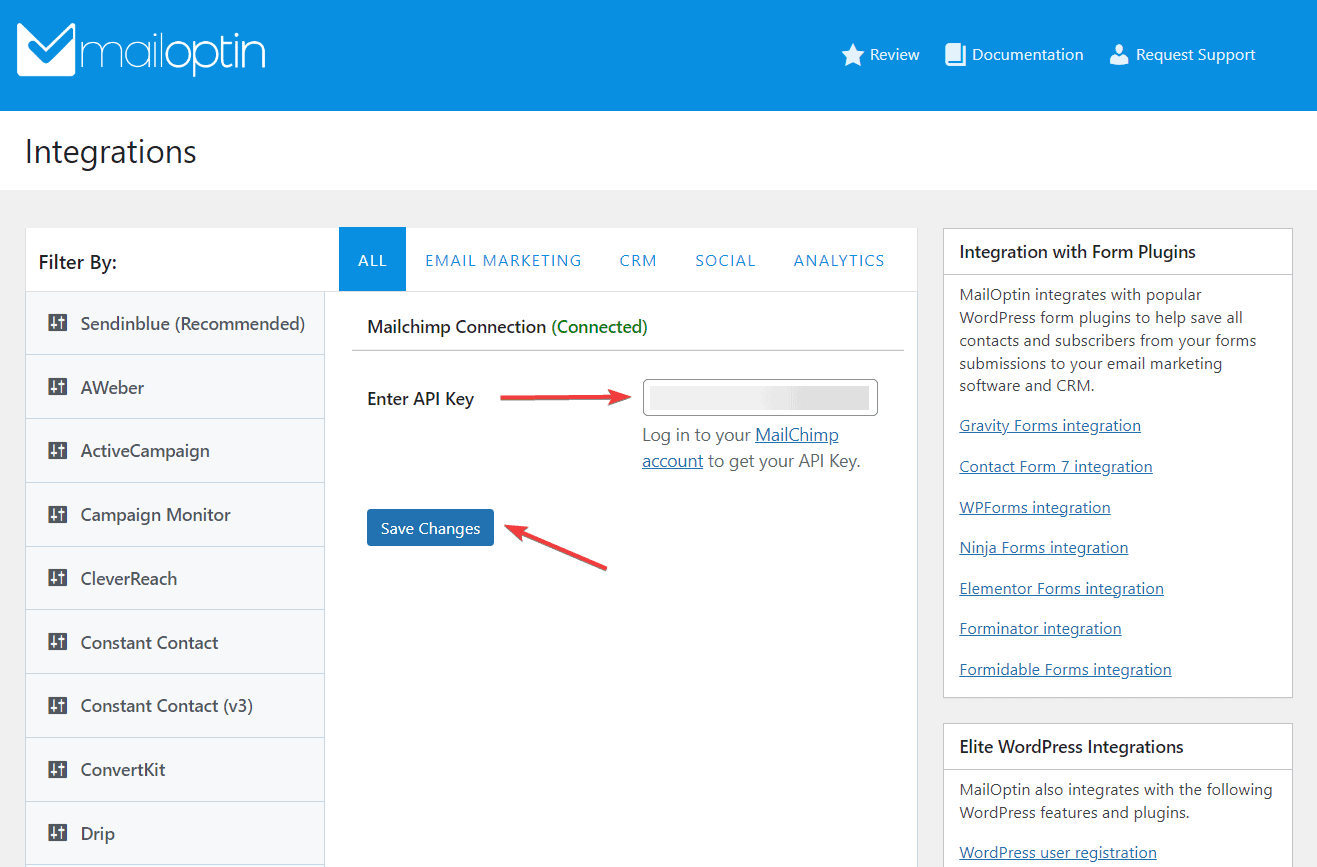
Now, go to your WordPress dashboard and navigate to MailOptin > Integrations. The integrations page lists numerous email marketing software. You need to find the MailChimp option and select it.
Once you do that, a Mailchimp connection box will appear, asking you to enter the API key you copied earlier. Paste the Mailchimp API key and hit the Save Changes button.
You have now connected the MailOptin plugin to your Mailchimp account.
3. Create a Popup Subscription Form Using MailOptin
Now that we have set up MailOptin and also connected our email service provider to our WordPress website, the next step is to create a way for our visitors to submit their email addresses to us.
While MailOptin offers various lead generation options, we will use its pop-up form to capture leads for growing our email list.
From your WordPress dashboard, go to MailOptin > Optin Campaigns > Add New. You will be redirected to a page where you will enter a title and select a template for your pop-up form.
Enter a title, and then select the LightBox option from the Select Optin Type menu.
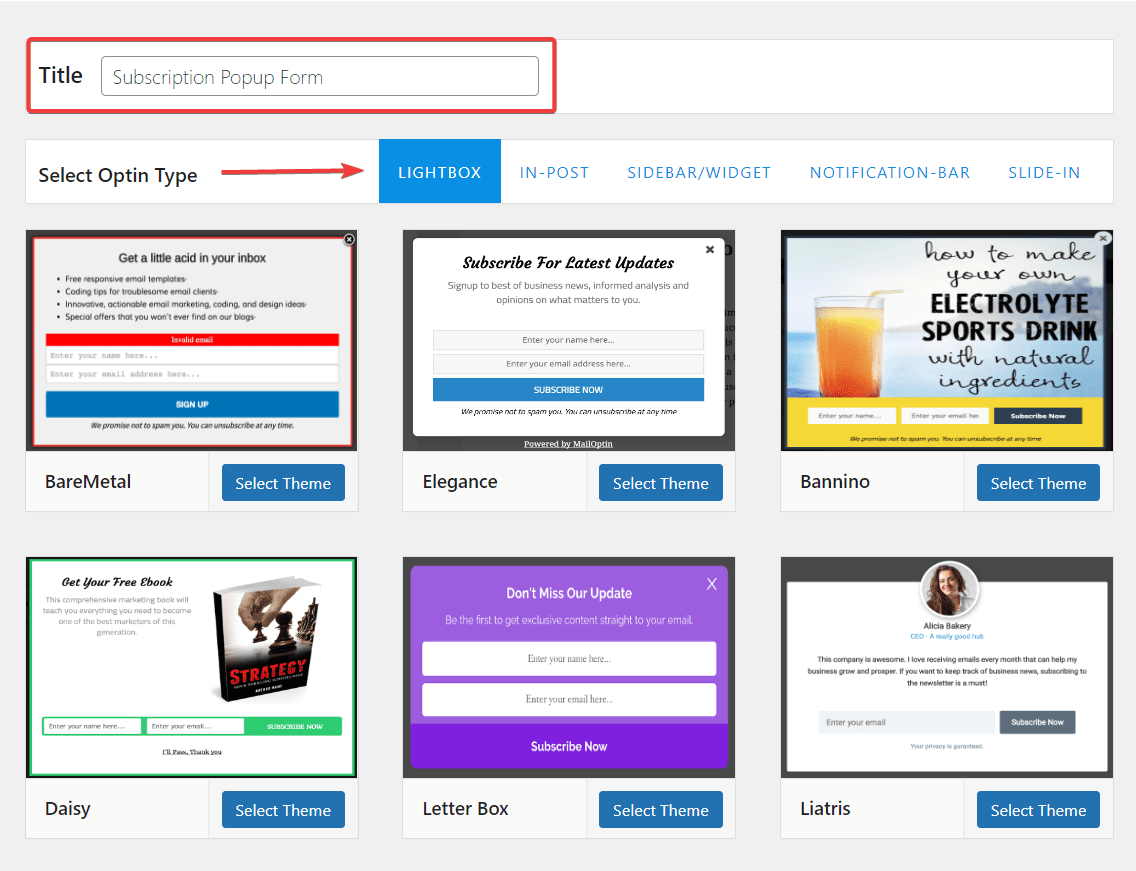
All the form templates under LightBox are pop-ups. If you change your mind about pop-ups in the future, you can switch to other opt-in forms, such as sidebars, notification bars, slide-ins, or in-post forms.
For now, choose a template from under LightBox and proceed by clicking the Select Theme button on your preferred template.
As soon as you do, you will be taken to a page where you can edit and customize the WordPress popup form.
On the left side of the page, you will have the settings pane for modifying the form, and on the right side, you will have the form.
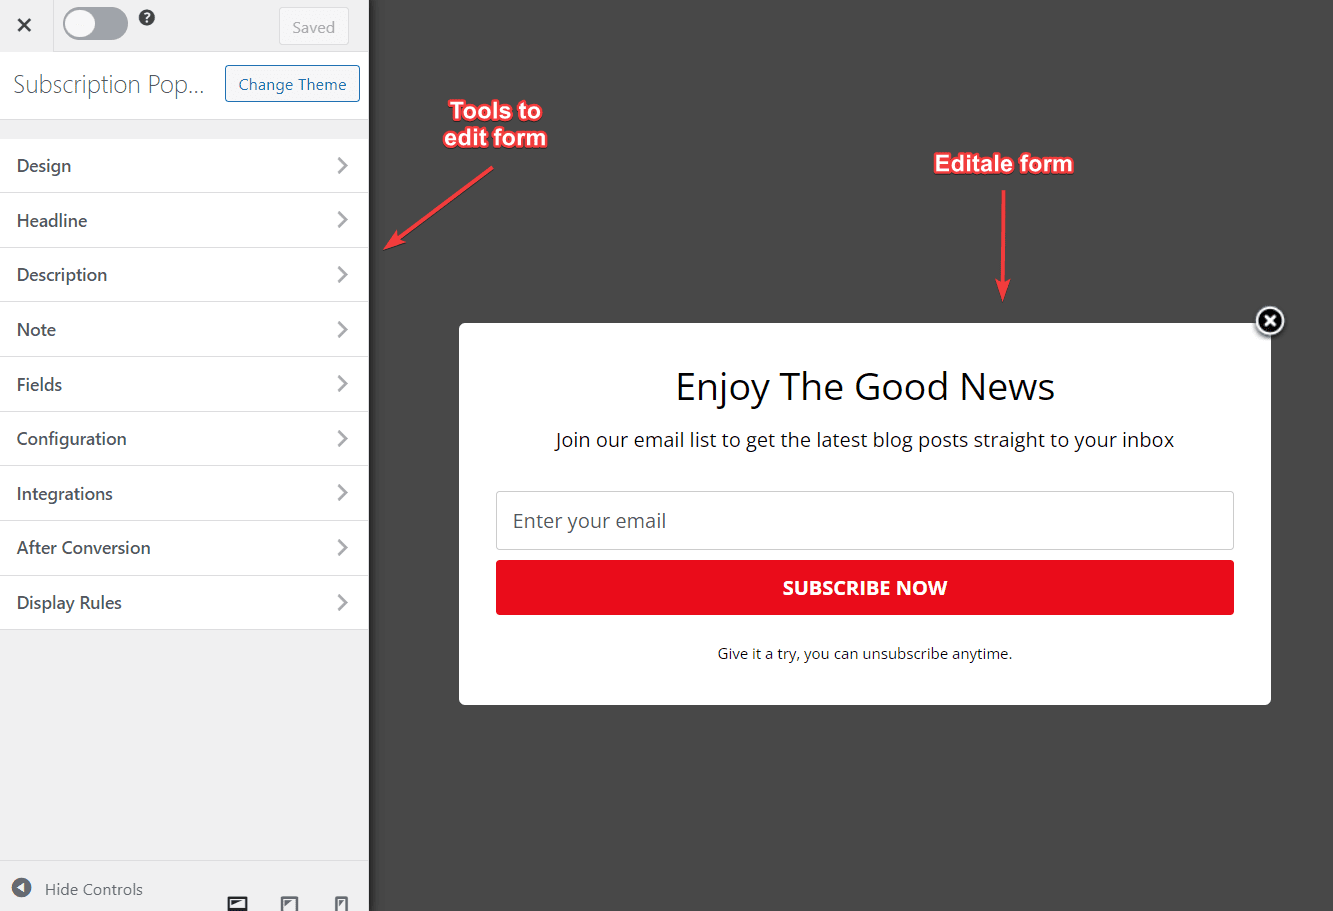
You can now use the options on the left panel to adjust the design of the pop-up form to your liking and save your changes.
4. Integrating The Popup Form With Mailchimp Audience
The final step in this process is to connect the subscription form to Mailchimp; this will ensure that anyone who submits their email address using this form is added to our Mailchimp mailing list.
Go to MailOptin > Optin Campaigns. Click on the popup form, and it will open on the next page.
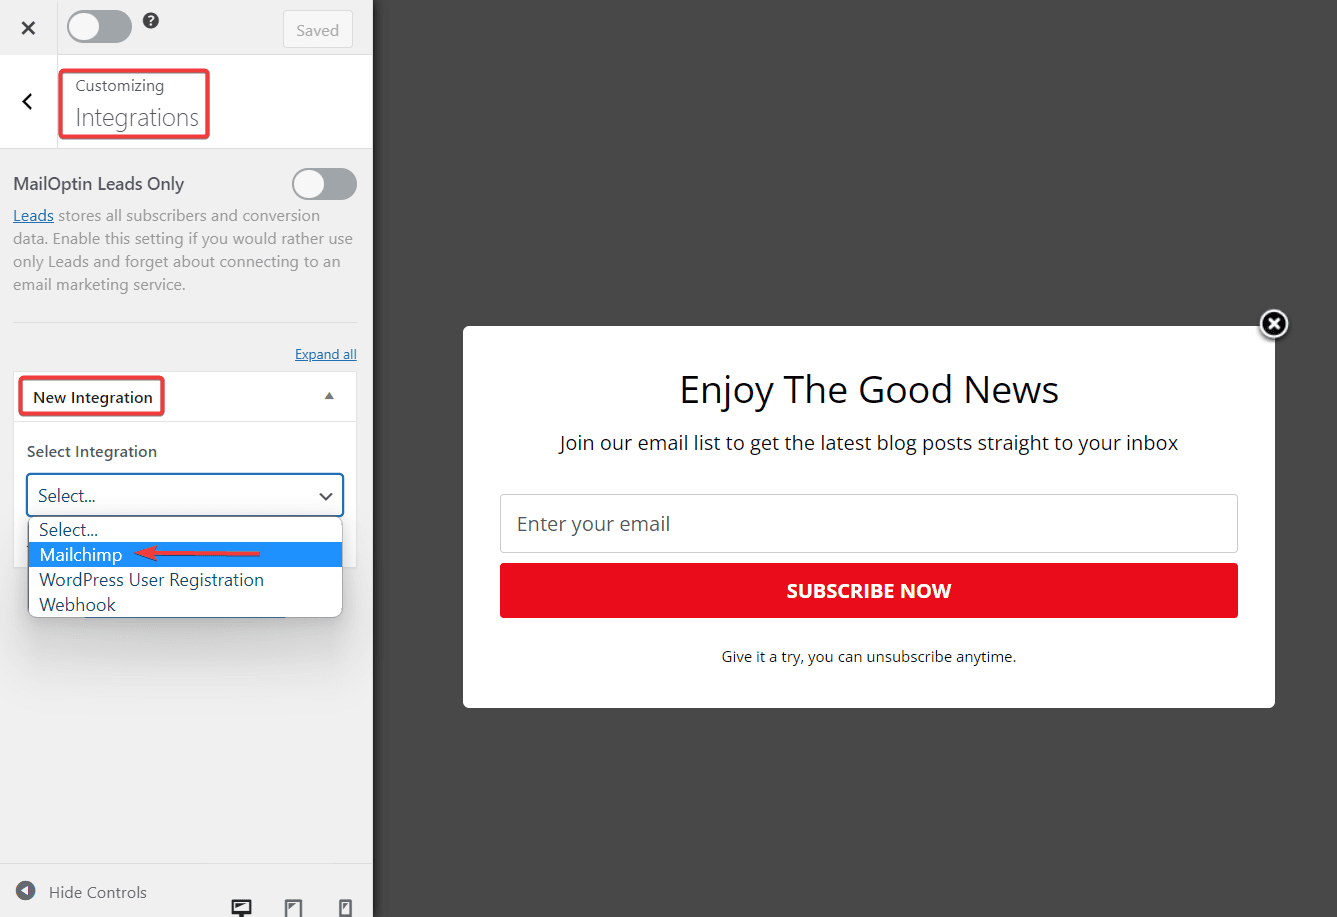
From the left-side panel, go to Integrations and click on New Integrations. A drop-down menu will appear with MailChimp as an option. Select it and save your changes before you exit the page.
Congratulations! You have successfully created a WordPress popup subscription form that collects email addresses from your website visitors and saves them in your Mailchimp account, helping you build your email list.
Building an Email List with FuseWP
FuseWP is a WordPress marketing automation plugin that seamlessly integrates with your email marketing software, ensuring your website users and customers are automatically subscribed to your email lists.
By using this plugin, you can effortlessly sync user registrations, WooCommerce customers, and membership sign-ups with your email marketing lists, while also capturing leads efficiently through popular form builders like WPForms and Gravity Forms, allowing you to add users who purchased a product, subscribed to a membership plan, or enrolled in a course to your mailing list.
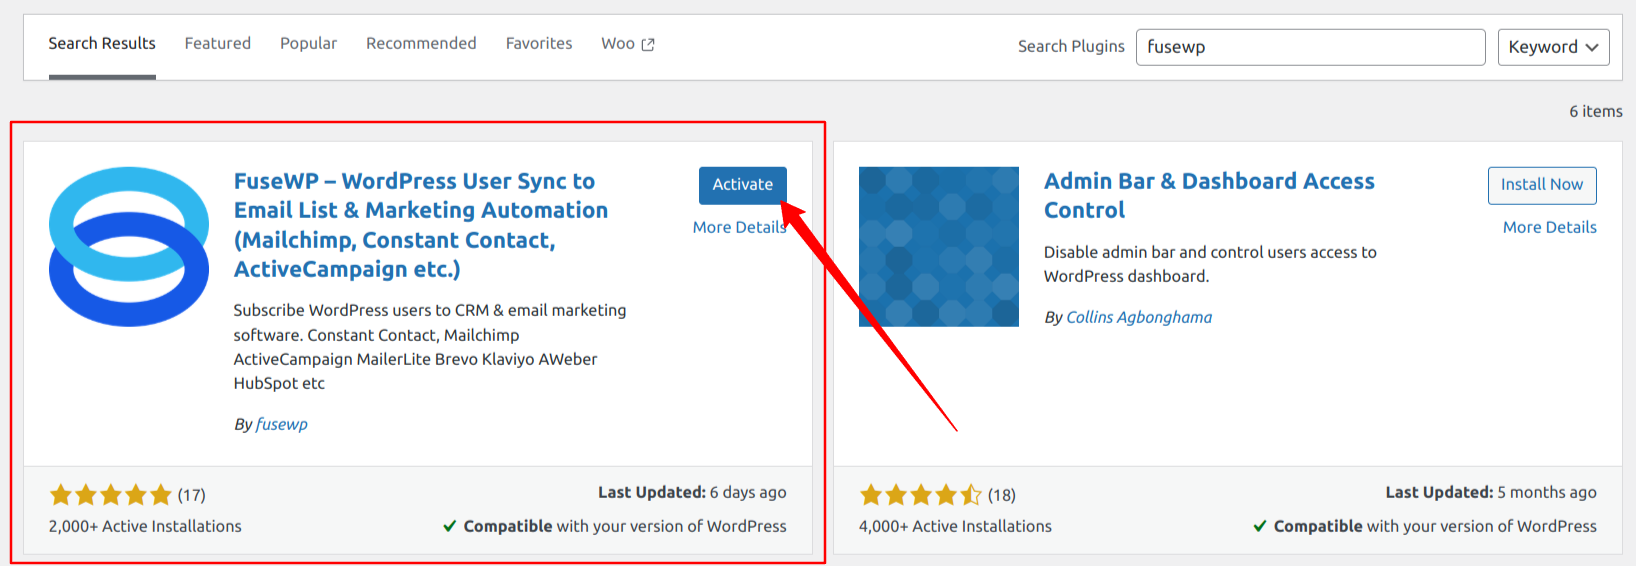
To demonstrate the capabilities of FuseWP for building email lists in WordPress, get started by installing and activating the FuseWP plugin from your WordPress admin dashboard.
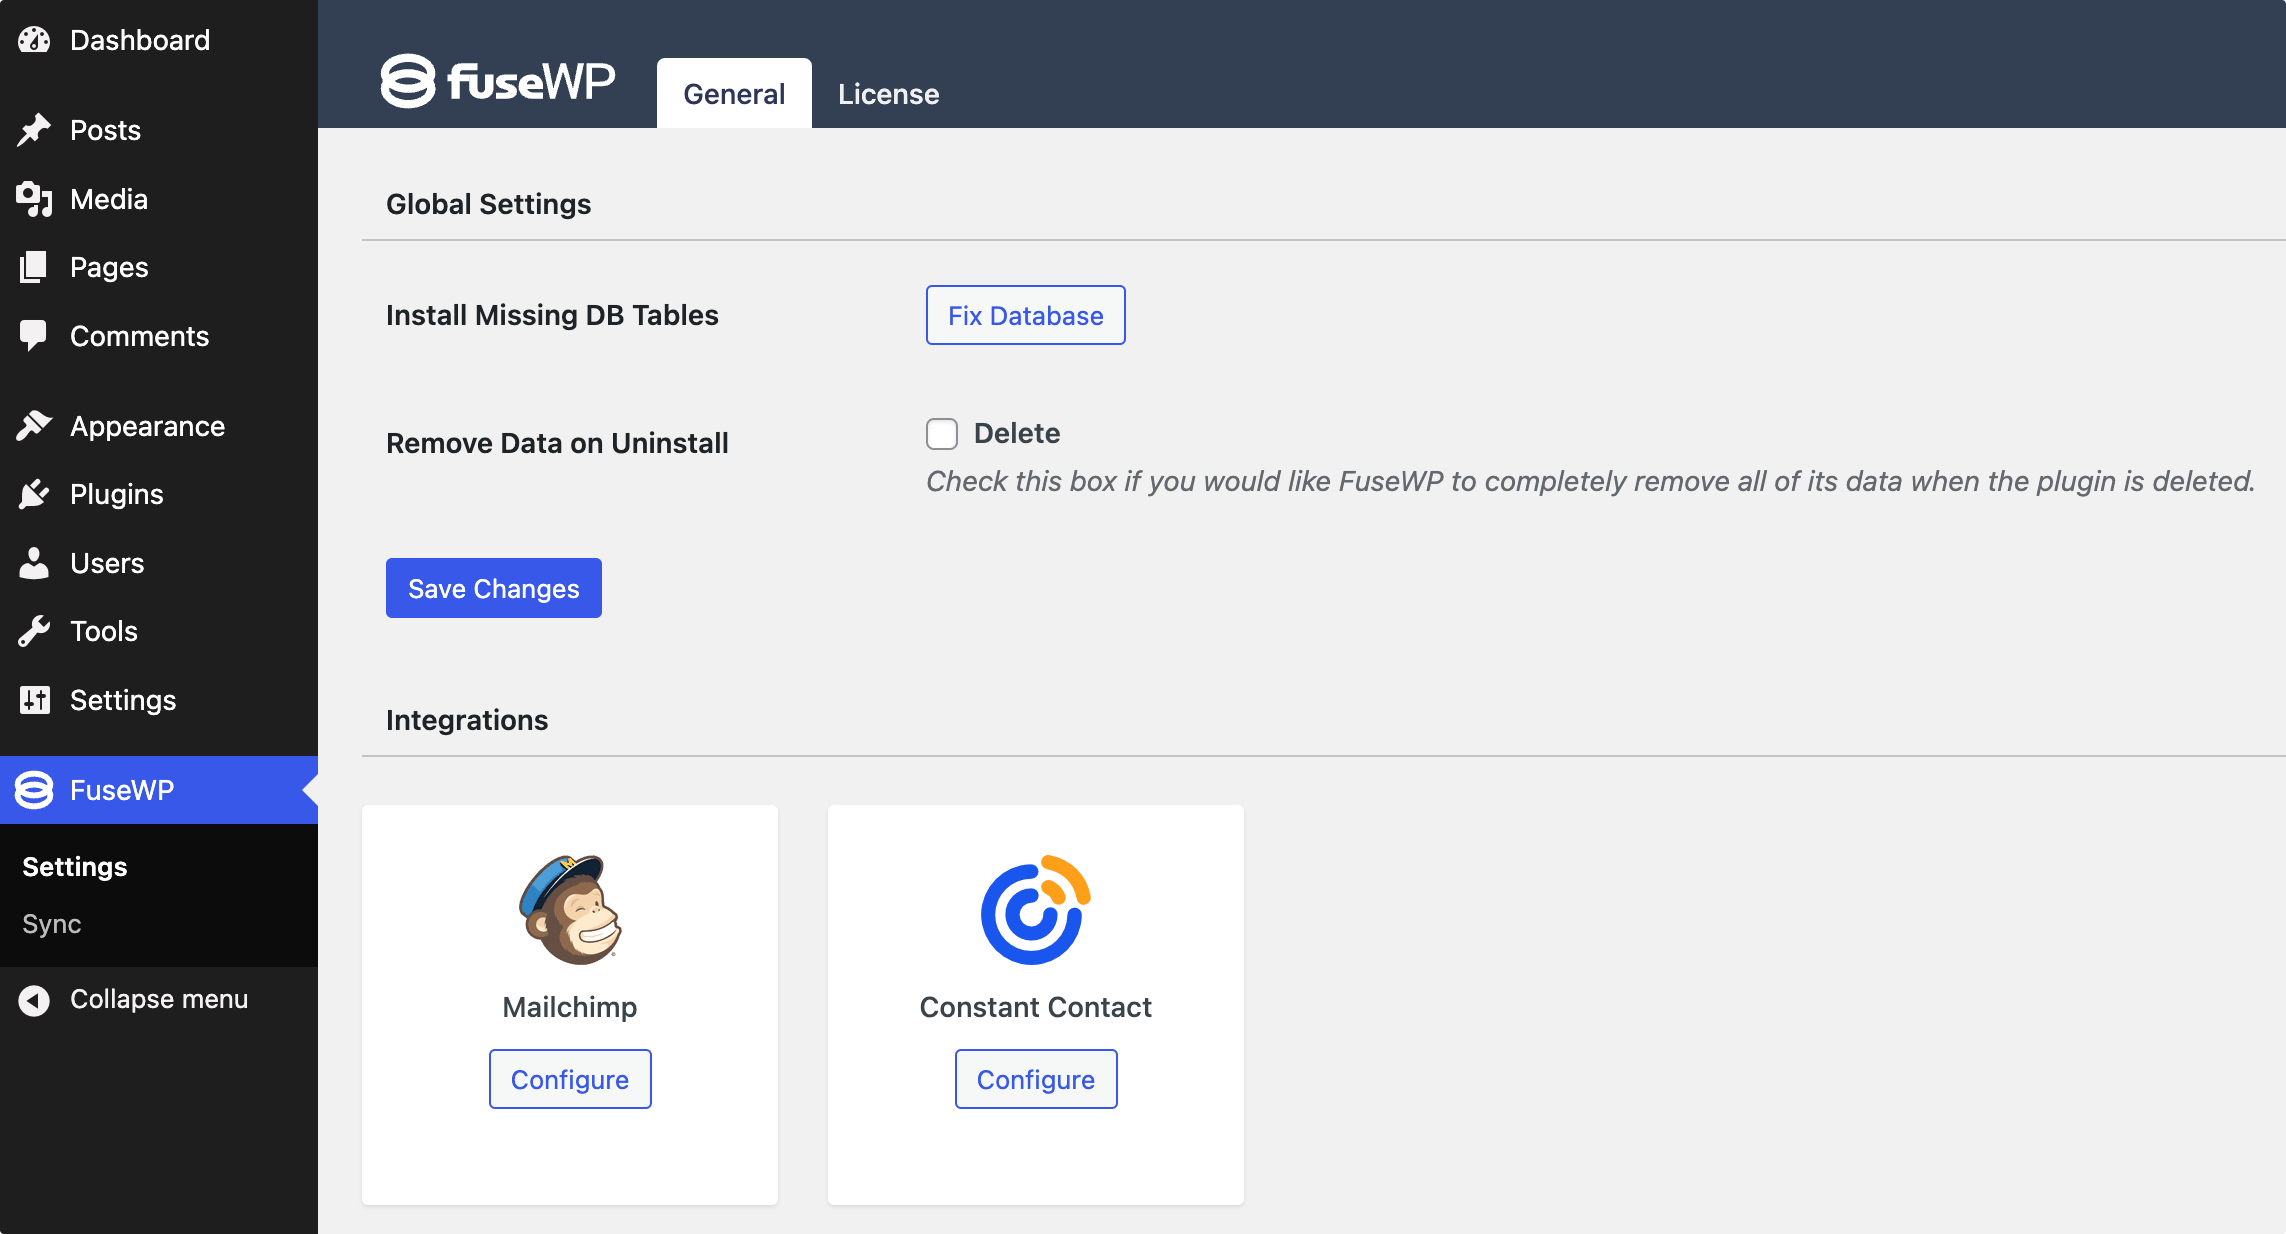
Next, go to FuseWP >> Settings and click the “Configure” button in the Mailchimp section to open the modal settings.
In the configuration popup, click on the “Connect to Mailchimp” button.

The button will redirect you to an authorization page, where you will log in to your MailChimp account and authorize the connection with FuseWP.
Click the allow button to complete the connection.
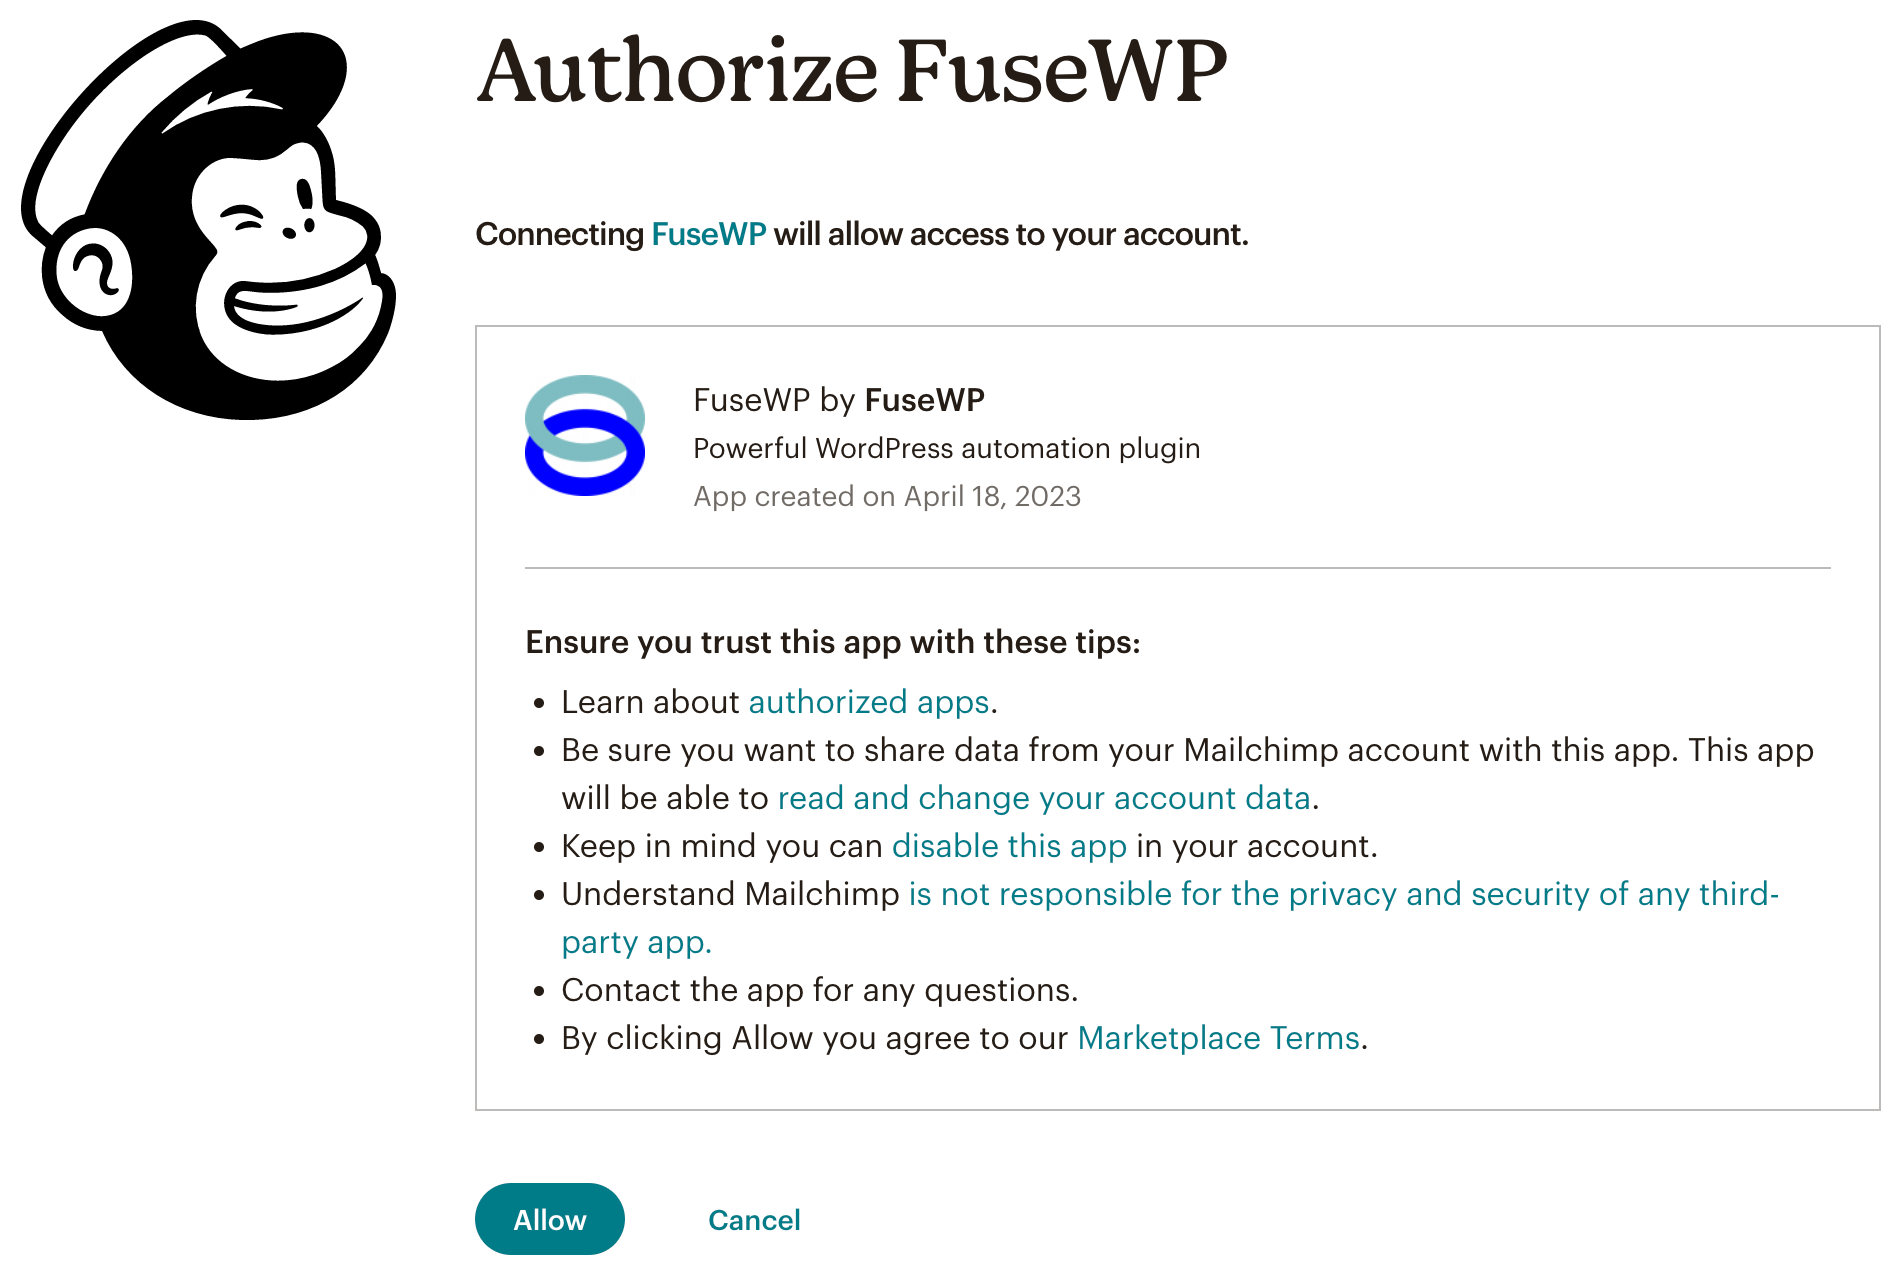
If successful, you will be redirected to the FuseWP integrations settings page, and a checkmark will appear next to the Mailchimp integration.

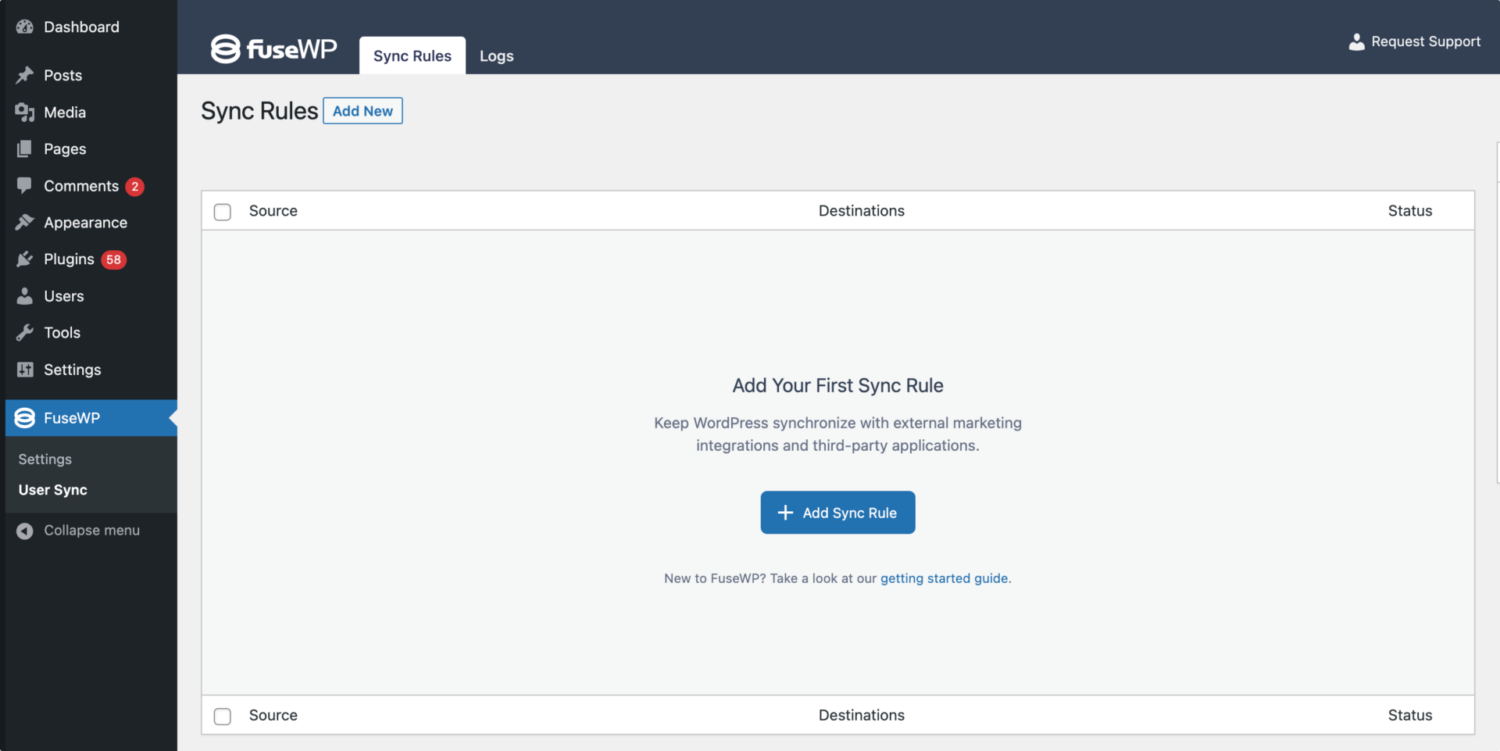
Next, go to FuseWP >> User Sync to add a syncing rule. The syncing rule determines when a user’s email is added to your email service provider and where they are added.
Click the Add Sync Rule button to set up a new sync system.
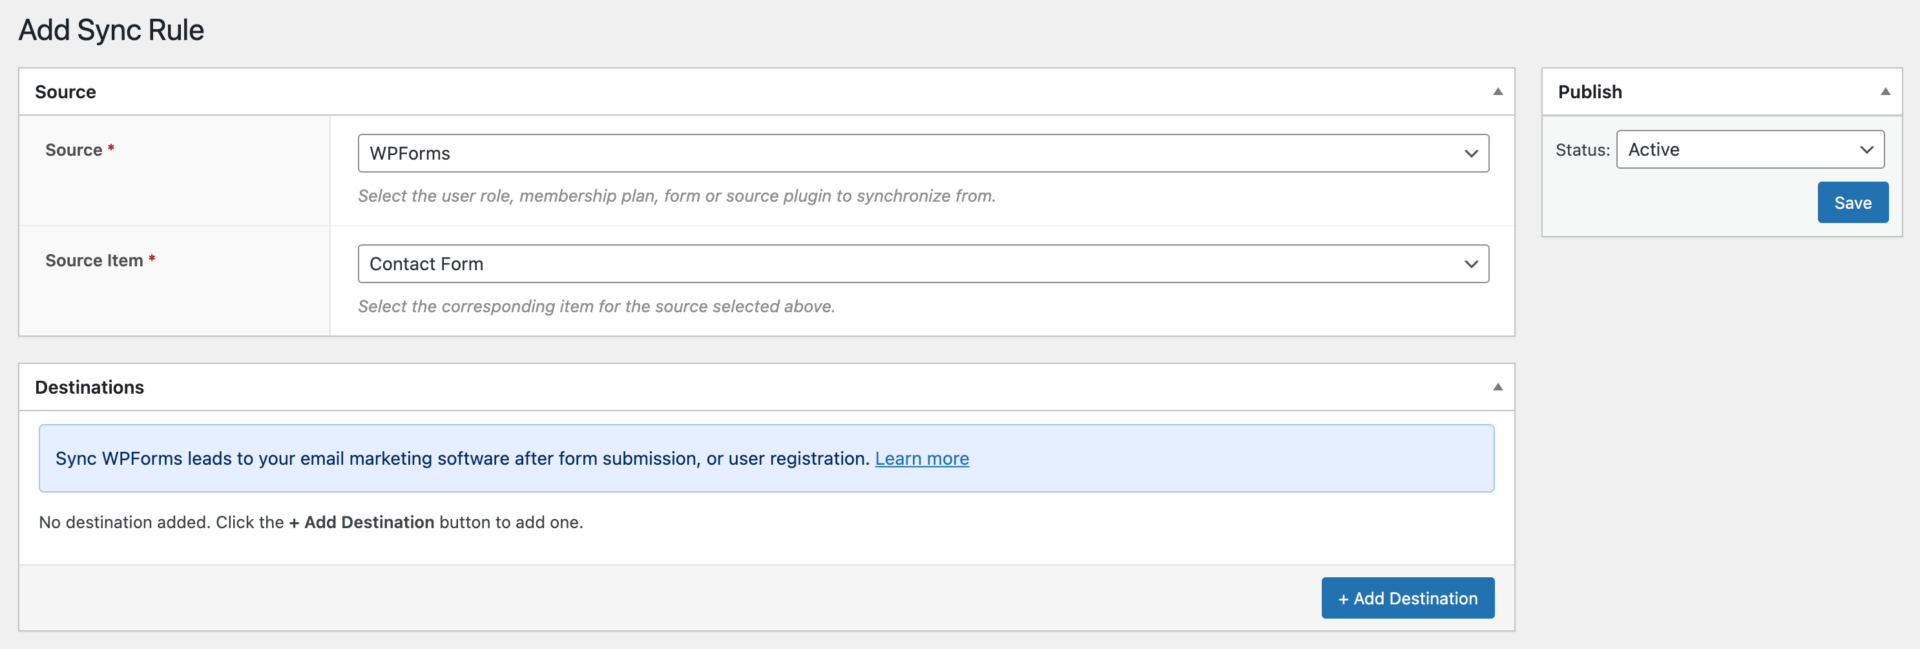
On the new page, select a source and destination for your data. Since we want to sync all lead submissions from a WPForms form to our CRM, we will choose “WPForms” as the source.
In the destination section, select MailChimp and choose your preferred email list as the target.
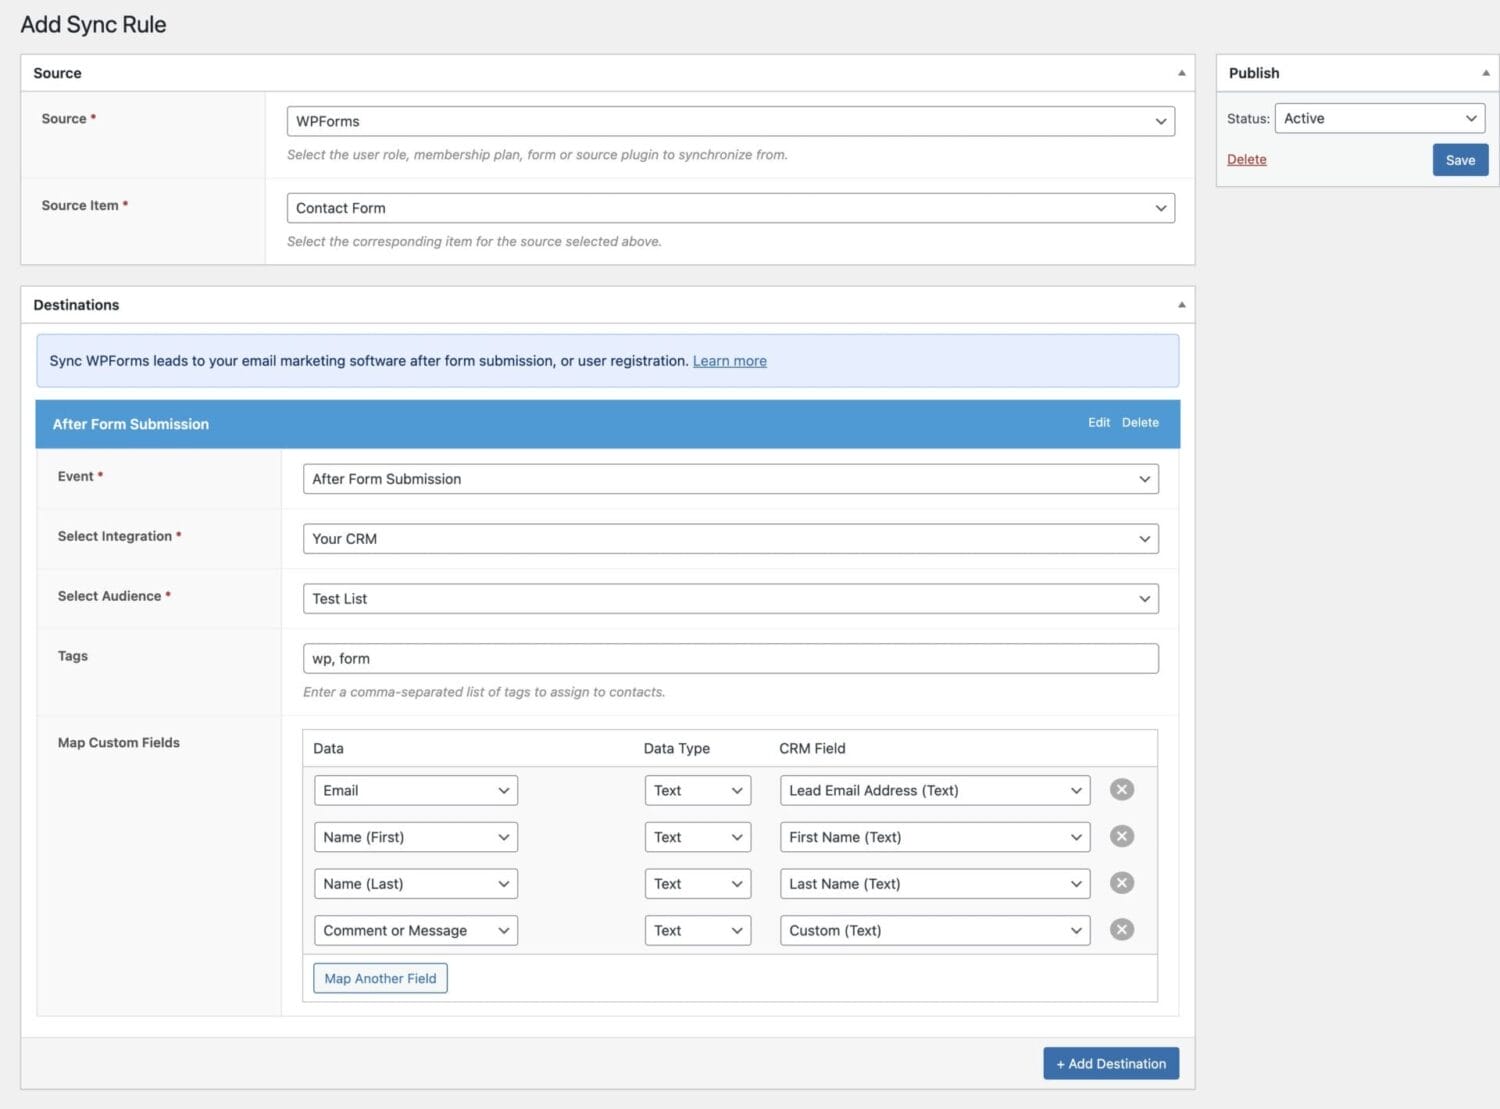
With this done, FuseWP will automatically add users and leads from WPForms to your email list in your CRM.
Bonus: If you own a WooCommerce online store, consider using the Email Verification for WooCommerce plugin or our email confirmation addon to prevent fake accounts and ensure real customers with real email addresses are in your email list.
Conclusion
Building an email list offers many benefits for your business; however, to create one in WordPress, you need an email service provider and a list-building plugin, such as ProfilePress, FuseWP, or MailOptin.
In this article, we dedicated various sections to setting up and collecting emails on our WordPress website.
If you followed the steps outlined above, you should have a functional setup for building an email list from your WordPress website.