How to Add Gated Content to Your WordPress Site
Gated content is a powerful way to create exclusivity and build a sense of community around your website. For example, it allows you to restrict access to certain parts of your website to only those users who have completed a specific action.
In this article, we’ll show you how to add gated content to your WordPress site. We’ll cover how to restrict access to specific posts or taxonomy and only allow access to members who register on the website.
Whether you’re a blogger, marketer, or business owner, this guide will help you take your website to the next level with gated content.
What Is Gated Content and How Is It Beneficial?
Gated content is any digital content that is hidden behind a form that requires a user to provide contact information or make a payment before accessing the content.
Using gated content can offer several benefits to your WordPress websites, including:
- Lead generation: By requiring users to provide their contact information to access gated content in WordPress, businesses can generate leads and build their email lists.
- New revenue stream: Gated content can open a new way to monetize a website, requiring users to pay to access certain content on the website.
- Increased engagement: By making certain content exclusive, websites can build relationships with their target audience and increase interest in their products and services.
- Targeted marketing: By collecting user information, businesses can better target their marketing efforts and personalize their communications to specific segments of their audience.
Given the many benefits of gated content, it is also essential to strike a balance between gated and open content. Restricting all or most of your content can backfire and hurt your SEO.
Now that we know the benefits, let’s look at the different types of gated content.
What Are the Different Types of Gated Content
There are several types of gated content, including:
- Paywall content: This type of content requires users to pay a one-time fee or purchase a subscription to access it.
- Membership-based content: This type of content is only available to members who are part of a certain group or meet certain qualifications.
- Lead generation content: This type of content requires users to provide their contact information, such as their name, email address, and phone number, to access it.
- Freemium content: This type of content is free to access, but users must pay for additional features or access to premium content.
How To Create Gated Content on WordPress
WordPress makes it easy to add gated content to your website. With the help of plugins like ProfilePress, you can create user registration and login forms, restrict access to specific blog posts or content within the post, and accept payment for the gated content.
1. Install and Set Up the ProfilePress Plugin
To get started, you’ll need to install and activate the ProfilePress Pro WordPress plugin. The free ProfilePress plugin comes with the Content Protection feature, but we want to take it further and add a metered paywall to our gated content in WordPress.
Metered Paywall will allow visitors, guests, or non-members to view a limited number of protected content on your WordPress site before they are required to purchase a paid membership plan.
Head to the Pricing page and purchase the Plus or a higher-tier plan, as the metered paywall is only available on these premium plans.
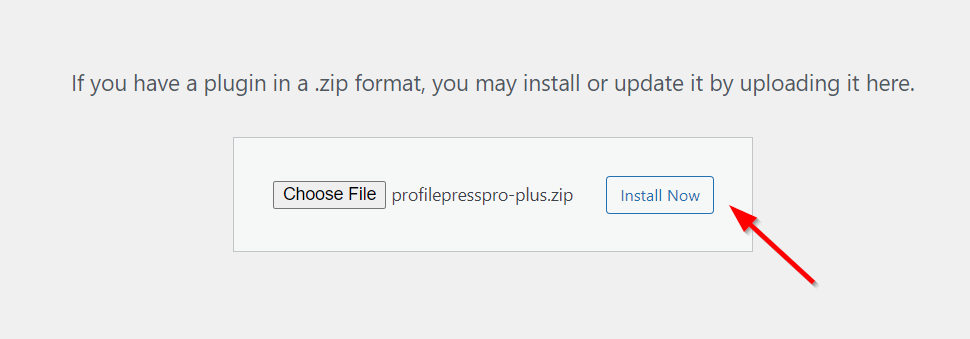
Once you have the plugin’s zip file, log in to your WordPress dashboard and navigate to Plugins > Add New. Next, click the Upload Plugin button to install and activate the ProfilePress plugin.
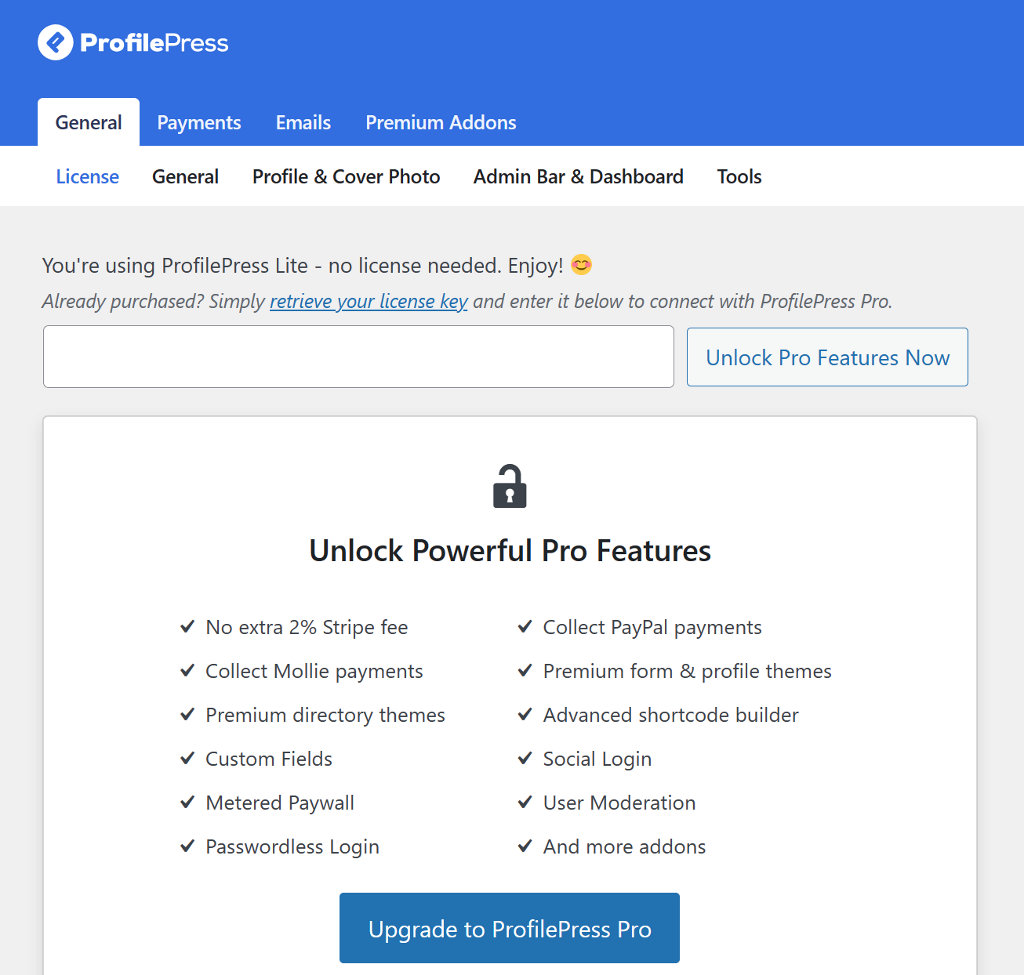
After the plugin is activated on your site, navigate to ProfilePress > Settings and verify the license key to unlock the premium features of the plugin.
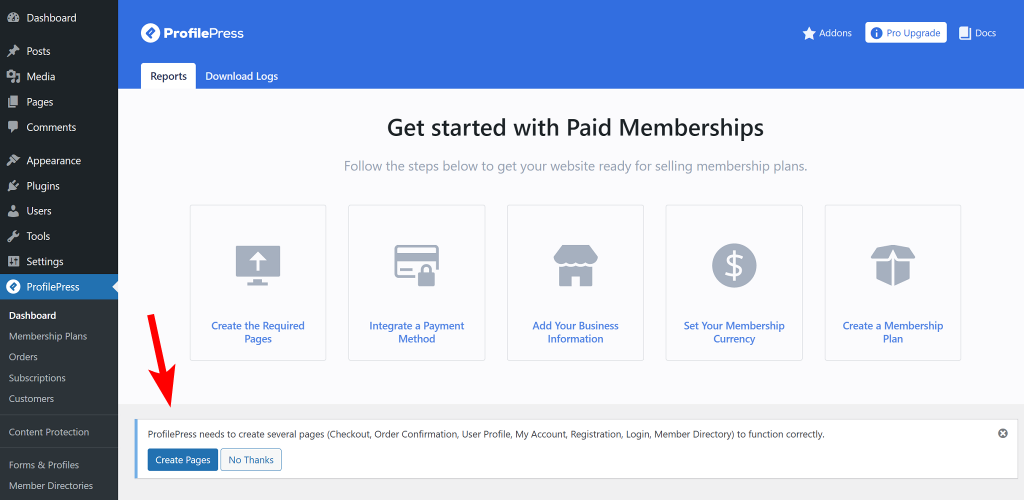
To function correctly, ProfilePress needs to create pages such as Checkout, Order Confirmation, User Profile, My Account, Registration, and Login.
To create these pages automatically, go to ProfilePress > Dashboard and click the Create Pages button at the top.
After these pages are created, you’ll be taken to the plugin’s settings page, where you must select the newly created page next to each name.

Once done, click the Save Changes button at the bottom.
2. Add Content Protection Rule
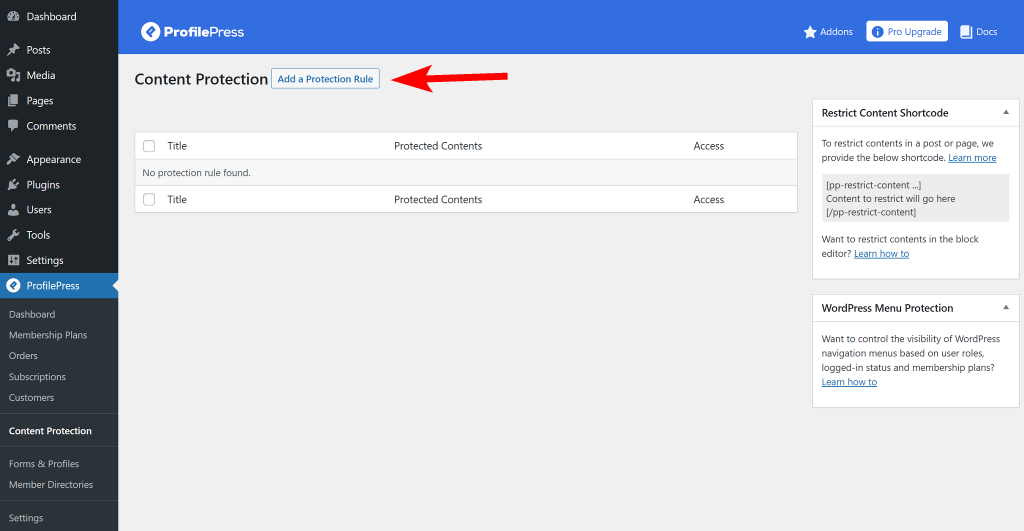
Once the plugin has been set up, the next step is to add the content protection rule. To do so, go to ProfilePress > Content Protection and click on Add a Protection Rule button at the top.
Give your rule a descriptive name that you can remember later, and then select the content to protect. ProfilesPress gives you a wide range of protection conditions, such as restricting posts to a specific category or tag, archives, format, and more. You can also fine-tune your condition by using the AND and OR relations.
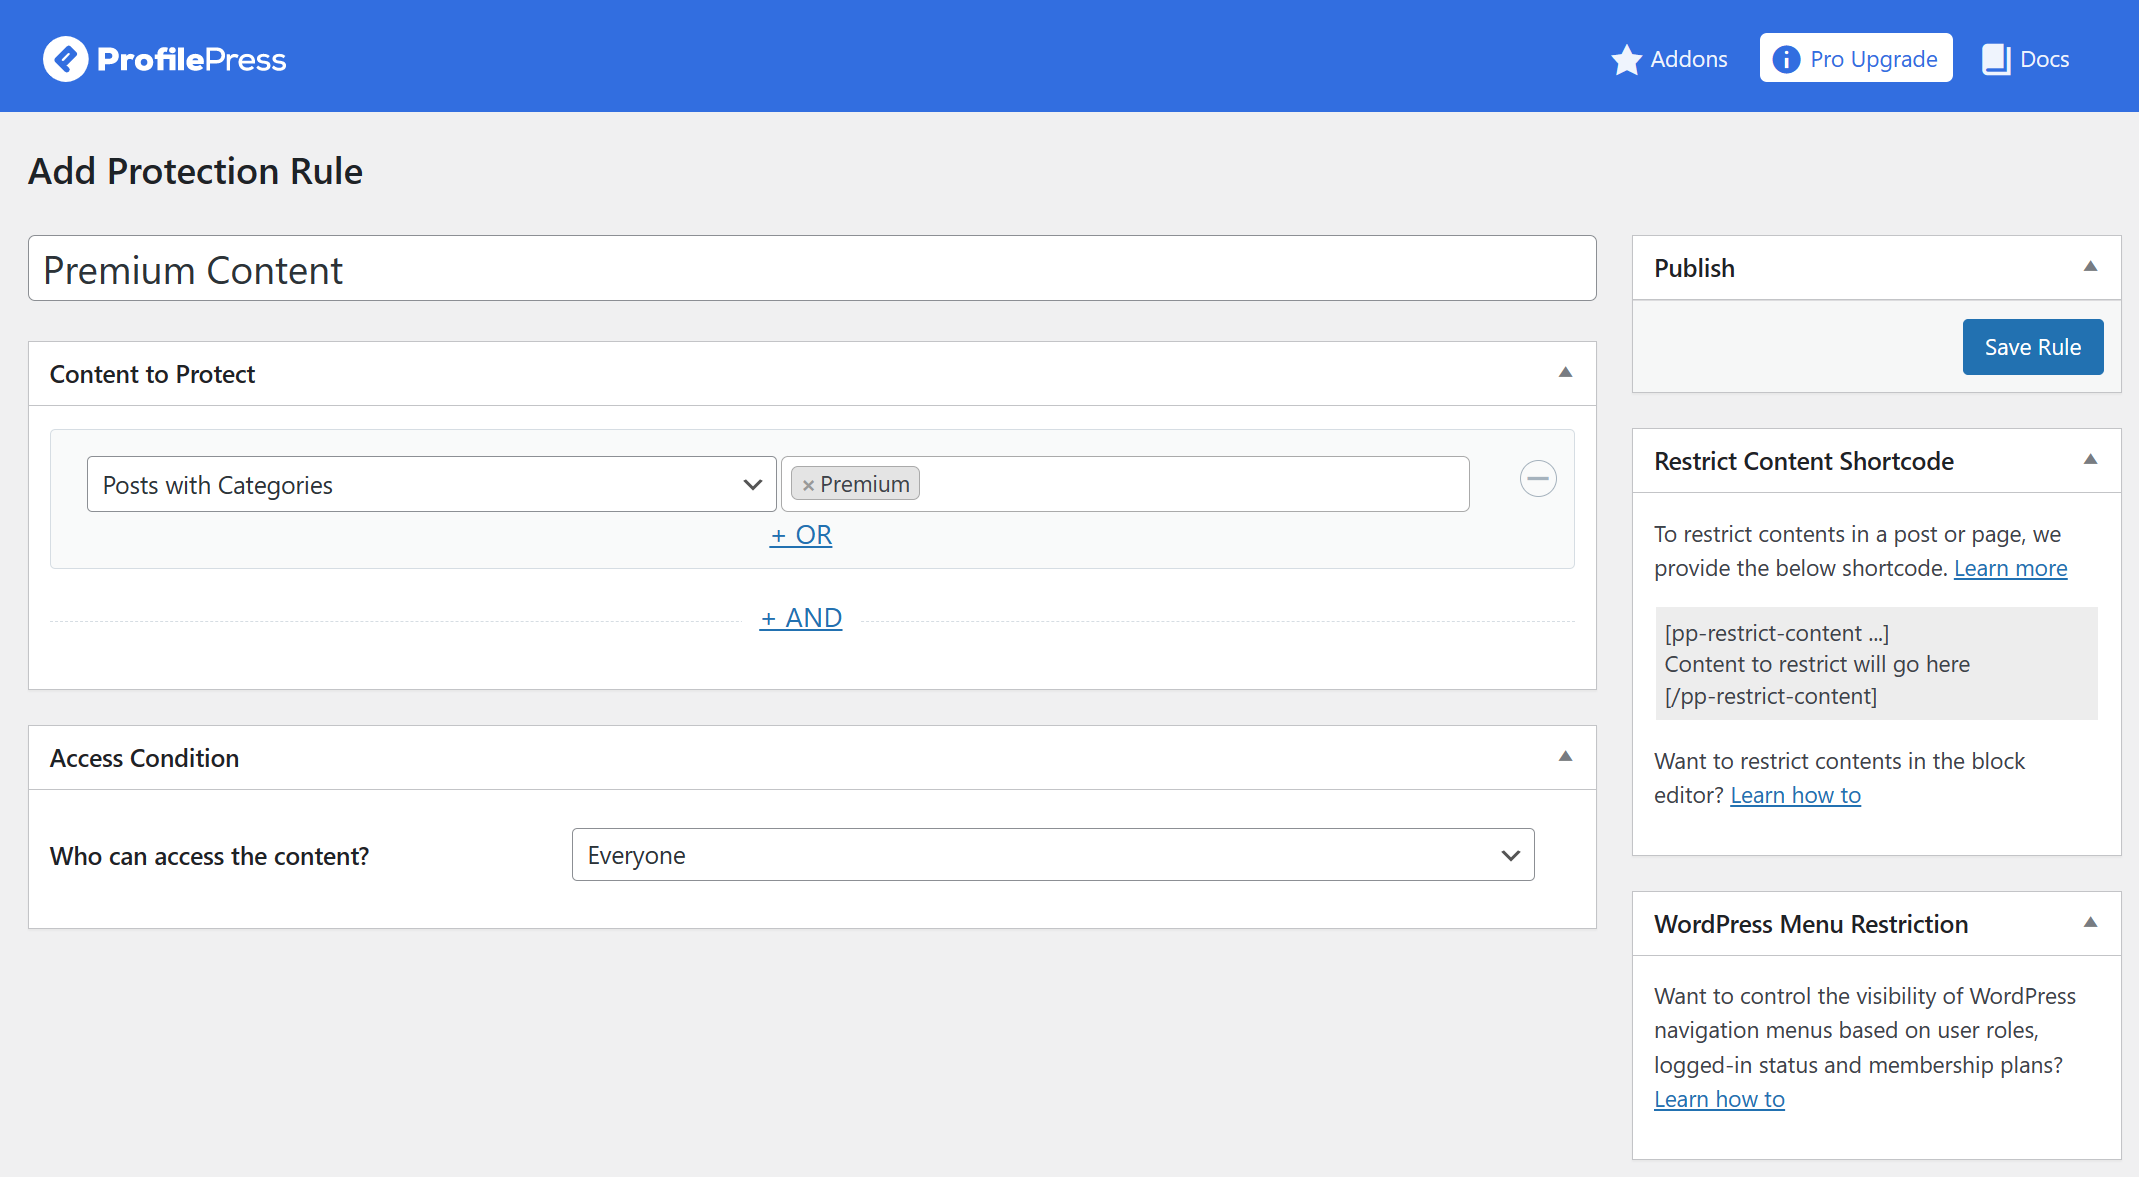
Next, we need to select who can access the content. You have three options: everyone, logged-in, and logged-out users.
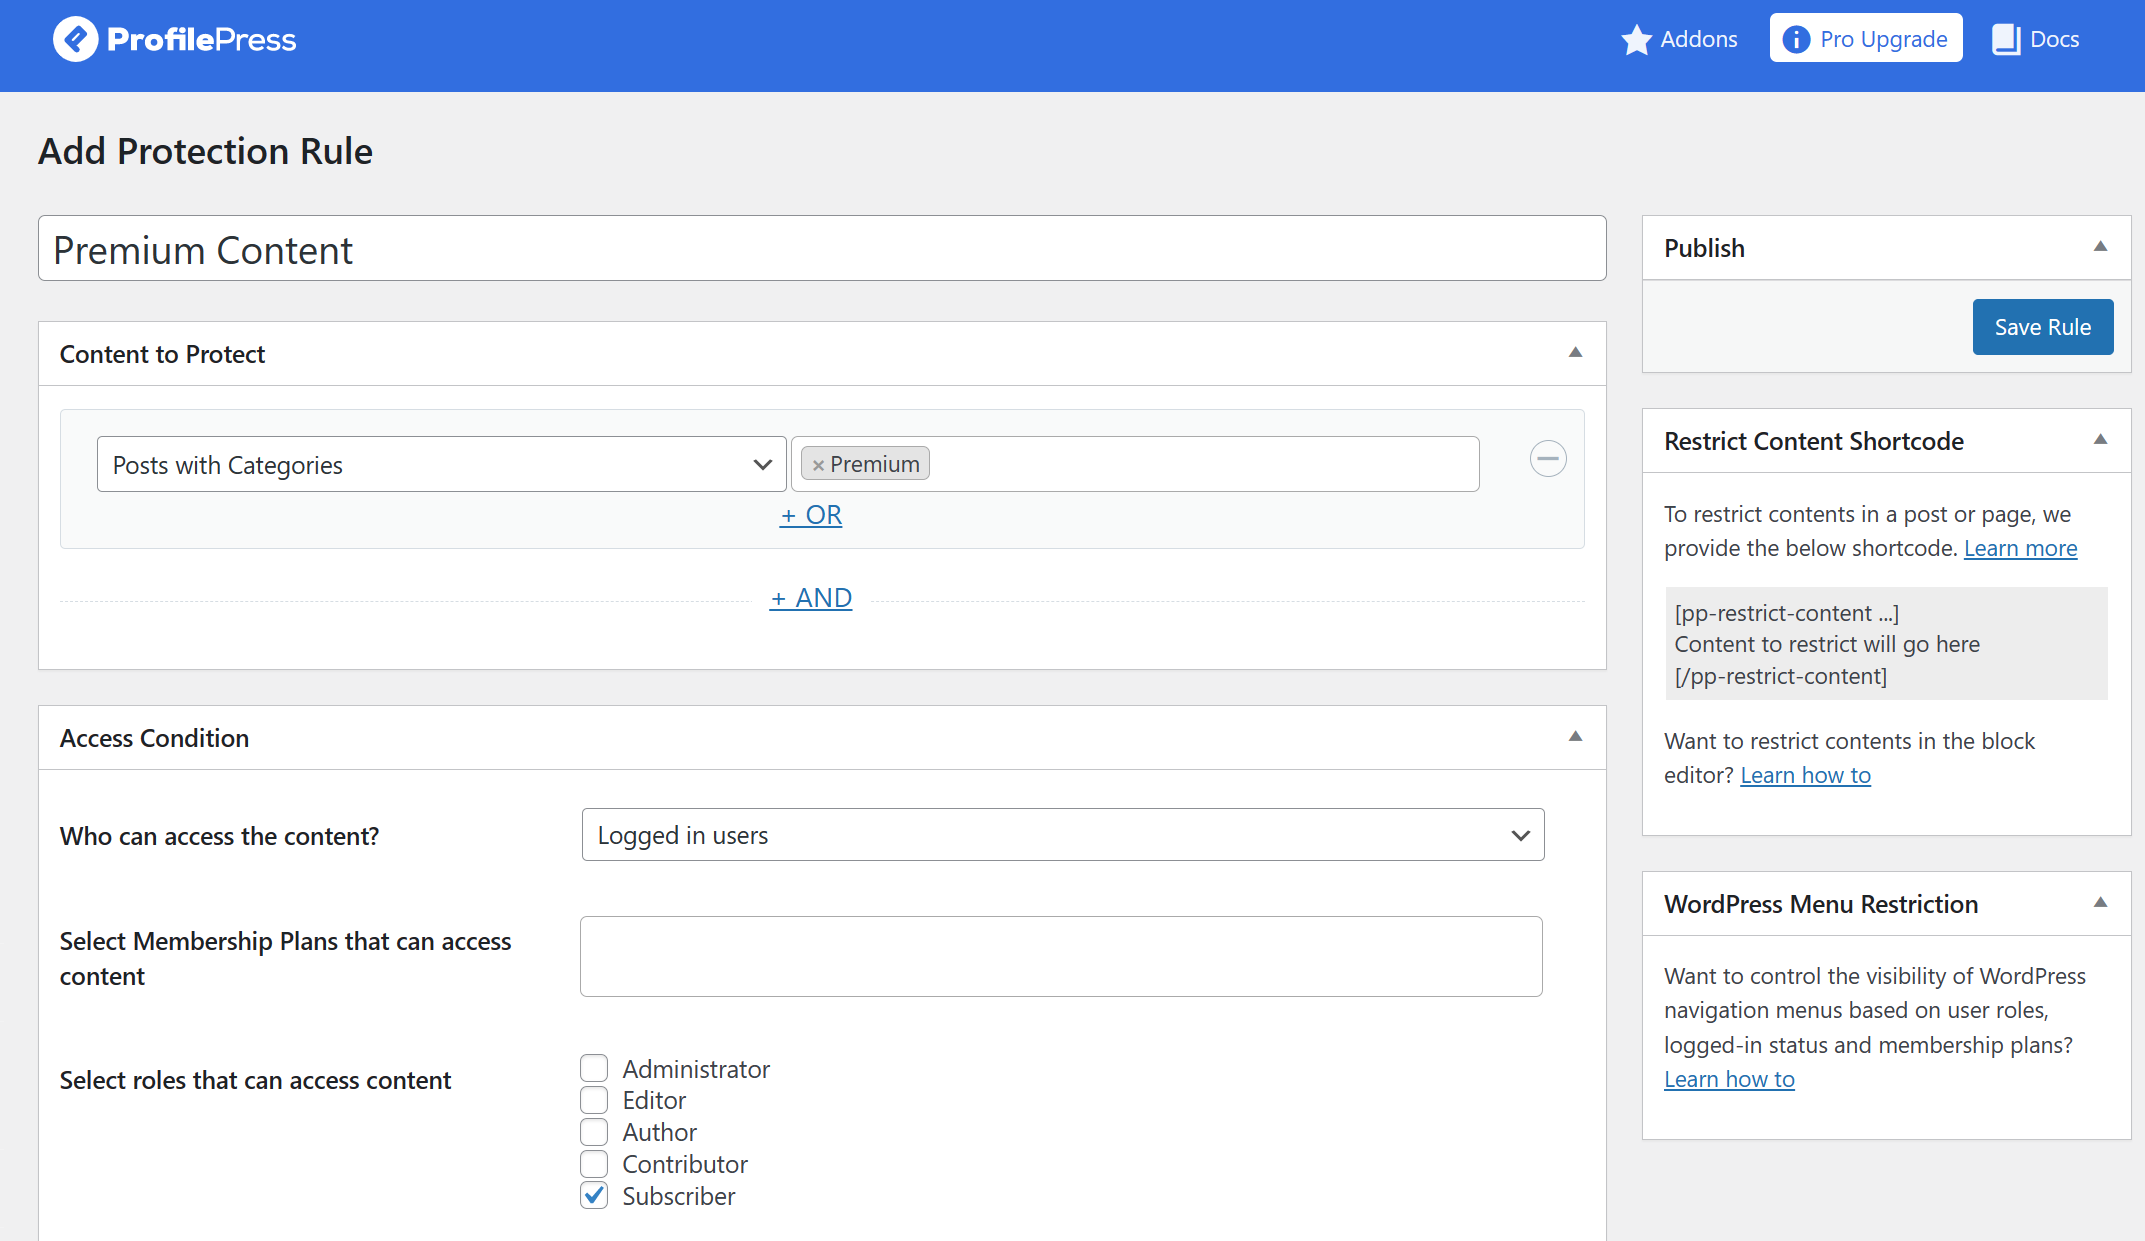
Based on your selection, you get additional options where you can select if you want to link the content protection rule to a membership plan or user role. You also get the option to manually select specific usernames that’ll have access to the content.
Next, you can specify what happens if unauthorized users attempt to access the content. You can either display a message or redirect the user to another page. We’ll display a short excerpt of the post before displaying a restricted message informing users that they do not have permission to access the content and what they can do about it.
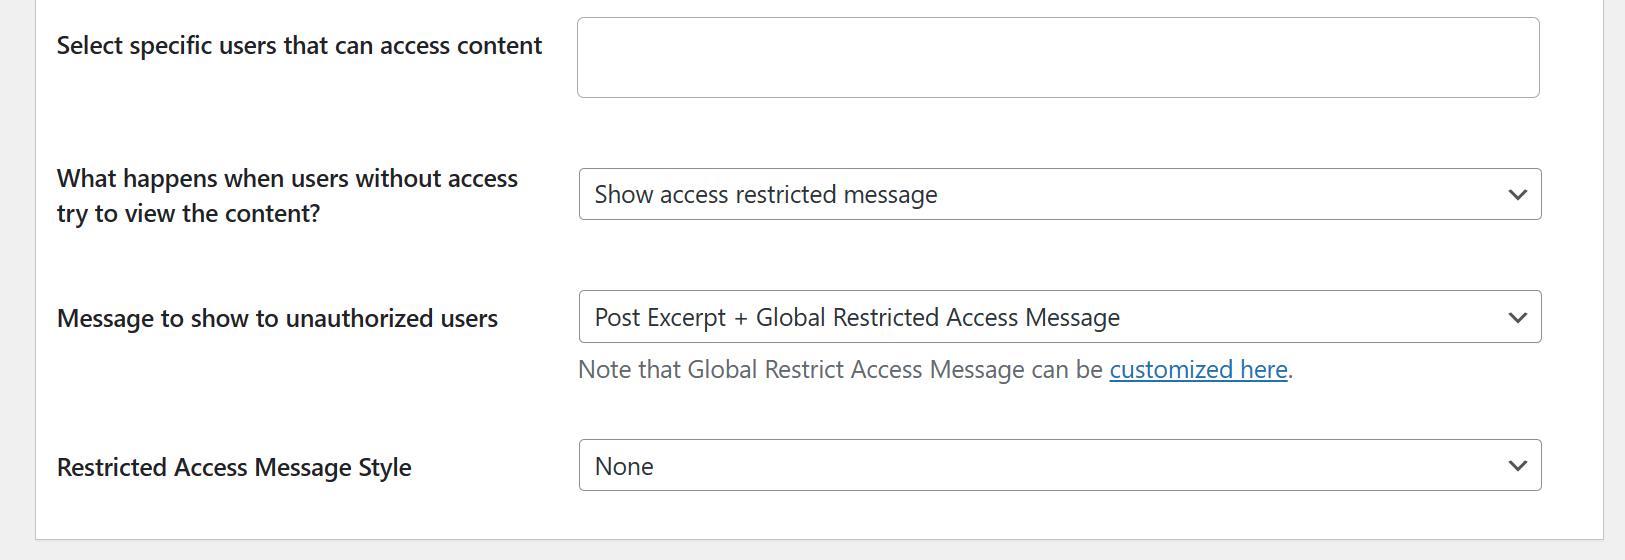
ProfilePress lets you edit the message on a global level, which you can do by clicking the customization link below the dropdown.
After you’ve finished configuring everything, click the Save Rule button in the right sidebar to publish the content protection rule.
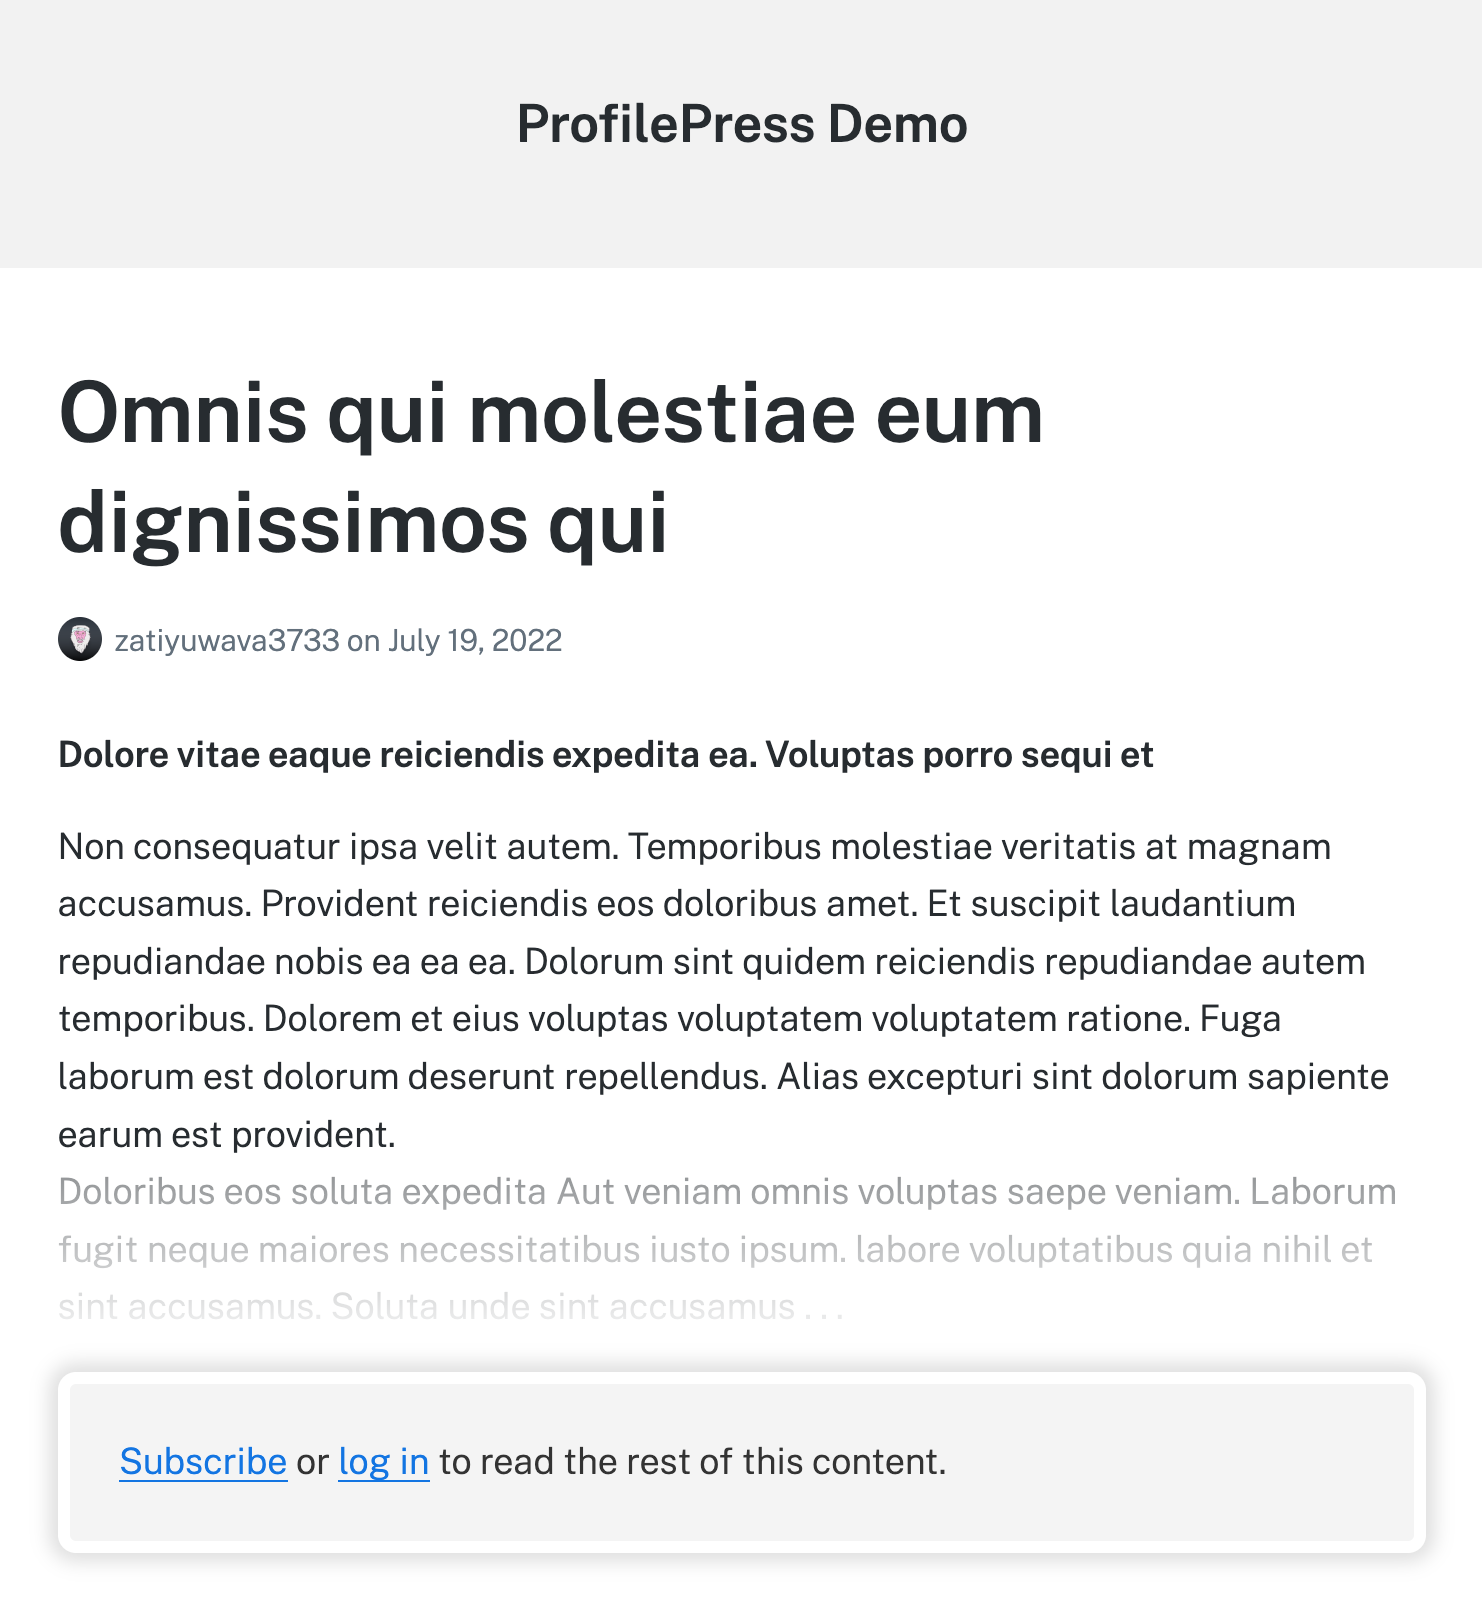
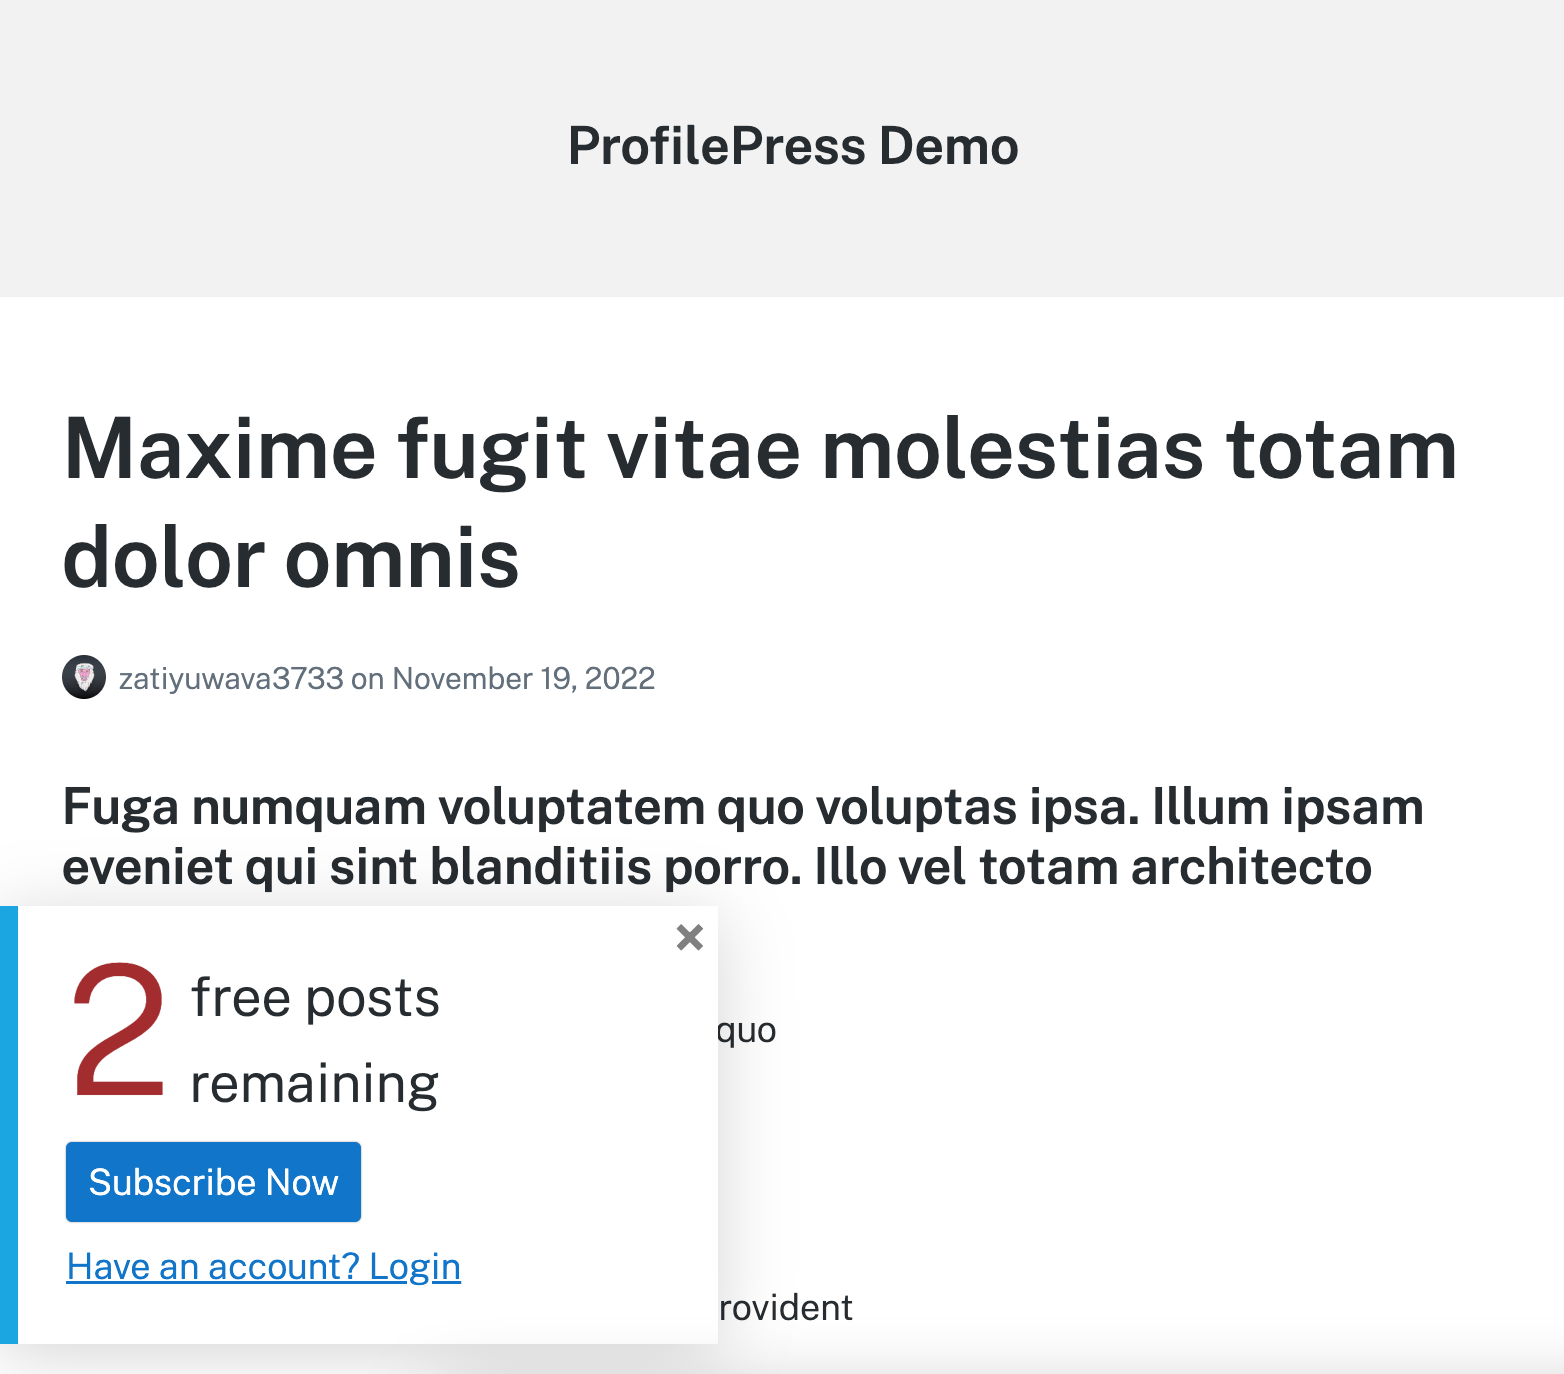
Now, users will see a restricted message asking them to register on the website whenever you publish a post assigned to the restricted category.
But what if we want to allow visitors to view a limited number of posts before restricting access? Let’s take a look at how to achieve that.
See Also: How to Set Up a WordPress Paywall for Your Content
3. Add Metered Paywall to WordPress
Metered Paywall is a premium addon in ProfilePress for adding metered paywall to WordPress content.
To enable it, navigate to ProfilePress > Addons and look for Metered Paywall in the list. Once you’ve located it, toggle the button on to enable it.

Next, click the Settings button on it to be taken to the configuration page. Alternatively, you can access it by navigating to ProfilePress > Content Protection and switching to the Metered Paywall tab.
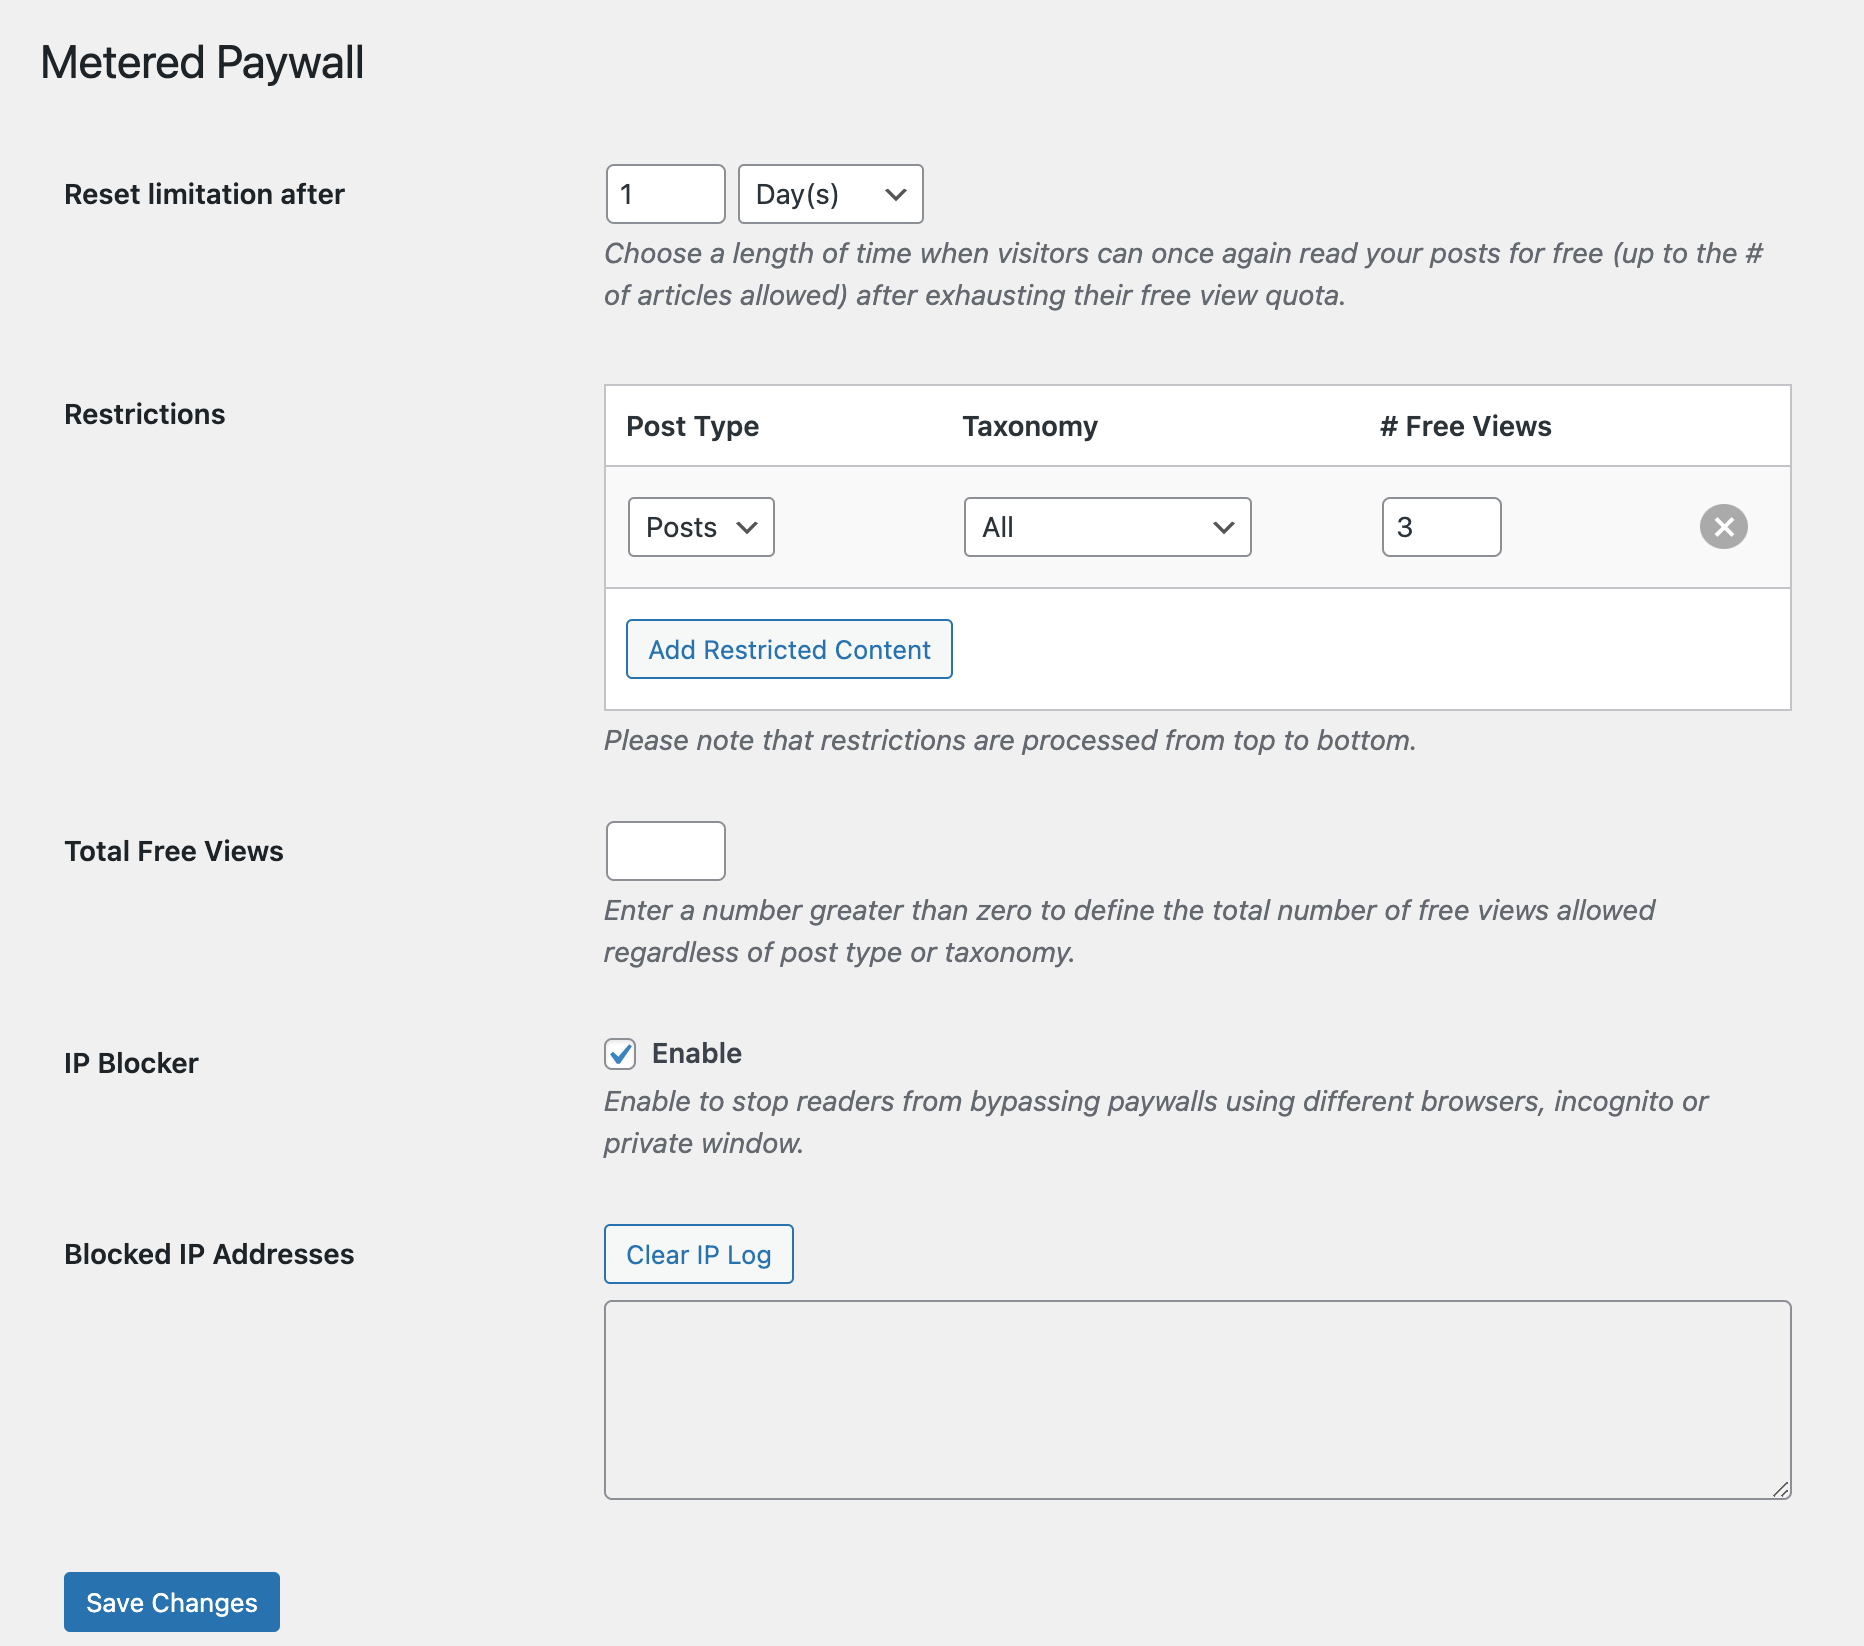
The first setting is the Reset limitation, which lets you define how long before a restricted user can once again view protected content for free after hitting their limit. You can input the value in hours, days, weeks, months, and years.
Next is the Restriction setting, which lets you define the post types and, optionally, the taxonomy to make available for free viewing and the number of free views to grant to users.
Since we have set up a content restriction for the category named Premium, we’ll select that in the restriction setting.
If you’ve set up restrictions based on user roles and want to use a single value for the total number of allowed free views regardless of content type or taxonomy, you can mention the value in the Total Free Views setting.
Next, enable the IP Blocker setting to prevent visitors from bypassing the free view limit. This will track their IP address and block their access if they attempt to view content in an incognito or private window. Once done, save the settings by clicking the Save Changes button.
We’ve enabled restrictions and set a free view limit. Let’s now look at how to add a register and login option to the website so that visitors can log in to view the gated WordPress content.
4. Allow Users To Register and Login
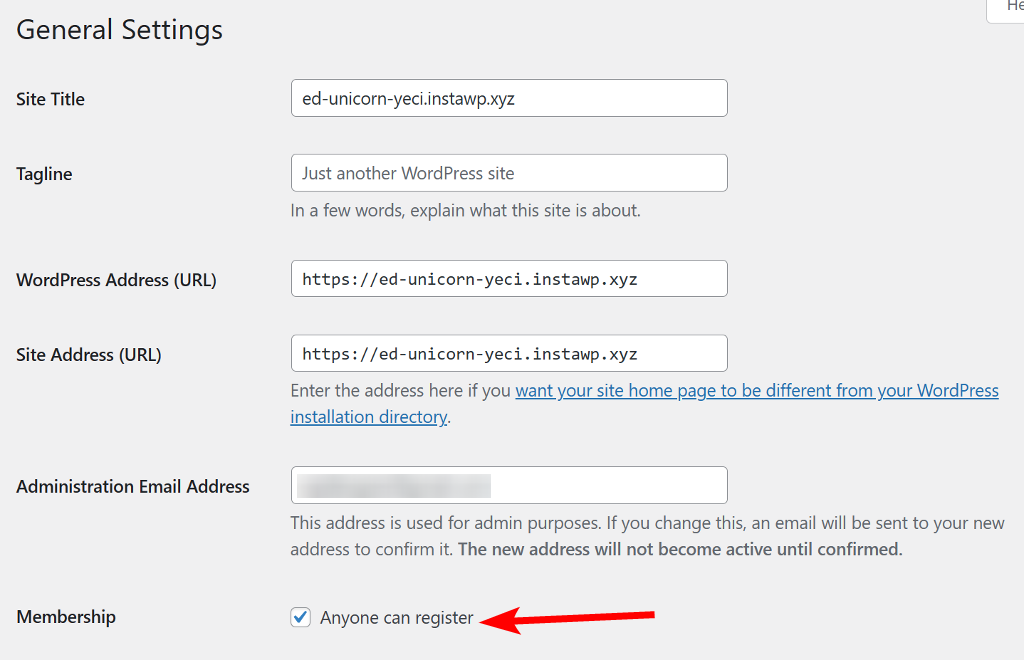
WordPress, by default, has the user registration option turned off. To enable it, go to Settings > General and check the box for “Anyone can register” next to Membership.
Want to create custom user registration and login form pages? See the video below.
Next, we need to add login and registration links to the header to make it easier for users to access the gated content in WordPress. To add a login and registration link to your header section, navigate to Appearance > Menus and create a menu if you don’t have one.
Once created, expand the ProfilePress links section and add Login and Sign-up links to the header.
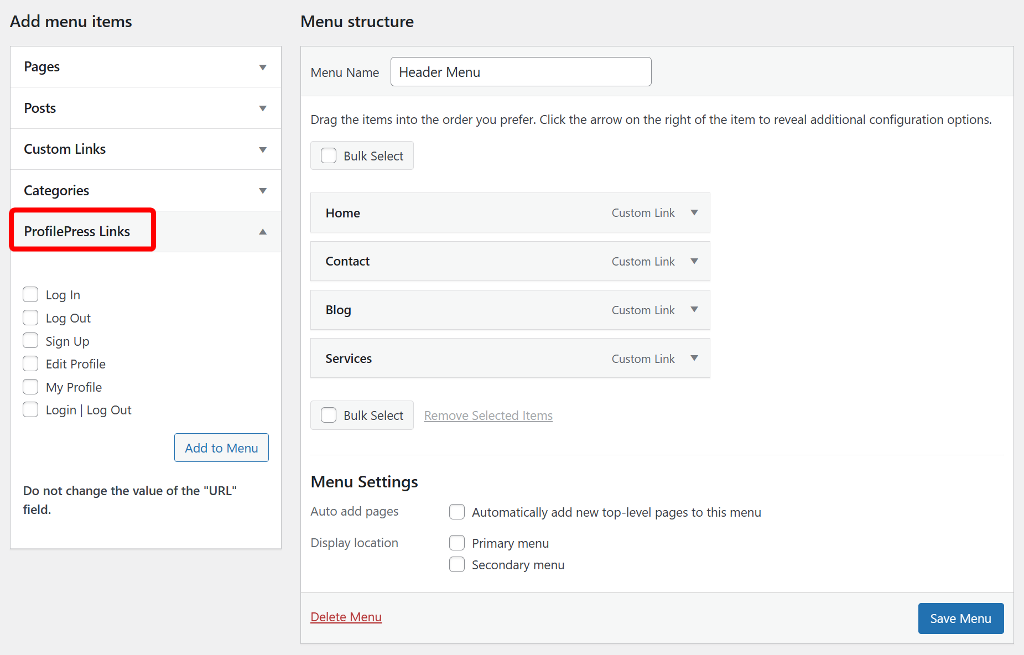
After that, click the Save Menu button to save the changes. Check the front end of the website to see if the links have been added and if they are functional.
That’s it! You now know how to add gated content to your WordPress website using ProfilePress.
Conclusion
ProfilePress is a powerful WordPress membership plugin that makes it easy to add gated content to your website. With its user-friendly interface, you can quickly and easily set up content restriction rules, add registration and login forms, and sell memberships and digital products on the website.
Whether you want to gate content for members only or build your email list, ProfilePress is a flexible and reliable WordPress paywall plugin to help you achieve your goals.
Try ProfilePress today!