How to Create a WooCommerce Popup Login Form
Do you want to add a WooCommerce popup Login form to your website?
As an online business owner, adding a popup login form to your WooCommerce store is a great way to improve user experience and boost conversions.
The default WordPress behavior is to redirect users to a login page and then redirect them back to the WooCommerce page after a successful login. You can bypass these redirects and create a better customer experience using a WooCommerce login popup form.
A WooCommerce popup login form presents the login form to the user in a modal/popup box without taking them away from the checkout page or any page on your website they are currently on. This is a faster and more convenient way to log users into their accounts and keep their attention focused on the buying process.
In this guide, you will learn how to create a custom WordPress login form, create a login popup, and display the login form on your WooCommerce checkout page.
How To Create a WooCommerce Popup Login Form
The default WordPress installation does not have the capability and the features we need to create a popup login form, but luckily for us, WordPress capabilities can be easily extended with the help of various plugins. In this guide, we will use two plugins to achieve our goal. ProfilePress and MailOptin.
ProfilePress is a popular WordPress user management plugin for creating custom WordPress login forms. MailOptin is a lead generation WordPress plugin for creating popups and other optin types: notification bar, scroll-triggered boxes, and slide-in campaigns. It embeds them at various locations, including on WooCommerce checkout pages.
In the steps below, we will install these plugins, configure them, create the login form, and add the popup to our WooCommerce checkout page. Let’s get started.
Install and Activate ProfilePress
The first step in this process is to install and activate the ProfilePress plugin. You must purchase a copy of ProfilePress.
After purchase, you will receive a confirmation email with a link to download the plugin zip file and your license key. You can also download the plugin from your account page on the ProfilePress website.
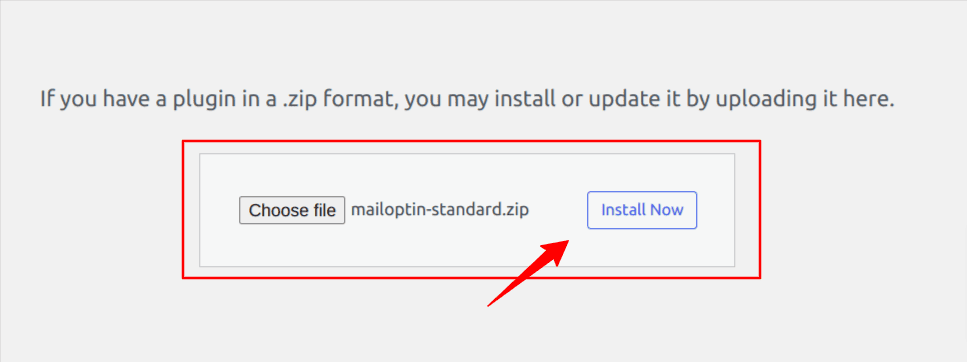
Once you have downloaded the plugin, login to your WordPress admin dashboard, and navigate to the Plugins page; click on the “Add New” button and click “Upload Plugin“.
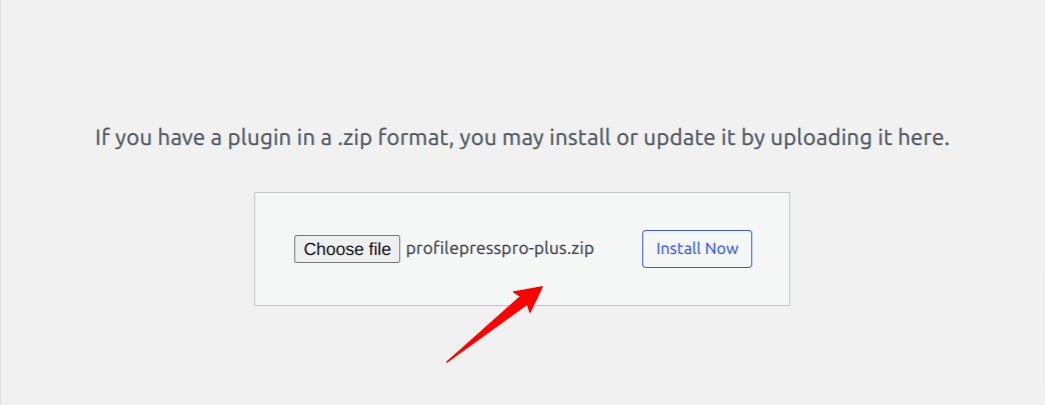
Next, click “Choose file” to select the previously downloaded plugin zip file. Click “Install Now.”
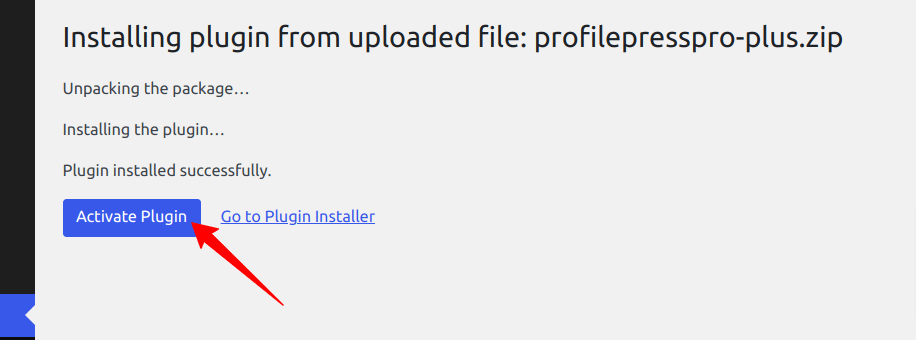
After installation is complete, click the Activate Plugin button.
Building a Custom WordPress Login Form
Now that we have set up ProfilePress, we can use it to create a custom login form for our WooCommerce website.
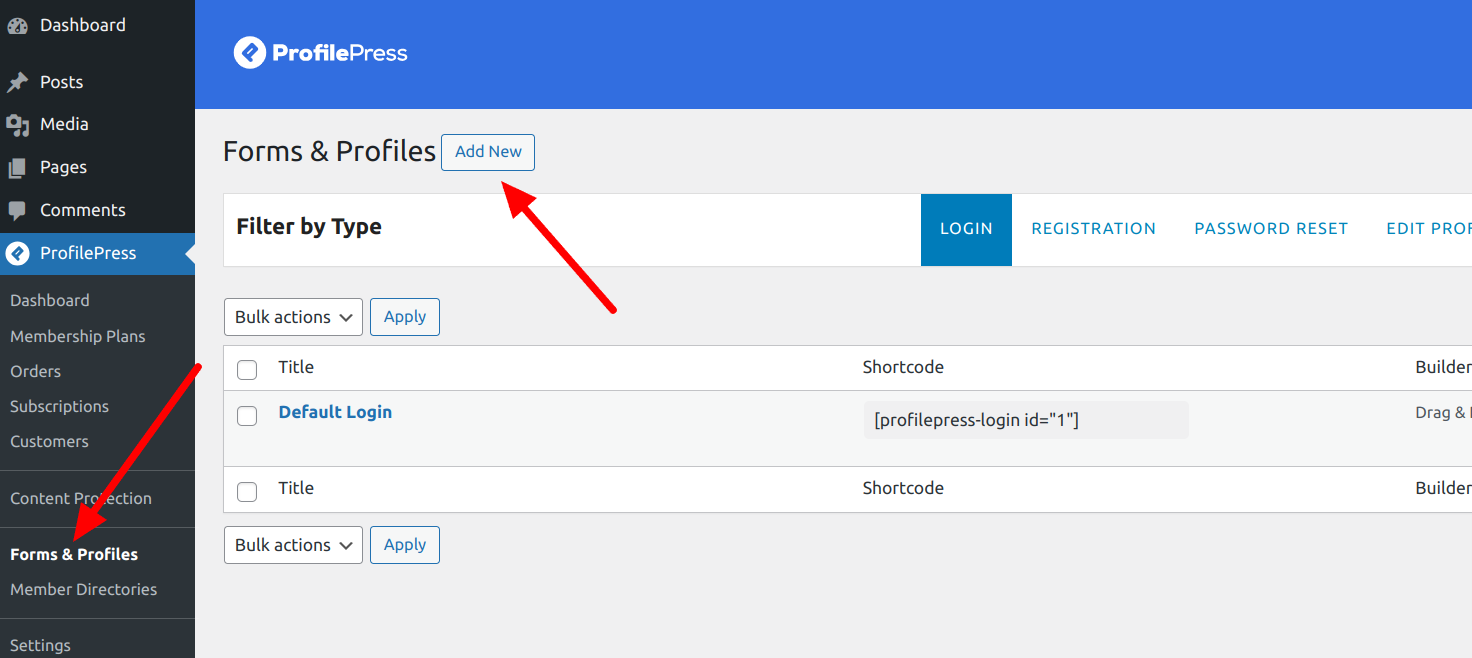
Navigate to ProfilePress >> Forms & Profiles, and click Add New.
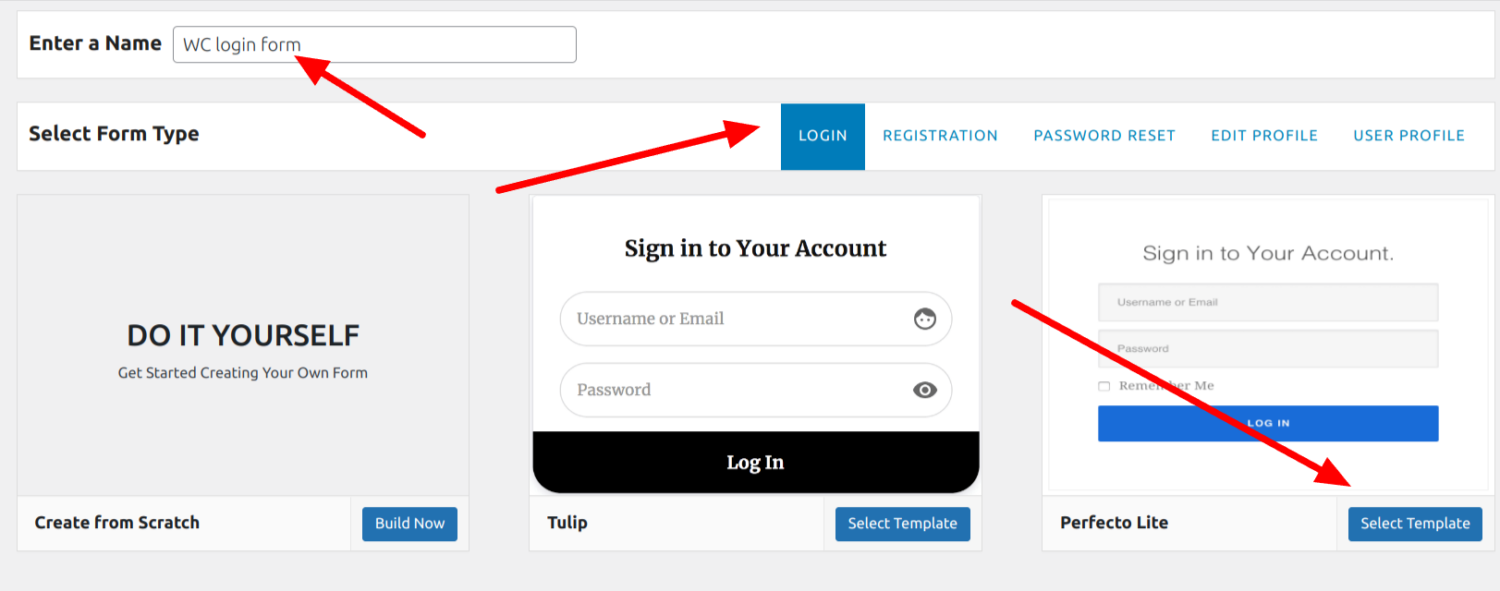
Click the Drag & Drop builder option on the next page and select the Login form type. Enter a name for the login form and choose a preferred template.
You will be taken to the login form builder in WordPress, where you can edit and customize the custom login form. You can click on the live preview button to see what your final form looks like.
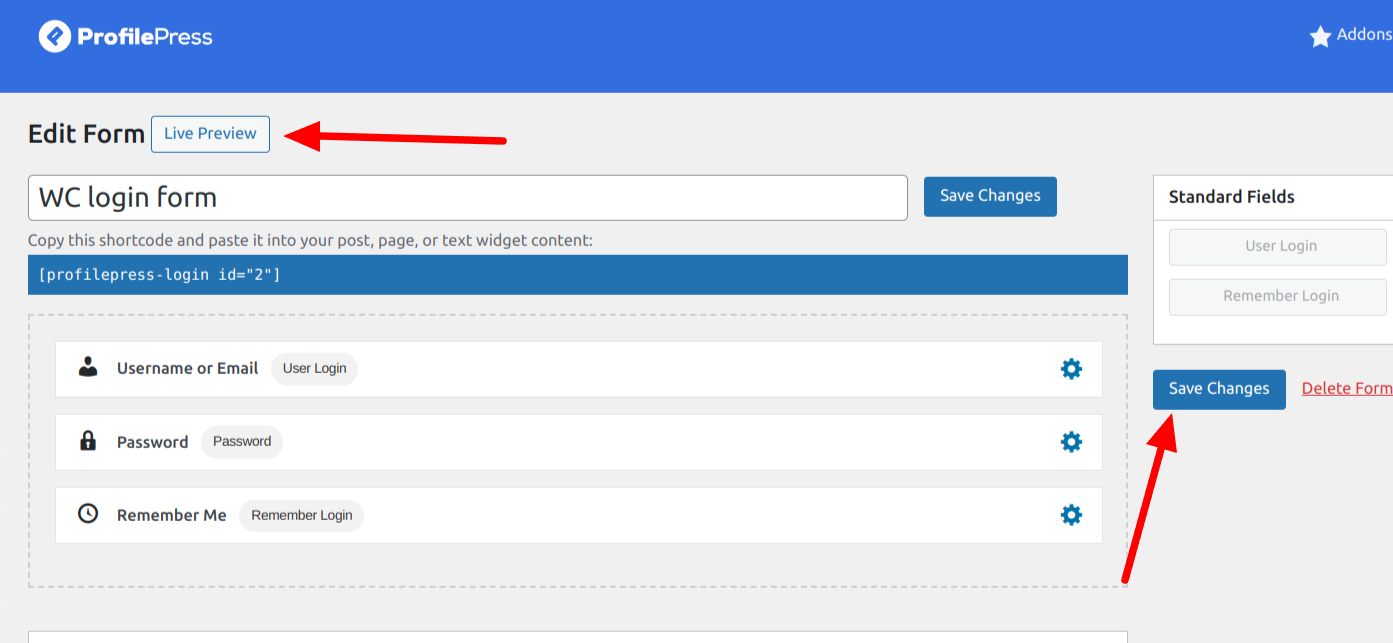
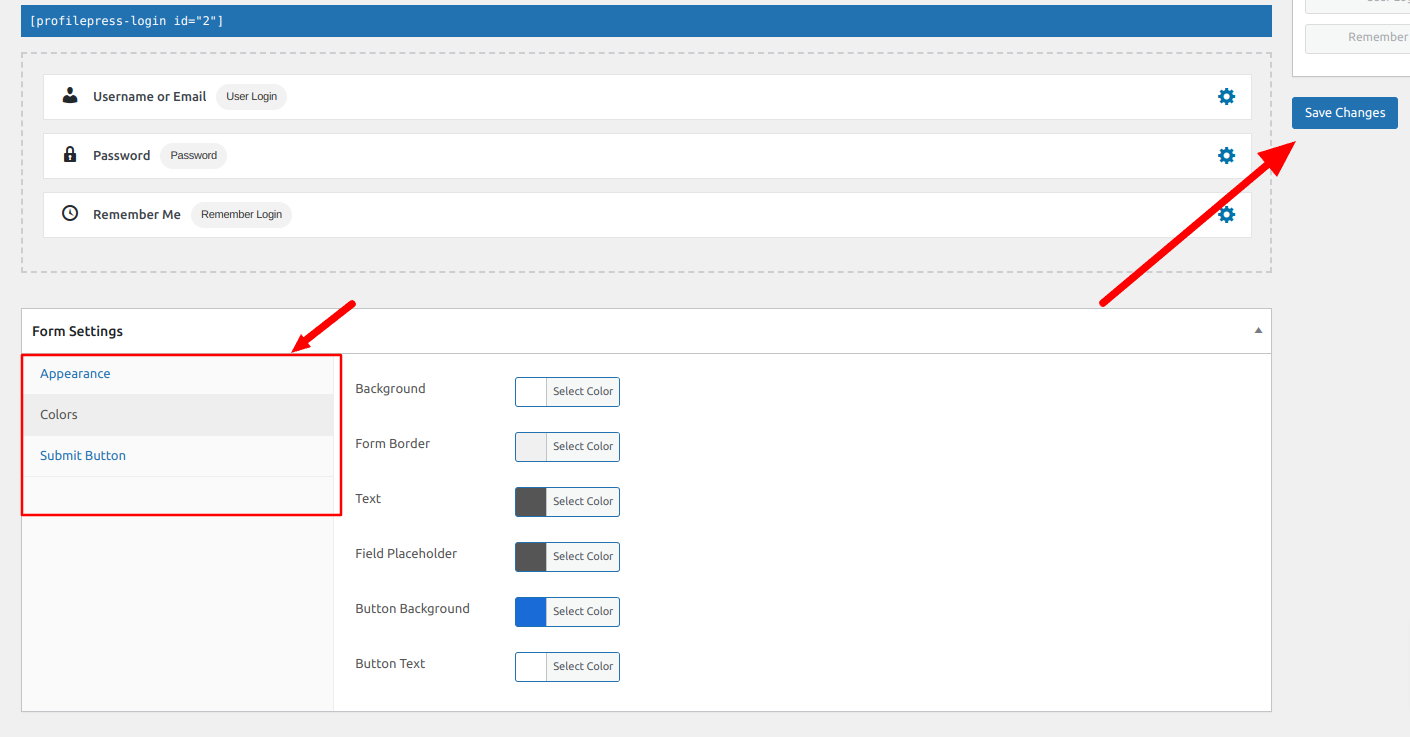
ProfilePress has a form settings section that allows you to customize the look of your custom WooCommerce login form. You can change the field styling, labels, text, and the submit button.
Now, save your form and a shortcode will be generated for that particular WooCommerce login form; take note of it, and we will use it later.
So far, we have created a custom WordPress login form. The next step is to create the WordPress popup, embed the form in it, and display it on the WooCommerce checkout page.
Installing The MailOptin Plugin
You will need to purchase a MailOptin License and then install and activate the plugin on your WooCommerce website.
Create a WooCommerce Popup with MailOptin
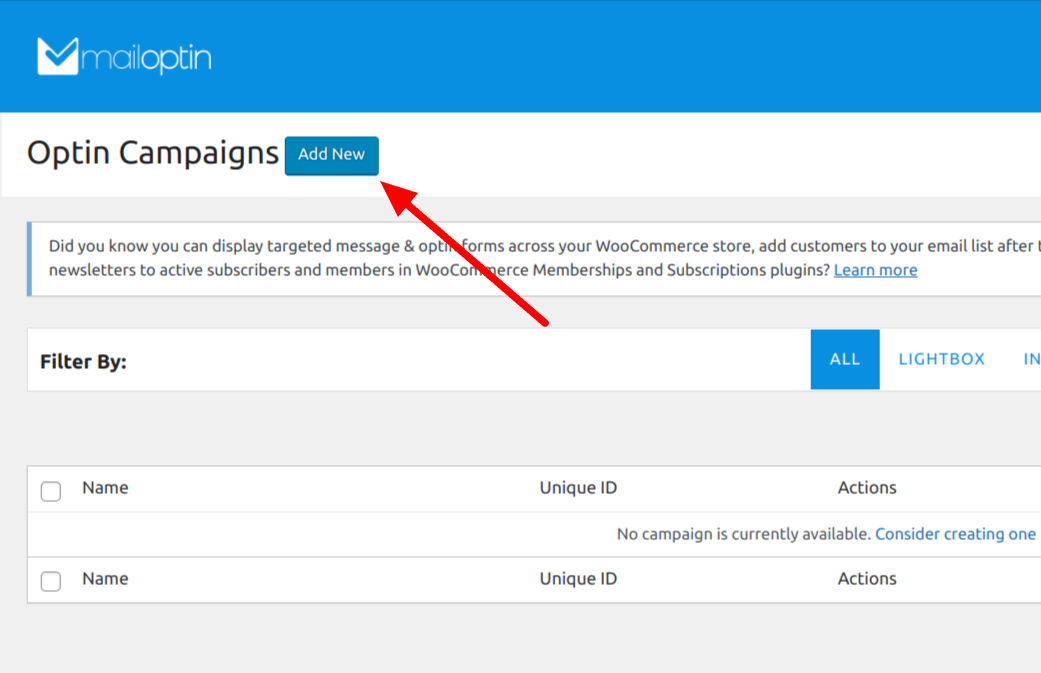
To create the WooCommerce login popup, navigate to MailOptin >> Optin Campaigns from your WordPress dashboard. Next, create a new optin campaign by clicking the Add New button.
Enter a title for the WooCommerce popup, click on the lightbox optin type, and select your preferred template.
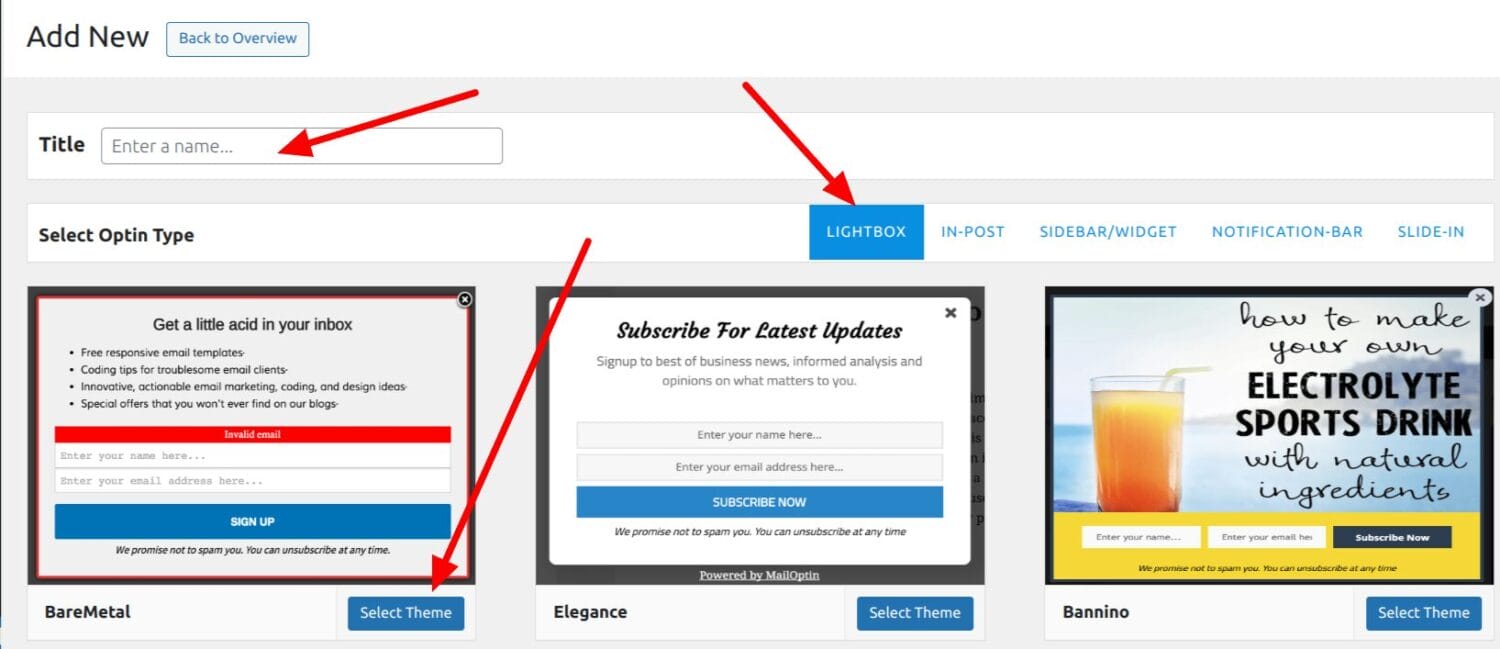
Once you select a template, you will be taken to the optin customizer, where you can edit and customize the WooCommerce popup box to suit our purpose.
The next step is to replace the default form in the chosen template with our custom login form, which we created with ProfilePress above. Remember that form shortcode you copied earlier? This is the time to use it.
If you didn’t copy it, go to ProfilePress >> Forms & Profiles to find the form shortcode.
On the campaign customizer, click on the Fields from the options panel on the left side.
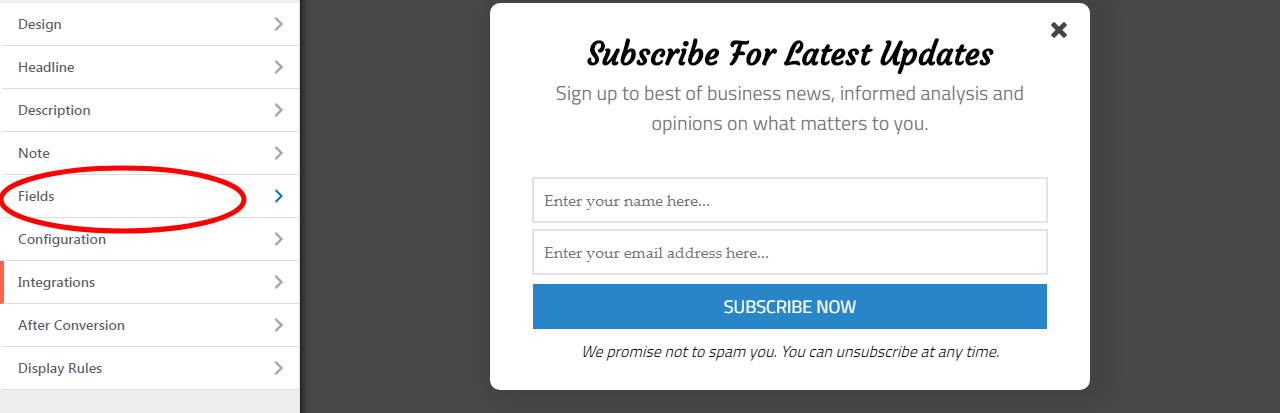
Next, click on the Use Custom HTML toggle. You will see a new code editor appear. Copy and paste the form shortcode from ProfilePress into the editor.

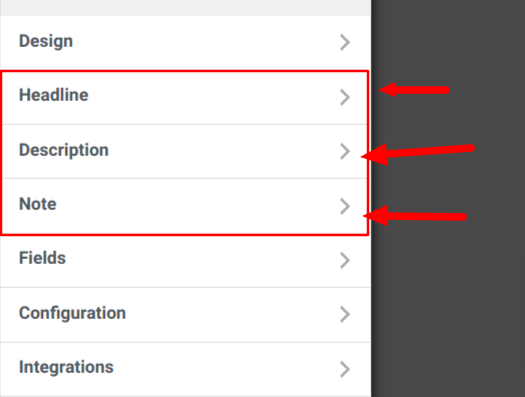
Next, look through the Headline, Description, and Note sections from the left-side options panel and edit the contents of these sections.
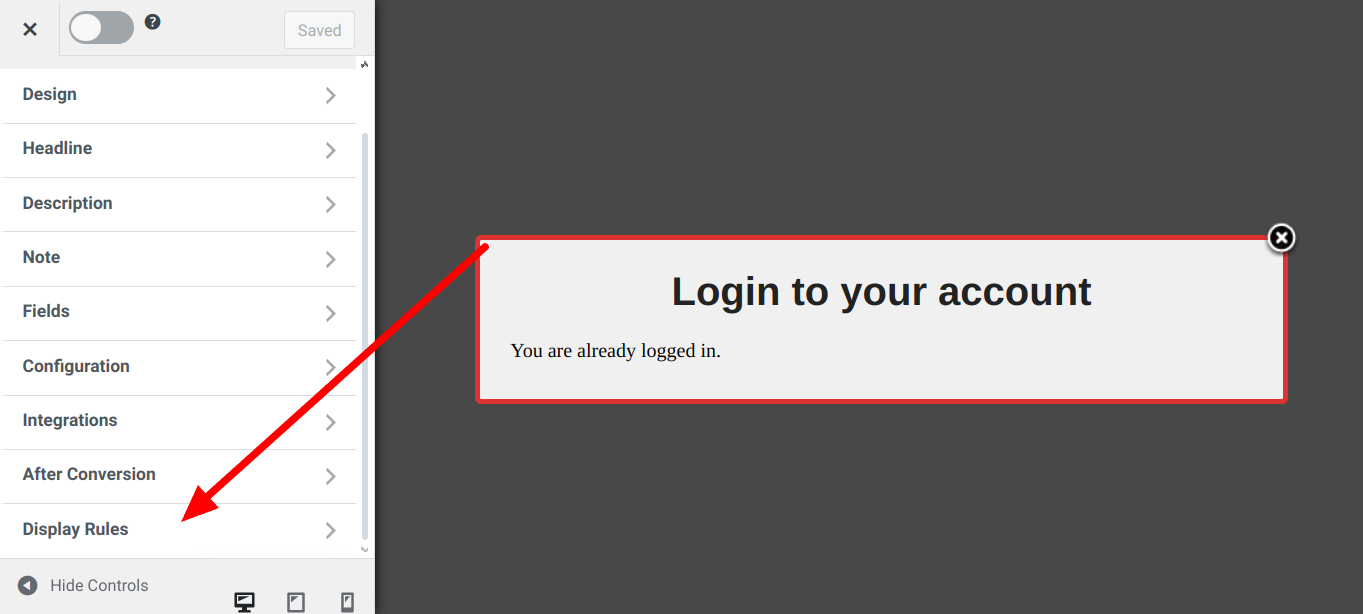
Note: your login form fields may not display because you are logged into your WordPress account, so you will see a notice that says, “You are already logged in”, but we will be able to view the form shortly.
Adding the WooCommerce Login Form Popup to the Checkout Page
In the above steps, we added the custom login form to the lightbox optin and customized our Headline, Description, and Note sections. The next step is to enable this form to show on the WooCommerce checkout page.
To achieve this feat, we will go to “Display Rules” from the left side options panel of the lightbox customer and modify a couple of settings.
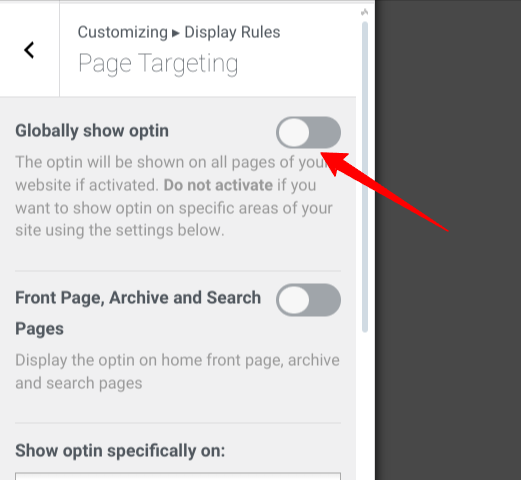
First, stop the popup from showing globally across all pages. So, click on Display Rules and select “Page Targeting”. Toggle the “Globally Show optin” to off and save your changes.
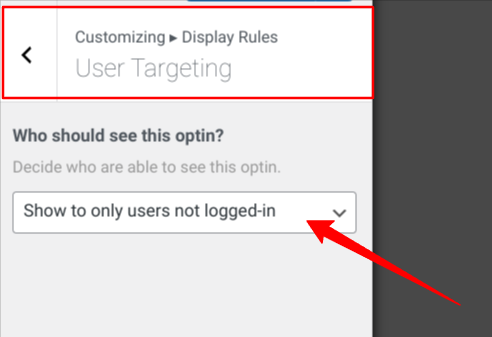
Next, we must ensure this popup will only appear for non-logged-in users. By default, the popup is enabled for all users, which can annoy already logged-in users.
So, under Display Rules, select User Targeting and change the dropdown option to “Show to only users not logged in”.
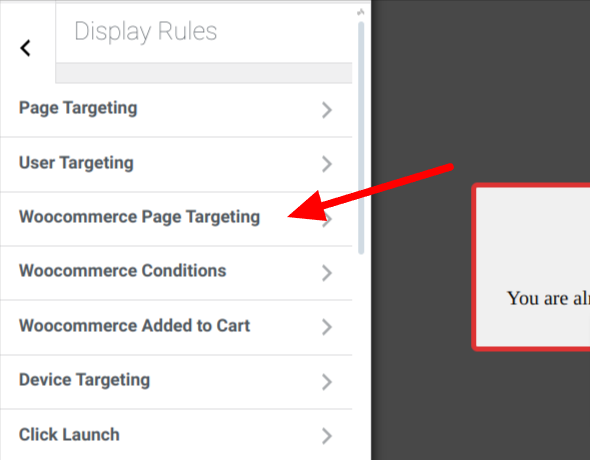
Next, Under the Display Rules, choose “WooCommerce page targeting”.
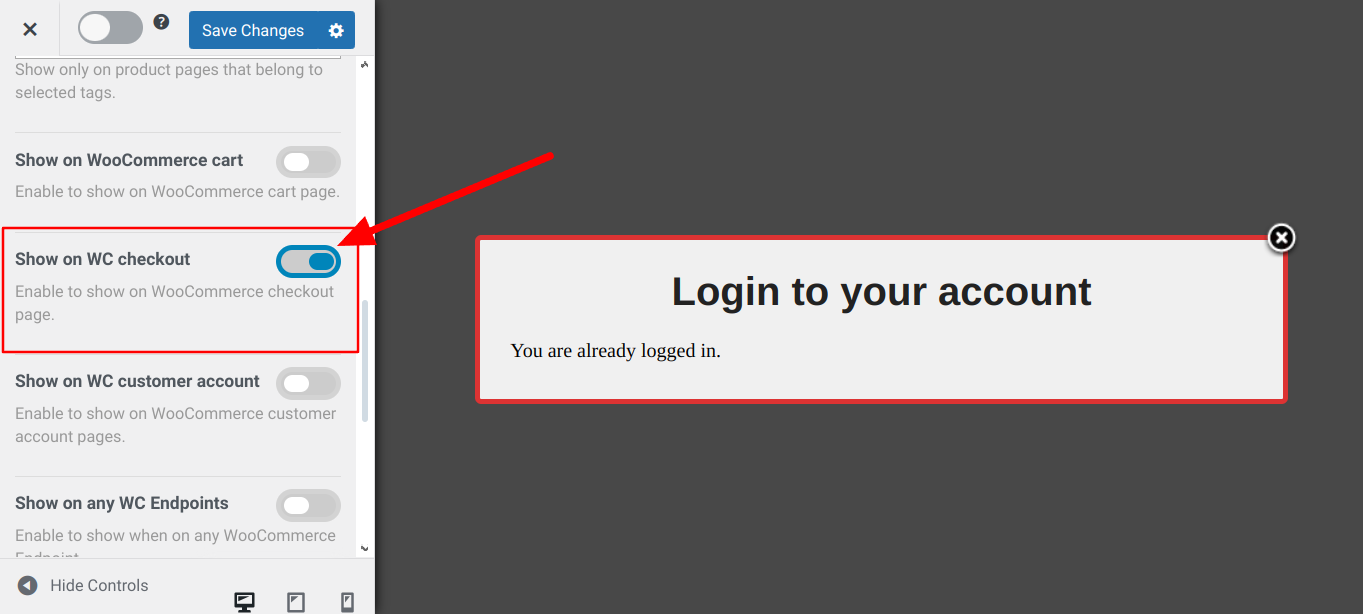
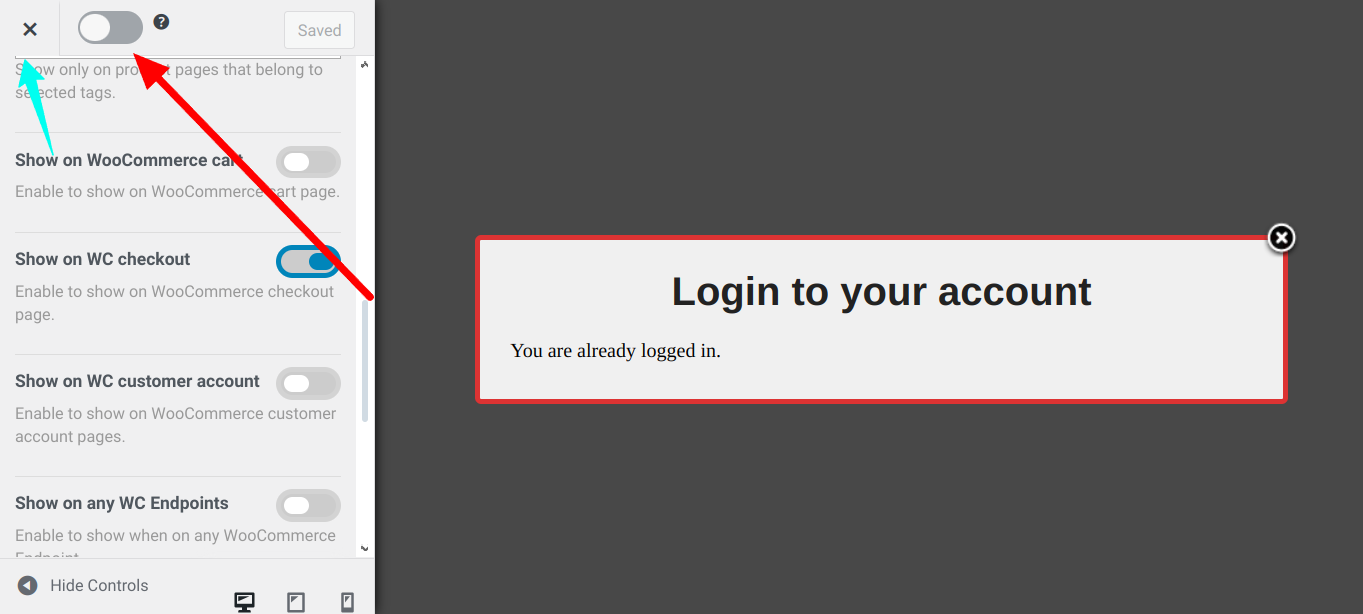
Next, scroll down till you find the “Show on WC Checkout” option. Toggle this option to enable the popup on the WooCommerce checkout page and save your changes.
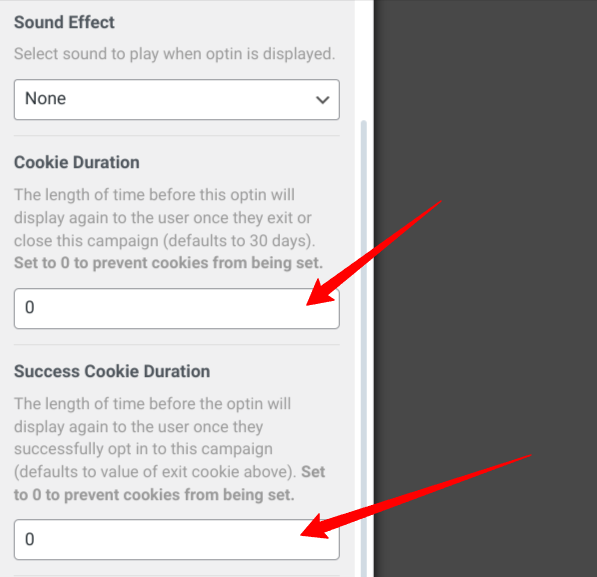
Another important thing to do is disable the “Cookie Duration” and “Success Cookie Duration” features. These two settings control the length of time before this optin will be displayed again to the user, but we need our form to show up all the time for non-logged-in users, so we will disable them by setting their value to zero.
From the left side panel, select “Configuration” then scroll a bit to the “Cookie Duration” and “Success Cookie Duration” sections, set their values to zero, and save changes.
The final step in this process is to activate this WooCommerce login popup form. You will find the toggle switch at the top of the left side panel (see image below). Click on it to activate this lightbox to appear on your site.
We have created a WooCommerce login popup form and configured it to display only on the checkout page.
The next thing is to test our setup, so log out of your account or open a new private browser window and navigate to your WooCommerce store, add a product to your cart, and navigate to your checkout page. A login popup form should appear.
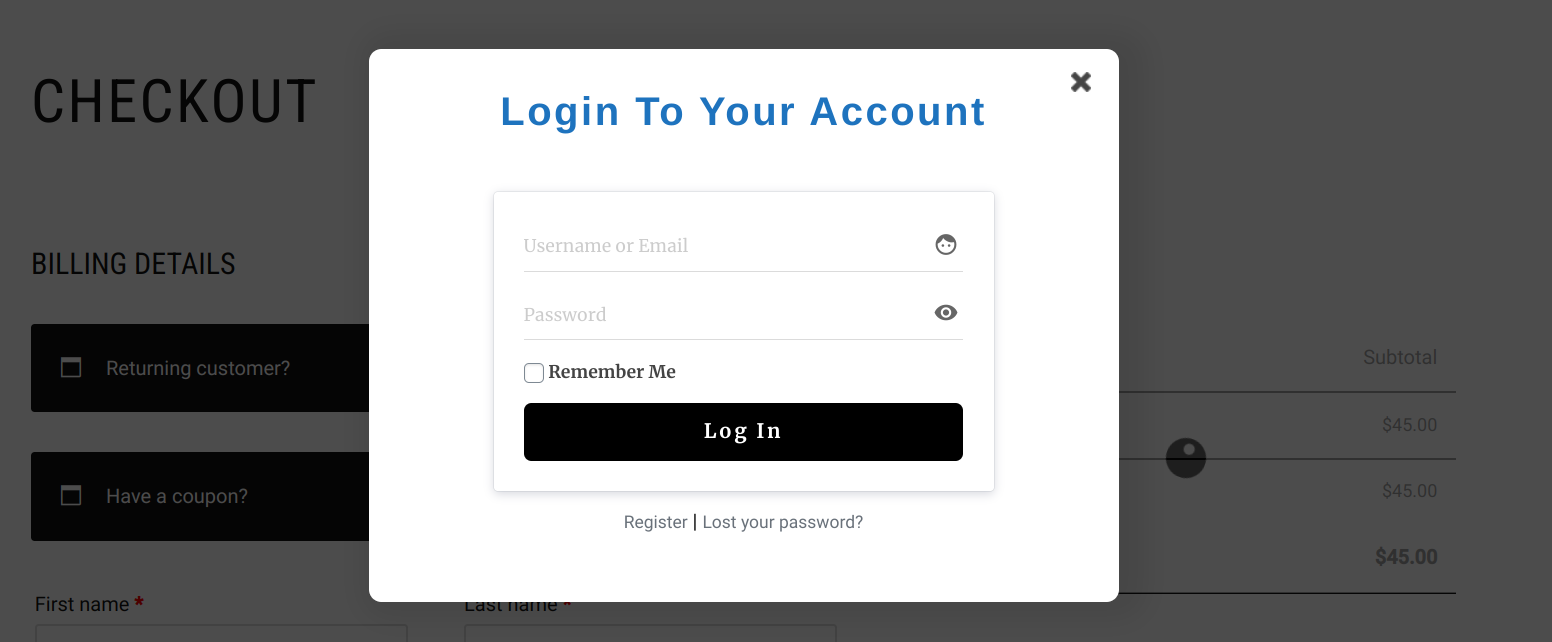
As you can see, theWooCommerce login popup form is showing on the checkout page to a non-logged-in user. If you are already logged in, this popup will not show, which is precisely how it should behave.
Create a WooCommerce Popup Login Form Today
Adding a WooCommerce popup login form to your website can significantly enhance user experience and boost conversions.
Following the steps outlined in this guide, you can create a custom WordPress login form using ProfilePress and seamlessly integrate it into a WooCommerce popup using MailOptin. This enables you to present the login form non-intrusively to users, keeping their focus on the purchasing process.
We hope this article helped you learn how to create a WooCommerce popup login form on your e-commerce website.