How to Sell on Instagram: A Step-By-Step Guide
Wondering how to use Instagram to sell your products?
Using Instagram to grow your business is an excellent idea because it’s one of the world’s leading social media sites and draws millions of visitors every month.
You can take three significant steps to sell your products on Instagram. First, set up a shop page, add your shop to your Instagram account, and then add the shop to your Instagram profile bio.
In this article, we will show you how to carry out these steps but first, let’s take a quick look at the benefits of selling products on Instagram. Let’s get started.
Benefits of Selling on Instagram
Some of the significant reasons you should be using Instagram to sell your products are:
- Instagram draws millions of users every month, so there is a good chance of finding a target audience for your products.
- The platform offers tools to create an engaging relationship with your audience.
- You can enable audiences to buy directly from the platform or via your website/shop.
- Using Instagram ads, you can boost your brand’s exposure and drive traffic to your shop.
- You can educate your audience about your brand and products, among other things.
These are the primary benefits of using Instagram to sell your products. Next, we will discuss whether you need a business license to sell on Instagram.
Do You Need a Business License to Sell on Instagram?
You don’t need a business license, but you do need to comply with the following eligibility criteria:
1. Comply With Their Policies
Take some time to read through the following documents: Terms of Use and Community Guidelines. The documents are lengthy, but if you fail to comply with the policies, you will lose access to your account.
2. Represent Only Your Own Business & Domain
Your Instagram account should be associated with your own business and domain. In other words, you can’t run other people’s businesses or link other people’s domains with your Instagram account.
You may need to verify ownership of your domain and business. The products listed on the account must be available from the verified domain.
3. Must Be Located in a Supported Market
Instagram does not support selling products in every country. Your business has to be located in countries where Instagram supports selling products. Here’s a list of all the eligible countries. Be sure to check if your country is eligible before starting an Instagram account.
4. Must Be a Trustworthy Business
Your business has to demonstrate trustworthiness. This could include maintaining a decent number of authentic followers, among other things.
5. Must Provide Accurate Information
The product descriptions and business information should be correct and should not mislead customers into you buying something they don’t want.
6. Must Follow Best Practices
Best practices include having contact pages, terms, and conditions, privacy policies, and return and refund policies.
Now that you know the eligible criteria, let’s learn how to sell your products on your Instagram account.
How to Sell Your Products on Instagram
There are two steps you need to take to start selling your products on Instagram. Those are
- Setting up a shop page and
- Using your Instagram profile bio to promote the shop page
Let’s start with setting up a shop page.
Setting Up a Shop Page
If you have an existing shop page, move on to the next step. If not, then the first thing you need to do is to create a shop page. Here’s how:
Step 1: Set Up Membership Plans
To create a shop page, you must add products to your website. You will also need to set up a payment system to enable people to buy the products.
The easiest way to add products and set up a payment system is to create membership plans around each product. Anyone who wants to buy your product will first have to become a paying member of your site. This does not mean they will need to pay a monthly or yearly fee. Instead, you can set the payment plans as one-time payments.
Here’s how you can create members’ plans around each product.
The first step is to install and activate a powerful membership plugin like ProfilePress.
Then on your WordPress dashboard, go to ProfilePress > Membership Plans > Add New Plan. On the next page, you can start adding information about your product.
Add your product title and description in the Plan Name and Description options.
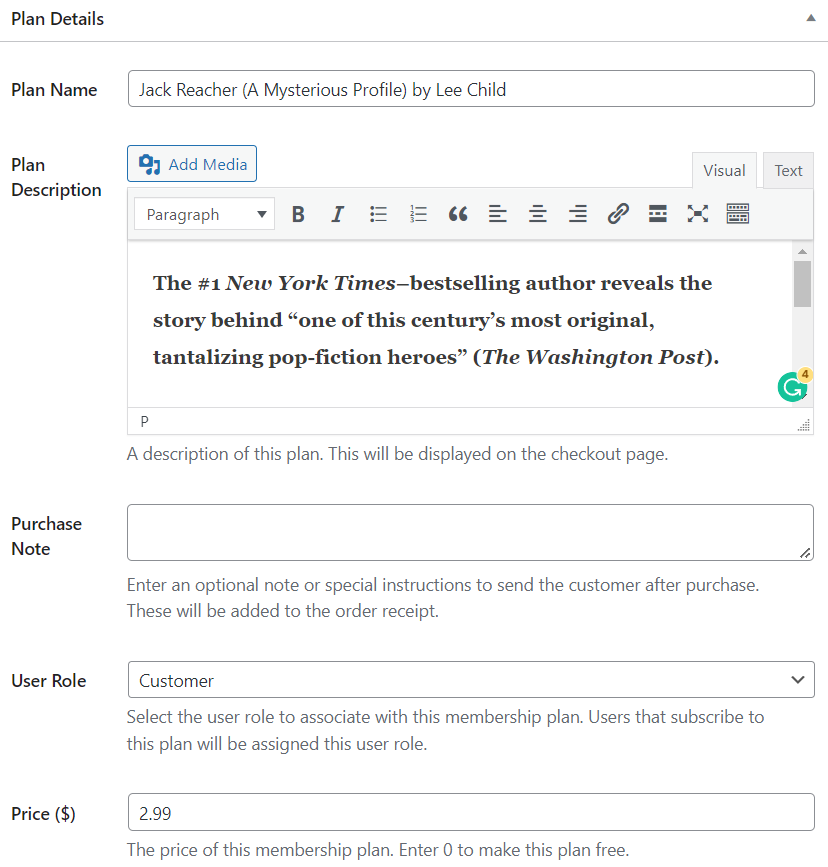
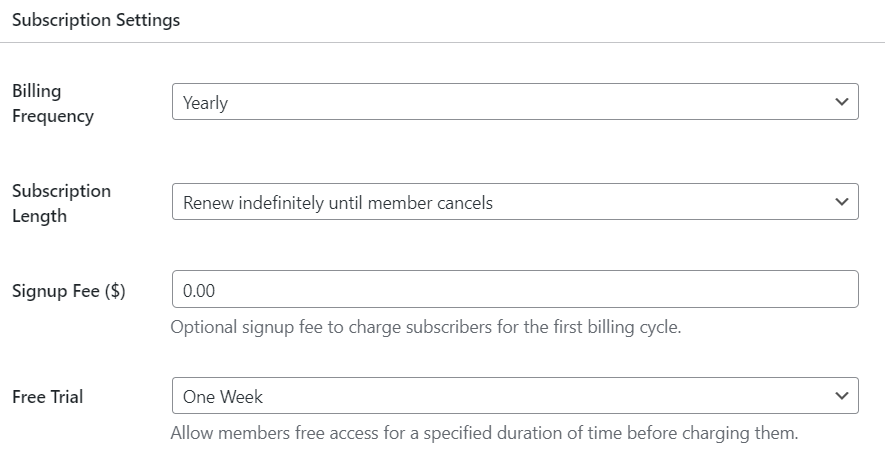
In the Subscription Settings section, you get to set the payment model. For example, when purchasing your product, you can choose whether you want the customers to pay a one-time, monthly, quarterly, or annually recurring fee.
You can also set the price and allow members to access your product for a limited period using the Free Trial option.
After you fill-up in the plan detail and subscription settings, save the plan.
Next, create membership plans around all your products.
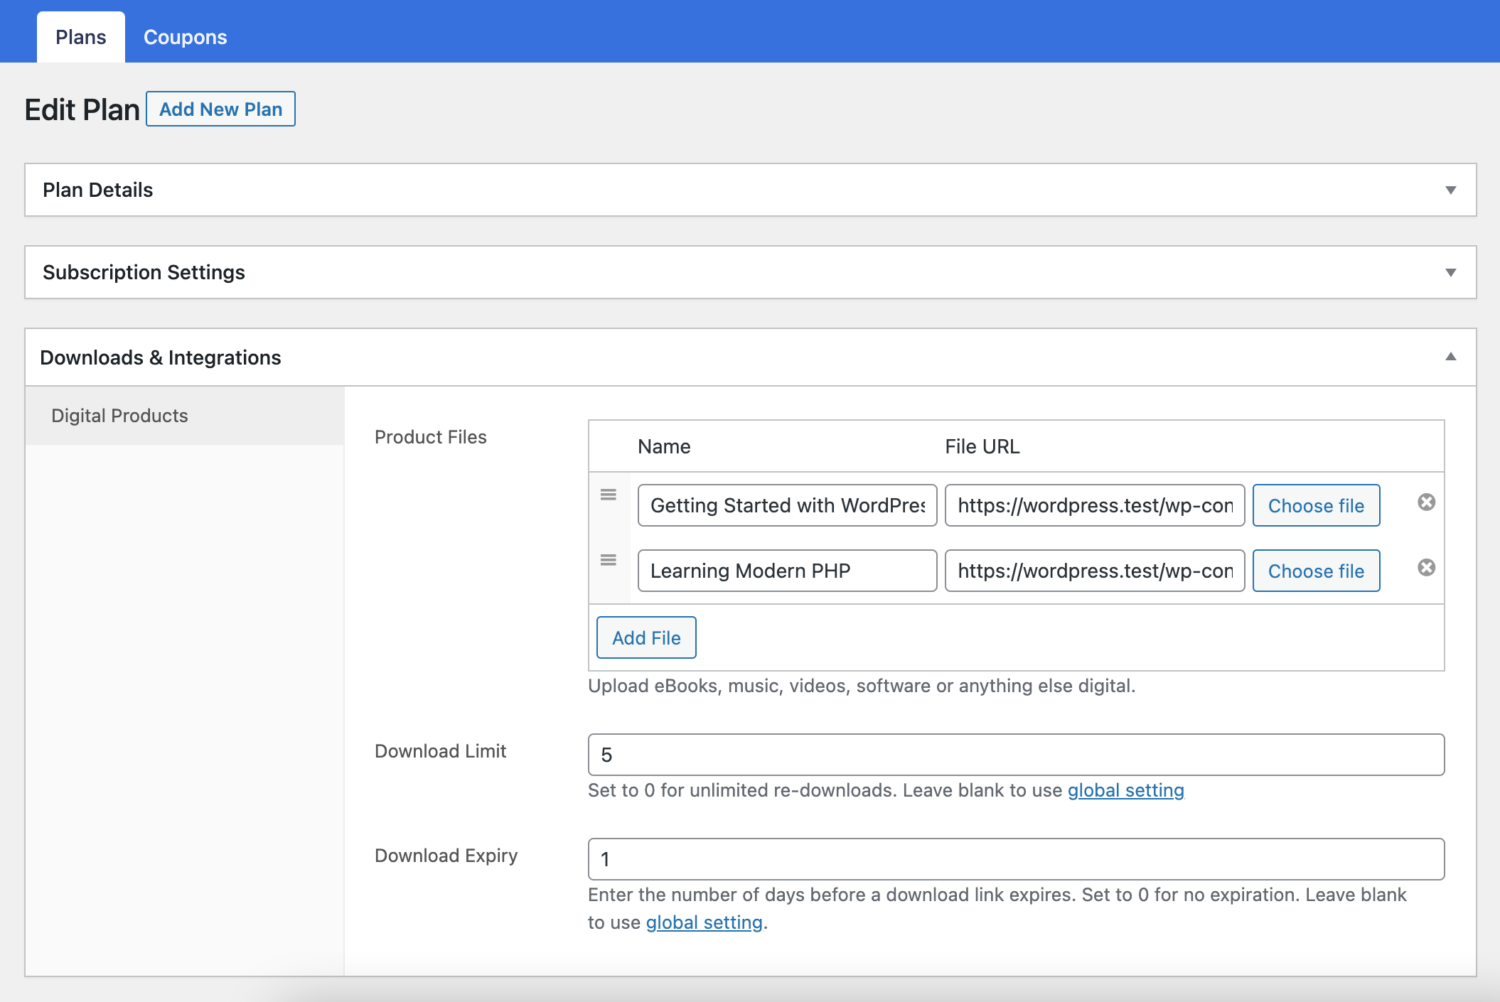
Finally, add or upload the digital products or downloadable files you intend to sell.
Step 2: Secure Digital Downloads (If Using Downloadable Product Type)
One of the most significant downsides of the Downloadable product type is that people can start sharing the download links. This means your products can be resold or used for free.
You must secure your digital download to ensure people can’t use your products for free. Here’s how to do just that:
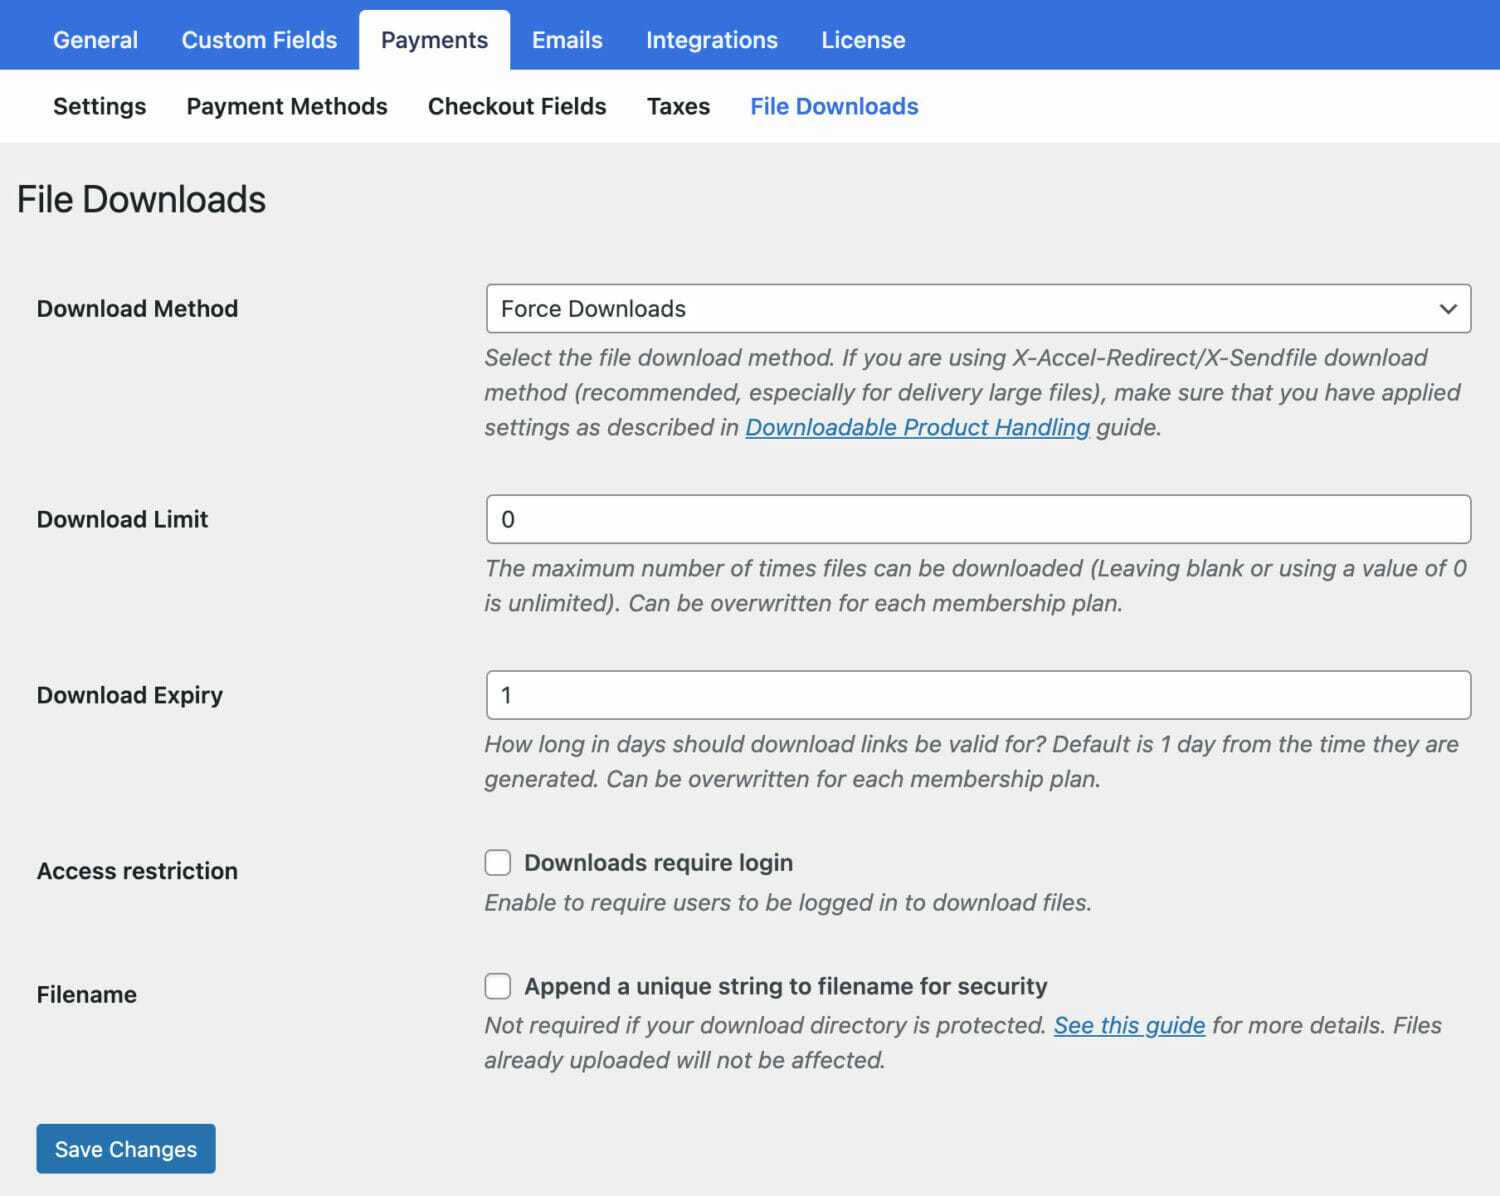
On your WordPress dashboard, go to ProfilePress > Settings > Payments > File Downloads.
Under Download Method, select, Forced Downloads or X-Accel-Redirect/X-Sendfile.
The former will protect your files from direct linking so that people can’t share your download link and exploit your product. If your digital file is too large, choose the latter option, or customers will experience timeouts during download.
Next, scroll down to set download limits and expiry time. Finally, you can only allow people logged in to download digital files from your site.
NOTE: Using this guide, you can take further steps to secure your digital files. It will also show you how to use ProfilePress to manage your orders and find logs of all files that have been downloaded, along with details of the user who downloaded them. We highly recommend you take a look at the guide.
Step 3: Set Up a Checkout Page
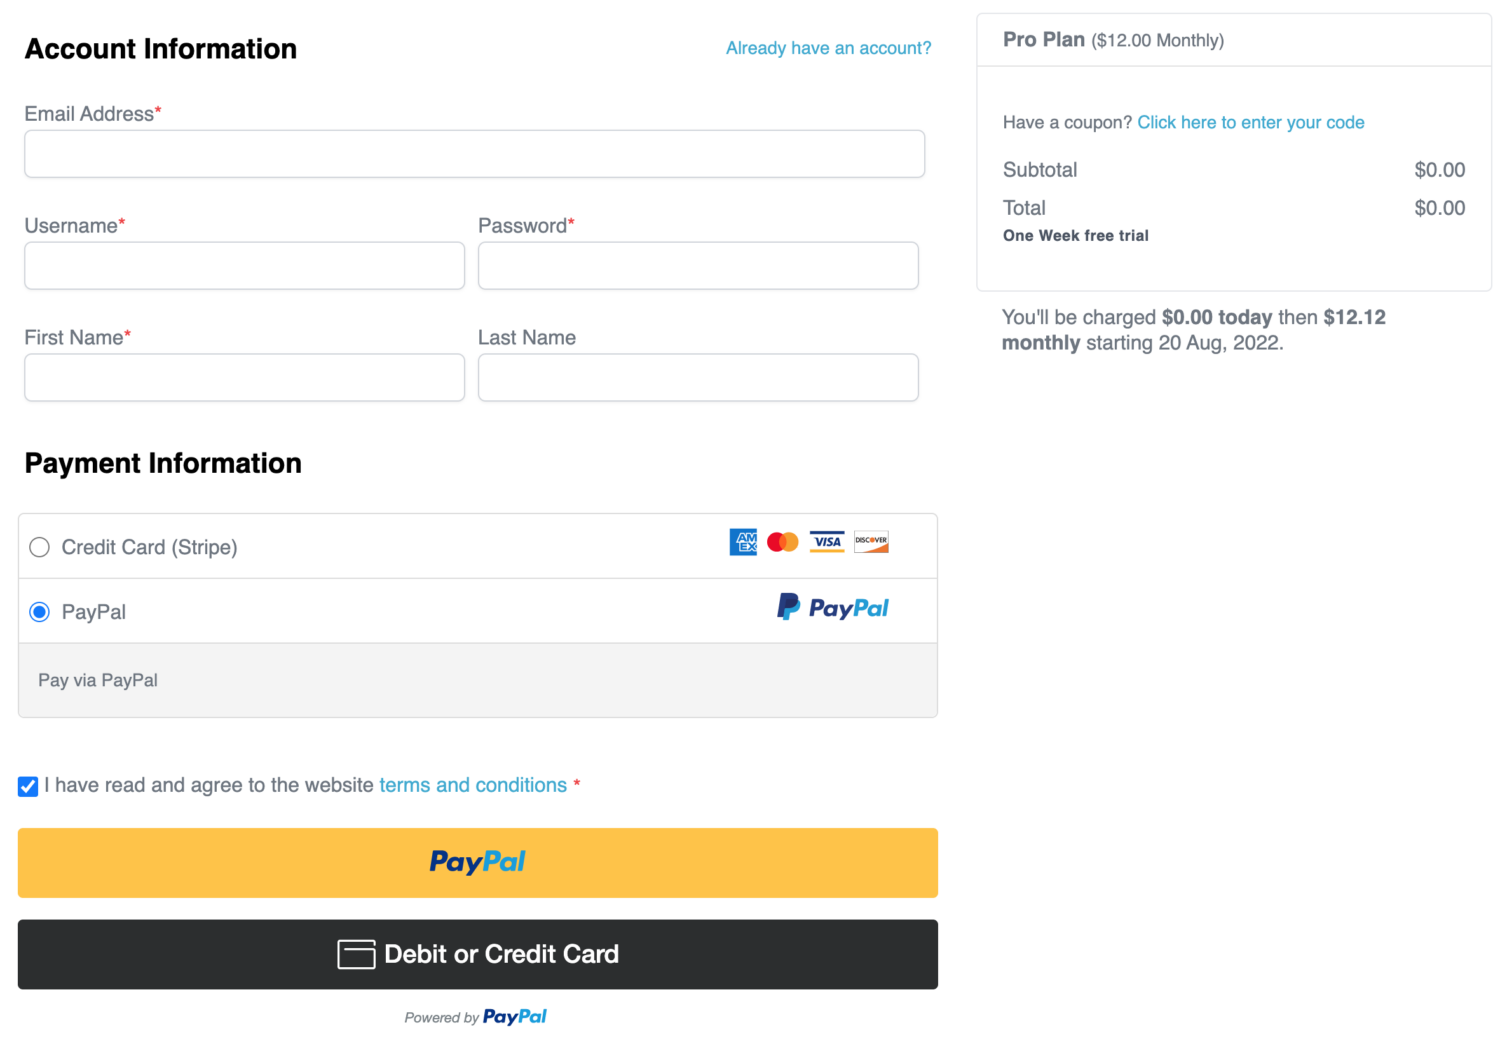
The checkout page is where customers will enter payment and billing details to purchase your products.
ProfilePress automatically creates this for you, but if it is missing on your site, you can create one by going to Pages > Add New. Name the page Checkout and then add the following shortcode:
[profilepress-checkout]Hit the Publish button.
IMPORTANT: Go to ProfilePress > Settings > General > Pages, scroll down to the Payment Pages section, and select the checkout page you created on the Checkout Page option.

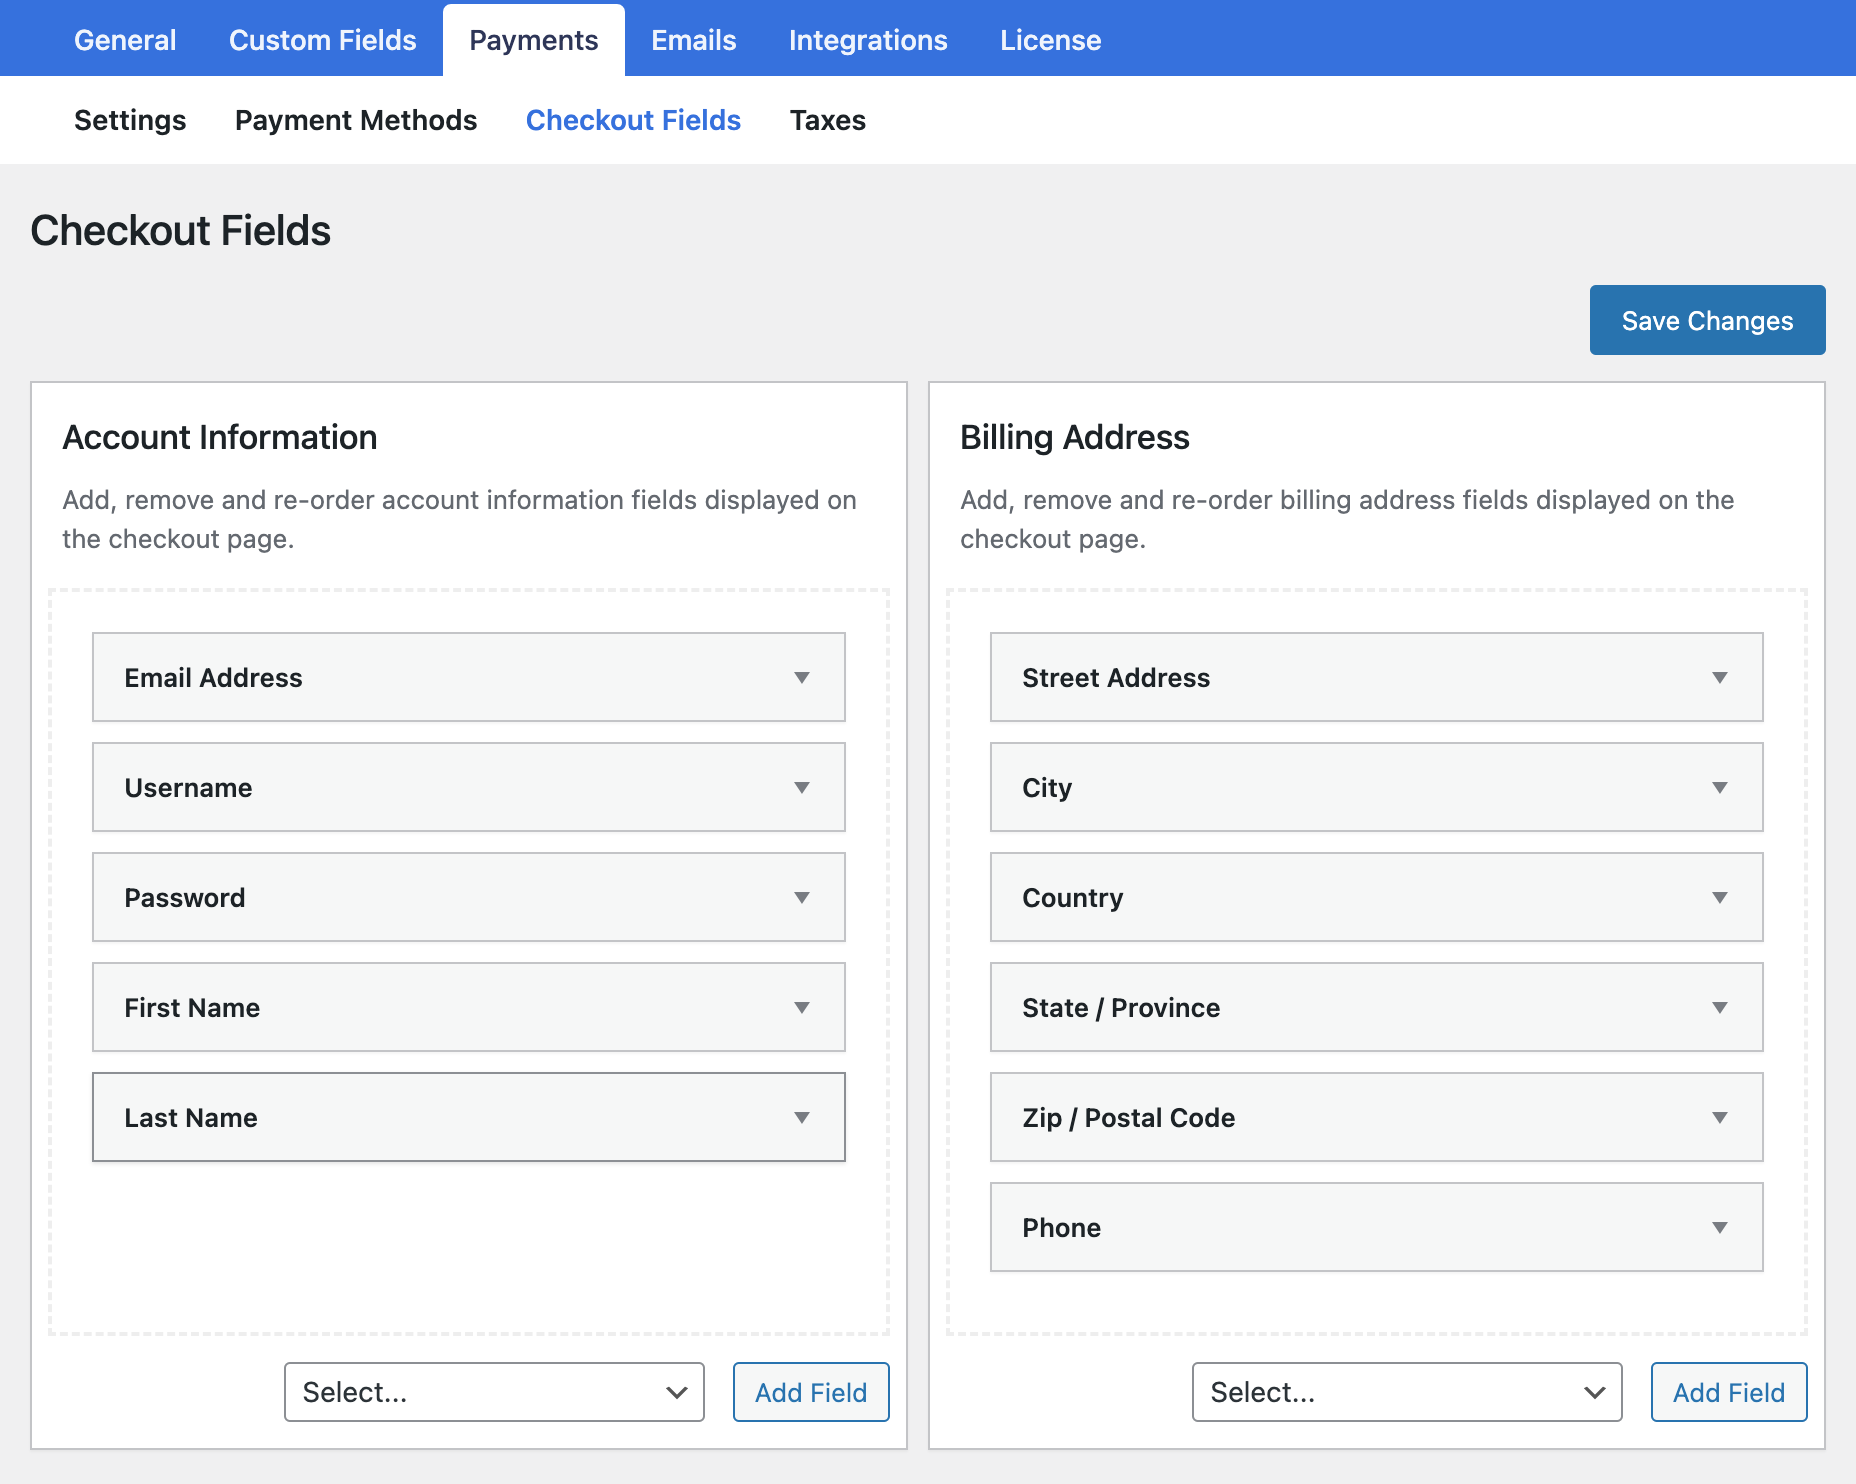
If you wish to add or remove fields from the checkout page, go to ProfilePress > Settings > Payments > Checkout Fields and add or remove fields according to your need.
Step 4: Create a Shop Page & Add Plans
So far, you have secured your digital downloads and created a membership plan for all your products. In this final step, you will create a shop page displaying all your products.
You can use the Gutenberg editor to do it. But if you don’t want to create a page from scratch, then use a shop template from website builders like Elementor, Beaver Builder, WPBakery, Visual Composer, etc.
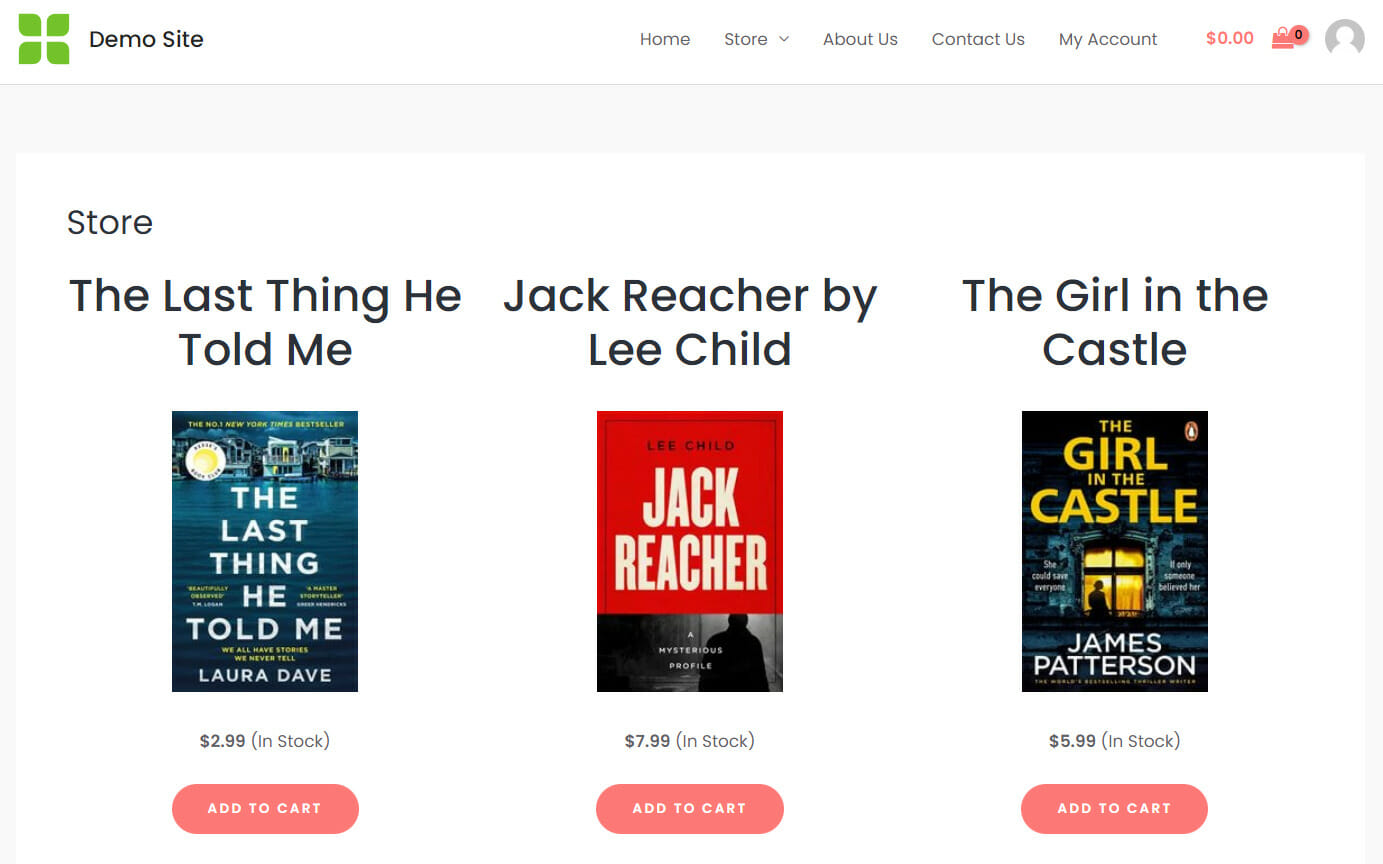
Here’s a simple shop page we created using the block editor:
When the shop is ready, make each product’s “Add to Cart” or “Buy Now” button link to their respective membership plans.
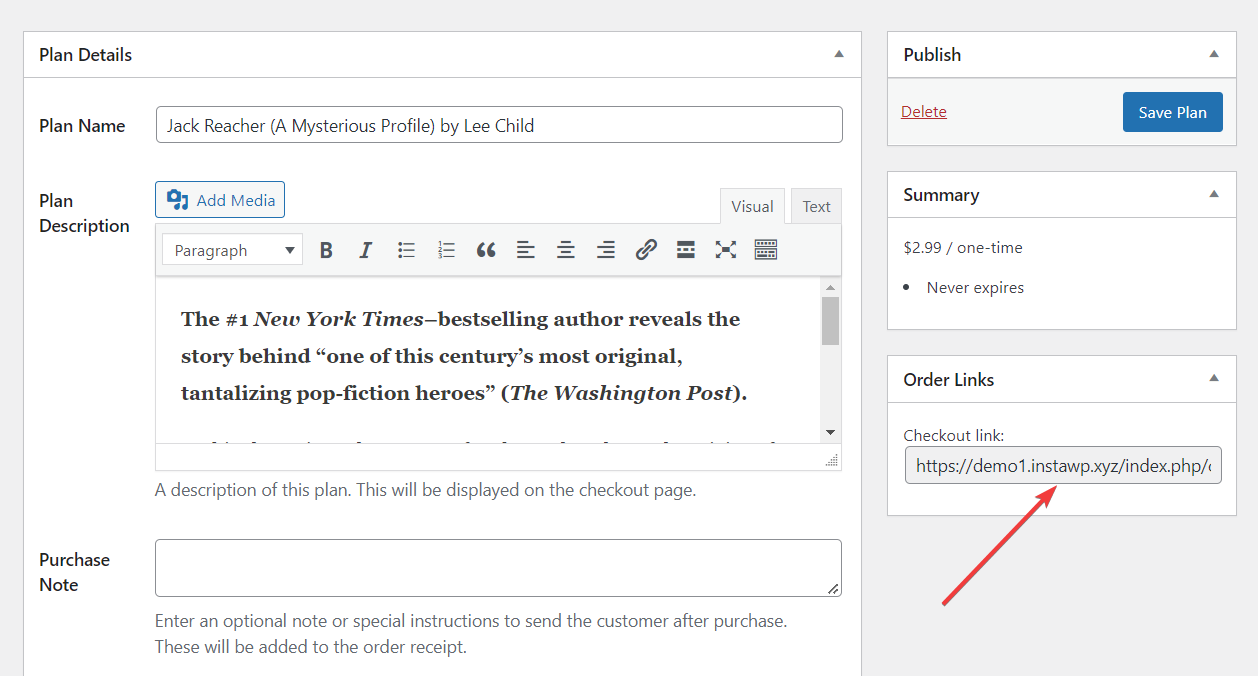
Go to ProfilePress > Membership Plans and open the plans.
You will see a checkout link in the right-hand corner of the page. Copy that link and insert it in the Add to Cart buttons.
When a customer clicks on the button, he will be taken to the checkout page of that particular plan/product.
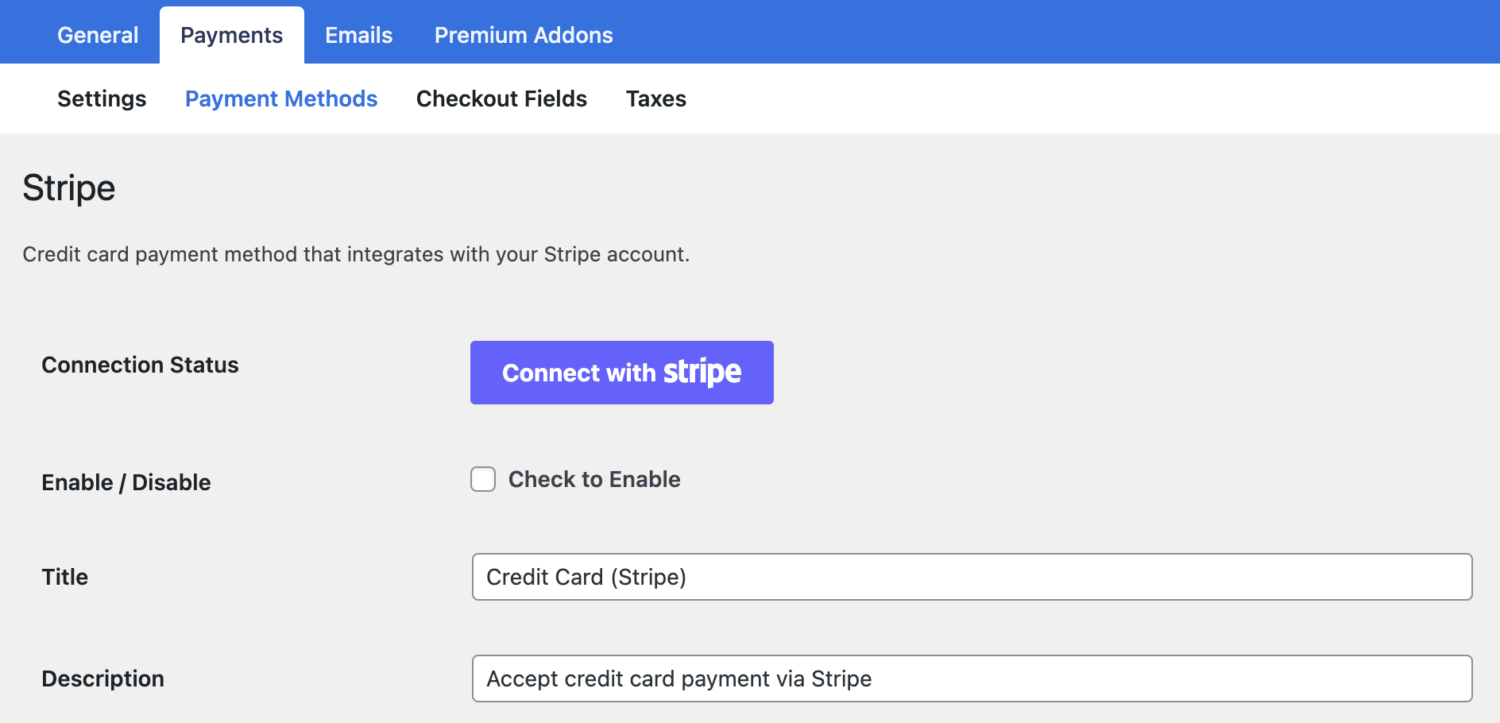
Step 5: Integrate Payments
You can accept payments via Stripe, PayPal, Razorpay, Paystack, Direct Bank Transfer, Mollie.
To set up the payment system, go to ProfilePress > Settings > Payments > Payment Methods.
Select your payment method and connect your account.
Now your shop is ready to be connected with your Instagram account.
Adding Your Shop to Instagram Profile Bio
The bio is the first thing people notice when they open your profile. With a link on your bio, many Instagram users will likely click the link to check out your shop.
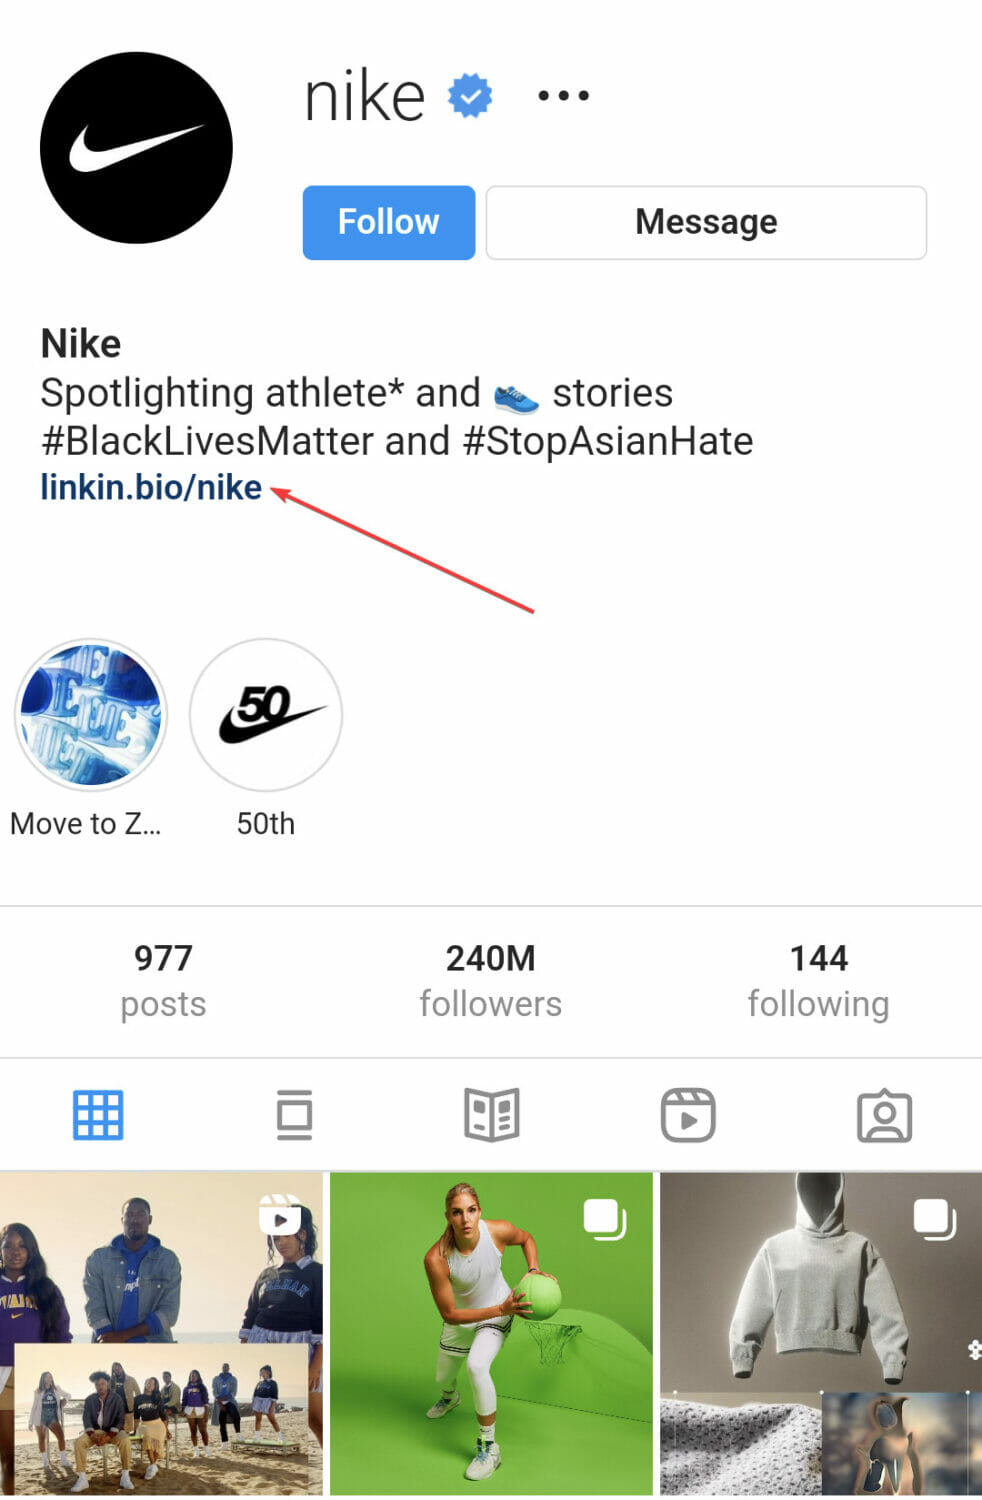
Tap your profile picture in the bottom right to go to your profile. Then select Edit Profile on the top of the screen and scroll down to the Website section to insert your shop link to your Instagram bio.
BONUS: If you have the budget, consider running ads to expose your posts to a larger audience. This will lead to a spike in your revenue collection. Read more on how to run Instagram ads.
Conclusion
Selling your products on Instagram is a great idea. It’s one of the world’s most popular social media platforms, so it can be a significant source of traffic and revenue. Just make sure to follow Instagram’s policies and then implement the steps below:
- Set up membership plans for all your products
- Make sure your digital downloads are secure (if you are selling any)
- Set up a checkout page
- Create a shop page and add your plans/products to the page
- Connect your Stripe, PayPal, Razorpay, Paystack, Direct Bank Transfer, Mollie account to the website
- Ad shop page to your profile bio
That’s it, folks! We hope you found our tutorial helpful. For more such tutorials, please visit our blog.