How to Accept Stripe Payments in WordPress
Do you want to accept Stripe payments in your WordPress website to sell digital products or paid memberships?
While several plugins are available on the market to help you with this, most require significant technical knowledge and a steep learning curve. However, don’t worry! In this article, we will introduce you to the easiest way to start accepting Stripe payments on your website without technical expertise. So, let’s get started!
Accepting Stripe Payments in WordPress
ProfilePress is the easiest way to start selling memberships and digital products, as well as accepting payments via Stripe in WordPress.
ProfilePress allows you to sell one-time payment plans and recurring plans. Additionally, it comes with over a dozen addons you can enable in one click to add more features to your website.
To start accepting Stripe payments on your website, first download and install the ProfilePress plugin. Don’t have it? get it from the pricing page.
How To Set Up Stripe in WordPress
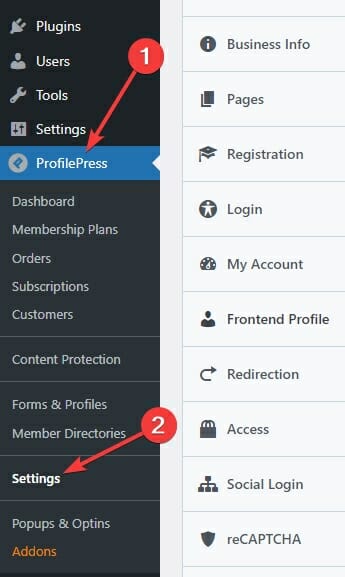
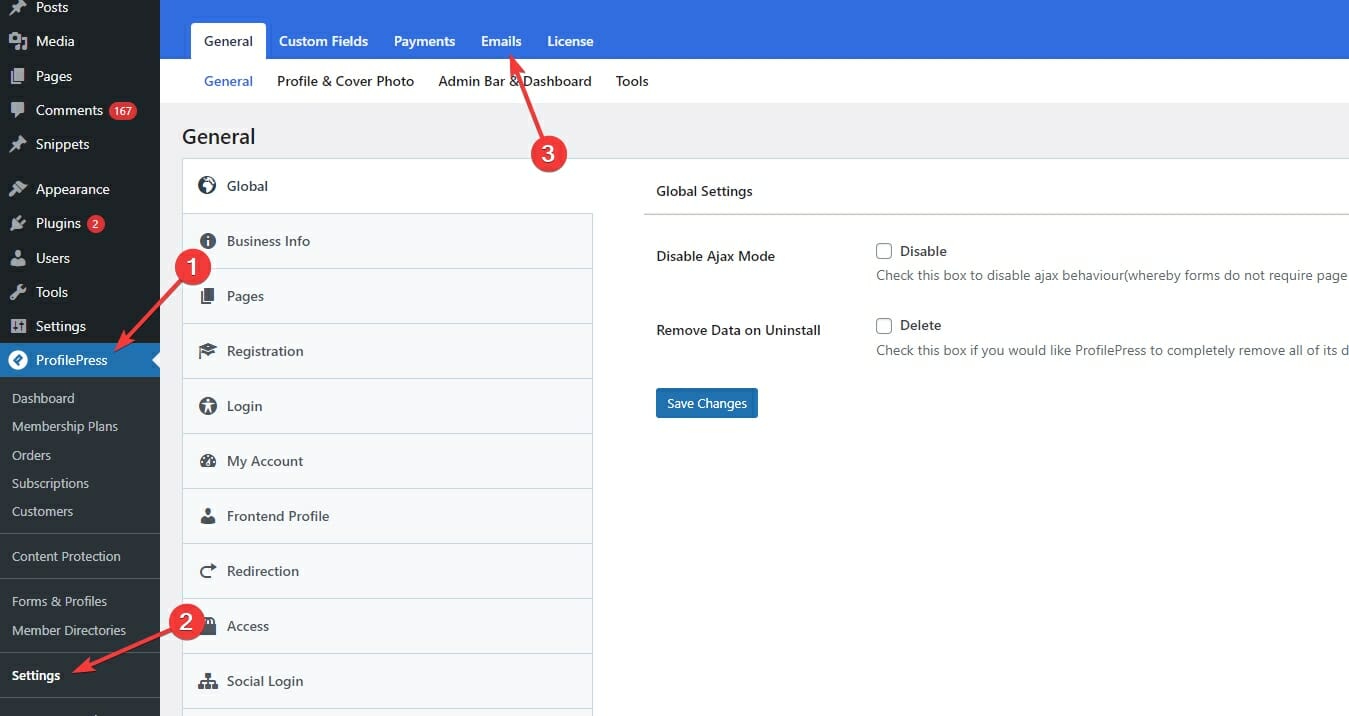
Firstly, we need to connect to Stripe in ProfilePress. To do this, navigate to ProfilePress settings from your WordPress admin sidebar:
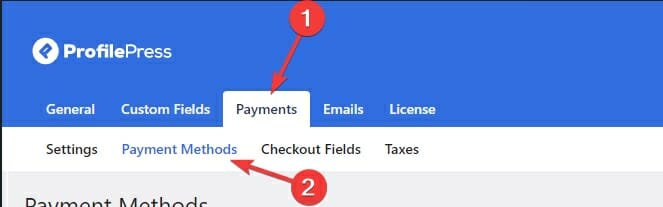
Now, Click the Payments tab, then the Payment Methods sub-tab:
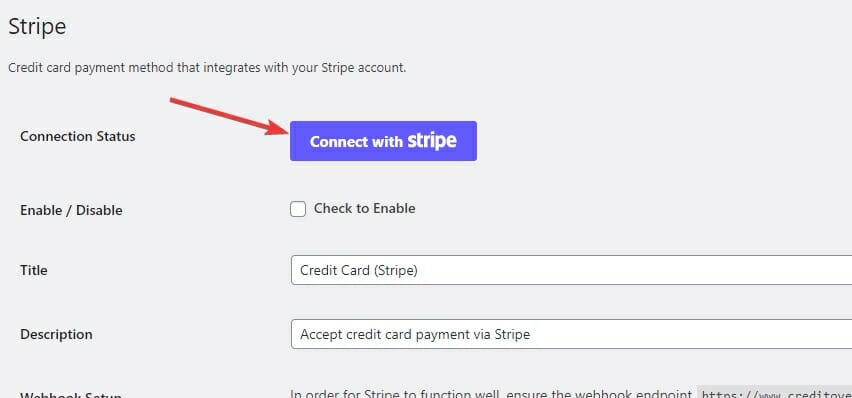
You’ll now see two available payment methods. Click the configure button next to the Stripe option:

Click the giant, blue Connect with Stripe button:
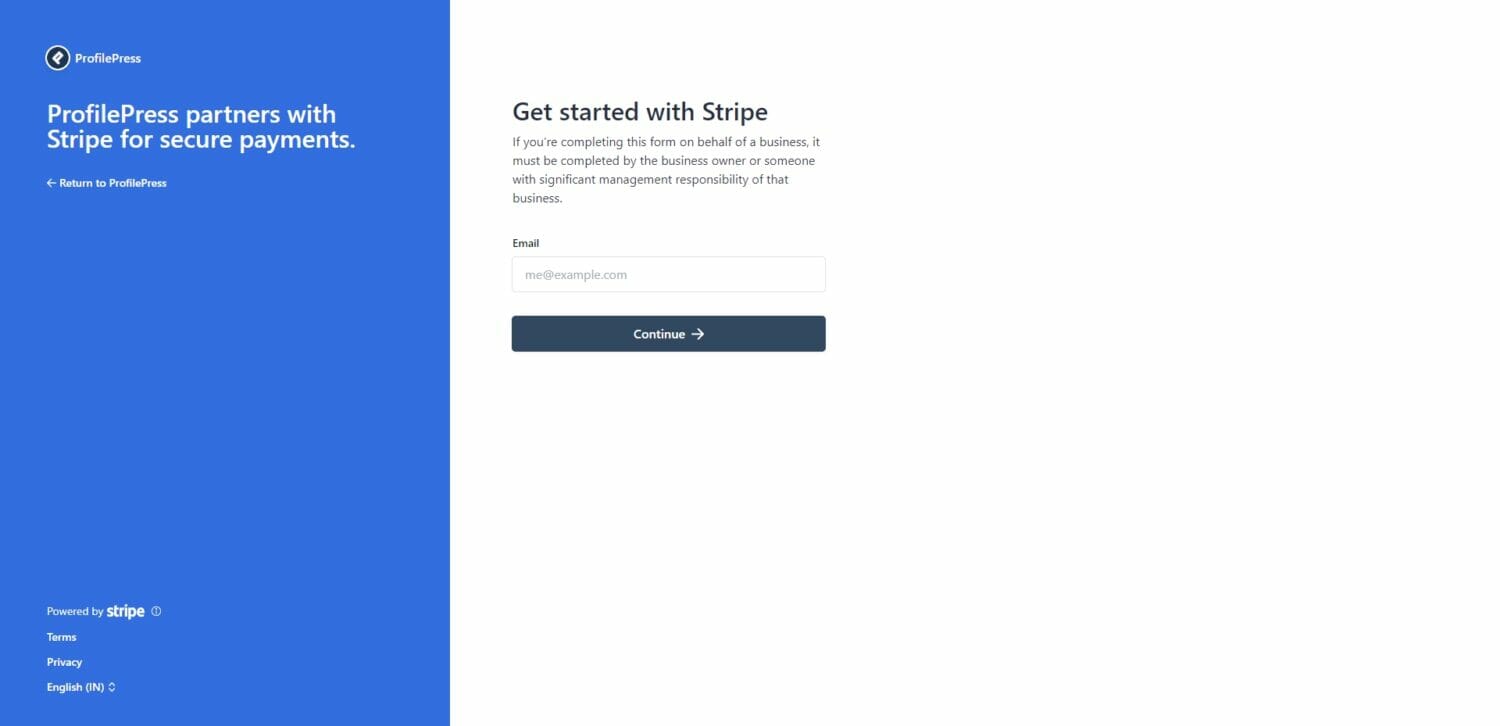
Now, Stripe will ask you to log in:
Once you are logged in, you’ll be asked to select the account you’d like to use:
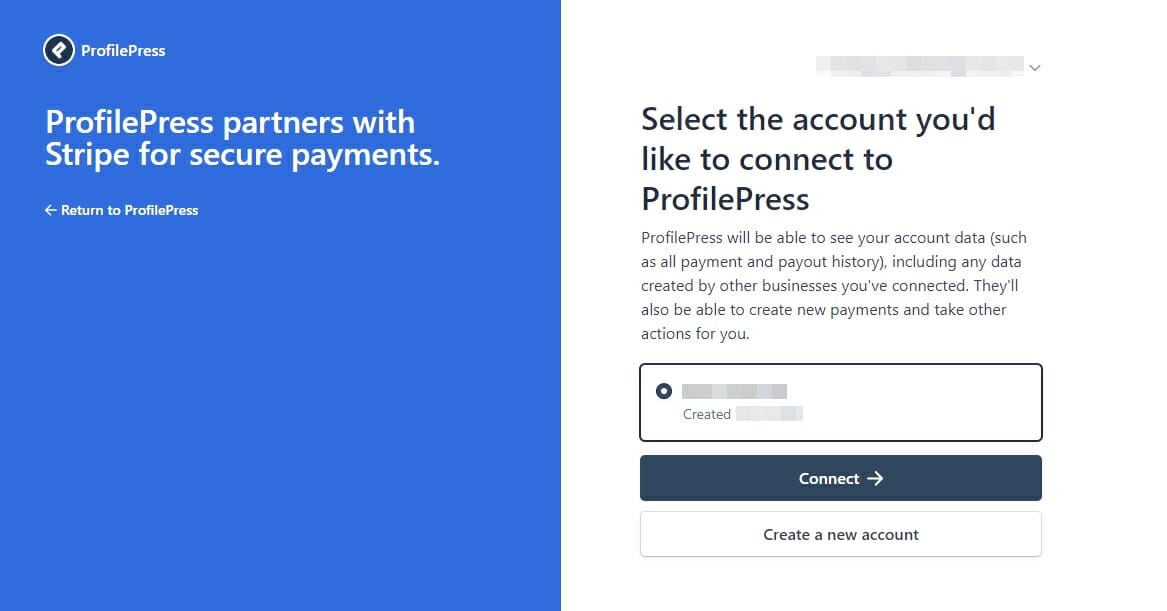
Select the account you want to use and click the connect button. This will bring you back to the configuration page.
Now that your stripe account is connected check the Enable checkbox, and then enter a statement descriptor. Your statement descriptor is what charges on your customer’s credit card statement will appear as. You’ll want these to be your business name. If you have a short domain name, put it here:
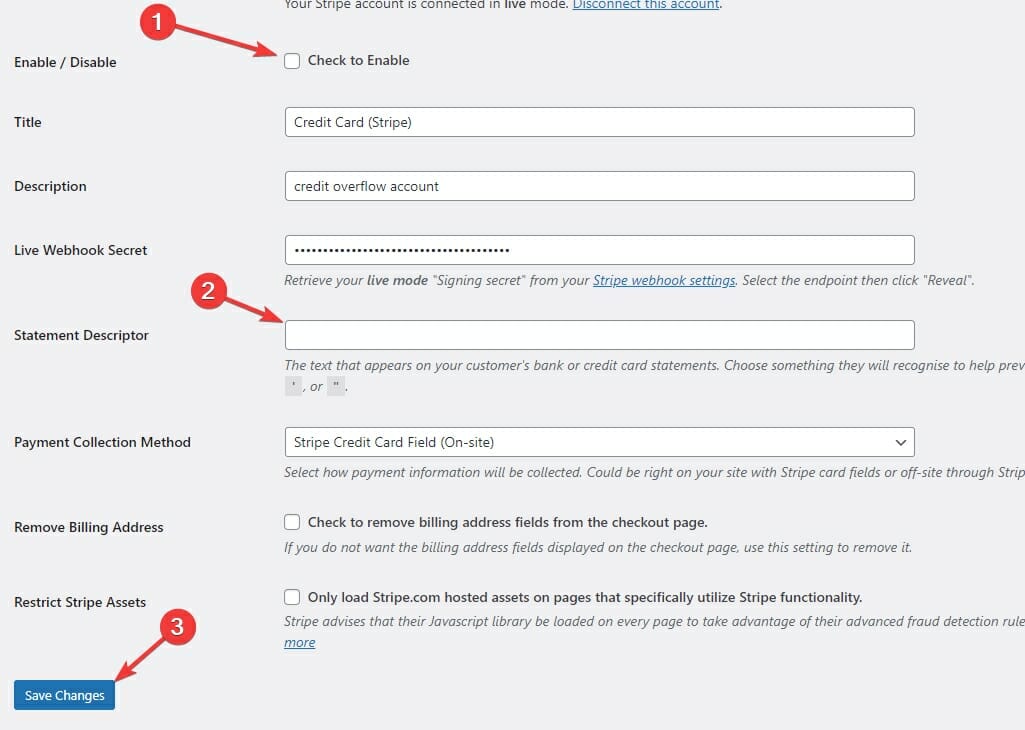
Click Save changes to enable Stripe payments on your website.
How To Create Payment Plans For Your Website
Now that you have enabled Stripe payments, it’s time to create payment plans for your website.
Create a One-Time Plan
You’ll probably want to create a one-time payment plan if you sell a standalone digital product such as an eBook or an online course. This plan will charge your customers only once.
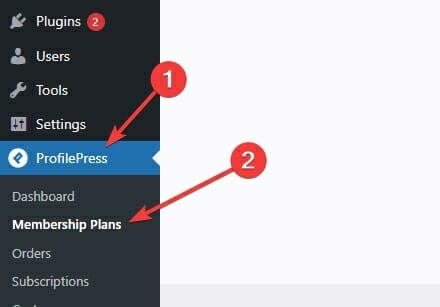
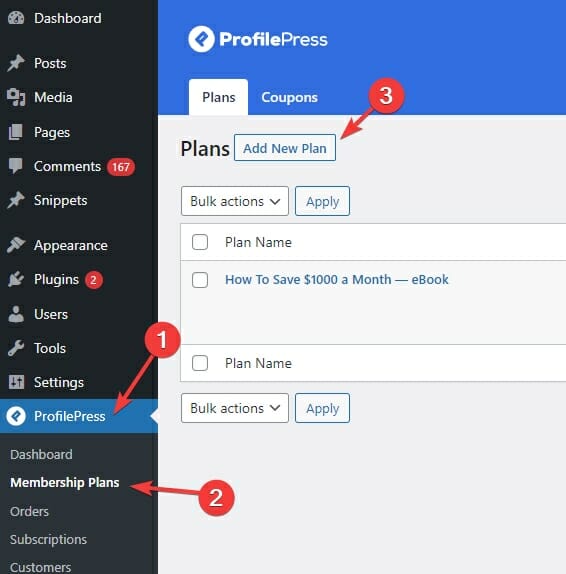
To create a one-time plan, navigate to membership plans under ProfilePress:
Click the Add New Plan button. It will take you to the Add Plan page:
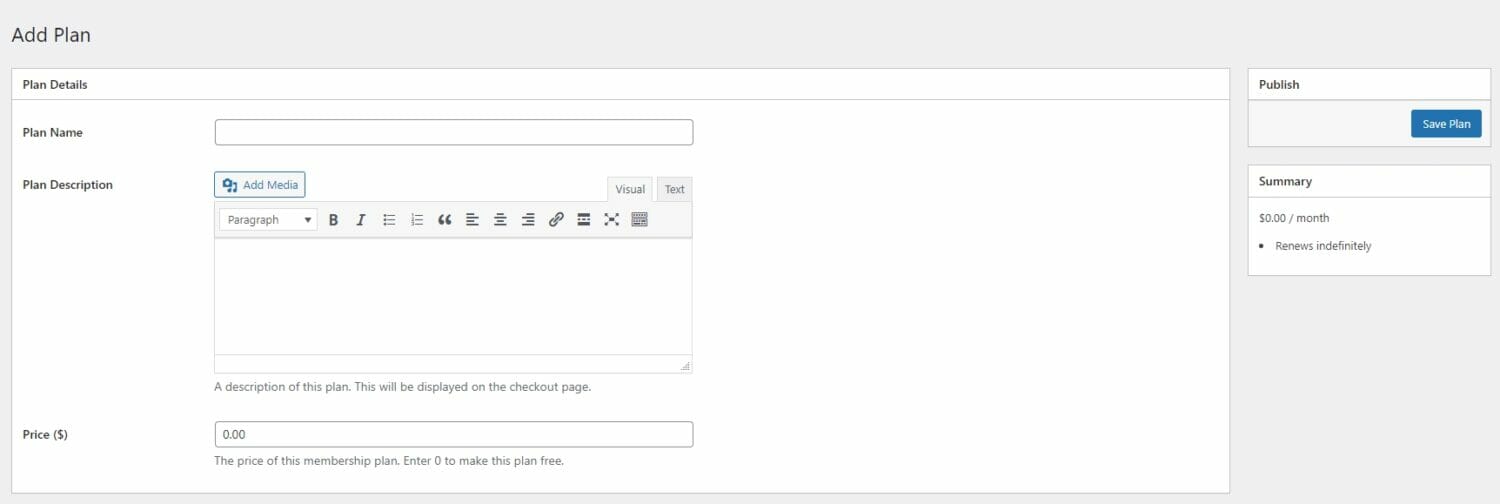
Now, first, enter a plan name, a description for the plan, and a price:
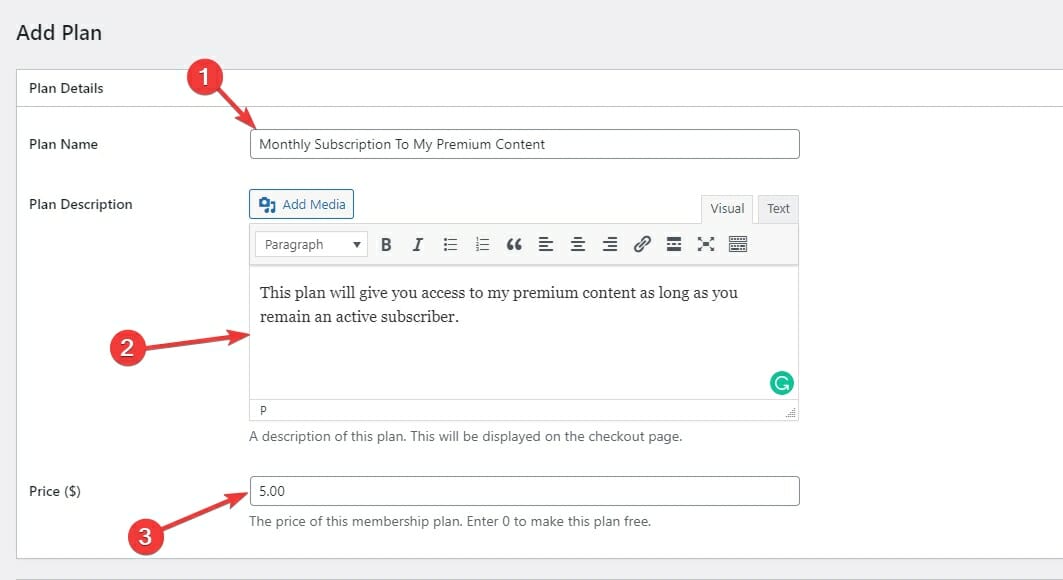
Your description will be displayed to the user when they checkout. Make sure it is clear and explains what’s included in the plan.
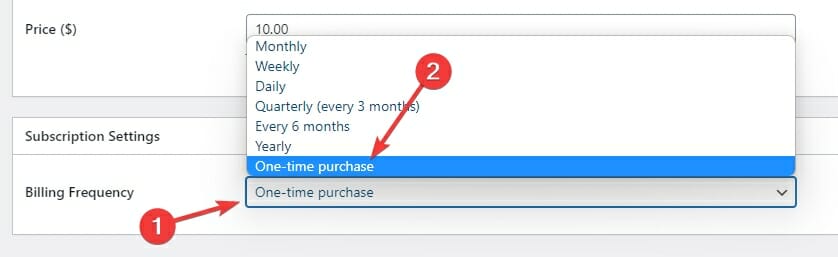
Now, scroll down the Subscription Settings section at the bottom and select one-time purchase as the billing frequency:
Finally, click the Save Plan button to save this new plan.
Create a Recurring Subscription Plan
If you are building a premium membership site, you’ll probably want to create a recurring monthly payment plan. This plan will charge your customers regularly. These plans are great for gated content.
First, navigate to Membership Plans under ProfilePress and click the Add New Plan button:
Now, enter a plan name, plan description, and price for this recurring plan:

Your customers will be charged this price at regular intervals.
Now scroll down to the Subscription Settings section to customize this new plan:
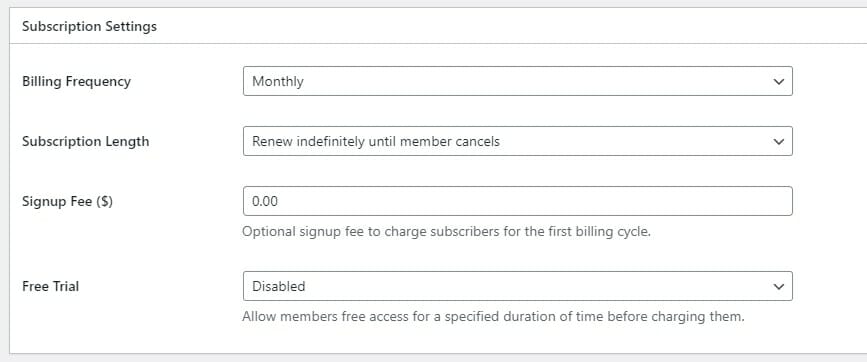
- Billing Frequency: This controls how often your customers are charged. If you select monthly, they’ll be charged every month.
- Subscription Length: This controls how long this subscription should last. Suppose you want to create a payment plan for an expensive product (such as a costly course). Select Fixed Number of Payments. This option is helpful if you want your customers to be able to pay you in instalments.
- Sign-Up Fee: This allows you to charge your customers a one-time fee for creating their subscriptions. This is helpful in case creating a subscription requires some manual work on your part. This could be an “account setup fee.”
- Free Trial: Want to offer your customers a free trial before they are charged? Select one of the available free trial durations.
Finally, click the Save Plan button in the top right of your screen to save this new plan.
IMPORTANT: The Checkout Page
Your new plans will not be visible on your website by default. Instead, you’ll have to link to their respective checkout pages wherever you want to give your users the option to purchase.
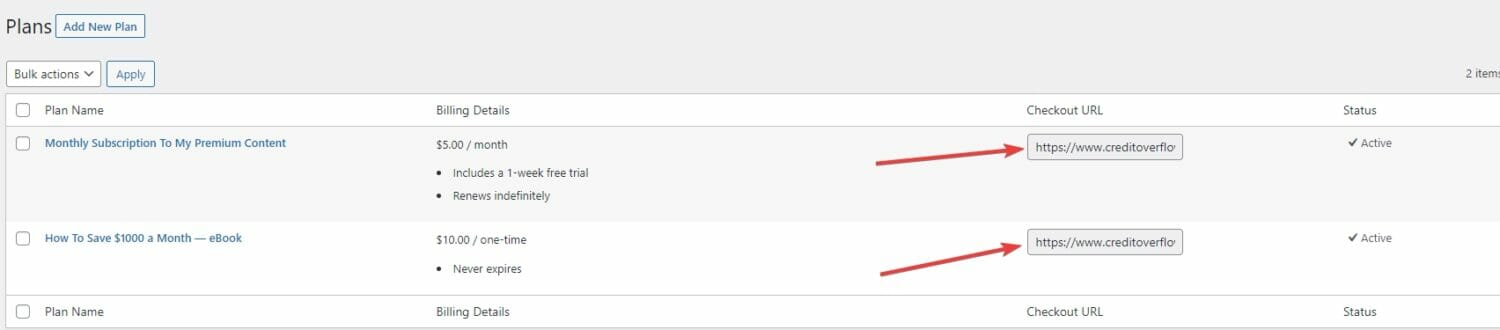
You can find the checkout link for every plan in the Membership Plans section under the ProfilePress settings:
You’ll see the checkout URL for your membership plans on this page:
If you open any of the checkout links, you can see the checkout page your customers will see:
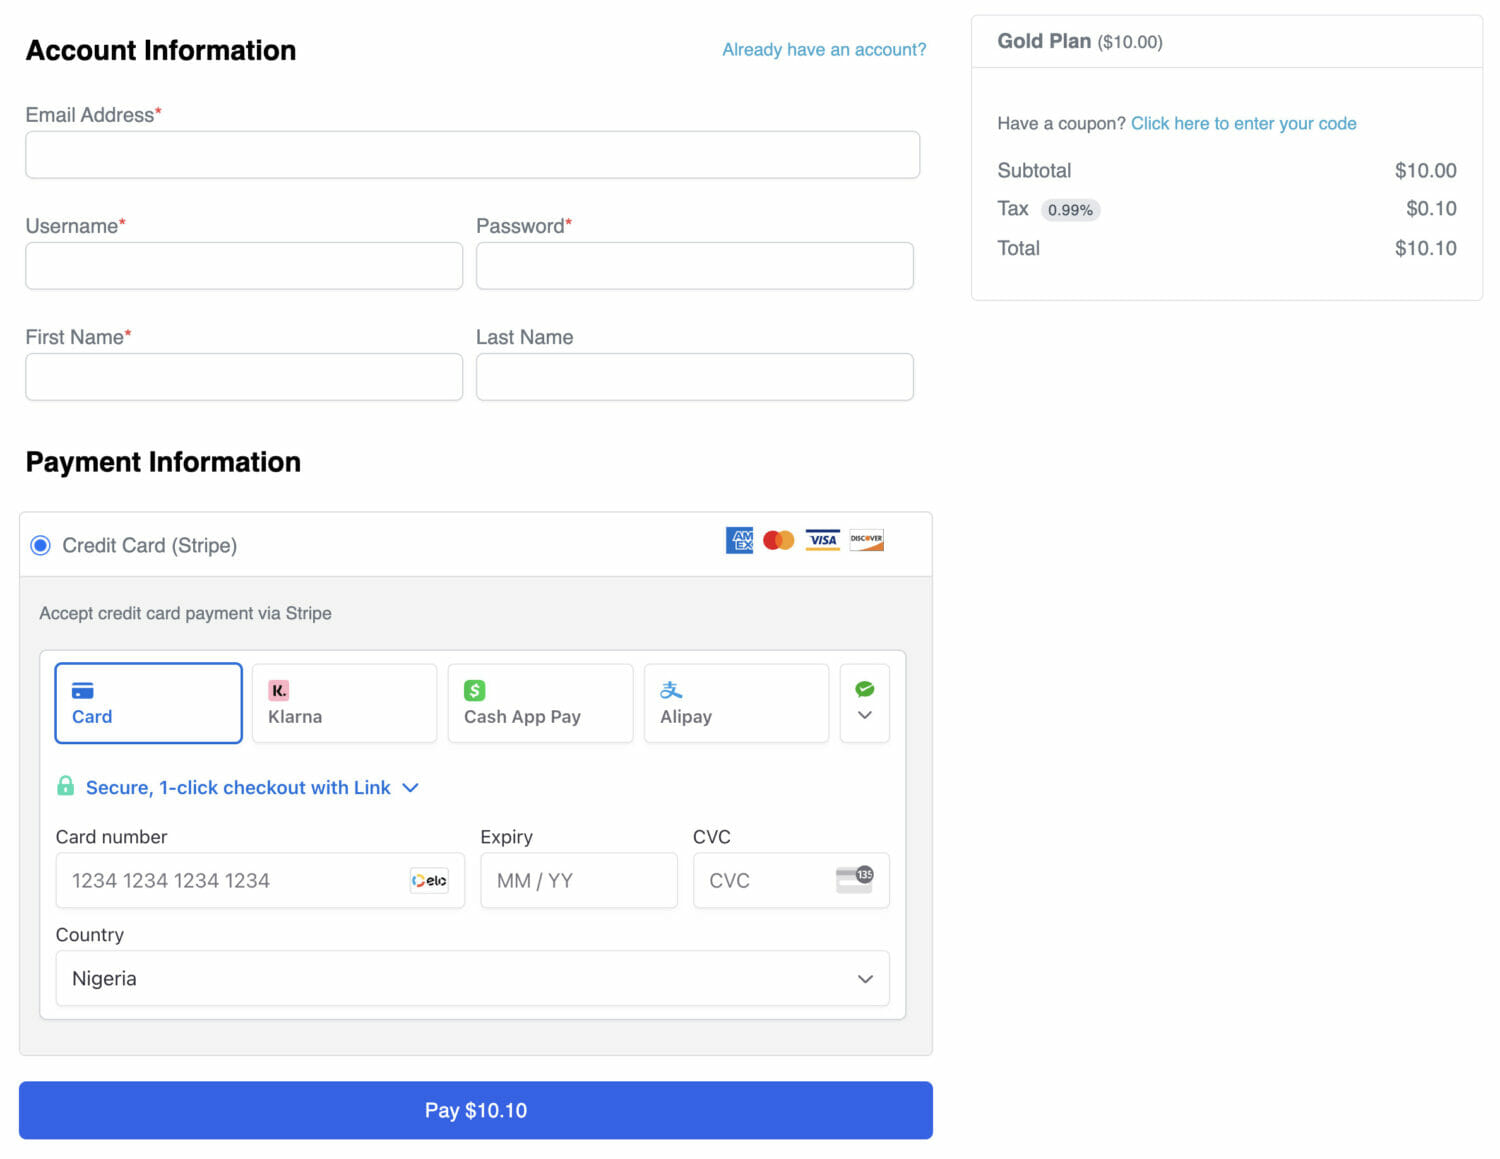
You’ll want to link to this page wherever on your website you want to give your users to buy this plan. You’ll want to link to this page from your product’s/membership details page to give your users the option to checkout.
How To Customize The Transactional Emails
Transactional emails are the ones your customers or users receive after you accept a Stripe payment from them in your WordPress website. They include order confirmation emails and emails with details about your purchase.
You can customize the emails ProfilePress sends to customers from the Emails tab of the ProfilePress Settings page:
You’ll now see the Account Emails sub-tab. This tab will display the three emails ProfilePress sends your customers related to account-based events:
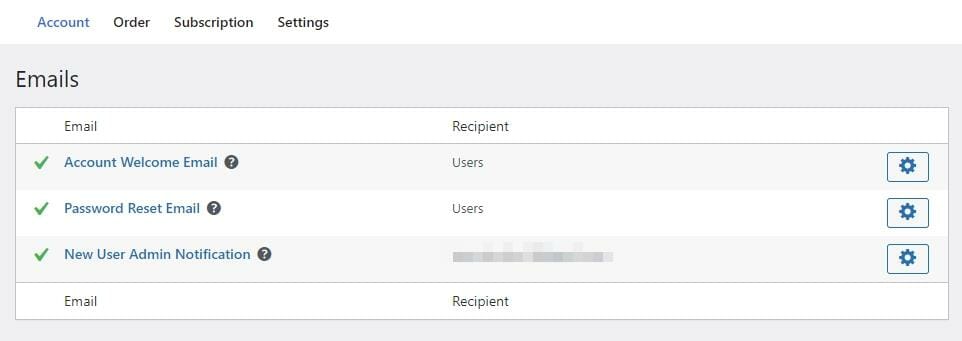
These emails include:
- Account Welcome Email: This is the welcome email sent to everyone who creates an account on your website.
- Password Reset Email: This is the email users receive when they click the Forgot Password/Password Reset link on the login page.
- New User Admin Notification: This is the email you’ll receive whenever someone signs up for your website.
To edit any of these emails, click the gear icon next to them:
![]()
Now, you’ll see the edit page:
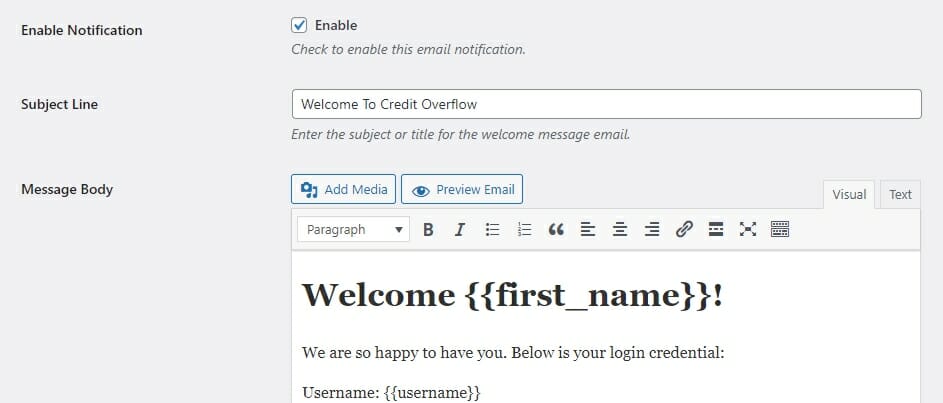
Here you can enable or disable this email using the checkbox.
You can also edit the subject line and the message body.
Finally, if you scroll down, you’ll see a list of available placeholders you can use in your subject line and your message body:

If you want to use the user’s first name in your subject line, you’ll change your subject line to “Welcome to our community, {{first_name}}.” When this email is sent to the user, the placeholder {{first_name}} will be replaced with their first name.
Once you are done customizing the email, scroll to the bottom and click the Save Changes button.
You’ll notice three other sub-tabs on the same Emails tab under ProfilePress Settings. Let’s go over them one by one:
Orders Tab
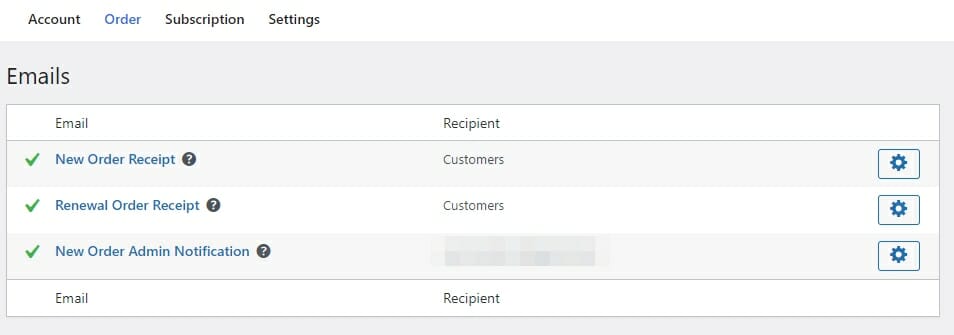
- New Order Receipt: This is the email your customers will receive when they place an order. This email will contain details about the order and an invoice.
- Renewal Order Receipt: The email your customers will receive when their product gets renewed. This email will be sent for recurring membership plans.
- New Order Admin Notification: This is the email notification you’ll receive whenever a new order has been placed on your website.
Subscription Tab
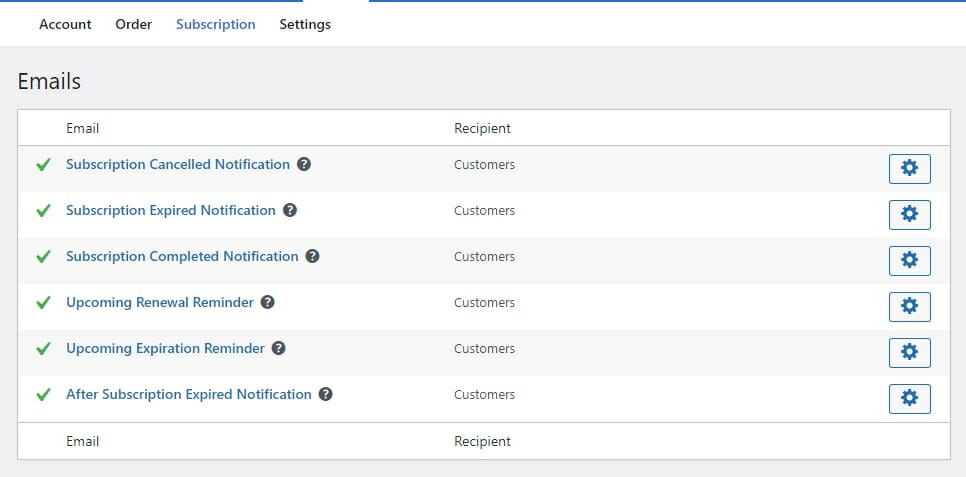
- Subscription Cancelled Notification: This is the email your customers will receive when they cancel their subscription. This is just a confirmation email.
- Subscription Expired Notification: Notifies the customer that their subscription has expired.
- Subscription Completed Notification: This email is sent in case you’ve selected a fixed number of payments for your subscription. By default, your customers get charged indefinitely until they cancel. Your customers will receive this email when they have made all the payments.
- Upcoming Renewal Reminder: Reminds your customers that they’ll be charged soon.
- Upcoming Expiration Reminder: Reminds your customers in case their subscription is about to expire.
- After Subscription Expired Notification: Notifies the customer that their subscription has expired.
Settings Tab
This tab lets you customize the settings for the emails that are sent:
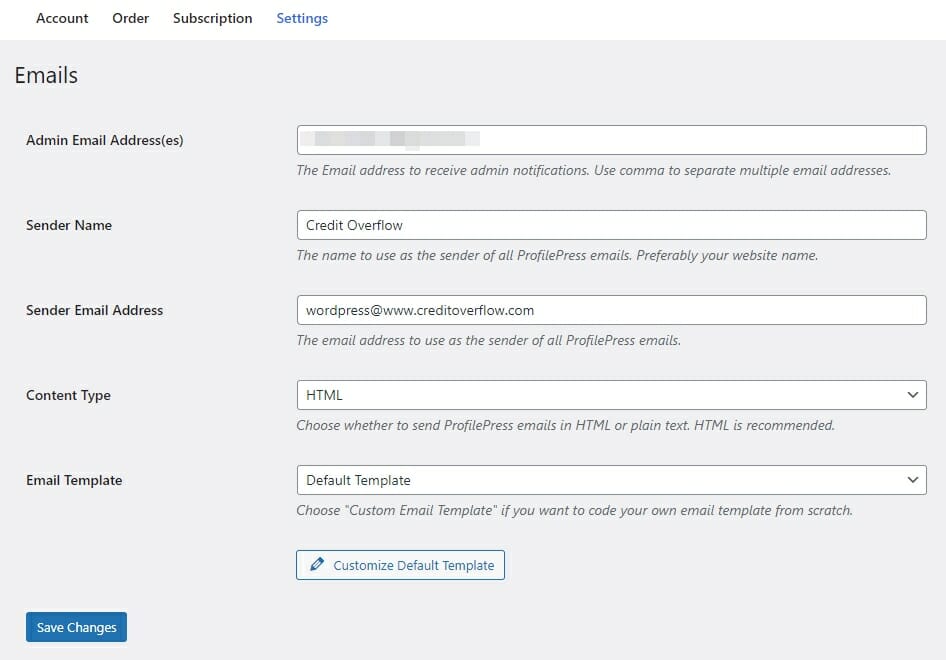
- Admin Email: This email address will receive all admin notification emails.
- Sender Name: The sender name used in all the emails sent to customers and the admin.
- Sender Email Address: The email address used to send the emails.
- Content Type: The type of email you want to send. HTML or Plain Text.
- Email Template: This option allows you to code your own template if you choose custom.
- Customize Default Template: You can use the simple customizer tool to customize the default HTML template that is used for the emails.
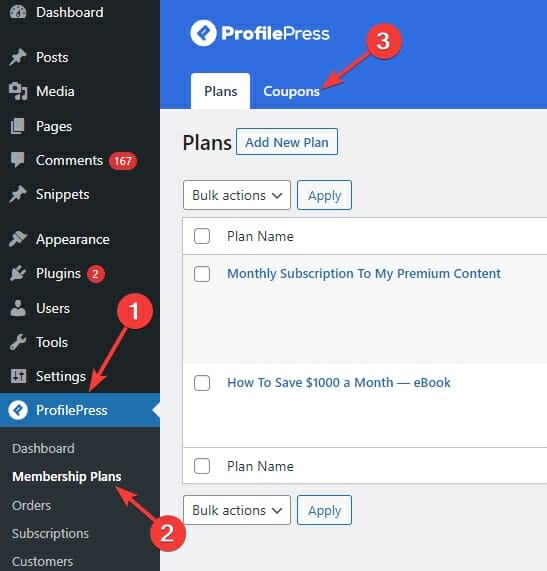
How To Create Coupons For Your Plans
ProfilePress gives you a straightforward way to create coupons for your plans so your customers can pay a discounted price when making payment via Stripe in WordPress.
Navigate to the Coupons tab under the Membership Plans section of ProfilePress settings:
Click the Add New Coupon button to see the Add a Coupon page:
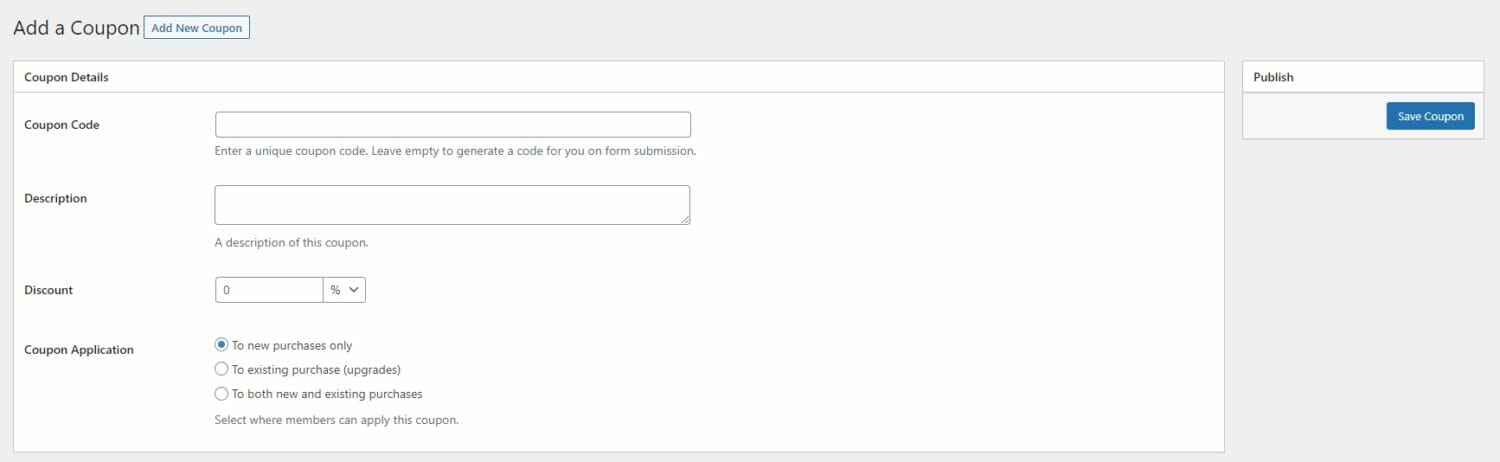
First, enter a coupon name. This is the code your users will enter on the checkout page to avail of the discount.
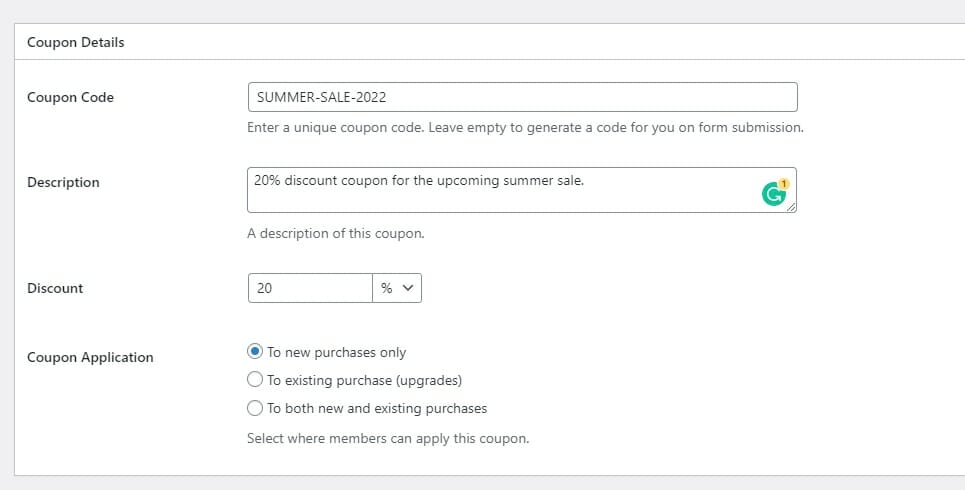
Next, enter a description for the coupon. Then, enter a percentage or a dollar amount to be deducted.
Then, select the applicability of this coupon.
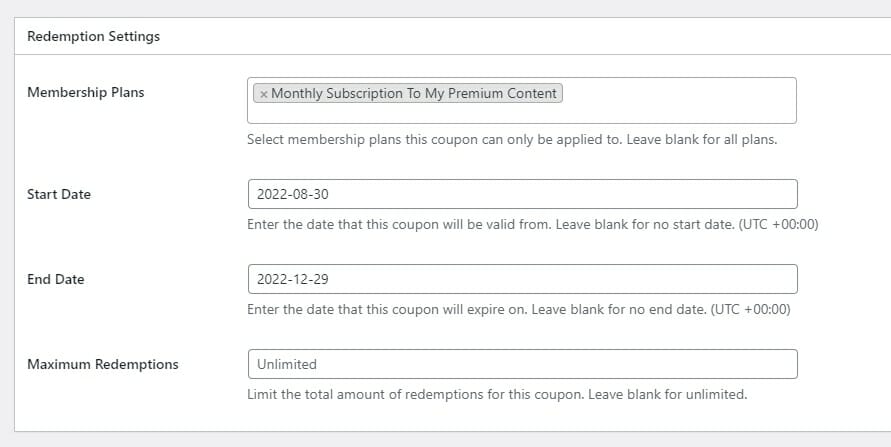
Now, scroll down to the Redemption Settings section:
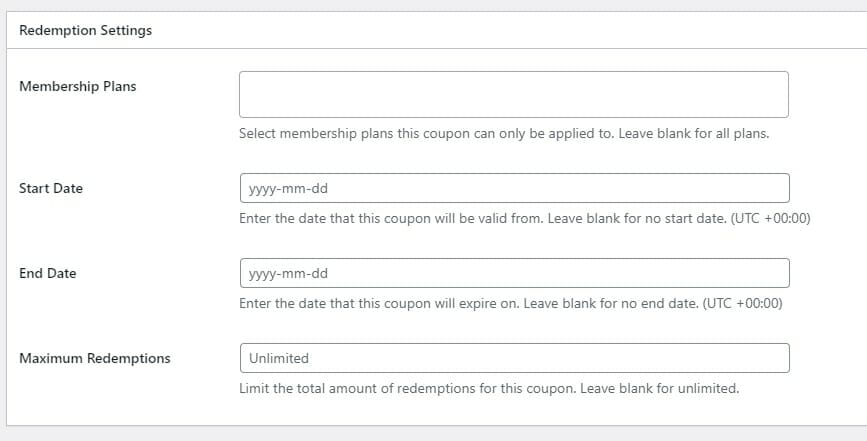
First, select all the plans you want this coupon to be redeemable for by entering their name and selecting them. Then, select a start and an end date for this coupon. Leave them blank to have a coupon that lasts indefinitely. Finally, select a maximum number of redemptions. You can leave this blank if you want to allow unlimited redemptions:
How To Manage Orders
To manage orders of any one-time payment via Stripe in WordPress, go to the Orders page in ProfilePress admin.
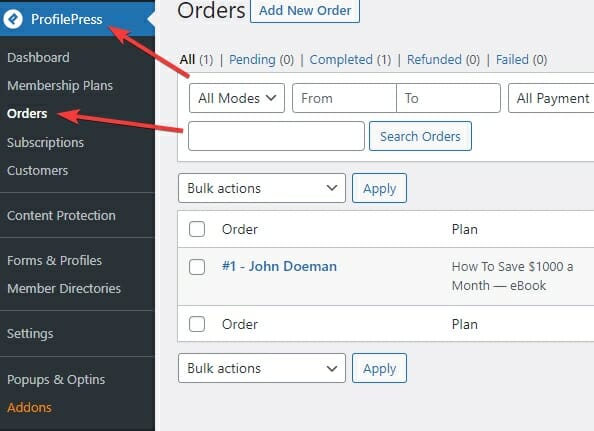
On this page, you’ll see all the orders that have been placed on your website:
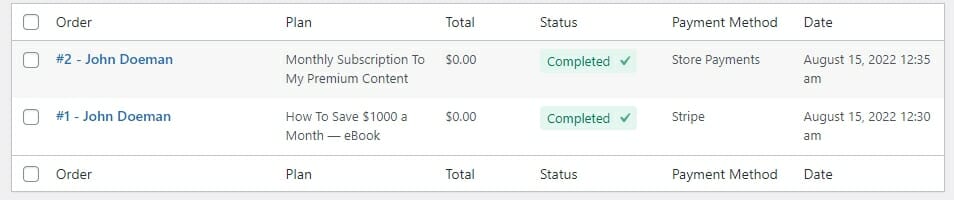
You can see how much they were charged and what plan they bought. You can also see the status, date, and payment method used.
Take your mouse over an order item to see the actions you can take:
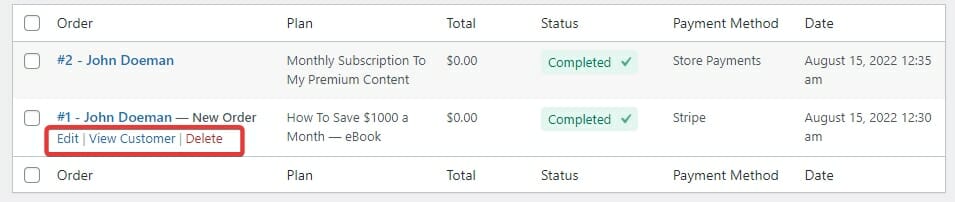
Click the Edit link to edit the order. Click the View Customer link to view all the details about the customer.
How To Manage Subscriptions
To manage active subscriptions, navigate to the Subscriptions section of ProfilePress, which is right under the Orders link in the navigation.
On this page, you’ll see all the active subscriptions:
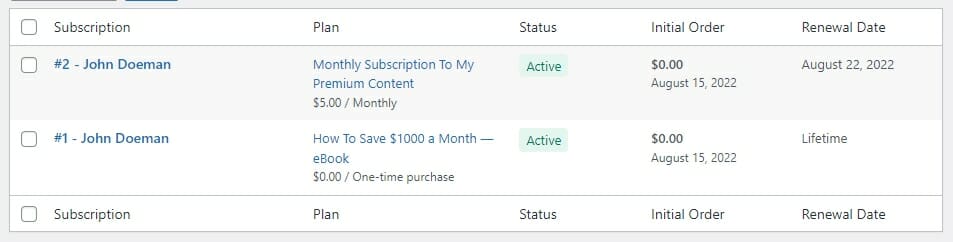
You can see the quick details about each active subscription on this page. You can edit any individual subscription you want by taking your mouse over it and clicking the Edit link.
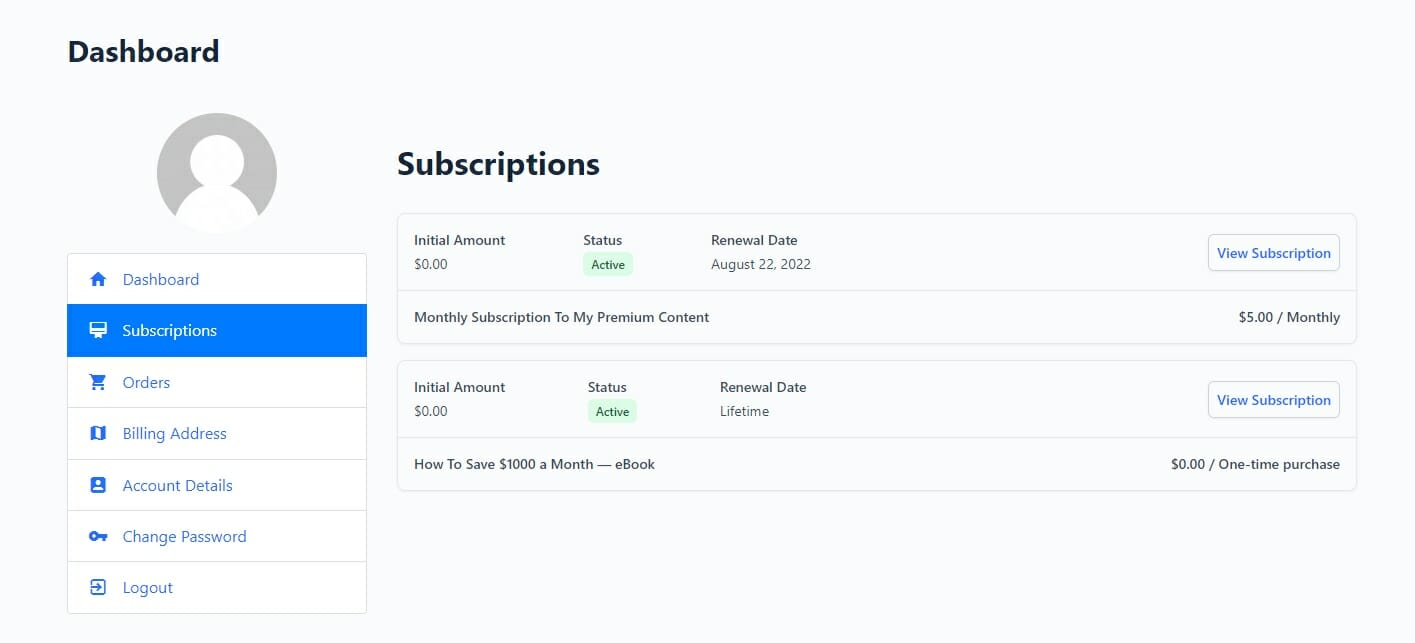
Order Management Page For Your Customers
Your customers will be able to manage their orders from the Orders section of your website’s My Account page:
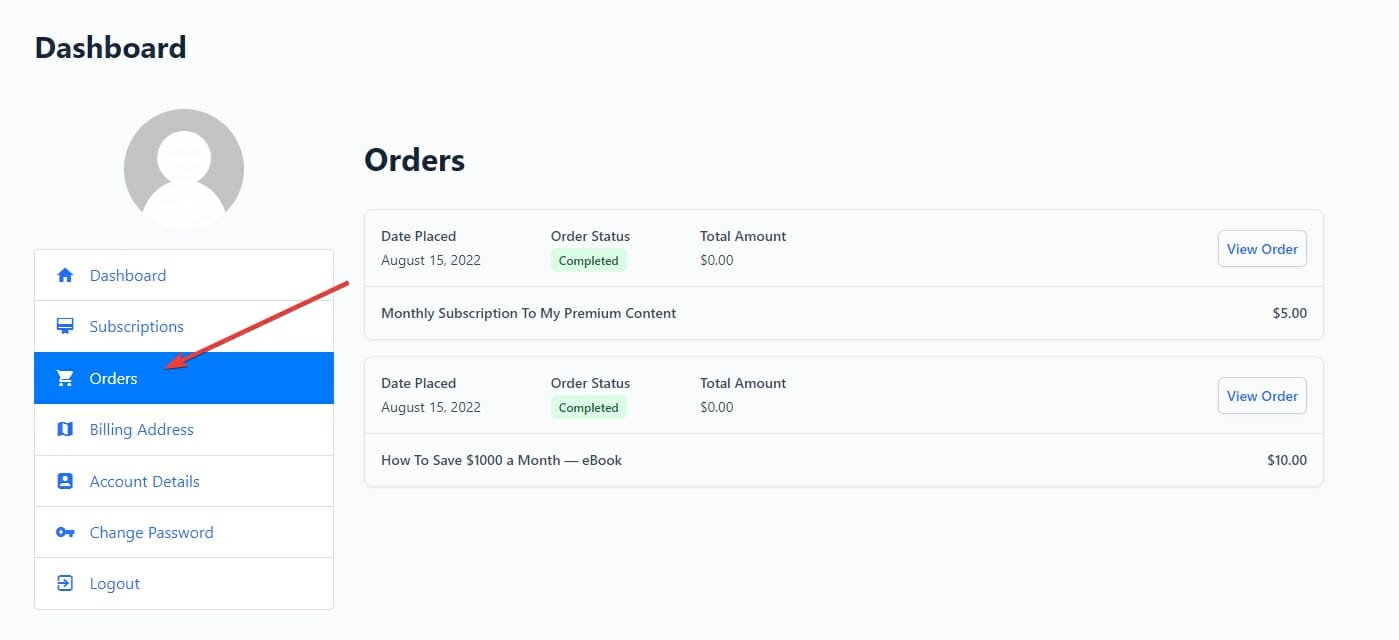
Your customers can see all their orders on this page and get details about specific orders by clicking the View Order button next to the order.
They’ll also be able to check their Subscriptions from the Subscriptions section:
If you haven’t set this page up yet, read our tutorial.
Start Accepting Stripe Payments in WordPress Today
Accepting Stripe payments on your WordPress website doesn’t have to be complicated or require technical expertise. With the ProfilePress plugin, you can easily set up payment plans and start accepting payments via Stripe.
By following the steps outlined in this article, you can quickly connect to Stripe, create payment plans, and customize the transactional emails that your customers or users receive. So, why wait? Start accepting Stripe payments on your website today and take your business to the next level.