Setting Up Brevo with WordPress Integration
Do you want to connect your WordPress website to your Brevo (formerly Sendinblue) account so that new users, members, and customers are automatically added to your email marketing lists?
The Brevo addon in ProfilePress lets you add your WordPress users to a Brevo list in your account when they register or sign up for your website, purchase a product, or a membership plan through the checkout page.
Beyond just adding contacts, the integration keeps your Brevo contact lists in sync and even lets users manage their email preferences on their My Account page, that is, the users of your WordPress website can unsubscribe and subscribe to your various marketing lists or segments without any admin involvement
Setting up Brevo & WordPress Integration
To get started integrating WordPress with Brevo, you need to activate the Brevo addon in ProfilePress from ProfilePress>>Addons.
Next, go to ProfilePress >> Settings >> Integrations >> Brevo.
Adding your Brevo API Key
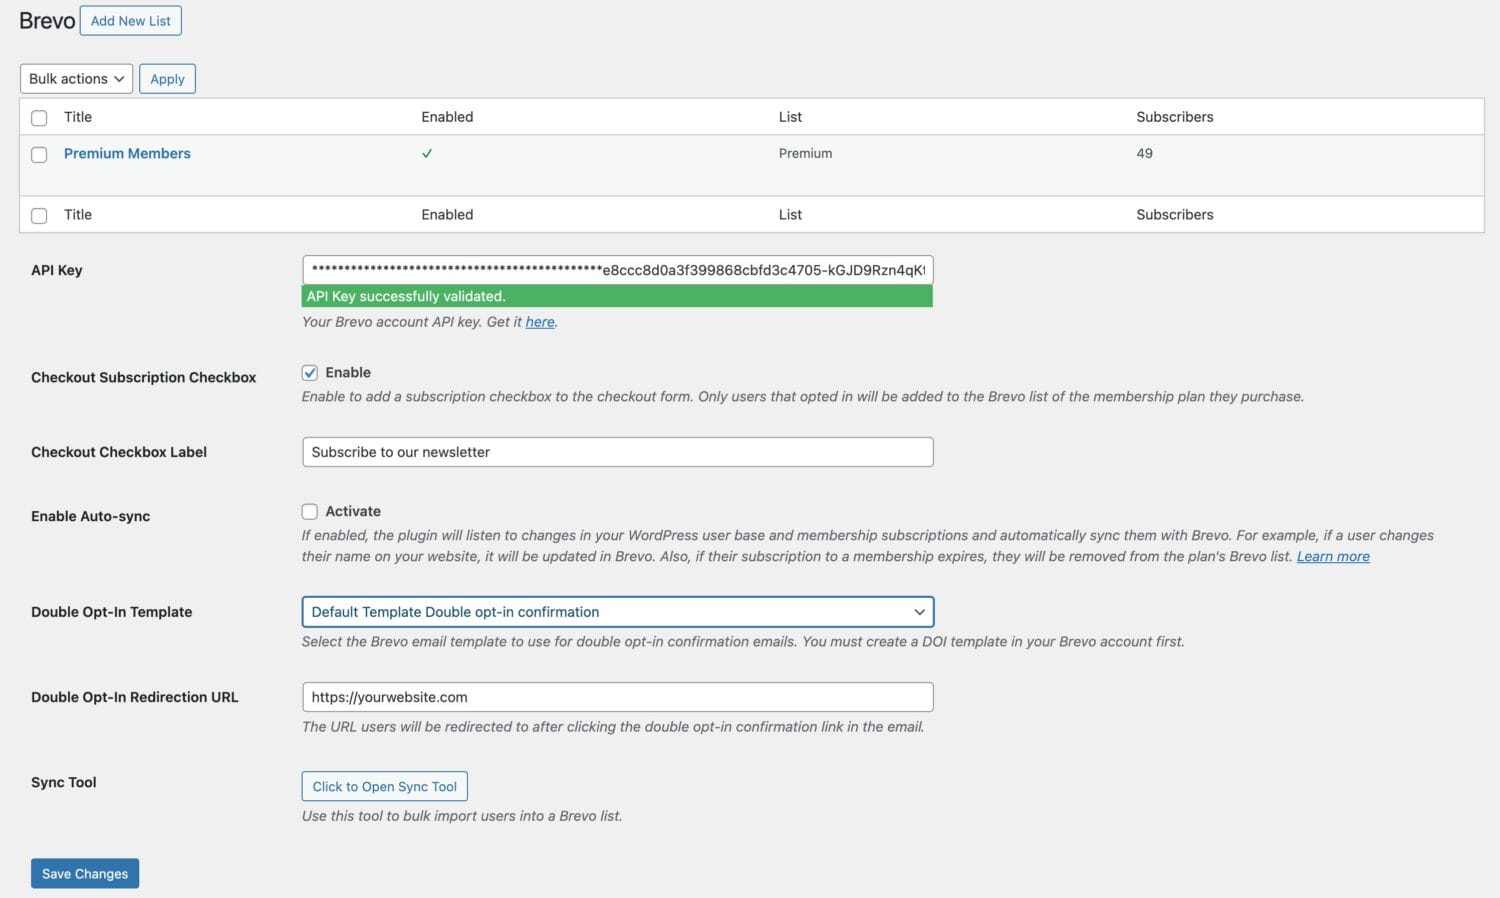
If you already have your Brevo account API key, you can either paste it into the field or click “Get it Here” below to go to the Brevo API settings page (you will need to log in to your Brevo account).
Double Opt-in Settings
To ensure compliance and improve lead quality, ProfilePress allows you to enable a Double Opt-in (DOI) process for your Brevo integration. This requires users to confirm their email address before being added to your lists.
Note: Before configuring these settings in WordPress, you must first create a DOI template within your Brevo account dashboard.
In the dropdown menu, select the specific Brevo email template you wish to use for the confirmation email. This is the message that contains the confirmation link users must click to verify their subscription.
In this field, enter the full URL (e.g., https://yourwebsite.com/thank-you/) where users should be sent after they click the confirmation link in the email. This is typically a dedicated “Success” or “Welcome” page on your WordPress site.
Brevo Newsletter Subscription Checkbox
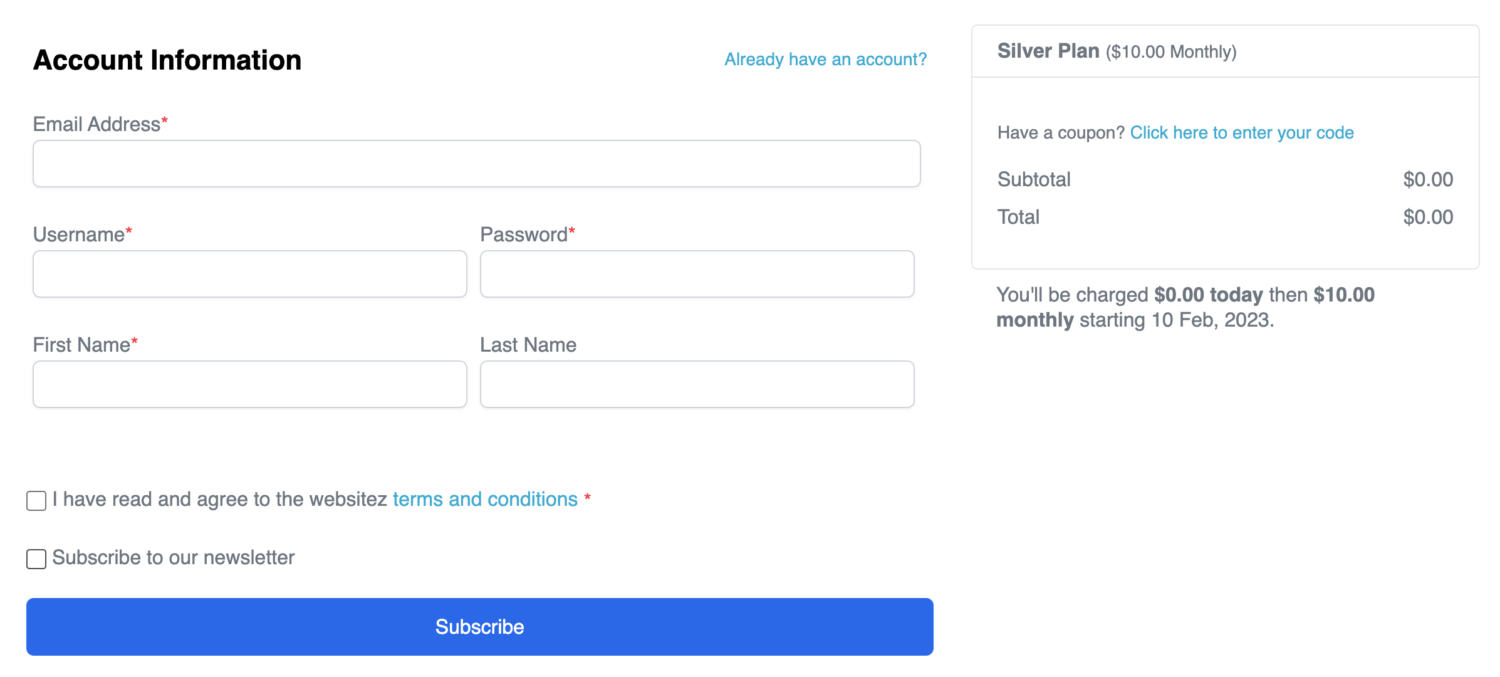
If you want WordPress users to opt in or tick a subscribe checkbox before they are added to the Brevo list of the membership plan they purchase during checkout, enable the “Checkout Subscription Checkbox” setting.
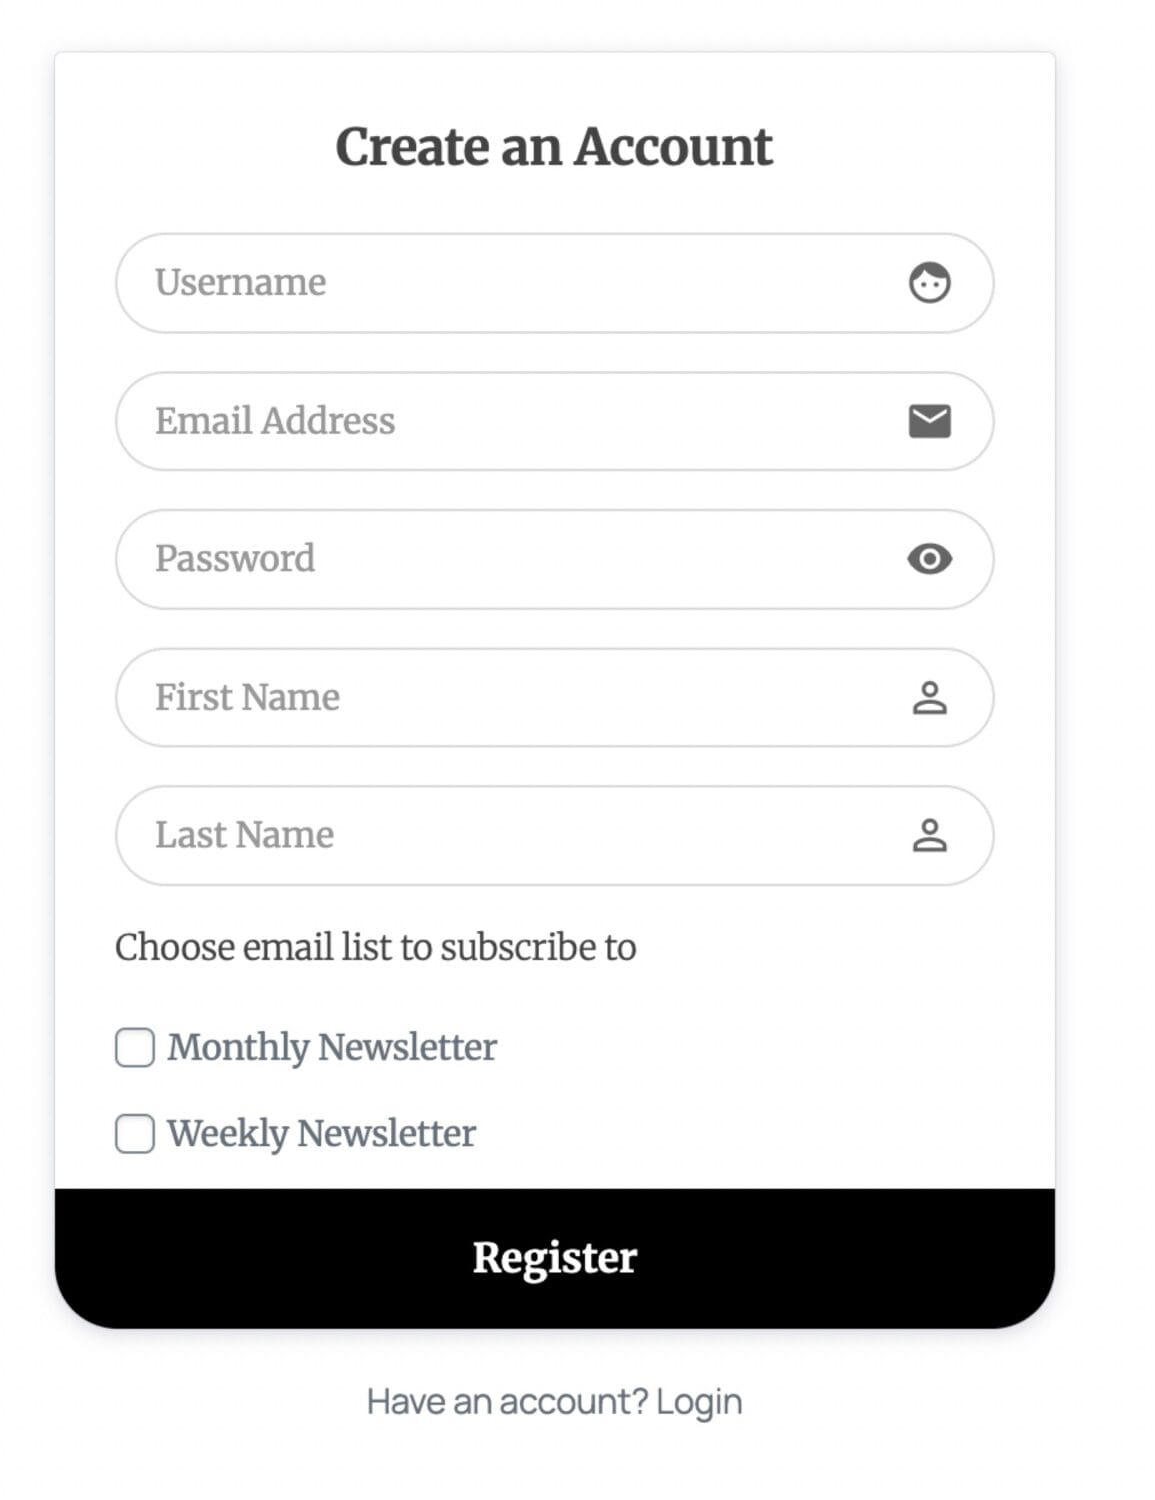
If you want users to select the Brevo email list to subscribe to during registration through a ProfilePress-powered registration form, add the Brevo block or shortcode to the WordPress registration form and select the List to add users to.
Enable Auto Sync
Enabling the Auto-sync feature lets ProfilePress track updates to your WordPress users and membership subscriptions and automatically sync these changes with your Brevo account. For example, if users or members update their profile details or email addresses, their information in Brevo will be updated automatically.
If you have configured each membership plan on your site to sync with a specific Brevo list, members who subscribe to a plan will be automatically added to the corresponding Brevo email list. If their subscription expires, they will be removed from that list.
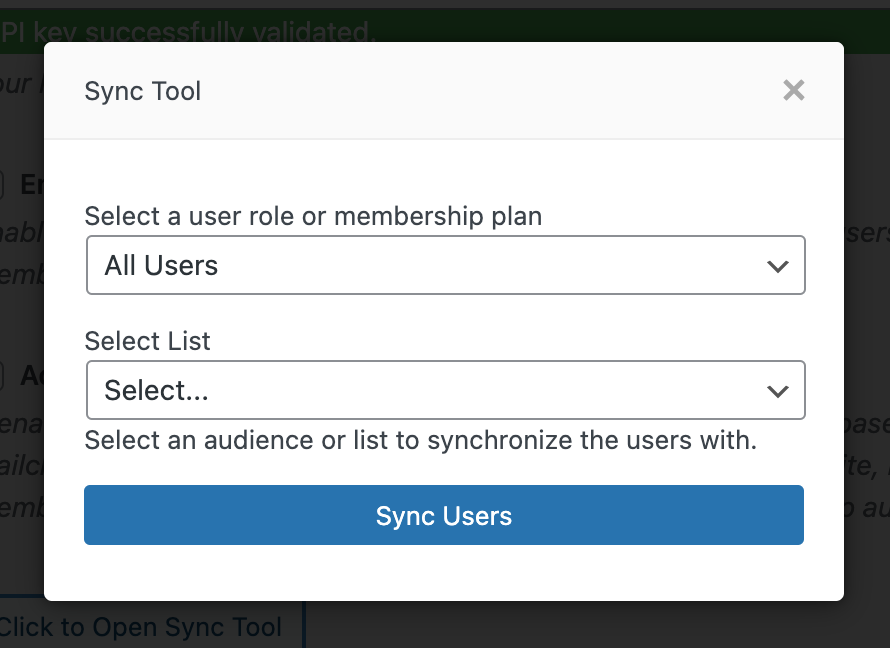
Sync Tool
This tool allows you to bulk import users into your Brevo account. Learn more about the sync tool.
Click on “Save Settings” to save and activate your API Key.
Note: This will add an “API key successfully validated” message to the API field
Setting Up Brevo Lists
ProfilePress allows you to use multiple contact lists from your Brevo account. To start, go to ProfilePress >> Settings >> Integrations >> Brevo and click “Add New List” at the top of the Brevo setup page.
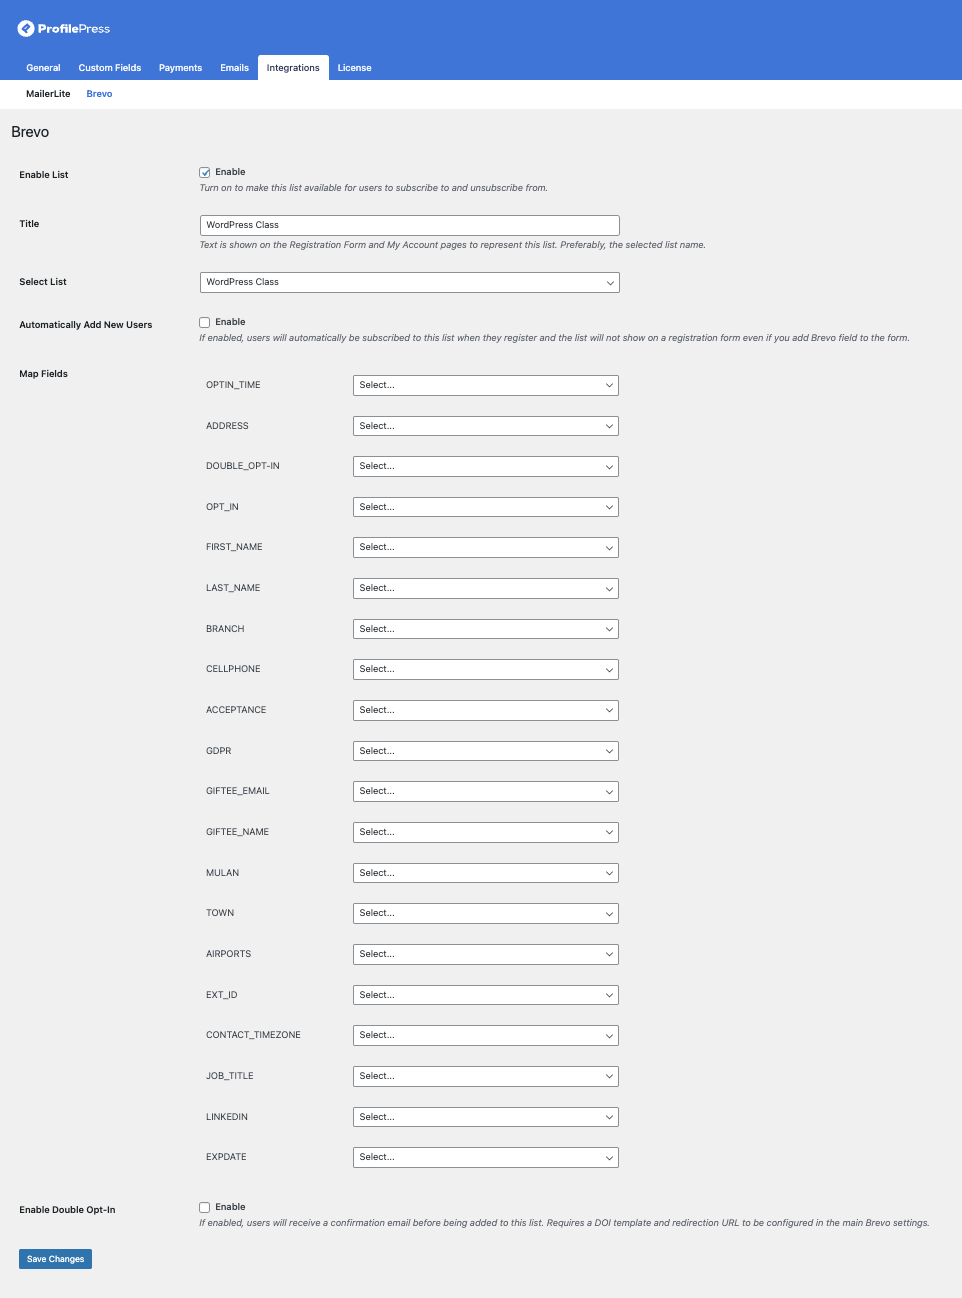
Enable List: Activating this makes the list available for selection when integrating Brevo into a custom WordPress registration form and My Account page.
Title: This is the title text shown on the Registration Form and My Account pages to represent the list.
Select List: This option lets you choose the specific Brevo list to which you want users added.
Automatically Add New Users: If enabled, users will be automatically subscribed to the selected Brevo list after registering in WordPress. The list will not show on a registration form even if you add the Brevo field.
Mapping Custom Fields: If you have custom fields created in ProfilePress, this section allows you to map them to their respective subscriber fields in your Brevo account. You can also map subscribed membership plans, subscription status, membership expiration date, order ID, order date, and more.
Enable Double Opt-In: If enabled, the user will not be added to the list until they click the confirmation link in the email they receive.
Requirements: For this to work, ensure you have already configured your DOI Template and Redirection URL in the main Brevo integration settings (under ProfilePress > Settings > Integrations > Brevo).
After filling out the form, click the submit button to add the Brevo list to ProfilePress in WordPress. Note that you can add as many Brevo lists as you will need in ProfilePress.
Conclusion
Our Brevo addon provides a complete, automated bridge between your WordPress site and your Brevo email marketing account.
From the moment a user registers or purchases a membership plan, through every profile update and subscription status change, your Brevo contact lists stay accurate and up to date.