Setting Up Stripe Payment Method
Stripe processes billions of dollars in payments annually for businesses of all sizes, from startups to enterprises. Setting up Stripe is a reliable way to accept payments on your WordPress site.
Whether you run a membership site, sell digital downloads, or manage subscriptions, Stripe’s seamless and secure system ensures customers enjoy a hassle-free checkout experience.
In this guide, we’ll walk you through the steps to set up Stripe payment with ProfilePress, enabling you to accept credit card payments directly on your WordPress site.
Our Stripe integration supports payments via debit and credit cards, Link, ACH Direct Debit, Apple Pay, Google Pay, Alipay, Bancontact, Bank transfers, BLIK, EPS, FPX, Giropay, iDEAL, Sofort, P24, Affirm, Afterpay, Clearpay, Klarna, Cash App Pay, GrabPay, WeChat Pay, SEPA debit, and Bacs Direct Debit.
Setting up Stripe Payment Method
Configuring WordPress to accept payments via Stripe is simple and only takes a few moments.
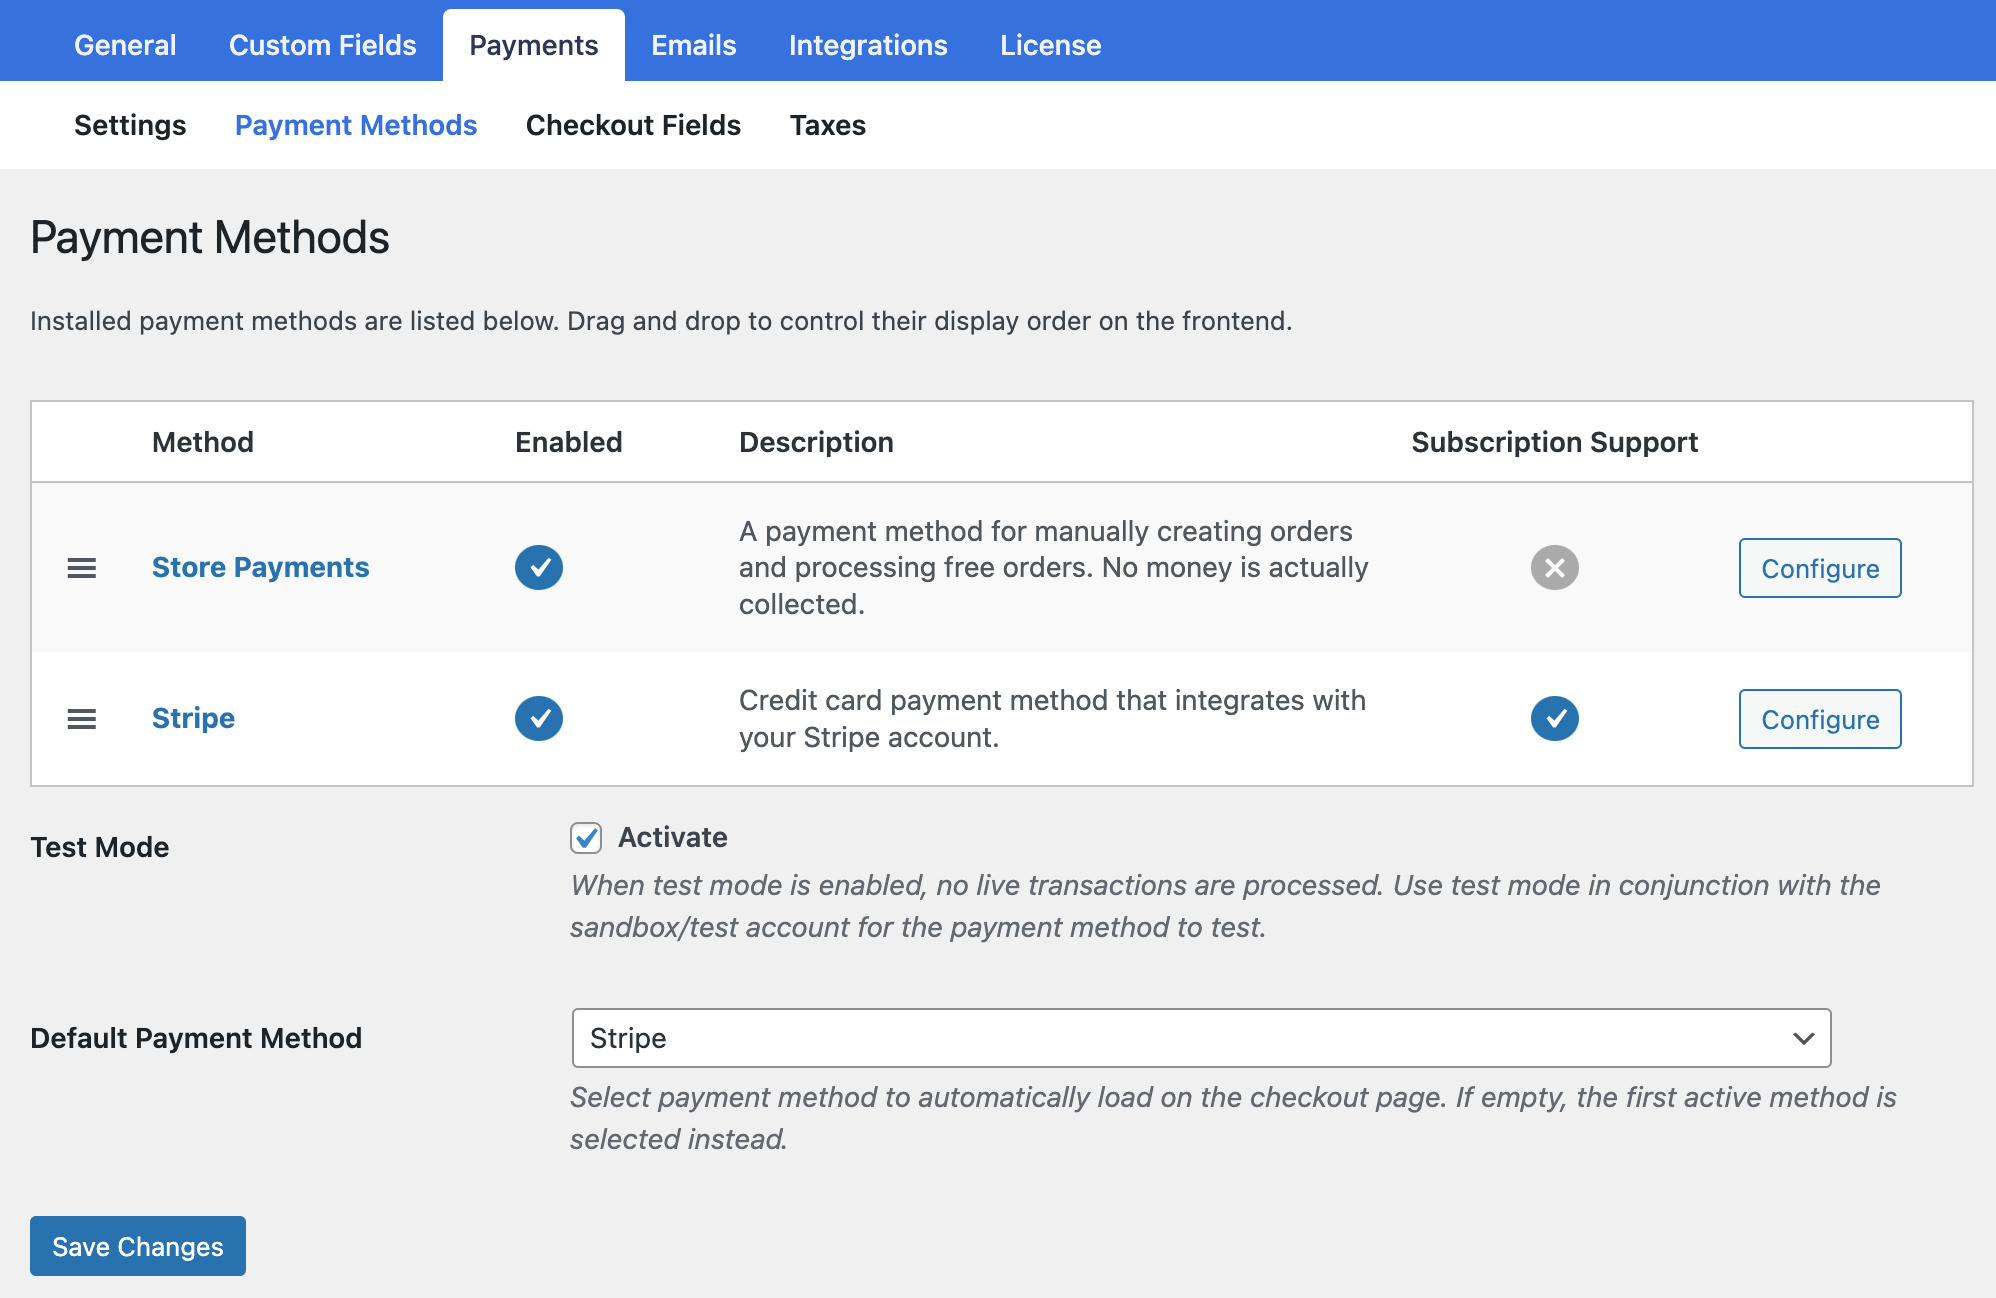
First, go to ProfilePress > Settings > Payments >> Payment Methods and click the Configure Stripe button.
If you want to test the setup before going live, ensure you activate “test mode” before going through the Stripe setup.
Next, click the “Connect with Stripe” button to connect ProfilePress to your Stripe account in WordPress.
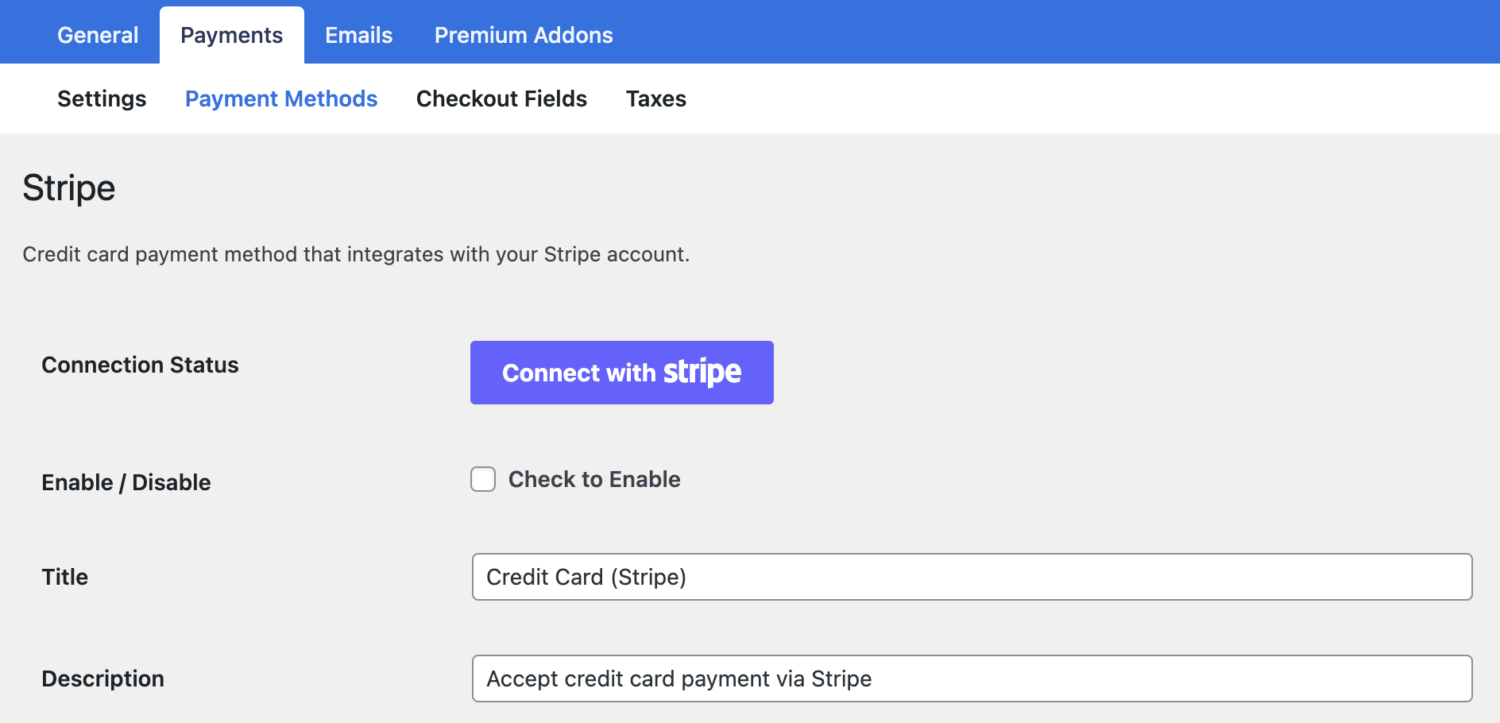
You’ll be taken to Stripe.com, where you’ll be prompted to create a new Stripe account or log in to your existing one.
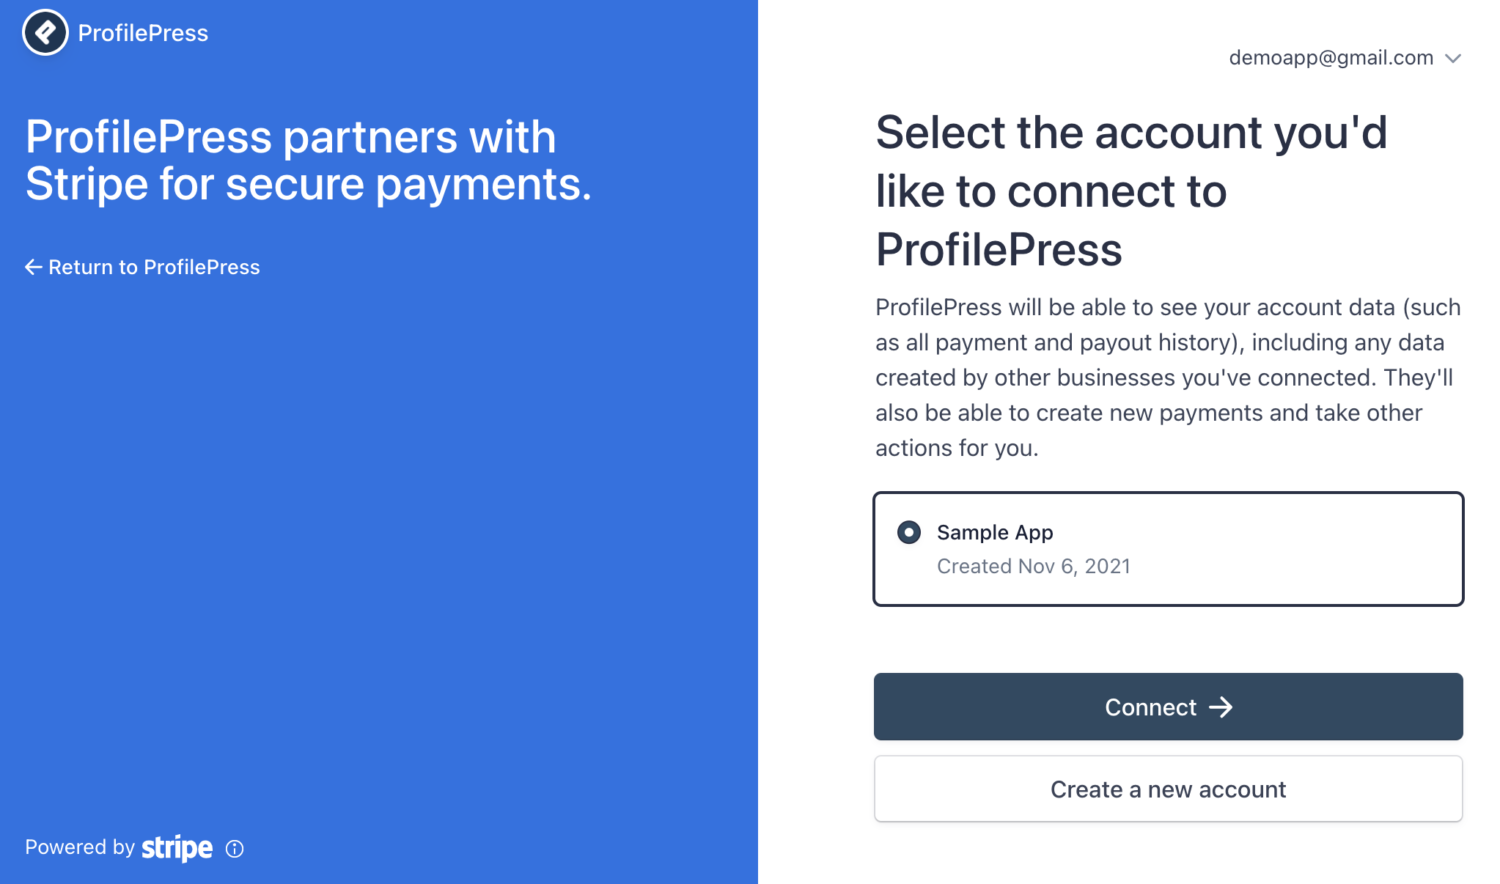 Once you complete the form, you’ll be taken back to your WordPress website.
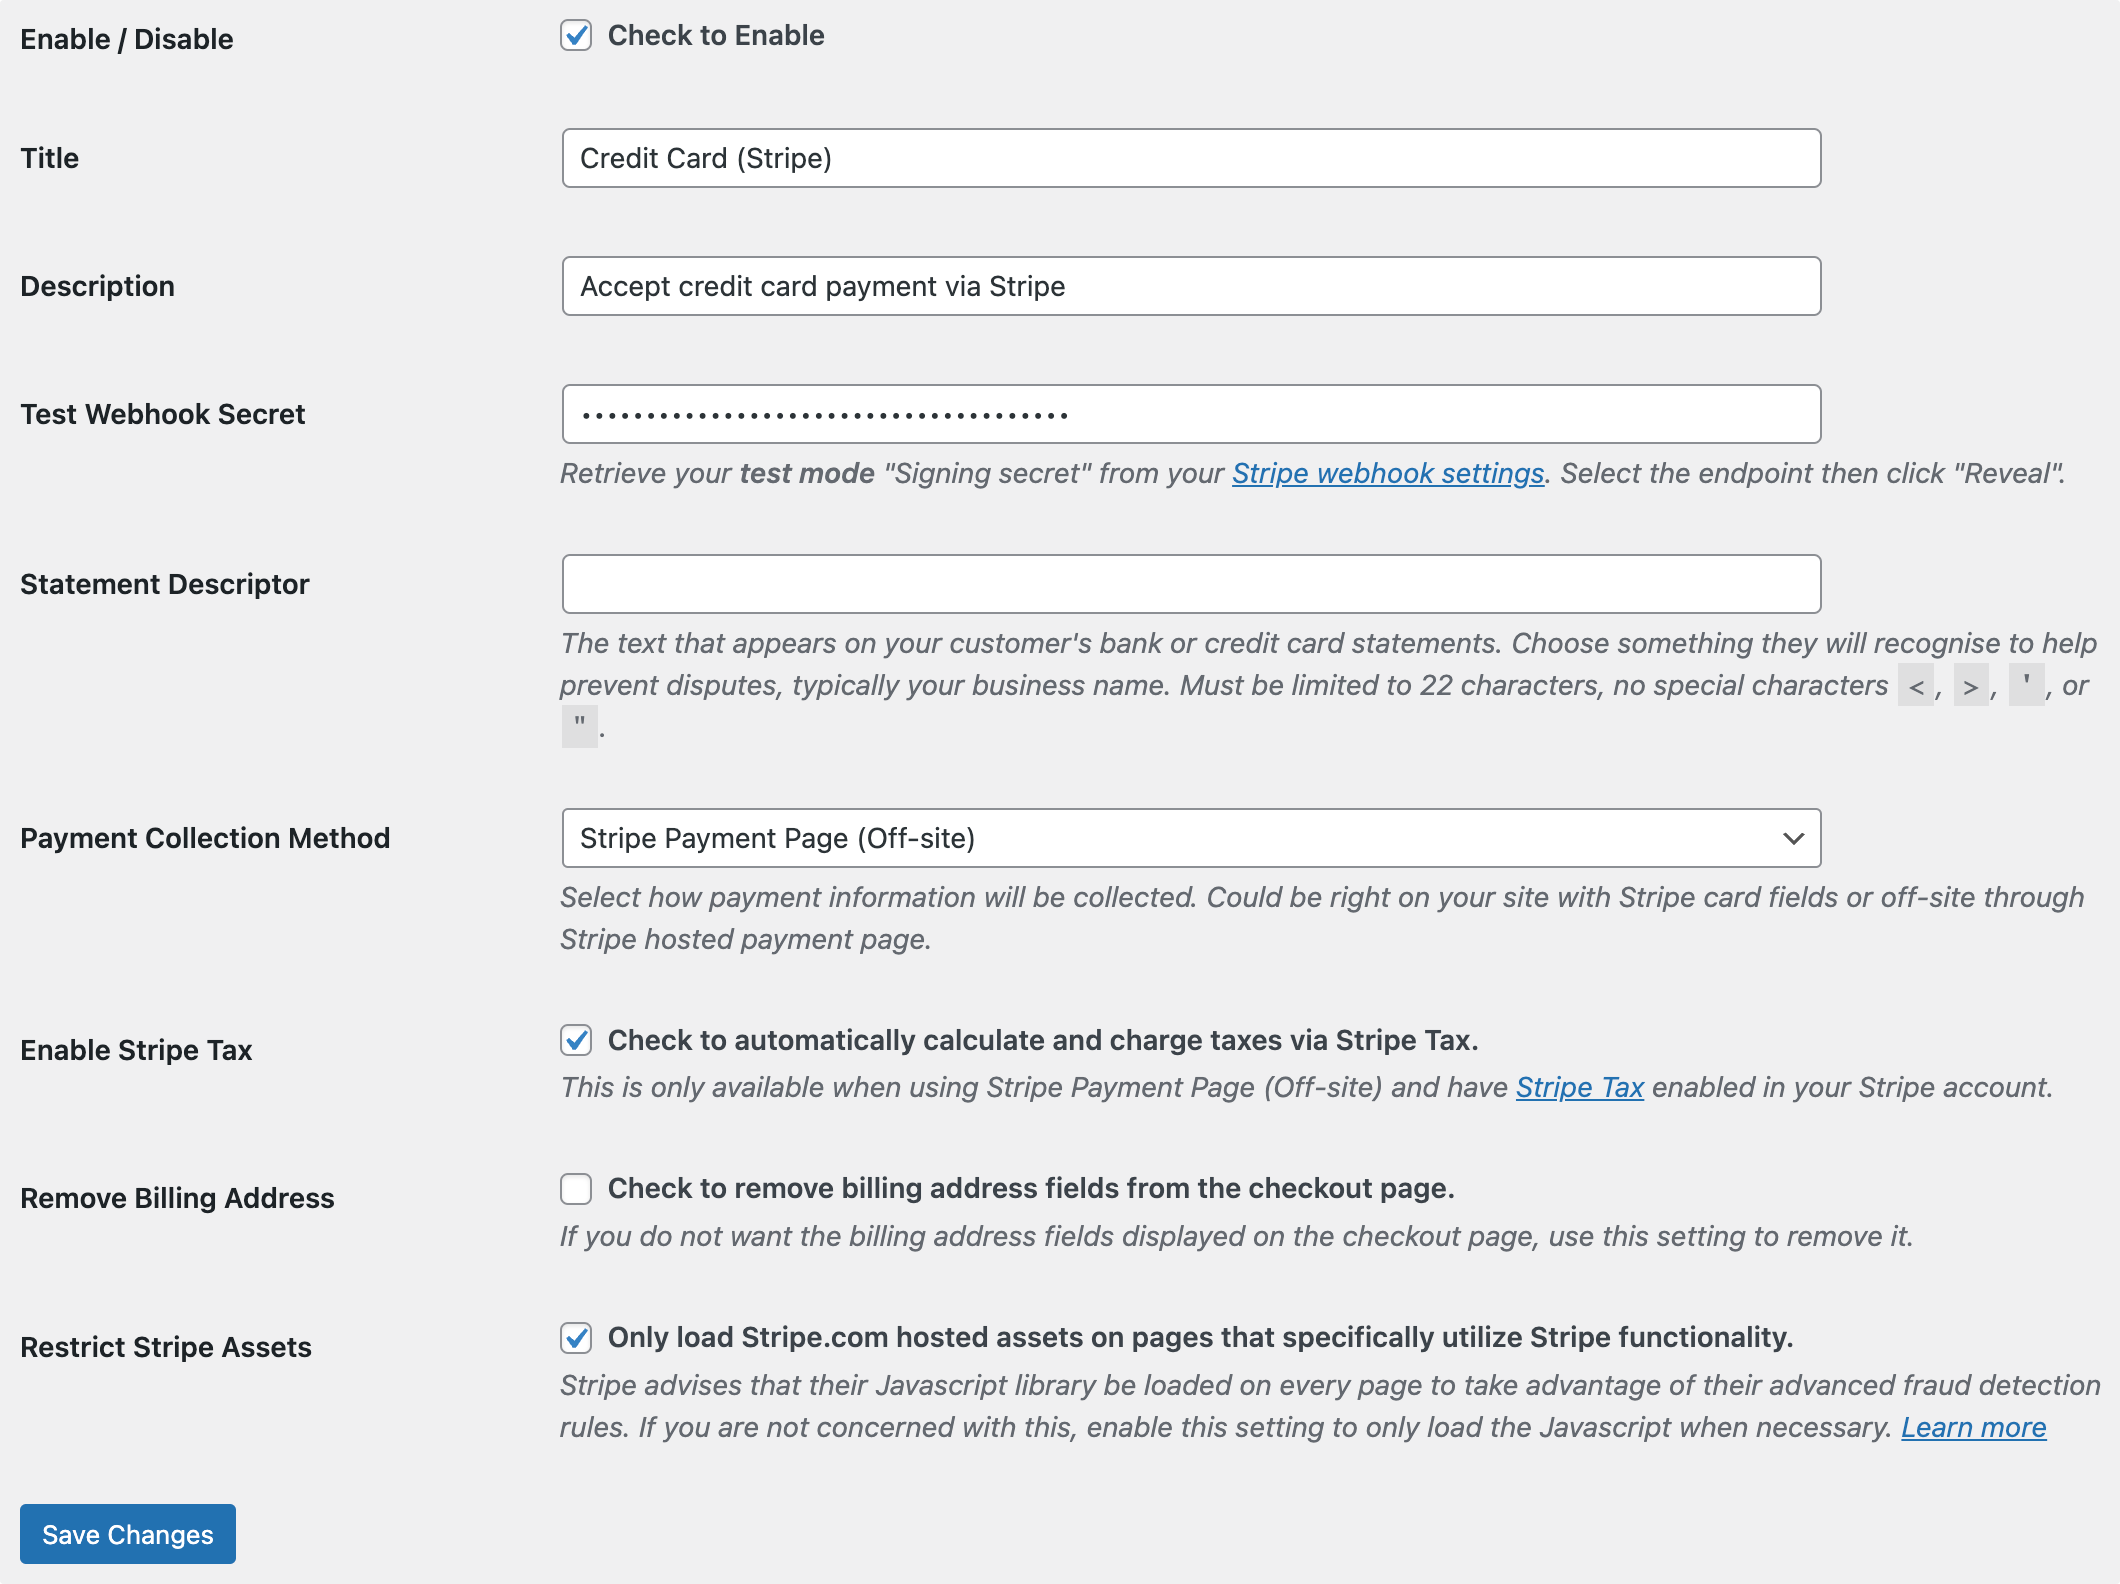
Enable the Stripe integration by checking “Enable / Disable. ” Remember to set a title and description.
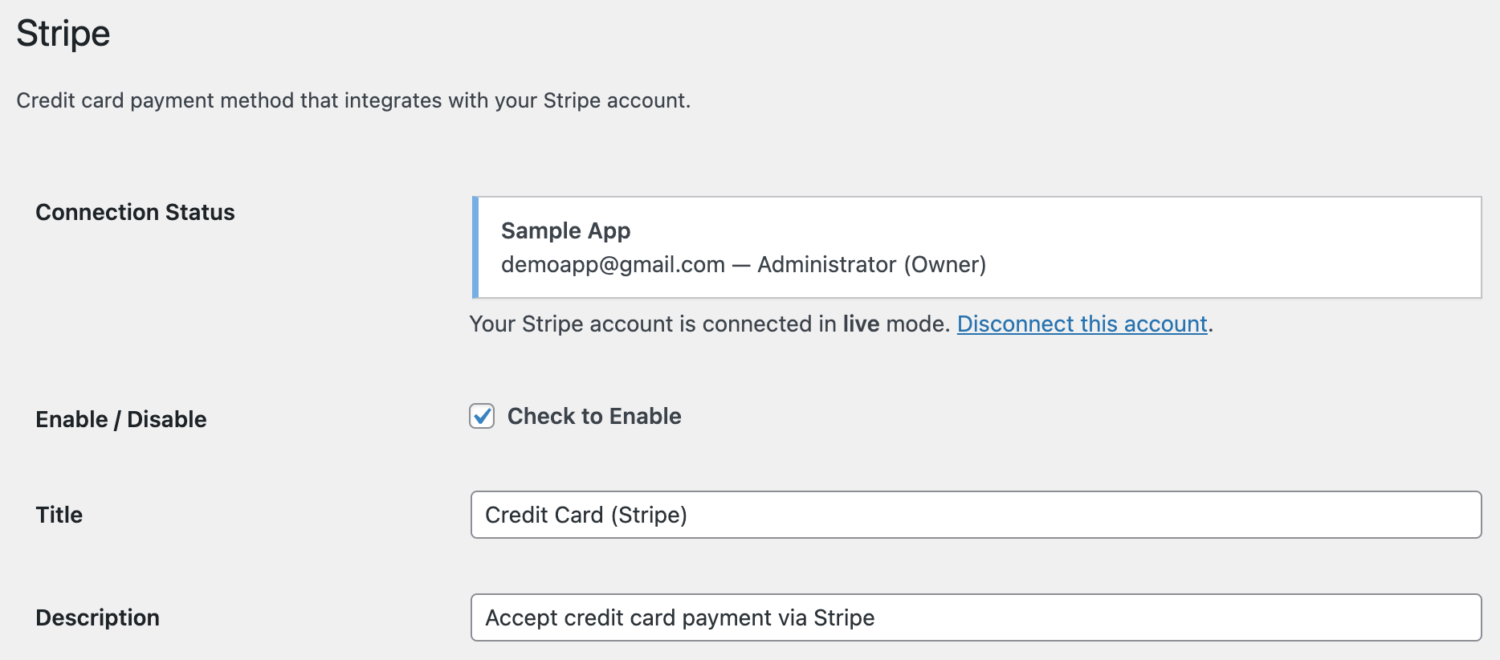
If you need to disconnect from Stripe for any reason, such as to connect to a different Stripe account, click “Disconnect this account“. Once you have done that, you should see the Connect with Stripe button again and be able to connect to another Stripe Account.
Webhooks
ProfilePress communicates with Stripe using Stripe Webhooks. It attempts to create the webhook endpoints automatically, so the manual configuration explained below is unnecessary in most cases.
To add the appropriate webhook endpoints in your Stripe Dashboard, go to Developers > Webhooks (direct link).
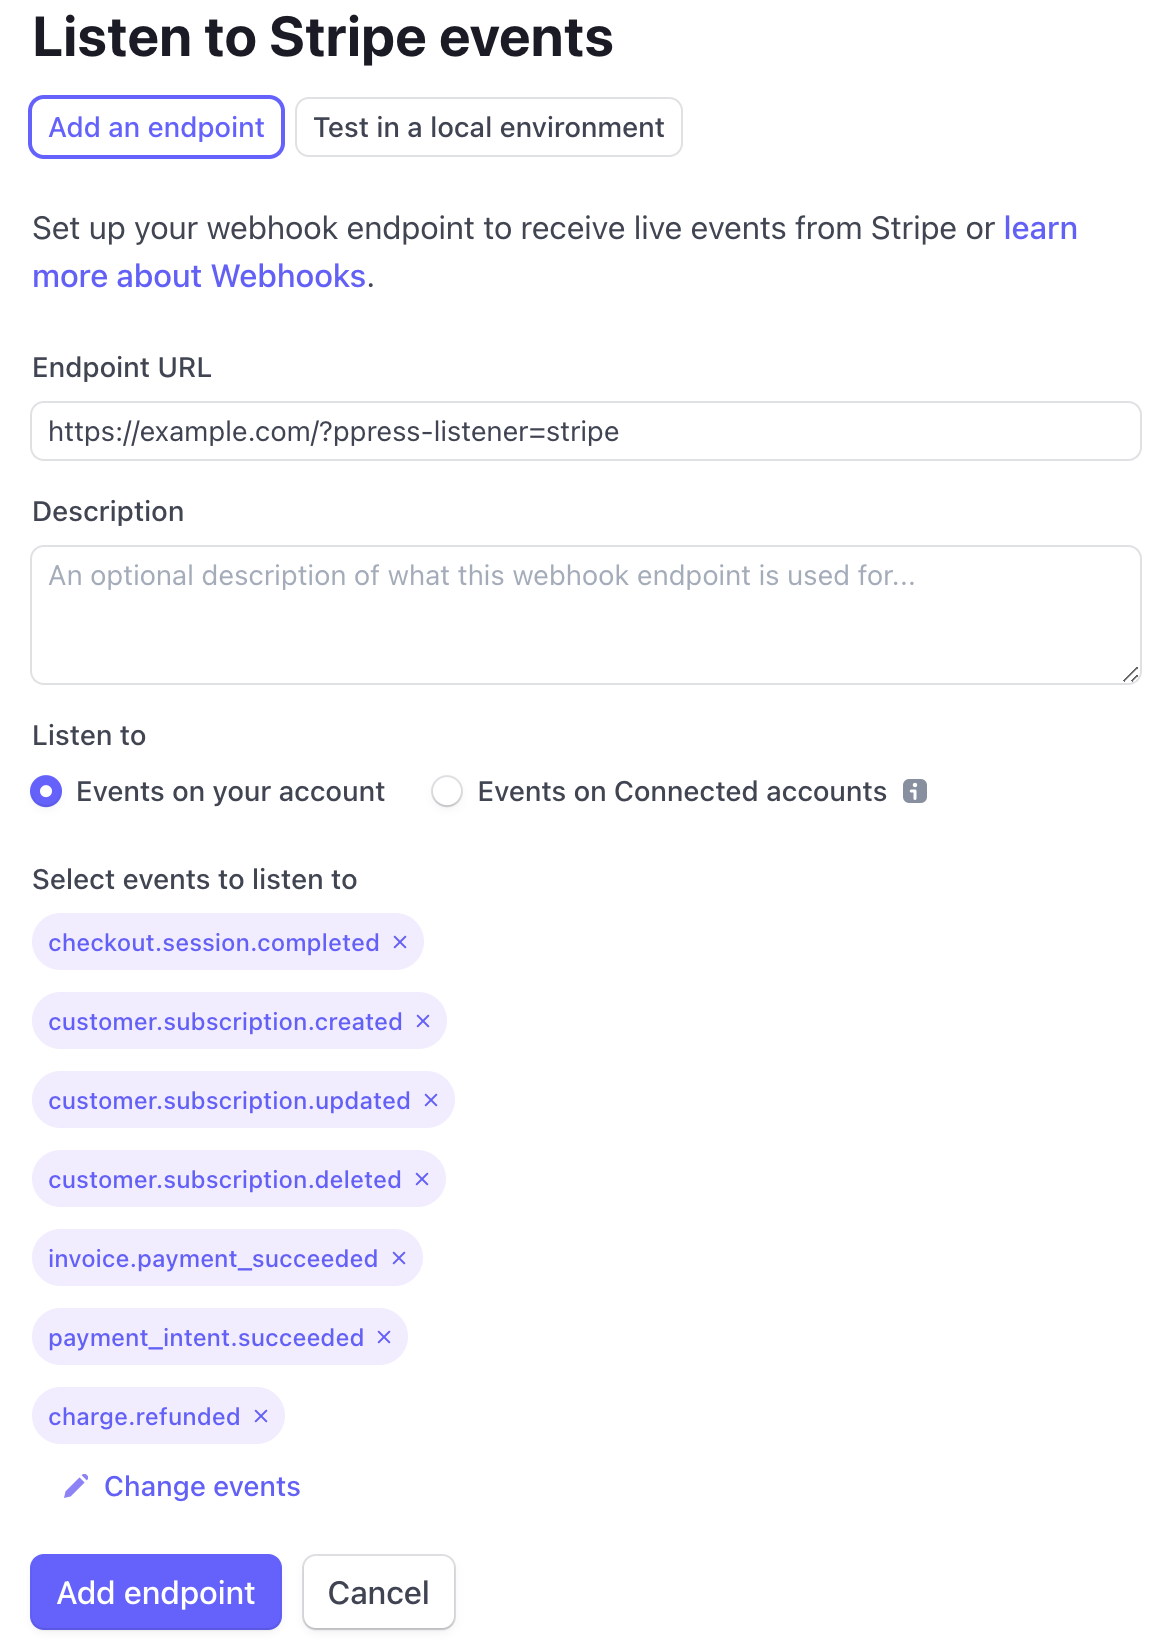
Click + Add Endpoint
Add the following URL:
https://example.com/?ppress-listener=stripeNote: Replace “example.com” with your actual site URL.
Listen to “Events on Connected Accounts” settings should be disabled (unchecked).
Select the following events:
checkout.session.completed
checkout.session.async_payment_succeeded
checkout.session.async_payment_failed
customer.subscription.created
customer.subscription.updated
customer.subscription.deleted
invoice.payment_succeeded
payment_intent.succeeded
charge.refunded
Example of how the Endpoint settings should be configured:
After you add the endpoint, you will see the new URL listed in the webhooks settings.

Note: Your webhooks won’t work out of the box in a local development environment like Vagrant, WAMP, MAMP, Desktop Server, or Local by Flywheel. These are typically non-publicly accessible IP addresses, and Stripe can’t reach them.
Next, you must retrieve your endpoint’s secret from your Dashboard’s webhooks settings. Select the endpoint from which you want to obtain the secret, then click the Reveal button.
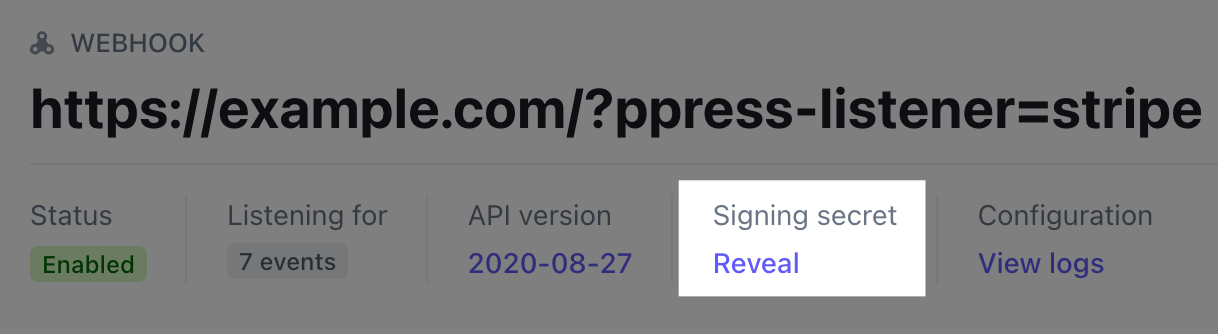
Then copy the signing secret from the Stripe Dashboard, head back to the ProfilePress Stripe Setup tab, and paste it into the Endpoint Secret text box.
Your webhooks are now set up and secure.
Stripe Tax Support
Stripe Tax lets you calculate, collect, and report tax on global payments with a single integration. Know where to register, automatically collect the right amount of tax, and access the reports you need to file returns.
To enable the Stripe Tax integration, check the Enable Stripe Tax checkbox.
Please note that ProfilePress integration with Stripe Tax is only available when using the “Stripe Payment Page (Off-site)” as the payment collection method.
Stripe Customer Portal Integration
The Stripe customer portal is a Stripe-hosted page that lets your customers manage their subscriptions and billing details.
The Stripe Customer Portal must be configured for both Live and Test mode inside the Stripe Dashboard if you wish to test the Portal before going live.
To set up the customer portal for your WordPress site, log into your Stripe account dashboard and select Settings. Under Billing, click on Customer Portal.
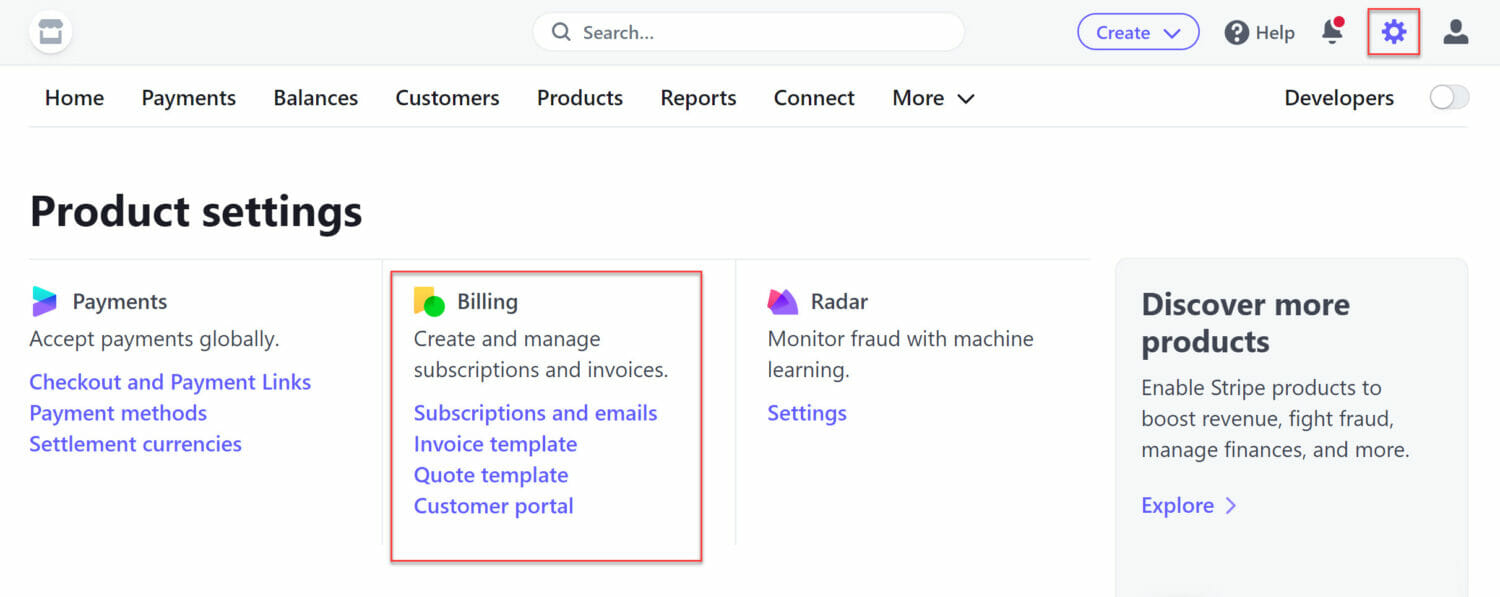
Alternatively, click this link to go directly to the Stripe customer portal setup page.
Then, enable the settings within the customer portal, selecting the functionality you want to provide your customers.

Not all settings are compatible with ProfilePress. The following settings can be used:
- Cancel subscriptions immediately or at the end of a billing period
- Update payment methods like adding and removing cards
- View invoice history
Your customers can access the Stripe customer portal by clicking the “Manage Subscription” button on the My Account page of your WordPress site when viewing a subscription.
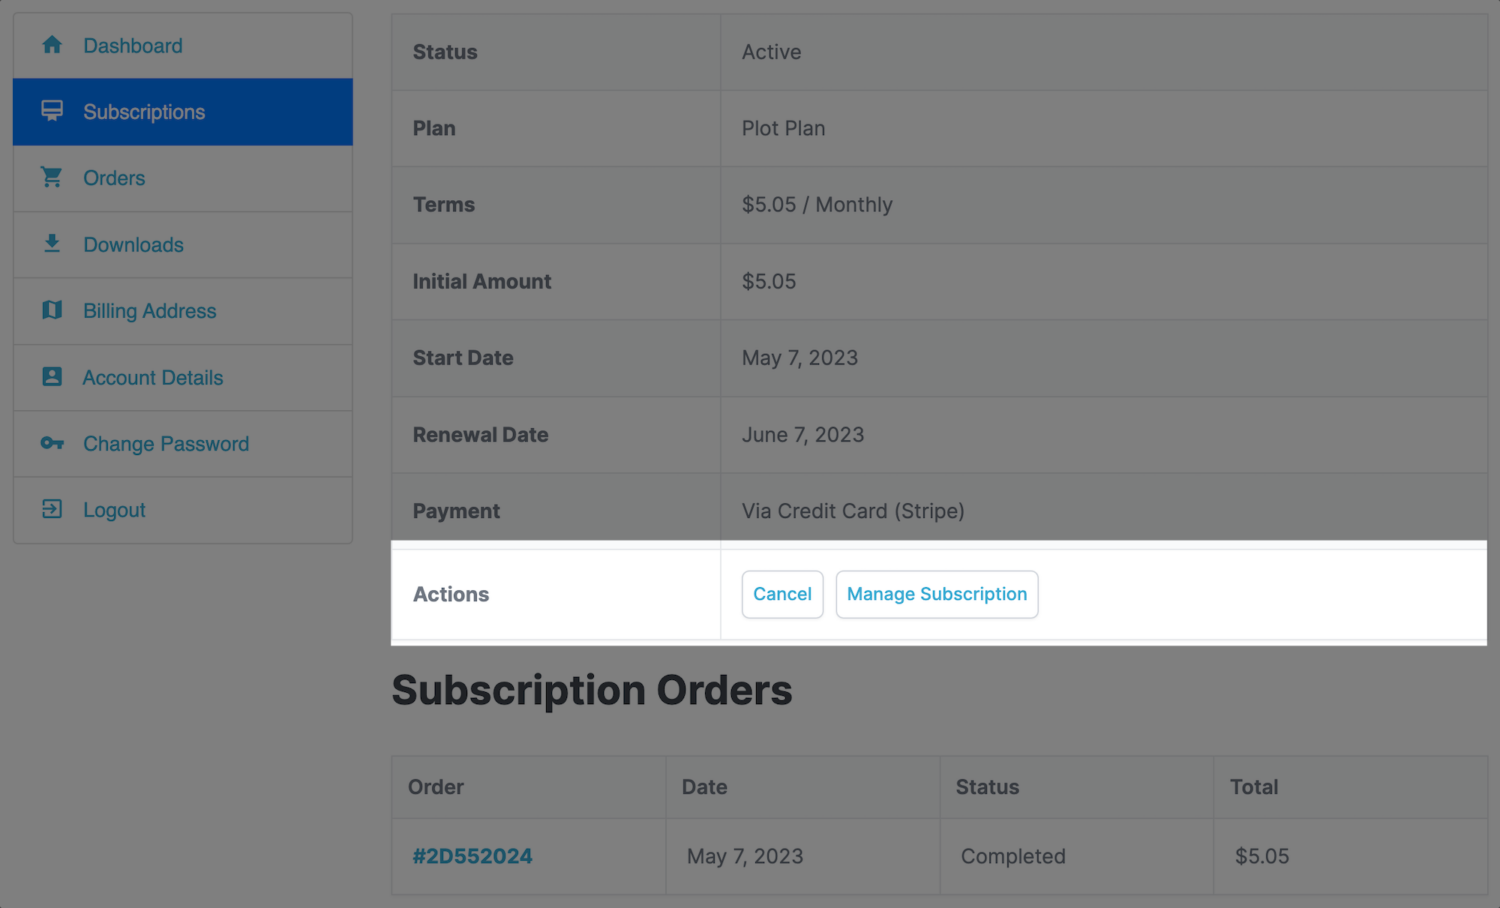
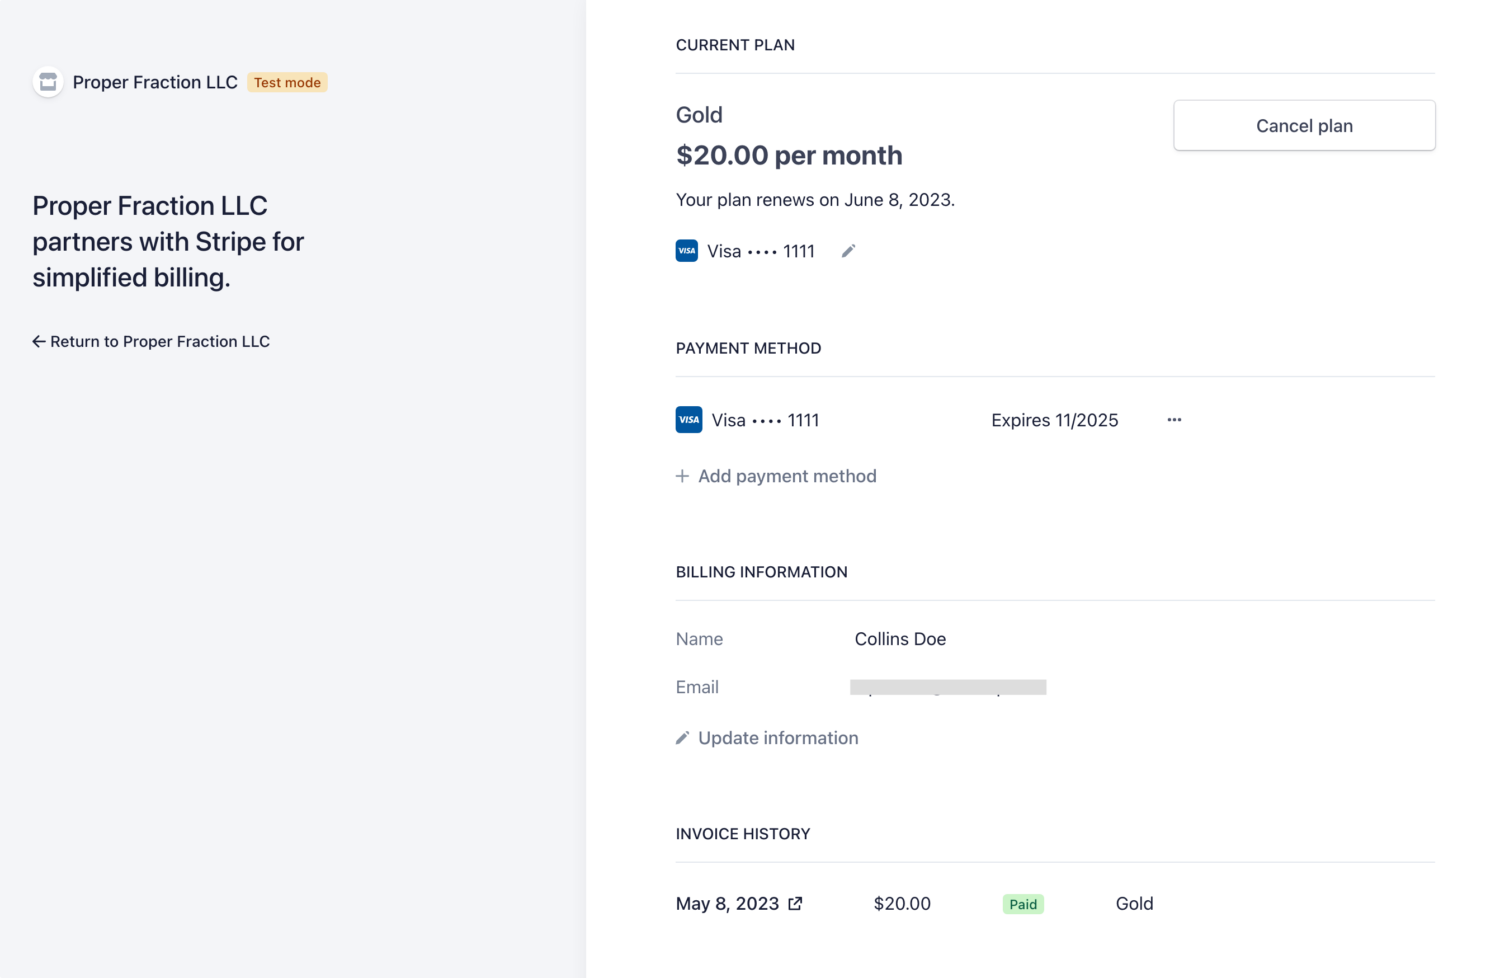
After that, they will be redirected to the Stripe billing customer portal, where they can cancel and manage their subscriptions and update their payment method.
Note: The Stripe Portal does not support non-recurring subscriptions or subscriptions with auto-renewal disabled.
Apple Pay & Google Pay Configuration
To set up Google Pay and Apple Pay, ensure they are enabled in the Payment Methods settings page in your Stripe account.
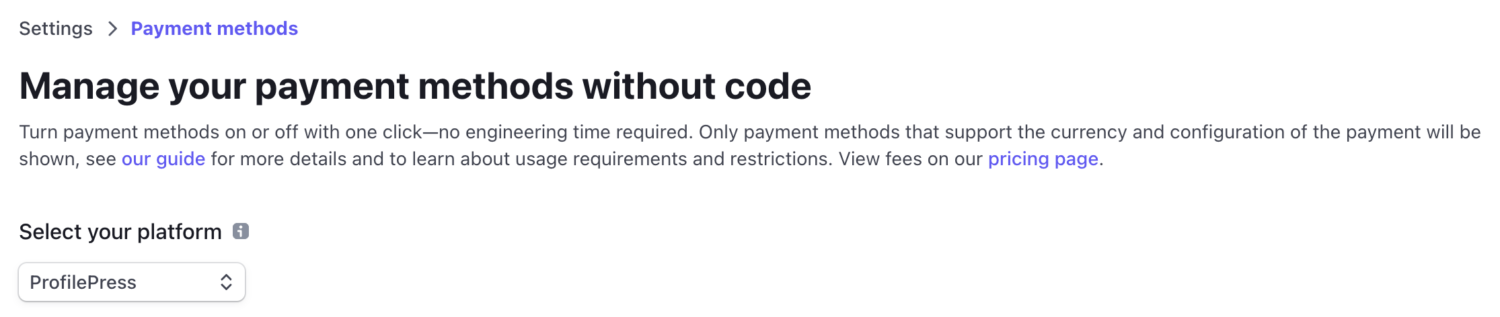
Go to Payment Methods (Stripe.com Settings > Payment methods) and select ProfilePress under “Select your platform”.
Find the Google Pay payment method and ensure it is turned on.
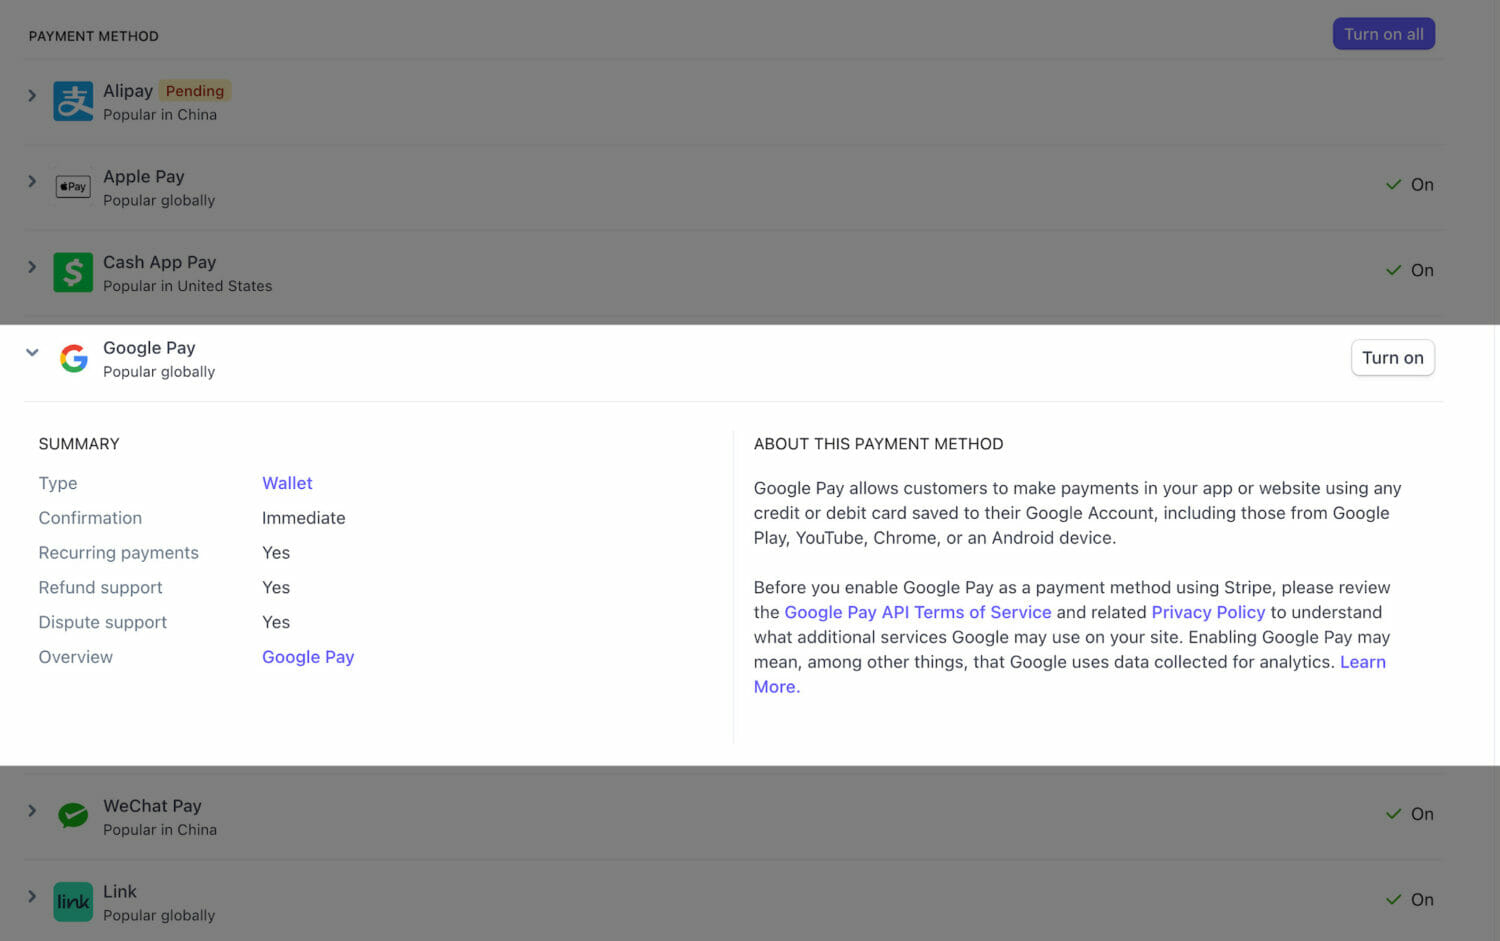
Also, turn on the Apple Pay payment method.
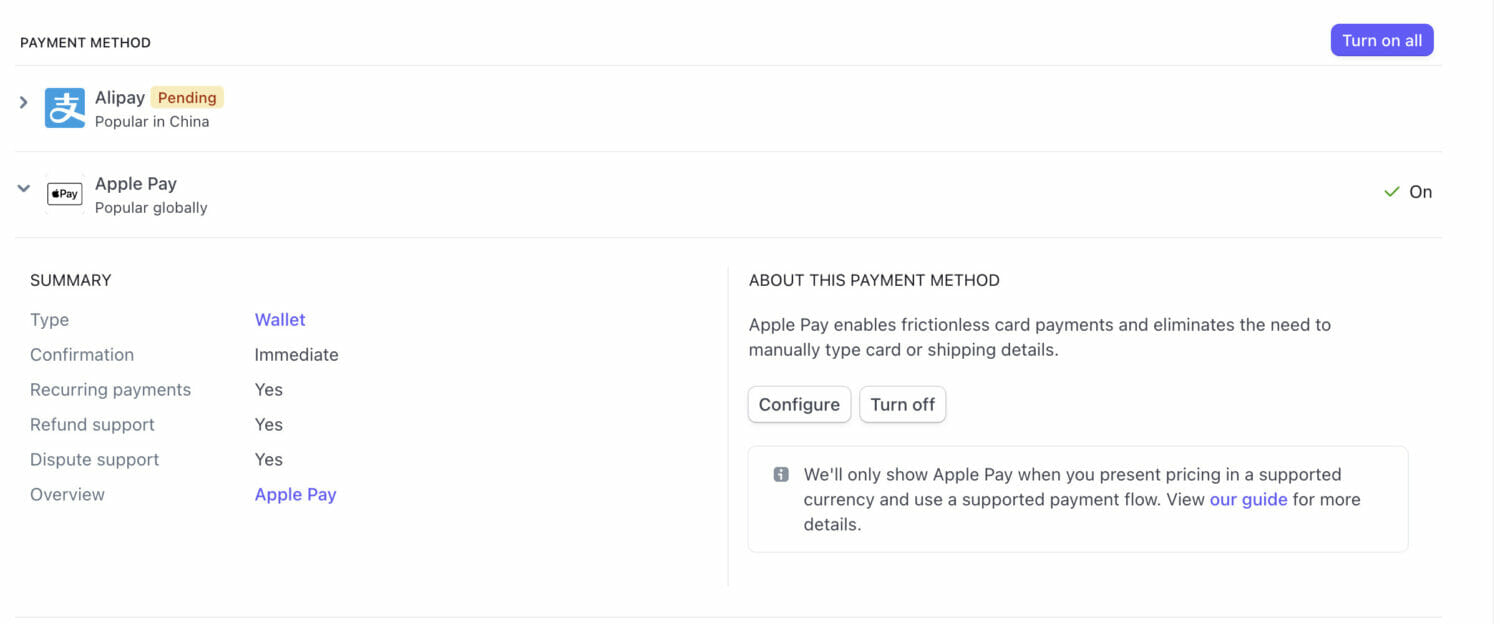
To use Apple Pay, you must register with Apple on all your web domains, which will show an Apple Pay button. Go to the Apple Pay tab in the Account Settings of your Stripe Dashboard.
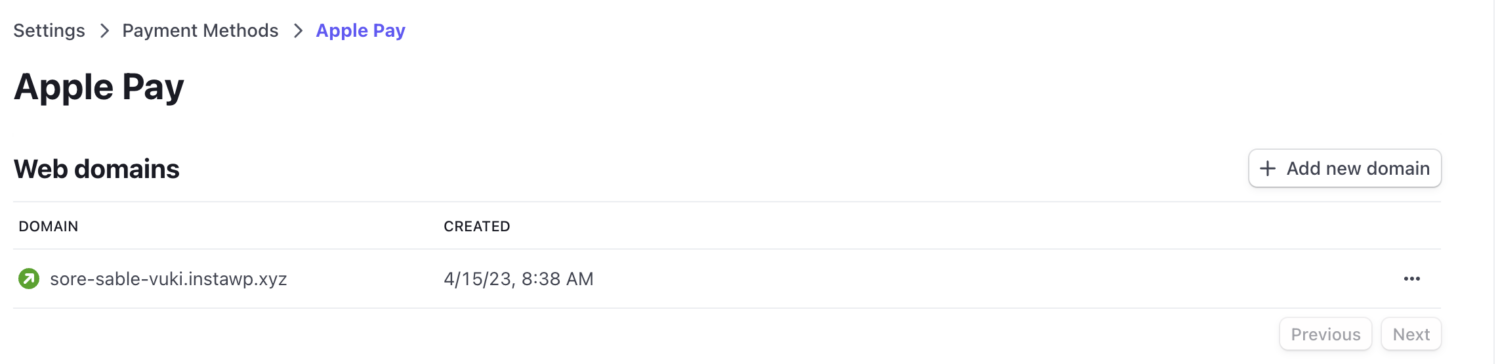
Click the Add new domain button.
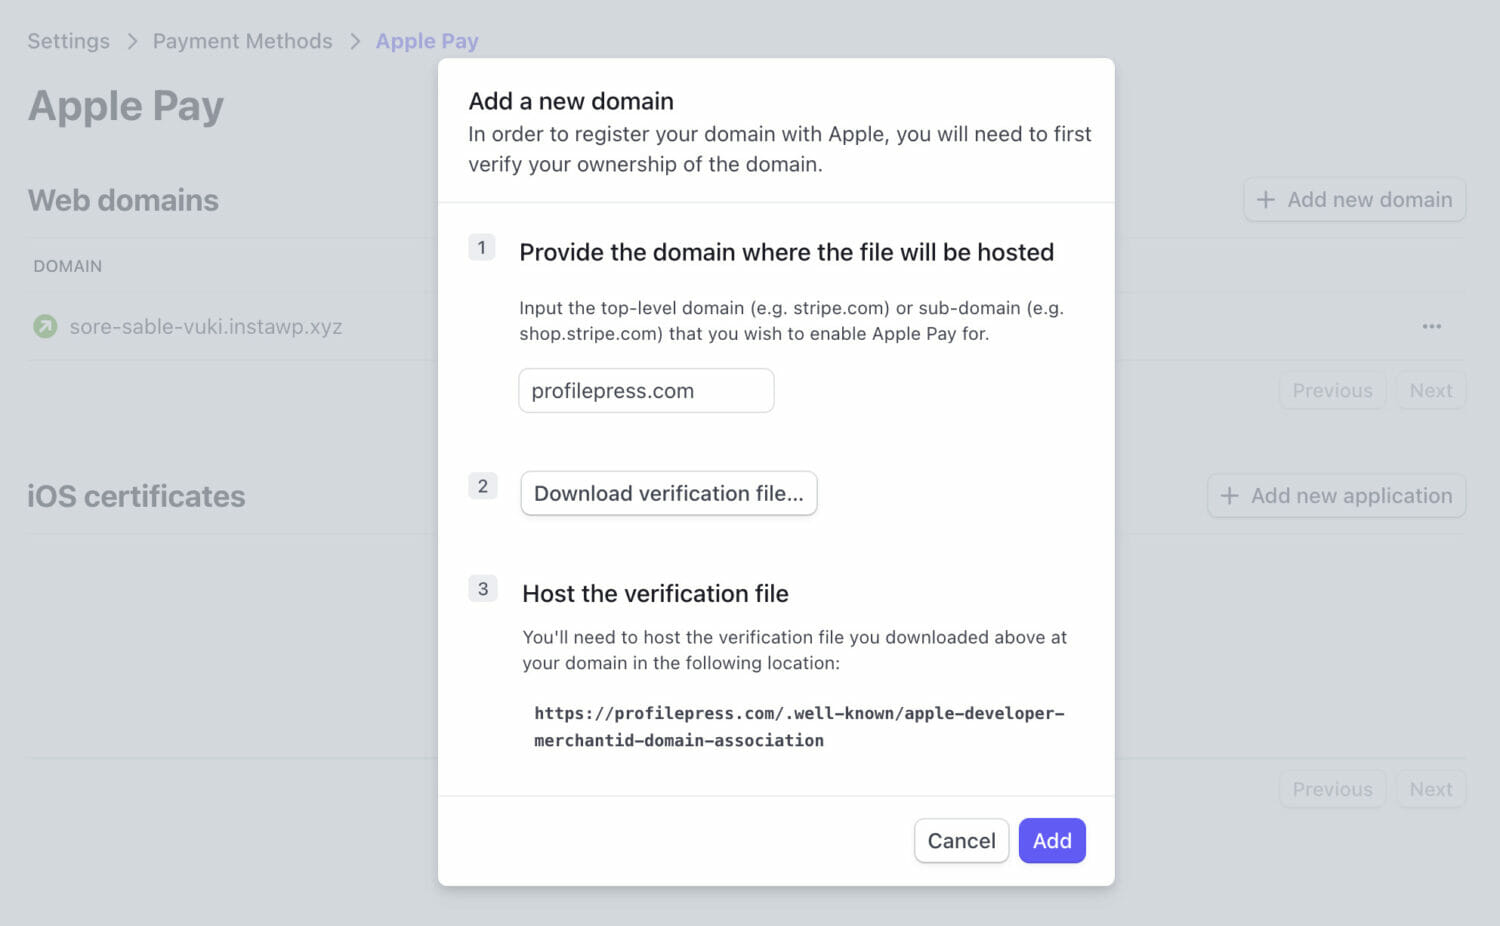
Download this domain association file and host it at /.well-known/apple-developer-merchantid-domain-association on your site.
For example, if you’re registering https://example.com, make that file available at https://example.com/.well-known/apple-developer-merchantid-domain-association.
Once you’ve registered your domains, you’ll be able to make payments in your store with Apple Pay using the Safari web browser. For more details, see Stripe’s doc on Verifying your domain with Apple Pay.
Currently, supported browsers include Chrome Desktop, Chrome Android, macOS Safari, iOS Safari, and Microsoft Edge for Windows.
A payment method needs to have been saved to the browser or device as well. For example, you can save a card in Chrome, or add a card to your Wallet for Safari.
Stripe Link Support
Link saves and auto-fills payment and shipping information for your customers, so they don’t need to enter their payment details manually.
Link automatically detects if a customer is enrolled using their email address, phone number, or browser cookie. The customer receives a one-time passcode to authenticate their session. After authentication succeeds, Link loads their payment and shipping information, and they pay with one click.
Your customers can visit link.com to make changes to their accounts or view their purchase history.
How Link works
Customers new to Link can save their payment details and shipping information to enable faster checkout in the future. Here’s how Link authenticates existing customers:
- Link automatically detects if a customer is enrolled by using their email address, phone number, or browser cookie.
- They receive a one-time passcode to authenticate their session.
- After authentication succeeds, Link loads their payment and shipping information, and they pay with one click.
- After a customer enrolls with Link, they can add backup payment methods and change shipping addresses.
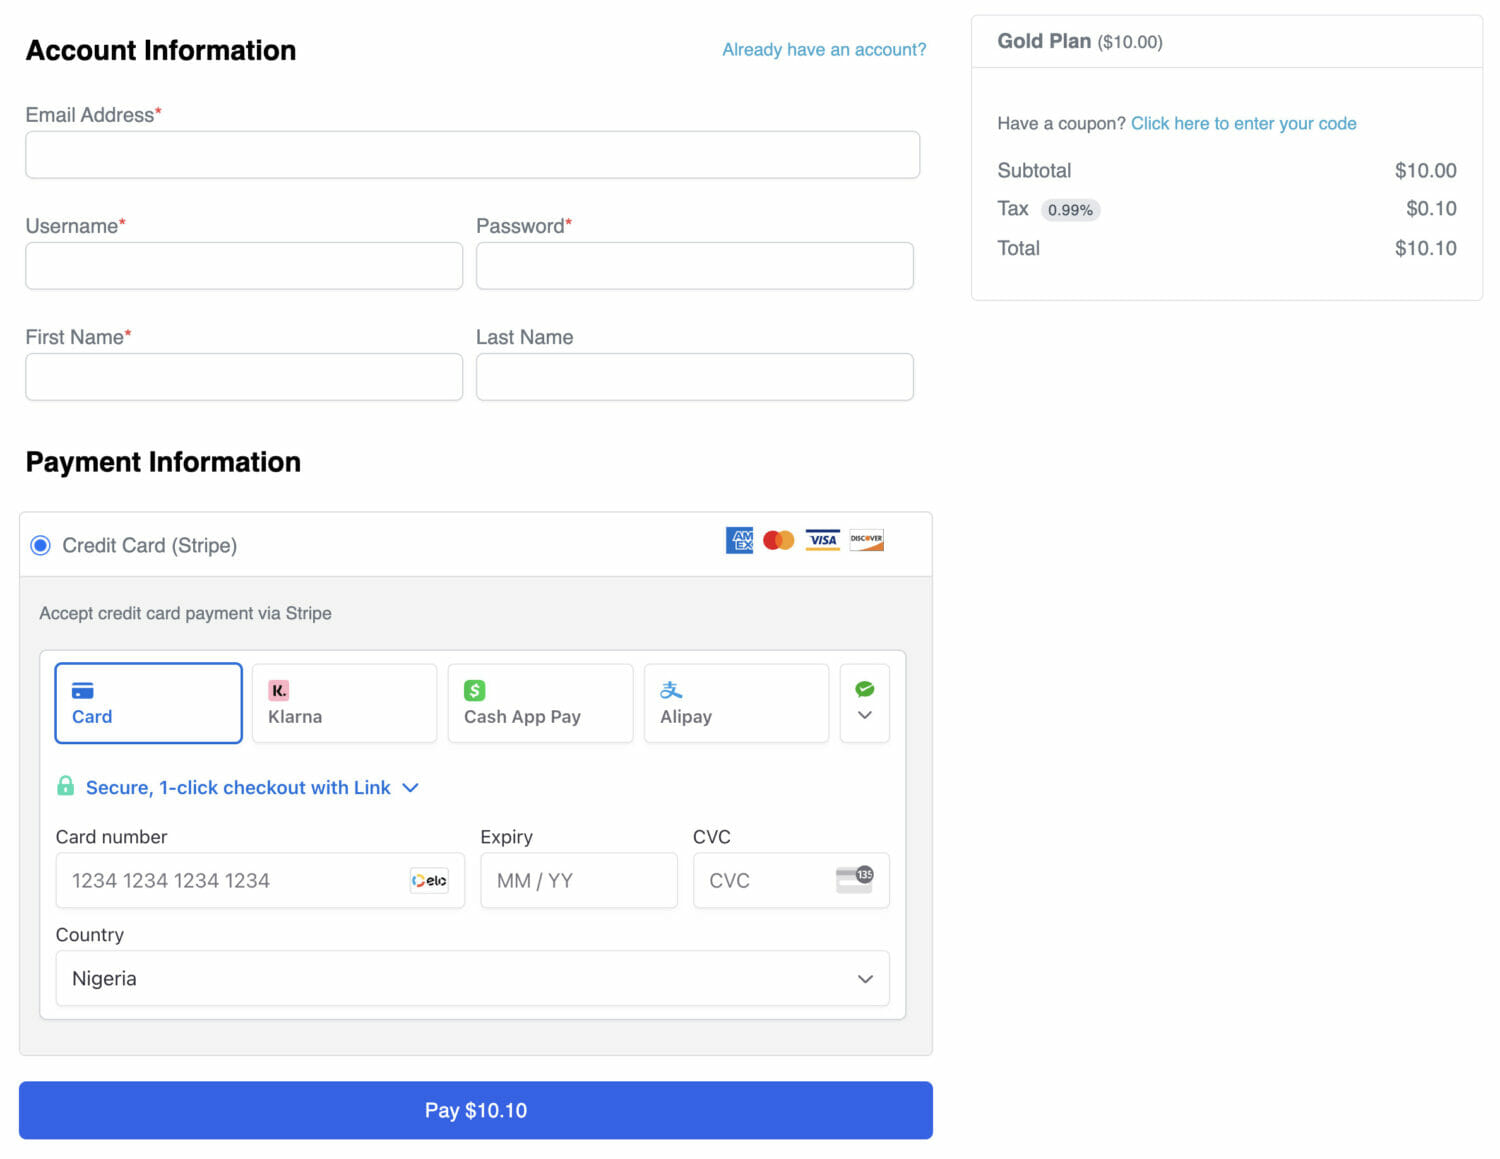
ProfilePress automatically supports Link thanks to its usage of the Stripe payment element. But you first need to activate it in your Stripe account by going to Settings >> Payment methods and selecting ProfilePress under “Select your platform”.
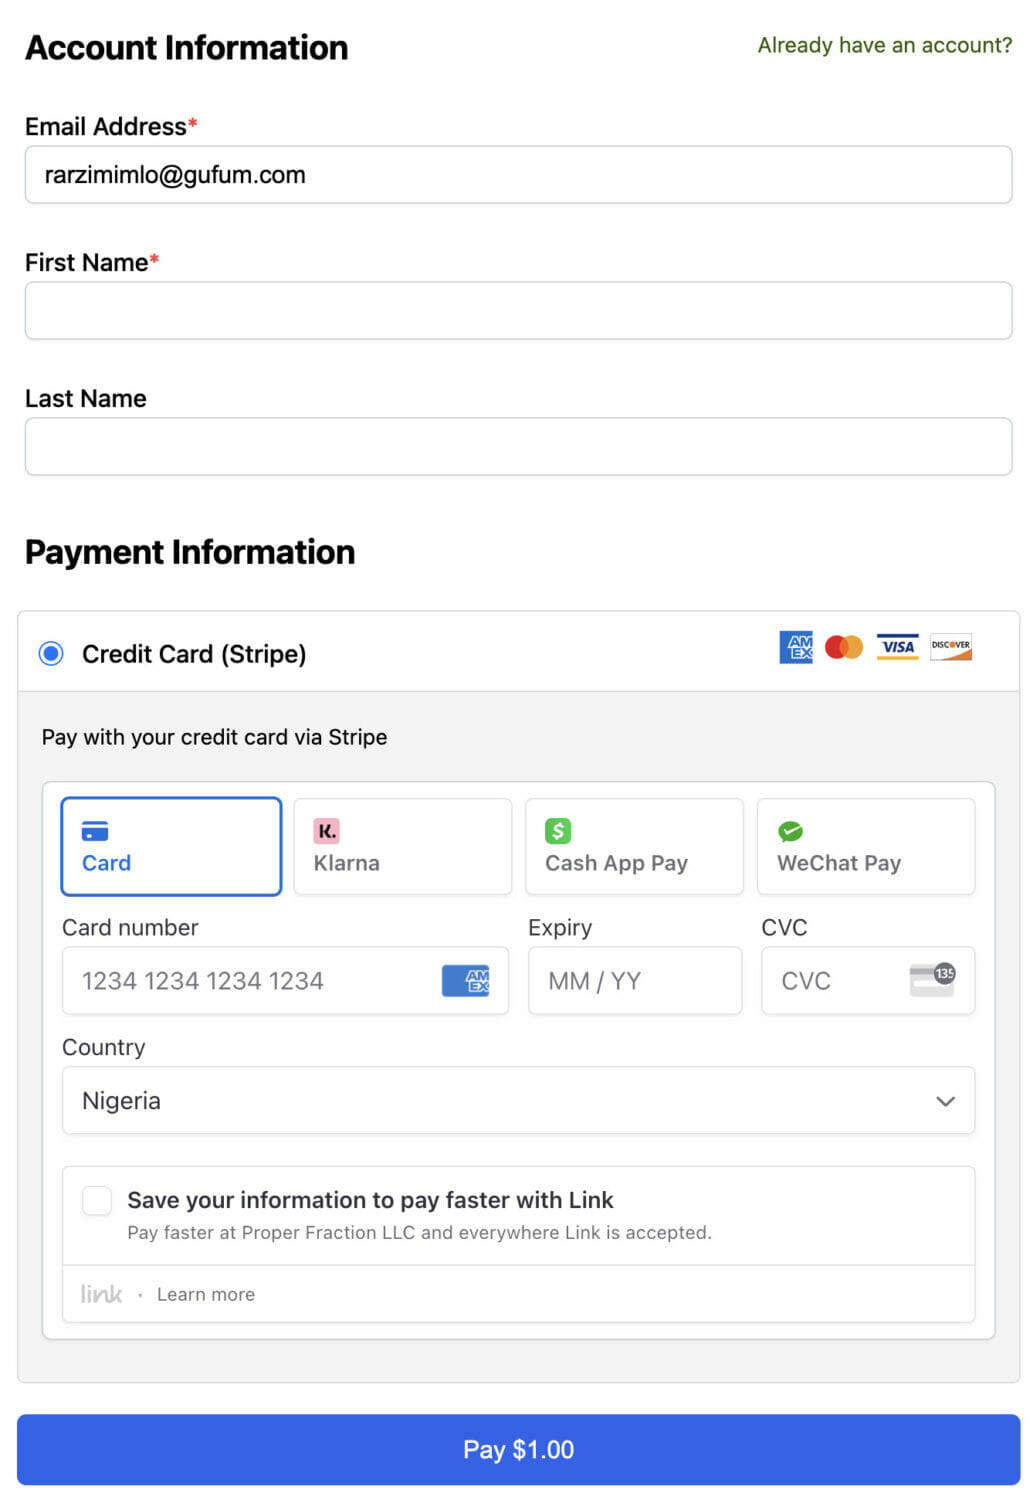
When a new user of your site visits the checkout page of your membership site powered by ProfilePress, they will see the Link option to save their payment method.
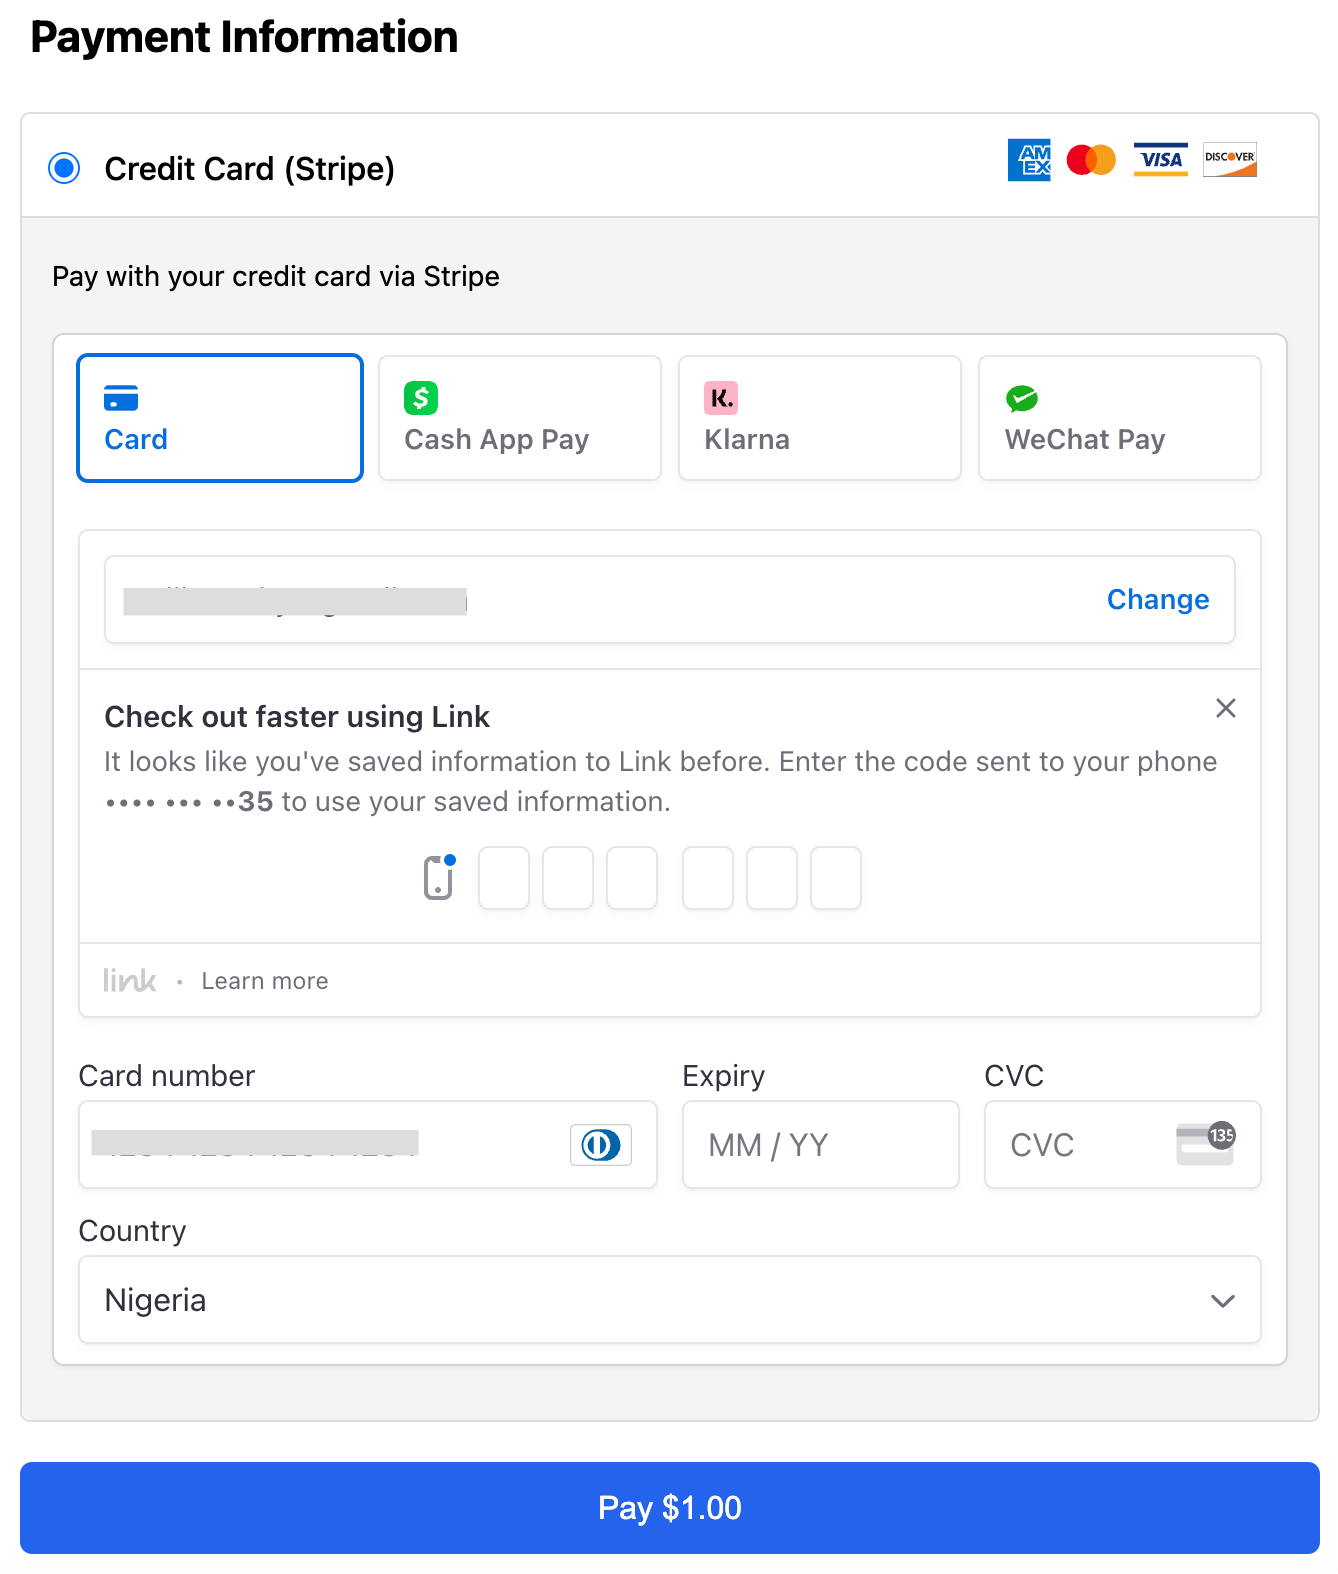
If an existing user of your WordPress website tries to get to the checkout page, they can use their saved payment method to checkout quickly via Stripe.
Additional Settings / Features
Payment Collection Method
This lets you select how payment information will be collected. For example, it could be displayed on your site with Stripe card fields or off-site through the Stripe-hosted payment page.
Statement Descriptor
A short purchase description alongside the charge will appear on the bank/card statement. If it is empty, it will be replaced by the statement descriptor of your Stripe account.
Note: Statement descriptors can only be 22 characters. If yours is too long, it will be truncated.
Remove Billing Address
Check this setting if you do not want to display the billing address fields on the checkout form.
Restrict Stripe Assets
This setting prevents Stripe assets from loading on every page. Most sites should not enable it. Stripe advises loading its JavaScript library on every page to take advantage of its advanced fraud detection rules. If you are not concerned about this, enable this setting only to load the JavaScript when necessary.
Testing Stripe
You can test Stripe in Test Mode, which allows you to try out the payment process without using an actual credit card. Stripe offers test cards for this process (see below).
Firstly, enable test mode from the manage payment method page.

Stripe offers a temporary test account by clicking “Skip this form”. We do not recommend this option, as it’s best to use an actual account, the same as your live account. This allows you to configure webhooks and apply for Live and Test Mode. Also, if you are testing recurring payments, renewals will not work with a temporary test account.
Testing a Purchase
In test mode, add a product to your cart and checkout.
You can use card number 4242424242424242 with any CVC and a valid expiration date (any future date).
Testing Express Checkout (Apple Pay / Google Pay)
To test these methods, you must add a payment method.
Apple Pay
A live card must be added to your Apple Pay wallet, but when Test Mode is enabled, live funds are not used when testing.
Google Pay
Google Pay allows you to add any Stripe Test Card. It should be added under chrome://settings/payments; if no test card exists (even with a live card listed), you may not see the Google Pay button.
If Express Checkout buttons are not appearing, you can test your browser(s) here: https://stripe.com/docs/stripe-js/elements/payment-request-button
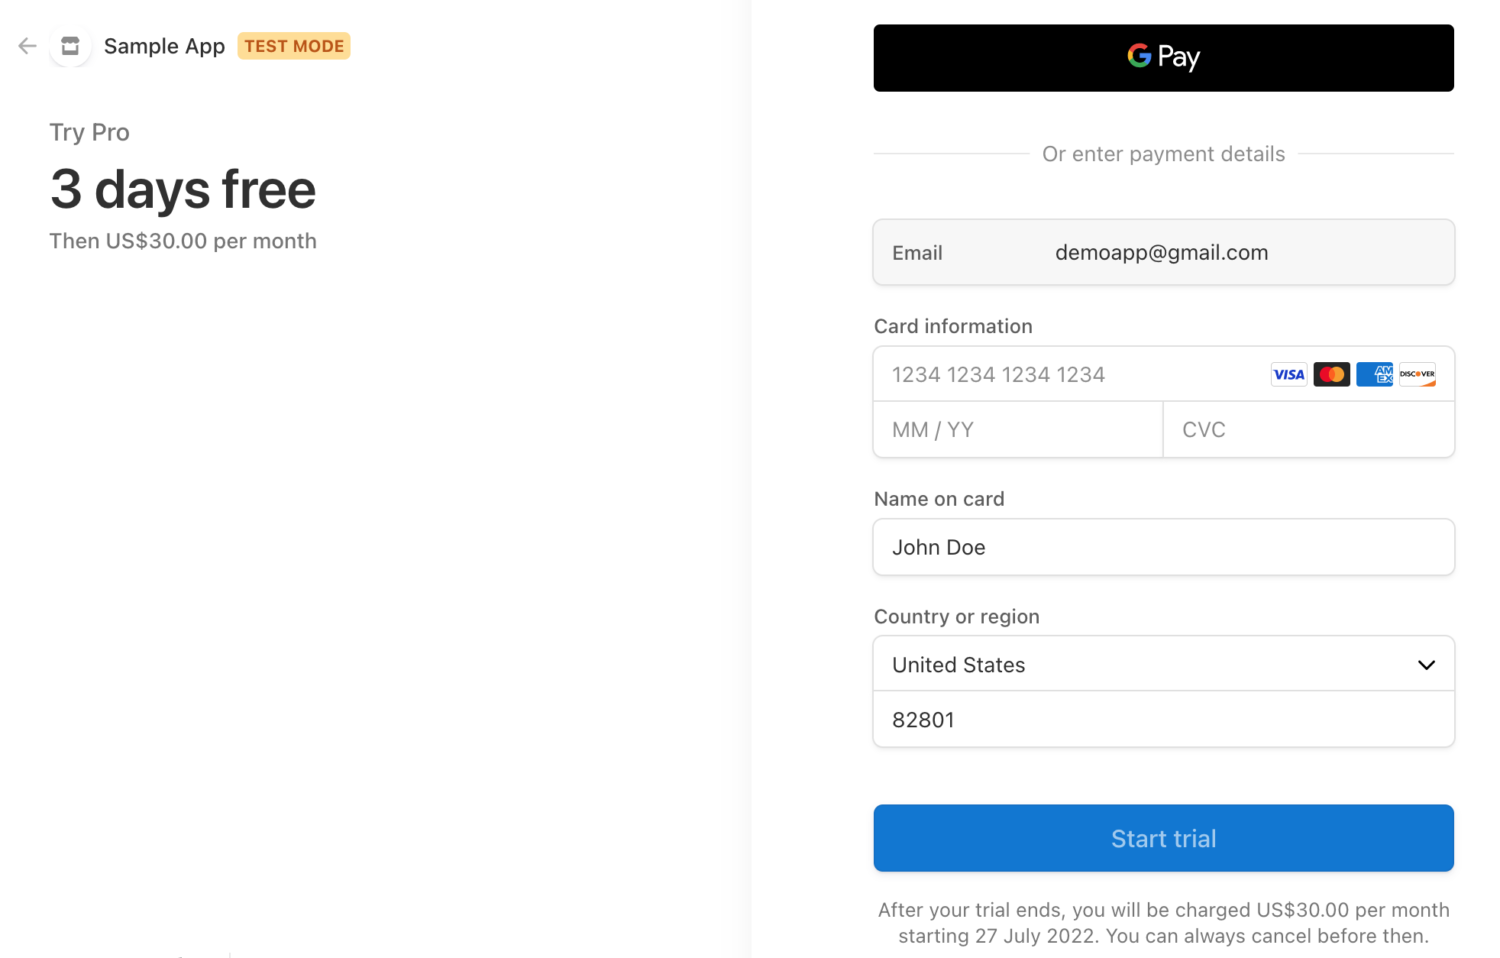
You should see the appropriate button appear at the top of the page (see screenshot below). If it doesn’t appear, it is due to your browser:
Apple Pay is available but fails to process payment:
Try re-registering your domain with Apple Pay by removing your site and registering it again.
Additional Resources
See Stripe Testing for more test card numbers and additional testing options.
Conclusion
Setting up Stripe payments through ProfilePress opens up a world of secure payment possibilities for your WordPress site. Following this guide empowers your business with one of the most trusted payment processing solutions available today.
With Stripe integrated into your WordPress site, you can confidently accept payments from customers worldwide using their preferred payment methods. ProfilePress’s user-friendly interface and Stripe’s excellent payment infrastructure create a professional payment system that can scale with your business needs.
FAQ
Q: How do you manage payment methods with Stripe?
A: The Stripe payment gateway includes credit cards, Apple Pay, Google Pay, and Link by default. However, some stores may disable one or more of these payment methods. You can do this via your Stripe account settings.
Go to Payment methods (Stripe.com Settings > Payment methods) and select ProfilePress under “Select your platform”:
This shows a list of all of Stripe’s available payment methods, including Cards, Link, ACH Direct Debit, Apple Pay, Google Pay, Alipay, Bancontact, Bank transfers, BLIK, EPS, FPX, Giropay, iDEAL, Sofort, P24, Affirm, Afterpay, Clearpay, Klarna, Cash App Pay, GrabPay, WeChat Pay, SEPA debit, Bacs Direct Debit, ACH Direct Debit.
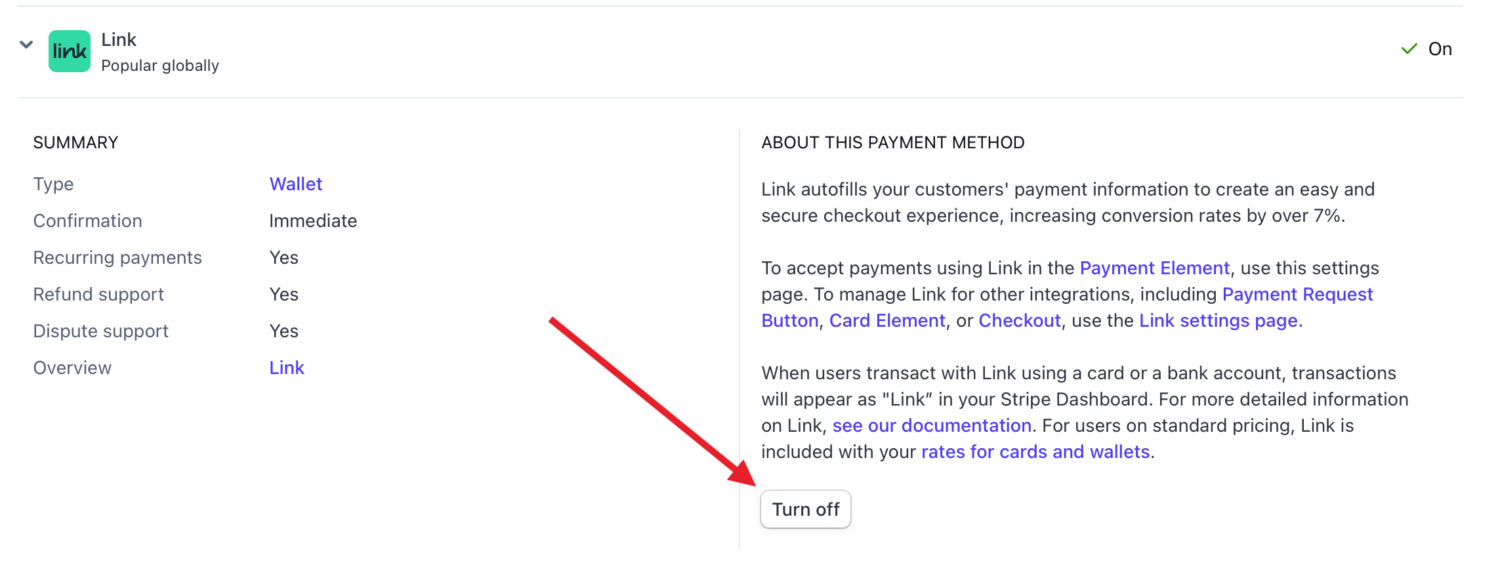
To enable and disable supported payment methods to make available on the ProfilePress checkout page, select that method and click the Turn On / Turn off button. The payment method will no longer appear as an option during checkout.
Q: How do I remove the additional 2% fee from my Stripe transactions?
A: You will not incur an additional 2% fee from your Stripe transactions if you purchase any ProfilePre Pro plan.
Q: Does the 2% fee apply to recurring Stripe transactions?
A: The 2% fee only applies to the initial transaction. If you have ProfilePress Pro installed and active on your WordPress site, you will not incur this additional initial transaction 2% fee.