How to Add Campaign Monitor Subscribe Checkbox to WordPress Registration Form
Campaign Monitor is a powerful email marketing service that helps businesses and organizations to connect with their audience and promote their brand through email communications.
Integrating Campaign Monitor with your WordPress website allows you to take advantage of its list management features and sync your WordPress users to your Campaign Monitor list.
This article will show you how to add a Campaign Monitor subscribe checkbox to your WordPress registration forms using the ProfilePress plugin. ProfilePress allows you to create custom registration forms for your website.
Activating the Campaign Monitor Addon
The Campaign Monitor addon lets you add your WordPress membership site users to a Campaign Monitor email list when they register on your site or purchase a product or membership plan via the checkout form.
It can automatically sync profile changes and membership subscriptions with Campaign Monitor and allow users to manage their email preferences from their account page. That is, they can unsubscribe or subscribe to some of your emails and not others.
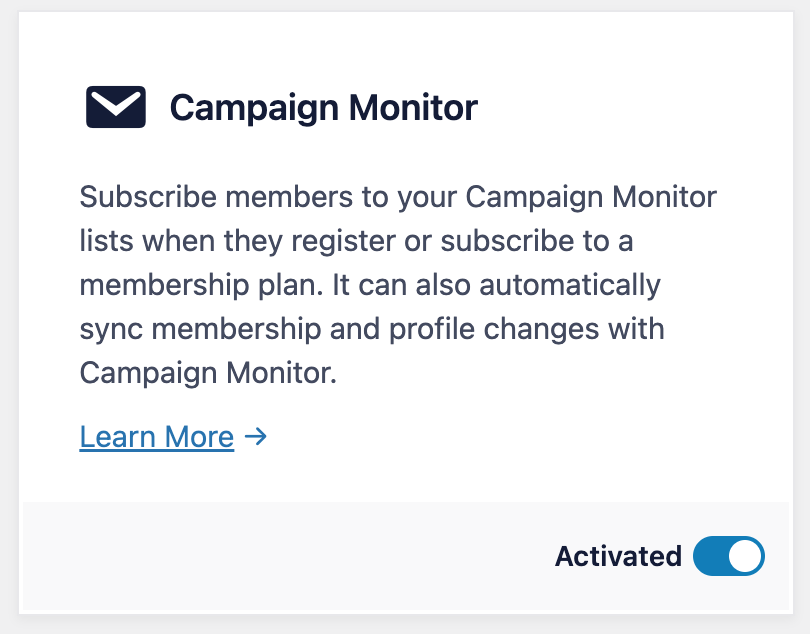
To activate the Campaign Monitor addon, go to ProfilePress>>Addons>> Scroll to Campaign Monitor and switch it ON.
Setting up the Campaign Monitor Integration
Before you can add a Campaign Monitor subscribe checkbox to your WordPress registration form, you need to set up the Campaign Monitor addon. To do this, follow these steps:
- First, log in to your WordPress website dashboard.
- Next, navigate to the “Integrations” section.
- Next, select “API Keys”.
- Create a new API key and Client ID and copy them.
Once you have copied the API key, you are ready to set up the Campaign Monitor integration with your WordPress website.
If you already have your Campaign Monitor account API key, you can paste it in the field or click on “Get it Here” below the field to navigate the API page of Campaign Monitor (you will be required to log in to your Campaign Monitor account).
Adding your Campaign Monitor API Key
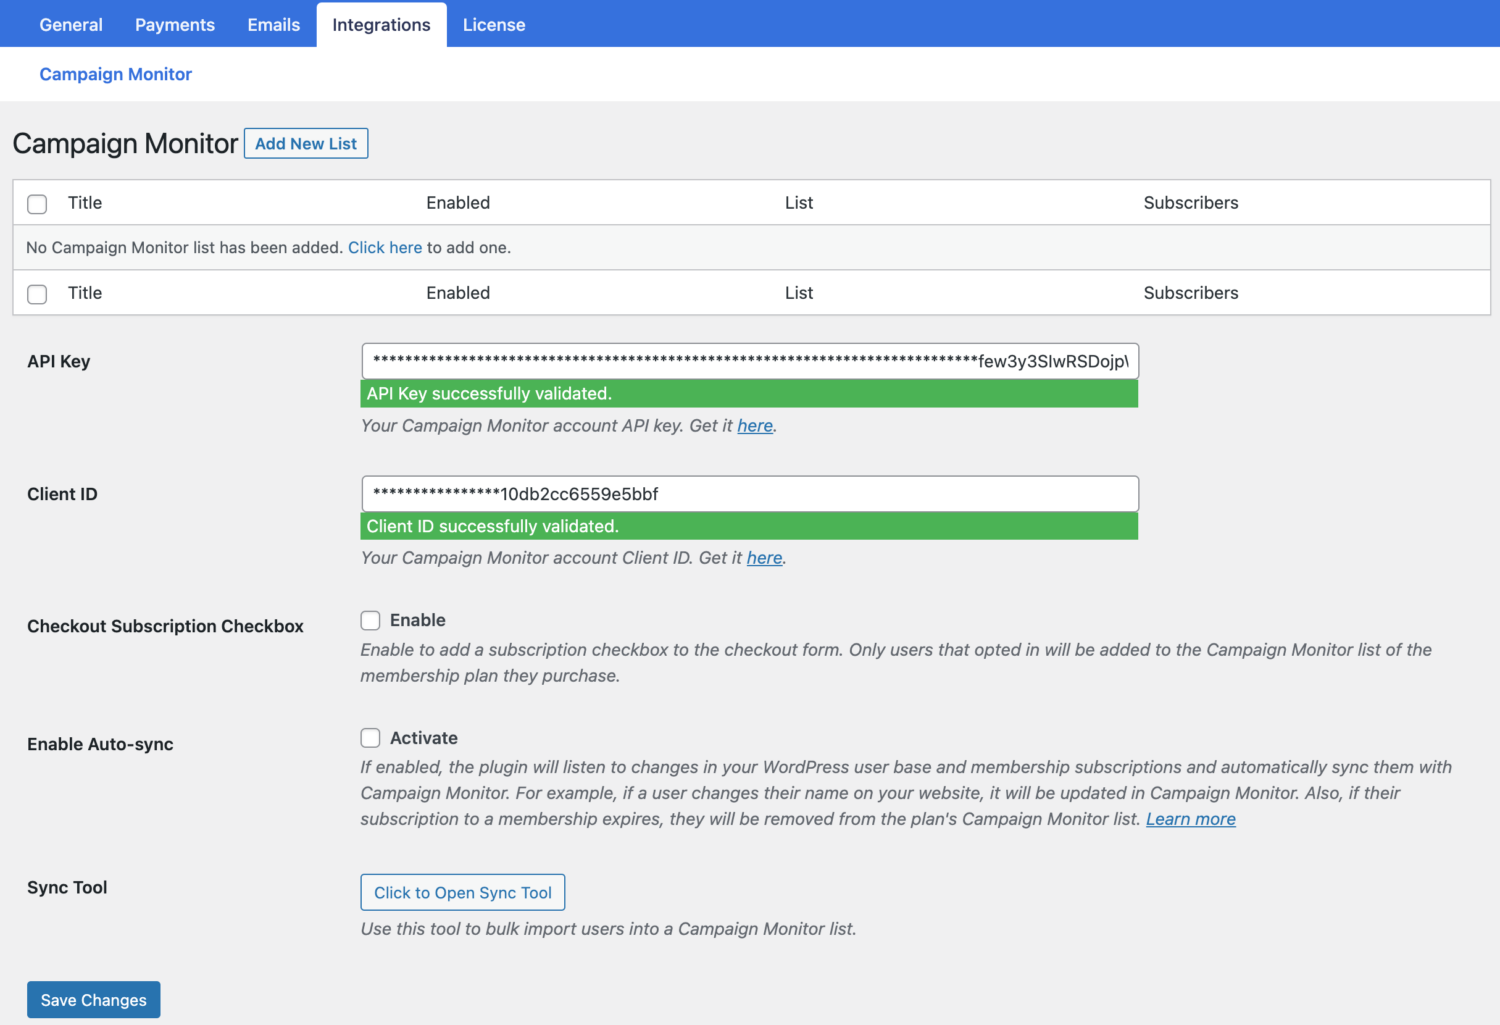
Go to ProfilePress >> Settings >> Integrations >> Campaign Monitor.
Adding Email Lists
ProfilePress allows you to create multiple audiences for use with Campaign Monitor. To Create your first list, click “Add New List” at the top of the Campaign Monitor setup page to reveal the page for adding new lists.
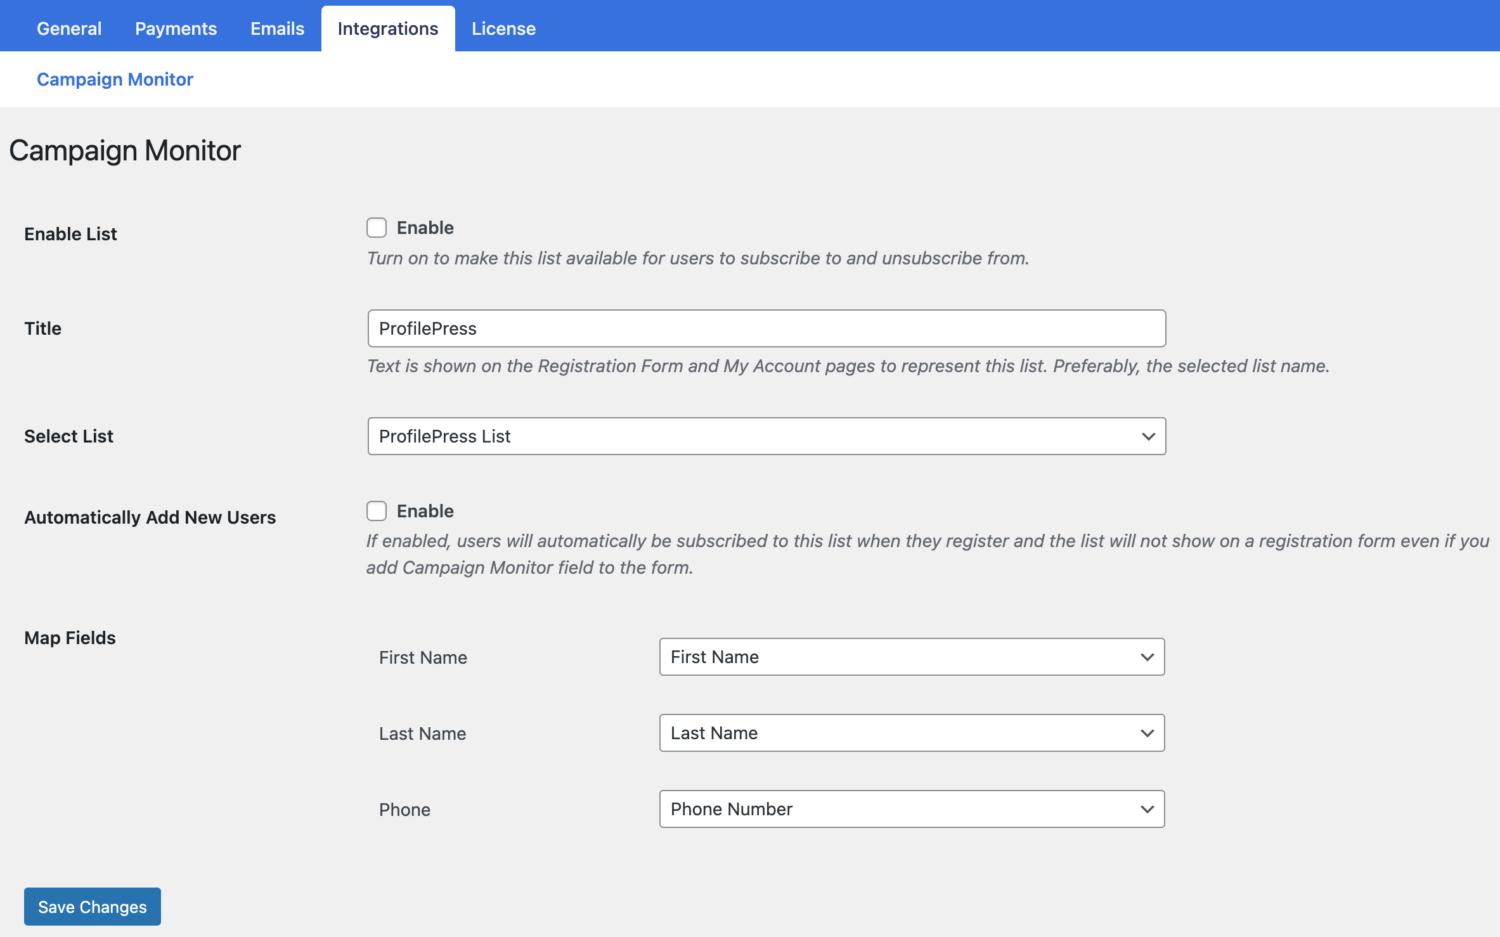
Activating the Enable List will make a list accessible in forms and user notification settings for subscription and unsubscription.
The Title is the title text displayed on the Registration Form and My Account pages to identify the list, ideally the selected list name. Select List enables you to choose the Campaign Monitor list for new user additions, and Mapping Custom Fields allows the mapping of custom fields in the registration form to their corresponding attributes in Campaign Monitor.
Creating ProfilePress Registration Form
Building the Registration Form
- Hover on ProfilePress and click on Forms & Profiles
- Click on Add New and select the Registration form type
- Enter a name for the form
- Select your preferred template
- Design the form with the drag & drop or Advanced shortcode builder.
- Drag and Drop the Campaign Monitor field into the form.
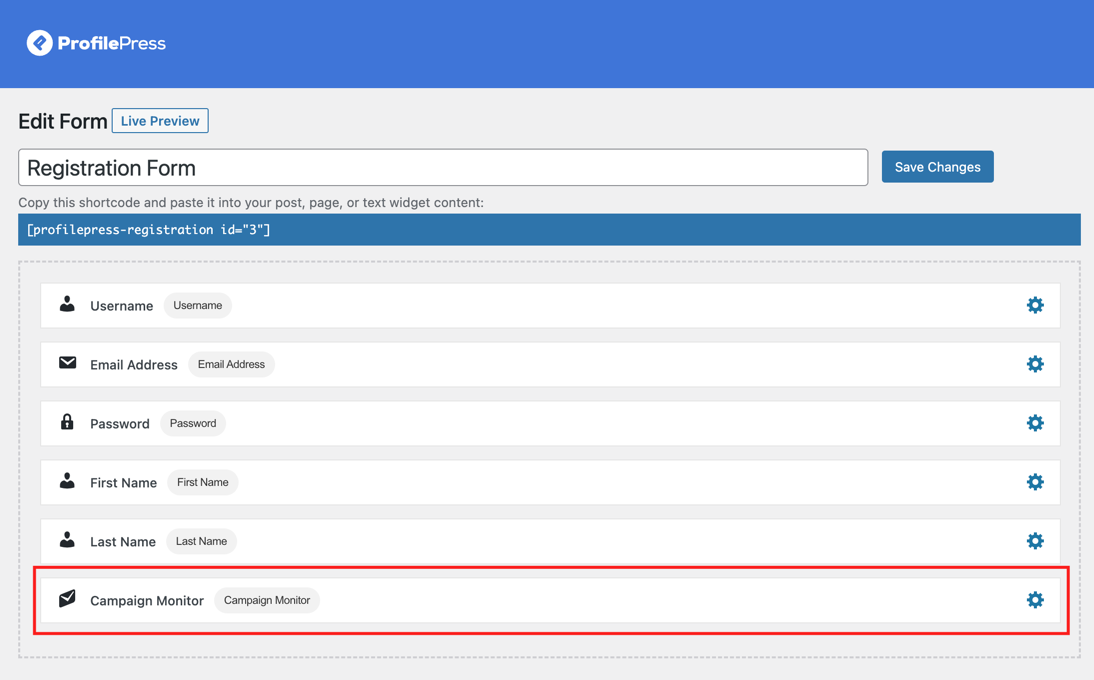
Setting the Campaign Monitor Field
- Select the mailing list you want the registration form to be attached
- Type in the text you want to be shown beside the checkbox
- Save changes.

You can preview how the form will look by clicking on the “Live Preview” button.
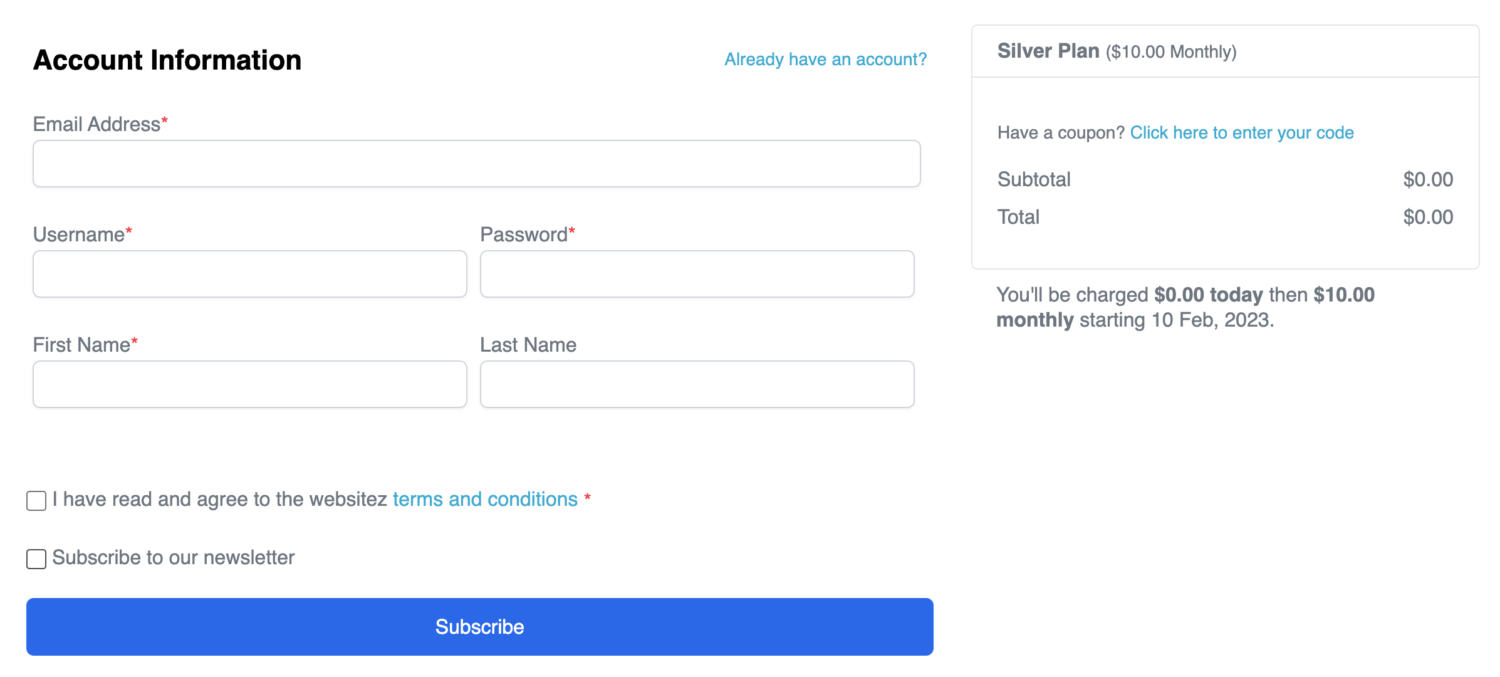
Adding a Subscribe Checkbox to ProfilePress Checkout Form
In addition to adding a Campaign Monitor subscribe checkbox to your registration form, you can also add it to your checkout form. To do this, follow the steps outlined below.
- Go to ProfilePress >> Settings >> Integrations >> Campaign Monitor.
- Scroll down to the “Checkout Subscription Checkbox” and enable it.

When you are done, don’t forget to save your changes. Easy Peasy!
If you want to ensure users who unsubscribe or whose subscription to this plan expired are removed from the Campaign Monitor audience, ensure you have Sync enabled on the Campaign Monitor setup page.
Conclusion
By integrating Campaign Monitor with your WordPress website and adding a subscribe checkbox to your registration form, you can allow your users to opt-in to receive email communications from you and grow your email list.
The ProfilePress plugin makes it easy to create custom registration forms, and the Campaign Monitor integration ensures that your users’ information is synced with your email marketing service, saving you time and effort.
Whether you’re new to email marketing or an experienced user, adding a Campaign Monitor subscribe checkbox to your WordPress registration form is a great way to engage with your audience and promote your brand.