Creating Custom WooCommerce Registration Form & Login Form
Want to improve the customer registration process of your WooCommerce website?
Building a custom WooCommerce registration form and login form is a step in the right direction.
The default WooCommerce user registration process only collects basic information. But with our ProfilePress plugin, you can collect more user information and reorder the form to make it more user-friendly. Information collected through the form can be used for your email marketing campaigns, among other things.
In this article, you will learn how to create a custom WooCommerce registration form that will replace the default one.
Creating a Custom WooCommerce Registration Form
To create a custom WooCommerce registration form, you need a plugin called ProfilePress. Below, we will show you how to set up the plugin.
Step 1: Install ProfilePress
Sign up with ProfilePress, and you will receive a receipt with a link to download the plugin and a license key. Download and install the plugin on your WordPress website. Enter the license key to activate the plugin.
Step 1.5: Enable WooCommerce User Registration
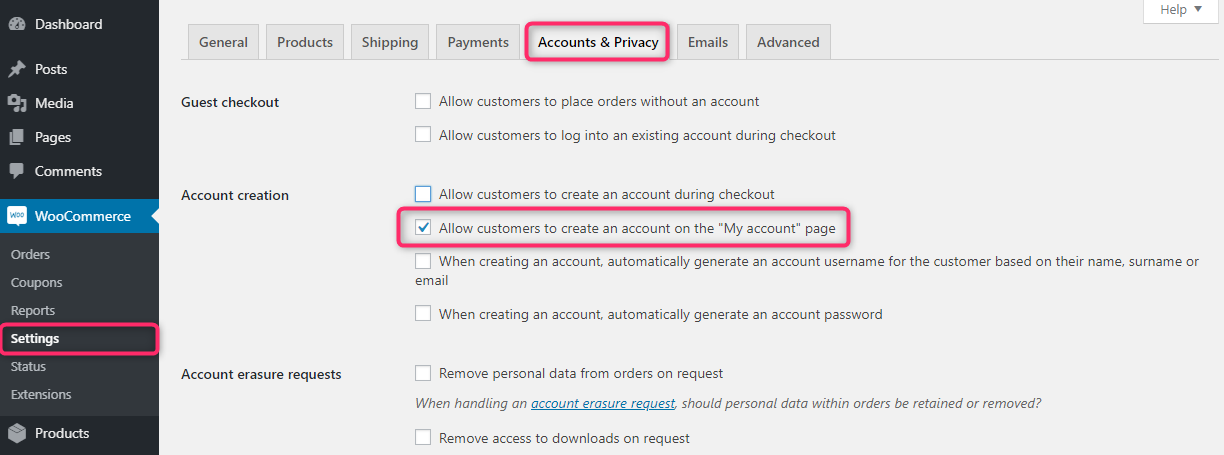
To enable user registration in WooCommerce so that anyone who makes a purchase has an account created, go to WooCommerce->Settings on your dashboard. Click on the Privacy and Accounts section and check the option to Allow customers to create an account on the “My Account” page option.
Step 2: Creating a Custom WordPress Registration Form
Now comes the fun part. On your WordPress dashboard, go to ProfilePress > Forms & Profiles > Registration > Add New.
You have two options to create a custom WooCommerce registration form. You can either use a pre-made template or build a form from scratch. If you don’t know how to code and don’t want to invest time in building a form from scratch, we recommend choosing a template.
Select the Drag & Drop Builder.
Give the form a name, then choose one of the pre-built templates. For this tutorial, we chose Tulip. On the next page, you can customize the form according to your needs.
Adding Custom Fields to WooCommerce Registration Forms
You can add the following custom fields, including WooCommerce billing and shipping fields, to your WooCommerce registration created with ProfilePress
- Username
- Email Address
- Confirm Email
- Password
- Confirm Password
- Password Strength
- Website Nickname
- Display Name
- First Name
- Last Name
- Upload Profile Picture
- Upload Cover Photo
- Biography
- Select Role
- Custom HTML
- reCAPTCHA
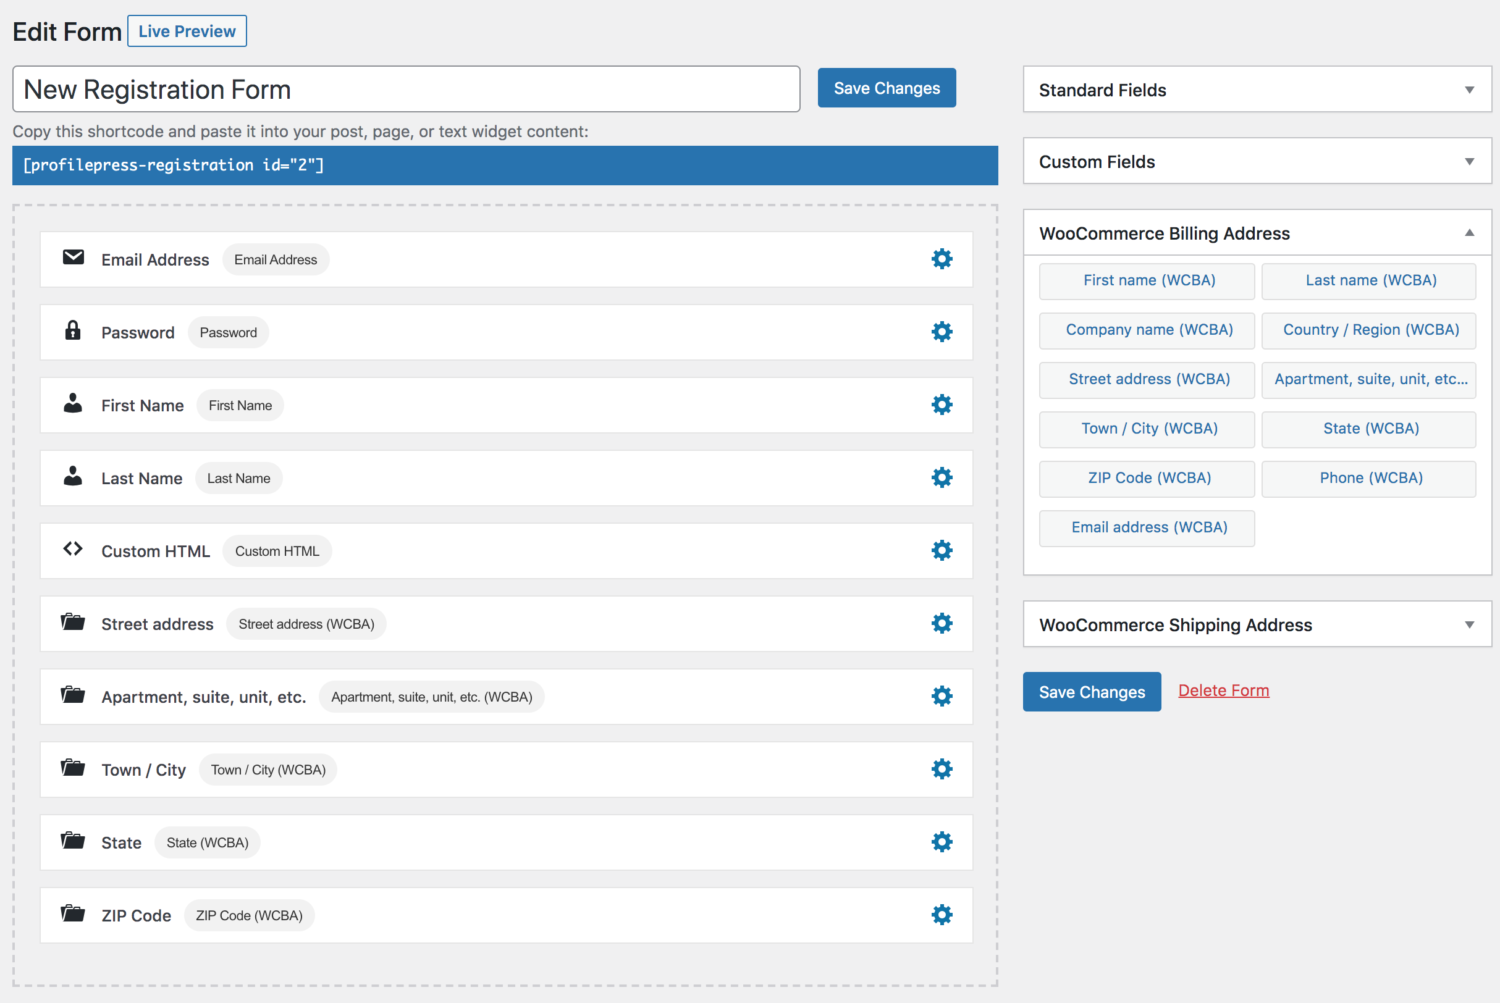
Here’s a quick look at the custom fields we added to our WooCommerce registration form:
Modifying Form Settings
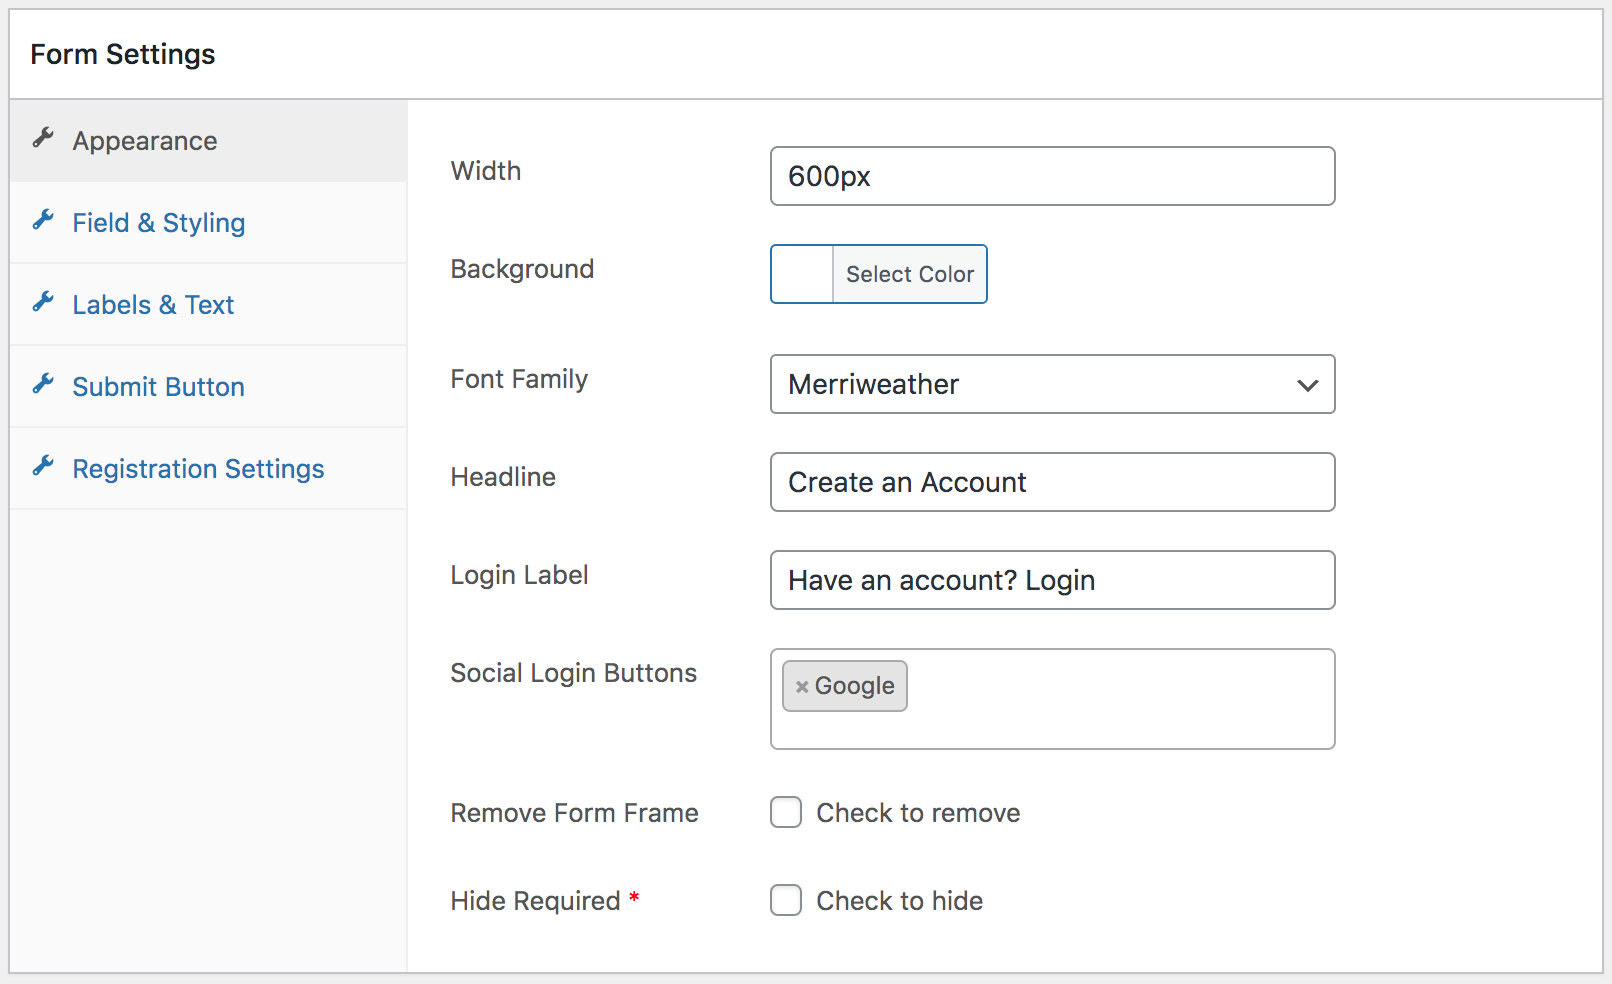
ProfilePress lets you change the form’s appearance. This means you can create a form that complements your branding and style. We recommend spending a few minutes modifying the look of your form.
Before moving to the next step, make sure you go to Registration Settings and choose Customer as the New User Role. Anyone signing up using this custom form will be counted as a customer.
When the form is ready, save the changes. It’s time to display the new custom registration form on your website.
Step 3: Replacing the Default WooCommerce Registration Form
This section will teach you how to replace the default WooCommerce registration form with the new custom registration form we created.
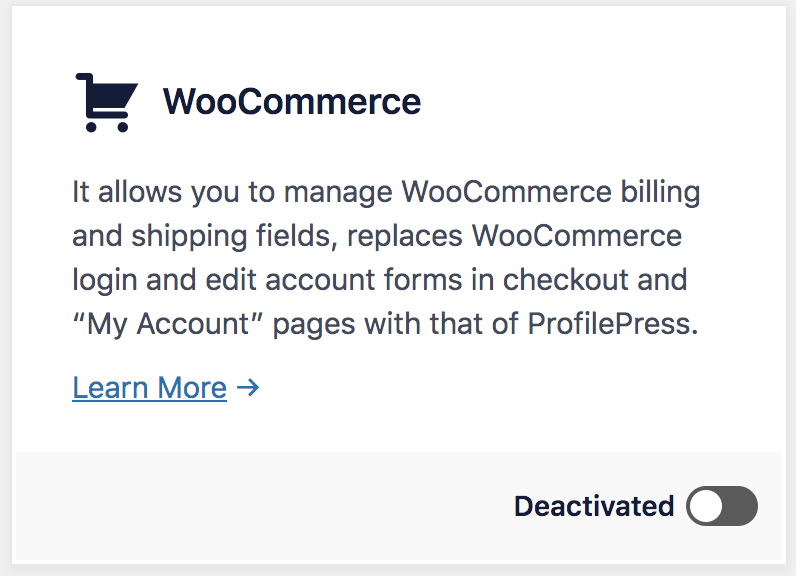
Ensure the WooCommerce addon is activated in ProfilePress at ProfilePress >> Addons.
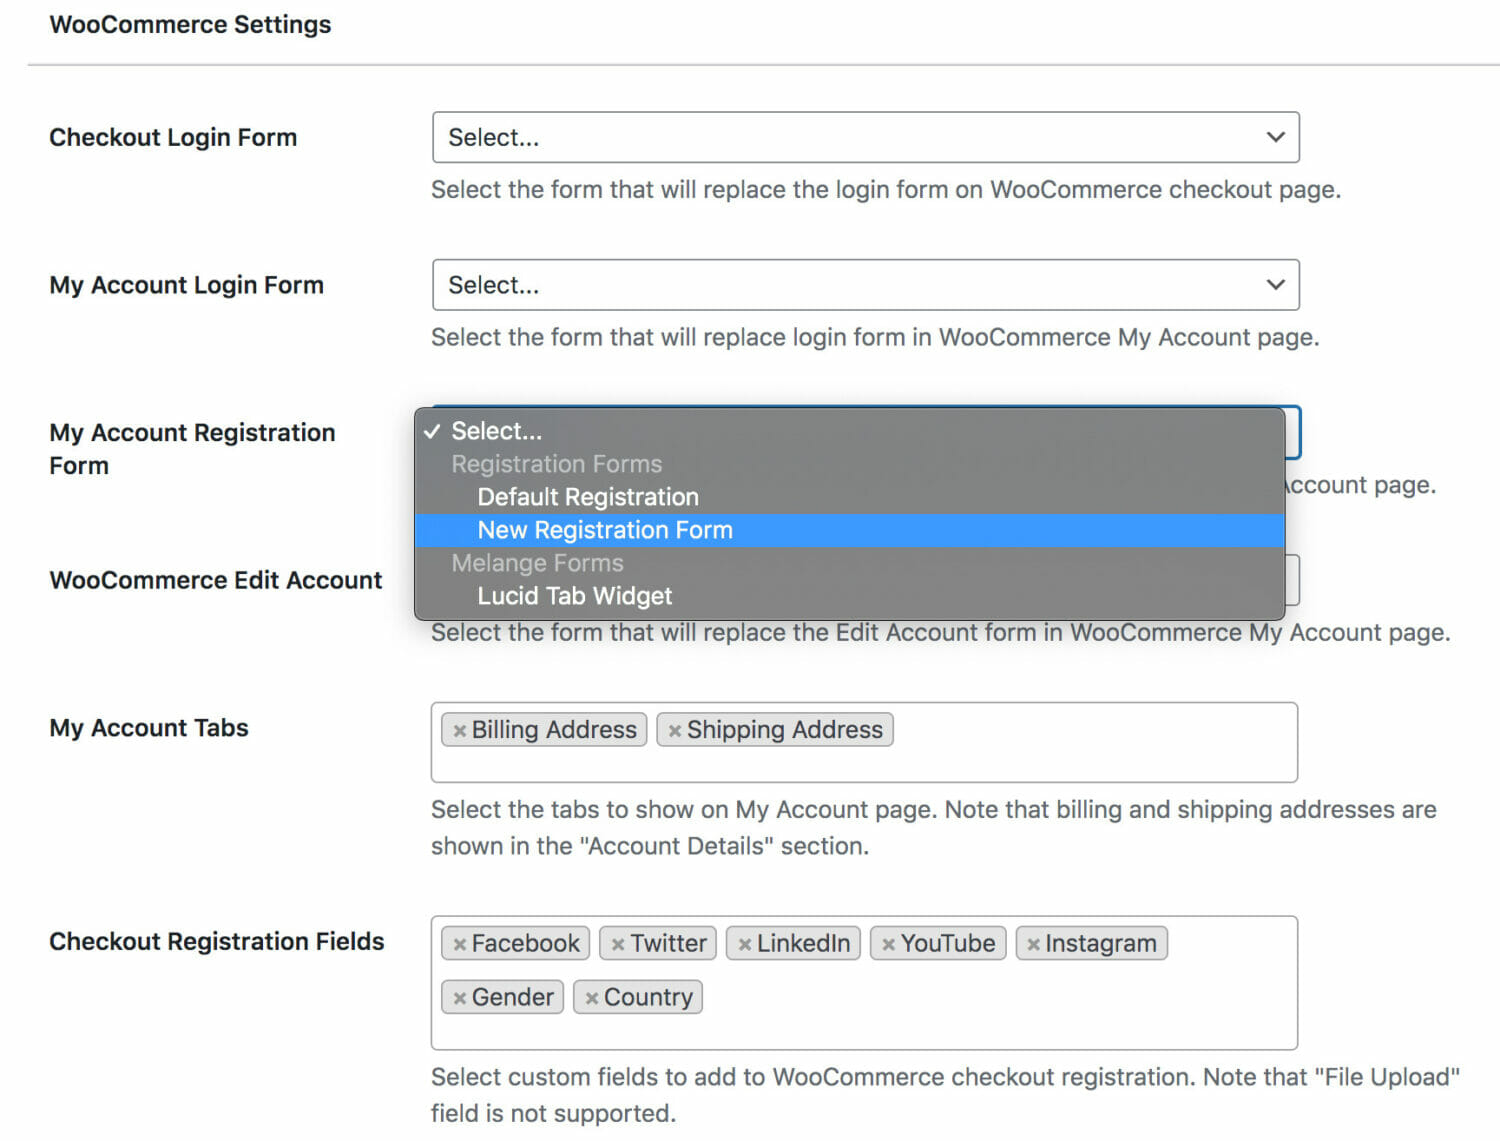
Then go to ProfilePress > Settings > WooCommerce. You should see an option called My Account Registration Form. From the dropdown menu, select the new registration form you had just built and save the settings.
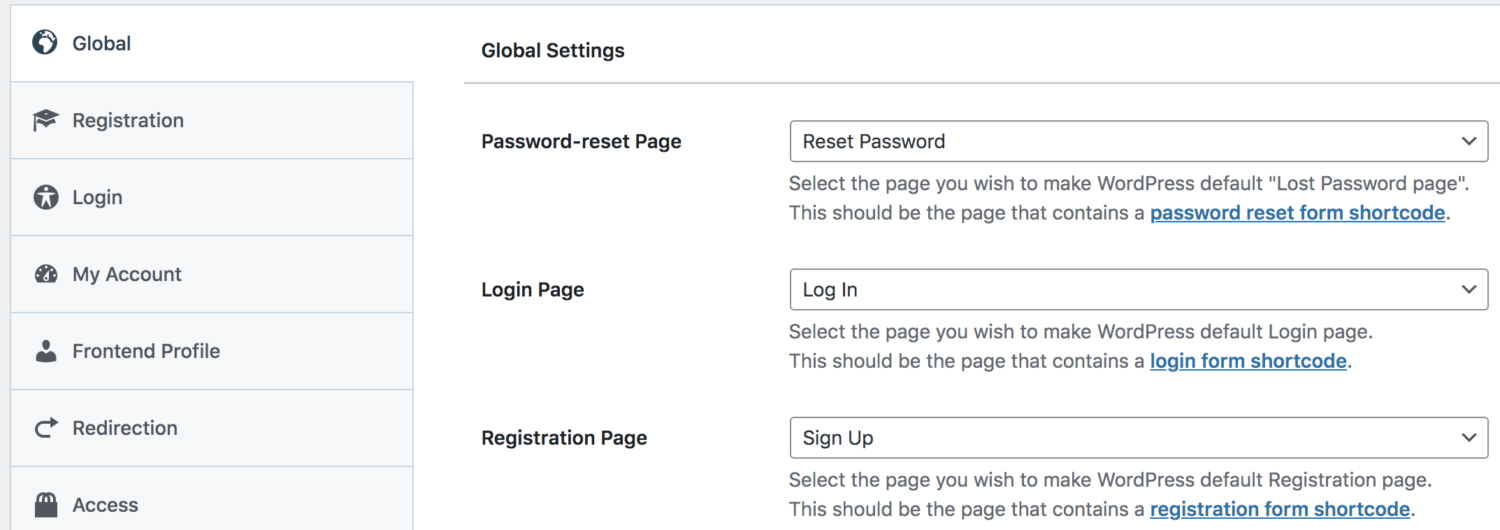
If you want, you can use this form as your default WordPress registration page for your website. All you need to do is go to ProfilePress > Settings > General > Global. Then, from the Registration Page option, select the new custom registration page.
It’s worth noting that if you ever create a new registration page, copy the form’s shortcode, create a new page, add the shortcode, and publish it. Yes, it’s that easy!
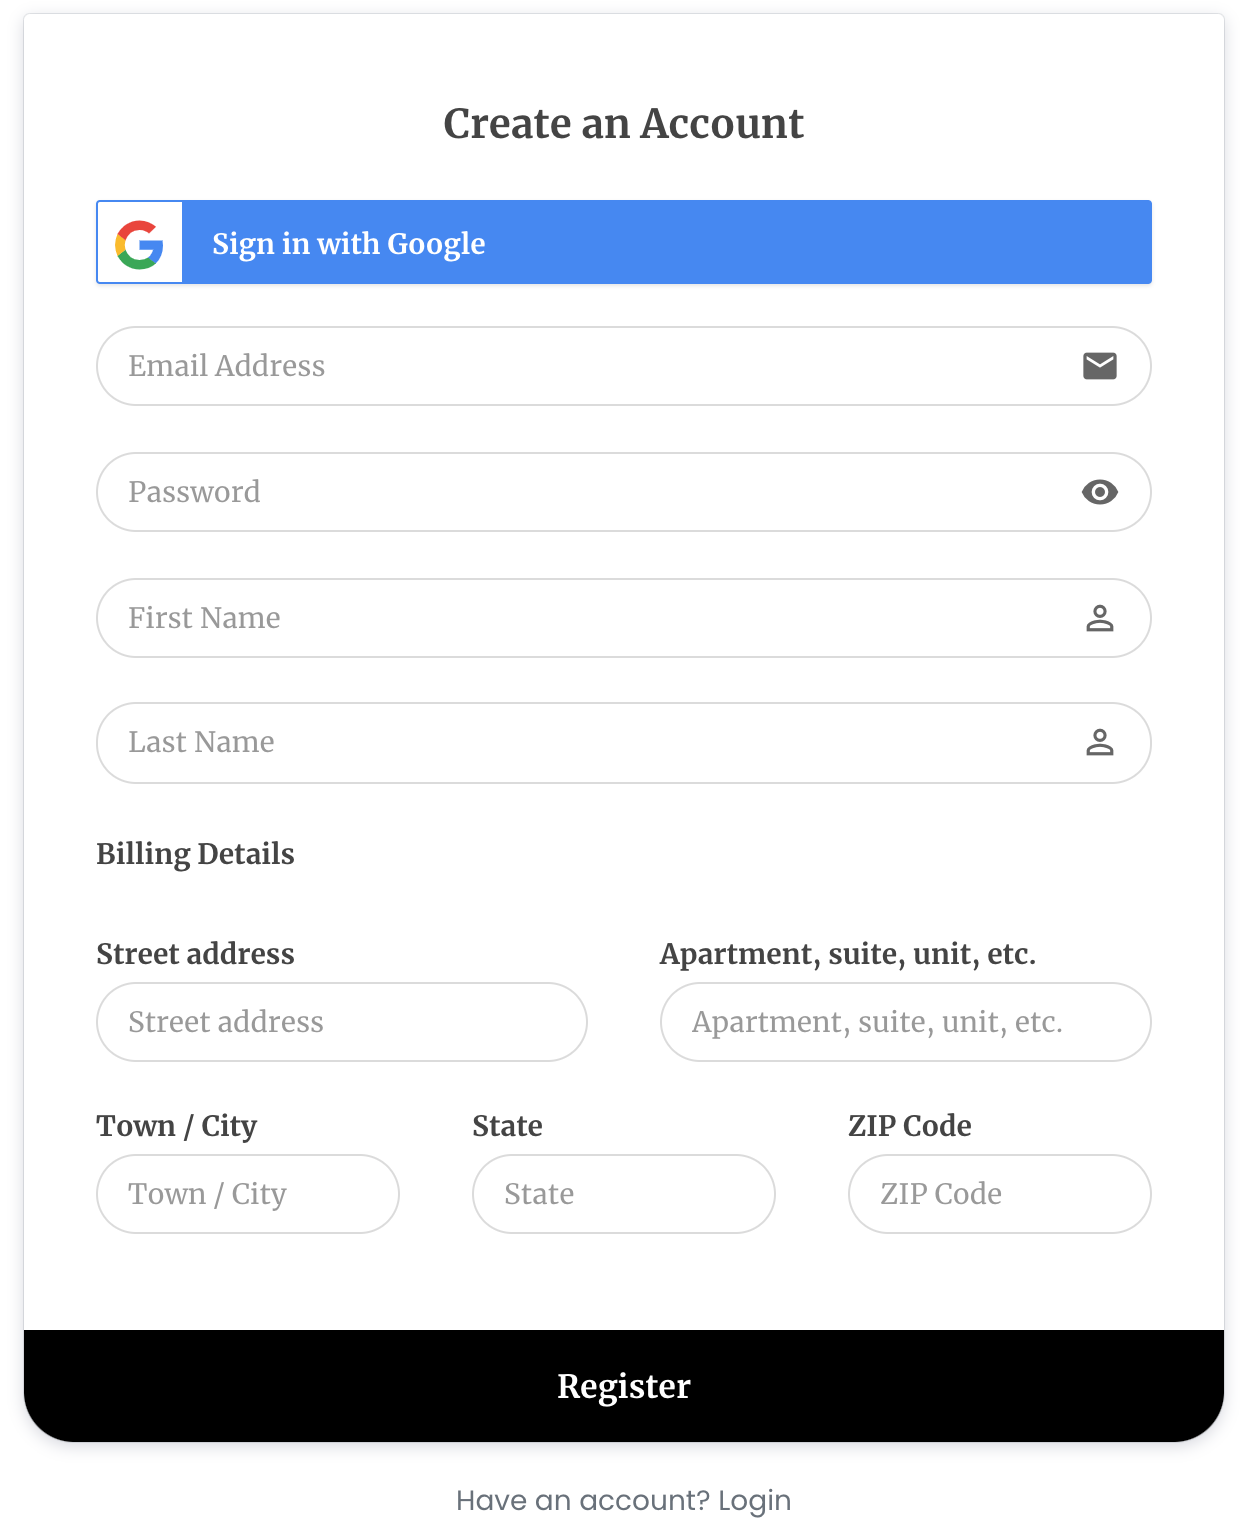
That’s it, folks! That’s how you create a custom WooCommerce registration form! You should see the registration form displayed when you preview your WooCommerce My Account page.
Now that you have the custom registration form for WooCommerce, some of you wonder if you can also create a custom login form. The process of creating a custom WooCommerce login form is identical to the process of creating a custom registration form. We will quickly show you the steps in the next section.
How to Create a Custom WooCommerce Login Form
To create a custom WooCommerce login form, go to ProfilePress > Forms & Profiles > Login > Add New.
Select the Drag & Drop Builder. Give the form a name, then choose one of the pre-built templates.
Next, add custom fields and modify the appearance of the form as per your needs.
And finally, to replace the default WooCommerce login form with the new custom form, go to ProfilePress > Settings > WooCommerce > My Account Login Form and select the new login form.
If you’d like to make the new login form your default login form for your entire website, then go to ProfilePress > Settings > General > Global. Then, from the Login Page option, select the new custom login form.
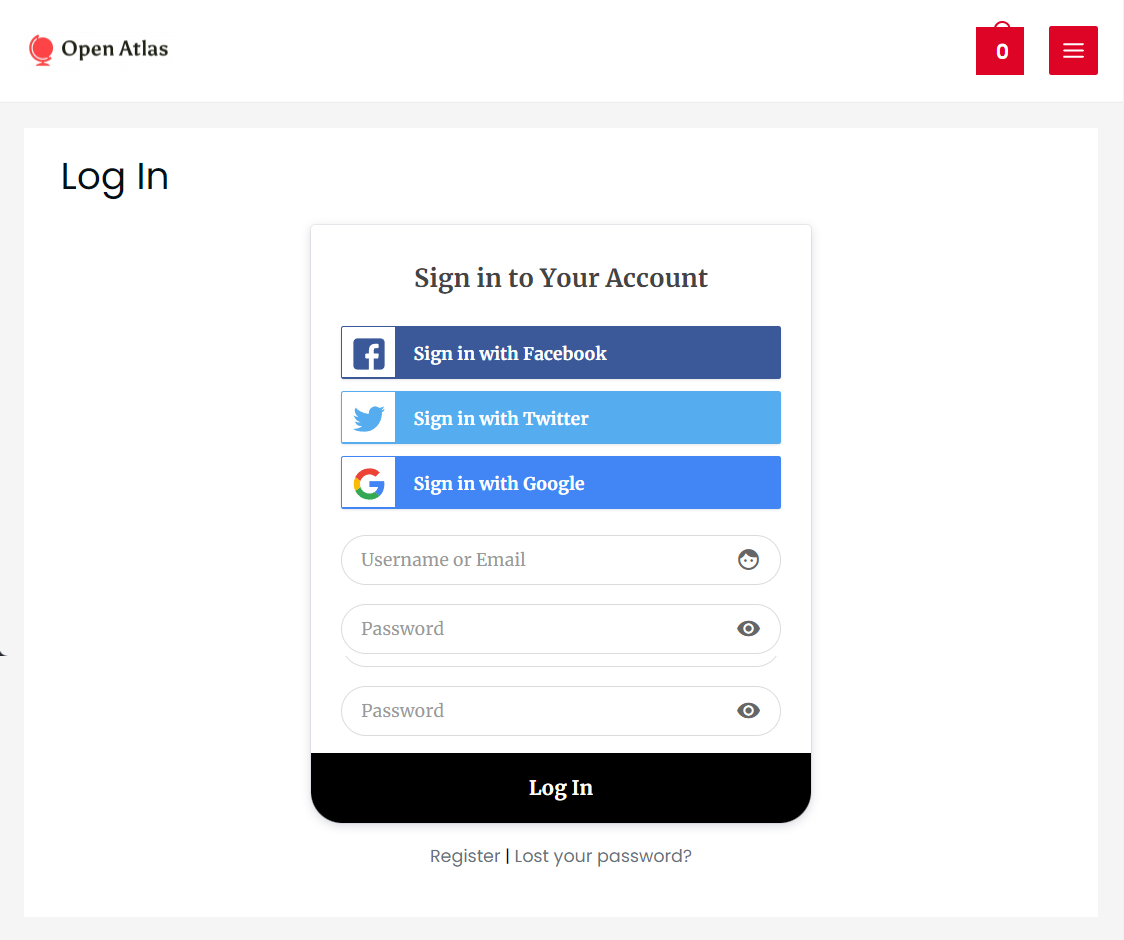
Here’s how the custom login page will look on our website:
So, with that, you now know how to create a custom WooCommerce login form.
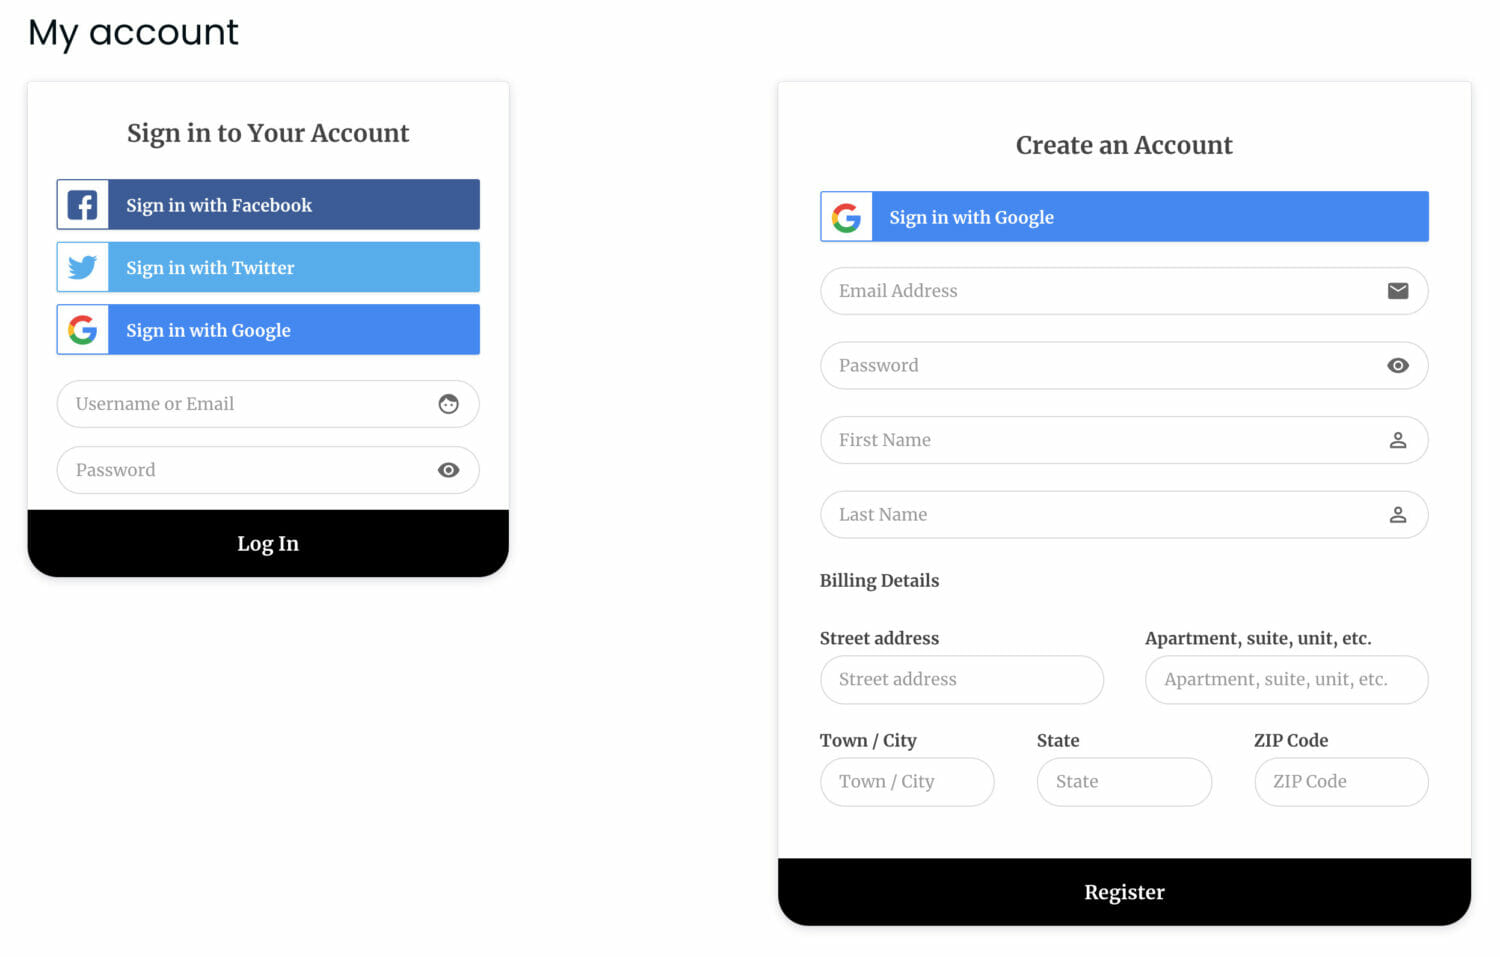
If you replace the default registration and login forms in the My Account page with custom forms from ProfilePress, here’s how it might look on your site.
In any WooCommerce store, apart from the registration and login form, visitors often use another essential form – the checkout form. Next, we will examine why you should consider customizing the checkout form and what steps you need to take.
Adding Custom Registration Fields to WooCommerce Checkout
Adding custom user registration fields to the checkout page is a great way to gather additional customer information. For instance, you can let customers add their social media accounts to simplify the registration process. This helps offer a better customer experience and boost your sales.
To add more user registration fields to the WooCommerce checkout page, go to WooCommerce > Settings > Accounts & Privacy and select Allow customers to create an account during checkout.
Next, go to ProfilePress > Settings > Custom Fields. You should find one or two custom fields available on this page. To add more custom fields, select Add New.
ProfilePress supports the following custom field types:
- Text
- Password
- Telephone
- Hidden Field
- Number
- Date
- Country
- Textarea
- Single Checkbox
- File Upload
- Select Dropdown
- Radio Buttons
- Checkbox
When you have created all the required fields, save the settings and then go to ProfilePress > Settings > WooCommerce > Checkout Registration Fields. Add the registration fields you just created.
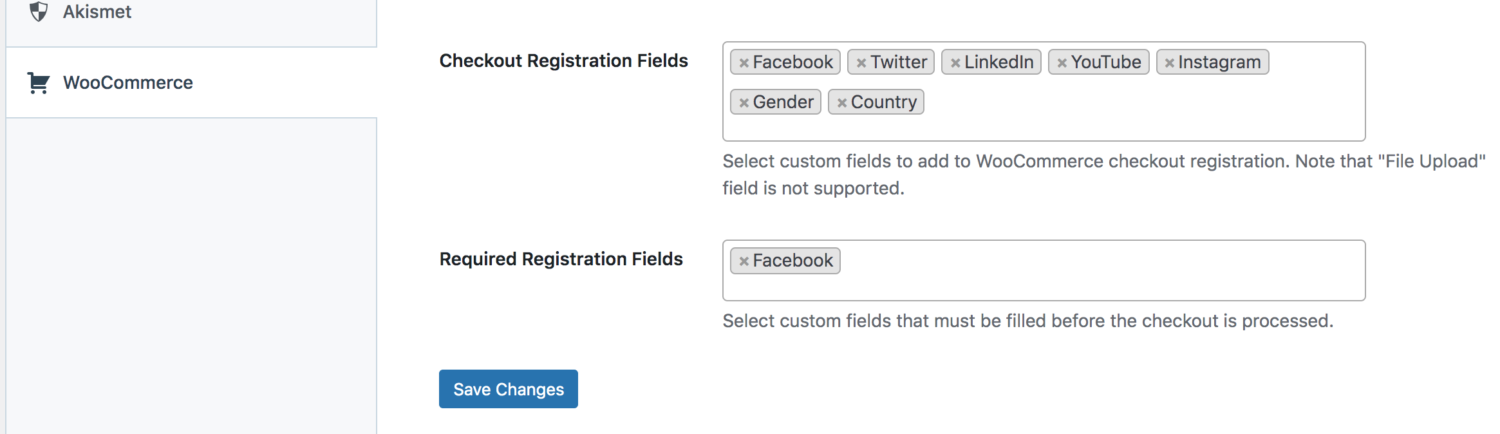
If you want to make the custom checkout registration fields required, then in the Required Registration Fields, add the fields you think should be mandatory.
Don’t forget to save the changes.
That’s it. You now have a custom checkout registration form.
Final Thoughts on Creating a Custom WooCommerce Registration Form
Collecting user information via a custom WooCommerce registration form can help boost your sales. However, WooCommerce does not offer options to add fields or customize its forms; hence, you need a plugin like ProfilePress to modify the WooCommerce login and registration forms.
That said, ProfilePress is more than just a form builder. It can help you manage users’ profiles and member directories.
Not only can you use this feature-rich plugin to prevent spam user registrations, but you can also change the default login URL and restrict content to users.