How To Sell Ebooks Online: The Complete Beginner’s Guide
Do you want to start selling eBooks online but don’t know where to start?
Selling ebooks is one of the easiest ways to monetize your audience. It’s a high-margin business that requires little-to-no maintenance. It’s great for anyone who has built an audience or teaches anything online.
In this article, I’ll show you how you can start selling eBooks on your website the easy way.
Why Sell eBooks?
Selling eBooks online is one of the best businesses. It can have the highest profit margin of all business models. You write an eBook once, and then you can sell as many copies as you’d like. It also doesn’t require the constant maintenance required by other businesses, such as software. However, you might need to update your eBooks maybe once or twice yearly to fix grammatical mistakes or other minor issues.
Let me show you a couple of examples of businesses that are doing this successfully.
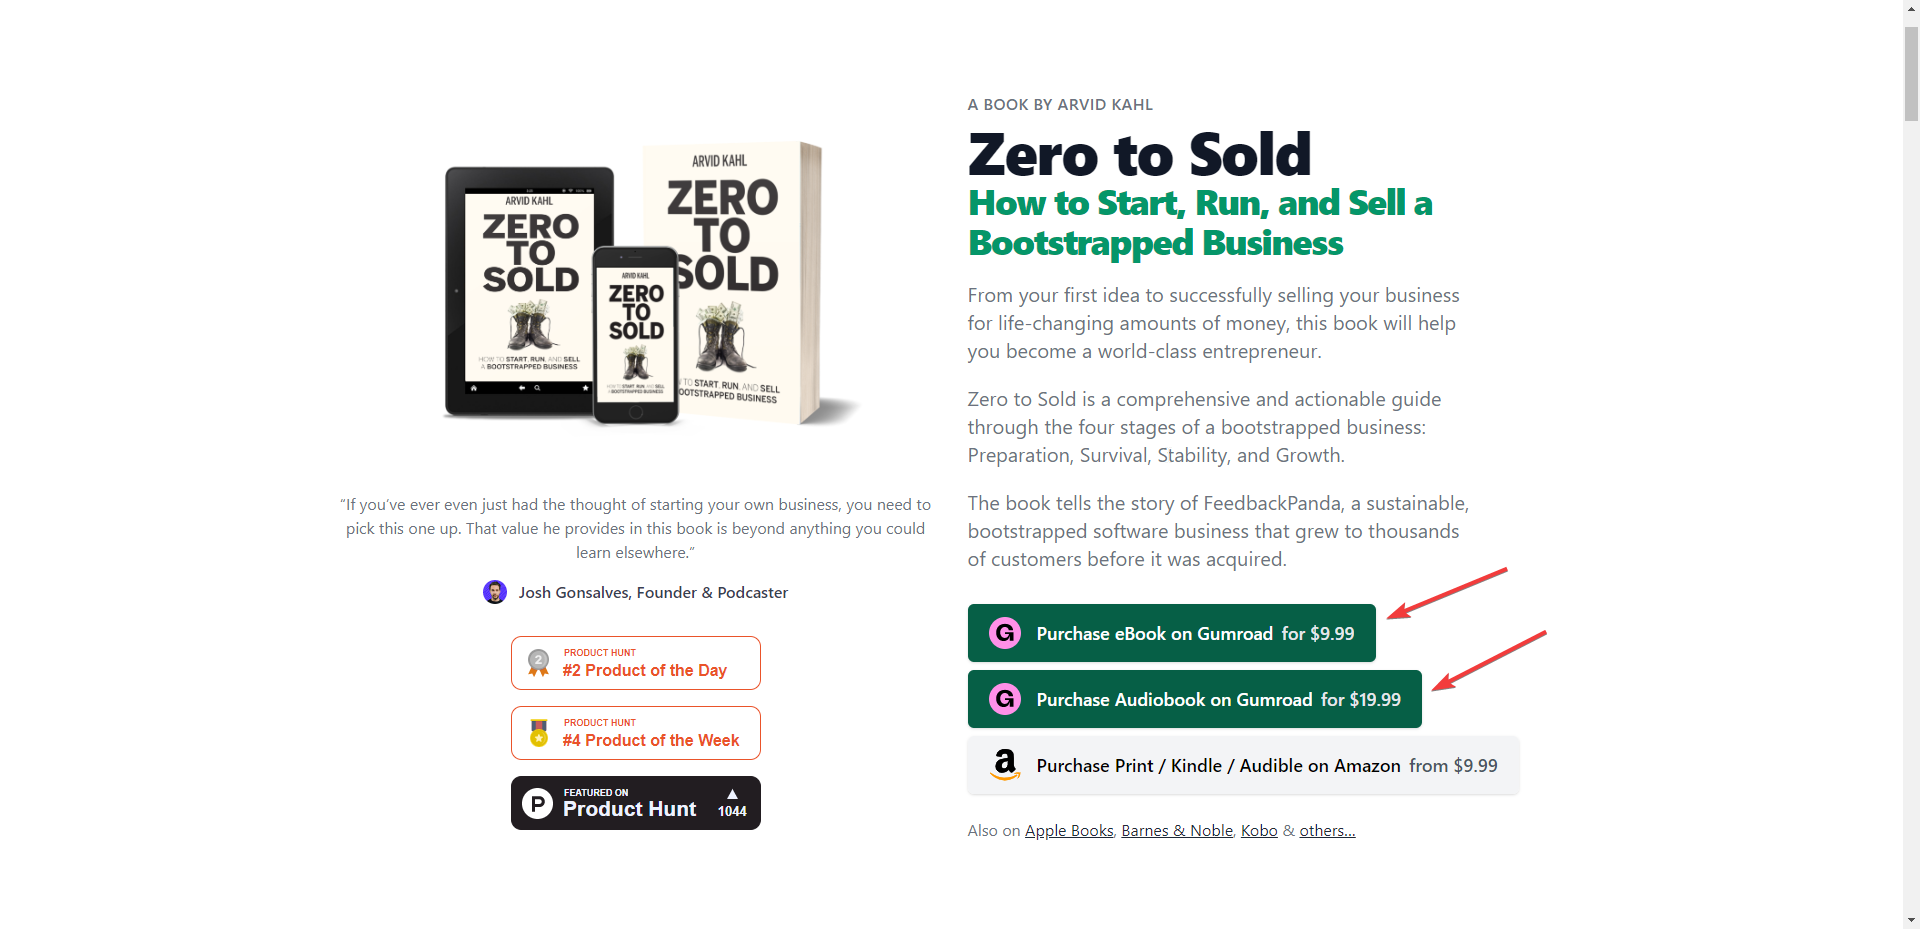
First up is Arvid Kahl. He’s an Entrepreneur and a writer. He recently published his new book called Zero to Sold. It’s available on Amazon, but he also sells it on Gumroad:
Although it’s easy to start selling eBooks on platforms like
Do you want to start selling eBooks online but don’t know where to start?
Selling ebooks is one of the easiest ways to monetize your audience. It’s a high-margin business that requires little-to-no maintenance. It’s great for anyone who has built an audience or teaches anything online.
In this article, I’ll show you how you can start selling eBooks on your website the easy way.
Why Sell eBooks?
Selling eBooks online is one of the best businesses. It can have the highest profit margin of all business models. You write an eBook once, and then you can sell as many copies as you’d like. It also doesn’t require the constant maintenance required by other businesses, such as software. However, you might need to update your eBooks maybe once or twice yearly to fix grammatical mistakes or other minor issues.
Let me show you a couple of examples of businesses that are doing this successfully.
First up is Arvid Kahl. He’s an Entrepreneur and a writer. He recently published his new book called Zero to Sold. It’s available on Amazon, but he also sells it on Gumroad:
Although it’s easy to start selling eBooks on platforms like Gumroad, it also heavily affects your profit margins. This is because you have to pay these platforms a percentage of the sale and a per transaction fee for credit card processing. If you sell your eBooks directly on your website, you don’t have to pay any such additional fees.
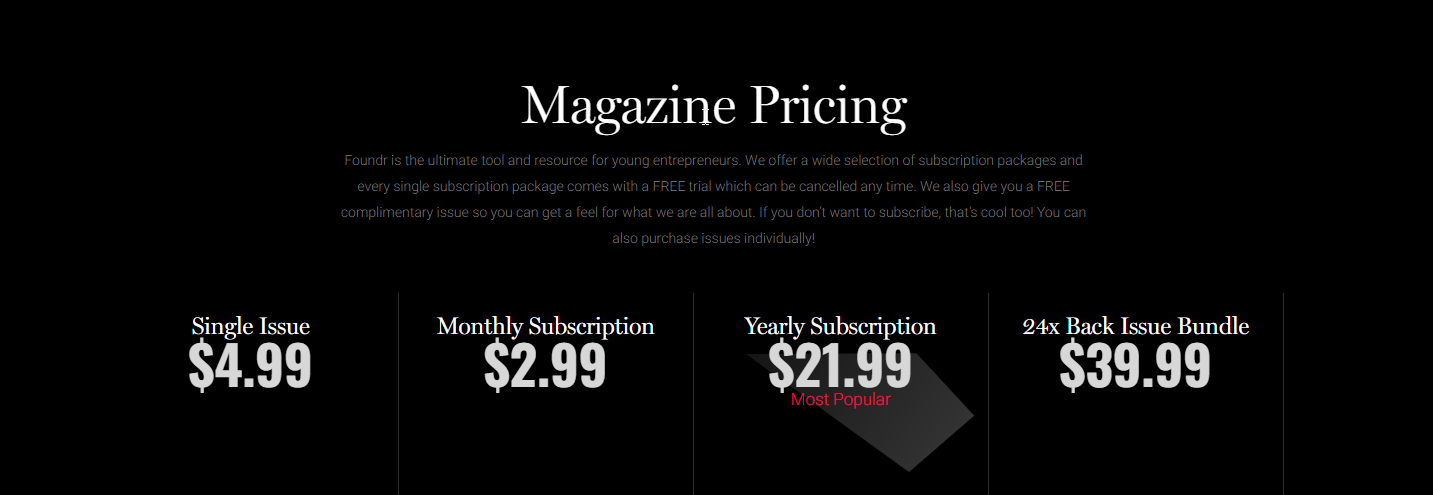
Another benefit of selling your eBooks on your website is offering your customers bundles or subscription-based access. For example, this is what Foundr magazine does. It’s a digital magazine that you can buy a monthly or yearly subscription to:

You can either purchase a single issue from their archives, or you can get a subscription:
In this article, I’ll show you the steps you need to follow to start selling your eBooks online.
How To Start Selling eBooks On Your Website Today
To start selling eBooks on your WordPress website, you need a plugin that helps you do that. Dozens of plugins let you sell online, but they all come with a steep learning curve and cost an arm and a leg to buy.
This is why we created ProfilePress. It’s an all-in-one plugin for selling digital products and memberships on your WordPress website. You can use it to sell downloadable products such as eBooks, online courses, art, music, etc. You can also use it to create a subscription-based membership site where people can purchase recurring premium plans to access your content.
ProfilePress is the most straightforward plugin in the market, and it can help you get up and running within minutes.
So, what are you waiting for? Download ProfilePress right now, and let’s start setting up your online eBook store.
Step 1: Create a Pricing Plan For Your eBook
To start selling your eBooks, you first need to create at least one pricing plan.
If you want, you can create more than one pricing plan for your book. For example, you can do this to create bundles that come with different versions of your eBook. This is what Arvid Kahl, from the earlier example, does:
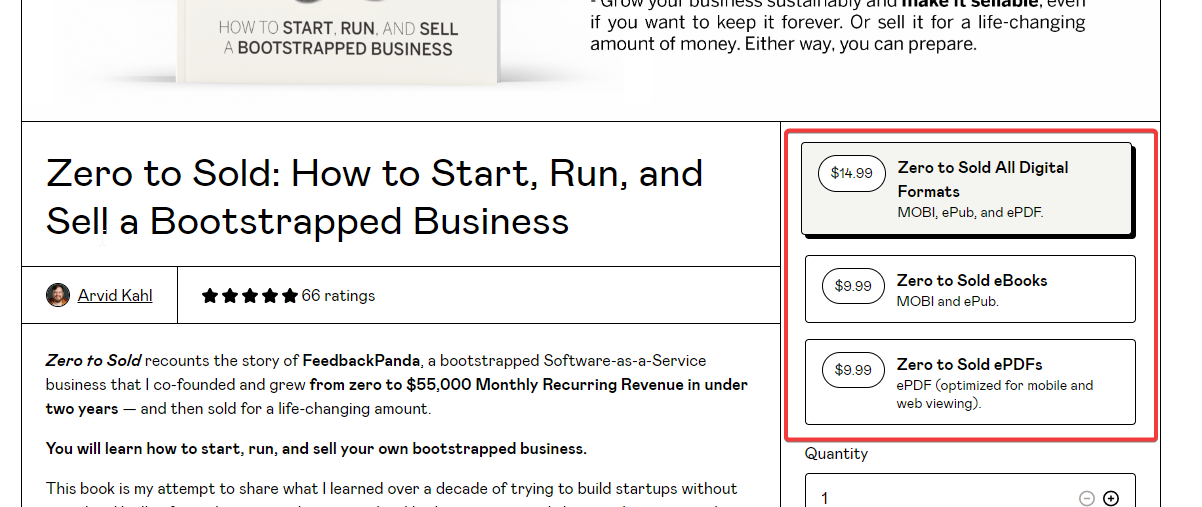
You can buy a bundle of all digital formats to read on your Kindle, phone, and PC. Or you can buy the version you prefer.
You’ll also want to create more than one plan if you want to sell different versions of your eBooks. For example, if you have an Audiobook version and an ebook version, you’ll want to create two other plans.
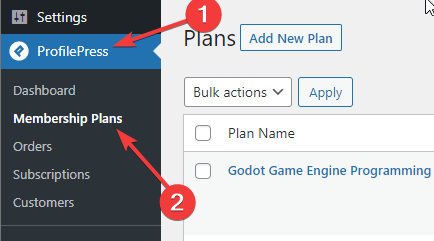
To create a plan in ProfilePress, first, navigate to the Membership Plans section under ProfilePress in your WordPress dashboard:
Then, click the Add New Plan button. It’ll take you to the Add Plan page:
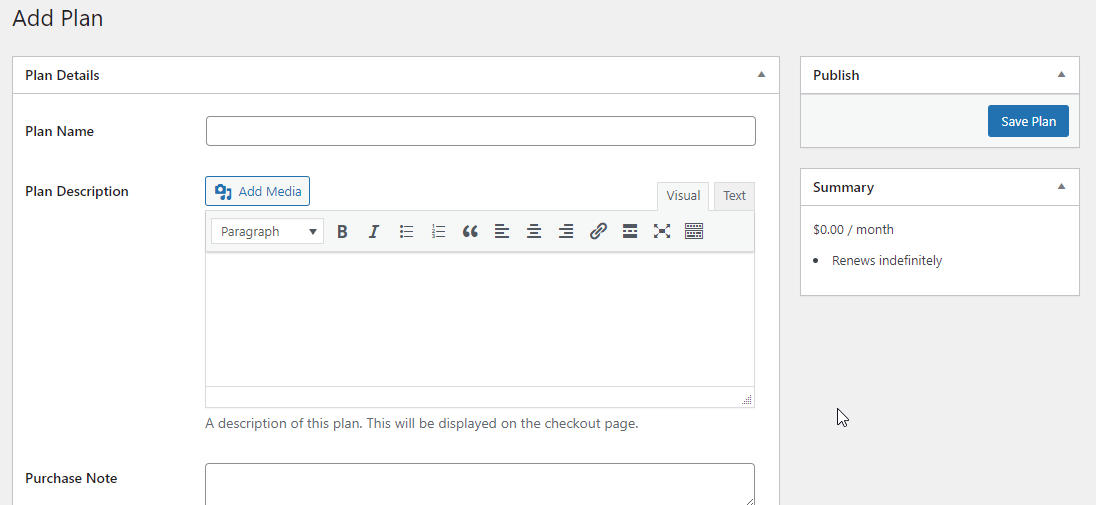
Let’s go over the Plan Details section first:

Here’s what these options do:
- Plan Name: The name of your plan. This will be visible to your audience.
- Plan Description: A brief description of this pricing plan. Be as descriptive as you can be about what this plan offers. This description will be displayed on the checkout page when a user purchases this plan.
- Purchase Note: This note will be emailed along with the order receipt to your customers when they purchase this plan.
- User Role: Create a new User Role or assign an already existing one. This is useful if you have a monthly and an annual plan. If you have two plans offering the same features, you only need to select the create new role option for one of them and then select that new role for the other.
- Price: How much do you want to charge for your eBook? If you are creating a monthly plan, this is how much your customer will be charged every month.
Let’s go over the Subscription Settings section:
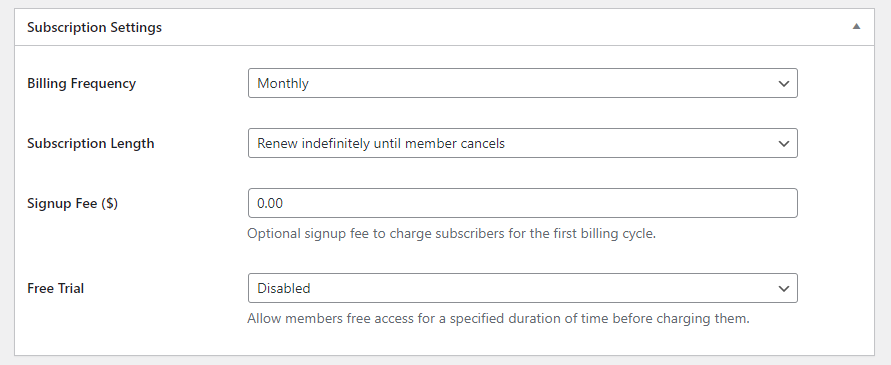
- Billing Frequency: This is how often your customer will be charged. Select Monthly to create a monthly subscription membership. Select One-Time to create a one-time payment plan. The below options don’t apply if you select one-time for this setting.
- Subscription Length: How long do you want this payment plan to last? If you are creating a subscription plan, you can select a Fixed number of payments for this option. This will allow you to create an instalment plan for your customers. Leave it be if you want this subscription to get charged until it’s cancelled.
- Sign-Up Fee: If the signup process requires manual effort, such as adding the customer to another application, you can charge a one-time signup fee. This additional fee will be charged along with the first payment that the customer makes for this recurring plan.
- Free Trial: If you create a recurring subscription, you can offer a free trial to your users. Their cards won’t be charged until their free trial period runs out. And if they cancel their account before the trial ends, they won’t get charged.
This brings us to the final section:
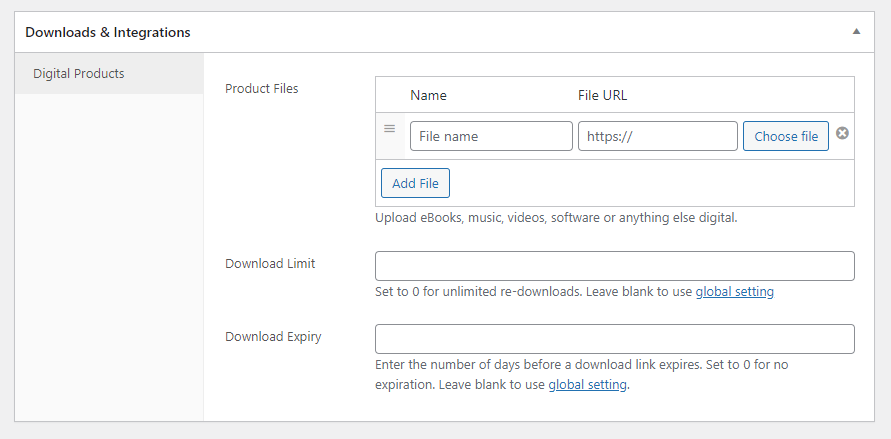
This is where you’ll upload your eBook file.
You can either upload your eBook file here by clicking the Choose File button or enter the link to the file and a name for the file. It’s much better to upload your file as it gives ProfilePress more control over who gets to access it.
You can also set a download limit for how many times the user can re-download this file. You can also set an expiration for the download link that will be generated for every customer.
When you are done customizing your plan, click the Save Plan button in the top right to publish this plan.
Step 2: Create a simple landing page
Now that you’ve created a pricing plan for your eBook, you need to give your users a way to purchase it. So, let’s create a simple landing page for your eBook.
But first, let’s take a look at what a good landing page looks like:
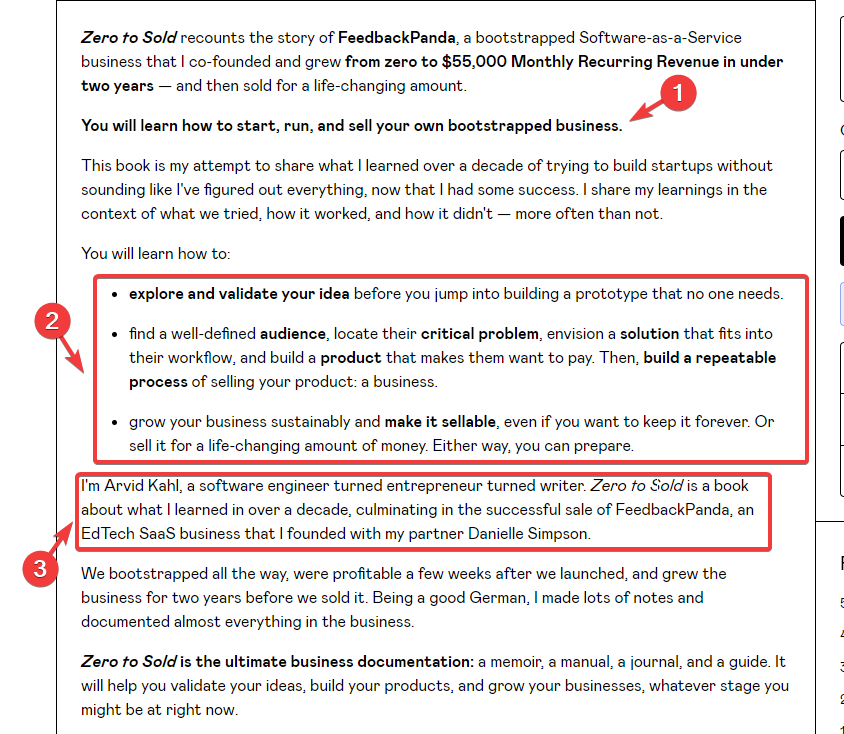
Here’s what makes Arvid’s landing page great:
- He gives you a quick one-line pitch for the book. Then, he highlights the main reason why you should buy his book.
- He lists all the main benefits you’ll get out of the book. This list includes three solid reasons you should buy his book if you’re an aspiring entrepreneur.
- He talks about why you should listen to him. He’s an entrepreneur with over a decade of experience. In his book, he’ll teach you everything he has learned about building a business from scratch, growing it, and selling it.
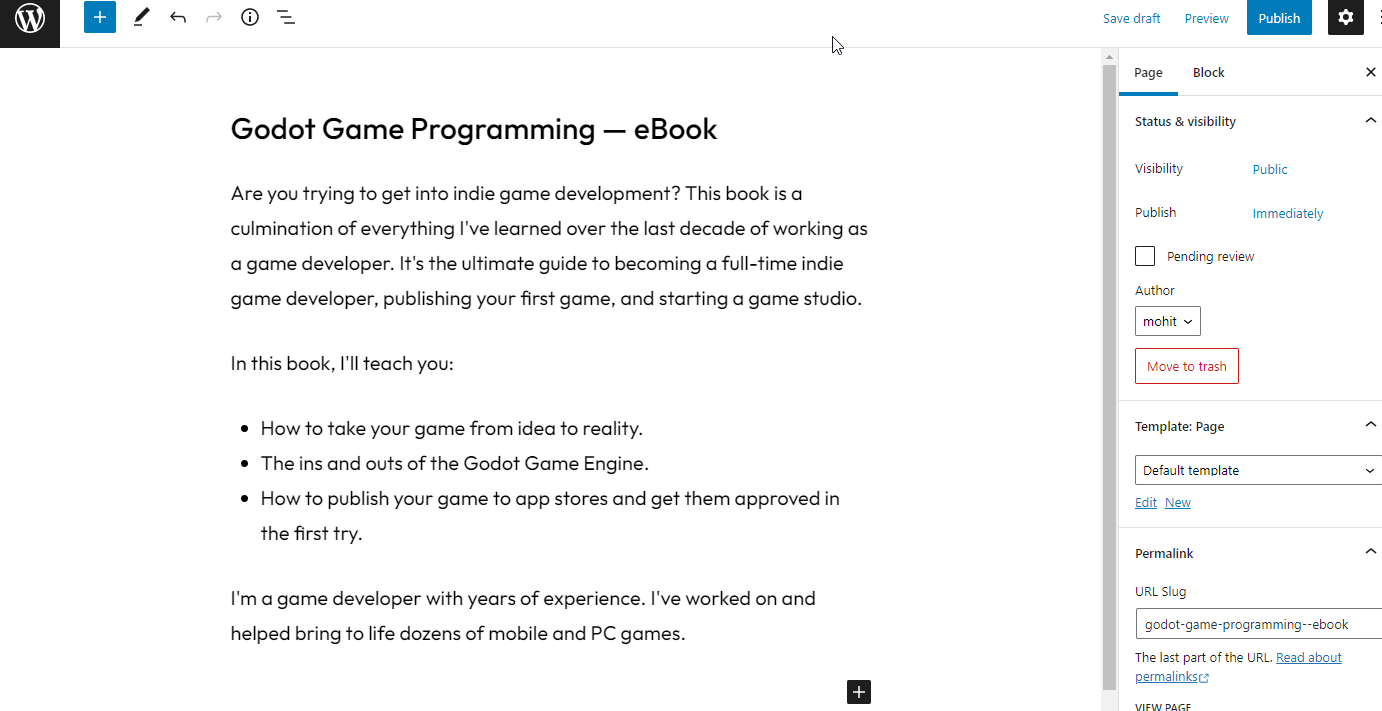
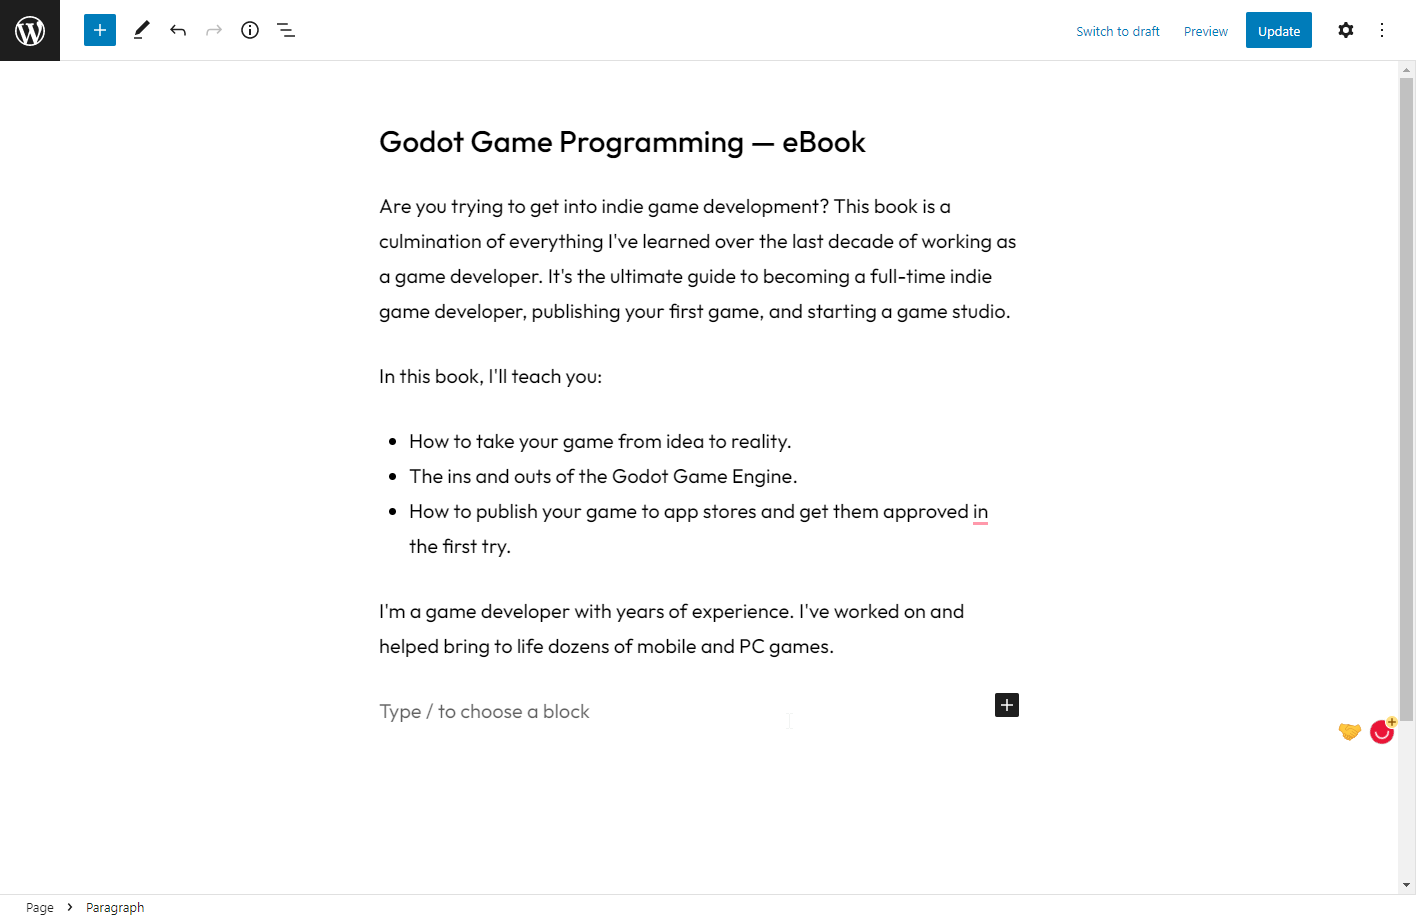
To create your landing page, first, create a new page in WordPress. Then, add some details about your eBook:
Tip: If you have more than one plan, skip this section and move on to the next one, where I will show you how to create a pricing table instead.
Now, click the blue Add Block button at the top of your screen and select the button block type to add a button to your page:
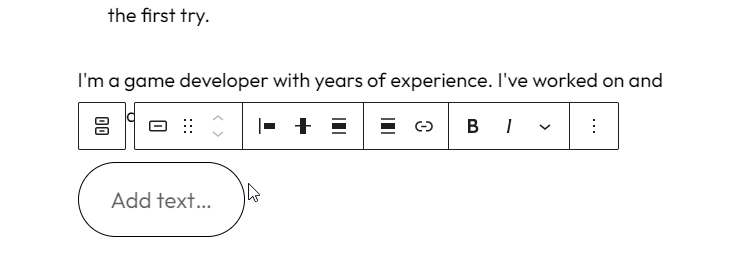
Finally, click the button to be able to edit its text.
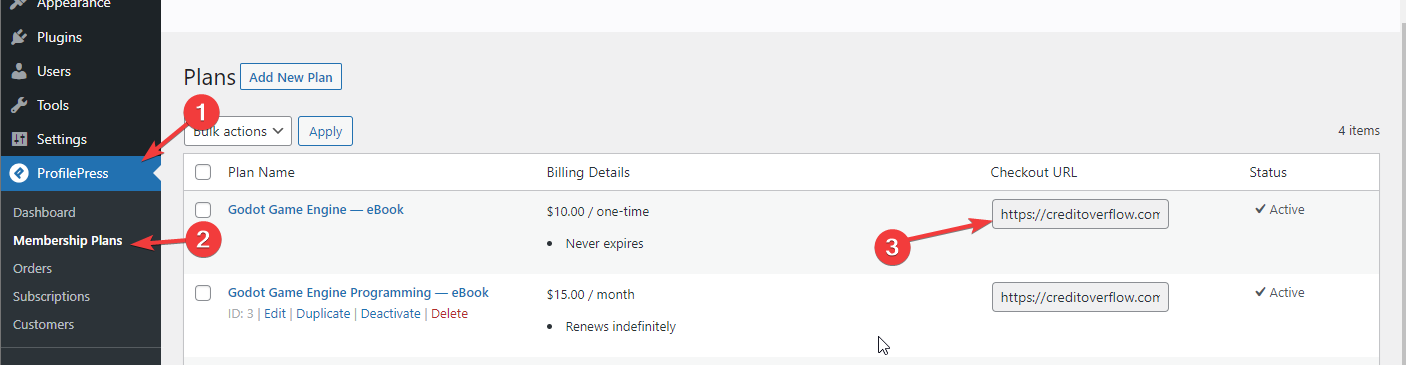
Now, navigate to the Membership Plans section of ProfilePress from your WordPress dashboard and copy the checkout link of the plan you created for your book:

Once you’ve copied the link, add it to the button on your landing page:
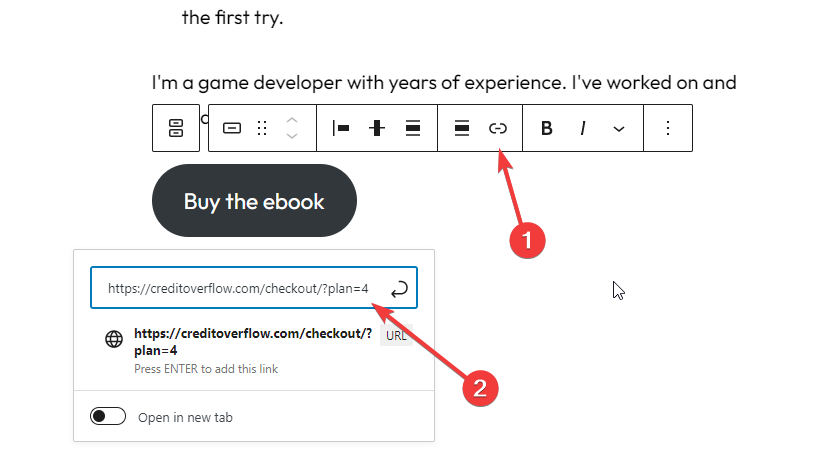
Finally, press Enter after entering your pricing plan’s checkout link.
Now, click the Publish button to publish your ebook’s landing page.
When your users click this link, they’ll see this checkout page:
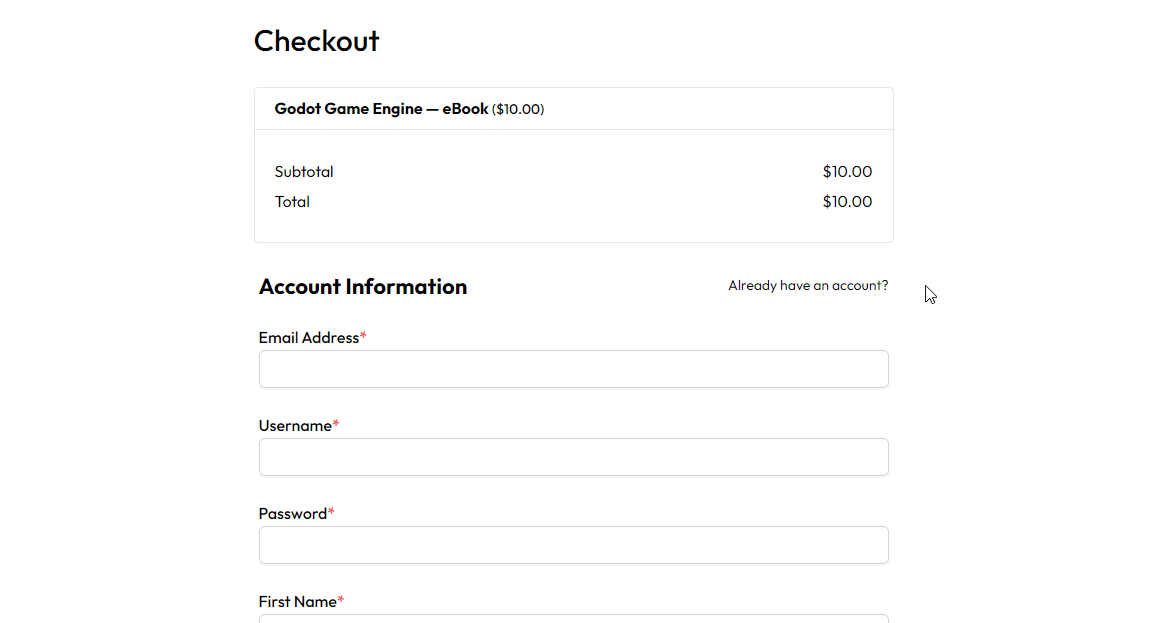
In addition, you can visit the link yourself in incognito mode to see what your customers will see.
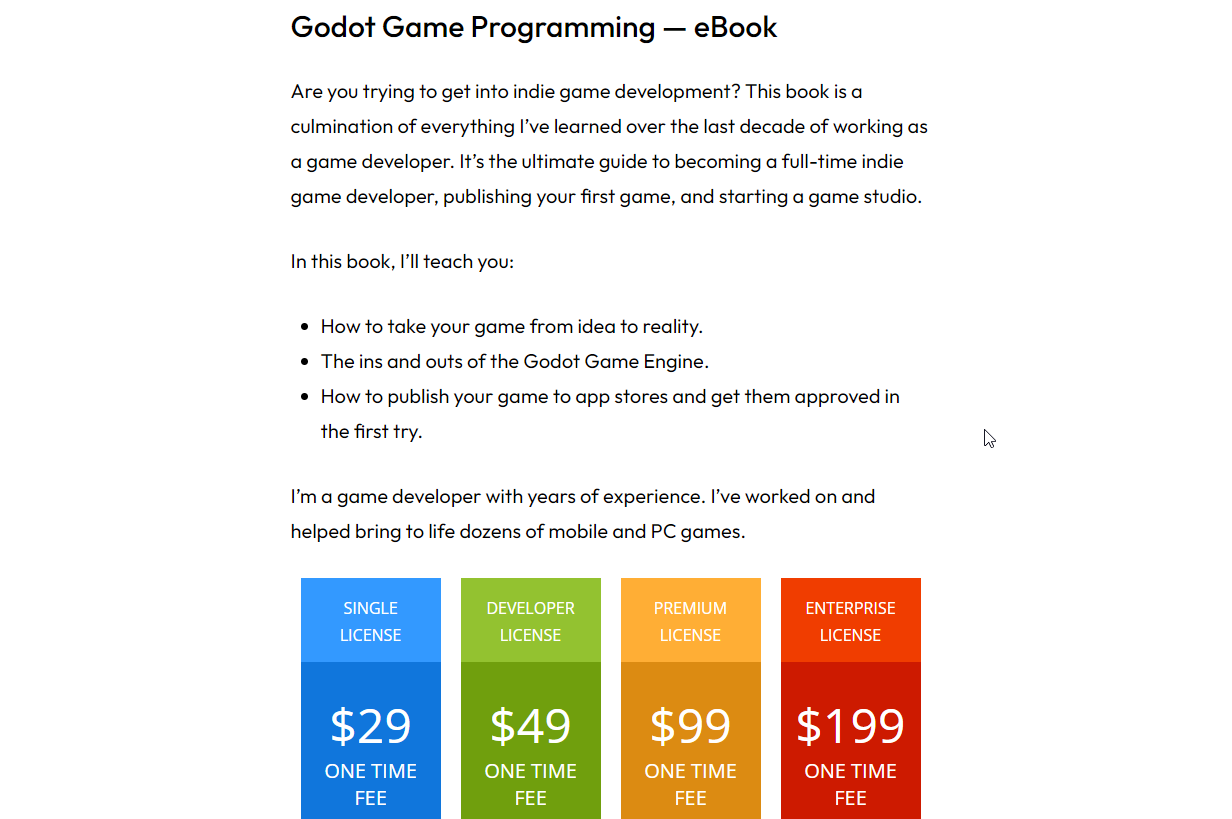
Step 3: Create Your Pricing Table
If you have more than one pricing plan for your book, you’ll want to create a pricing table to better explain the difference between the different pricing plans.
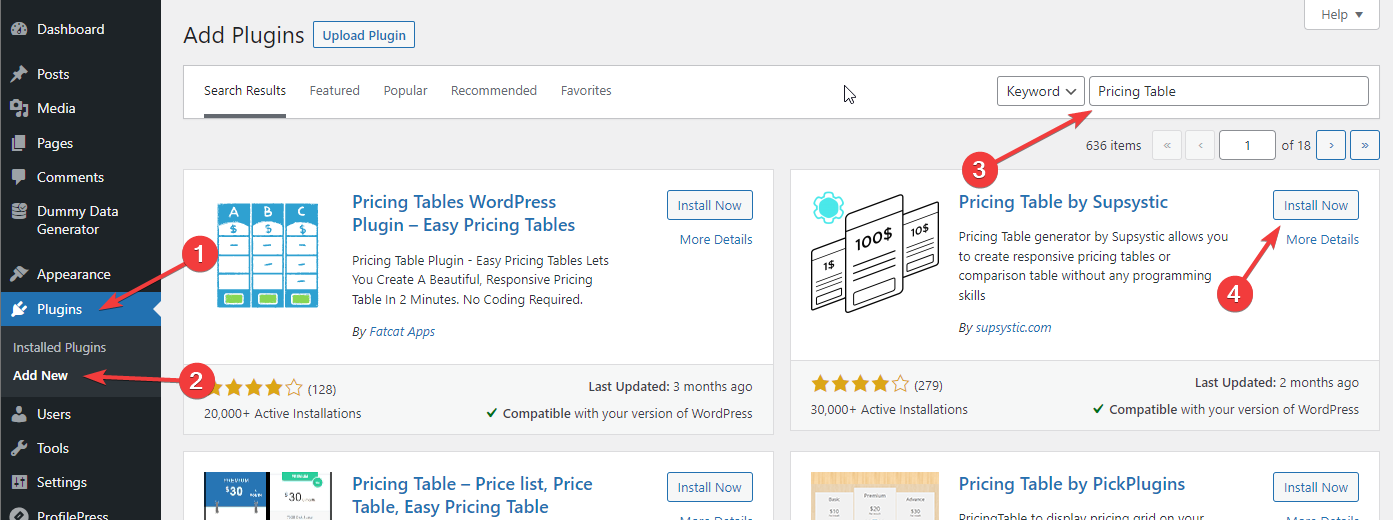
To do this, you’ll need to navigate to the Add New section under Plugins, search for Pricing Table and install and activate the Pricing Table by Supsystic plugin:
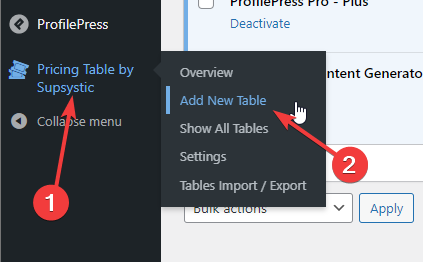
Now, navigate to add a new table section under the Pricing Table by Supsystic menu:
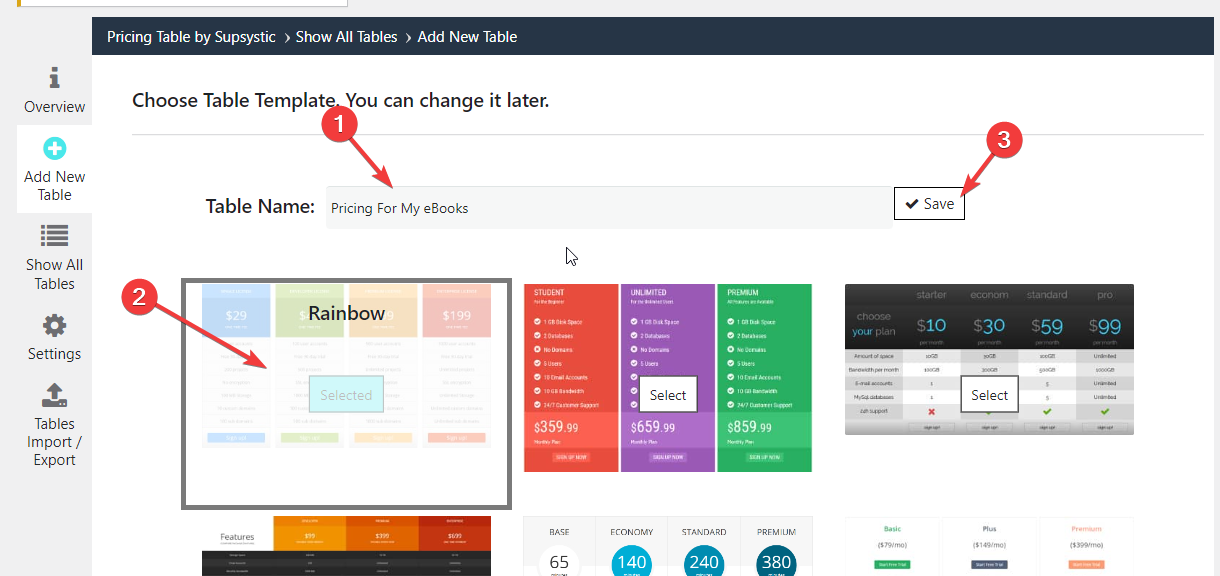
Now, select a template, enter a name, and click the save button:
You can now edit your pricing table by clicking any element you want to customize. You’ll see the available customization options when you click an element.
Right now, all you have to do is add details about your pricing plans to the list of features and change the pricing to your actual prices.
When you are done customizing the details about your plans, find the checkout link to the first plan from the Membership Plans section of ProfilePress:
Now, click the button at the bottom of the pricing table’s first pricing column, and click the link button:
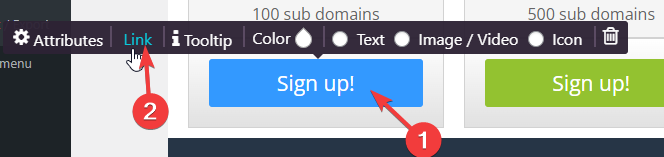
Paste the checkout link you copied and press enter. Now, repeat this for all the other pricing plans.
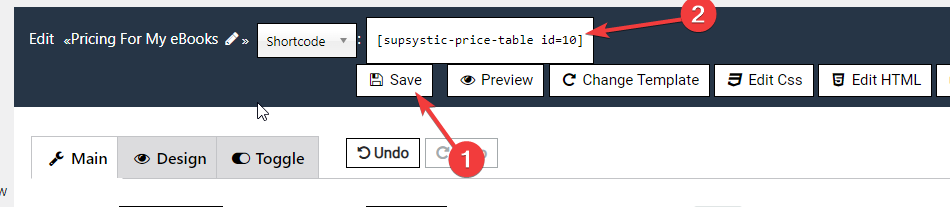
When you’re done, click the Save button on top and copy the shortcode:
Step 4: Add Pricing Plan To Your Landing Page
Once you’ve created the pricing plan and copied its shortcode, it’s time to display it on your eBook’s landing page. To do this, open your eBook’s landing page in edit mode:
Now, add the shortcode you copied at the bottom of the page:
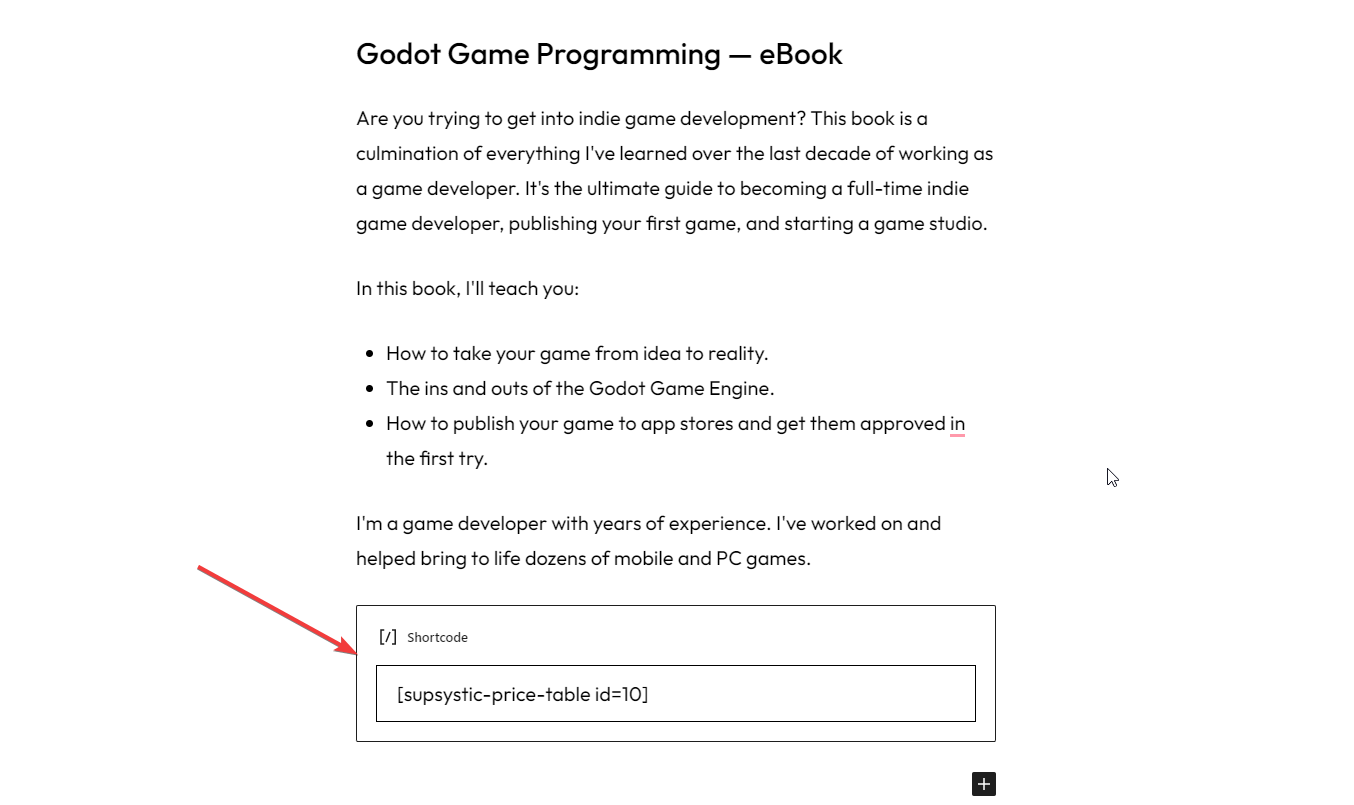
Next, click the publish/update button on top, and visit the page to see the results:
As you can see, our landing page is live.
You might need to scroll down a bit to see your pricing table if there’s a lot of text on the page.
Conclusion
If you want to start selling eBooks online, there’s no easier way to start than using ProfilePress. It’s made for beginners and has all the features you’ll need to get started.
To start selling eBooks on your WordPress site, follow this tutorial, and you’ll be up and running within the next 15 to 20 minutes.