How to Sell Digital Products & Downloads With RazorPay & WordPress
For many years, e-commerce has allowed business owners to operate online stores. One fascinating aspect of e-commerce is that it is not limited to physical products. Business owners in the creative industry can bundle their knowledge and expertise and sell them as digital products and downloads.
These digital products and downloads are typically available only in electronic form and can be accessed through various devices, such as smartphones, laptops, iPads, and more. They include videos, music, ebooks, audio, and other items.
However, just uploading your digital product on your website is not enough. You must choose the right payment gateway to make accepting payments seamlessly. That’s where Razorpay comes in.
This article will explain the benefits of selling digital products and downloads. We will also discuss why we recommend Razorpay as the preferred payment gateway for your digital store in India and how to use it to sell digital products and downloads with Razorpay in WordPress.
Let’s dig right in.
Why Sell Digital Products and Downloads?
Selling digital products and downloads has become a popular choice for businesses of all sizes. The rise of e-commerce has made it easier than ever for entrepreneurs and small business owners to reach a global audience, and digital products offer an efficient way to deliver products to customers without the need for physical inventory or shipping costs.
One of the most significant advantages of selling digital products is the low overhead costs. Unlike physical products, digital products do not require manufacturing or shipping costs.
Another benefit of selling digital products is the ease of distribution. Customers can receive their products instantly without waiting for shipping or delivery. This can increase customer satisfaction and encourage repeat business.
Selling digital products also allows businesses to offer a broader range of products and services. Digital products include ebooks, software, courses, music, and more. This means that companies can diversify their product offerings without investing in physical inventory or equipment. This can also help companies to reach a wider audience with different interests and needs.
Finally, selling digital products allows businesses to reach customers on a global scale. With the rise of e-commerce and digital downloads, companies can now sell products and services to customers worldwide. This means businesses can reach a larger audience, increase revenue, and expand their brand globally.
Now that you know why you should consider selling digital products and downloads, let’s take a look at why you should choose Razorpay as your payment gateway for your eCommerce store.
6 Benefits of Using Razorpay Payment Method
Razorpay offers a range of features and benefits, making it an ideal choice for businesses of all sizes. This article will explore six benefits of using Razorpay as your payment method.
1. Easy Integration
Razorpay’s payment gateway is easy to integrate with your website or mobile app. The platform provides a wide range of APIs, plugins, and SDKs, making integration a breeze. Whether using a popular e-commerce platform or building your website from scratch, you’ll find that Razorpay is easy to set up and customize to your needs.
2. Multiple Payment Options
Razorpay supports various payment options, including credit and debit cards, net banking, UPI, and mobile wallets. This means that your customers can choose the payment method that suits them best, resulting in a better checkout experience and higher conversion rates.
3. High-Security Standards
Razorpay takes security seriously and has implemented measures to ensure your customer’s payment information is safe and secure. The platform is PCI-DSS compliant, uses advanced fraud detection systems, and provides real-time risk monitoring to prevent fraudulent transactions.
4. Fast Settlements
With Razorpay, you can receive settlements directly to your bank account within two working days. This means you’ll have access to your funds faster, which can help improve your cash flow and streamline your business operations.
5. Advanced Analytics
Razorpay’s dashboard provides detailed analytics and insights into your transactions, allowing you to monitor your business’s performance and identify areas for improvement. You can track your transaction volumes, success rates, and more in real time.
6. Excellent Customer Support
Razorpay’s customer support team is available 24/7 to help you with any questions or issues. The platform also provides extensive documentation, guides, and tutorials to help you get the most out of its features and functionality.
Selling Digital Products & Downloads with Razorpay & WordPress
Numerous methods exist for selling digital goods, such as eBooks, videos, and audio. You can employ platforms like Amazon, Shopify, and Sellfy to upload and sell your products.
Although these platforms are effective, selling digital products through your WordPress website remains optimal. This is because it provides the most flexibility, giving you complete authority over your products and payments. Furthermore, it is user-friendly, so you do not need coding experience, making it suitable for beginners.
ProfilePress is a WordPress membership plugin designed for quickly selling digital products, such as eBooks, videos, music, and plugins. It offers a range of powerful features, including:
- Payment integrations,
- Easy paywall setup,
- Custom frontend forms,
- Coupon and discount creation,
- Customizable themes, and
- Add-ons that enhance the user experience.
With ProfilePress, you have more control over your digital payments. The plugin enables members to manage their accounts and subscriptions, while admins can view which products have been downloaded and by whom.
One impressive aspect of ProfilePress is that you can seamlessly integrate Paystack to accept payments. The following section will guide you on integrating Paystack with ProfilePress for a hassle-free payment experience.
1. Install and Activate ProfilePress
The first step to selling digital downloads on your WordPress site is to install ProfilePress. Once you’ve gotten your copy of ProfilePress here, you can download the ZIP file. ProfilePress will also send you a license key.
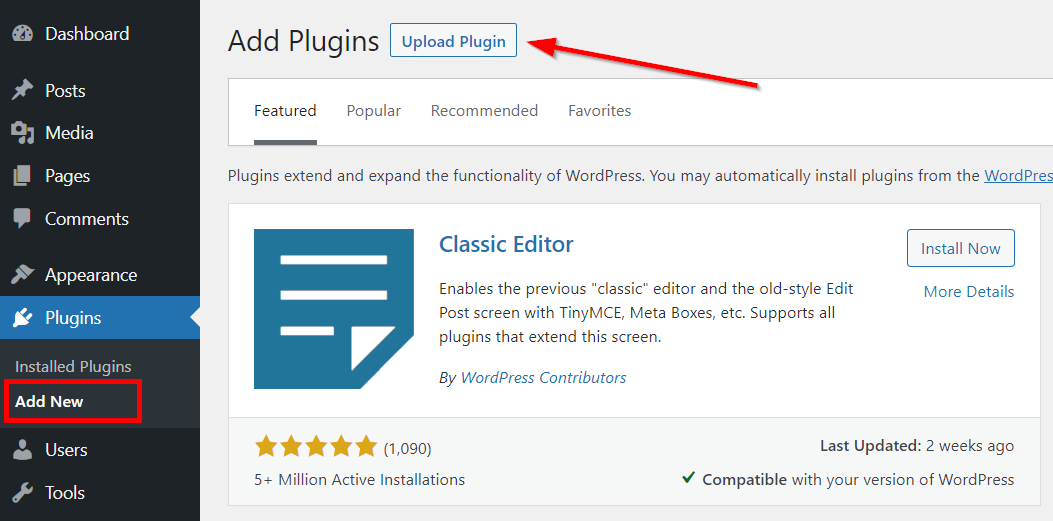
Next, go to Plugins > Add New in your WordPress dashboard and select Upload Plugin.
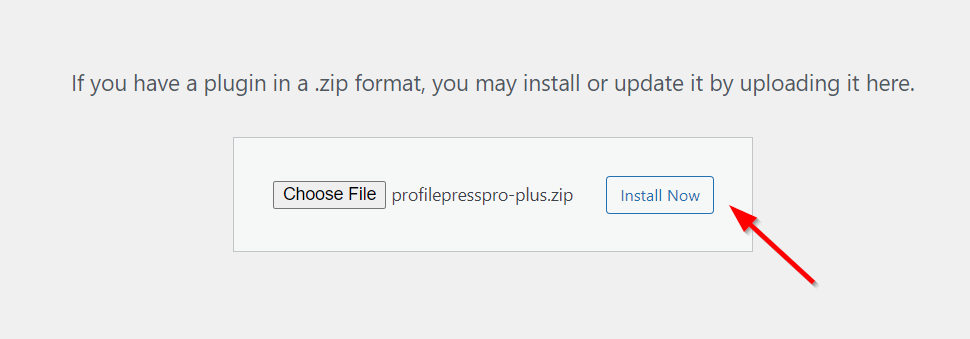
Select the plugin’s zip file and click Install Now.
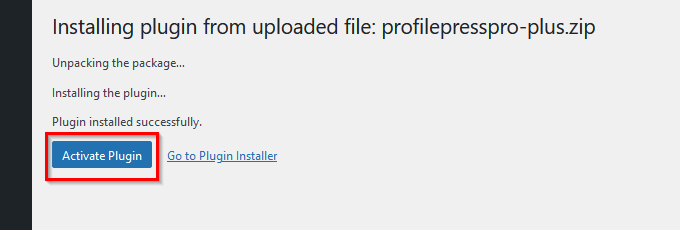
When the installation is done, click Activate Plugin.
After that, you must activate your license key to get updates. To do so, go to the plugin settings menu and click License.
Then, enter your license key in the License Key field and click Save Changes.
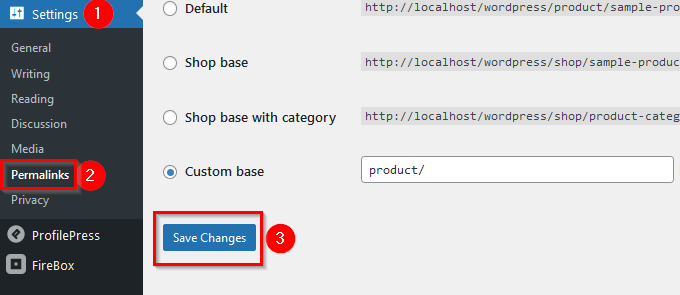
Lastly, go to Settings > Permalinks and click Save Changes to update the permalink.
2. Configure ProfilePress Download Settings
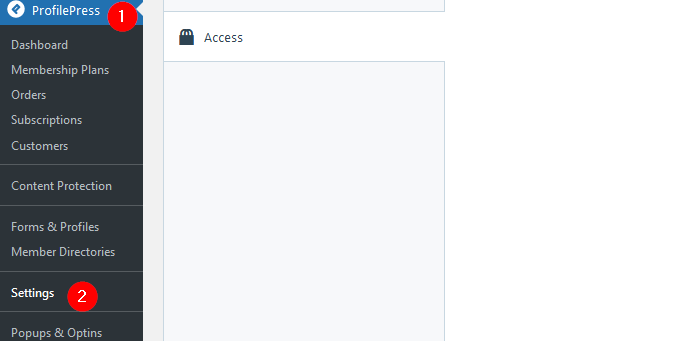
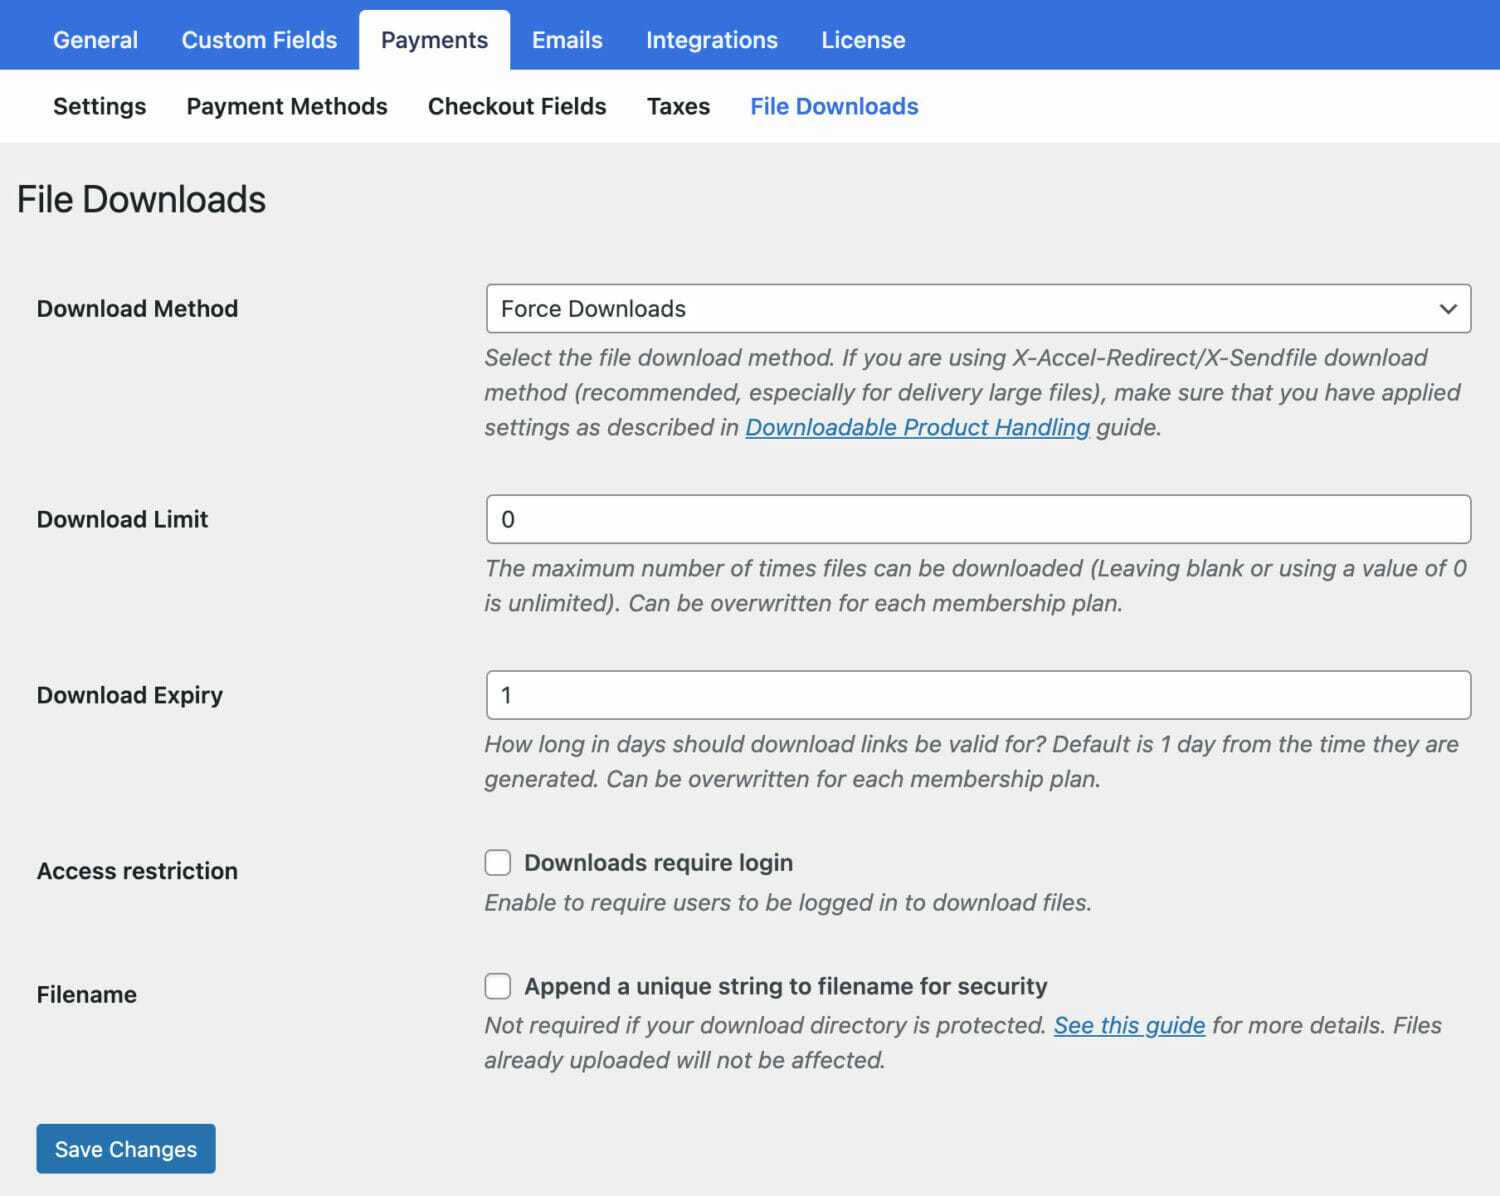
Go to ProfilePress > Settings > Payments > File Downloads in your WordPress dashboard.
Choose a file download method, the download limit, download expiry, and access restriction. To enhance your file’s security, check the box beside Append a unique string to filename for security. Save changes once you’re done.
The next thing is to set up protection for your uploads directory. WordPress does this by default. Unfortunately, this doesn’t provide complete security for your directory because it depends on the server’s setup. Check this article for details about protecting your uploads using an NGINX server or Lighttpd.
3. Set Up Razorpay Payment Gateway
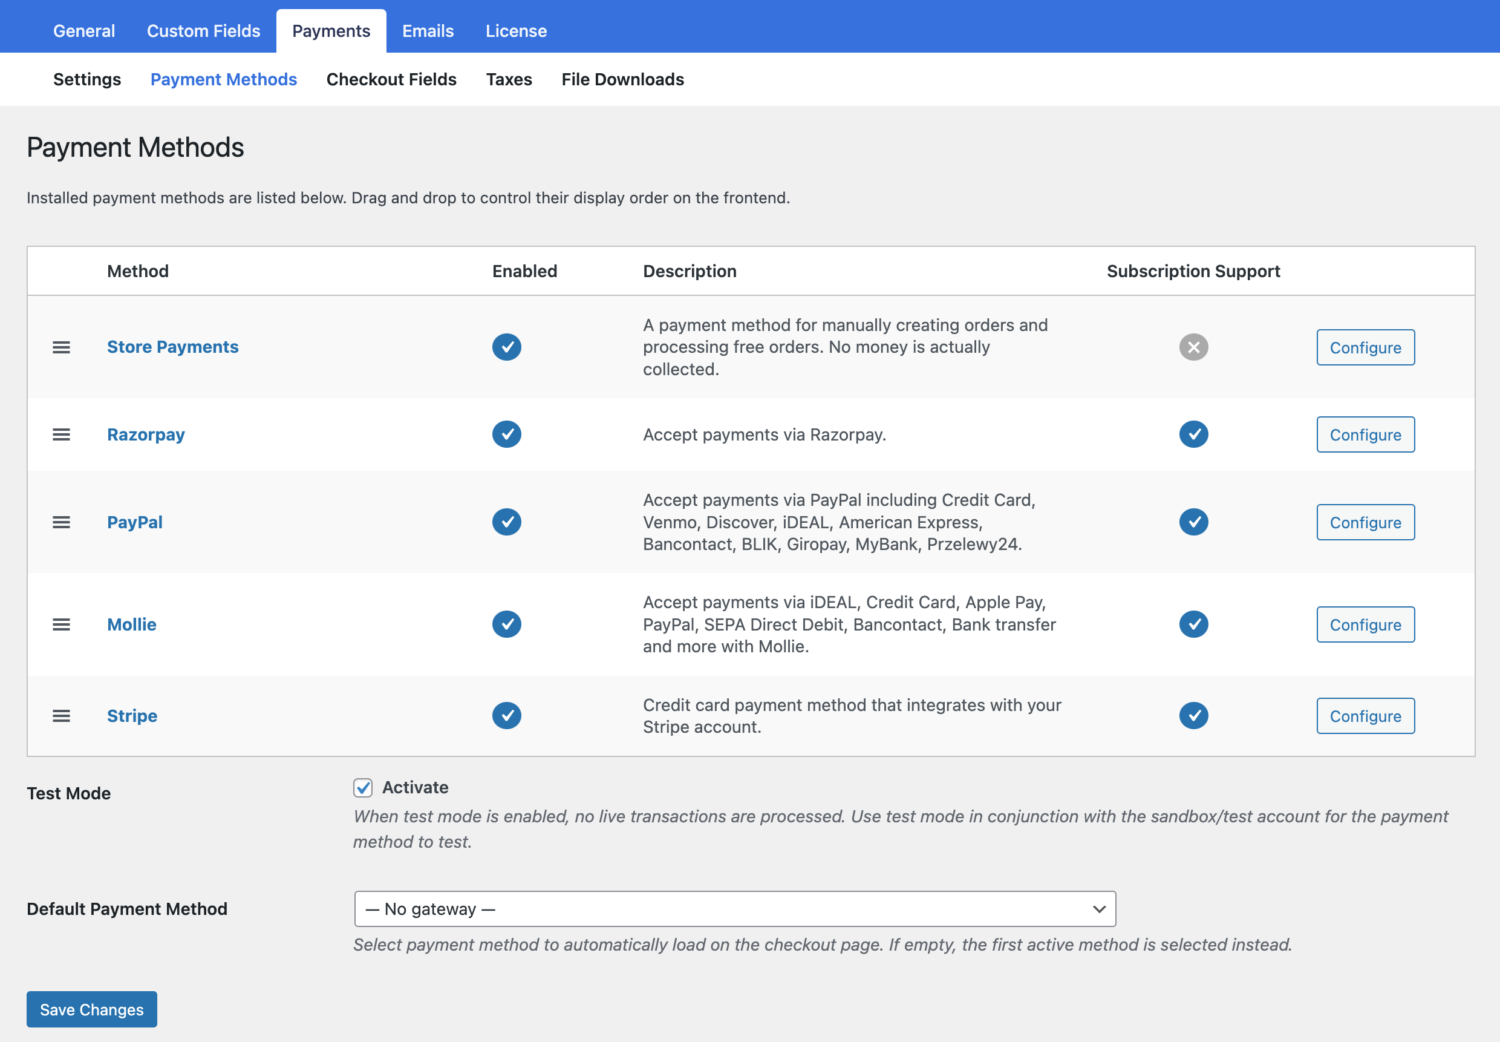
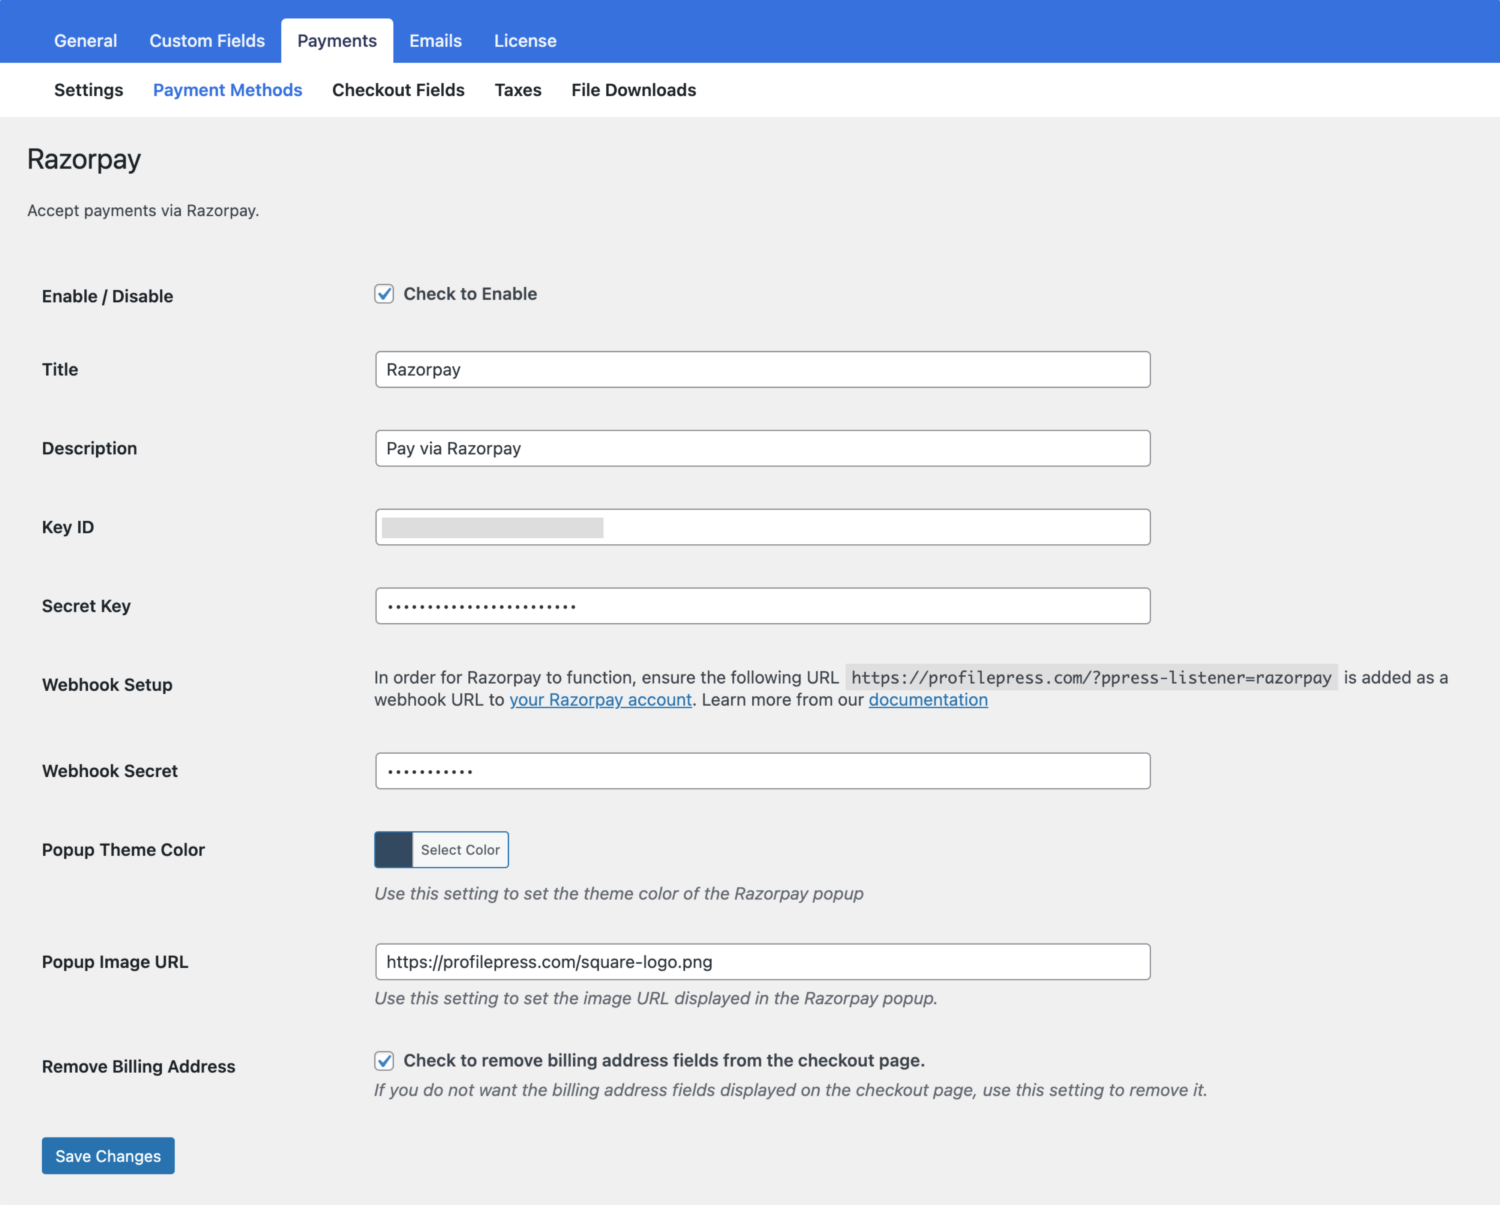
Go to ProfilePress > Settings > Payments >> Payment Methods and click the Configure button for Razorpay.
If you want to test the setup before going live, ensure you activate “test mode” here before going through the setup.
ProfilePress requires your Razorpay API keys and webhook setup in Razorpay to start accepting payments. You can also set the theme color and image/logo in the Razorpay popup checkout.
Finding Your API Keys
Log into your Razorpay dashboard.
From the menu on the left, go to Settings > API Keys.
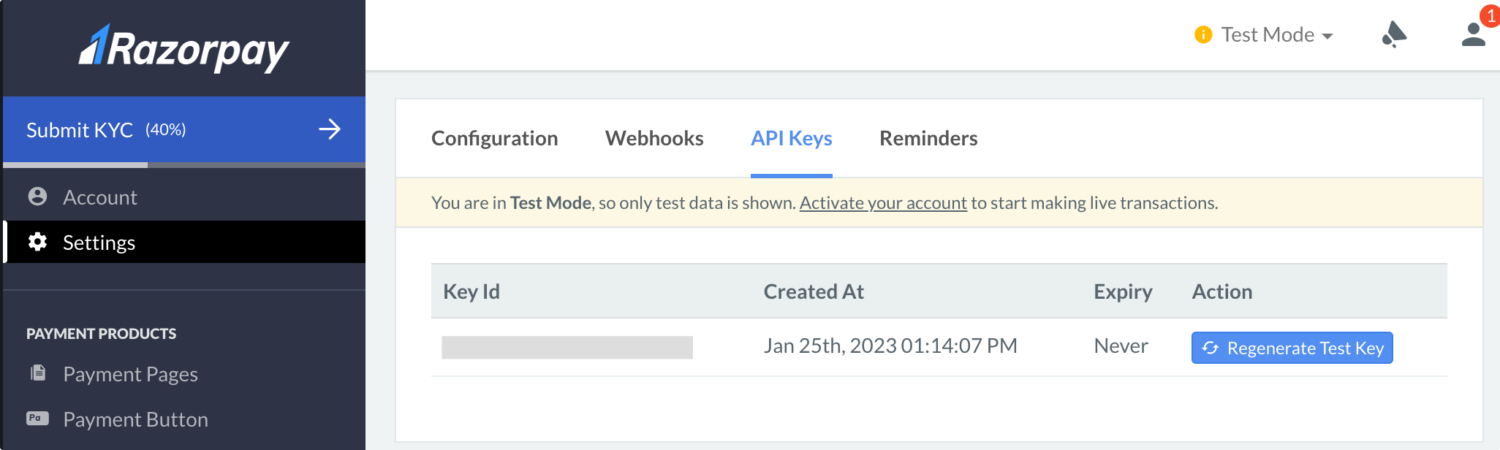
Copy and paste your Live Key ID and Secret Key or the Test Key ID and Secret Key (depending on whether you have test mode enabled in ProfilePress) into the appropriate Razorpay settings in ProfilePress.
Webhooks
Webhooks are how ProfilePress communicates with Razorpay. Follow the guide below to add the appropriate webhook endpoints in your Razorpay application.
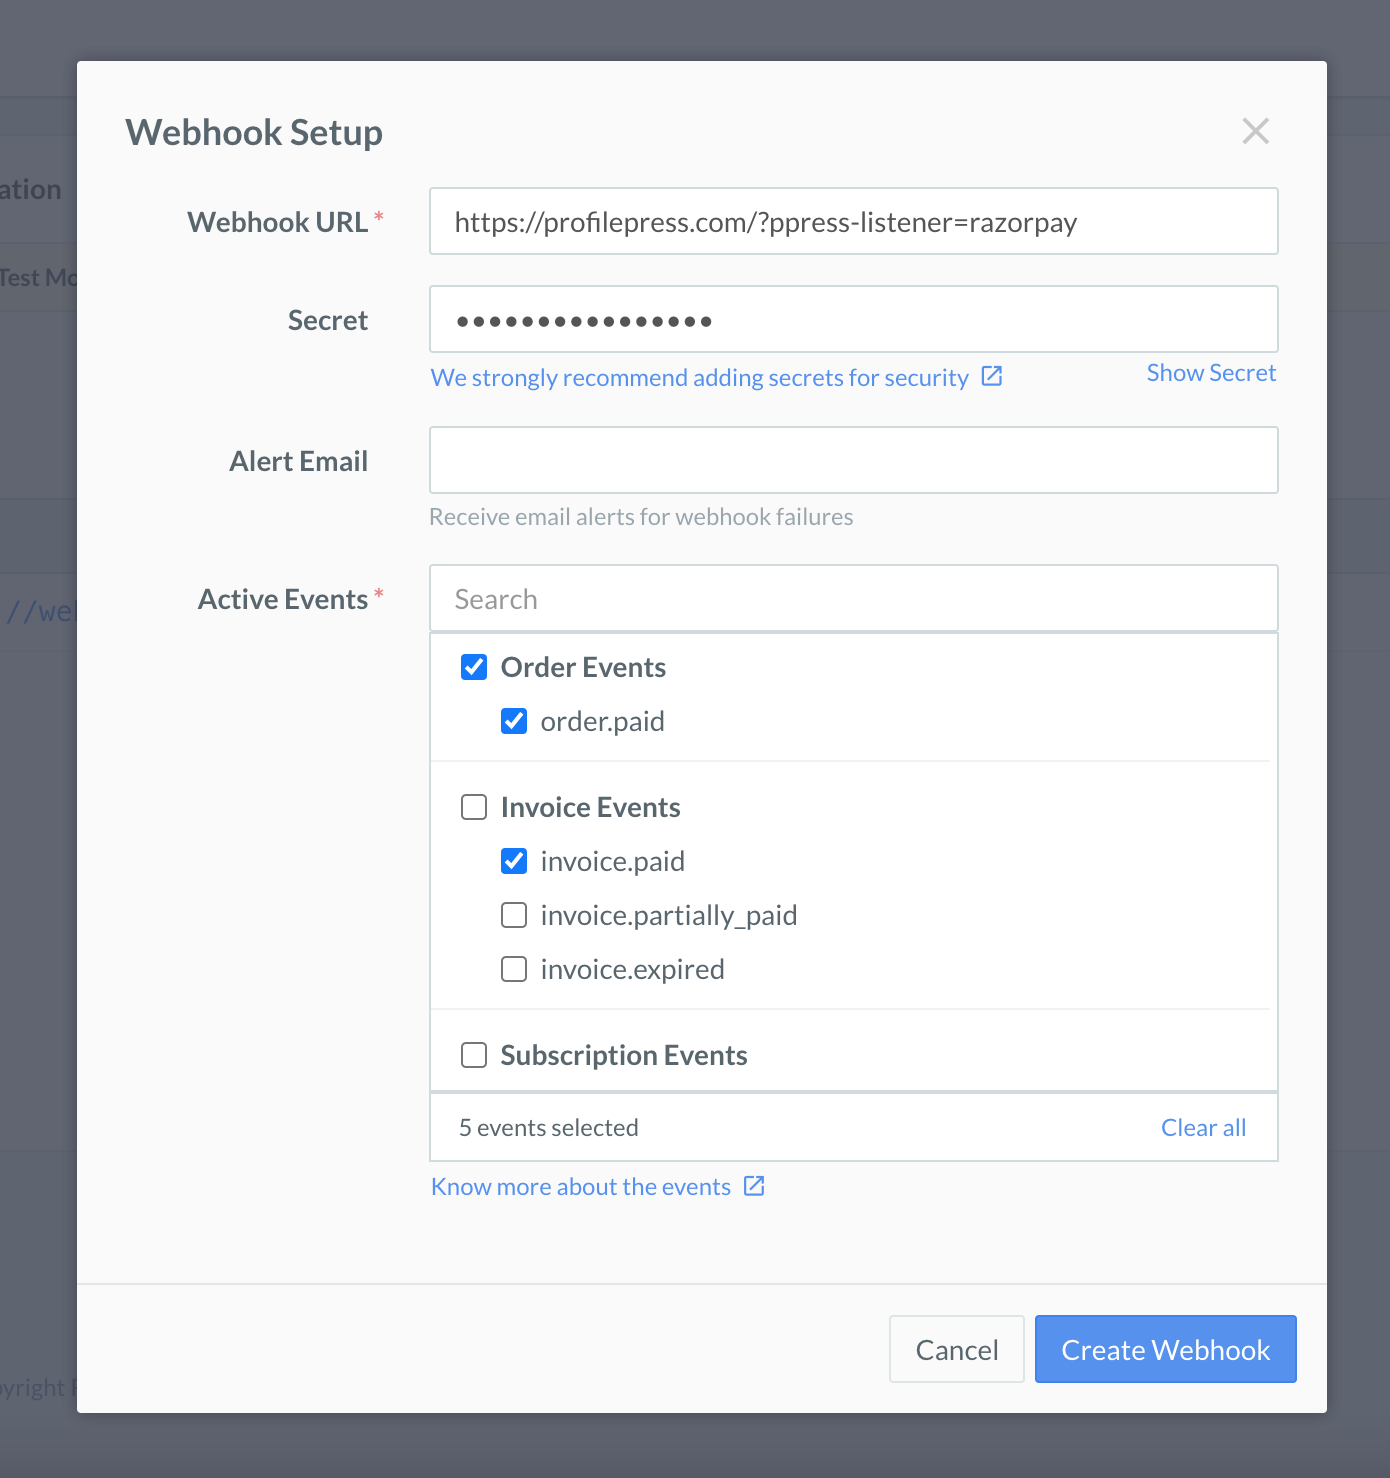
On your Razorpay account dashboard, go to Settings >> Webhooks >> Add New Webhook.
Enter your website webhook URL. You can get and copy the Webhook URL from the Webhook Setup section of the ProfilePress Razorpay settings page, which is usually https://example.com/?ppress-listener=razorpay.
Secret – Enter your webhook secret to secure your transactions further. Razorpay does not auto-generate this information, so you have to come up with one yourself.
Leave the “Alert Email” as it is.
Active Events – Make sure the following events are added:
order.paid
invoice.paid
subscription.authenticated
subscription.cancelled
refund.processed
Once you’re done, click on the “Create Webhook” button.
Once the webhook is created, ensure you return back to the ProfilePress Razorpay settings page to save the webhook secret.
4. Upload Your Digital Product
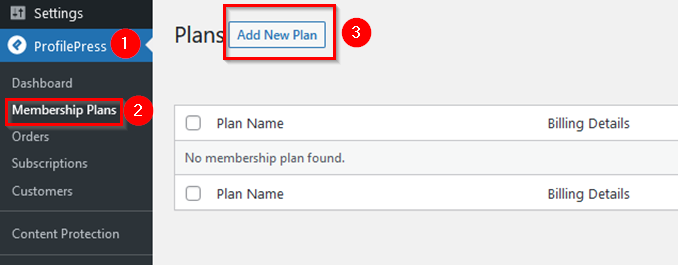
To create a downloadable digital product, create a new membership plan or edit an existing one. Then, go to ProfilePress > Membership Plans > Add New Plan.
Under Plan Details, input the Plan name, Description, Purchase Note, User Role, and Price.
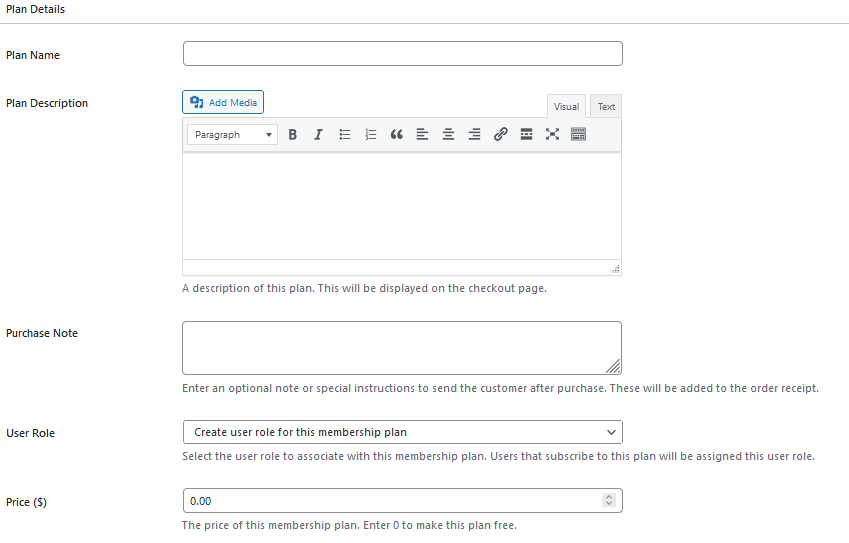
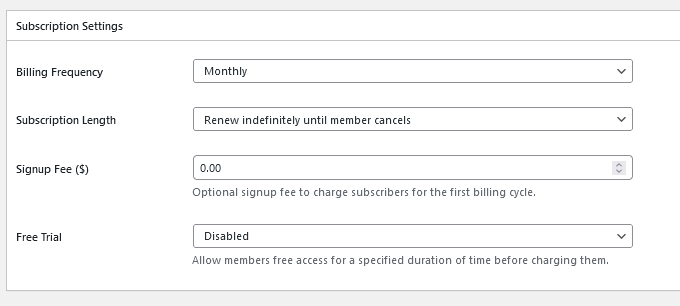
Choose the Billing Frequency, Subscription Length, and Signup Fee in the Subscription Settings section. You can also enable or disable Free Trial.
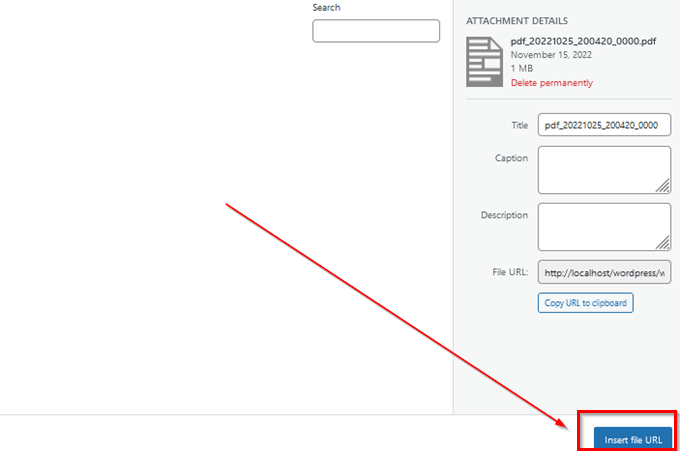
In the Downloads & Integrations section, go to Digital Products. There, you can add a new file with the Add File option. If your product is hosted elsewhere, insert the URL.
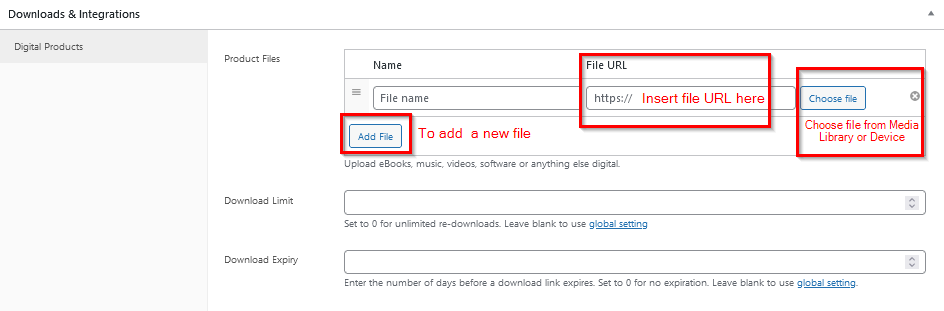
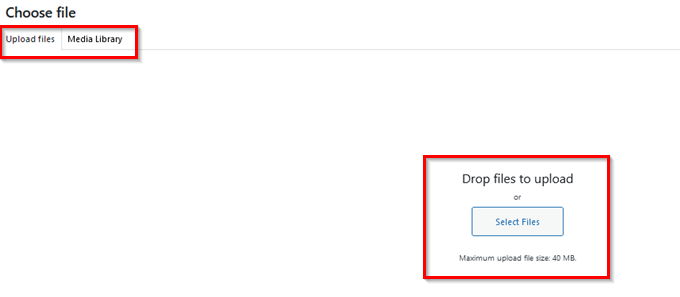
If not, click Choose File, select the file from the Media Library, or upload it from your device.
Next, Click Insert the URL at the bottom right.
You can also set the download limit and download expiry if you want.

When you finish the setup, click Save Plan at the top right, beside the Plan Details panel.

5. Manage Your Digital Product Downloads
To view or edit downloadable digital products attached to orders, go to ProfilePress > Orders.

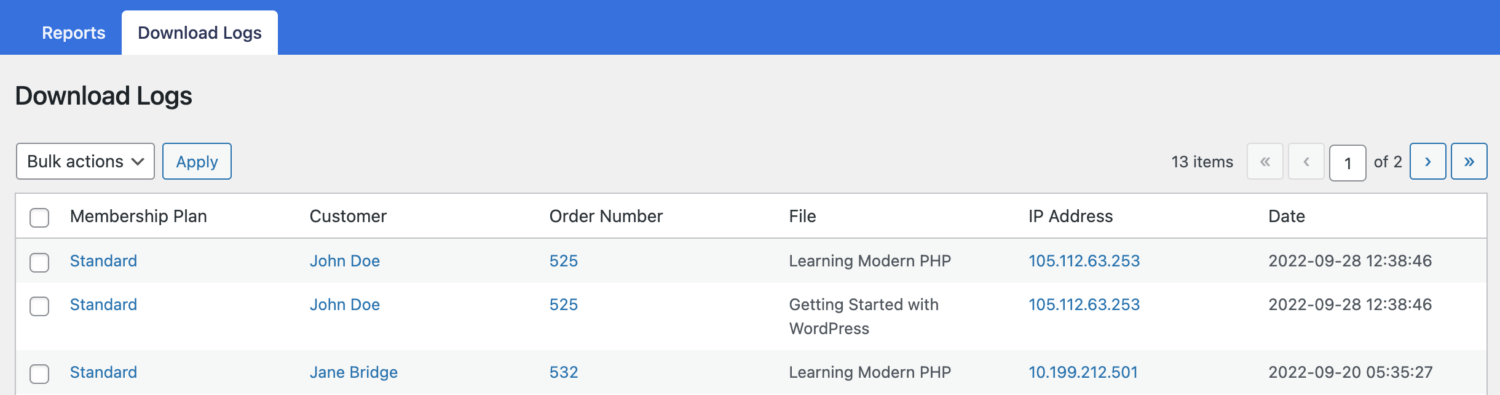
To view what products were downloaded and who downloaded them, go to ProfilePress > Dashboard > Download Logs.
6 Top Digital Products to Sell
We’ve explained why you should sell digital products with Razorpay. But if you’re still thinking of what digital products to sell, check out these top digital products you can sell to earn a good income.
1. Online courses
An online course is one of the most profitable digital products you can sell. With an adequately packaged quality audio or video course, you can attract thousands of buyers from across the globe. There are platforms to create and sell your courses. However, we recommend that you sell them on your website so that you have complete control over them.
2. Ebooks
These are one of the most popular and profitable digital products you can think of. Writing your ebook and editing and designing it may take a while. But once all that is done, you can upload it on your website and continue earning from it.
3. Membership services and recurring subscriptions
Membership services let you continually offer people information and educational resources, webinars, and training at a price. They can also pay subscription fees to access content on your website.
4. Templates
If you have pretty good design skills, consider designing templates for resumes, brochures, flyers, proposals, etc. Templates are cheap and easy to create. All you need is the design software. And once your design is ready, you can start selling.
5. Photos
If your photography skills are top-notch, consider publishing and selling them on stock photography platforms like Shutterstock. But, like for other digital products, we advise that you sell your photos on your website so that you can have complete control over them
6. Professional services
This may not necessarily sound like products, but if you have digital skills that are in high demand, you can offer them at a price, and you’d find people who are willing to pay for your services. You can sell services like editing, proofreading, consultancy, coaching, content writing, etc. You only need to grasp what service you want to sell to attract well-paying customers.
Maximizing Digital Product Sales With Razorpay
To maximize your profits from selling digital products and downloads with minimal investment, using a reliable payment gateway that enables secure payment transactions is essential. We recommend using Razorpay as it offers a range of features that cater to your business needs.
This article explains the benefits of selling digital products and downloads and why Razorpay is a suitable payment gateway. It also outlines the steps to take to sell digital products with Razorpay. Additionally, the article suggests six popular digital products to consider selling if you’re unsure of what to sell.
We would appreciate your feedback if you have used this article to set up Razorpay and start selling digital products on your WordPress eCommerce store.