How to Subscribe WordPress Users to Mailchimp After Registration
Do you want to subscribe WordPress users to your Mailchimp email list after registration to your website?
It’s important to build a email list of your users or customers. There are several ways to do it. For example, you can add a popup to your popular pages, add a subscription bar on your website, or run contests and offer giveaways on social media.
This article does not cover all the different ways to build a subscription list, but only how to subscribe WordPress users to a Mailchimp audience after registering on your website.
Users who are registering on your site will have the option to select the checkbox. After the registration, the users will be added to your Mailchimp subscription list.
In addition to adding new users, we will also show you how to add or synchronize old users who are already registered on your WordPress site.
Adding WordPress Users to Mailchimp After Registration
To subscribe WordPress users to Mailchimp after registration, you will need a plugin that adds the subscription checkbox to your website registration form. There are several plugins to choose from, but we recommend using ProfilePress because it’s easy to use, offers many features, and has a responsive support team.
Install ProfilePress & Mailchimp Addon
Step 1: Install and activate ProfilePress on your WordPress website.
Step 2: Go to ProfilePress > Addons, then scroll down to Mailchimp and toggle the button.
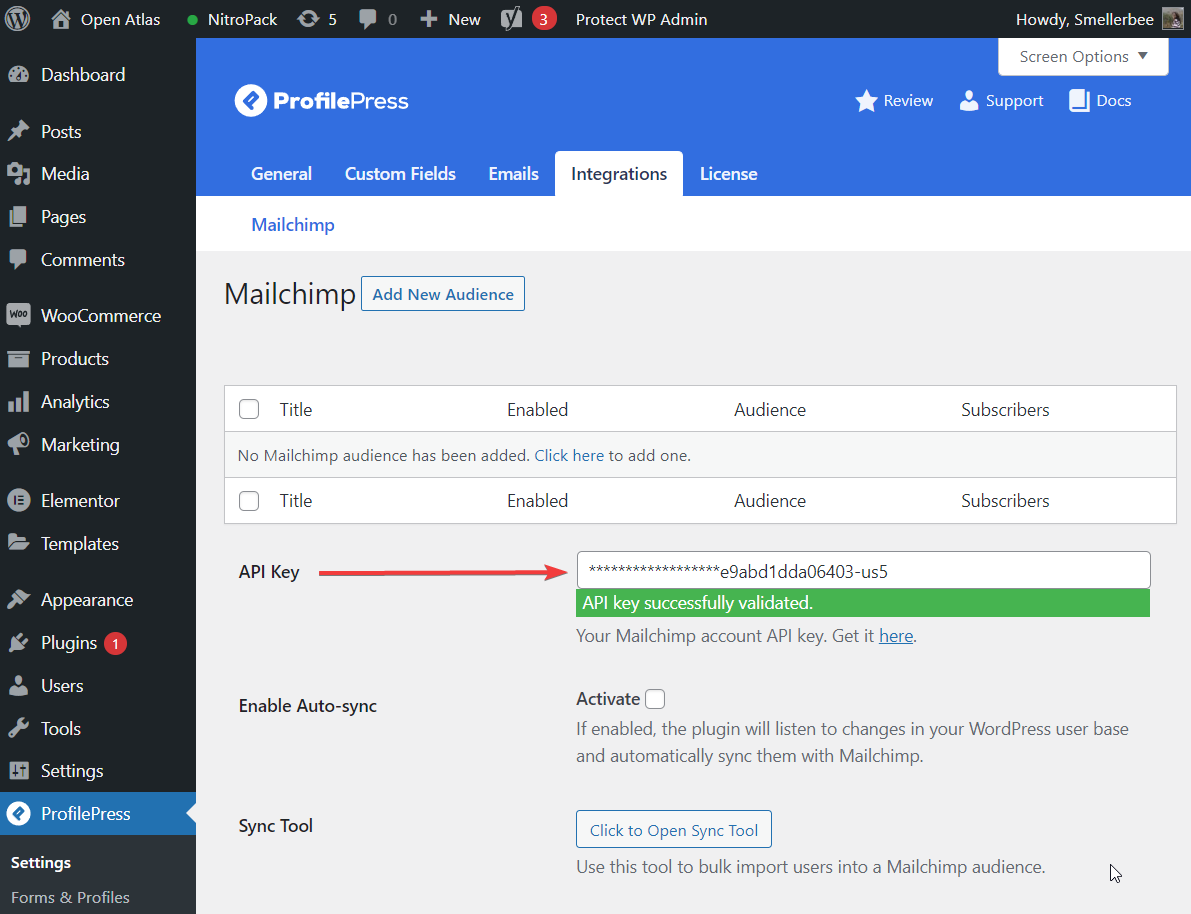
Step 3: Create a Mailchimp account and generate an API key if you haven’t already done so. Next, open your WordPress dashboard, go to ProfilePress > Settings > Integrations > API Key, and enter your Mailchimp API key. Then, hit Save Changes.
Create a New Email List
Step 4: On the page where you added the API key, there is an Add New Audience button. Click on that.
Step 5: On the next page, you will find some options. Let’s first look at how you can use these options to create a checkbox on your registration form.
i. Select Enable Audience.
ii. In the Title option, add a name that will appear on the registration form and my account page of yosite’se’s users.
iii. In the Audience option, you will find a drop-down with email lists from your Mailchimp account. You may have more than one email list. First, choose the email list to add newly registered users.
Iv. The steps you have taken so far will allow you to add a checkbox to your registration form. This means users can choose not to be added to your email list. But if you want to remove that option, select the Automatically Add New Users option. Then, the checkbox will be removed from the registration form, and users will be automatically added to the Mailchimp list after registering.
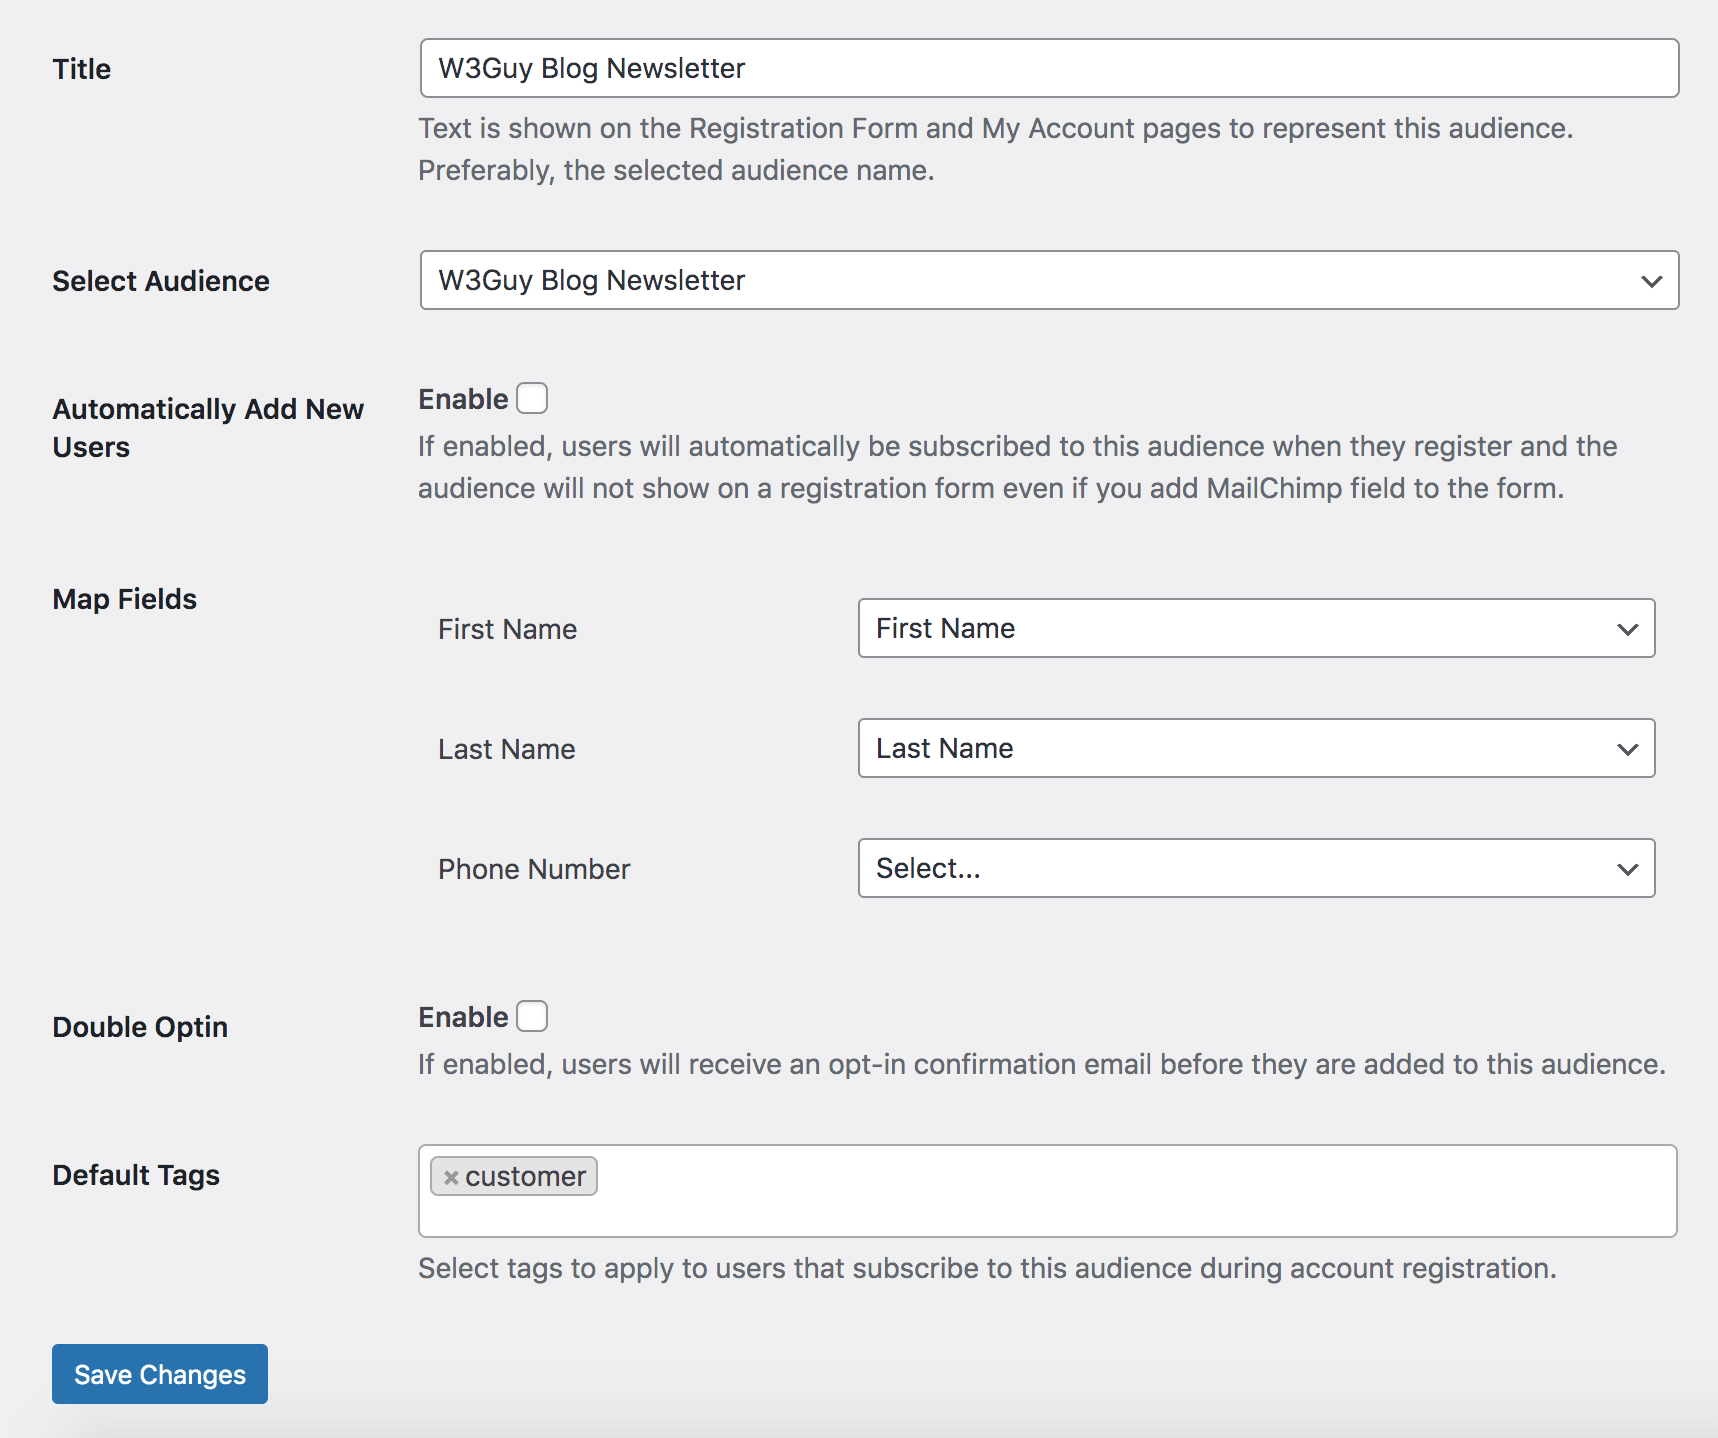
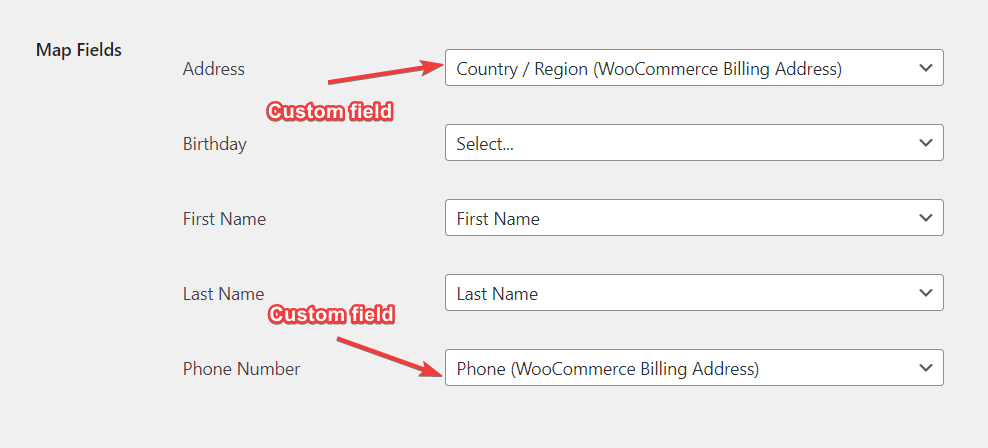
v. As the name suggests, the Map Fields option allows you to map the fields to their respective attributes in Mailchimp. So, map the fields carefully.
vi. Select Double Optin only if you want to send email verification to users before adding them to the email list.
vii. Use the Tag option to assign tags to users signing up for this particular email list. To use the Tag option, you must first create the tag in your Mailchimp account.
When you are ready, click on the Save Changes option.
Create & Publish Custom Registration Form
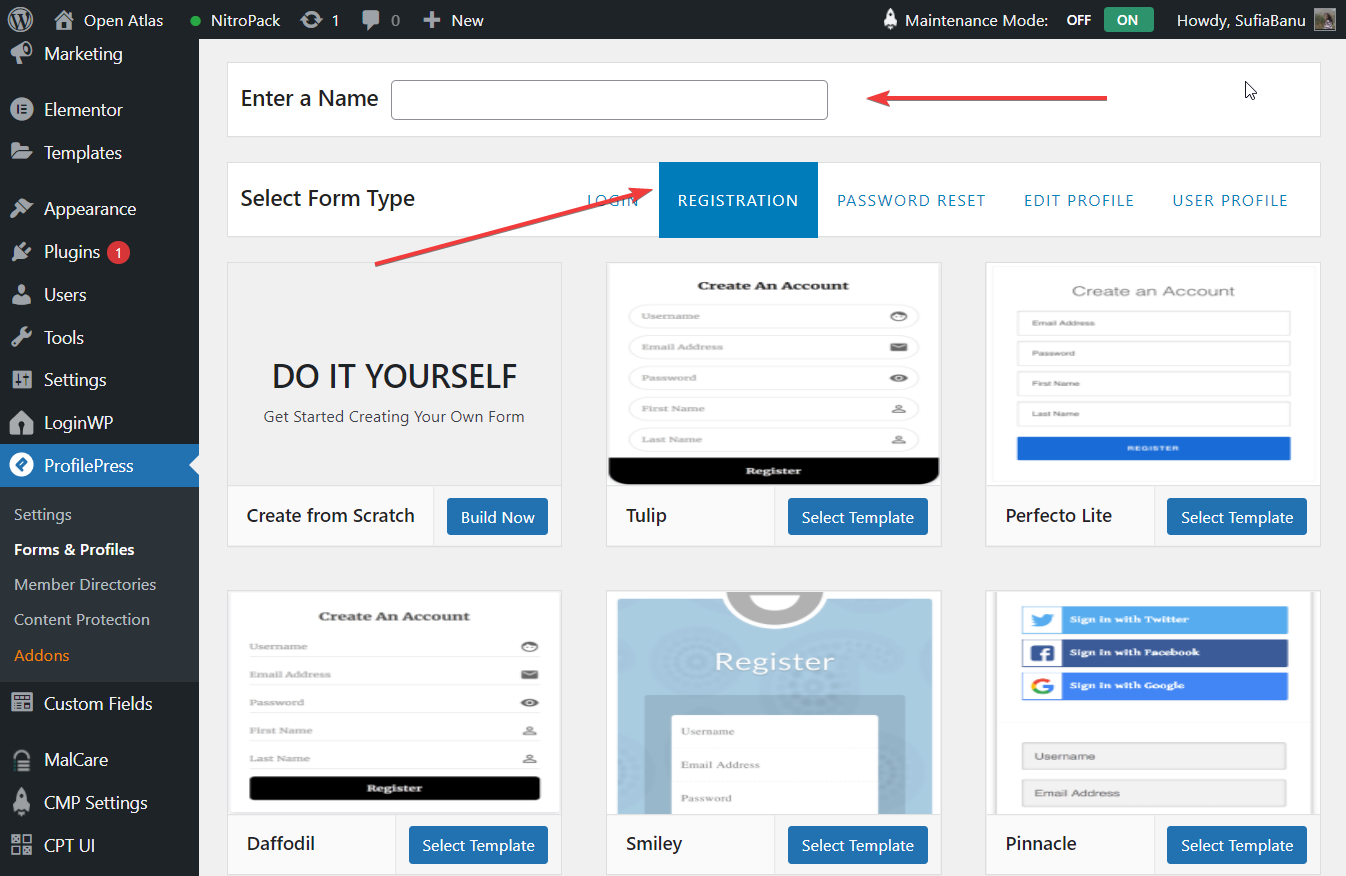
Step 6: You have to create a new custom WordPress registration form. Go to ProfilePress > Forms & Profiles > Add New > Registration.
Step 7: You will be given the option to edit a pre-built template or create the form from scratch.
To create a form from scratch, you need to know how to code. This is why we recommend choosing the Drag & Drop Builder.
Step 8: On the next page, you have to name the form and choose a template. Then, you will proceed to design the form using the drag-and-drop builder.
Step 9: On the right side of the drag-and-drop builder, you will find custom fields like username, email address, password, website, etc. Drag these fields to the left to start building the form.
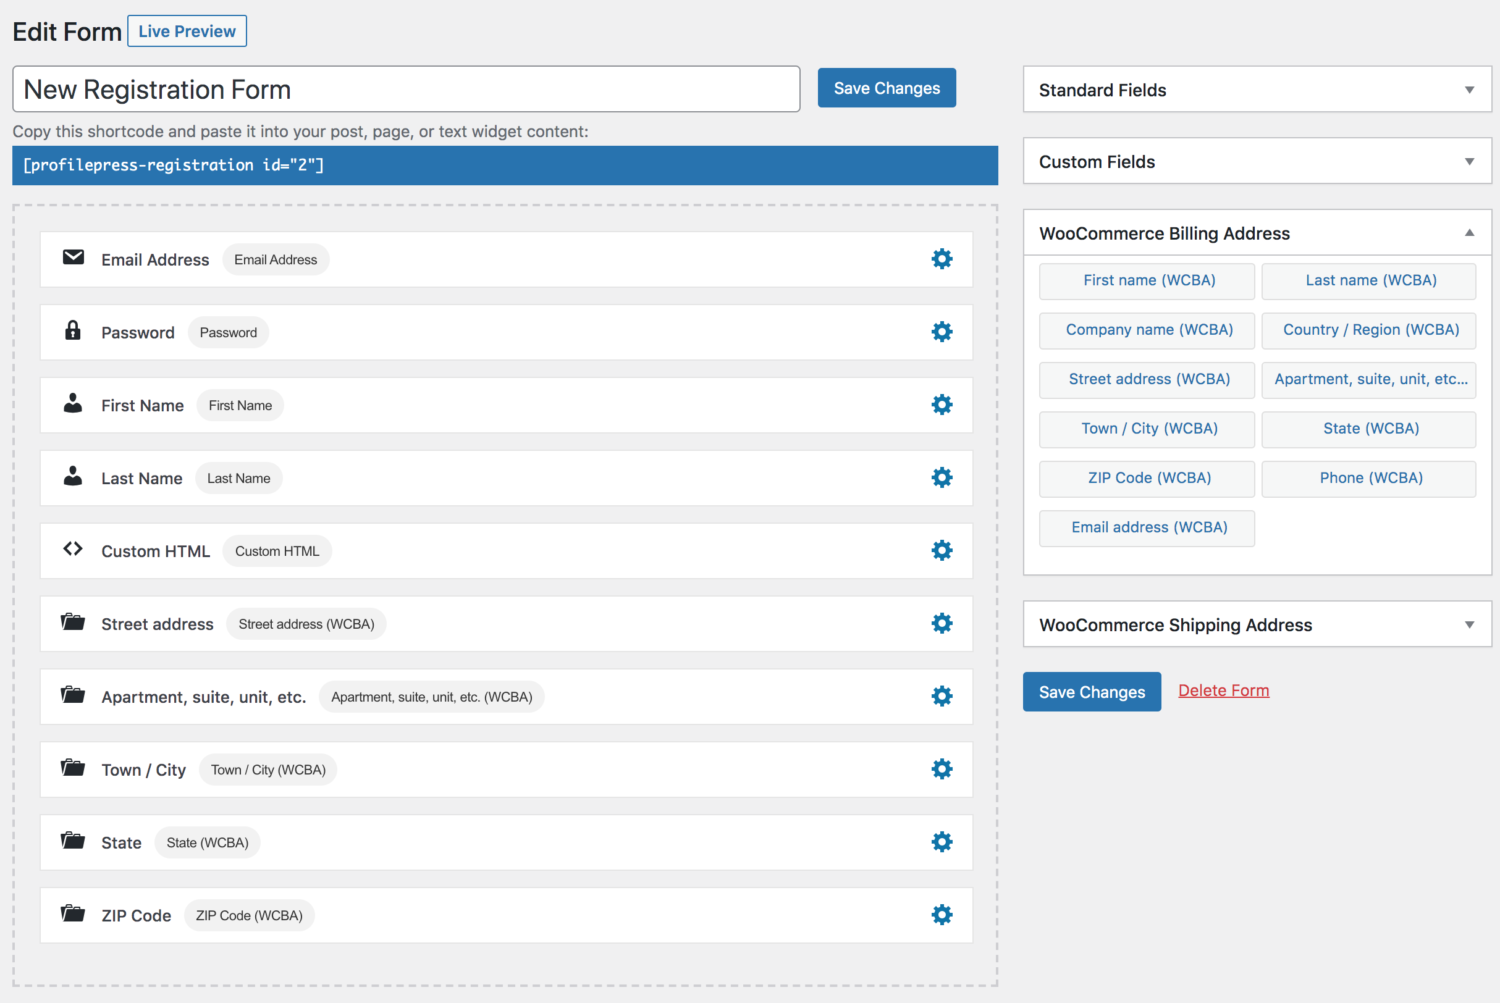
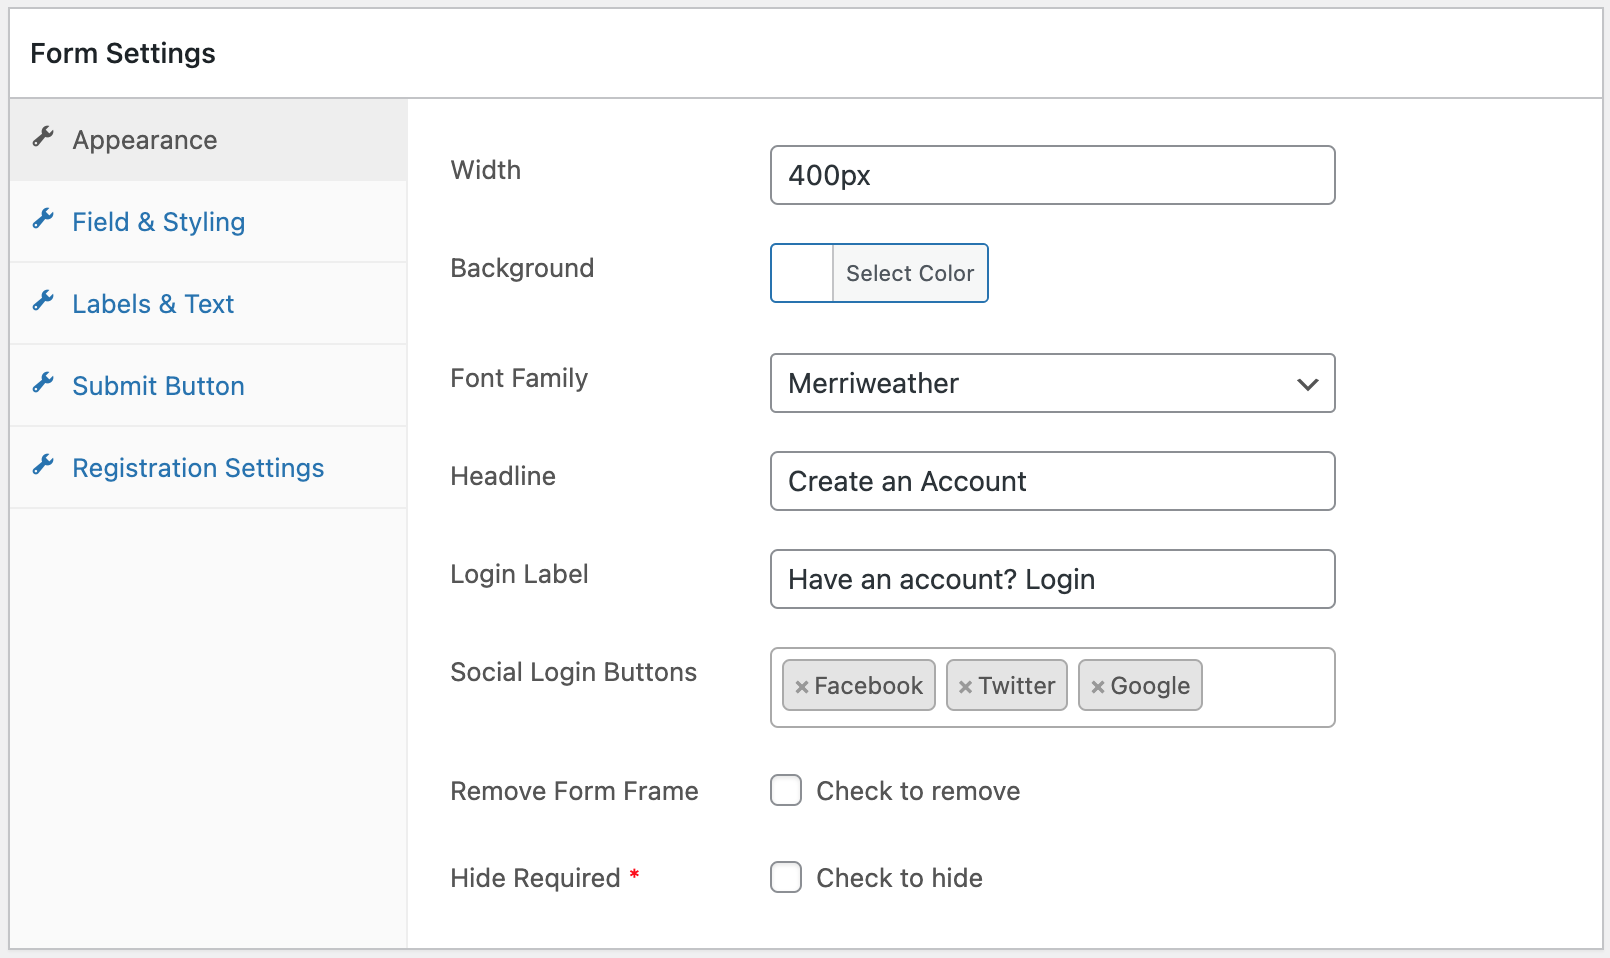
Step 10: Scroll down to the Form Settings section and change the appearance, fields, labels, etc., per your needs.
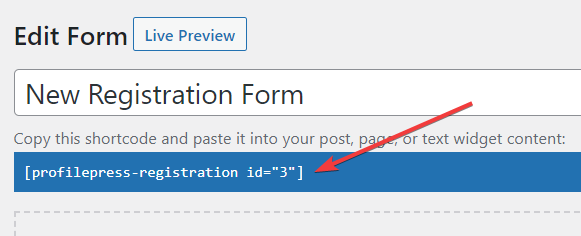
Step 7: Hit the Save Changes button when the form is ready. Then, copy the form’s shortcode, located right below the form’s name.
Step 7: Next, create a new page by going to Pages > Add New and paste the shortcode on the page. Give a title to the page and hit the Publish button.
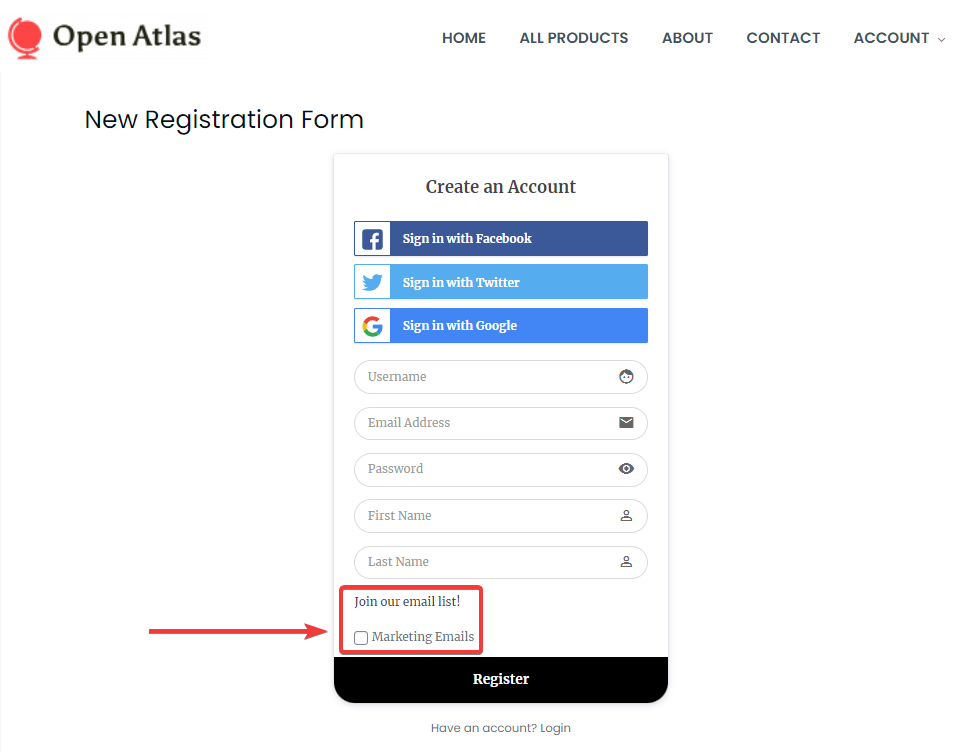
Your form is now live on your website. Below is how the registration form looks on our demo site:
Now that the form is ready, the only thing left to do is add an email checkbox on the new registration form to allow users to opt for the email list.
Adding Newsletter Subscription Checkbox to Registration Form
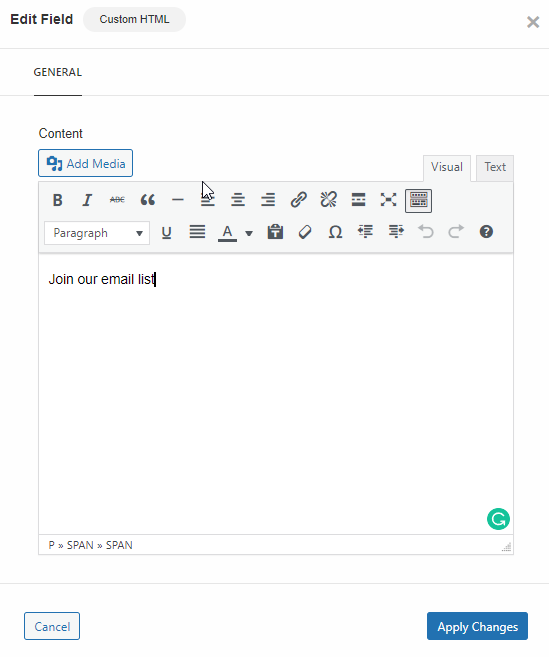
Step 8: Drag and drop the Custom HTML field where you want the email list checkbox to appear.
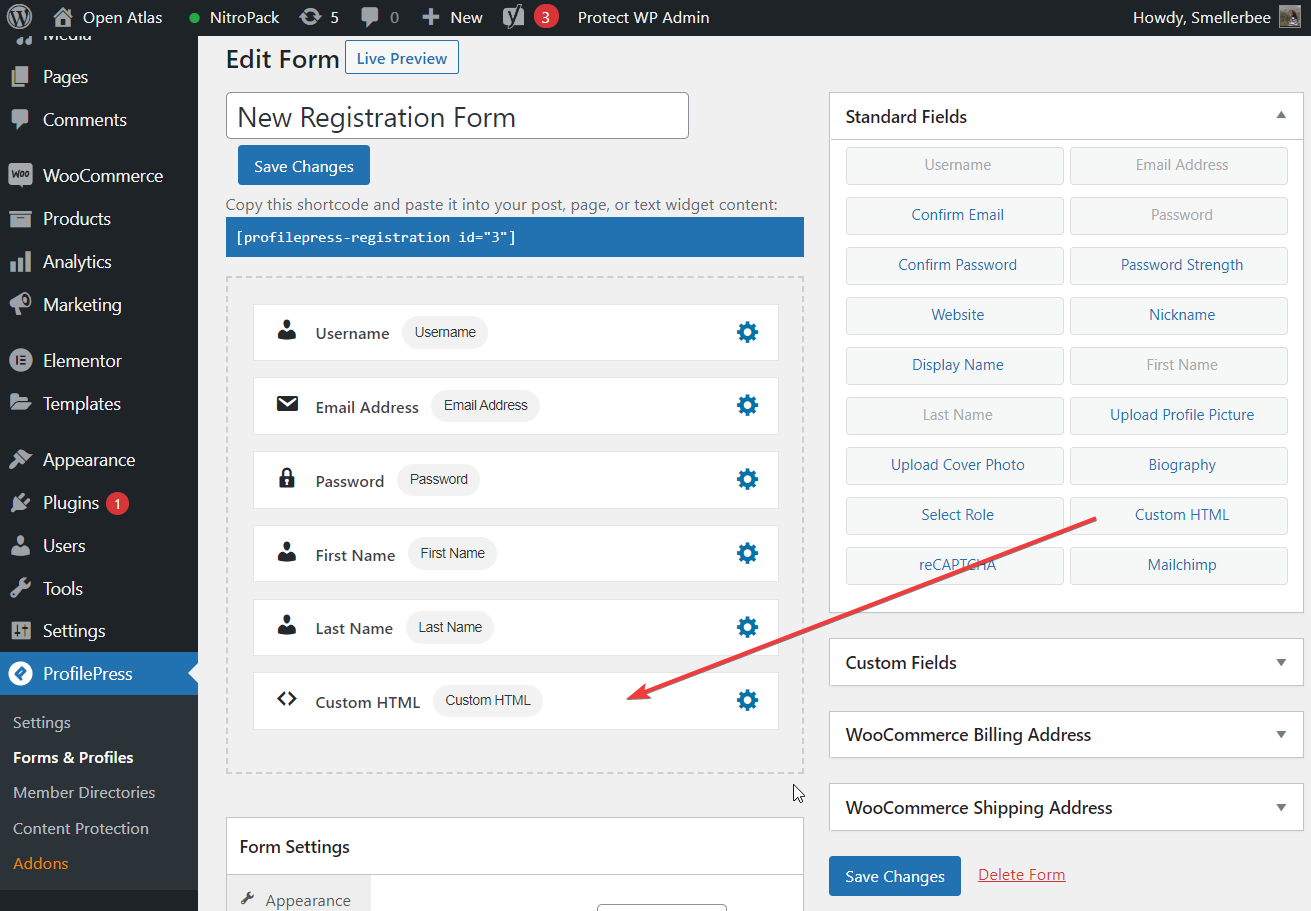
Click on the gear icon, and a popup with a content field will appear. In the content field, write this text: Join our email list. Then, hit the Apply Changes button and close the popup.
Step 9: Drag and drop the Mailchimp custom field below the custom HTML field. Click on the gear icon, and a pop-up will appear. Under Select Audience, choose the email list you created and hit Apply Changes. Close the popup.

Step 10: Preview the form by clicking on the Live Preview button.
If you feel the need to change anything, such as the text or appearance of the email subscription checkbox, select the gear icon in the Mailchimp custom field.
Remember to save your settings by clicking on the Save Changes button. That’s it, folks. Anyone who registers on your website will have the option to subscribe to your email list. After the registration, they will be added to your Mailchimp email list.
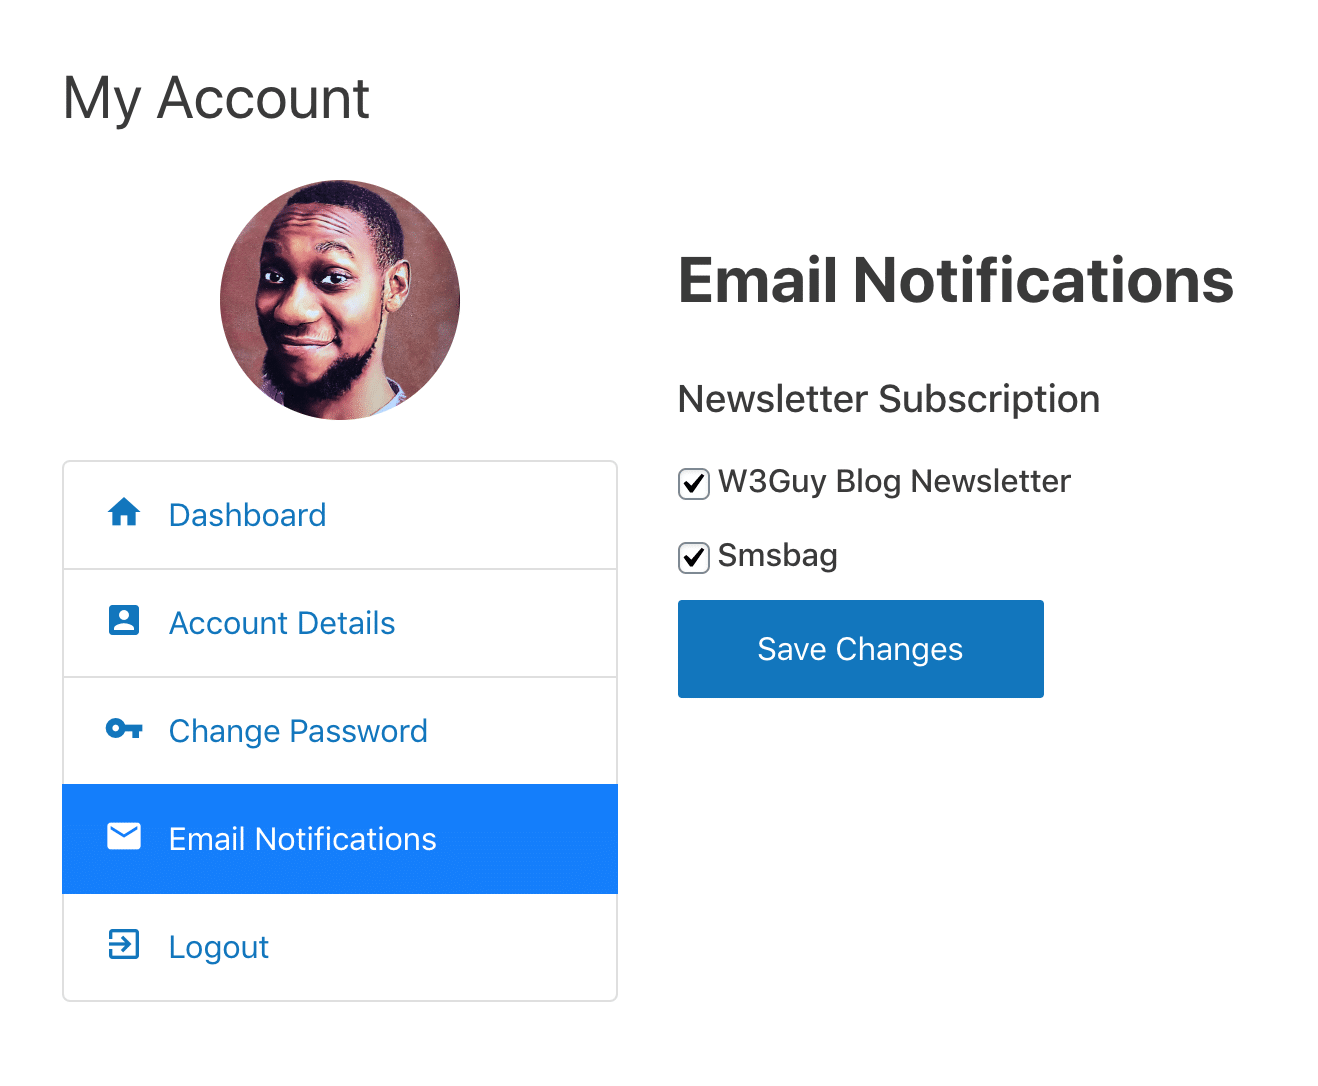
Note that users can remove themselves from the Mailchimp email list from the My Account page. All they need to do is uncheck the checkboxes.
How to Subscribe Existing WordPress Users to Mailchimp
You have learned how to add new WordPress users to your Mailchimp email list or audience after they register. But what about your existing users? How do you add them to the Mailchimp email? We’ll show you how.
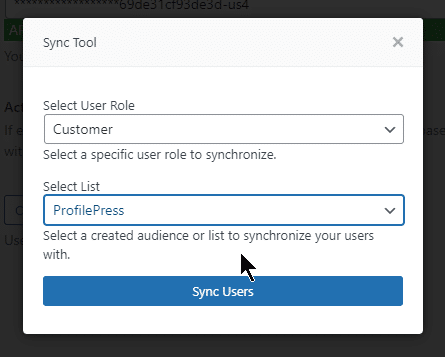
The steps are straightforward. On your WordPress dashboard, go to ProfilePress > Settings > Integrations > Sync Tool and click on “Click to Open Sync Tool”.

Next, there is a drop-down menu in the Select User Role option. From the drop-down menu, select All Users. If you want to sync users with specific user roles, then choose those user roles from the drop-down menu instead of the All Users option.
Then, choose the email list you created in the previous section under the Select List option.
Done? Now, hit the Sync Users button. And all your site users will be added to the new Mailchimp email list.
Setup Mailchimp Subscription of Users After WordPress Registration Today
Adding newly registered users to your WordPress site’s Mailchimp email list is a straightforward process. With the help of a plugin like ProfilePress, you can add a checkbox to your registration form. By doing so, users can choose whether or not they want to subscribe to your email list.
Alternatively, you can make it mandatory for users to subscribe to your email list. Moreover, you can add existing site users to your email list if you haven’t already done so.
But ProfilePress does much more than just adding users to your email list. You can use it to create user profiles and member directories, restrict access to posts, pages, and categories, and set up WordPress social logins. Check out all the features that ProfilePress has to offer and give it a try!