How to Create Custom WordPress User Profile Page
Do you want to create a custom WordPress user profile page that allows users to view their profiles and others from the frontend of your website?
WordPress has many great features, but it doesn’t offer front-end user profile display and editing. Many website owners are not comfortable giving back-end access to their users, which is why some site owners like to hide the admin bar. Fortunately, some plugins can enable front-end editing for users.
This article will show you how to create a custom user profile page in WordPress that displays user information on your website’s front end.
Creating a Custom WordPress User Profile Page
To create a custom WordPress user profile page, you must install and activate a plugin on your WordPress website. Installing a new plugin is known to break websites, so we recommend taking a backup of your entire site. Then, if things go south, you can use the backup to restore your site to normal.
Now, let’s get started with the tutorial.
Building the WordPress User Profile Page
Firstly, install and activate ProfilePress. It’s one of the best WordPress user profile plugins out there.
Then go to ProfilePress > Forms & Profiles > Add New > Form Type and select User Profile.
Next, you will need to enter a title (like, say, User Profiles), then select a preferred template.
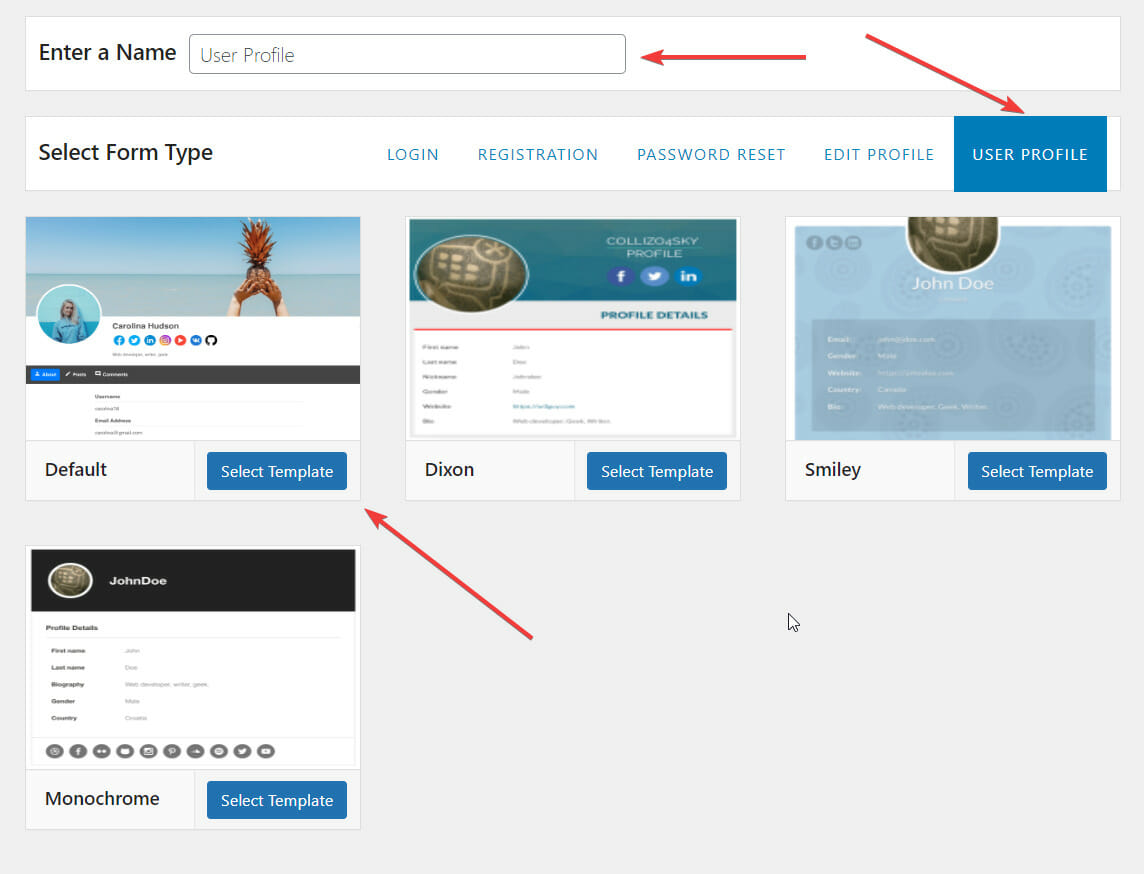
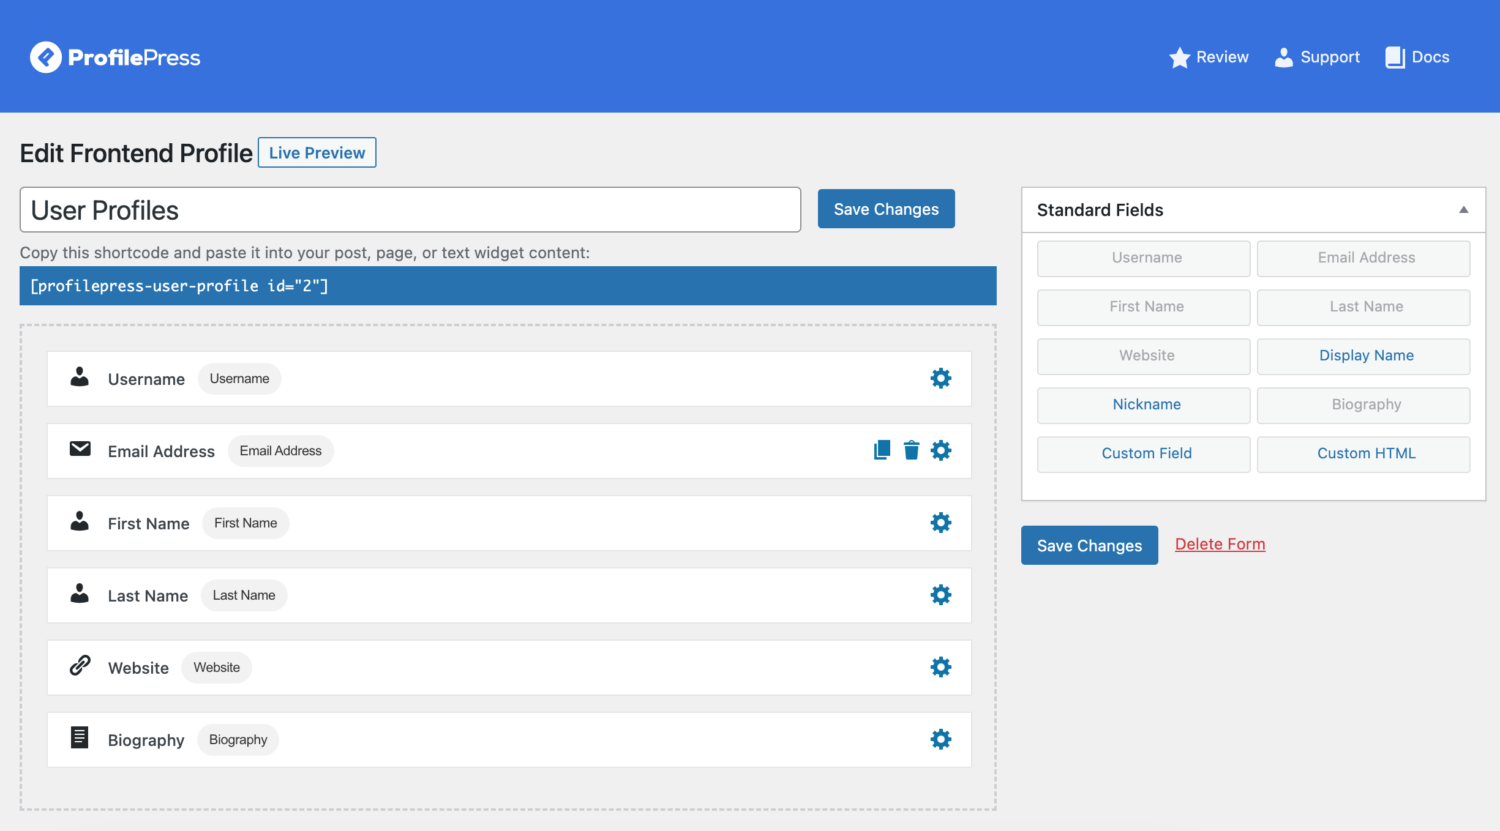
You will be taken to a page called Frontend Profile builder. On this page, you get to design the user profile page with the help of the following Standard Fields:
- Username
- Email Address
- First Name
- Last Name
- Website
- Display Name
- Nickname
- Biography
- Custom Field
- Custom HTML
Drag and drop these fields to the left side as we have done, as shown in the image below.
Displaying Custom Field on the WordPress User Profile Page
If you need to display more information about your WordPress users, create a custom user profile and add the fields to the builder.
Go to ProfilePress > Addons > Custom Fields and toggle the Activated button.
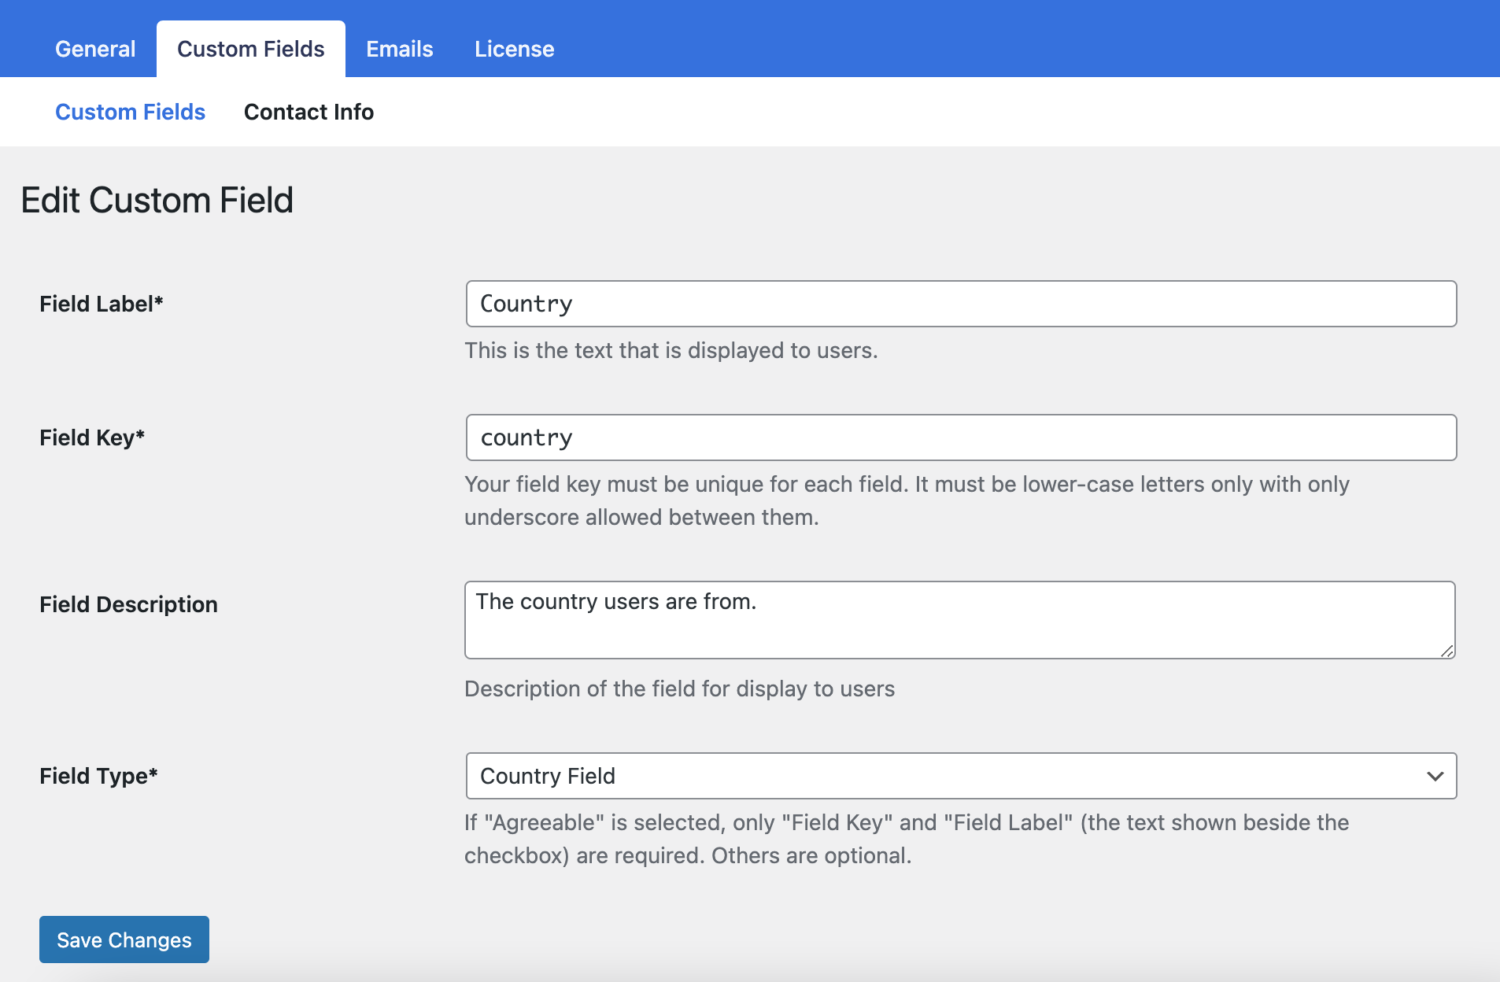
Next, go to Settings > Custom Fields, click on the Add New button and add a label, key, field description, and field type. Save the changes.
Now, go back to the Frontend Profile builder page.
In the Standard Fields section, there is an option called Custom Fields. Select that.
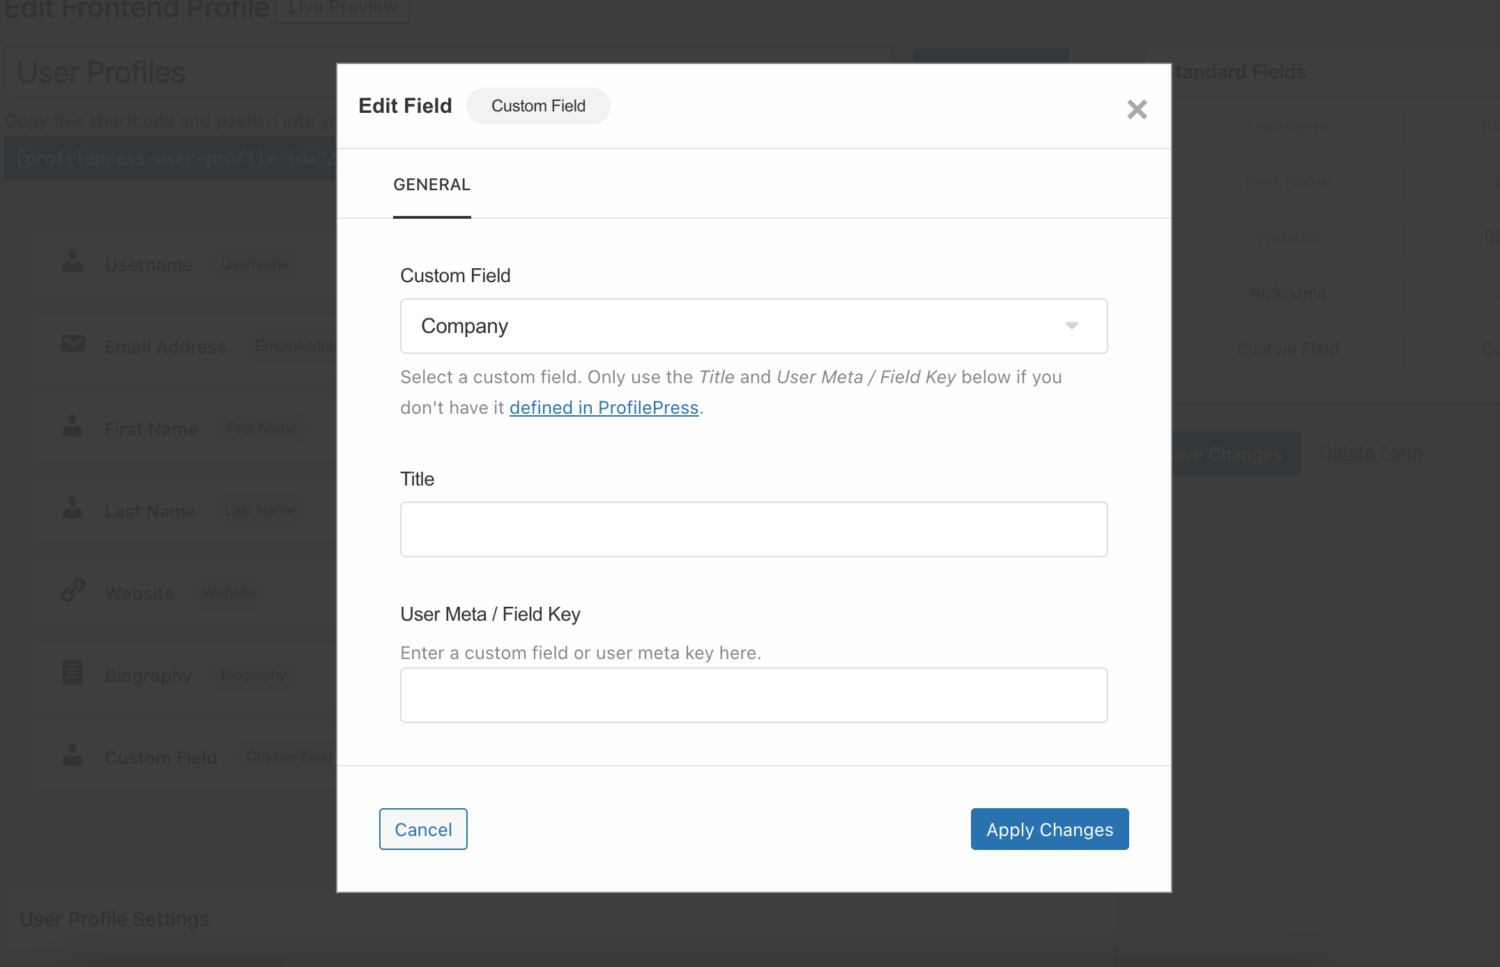
A popup will appear with the following options: Custom Field, Title, and User Meta / Field Key.
In the Custom Field option, select the custom field that you just created. Then, add a title and the field key similar to what we have done in the images below.
Before you save the design, we suggest previewing it once by clicking on the Live Preview button at the top of the page.
When you are ready, save the changes.
Publishing The Custom User Profile Page
Next, you need to add a user profile display to a WordPress page, which will serve as the custom user profile page and show information about users.
Just copy the shortcode of the Frontend Profile you created earlier.
Then, go to Pages > Add New, name the page, paste the shortcode, and hit the Publish button.
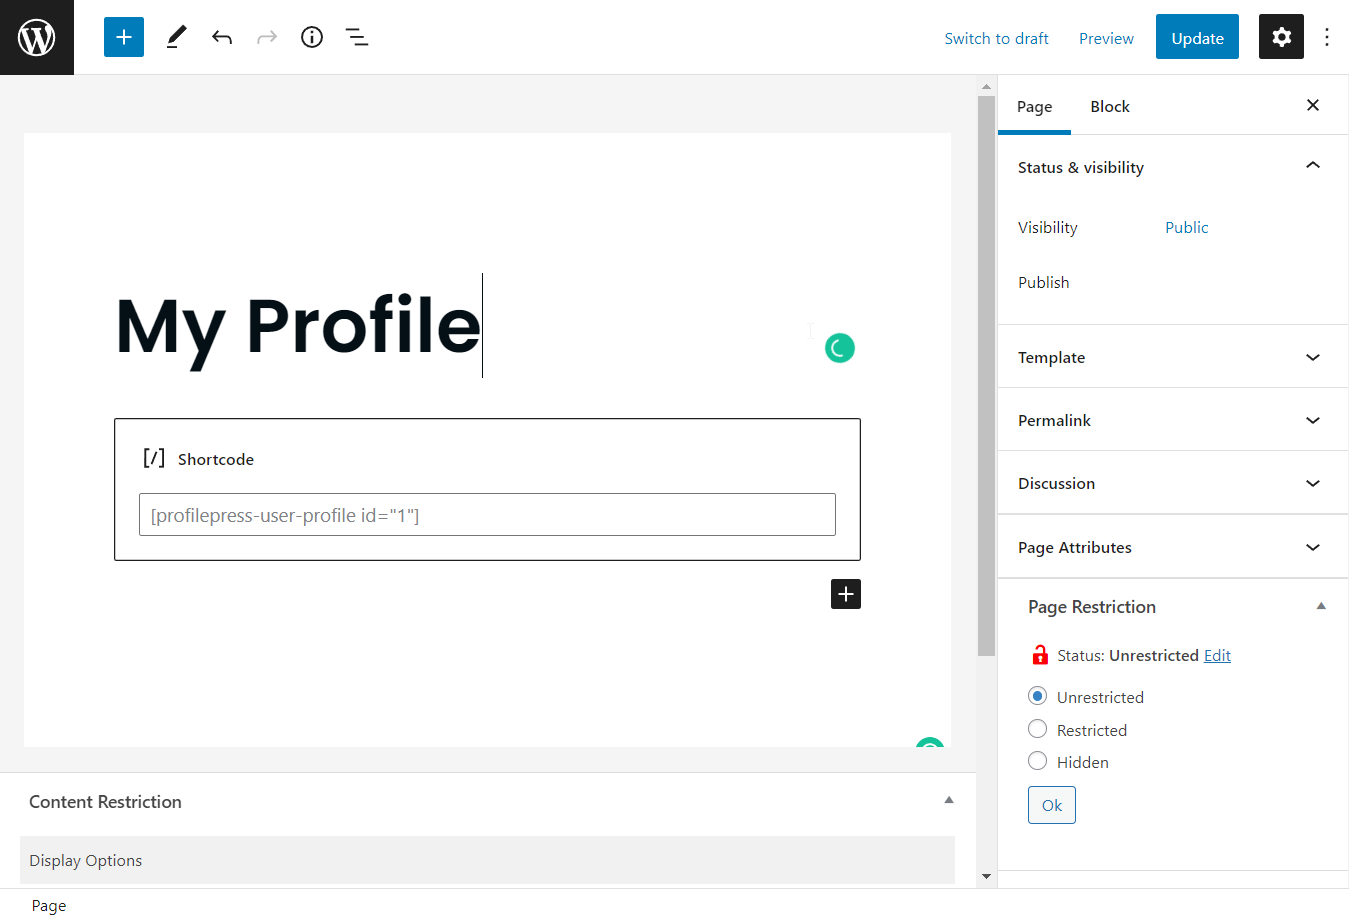
Now that the user profile is ready, you will need to set the new custom user profile page as the default profile page.
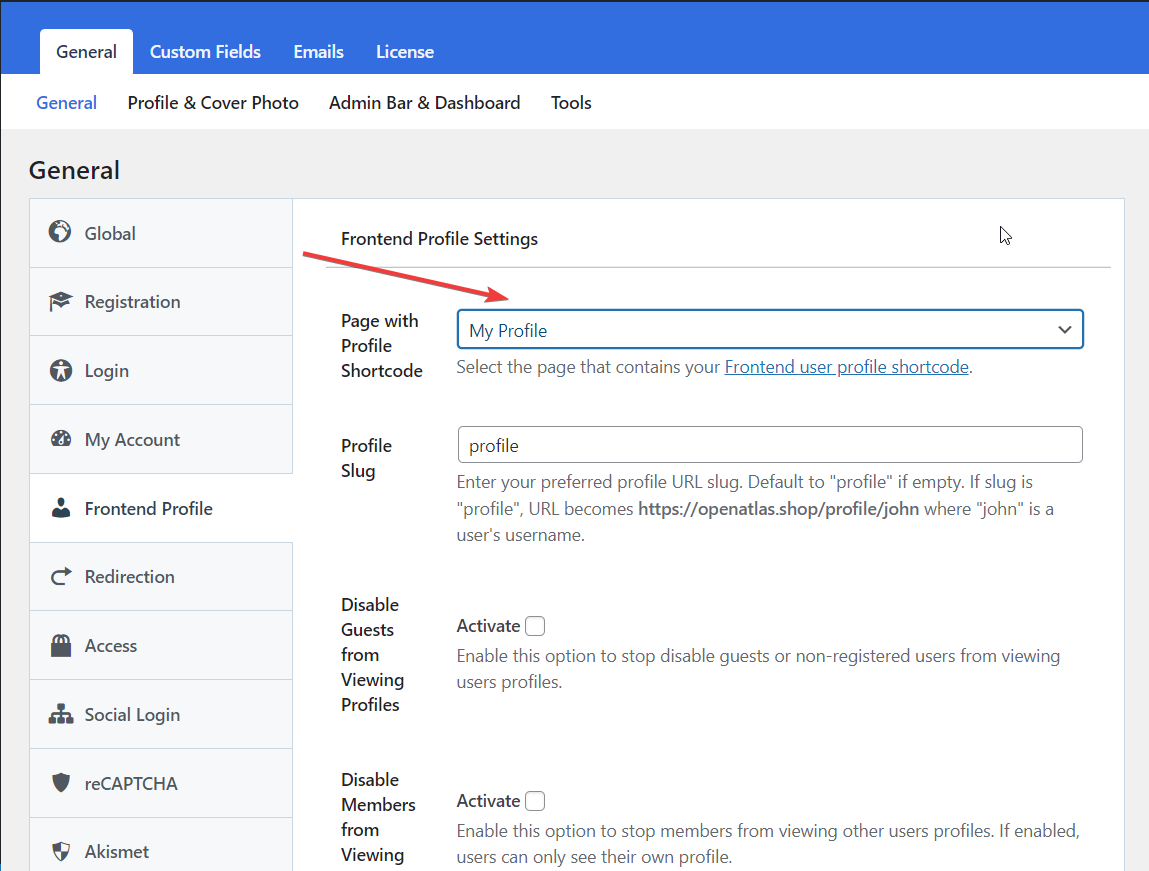
Set New Custom User Profile as Default
Go to ProfilePress > Settings > Frontend Profile > Page with Profile Shortcode, then select the user profile page you just created. Save your changes.
That’s it. You now have a custom WordPress user profile page for all your users.
Here’s how the user profile looks on our demo site:
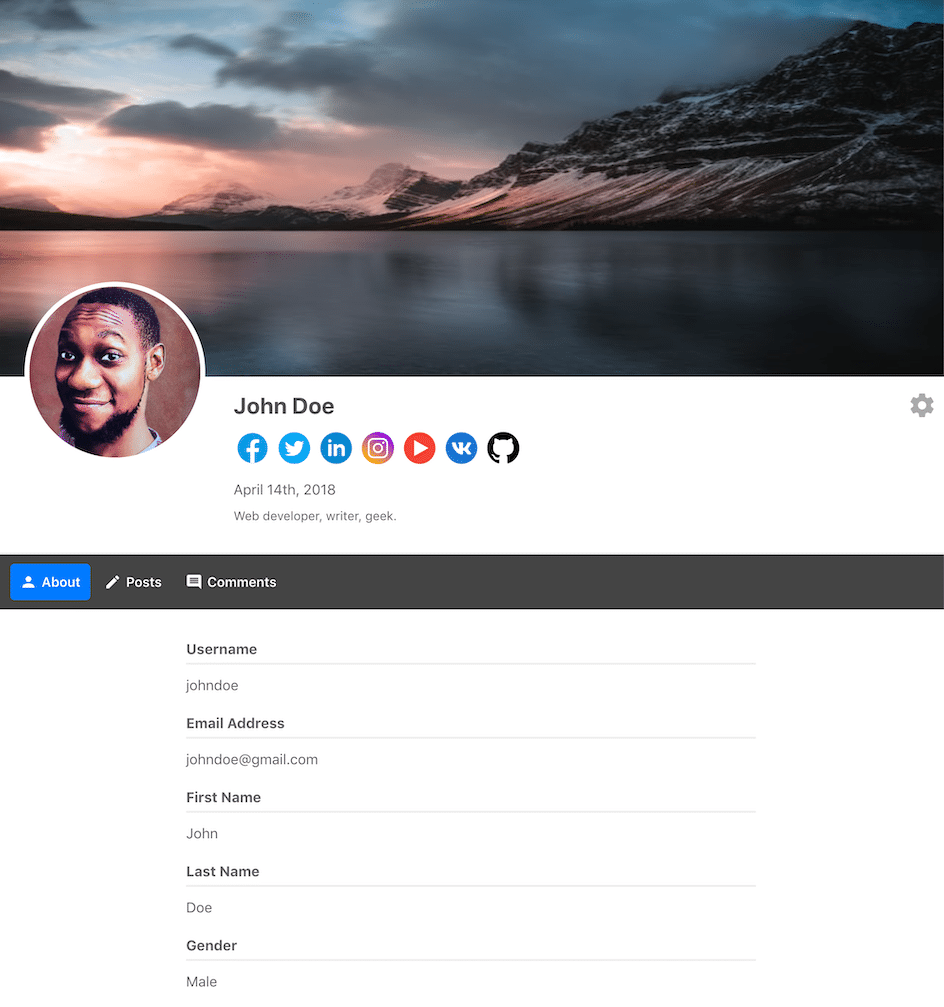
Pro Tip: You can access the user profiles using the URL: https://yoursite.com/profile/johndoe, where “johndoe” is the user’s username.
By the way, if you want to change the word “profile” in the URL to something else like “user profile,” or “my profile,” etc., go to Settings > Frontend Profile > Profile Slug.
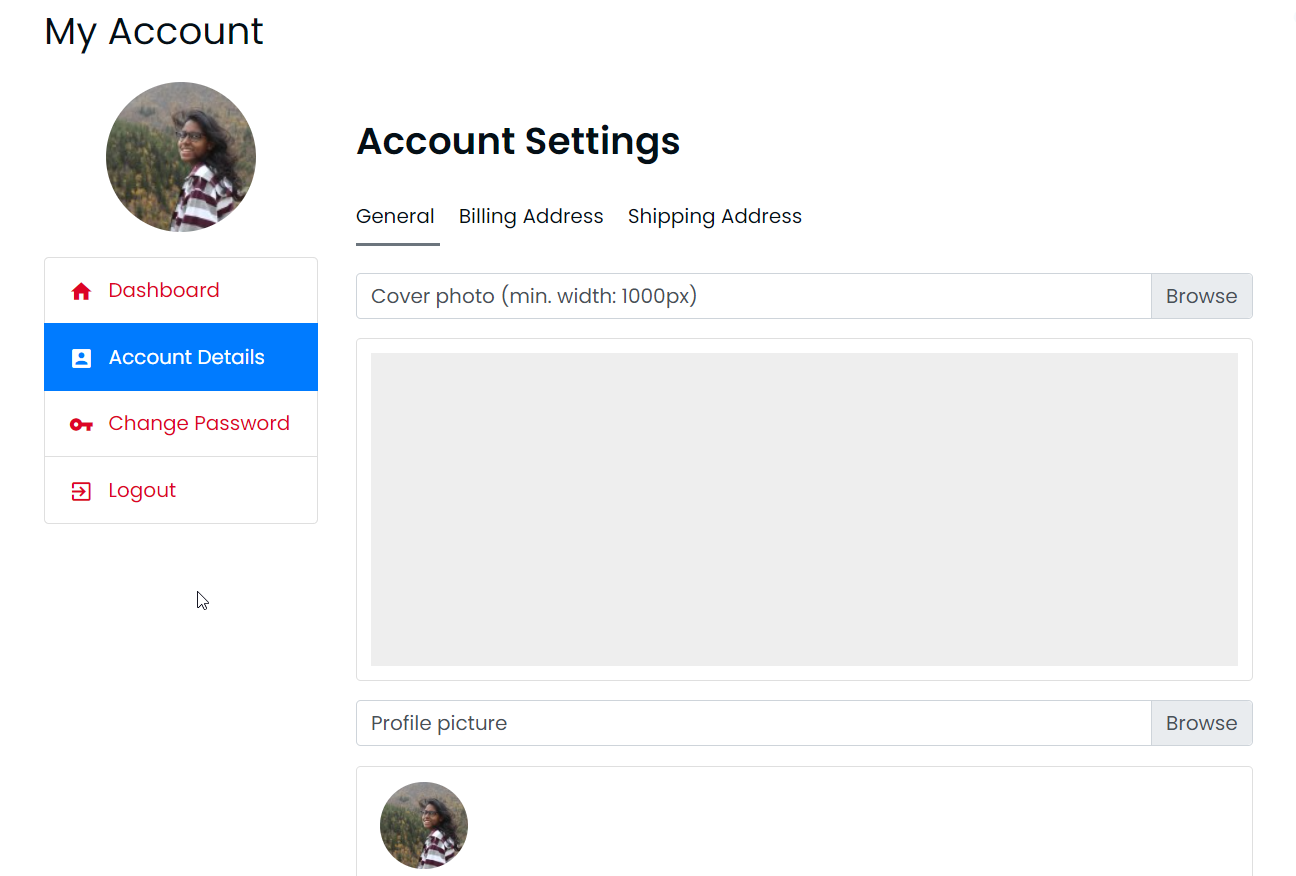
Creating an Account Page
Your website users should be able to edit their user profile information in WordPress by clicking on the Settings buttons on their profile page. Then, they will be taken to their account page, where they can modify their account details like profile pictures, email address, bio, nickname, website, social media profiles, etc. But first, you need to create an account page.
ProfilePress can help you create a custom account page. All you need to do is add this shortcode to a page: [profilepress-my-account]
Copy that shortcode, go to Pages > Add New, paste the shortcode into the page, and hit Publish. This will add a My Account page to your website.
Next, you will need to restrict access to the default WordPress account page and redirect users to the new My Account page. Go to ProfilePress > My Account Settings and Activate the “Redirect Default Edit Profile” option. Don’t forget to save the changes.
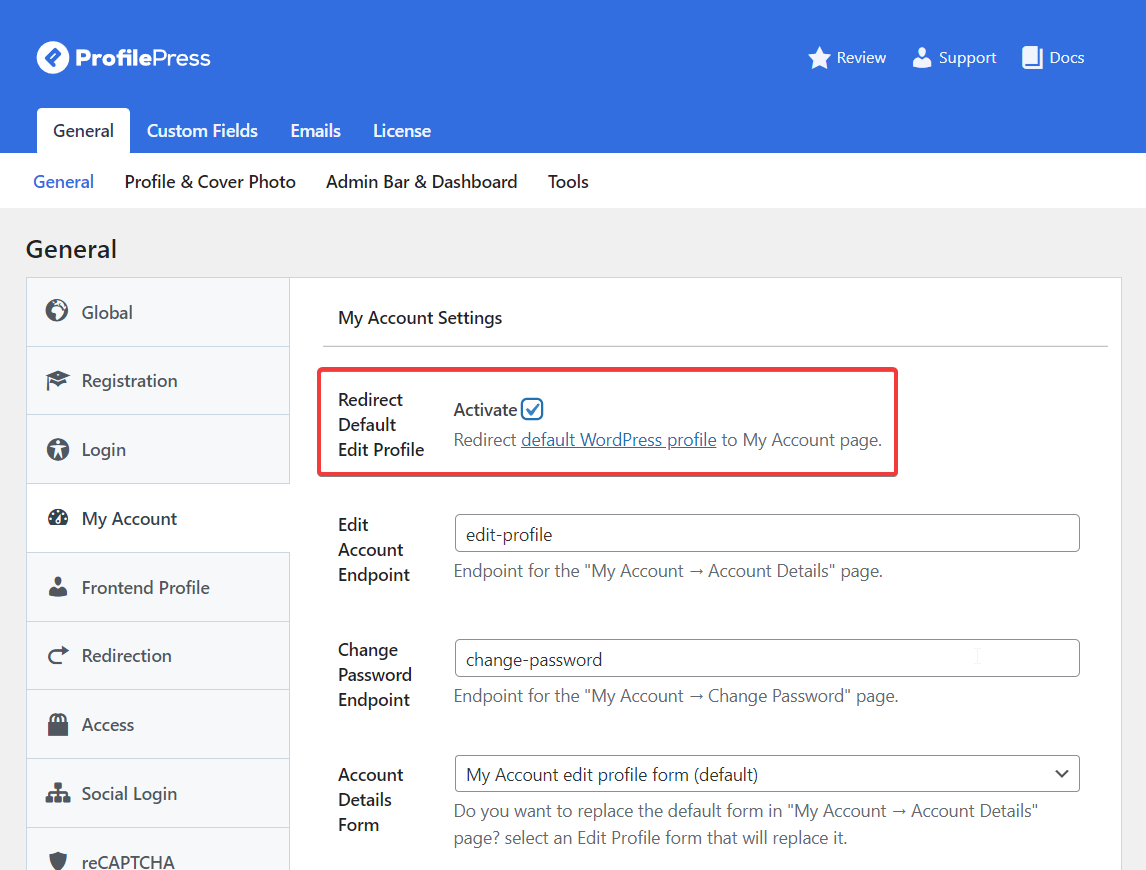
Here’s how the account page looks on our demo site:
That’s it, folks. With that, we have come to the end of this tutorial. By now, your site users should be able to edit their user profiles from the front-end.
Conclusion
Creating custom WordPress user profile pages is easy if you have the right tools to assist you. We hope you have learned how to create a user profile page in WordPress from this article.
ProfilePress is a powerful user profile plugin. This plugin allows you to create a custom user profile page, add custom fields if needed, and create an account page where users can modify their profile details.
ProfilePress is more than just a user profile plugin; it’s a complete user profile solution. For example, it helps you hide the admin bar so that users can’t access the backend of your WordPress website. Also, it enables you to create custom login and registration forms for your WordPress site.
Try ProfilePress now!